u-line.com
Adjustable Grille Installation
Adjustable Grille Installation
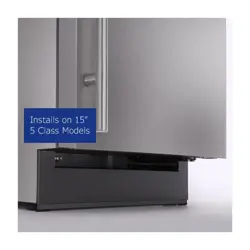
Applies to the following:
• ULAGRILLE15
• ULAGRILLE18
• ULAGRILLE24
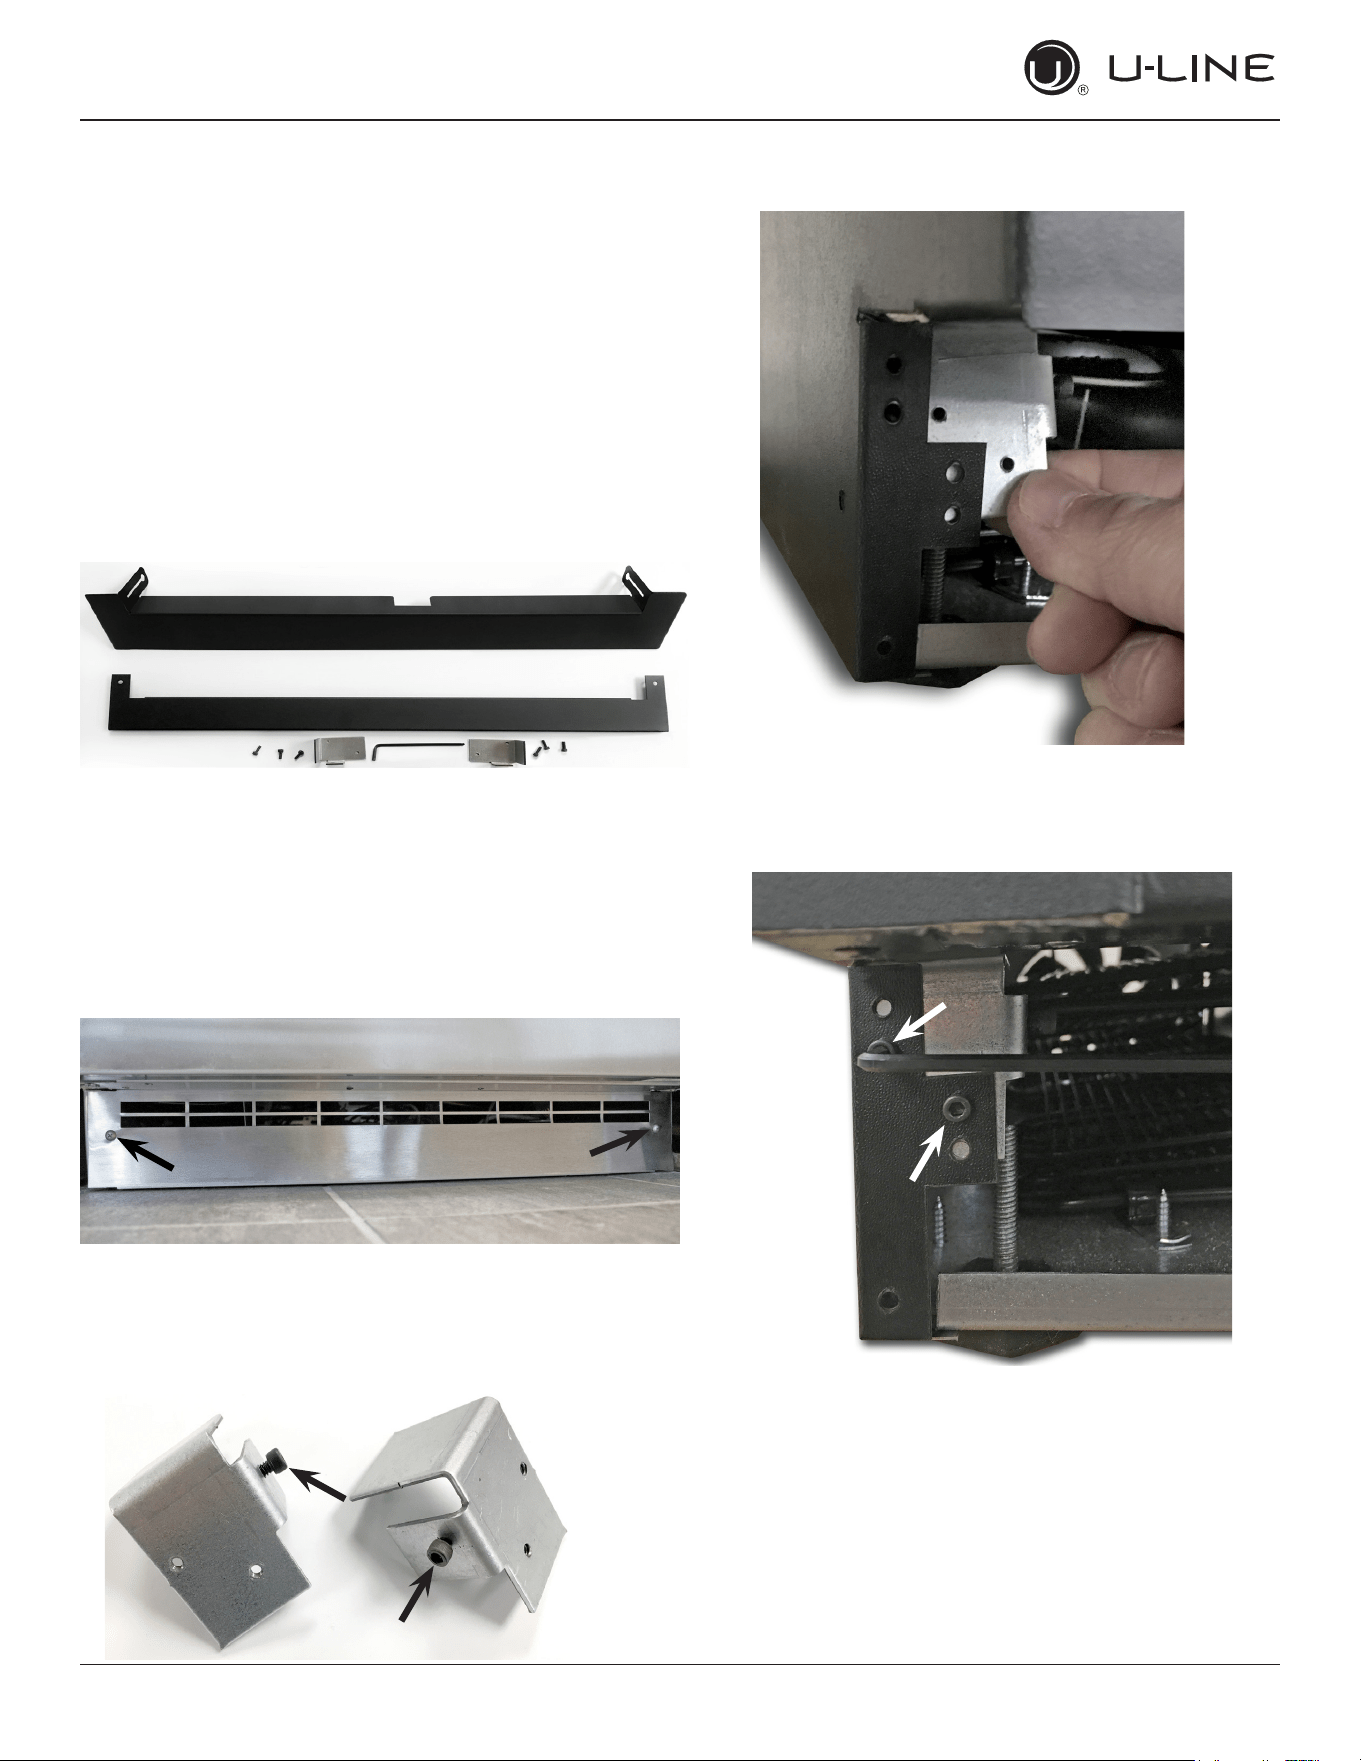
INCLUDED IN KIT
• 1 Adjustable grille
• 1 Grille sweep
• 2 Installation brackets (1 left, 1 right)
• 6 Allen screws
• 1 Allen wrench
REMOVE EXISTING GRILLE
1. Use a Philips screw driver to remove two screws from
front of existing grille.
2. Remove grille and set aside.
INSTALL ADJUSTABLE GRILLE
1. Locate two brackets and install 2 inner adjusting
screws - leave loose.
2. Position one bracket behind ange, lining up holes.
3. Use two adjusting screws to install bracket; tighten
screws with provided Allen wrench.
Left Bracket
Right Bracket
u-line.com
Adjustable Grille Installation
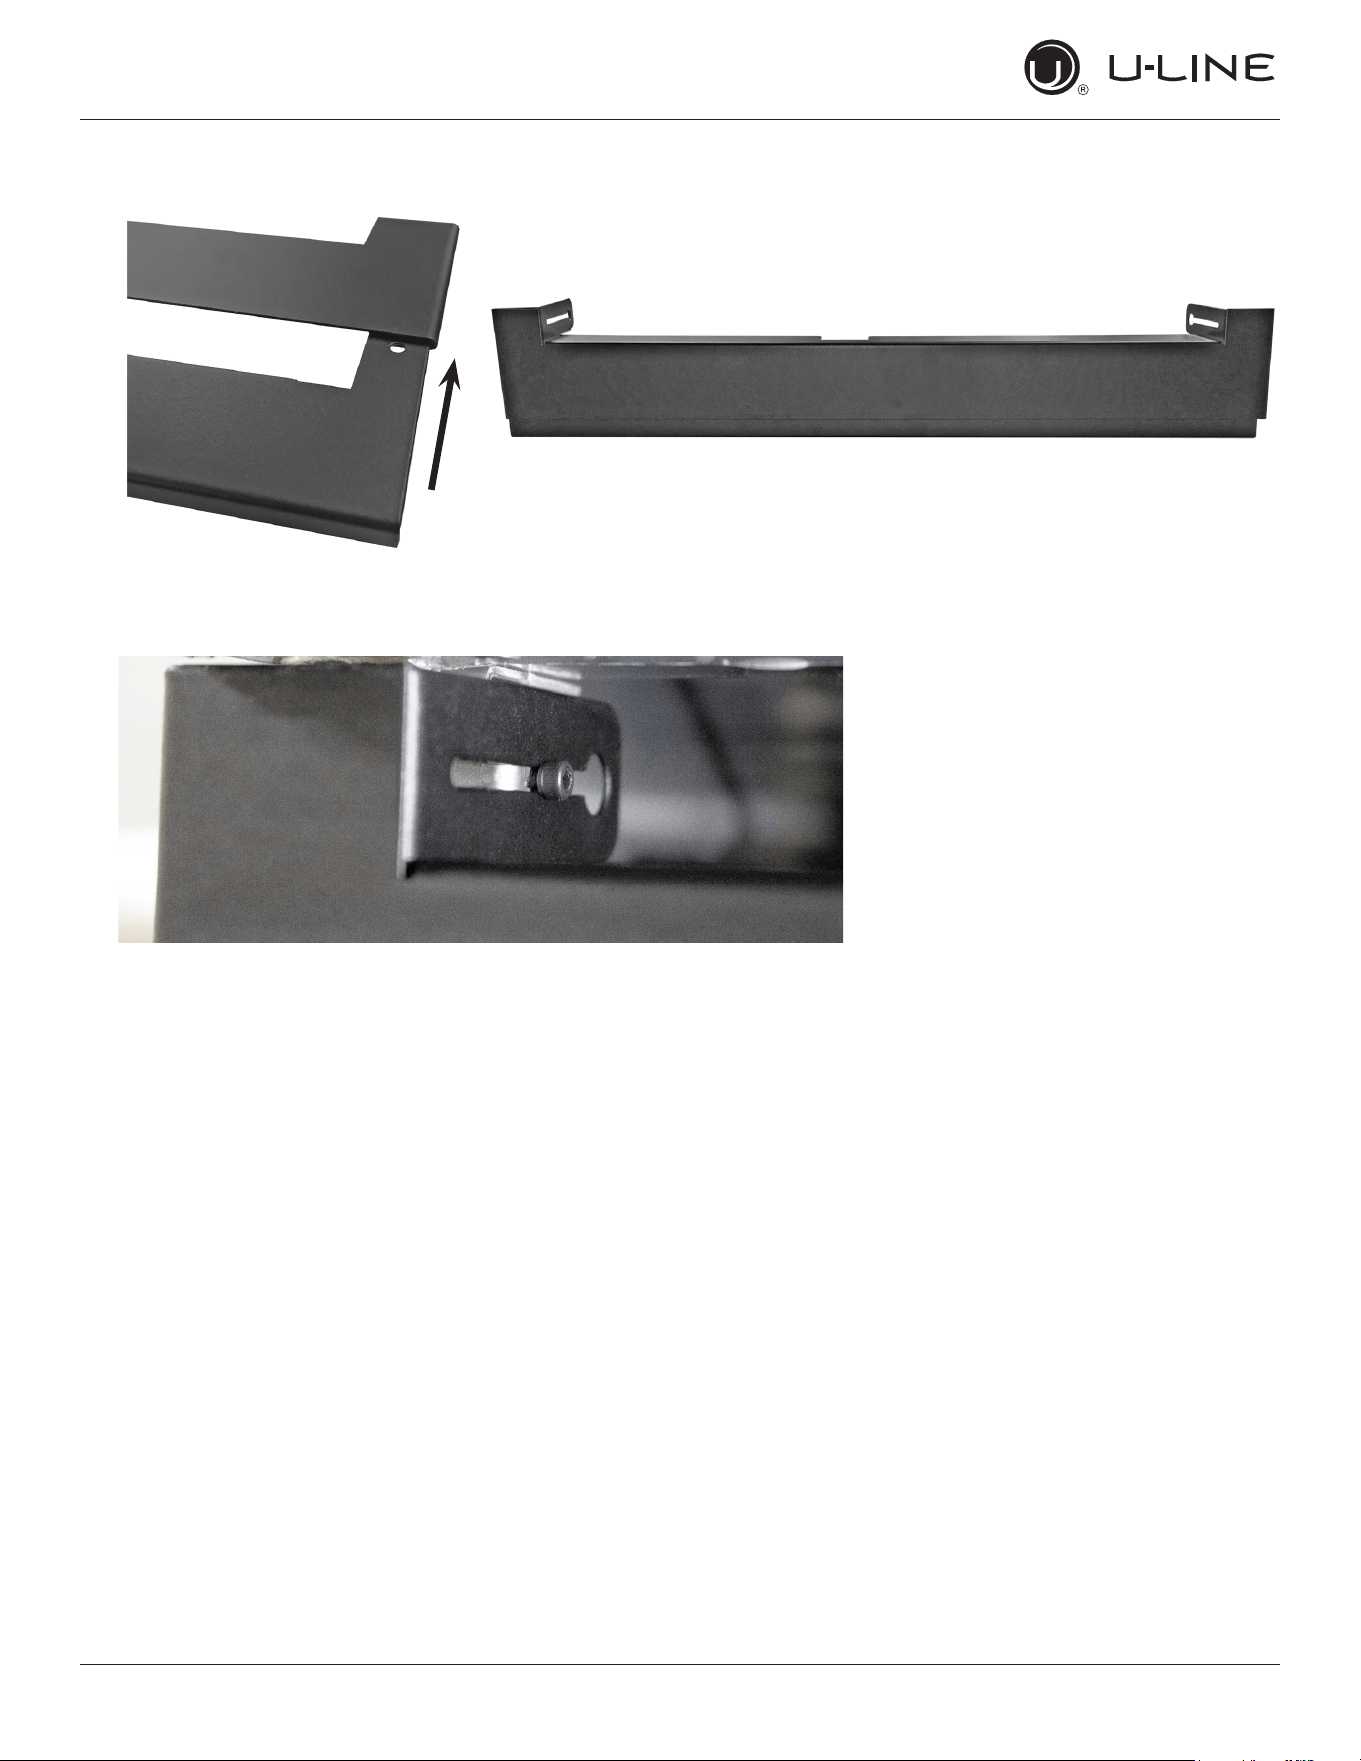
4. Insert grille sweep into grille.
5. On both ends of grille, line up adjusting screws with
slots in grille arms.
6. Adjust grille depth and tighten both adjusting screws
with Allen wrench.
u-line.com
Adjustable Grille Installation
ADJUSTING GRILLE
The grille has an automatic vertical plane adjustment and
can also be adjusted on its horizontal plane as well. To
adjust your grille to match your surrounding furniture,
follow the instructions below.
1. Loosen, but do not remove, the lock screws on the
inside of the grille rails. Lock screws are located on the
inside of each grille rail.
2. The grille can be extended horizontally by pulling out
a maximum of 1-1⁄2” (38 mm). Do not exceed 1-1⁄2”
(38 mm). Secure the lock screws after adjusting.
3. The grille skirt may be manually adjusted to the height
of your oor. Simply raise or lower the skirt as needed.
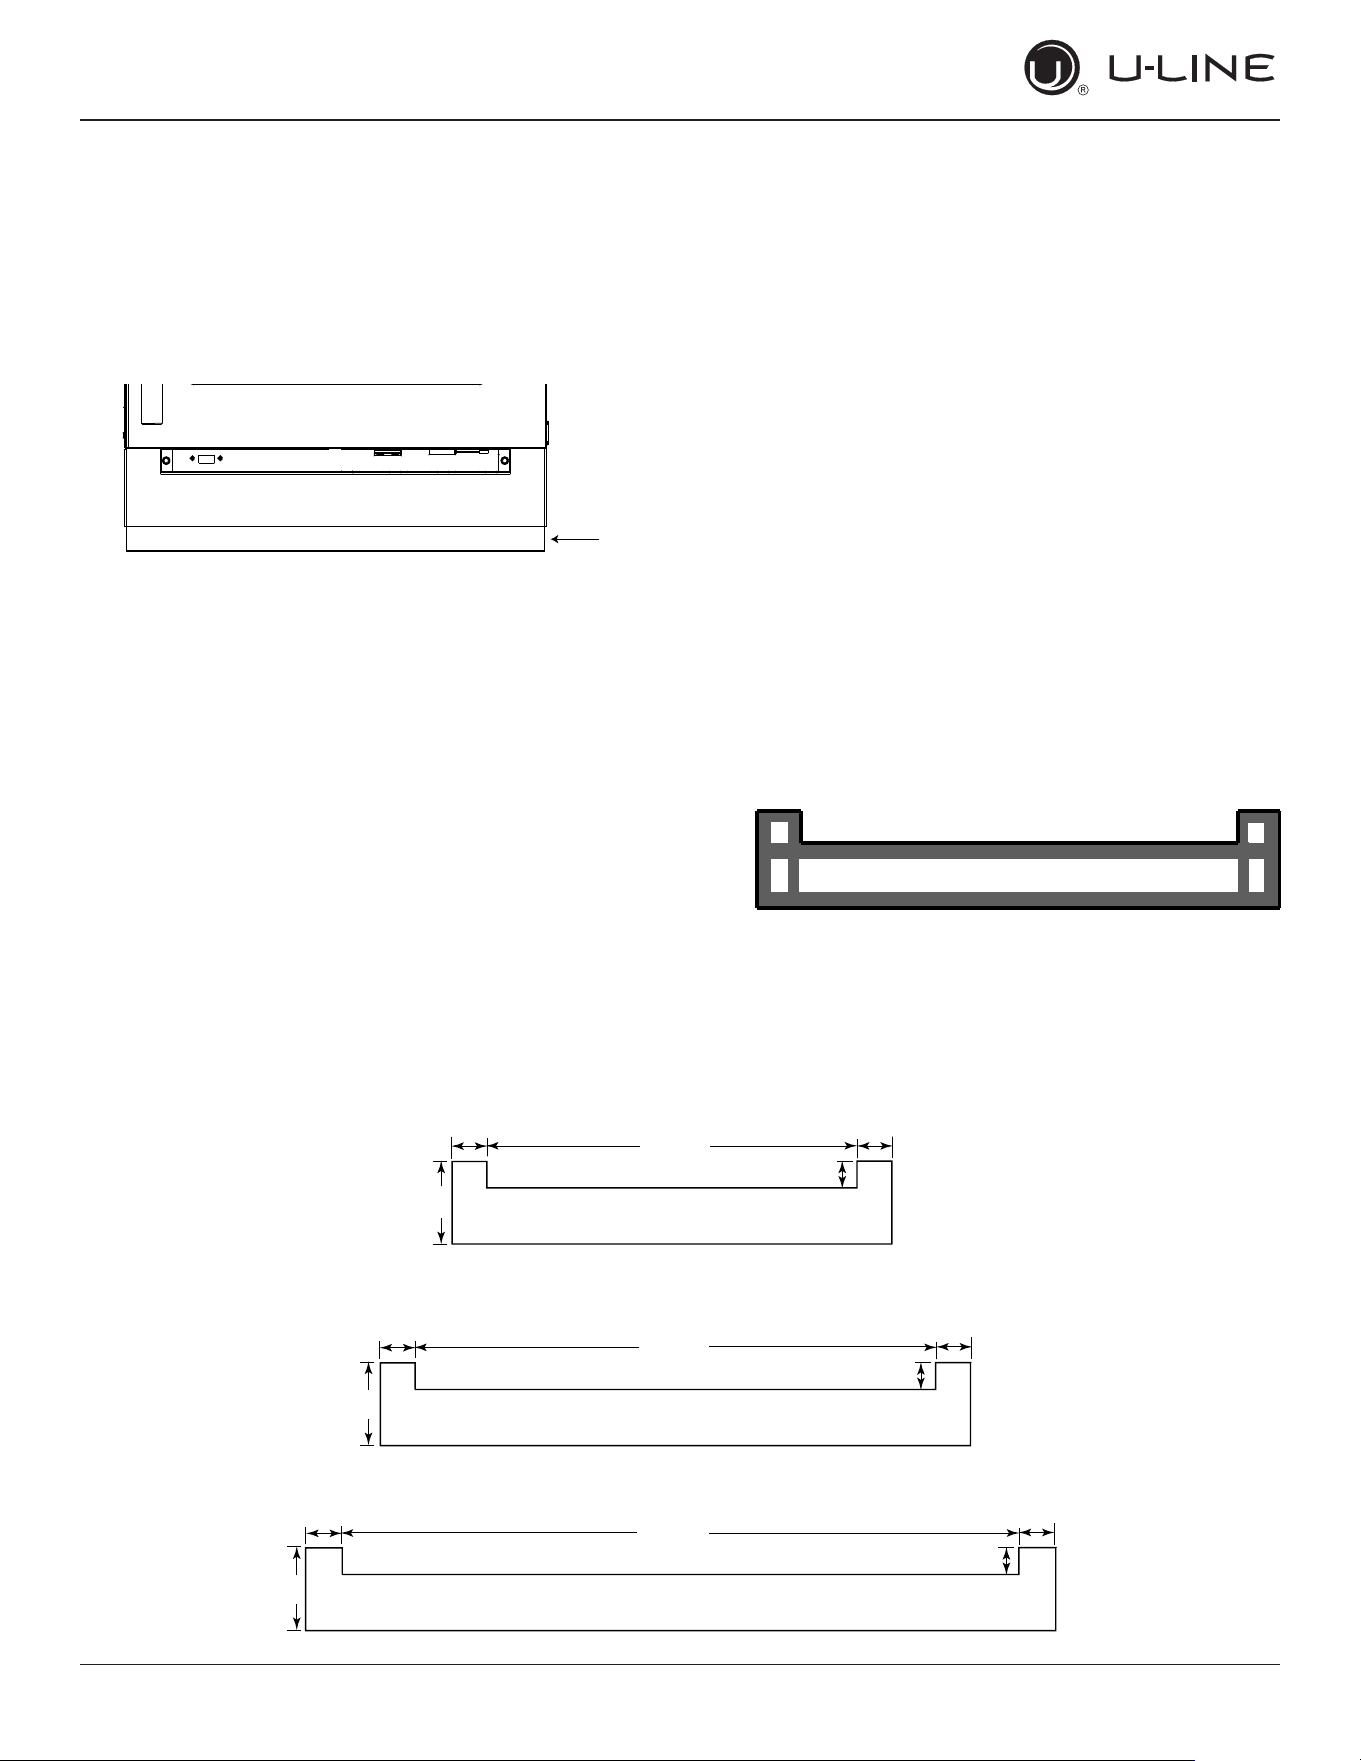
Integrated Grille
PREPARE AND INSTALL INTEGRATED GRILLE
1. Use the dimensions provided in the diagram to cut
and shape your integrated grille panel. Recommended
panel thickness is between 1⁄4” (6 mm) and 3⁄8”(9 mm).
Height will vary from 3-5/16” (84 mm) to 4-5/16” (110
mm) based on your grille height.
2. Finish or stain your grille panel to match your
surrounding furniture. Finish front, back and edges to
prevent warping. Carefully follow the manufacturer’s
recommendations for nish application and cure times.
3. Apply double sided tape to the backside of the
integrated grille panel. Use the diagram below for
reference. U-Line recommends 3M™ VHB™ tape, a
high strength bonding tape.
4. Remove backing paper from double sided tape.
5. Carefully align grille over integrated panel and press
into position.
Grille
Skirt
Apply Tape To Shaded Area
1" (25 mm)
1-7⁄16"
(38 mm)
12"
(305 mm)
14-3⁄4"
(375 mm)
3-1⁄4" - 4-1⁄4"
(83 mm - 108 mm)
1-7⁄16"
(38 mm)
1-7⁄16"
(38 mm)
1-7⁄16"
(38 mm)
20-5⁄8"
(525 mm)
1-7⁄16"
(38 mm)
1-7⁄16"
(38 mm)
1" (25 mm)
1" (25 mm)
3-1⁄4" - 4-1⁄4"
(83 mm - 108 mm)
3-1⁄4" - 4-1⁄4"
(83 mm - 108 mm)
15” Models
18” Models
24” Models
30620 Rev A 4/2019
