STOP
DO NOT RETURN TO STORE!
HAVE QUESTIONS OR NEED SERVICE?
1-800-776-3538
Read the instructions carefully and keep for future reference. Information maybe updated
from time to time so please refer to the website for the latest version of the manual.
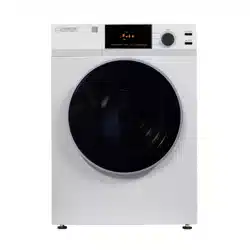
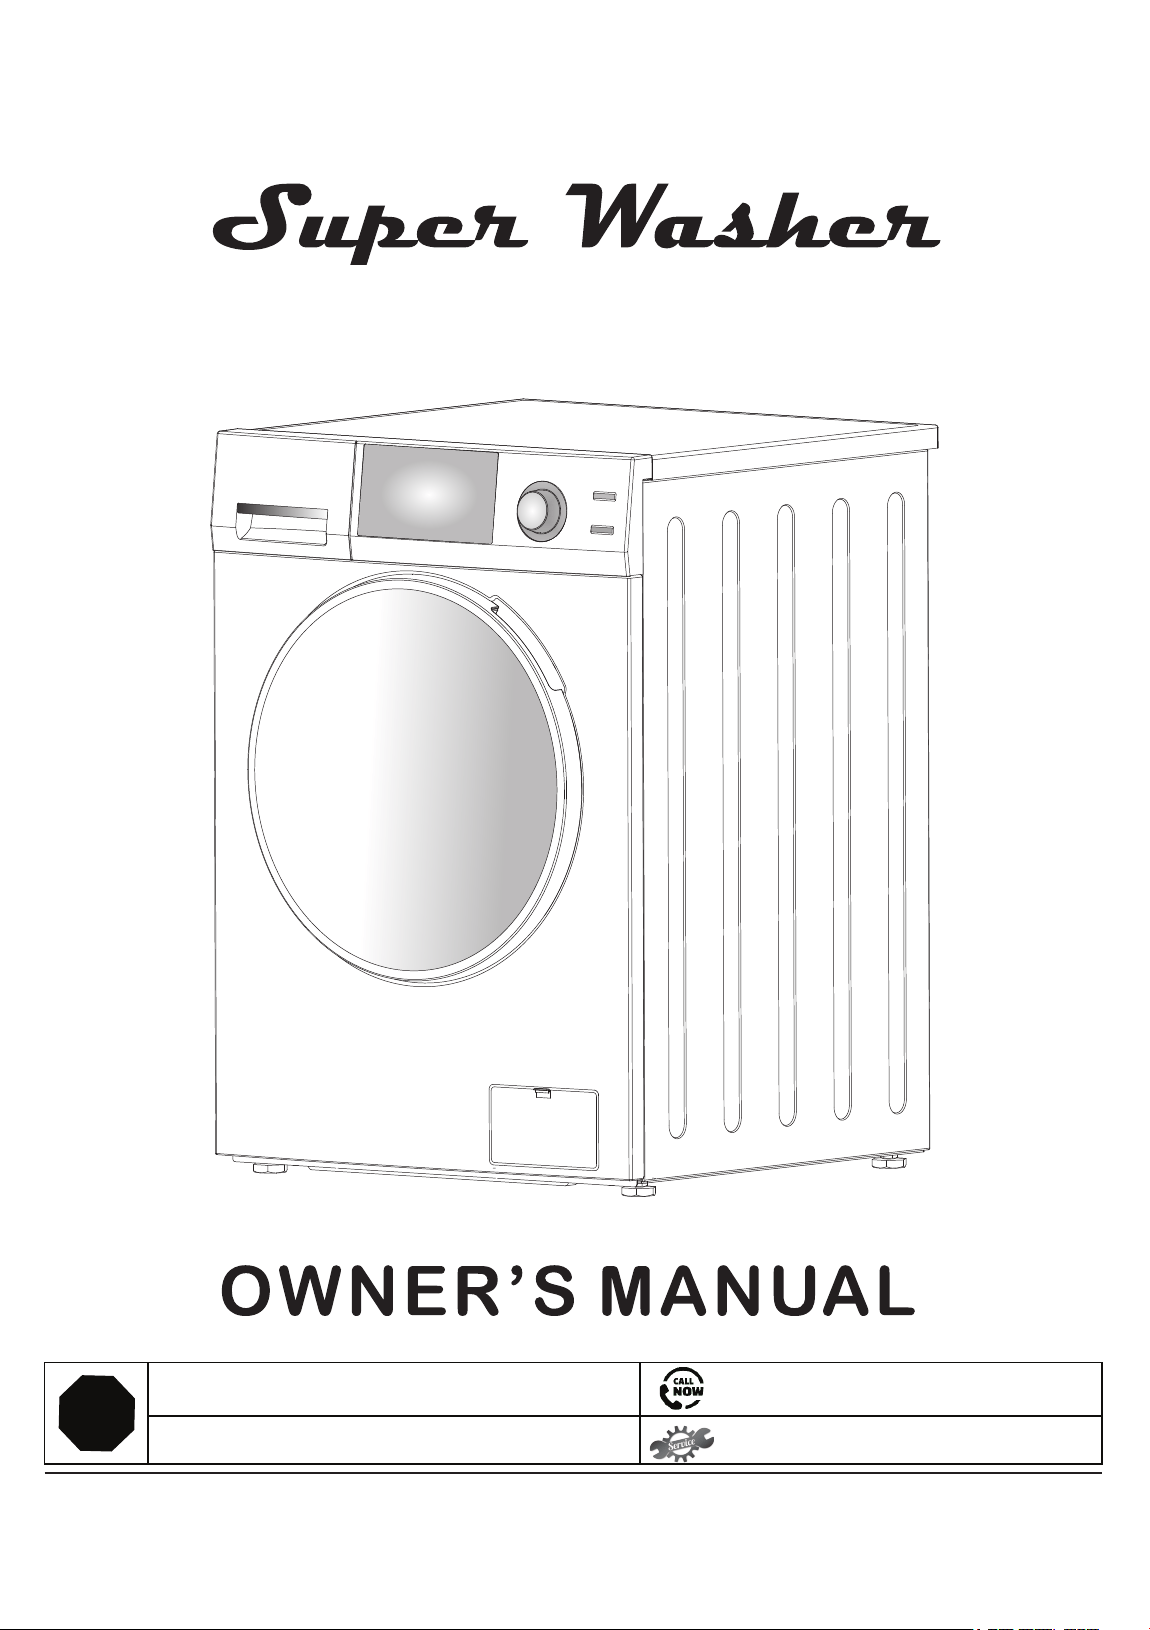
Model: 842

Introduction
Warranty Information
Technical Data
Important Safety Instructions
Diagram of the Washer
Handling and Placement
Remove Shipping Bolts and Level Washer
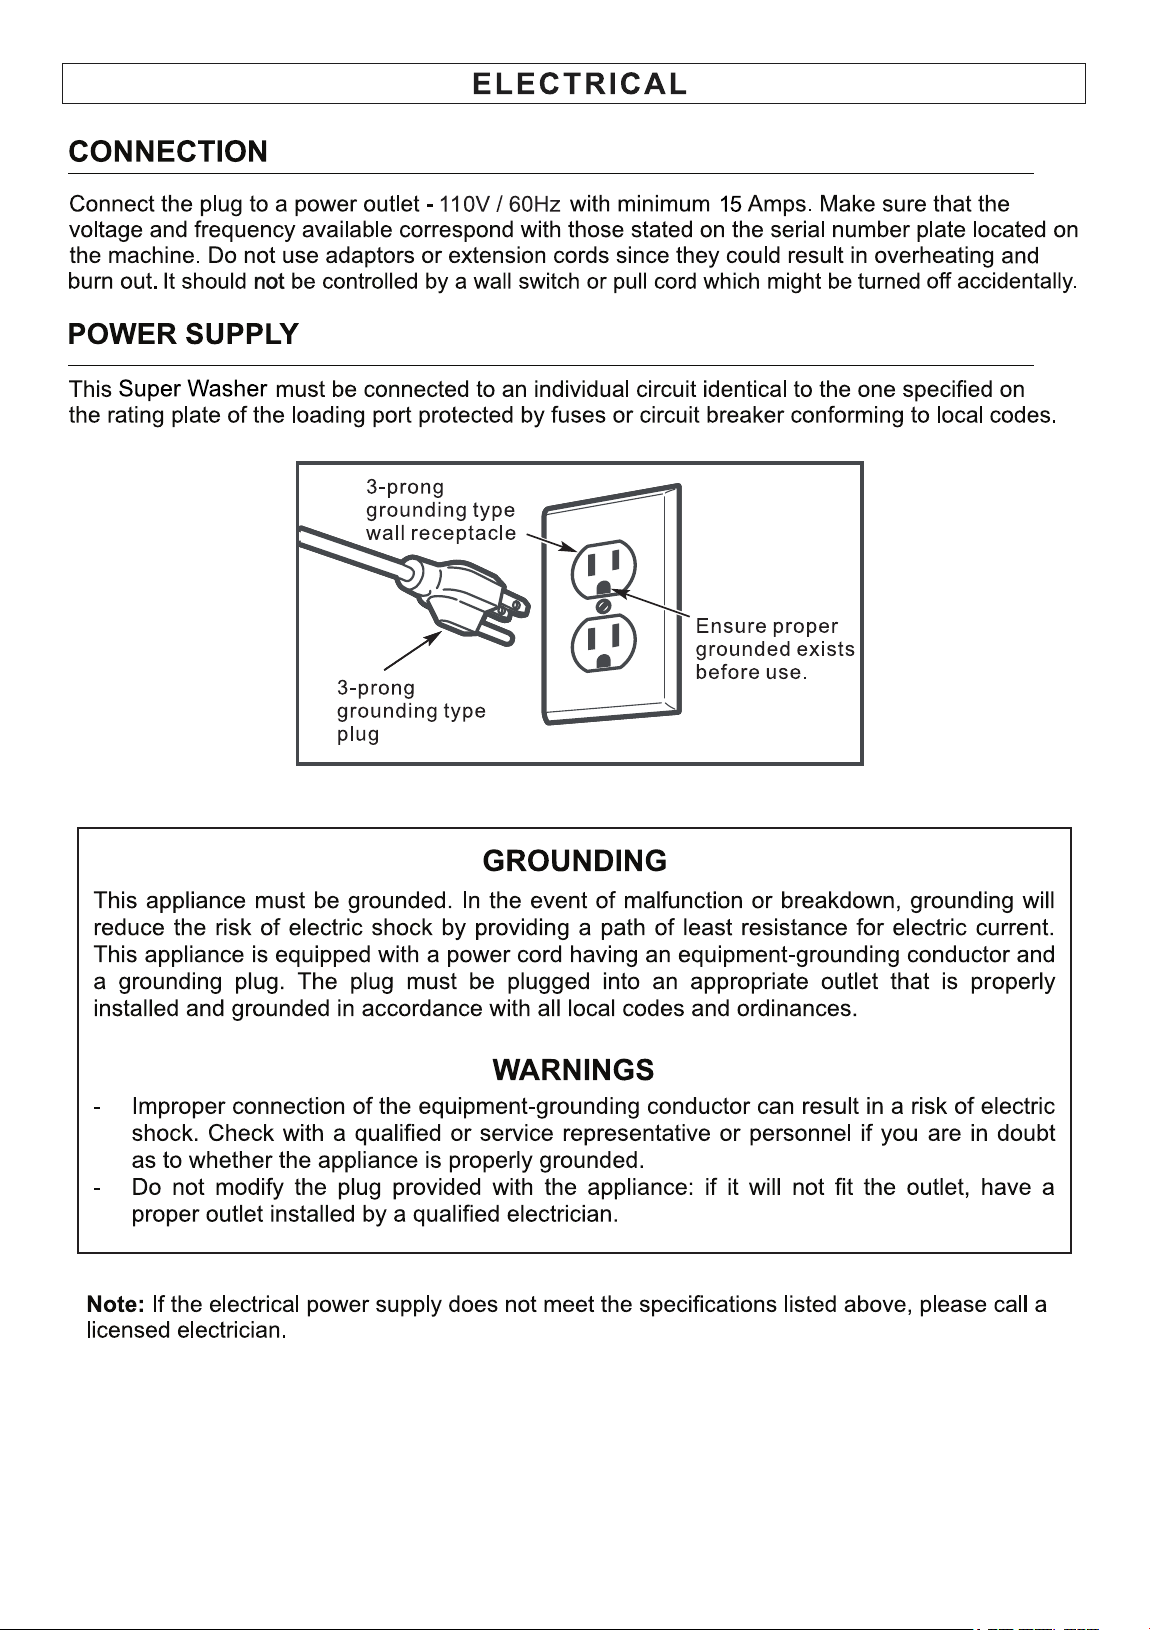
Electrical
Plumbing
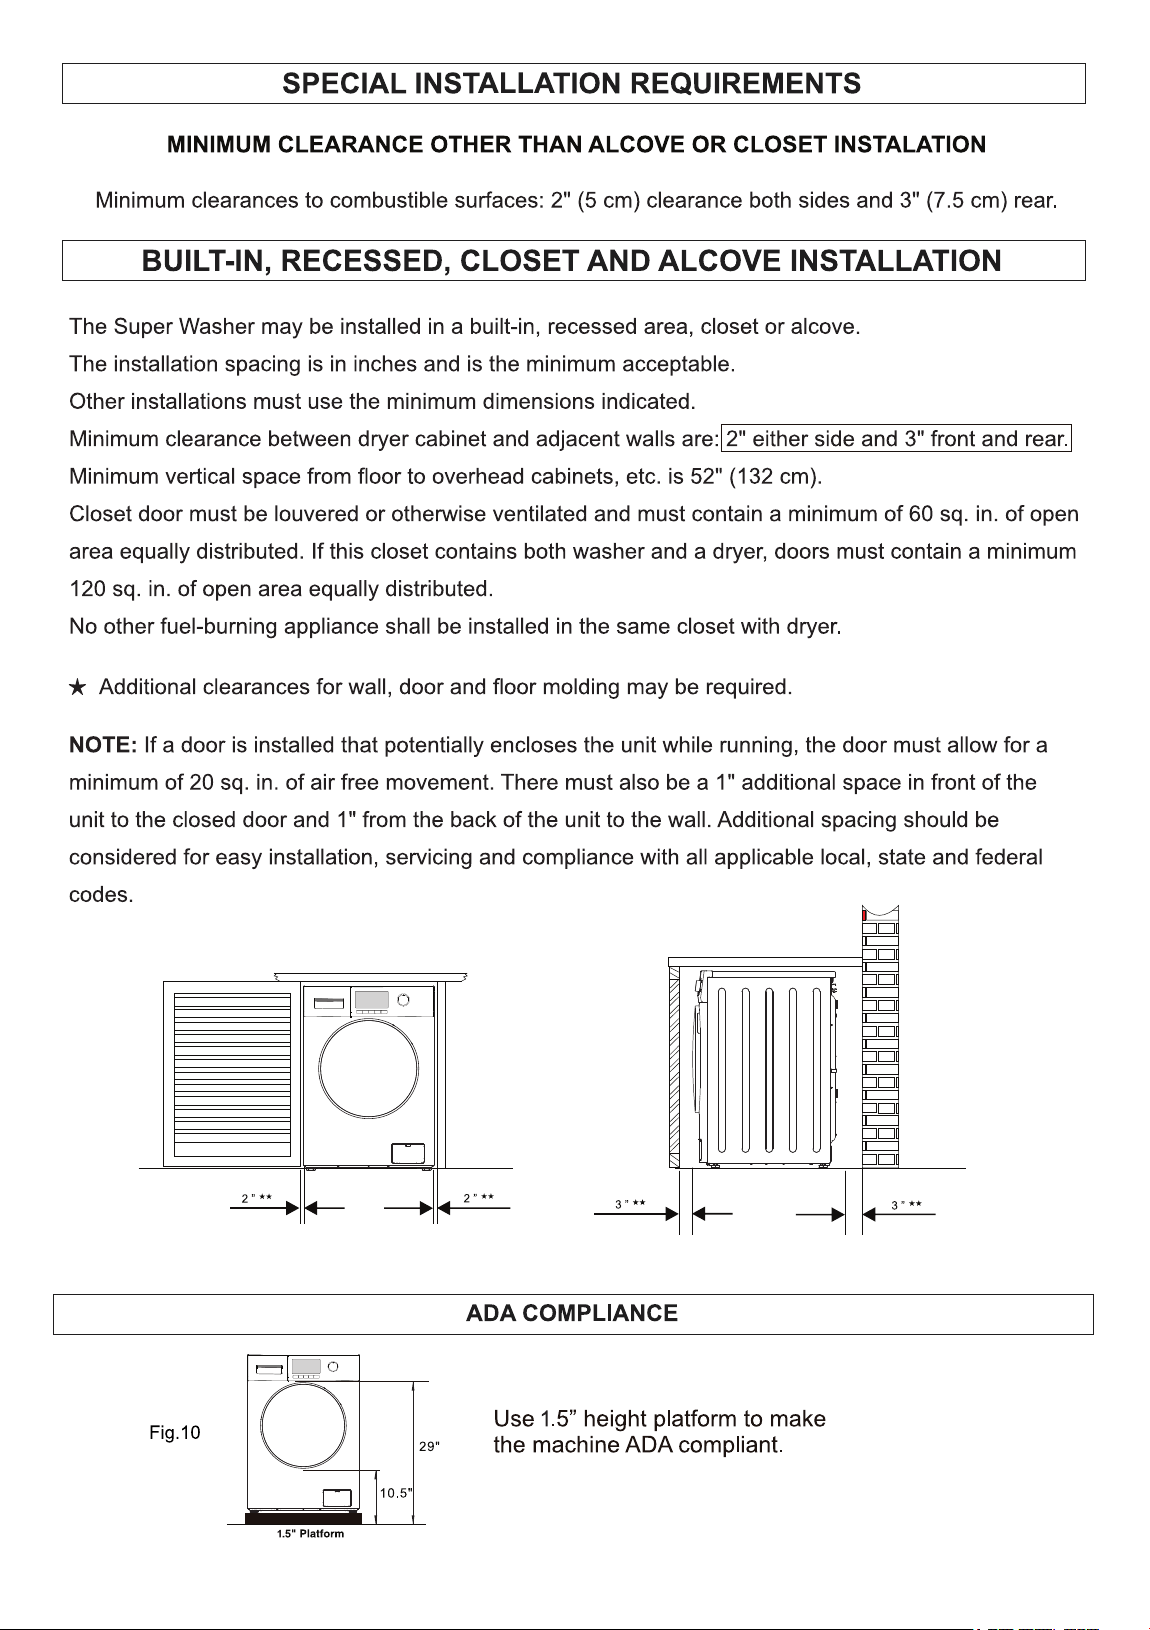
Special Installation Requirements
Operating Instructions
Program Selection Chart
Special Wash Programs
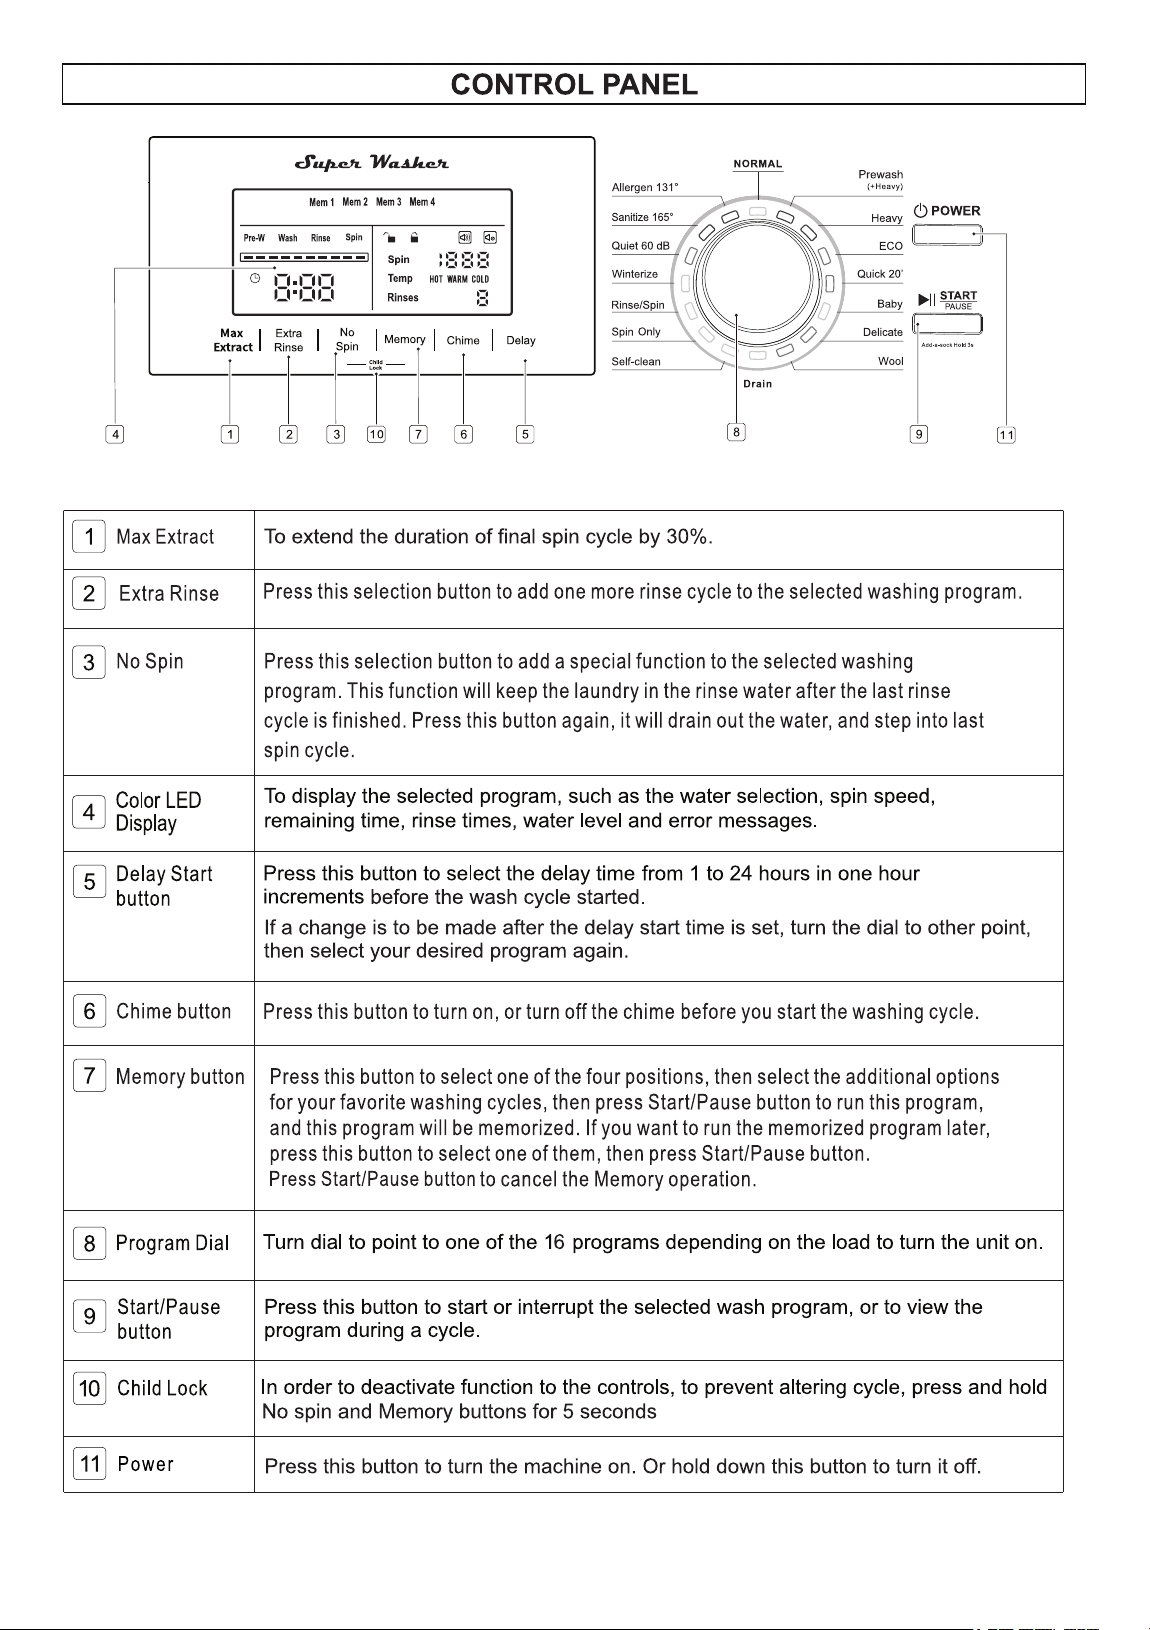
Control Panel
Display Panel
Maintenance
Troubleshooting
Error Codes
1
2
4
5
6
7
8
9
10
11
12
13
14
15
16
17
19
20
1
1400 rpm
resulting in shorter dry times.
2
WARRANTY INFORMATION
3
4
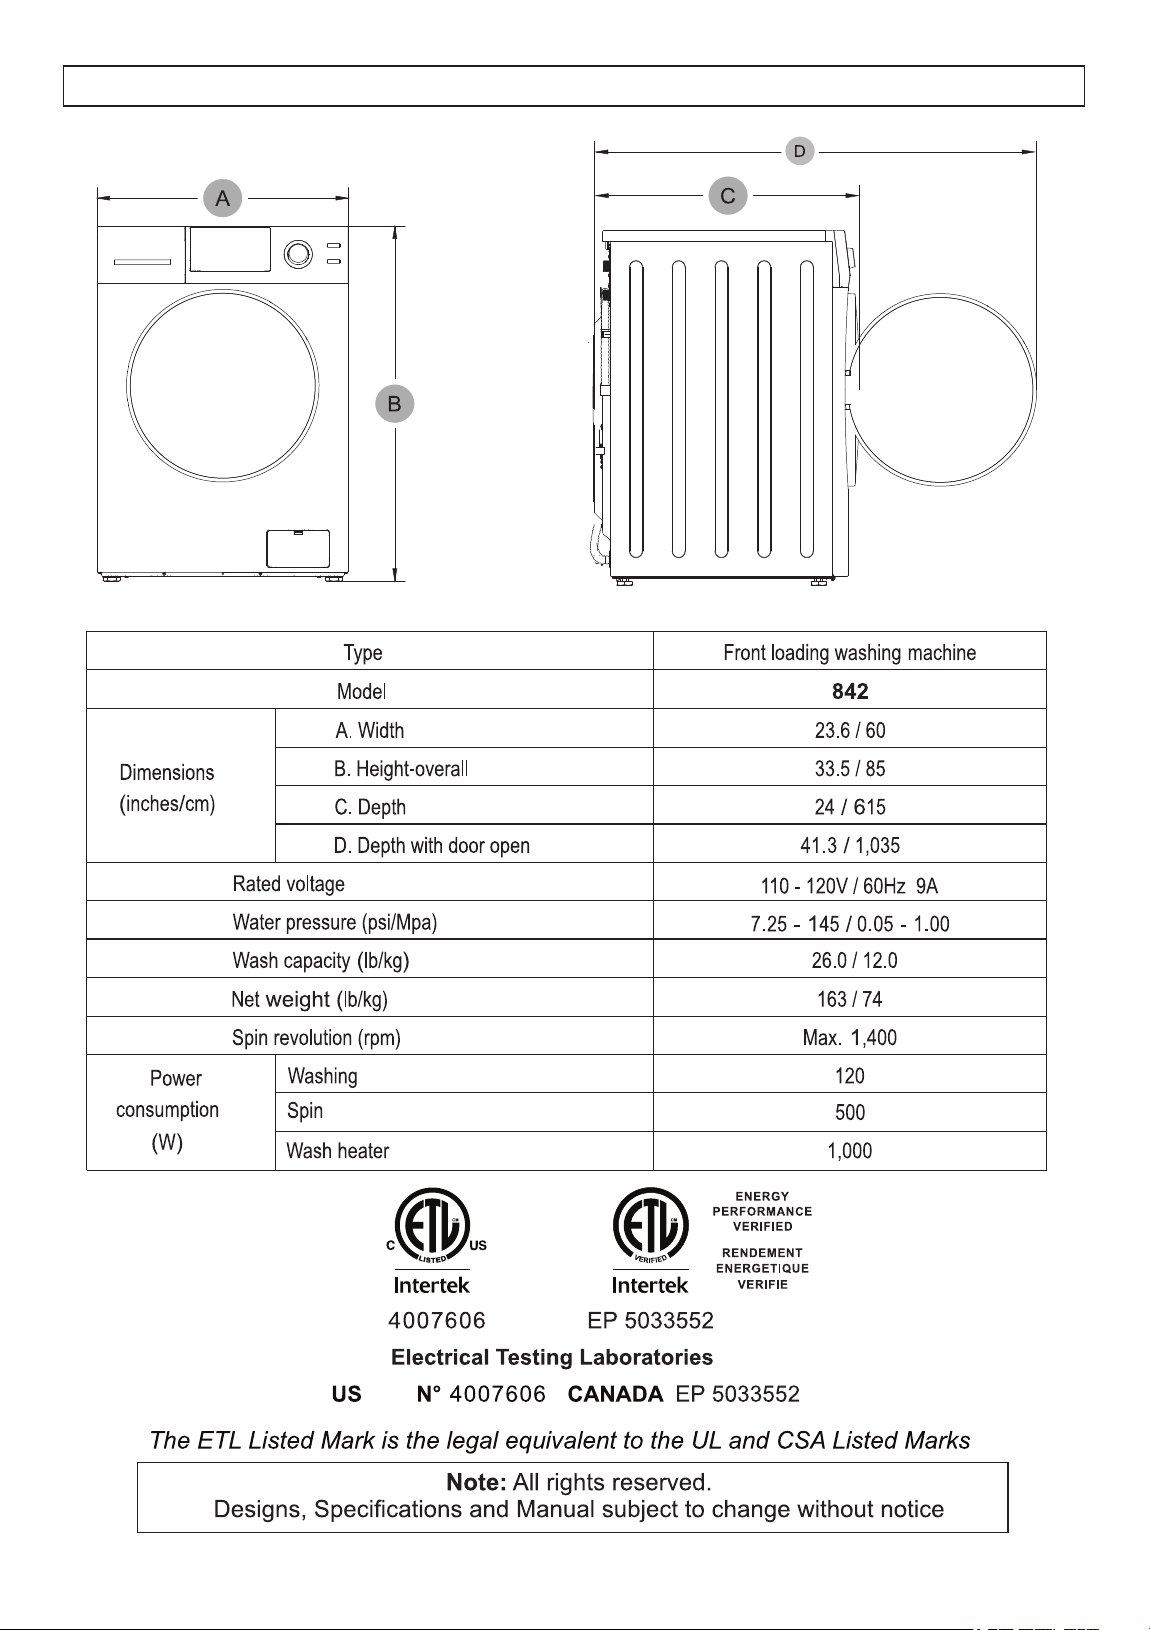
TECHNICAL DATA
5
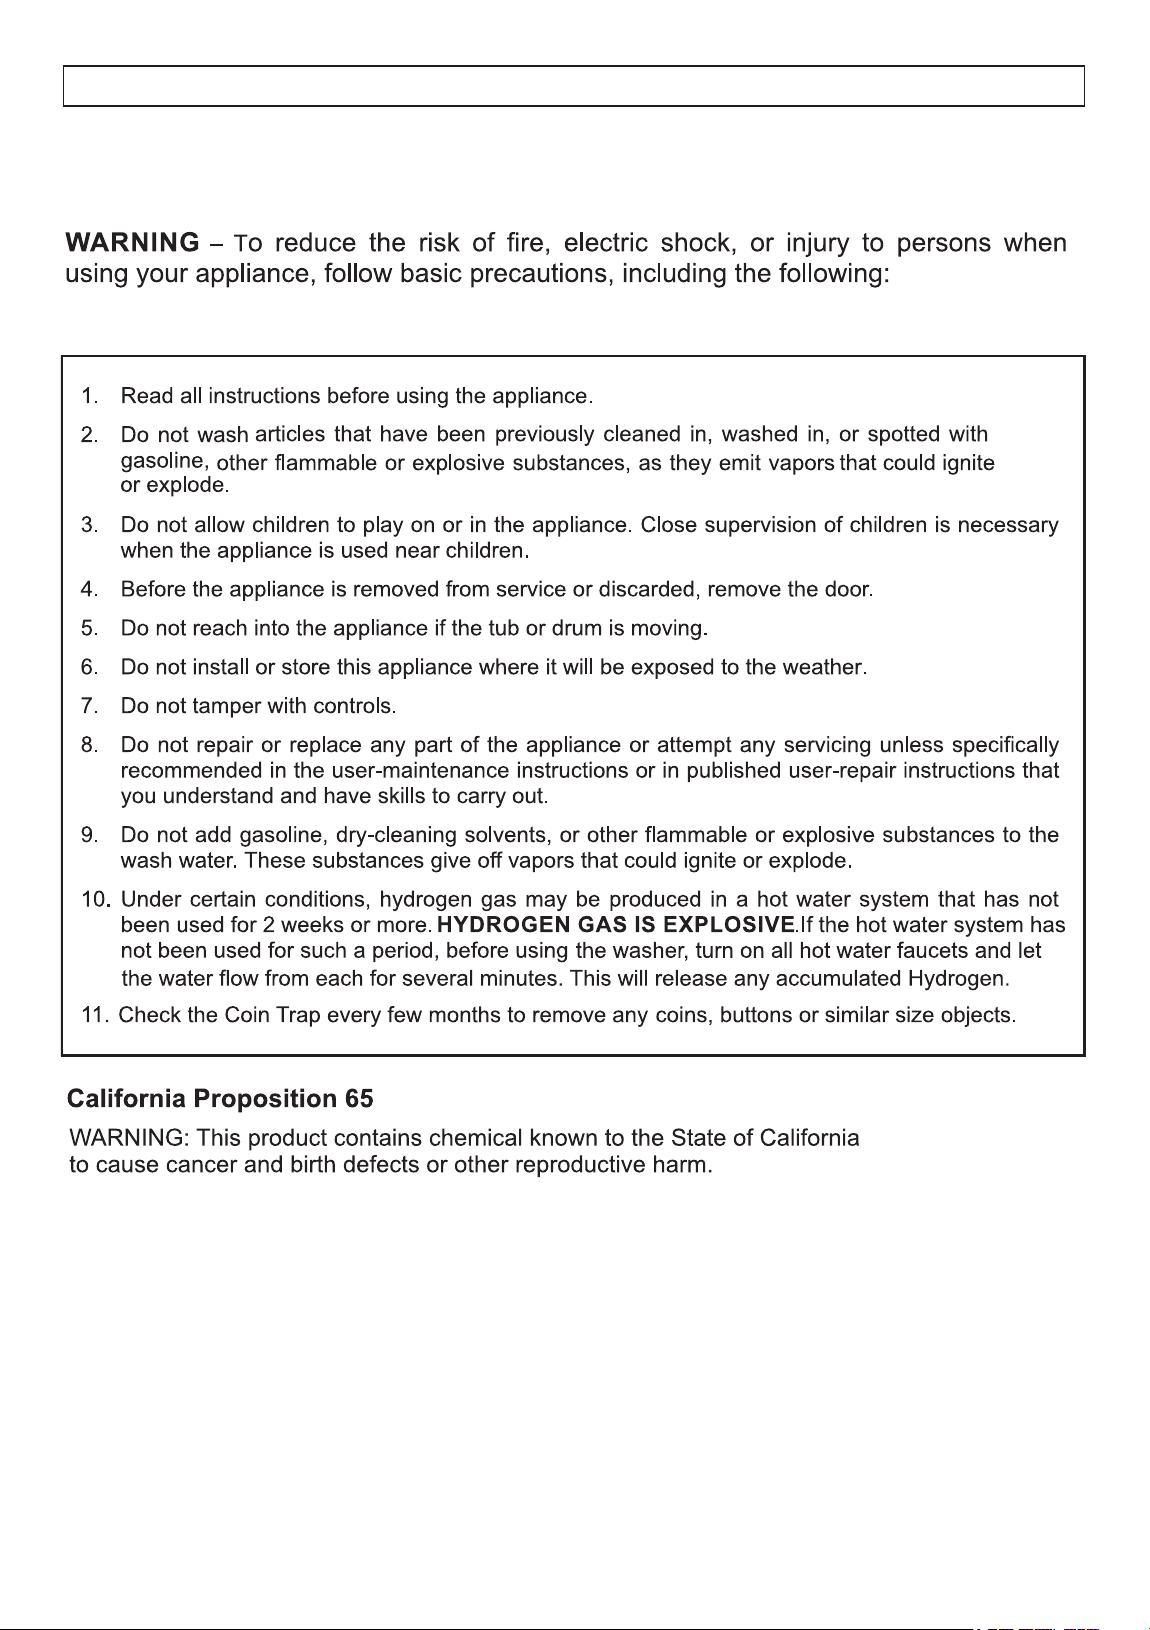
Your Washer has been built in compliance with safety regulations,
to protect you and your family.
IMPORTANT SAFETY INSTRUCTIONS
6
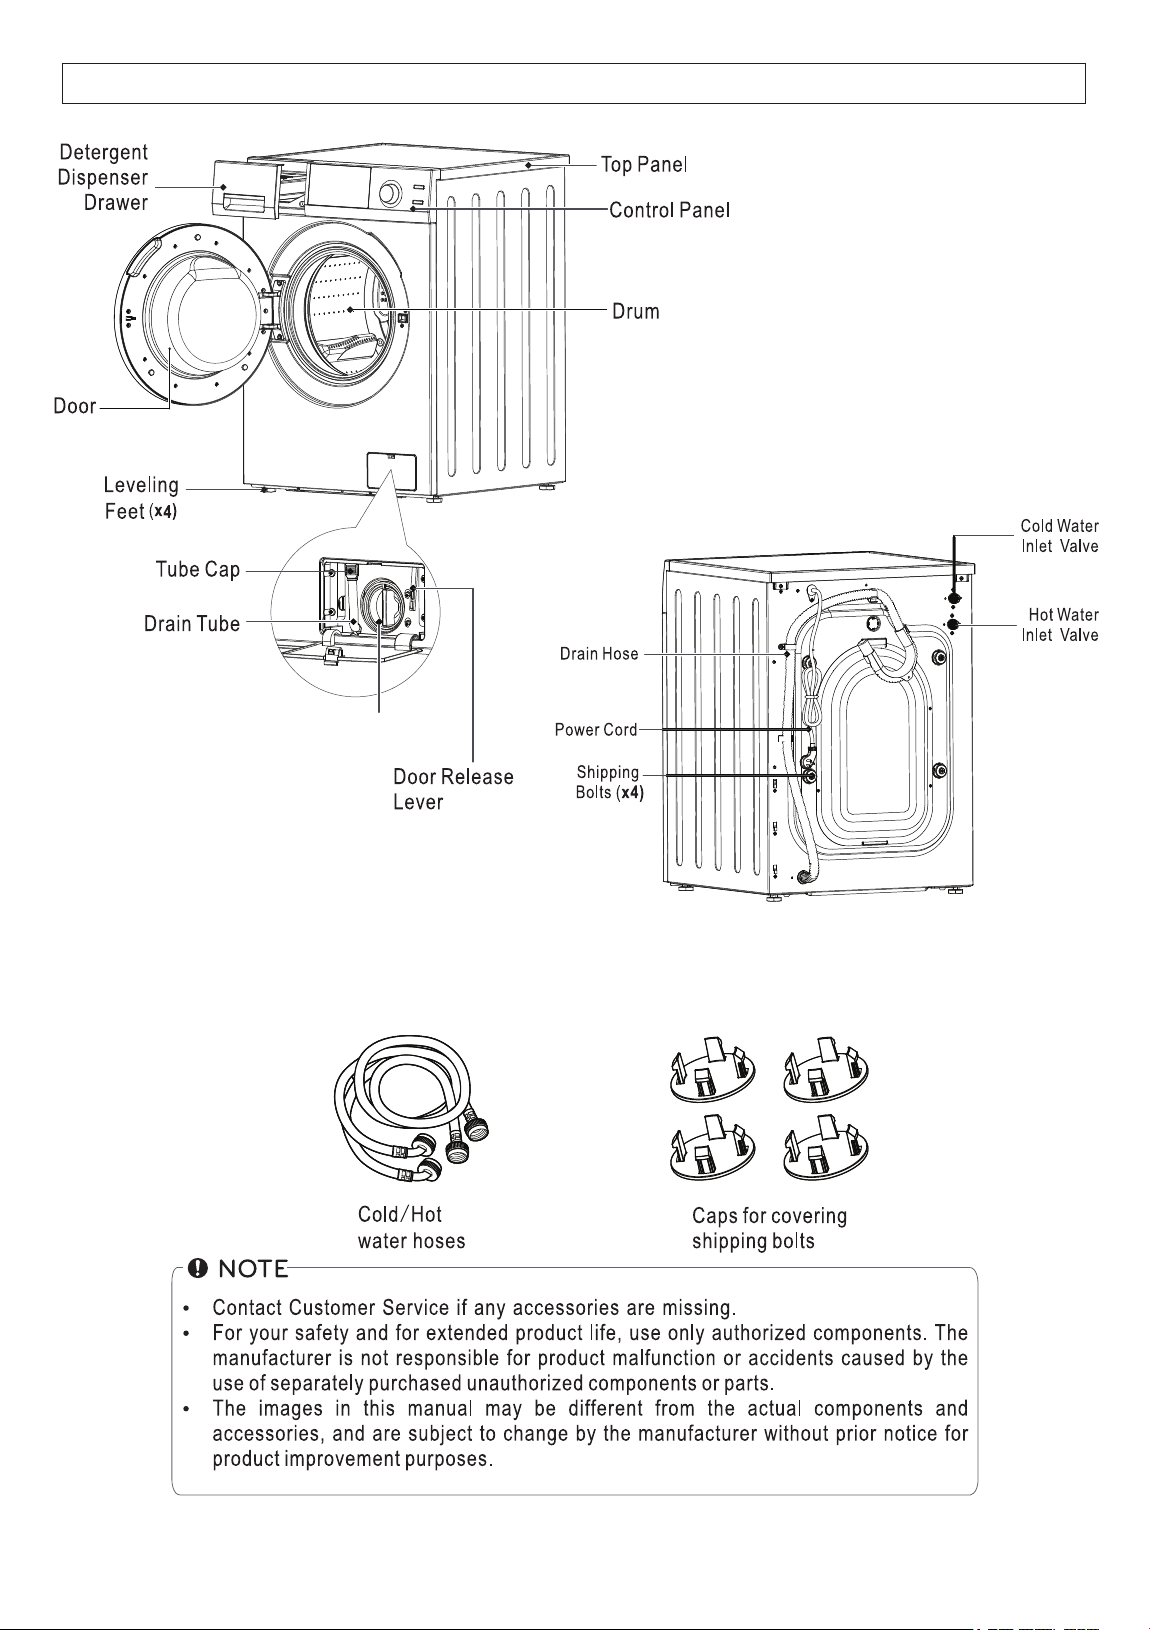
Coin Trap / Knob
Included
(4)
(2)
DIAGRAM OF THE WASHER
7
HANDLING AND PLACEMENT
Disposal
Suffocation from plastic and folding cartons.
Please dispose of packing material and your old appliance in accordance with local regulations.
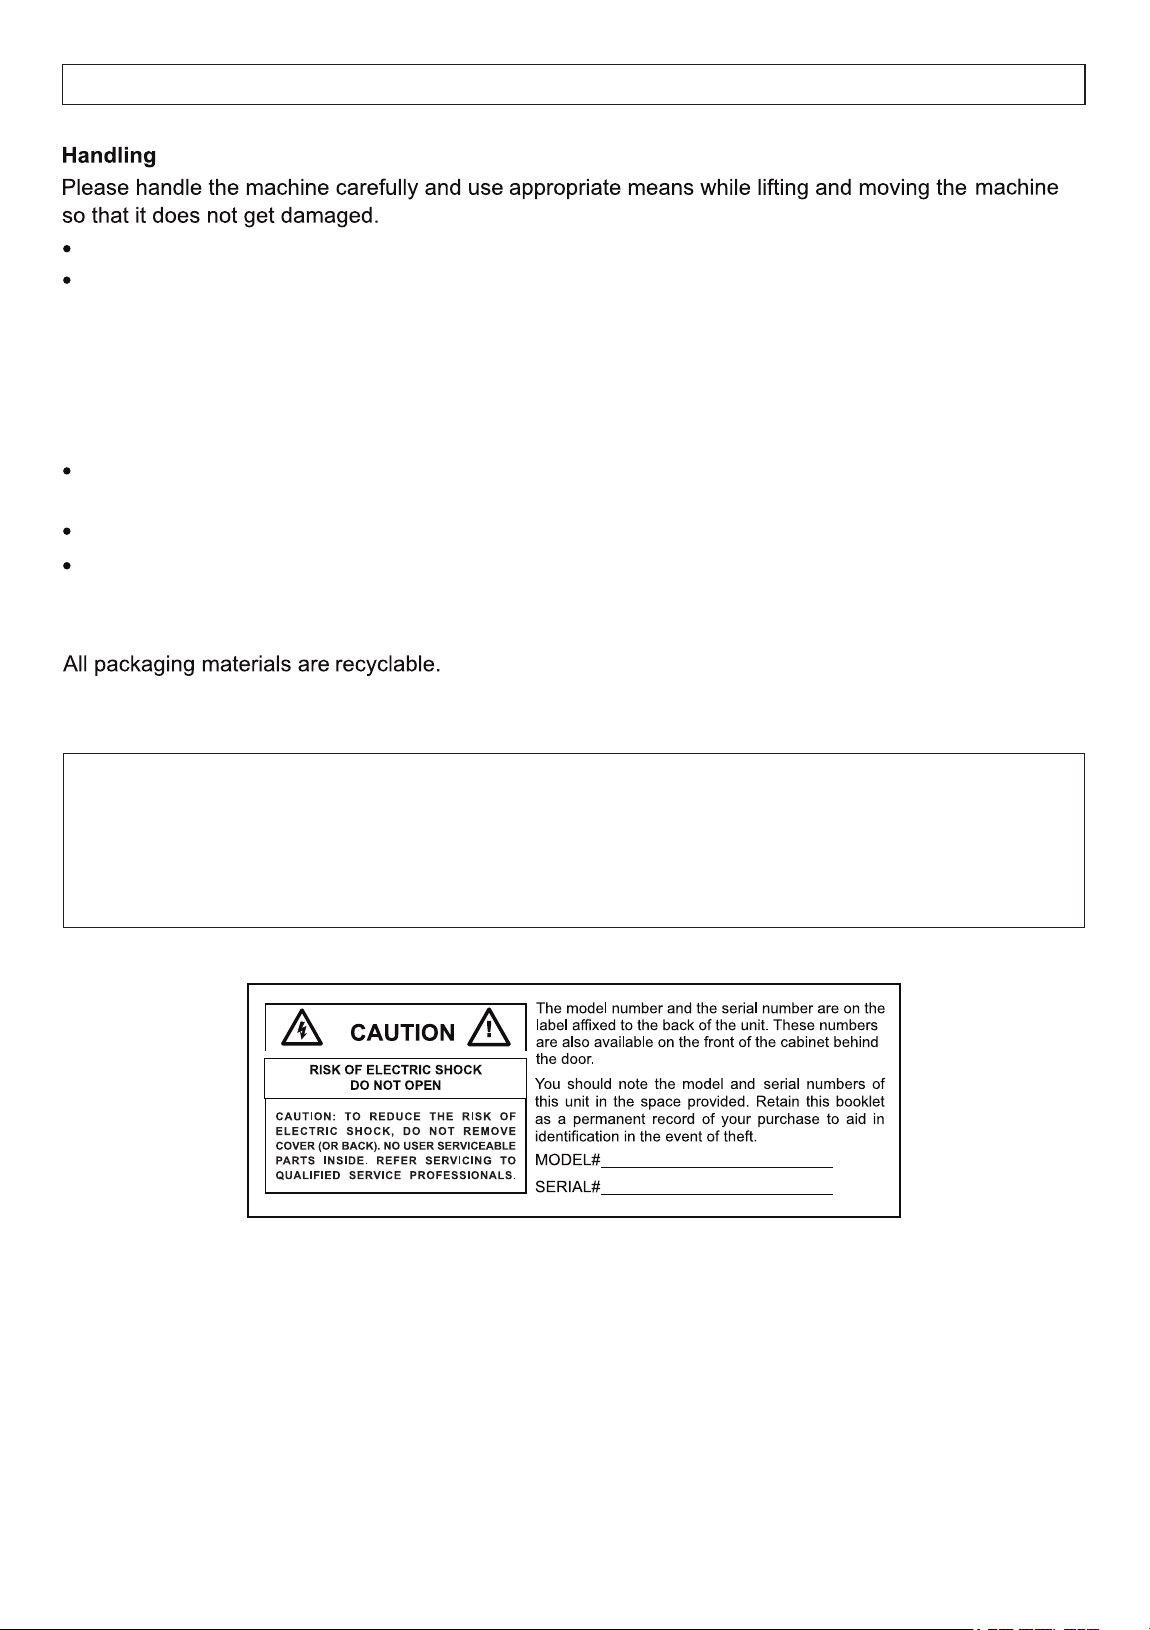
Inspect the Washer to ensure there is no damage.
Placement
Place the appliance away from direct sunlight, sources of heat and high humidity, and also away
from areas or moisture and exposure to cold temperatures.
Ensure the appliance is placed in a well-ventilated and dry environment.
Ensure that the appliance is placed on flat and stable ground. Adjust the 4 feet to make it level.
Any residual moisture inside the drum is due to the final testing which every washing machine
undergoes before leaving the factory. This is normal.
Ensure not to drag the appliance.
Ensure not to hold on to protruding parts when lifting.
DANGER
Keep children away from the shipping carton and packing material.
Before discarding the appliance, remove the door in order to prevent risk of child entrapment.
8
REMOVE SHIPPING BOLTS AND LEVEL
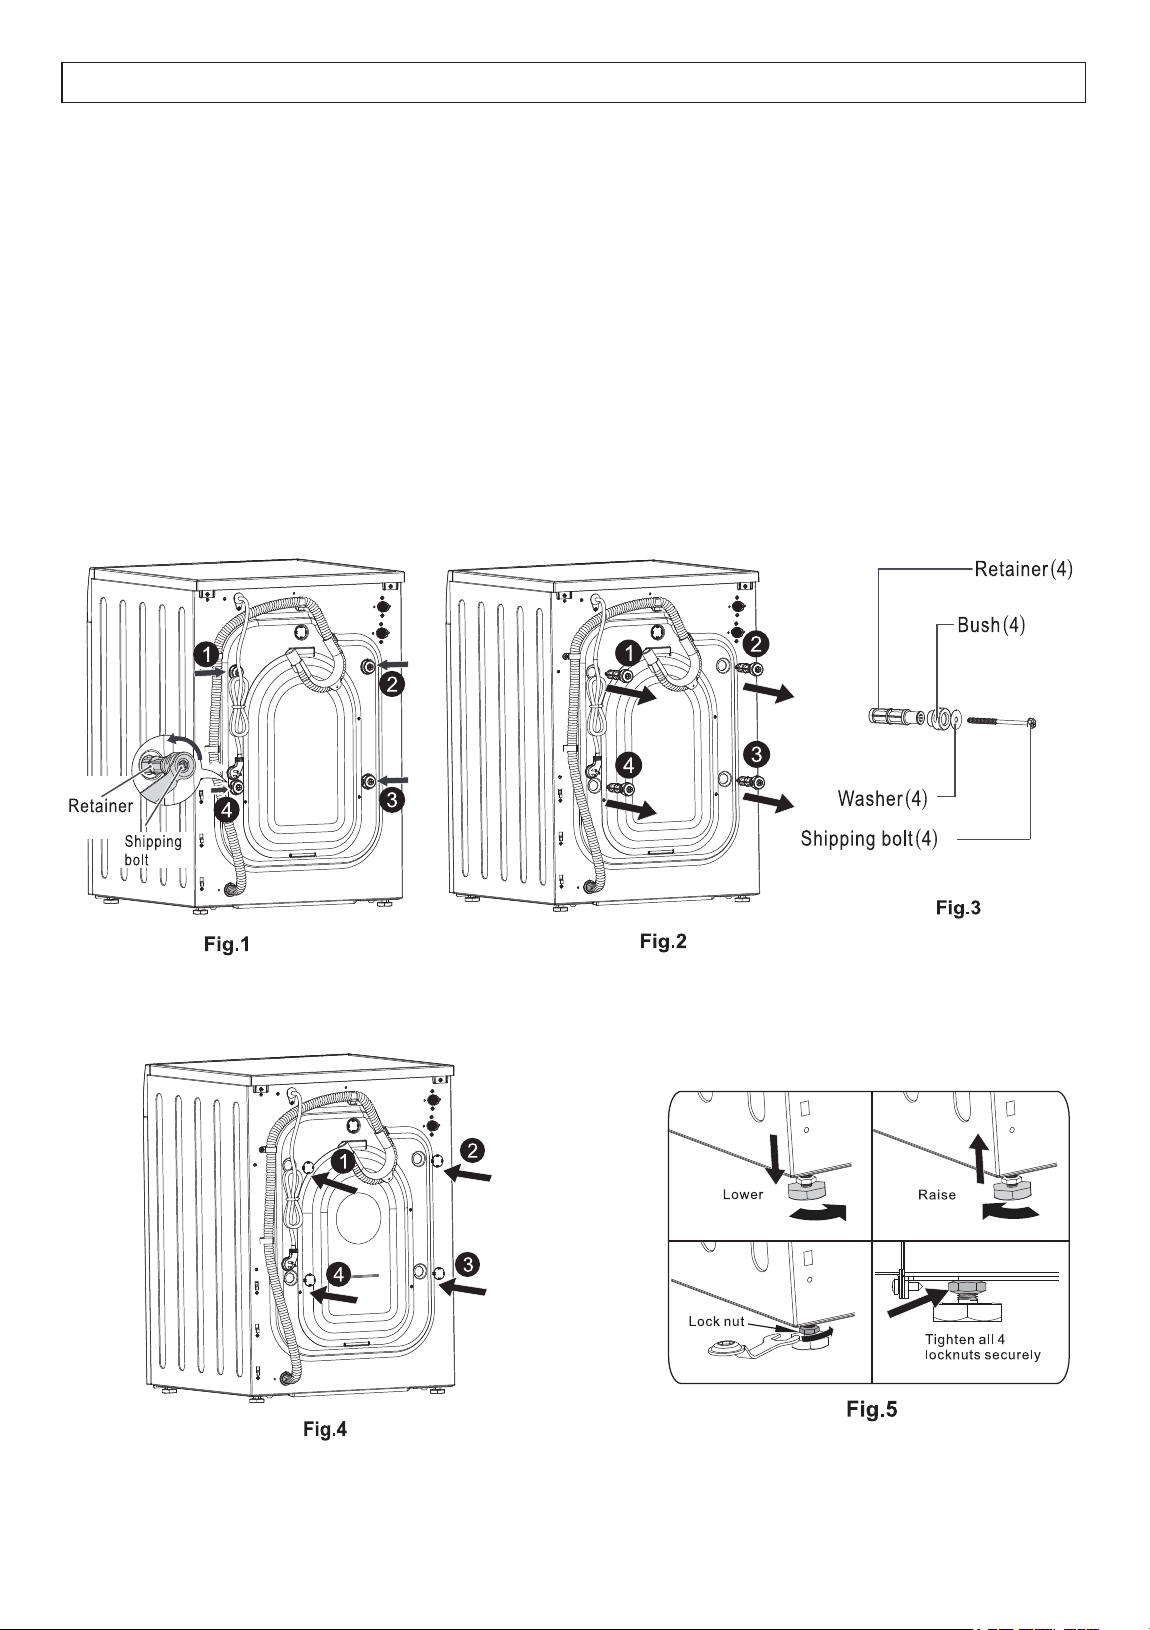
The free-floating drum inside the Combo is held in place during transport with 4 shipping bolts. (Fig. 1.)
Remove each shipping bolt along with the retainer, bush and washer. (Fig. 2.)
Failure to remove shipping bolts may cause severe vibration, noise and can lead
to permanent damage to the machine. IT WILL ALSO VOID THE WARRANTY.
It is important for the machine to be perfectly level. For this reason, the machine is fitted with adjustable
feet used for leveling the machine before use (Fig. 5.)
An adjustable wrench or 17mm open end wrench is required to loosen or tighten the leveling feet.
Close the holes left open by the bolts with the caps provided (Fig. 4).
Store all these parts for future use when moving the Combo to a new location. (Fig. 3.)
DO NOT transport the machine without reinstalling the shipping bolts.
9
10
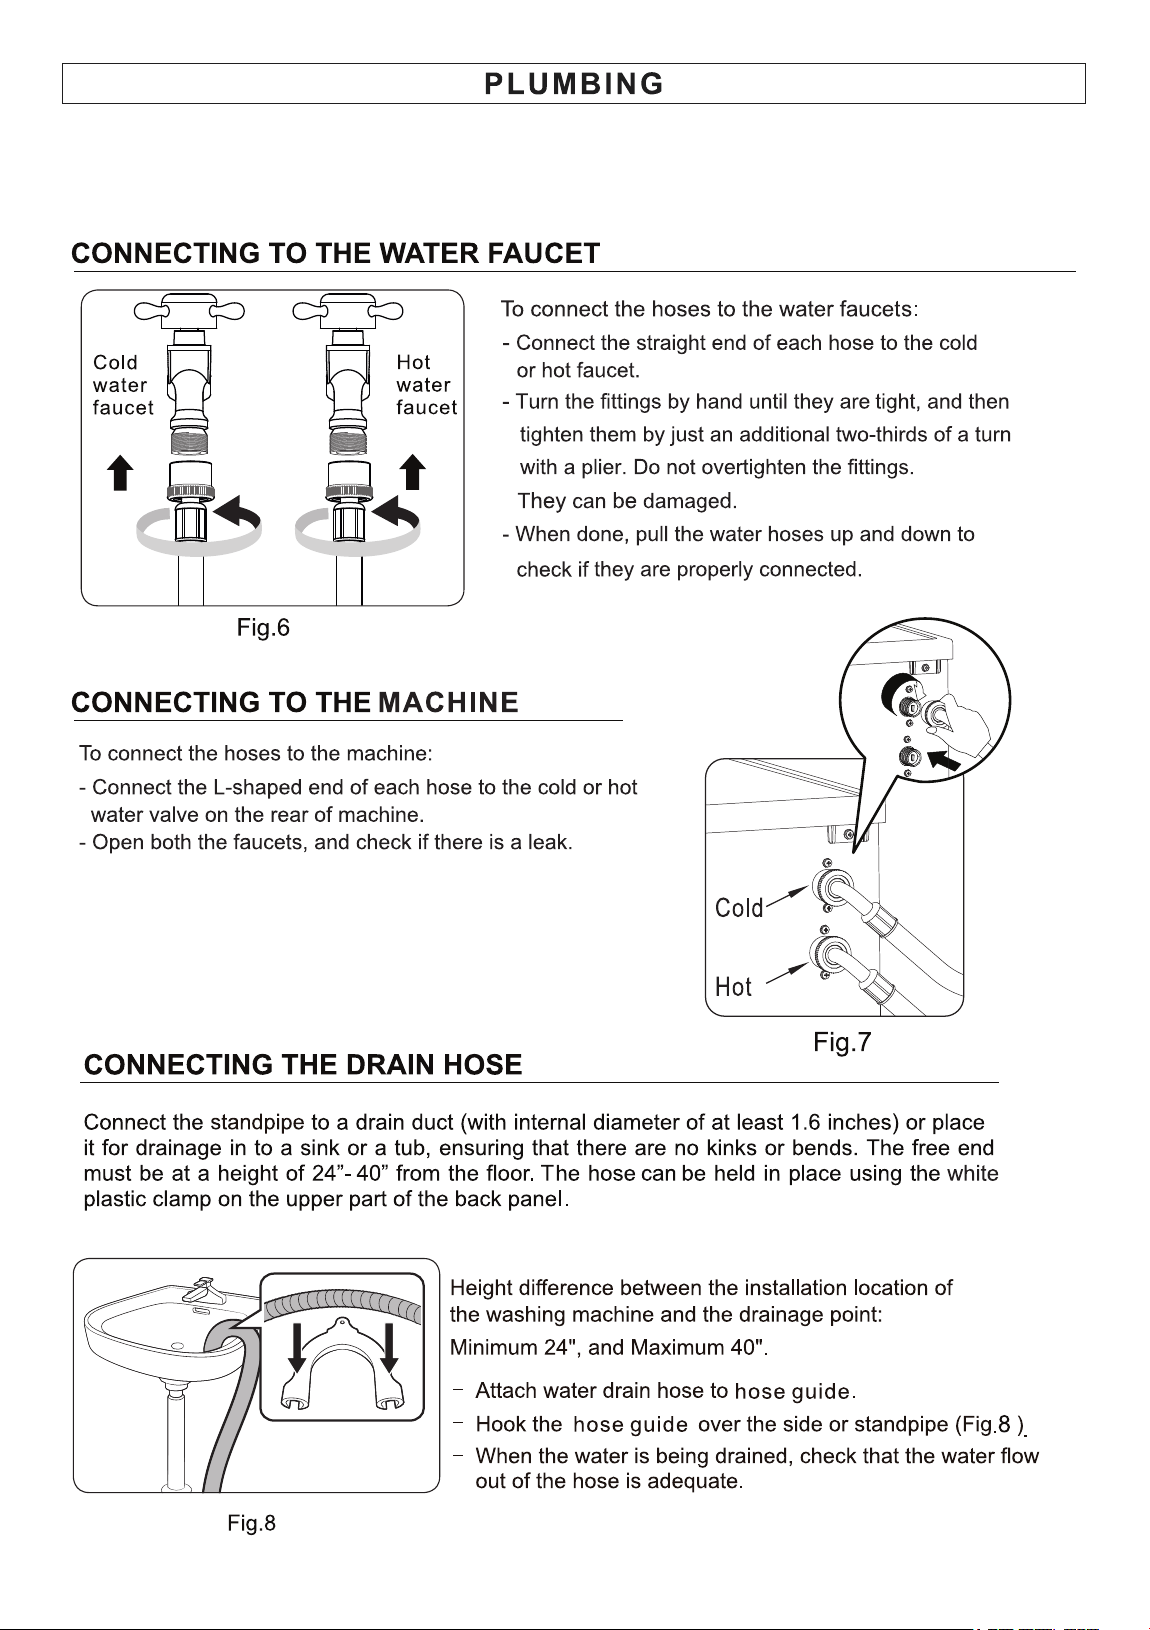
ONLY USE THE WATER INLET HOSES THAT COME WITH THE MACHINE.
Reason: They are custom hoses. The L-Shaped side uses metric thread to fit the valve and the
straight side uses US pipe (NPT) thread. Replacement hoses will not fit the metric thread and will leak.
11
Fig. 9
12
Fig. 11
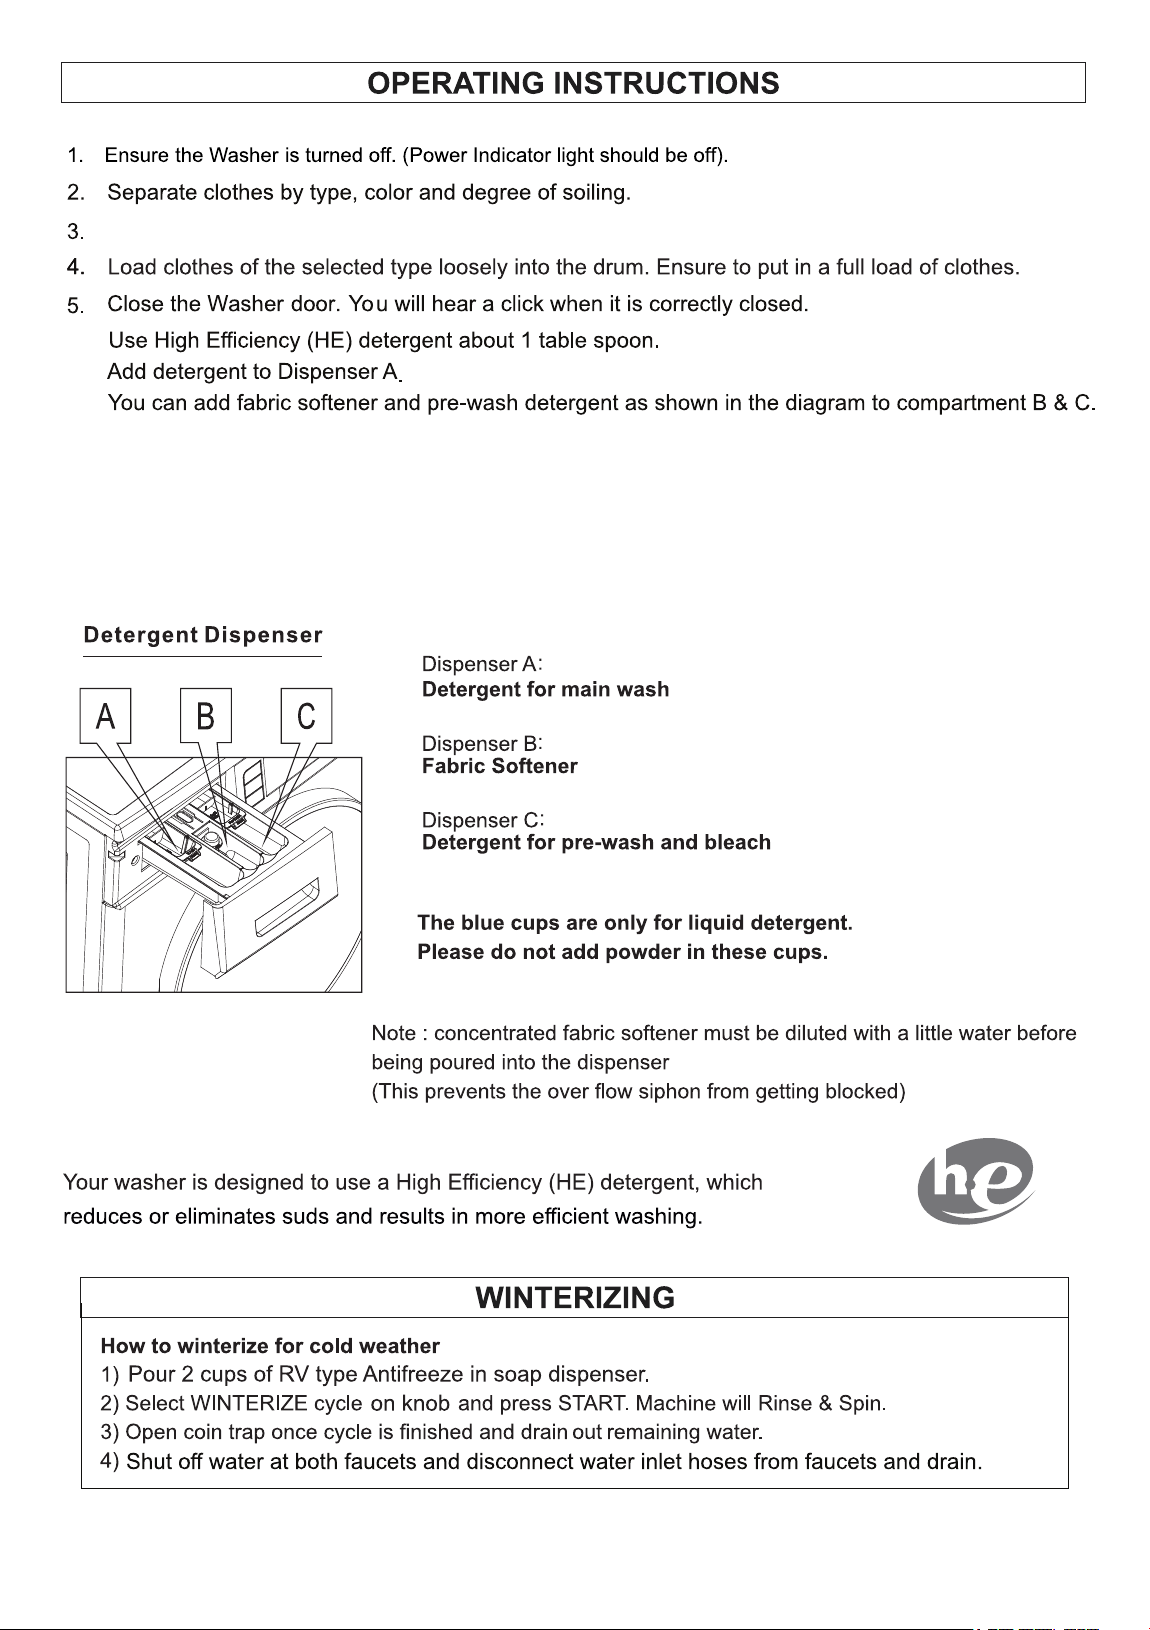
For small items such as socks and children’s clothes please use a mesh bag.
Note: The washer is designed to be used with a full and balanced load. If a small or half load of
clothes is put in the washer, it will be unbalanced causing the drum to rotate slowly during the
spin cycle and will not extract sufficient water. This will result in wet clothes at the end of the
cycle and will not be ready to put in the dryer.
13
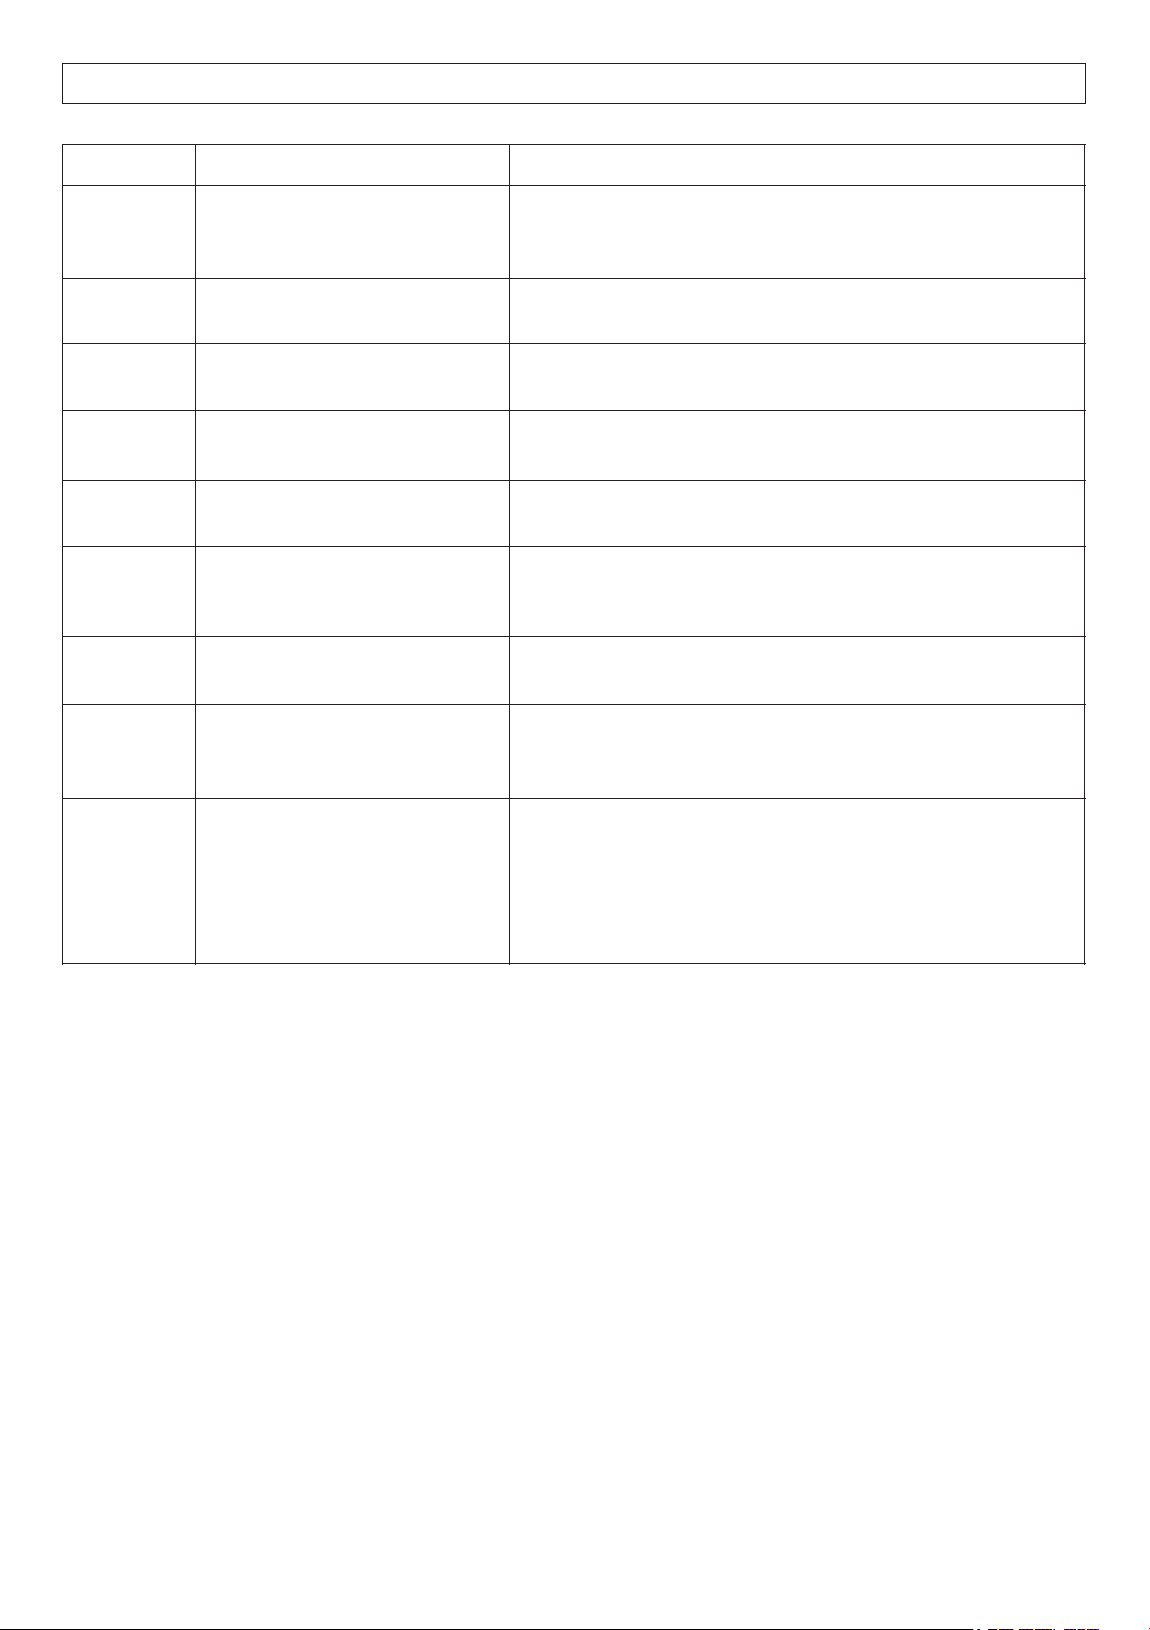
Wash Programs
Description of Load
Wash
Temperature
Spin Speed
(rpm)
Display
Time min
1. NORMAL
Mixed Clothes (Shirts, Trousers, etc)
Warm
1200
51
2. Prewash + Heavy
Thick Cottons (T-Shirt, Jeans)
Cold+Hot
1400
75
3. Heavy
Mixed Cottons (T-Shirt, Jeans)
Hot
1400
51
4. ECO
Cotton Blends, Light Fabrics
Cold
800
31
5. Quick 20
Cotton Blends, Light Fabrics
Cold
1200
20
6. Baby
Light Fabrics
Warm
800
41
7. Delicate
Silk, Polyester etc
Cold
800
36
8. Wool
Woolens
Cold
500
36
9. Quiet 60
Mixed Cottons
Cold
800
31
o
10. Sanitize 165
Bed Sheets etc
Hot
1200
69
o
11. Allergen 131
Mixed Cottons
Hot
1200
59
12. PET Cycle
Mixed Cottons
Cold
1200
46
PET CYCLE
Before loading clothes and sheets into the appliance, remove as much pet hair as possible in
order to prevent buildup and clogging of the drain pump. Wipe the surface of clothes and
sheets with a lint roller or a damp rubber glove to easily remove pet hair.
After the end of the wash cycle, run a quick wash cycle without clothes. After the cycle ends,
wipe down the drum with a damp cloth to collect any pet hair on the drum surface.
Each wash program has default temperature, spin speed and rinse settings. You can use
the buttons on the control panel to changes the defaults for most of the programs.
The total working time will vary with the laundry size, water pressure, water temperature and
ambient temperature etc.
14
PROGRAM
PURPOSE
HOW IT WORKS
ECO
Energy-efficient wash using
less water and power for
everyday cleaning.
Uses lower wash and rinse temperatures, longer cycle
times, and optimized drum motions to reduce power use.
Heavy
Deep cleaning for heavily
soiled items.
Uses higher water levels, stronger agitation, and hotter
water. May include an extra rinse or pre-wash.
Quiet 60’
Minimize noise during
operation.
Reduces spin speed and slows drum movement to lower
vibration and sound.
Sanitize
o
160
Kills germs, bacteria, and
allergens.
Heats water to very high temperatures (up to ~160 -
170°F / 70-75°C).
PET Cycle*
Remove pet hair and odors.
(See instructions below)
Uses extra rinse cycles, higher water levels, and
sometimes soak to loosen fur and dander.
Self Clean
Cleans the washer drum itself.
Runs hot with extra water and strong agitation (empty).
Some machines suggest adding a cleaning tablet or
vinegar.
Allergen
o
131
Reduce common allergens
like dust mites and pollen.
Uses high-temperature water and an extended wash
cycle to break down and flush away allergens.
Winterize
Prepare the machine for cold
weather or storage (to prevent
freezing damage).
Drains all water from the hoses, pump, and internal
parts. Some versions circulate antifreeze through the
system.
Baby Wash
Gently but thoroughly clean
baby clothes, while removing
detergent residues and germs.
Ÿ Gentle drum movements protect delicate fabrics like
cotton and soft baby wear.
Ÿ Uses higher water temperatures (often around 140-
160°F / 60-70°C) to sanitize fabrics and kill bacteria.
Ÿ Includes extra rinse cycles to ensure no detergent
residue remains - important for babies sensitive skin.
SPECIAL WASH PROGRAMS
15
16
How to Run Wash Cycle
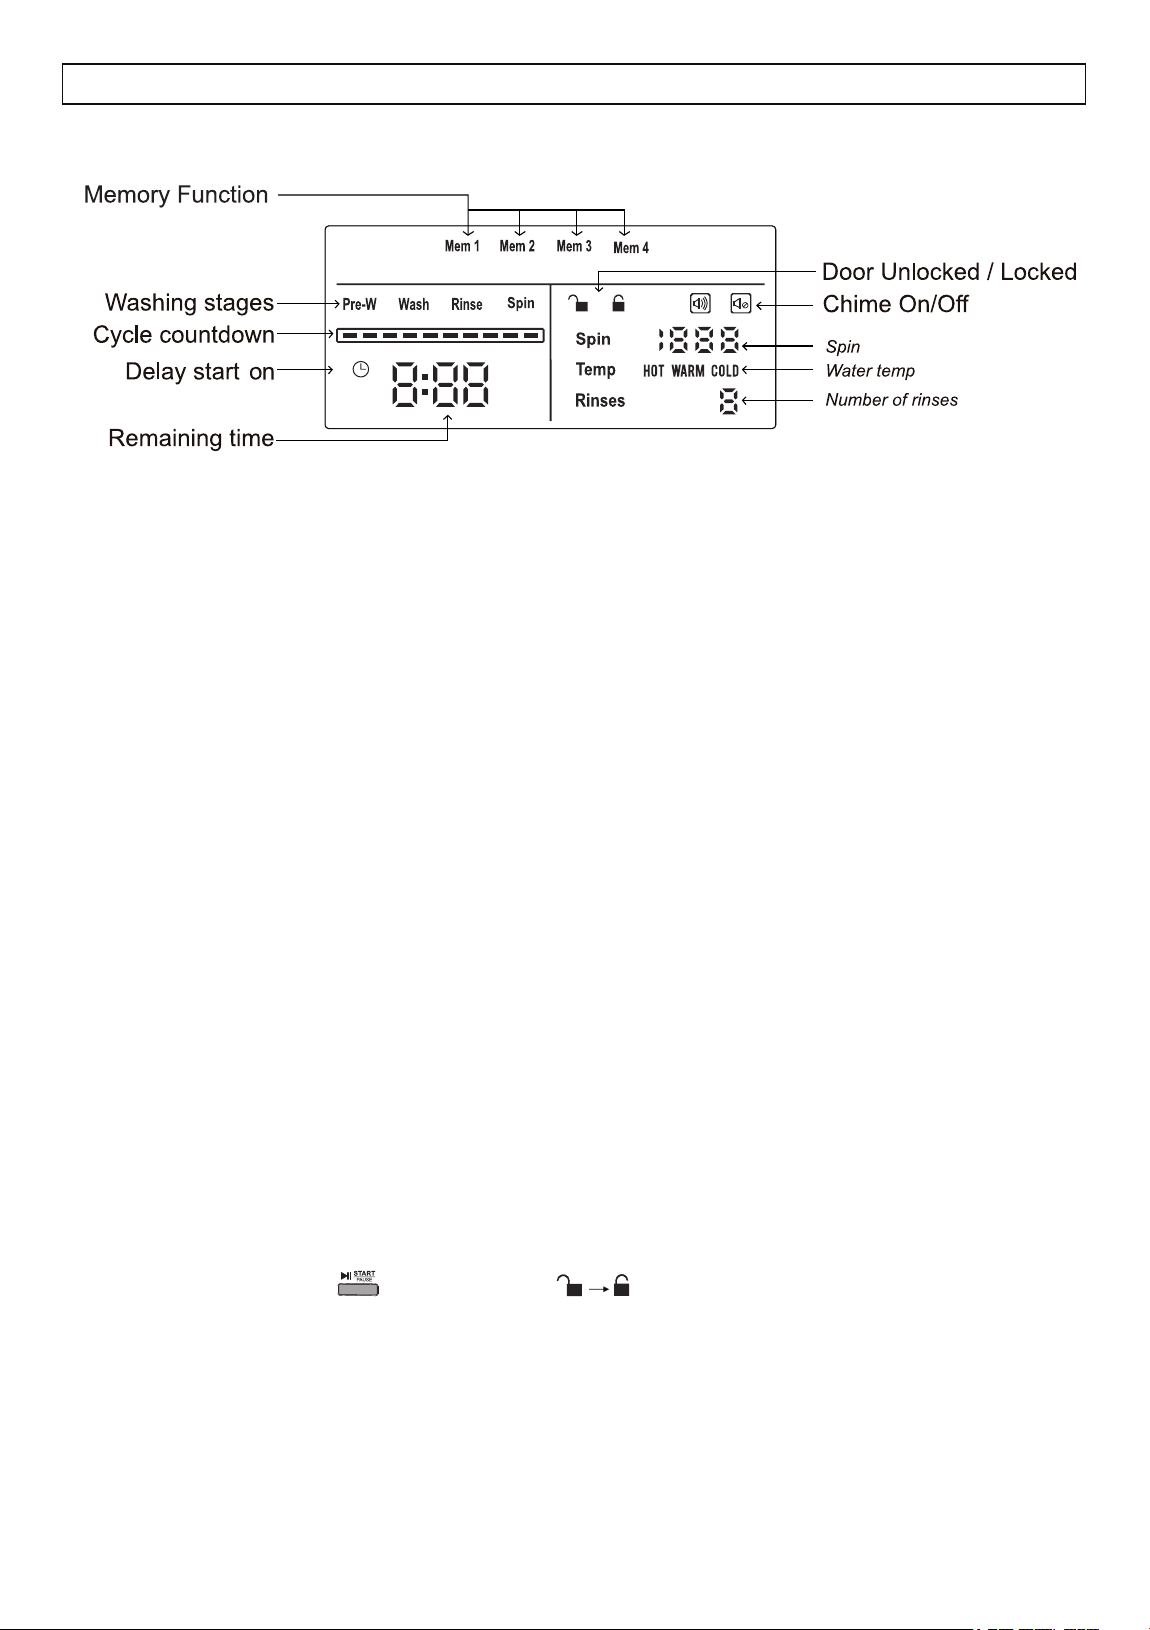
1. Press POWER button
2. Press START
How to stop the wash cycle
- The wash program can be stopped at any time.
- Press START/PAUSE, rotate the knob to another program to cancel the current selected program.
- Press POWER button for 3 seconds to turn off the machine.
How to turn on the display in energy saving mode
- Machine display gets turns off automatically during operations to save energy.
- Press any button to turn the display during this energy saving mode.
Add-a-sock Feature
The wash program can be stopped at any time to add forgotten items to the laundry.
- Press START/PAUSE for 5 seconds.
- Door will open after draining water so that it does not overflow.
- Load clothes. Close the door.
- Press START The cycle will continue from the point it stopped.
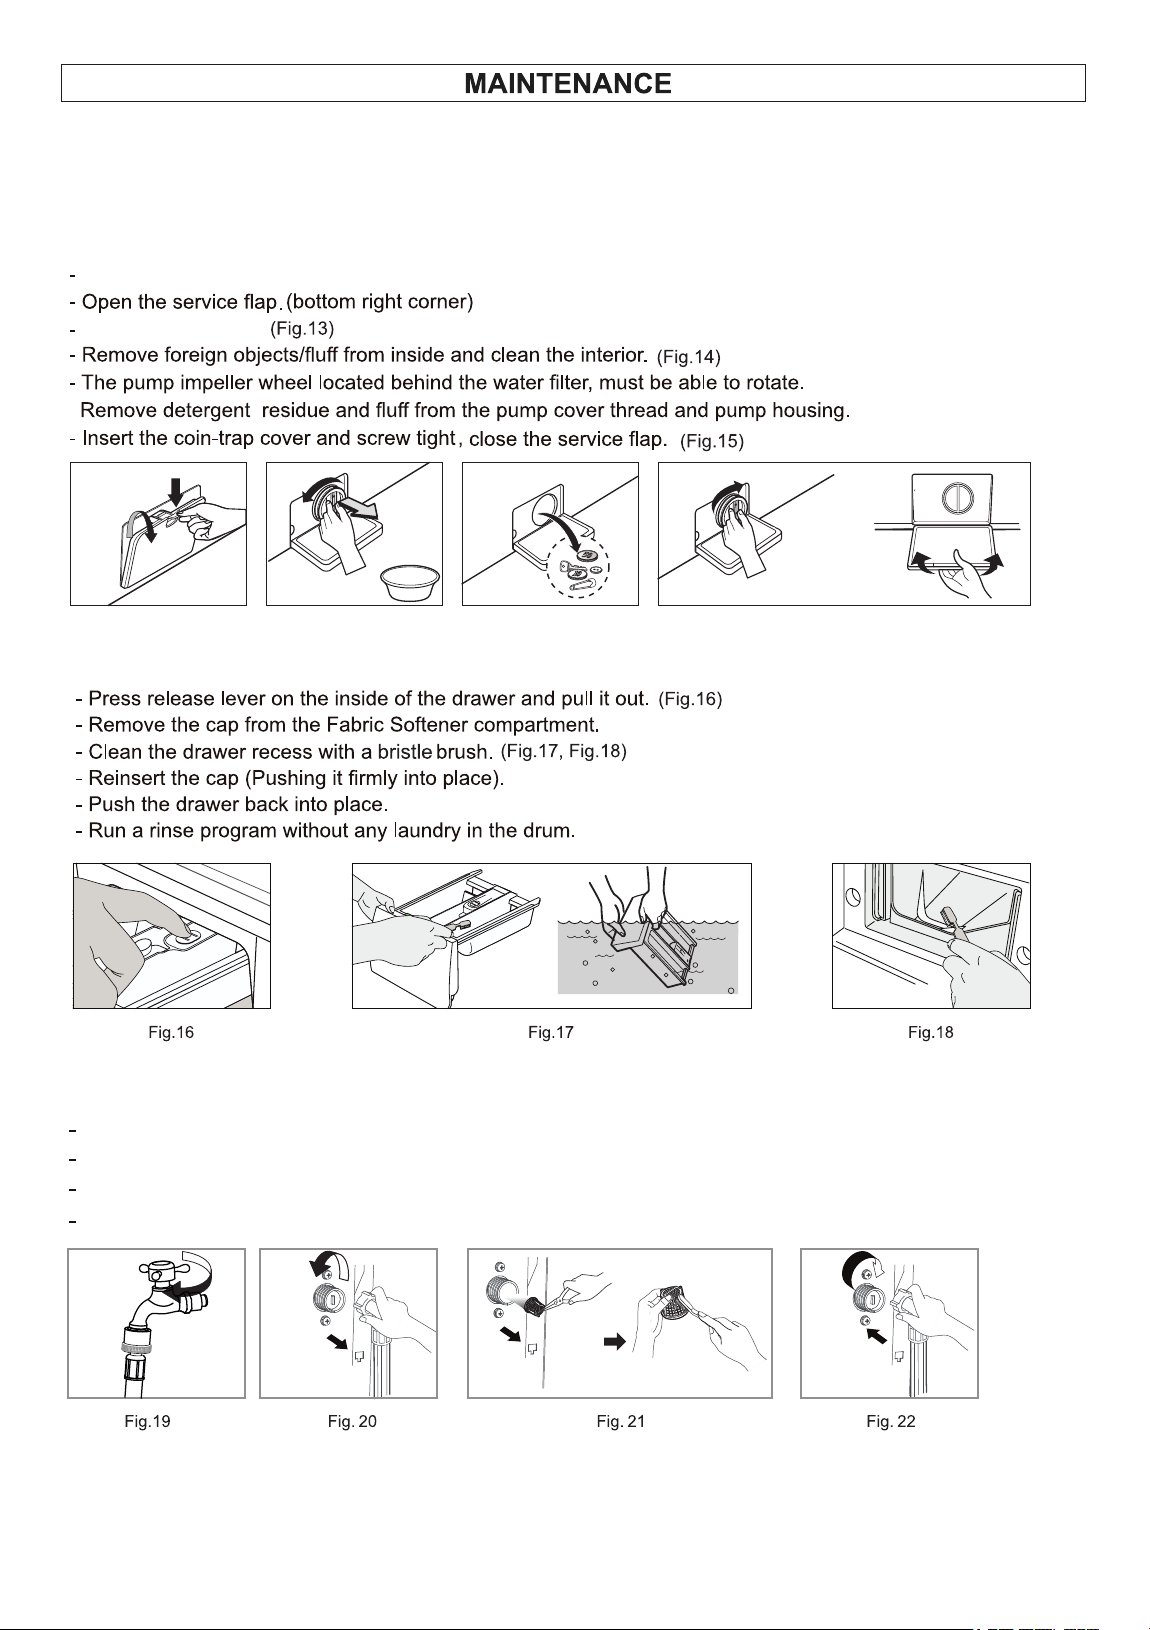
Understanding the door lock function
Pressing the START button will lock the door . The wash cycle will start and will continue
until the whole program is completed. The door will be locked and cannot be opened until the
wash cycle ends. Please do not try to force the door open.
Breakage of the door handle is not covered by warranty.
Default cycle is DAILY - If required, you can change to desired washing cycle based type of clothes
by rotating the Program Dial knob.
DISPLAY PANEL
17
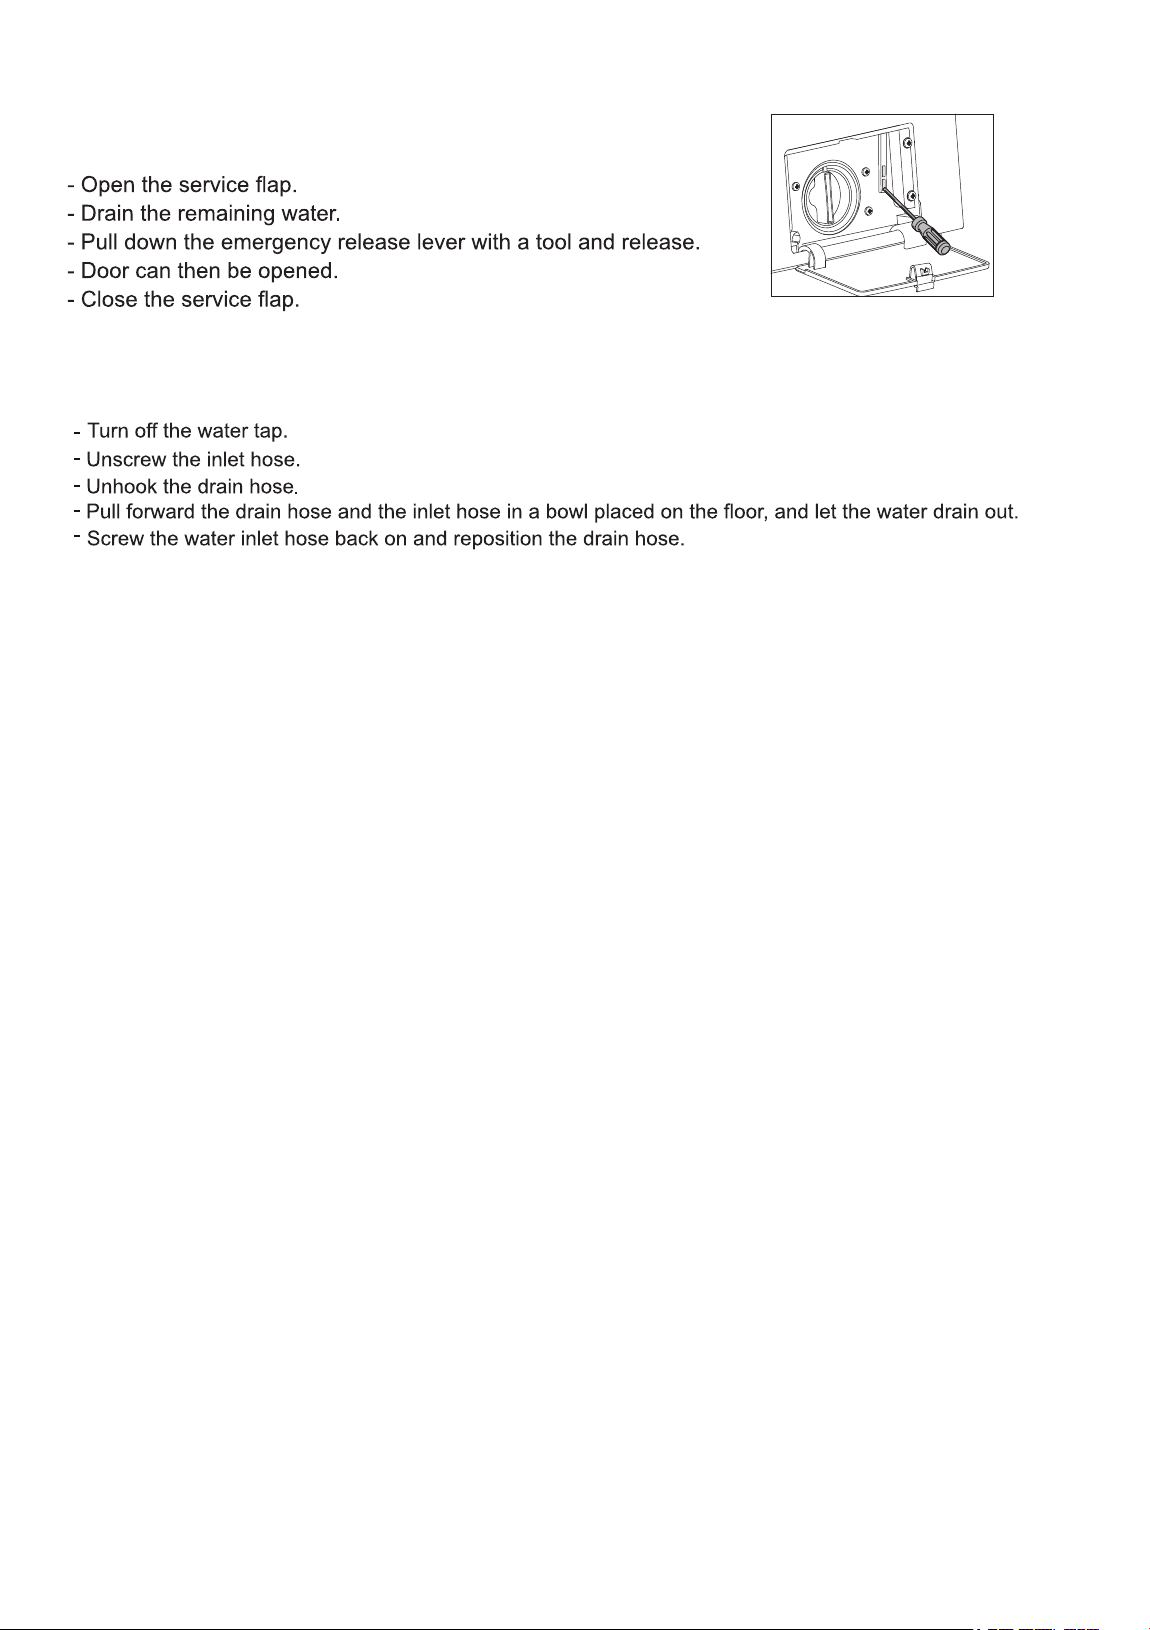
Fig. 12 Fig. 13 Fig. 14 Fig. 15
(Fig. 12)
Clean the outside and inside of the appliance regularly, including the door gasket, using water, mild detergent and
a soft cloth. Please do not use strong chemicals and abrasive materials to clean.
General Cleaning
Turn off the Washer.
Turn knob to the left.
Insert the filter into the valve and tighten up the inlet hose. (Fig. 22)
Turn off the water tap. (Fig.19)
Unscrew the water inlet hose. (Fig. 20)
Clean the filter using a hard bristle brush under the running water. (Fig. 21)
Cleaning the coin trap
Cleaning the Detergent drawers
Cleaning the water inlet filter
18
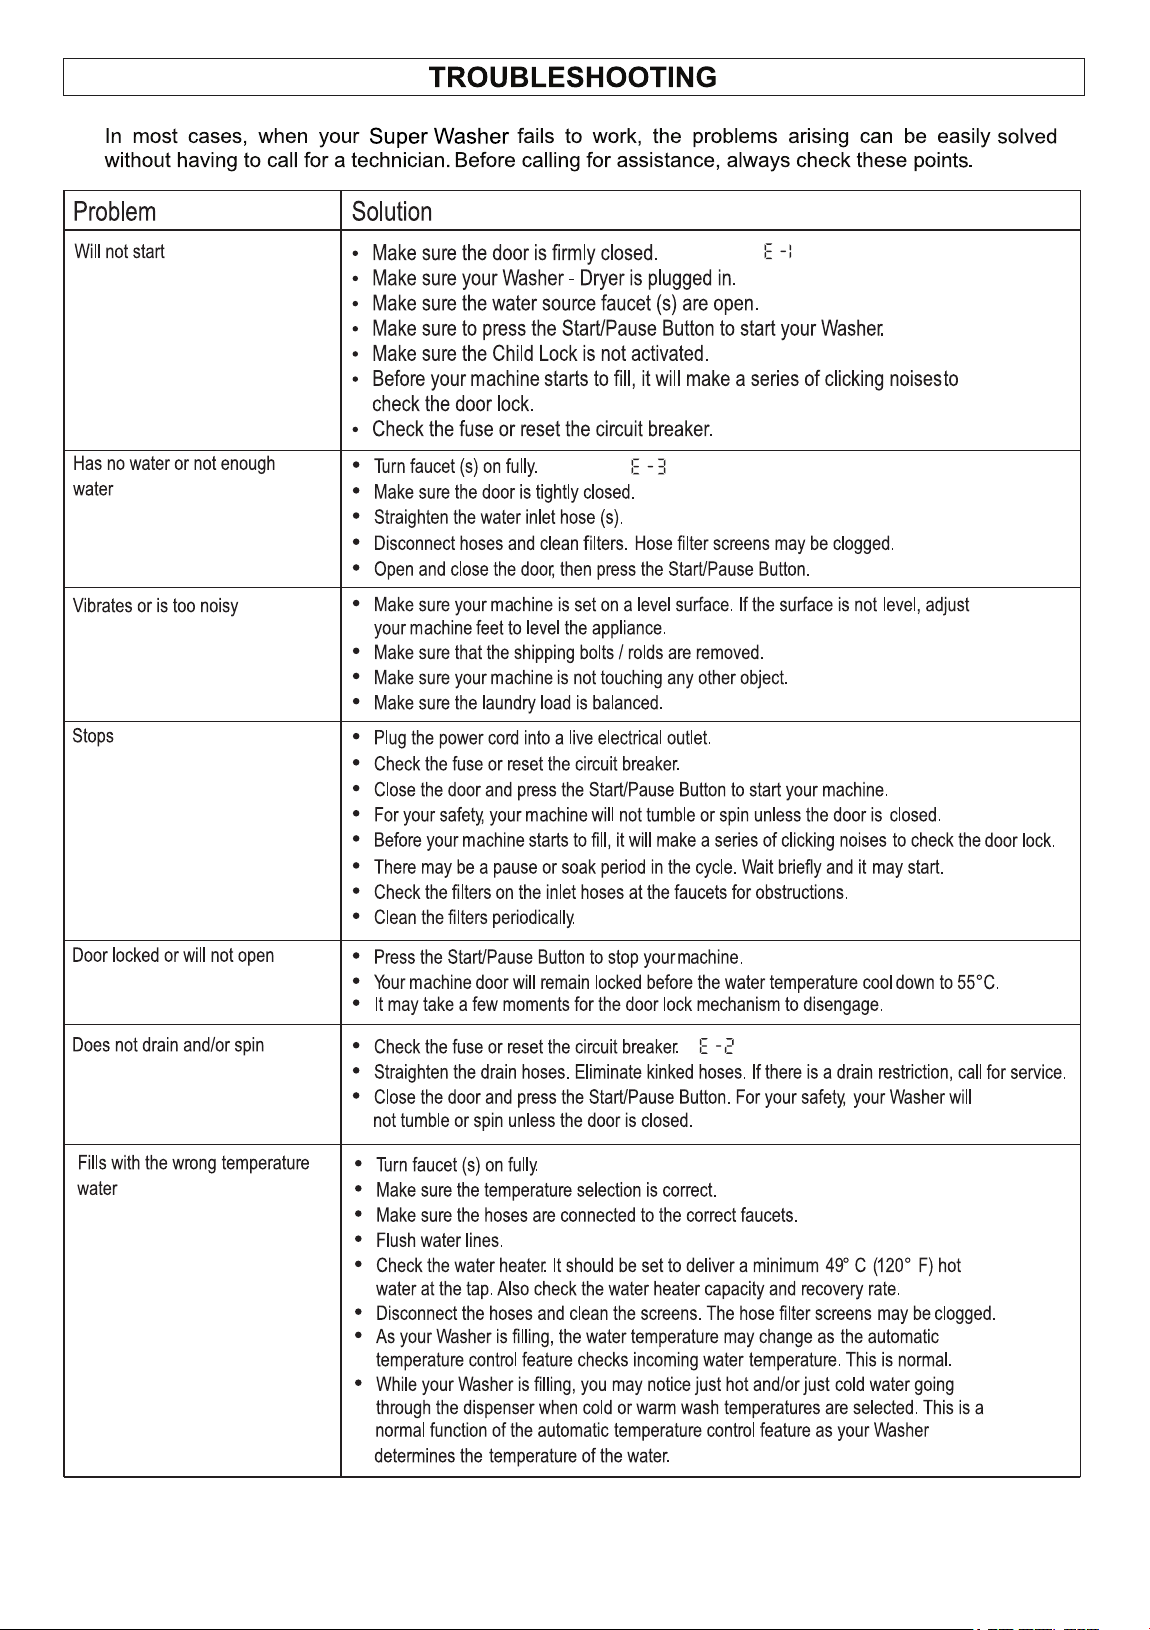
If the Washer door is locked and clothes need to be removed,
follow this procedure:
If the machine is exposed to freezing temperatures, certain precautions should be taken.
If the Washer is not going to be used for an extended time, ensure that the door is left open to
prevent mold and odors.
Vacation
Emergency Release
The dangers of freezing
19
20
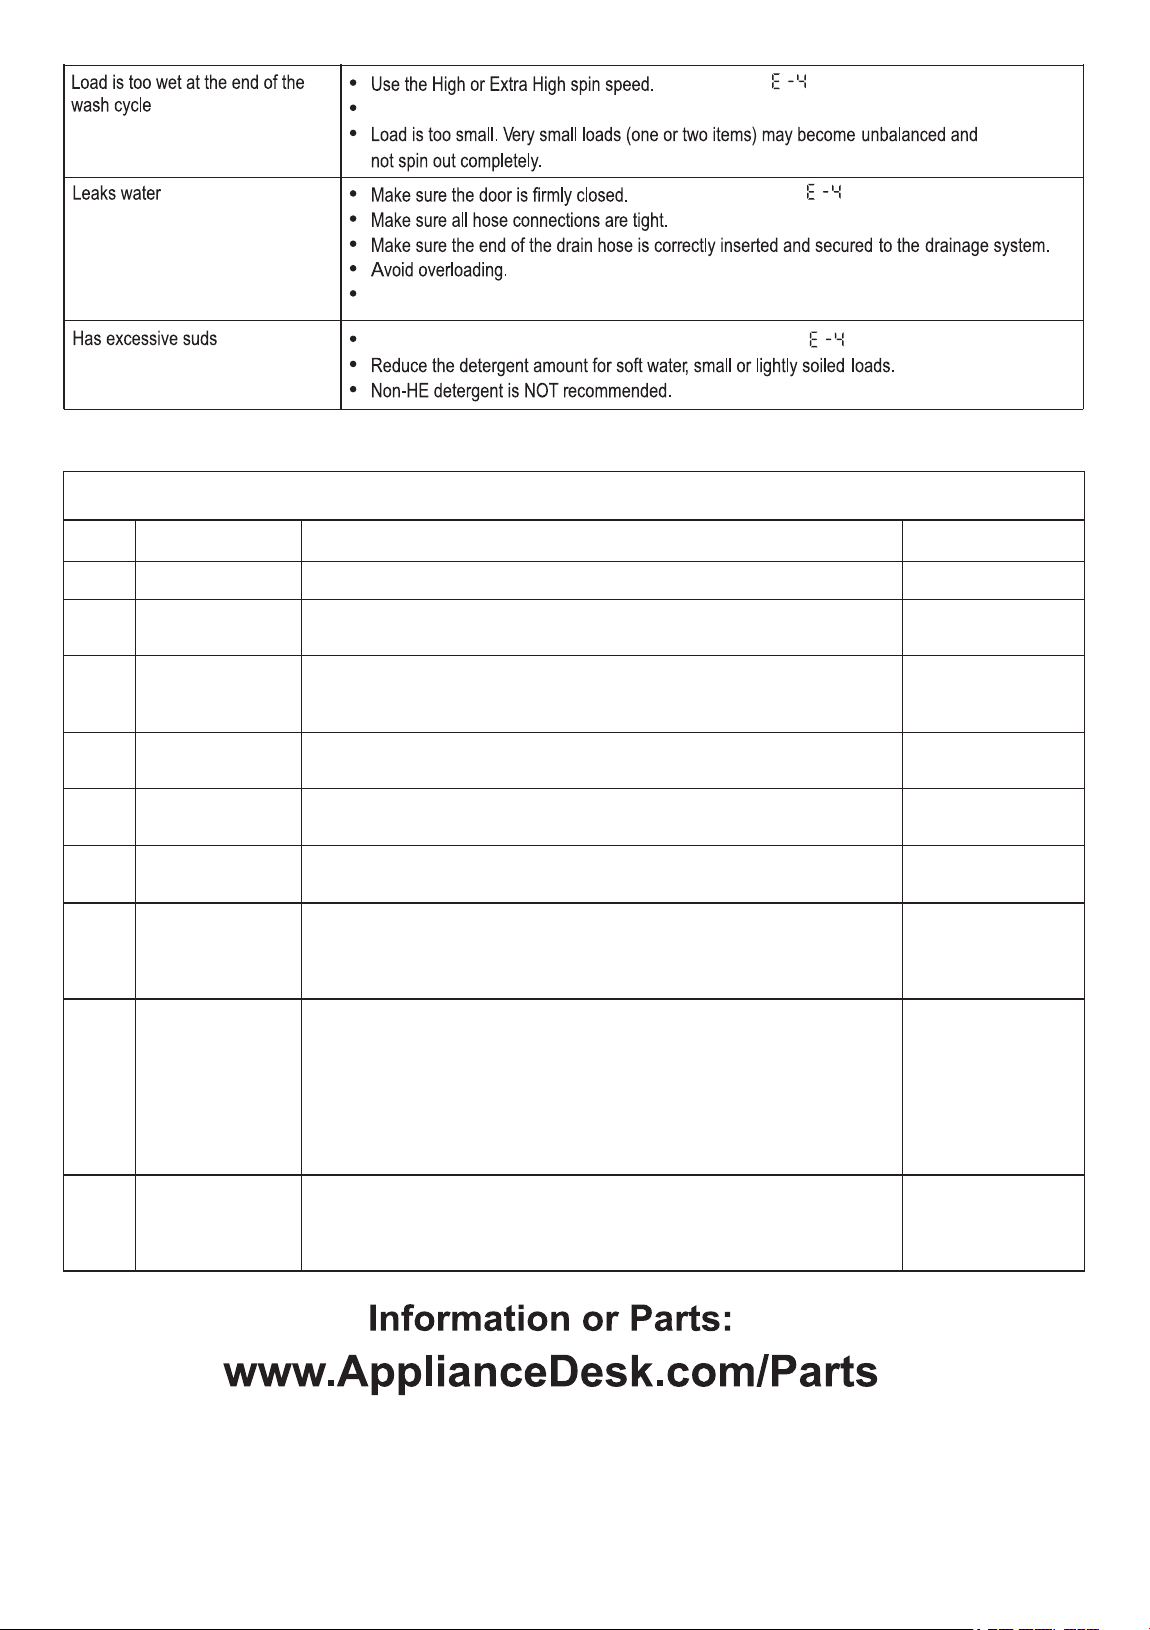
ERROR CODES
Code
Possible Cause
Solution
Component
E1
Door Open
Ensure the door is completely CLOSED and properly latched.
Door Switch
E2
Drain Issue
Ensure the drain HOSE is not kinked, bent, blocked, or crushed.
Clean the drain FILTER thoroughly.
Drain Pump
E3
Water Inlet Valve
Confirm that the WATER FAUCETS are fully turned ON.
Check and clean the inlet valve filter if clogged.
Check if there is any water leakage from water / drain hoses.
Inlet Valves
E4
Excessive Suds
Excess Water /
Ensure the door is properly CLOSED.
Use appropriate spin speed and adequate High Efficiency (HE) detergent.
Inlet Valves
E5
Motor
Ensure the drum is NOT OVERLOADED and select the appropriate wash
program based on the fabric type.
Motor + Electronic
Module
E7
Washing Heater
Avoid OVERLOADING the unit.
Reduce load size and restart the cycle.
Washing Heater
E8
Overload /
Temperature
Sensor
Malfunction
Reduce load size and distribute clothes evenly.
Connect properly the HOT and COLD faucet.
Temperature Sensor
(@rear-bottom of
Drum)
E10
Water Pressure
Switch
Ensure faucets are FULLY OPEN.
Clean inlet FILTERS if necessary.
Check water pressure (not above 145 PSI)
Check hoses for tight connection / damage
Turn OFF & unplug → see if water still enters
Clean inlet valve filters / screens
Confirm hoses are not kinked or blocked.
Try a RESET (unplug 5 -10 mins)
Water Level Sensor
E16
Communication
Error
If the unit is not responding, UNPLUG it for 10 -15 minutes and plug it
back in.
If the DISPLAY FLICKERS or the unit makes noise while off, perform a
power reset by unplugging and reconnecting after 10–15 minutes.
Communication
Cable
Use High Efficiency (HE) detergent to prevent over-sudsing.
Use High Efficiency (HE) detergent to prevent over-sudsing.
Use High Efficiency (HE) detergent to prevent over-sudsing.