
User Manual
COLUMN REFRIGERATION
RBCFVL-18, RBCFVR-18,
RBCFV-24, RBCRV-24, &
RBCRV-30 MODELS
www.zlinekitchen.com

ZLINE Kitchen and Bath provides Attainable Luxury, where the kitchen and bath of your dreams is
never out of reach. Through our unique designs and unparalleled quality, we’re dedicated to providing
you an elevated experience in the heart of your home. With an endless selection of features and
finishes, our inspiration is your reality.
ZLINE is fueled by a passion for innovation; A relentless pursuit of bringing the
highest end luxury designs and professional features into everyone’s homes.
Because we continually strive to improve our products, we may change
specifications and designs without prior notice.
Scan the QR code to view the most up-to-date version of the Installation Manual
and User Manual.
WARNING: This product can expose you to chemicals including nickel, which is known to the
State of California to cause cancer. For more information, go to www.P65Warnings.ca.gov.

IMPORTANT SAFETY INSTRUCTIONS . . . . . . . . . . . . . . . . . . . . . . . 1
OPERATION . . . . . . . . . . . . . . . . . . . . . . . . . . . . . . . . . . . . . . . . . . . . 9
Product Specifications (RBCFVL-18/RBCFVR-18/RBCFV-24) . . . . . . . . 9
Product Specifications (RBCRV-24/RBCRV-30) . . . . . . . . . . . . . . .10
Control Panel – Freezer. . . . . . . . . . . . . . . . . . . . . . . . . . . . . 11
Control Panel – Refrigerator . . . . . . . . . . . . . . . . . . . . . . . . . . 14
Food Storage . . . . . . . . . . . . . . . . . . . . . . . . . . . . . . . . . .19
Shelves and Drawers . . . . . . . . . . . . . . . . . . . . . . . . . . . . . . 21
MAINTENANCE AND CLEANING . . . . . . . . . . . . . . . . . . . . . . . . .23
TROUBLESHOOTING . . . . . . . . . . . . . . . . . . . . . . . . . . . . . . . . . . . . 25
WARRANTY . . . . . . . . . . . . . . . . . . . . . . . . . . . . . . . . . . . . . . . . . . . . 32
TABLE OF CONTENTS

1
General Safety
IMPORTANT SAFETY INSTRUCTIONS
WARNING
If the information in this manual is not followed exactly, a fire or explosion
may result causing property damage, personal injury, or death.
GENERAL SAFETY
• Before installation and operation, please read and follow these important instructions for
the safety of your home and the people living in it.
• This appliance is not intended for use by children unless they have been adequately
supervised by a responsible person to ensure they can use the appliance safely.
• Young children should be supervised to ensure that they never play with the appliance.
• Cleaning and care should not be performed by children unless they are supervised by an
adult or responsible person.
• Immediately unplug the product if you encounter a failure during use.
• If the product malfunctions, it must not be operated until repaired by an authorized
service provider.
• It is recommended that installation and service be performed by a qualified installer.
The appliance should not be adjusted or repaired by anyone except properly qualified
service personnel.
• The manufacturer will not be responsible for any damage to property or to persons caused
by incorrect installation, improper use of the appliance, or failure to heed the warnings
listed; the warranty will be voided.
• The manufacturer reserves the right to make changes to its products when considered
necessary and useful, without affecting the essential safety and operating characteristics.
• Do not eat ice cubes, ice cream, or other frozen foods immediately after you take them out
of a freezer. This may cause frostbite in your mouth.
• Do not touch frozen food with wet hands. They may stick to your hand.
• Do not put bottled or canned liquid beverages in a freezer. They may burst.
• Please observe all local, state, and national codes and ordinances. Please ensure the
appliance is properly grounded. The plug should always be accessible.

2
General Safety
• Never wash the appliance by spreading or pouring water onto it, as you run the risk of
electric shock.
• Never touch the plug with wet hands.
• To disconnect the appliance from power, firmly grip the plug and pull it from the electrical
outlet. Never pull by the cord.
• Do not plug in the refrigerator or freezer if the wall outlet is loose.
• Never connect your refrigerator or freezer to energy-saving devices; such systems are
harmful to your product.
• Unplug the product during installation, care, cleaning, and repairing procedures.
Improper use of the grounded plug can result in the risk of electrical shock.
If the power cord is damaged, have it replaced by a qualified electrician or
an authorized service provider.
WARNING
IMPORTANT SAFETY INSTRUCTIONS

3
General Safety
• Never use steam or steam cleaners to clean or defrost the refrigerator or freezer. Steam may
infiltrate your unit's electrical system, increasing risk of a short circuit or electric shock.
• Do not use mechanical devices or other means to accelerate the defrosting process other than
those recommended by the manufacturer.
• Never use the parts in your appliance, such as the door, shelves, or drawers, as a means of
support or step. This may damage the unit and/or cause it to tip over.
• Do not damage or attempt to fix/adjust the unit's sealed system where the refrigerant circulates
with drilling or cutting tools.
• If pipe extensions, surface coatings, or gas channels of the evaporator located inside the
sealed system are punctured, the refrigerant may escape, potentially causing skin irritations and
eye injuries.
• Do not cover or block the ventilation holes in your refrigerator or freezer with any object.
• Ensure beverages in round containers are tightly closed and placed vertically in the appliance to
avoid damage to the interior or injury when opening doors.
• Do not use gaseous sprays near the product since there is the risk or fire or explosion.
• Flammable items, products that contain flammable gases (e.g. spray), and explosive materials
should never be kept in the appliance.
• Do not place containers filled with liquid on top of the refrigerator or freezer. Splashing liquids on
any electrical parts increases the risk of fire or electric shock.
• Do not store items that need precise temperature adjustment (vaccines, heat-sensitive medication,
science materials, etc.) in the refrigerator or freezer.
• If you are not going to use the appliance for an extended period of time, unplug it and remove
any contents.
• Exposing the product to rain, snow, sun, or wind is dangerous and may increase risk of electrical
shock or failure.
• If the product's sealed mechanical system needs to be serviced or replaced by a professional
service provider, wait at least 5 minutes after installation to reconnect the unit to electrical power.
• Do not overload the refrigerator or freezer. Objects may fall down when the door is opened,
causing injury or damage. Similar problems may arise if any object is placed on top of the unit.
• If the product has a door handle, do not pull on the handle when re-locating the product. The
handle may become loose and become damaged and/or cause injury.
• Be careful not to jam your hand or any other body part in the moving parts of the appliance.
• Do not put your hand or any other foreign materials into the ice maker while it is operating.
IMPORTANT SAFETY INSTRUCTIONS

4
General Safety
INTENDED USE
• This product has been designed for domestic use. It is not suitable for commercial use
and it must not be used outside of its intended use. It must be used only for storing food
and beverages.
• The manufacturer does not take any responsibility for damages resulting from improper use
or transport.
CHILDREN'S SAFETY
• If there is a lock on the door of the product, the key should be kept out of the reach of children.
• Do not let children play with the product.
WARNING
Before disposing of your old refrigerator or freezer:
• Ensure that children are not inside.
• Leave the shelves inside the unit to prevent children from getting inside the
product easily.
• Remove the doors.
IMPORTANT SAFETY INSTRUCTIONS

5
General Safety
COMPLIANCE WITH THE ROHS DIRECTIVE
This appliance conforms to the EU RoHS Directive (2011/65/AB). It does not contain harmful
or prohibited materials specified in the directive.
PACKAGING INFORMATION
• While some packaging materials for this product may have been manufactured from
recyclable materials, others, such as Polystyrene (Styrofoam), are not recyclable.
• Dispose of this unit's non-recyclable packaging with normal domestic waste, and consult
your local recycling programs or regulations for which materials may be recycled.
WARNING
DANGER:
Risk of Fire or Explosion:
• This product uses flammable refrigerant.
• Do not use mechanical devices to defrost the refrigerator.
• Do not use chemicals for cleaning.
• Do not pierce the refrigerant pipe.
• If the refrigerant pipe is pierced, it must be repaired only by licensed
service personnel.
• Please consult the repair/user manual before cleaning the product.
• All safety instructions must be followed.
• Dispose the product according to federal or local regulations.
HYDROCARBON (HC) WARNING
• This product's sealed cooling system contains R600a refrigerant. This gas is flammable.
Therefore, pay attention not to damage the cooling system or piping during use and
transportation.
• If damaged, keep the product away from potential fire sources that may cause it to catch
fire and ventilate the room where the product is placed.
• Never use an appliance with a damaged cooling system. If the system is damaged upon
delivery, contact ZLINE at 1-614-777-5004.
IMPORTANT SAFETY INSTRUCTIONS

6
Water Pressure
ATTENTION
If the product is damaged and if you see gas leak, please keep away
from the gas. It may cause frostbite when it gets into contact with the skin
(including R600a).
ATTENTION
The type of gas used in the product is stated on the unit's label, which is located
on the left wall inside the refrigerator.
WARNING
Never throw the product into fire for disposal.
WATER PRESSURE PRECAUTIONS
• Operating pressure for cold water inlet is between 25–80 psi (1.7–5.5 bar). If the water
pressure exceeds 80 psi (5.5 bar), install a pressure limiting valve to your mains system.
• If water main pressure is lower than 25 psi (1.7 bar), you can use an auxiliary pump to
compensate the low pressure.
• If you do not know how to check the water pressure, please consult a professional plumber.
• If there is a risk of water impact in your installation, always use a water impact protection
equipment in that installation.
• Please consult professional plumbers if you are not sure if there is water impact in your
installation.
• Do not make installation on the hot water inlet.
• Take the necessary measures against the freezing risk of the hoses.
• The water temperature operating range must be 0.6 °C (33 °F) minimum and 38 °C
(100 °F) maximum.
WARNING
Never connect the product to cold water mains with a pressure of 80 psi
(5.5 bar) and above
IMPORTANT SAFETY INSTRUCTIONS

7
Energy Saving Tips
ENERGY SAVING TIPS
WARNING
Connecting your refrigerator or freezer to systems that save energy is
dangerous and may cause damage to the product.
• Do not leave the doors of your refrigerator or freezer open for a long time.
• Do not put hot food or liquids in your appliance.
• Do not overload the appliance. Cooling capacity will decrease when the air circulation in
the refrigerator is hindered.
• Do not place the refrigerator or freezer in places subject to direct sunlight. Install the product
at least 12" (305 mm) away from heat sources such as microwaves, ovens, heater units,
and gas ranges, and at least 2" (51 mm) away from electrical ovens.
• Store food and liquids in your refrigerator or freezer inside closed containers.
• You can remove the shelves and drawers to the fill the unit with the maximum amount of
food. The energy consumption value is determined with the shelves and drawers removed
and the unit filled with the maximum amount of food.
• Thawing frozen foods in a refrigerator both saves energy and preserves the quality
of the foods.
ATTENTION
The temperature of the room where your refrigerator or freezer is located
should at least be 61 °F (16 °C). Operating your appliance under cooler
conditions is not recommended in terms of energy efficiency.
ATTENTION
The inside of your refrigerator or freezer must be cleaned thoroughly.
IMPORTANT SAFETY INSTRUCTIONS

8
Initial Use
RECOMMENDATIONS FOR THE REFRIGERATOR COMPARTMENT
• Make sure that the food does not touch the temperature sensor in the refrigerator or freezer
compartment. To allow the unit to maintain its ideal storage temperature, the sensor must
not be hindered by food.
• Do not place hot foods or liquids inside the unit.
INITIAL USE
• Before using the product, make sure that all preparations have been made in accordance
with the instructions provided in the column refrigeration installation manual.
• Clean the interior of the refrigerator or freezer as recommended in the "Maintenance and
Cleaning" section of this manual (page 23). Before plugging in the appliance for the first
time, make sure that the interior is dry.
• Plug the appliance into a grounded socket. The interior becomes illuminated when the door
of the refrigerator or freezer is opened.
• Plug the unit in for a minimum of 6 hours without placing any food in it and do not open the
door unless it is necessary.
ATTENTION
You will hear a noise when the compressor starts up. The liquids and gases
sealed within the cooling system may also create noise even if the compressor
is not running; this is quite normal.
ATTENTION
Front edges of the refrigerator or freezer may feel warm. This is normal. These
areas are designed to be warm to avoid condensation.
• Take necessary measures against risk of freezing in the unit's water hoses.
• The water temperature operating range must be 33 °F (0.6 °C) minimum and 100 °F
(38 °C) maximum.
WARNING
Never connect the product to a cold water main with a pressure of 80 psi
(5.5 bar) and above.
IMPORTANT SAFETY INSTRUCTIONS
9
Product Specifications
OPERATION
FREEZERS
PRODUCT SPECIFICATIONS (RBCFVL-18/RBCFVR-18/RBCFV-24)
X$8&-1)&/#&$?$+"$/"#&+-&$"" ,1(#"%
"
>25($"+%2:%,32+%(+"$%.#:(#'%#$"%+93".#,29%#:)%.#4%:-,%
.#,93%,3"%8$-)(9,%"F#9,'4=%?7%4-($%8$-)(9,%)-"+%:-,%3#@"%
,3"%$"'"@#:,%8#$,+/%,3"%2:7-$.#,2-:%#88'2"+%,-%-,3"$%
.-)"'+=
8"3(&')10"40)(,'0+
( !"##$#"
!"#$%&'(
)*# +,-#.
/&0 ,11$&*,2$#3
!#$0 *$45# 2&'5
644. 2&'5
7 !#$#*8,2$# 5"#$0 "#&("859
7 :#,8 8.#,8#; 5,0#8< ($,5599
7 =#+4%,2$# &*# *4'8,&'#.9
7 :<(&#'&* &*# 5*4419
7 >.##?#. 2&'5 5#$0 *$45# 84 #'5@.# ,$$ 2&'5 *$45# 1.41#.$<9
7 A;B@58,2$# ,'; .#+4%,2$# ;44. 2&'59
Q'##>#' 41,31-#-)%
!""#$%&'
(")*$+,"-.$-/0,,$%&'
(")*$+,"-.$%&1$%&'
2+.$/03.#
(")*$+,"-.$&+.$%&'
(4.,5&'1
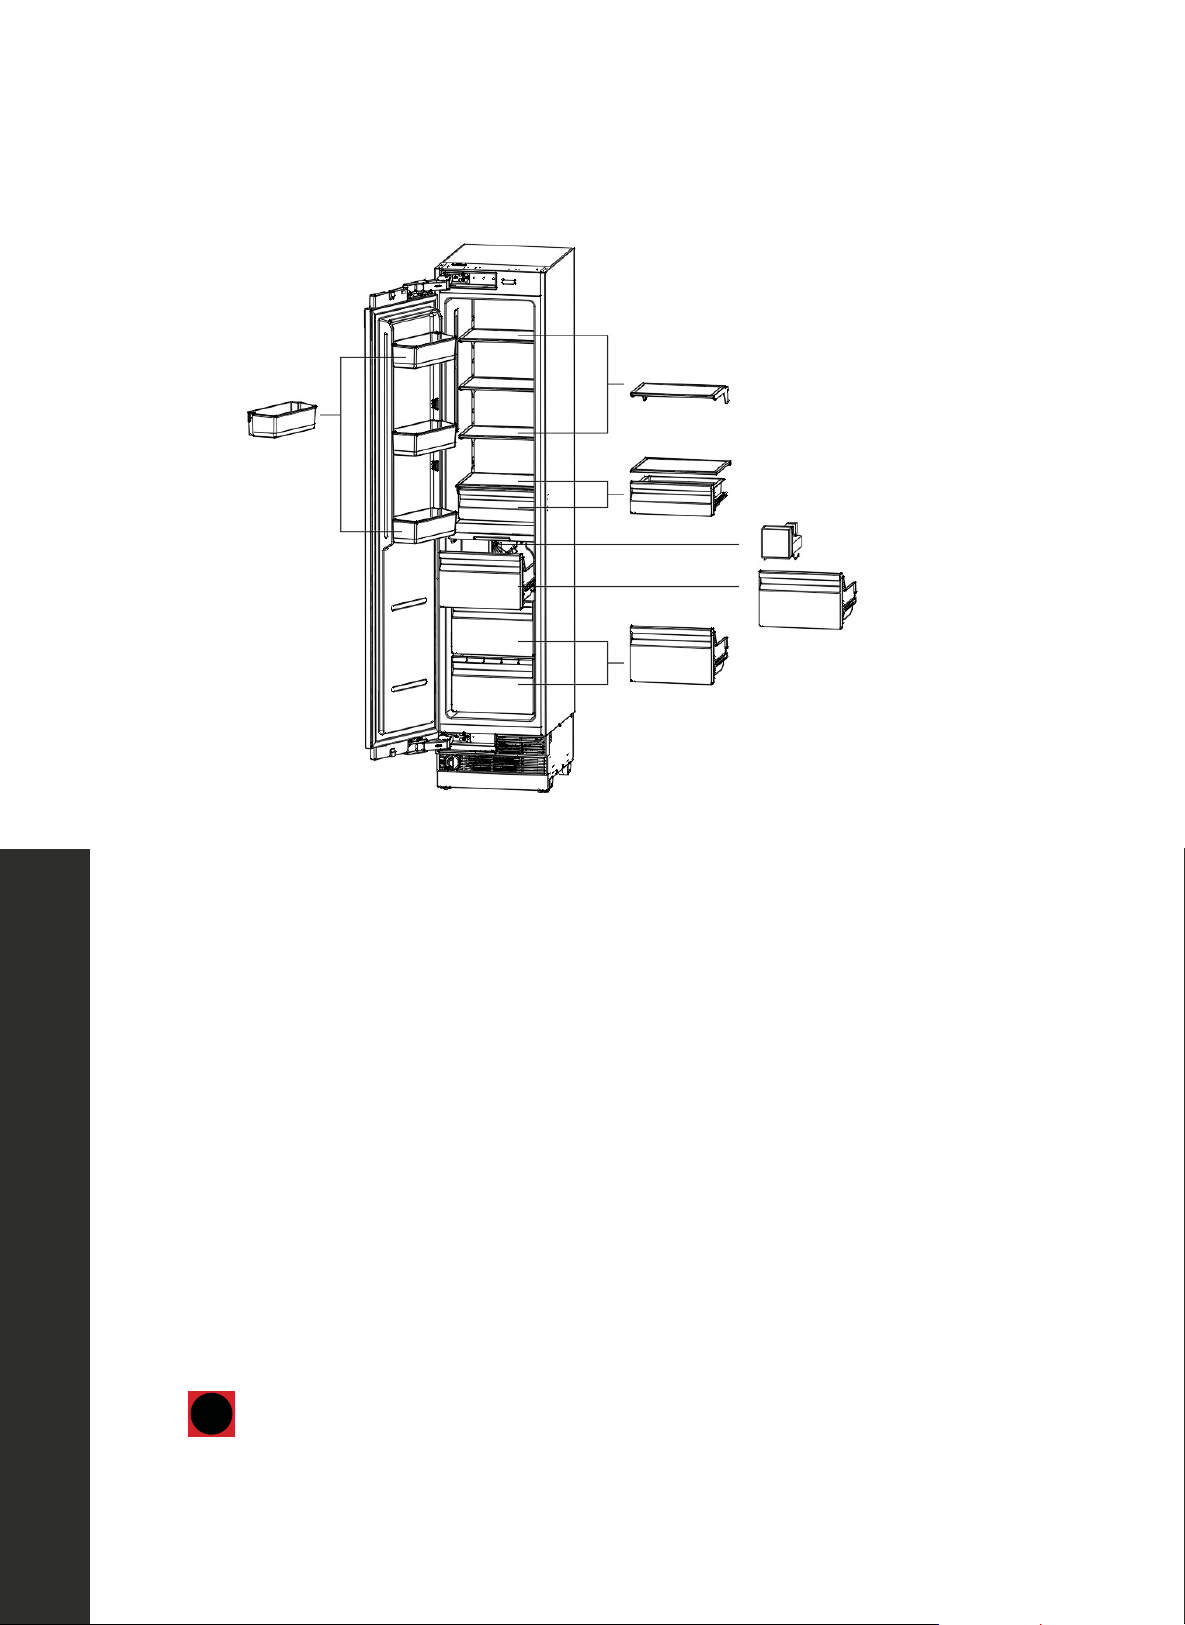
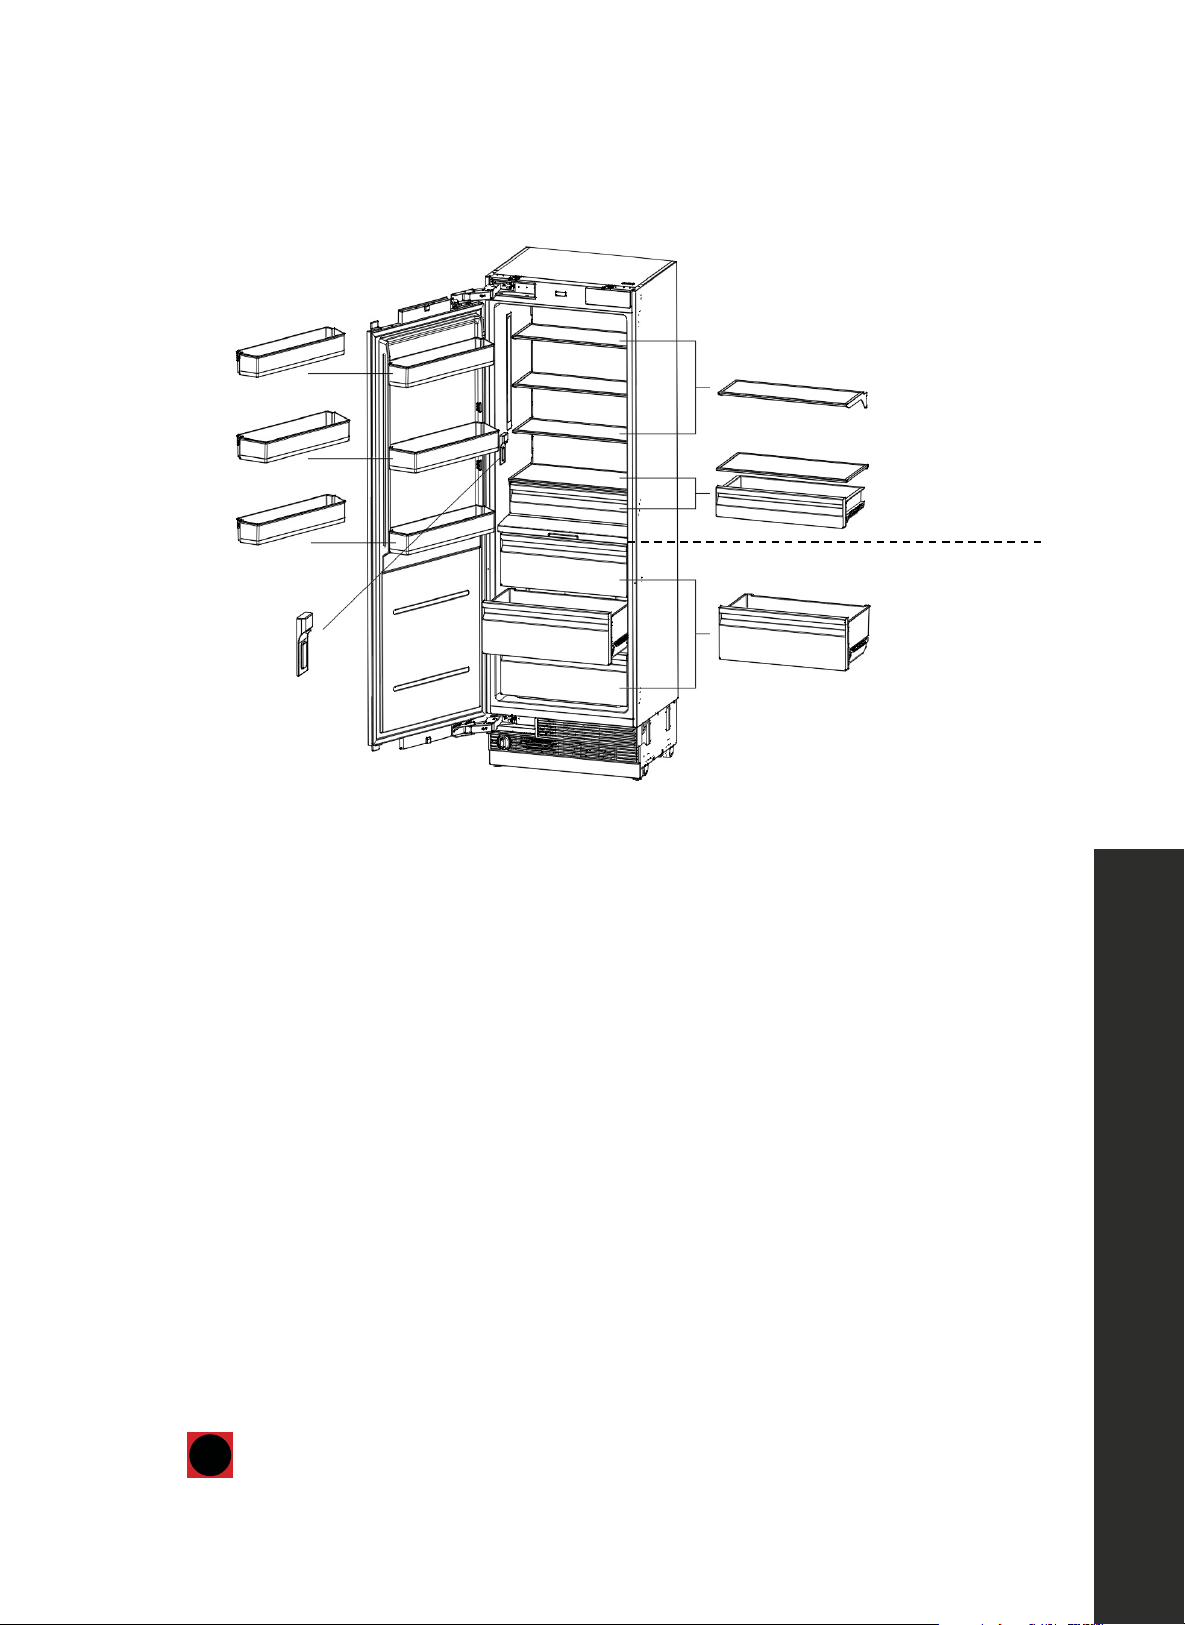
Shelving
Door bin
Soft-close small drawer
Soft-close big drawer
Ice maker
Soft-close
ice drawer
Adjustable shelves (3)
• Heat-treated safety glass.
Stationary shelf (1)
• Stationed on top of ice maker drawer; heat-treated safety glass.
Ice maker (1)
• Inside 1 removable soft-close ice drawer and includes 1 hygienic ice scoop.
Soft-close drawers (1 small, 2 big)
• Freezer drawers feature soft-close technology to ensure all drawers close properly.
Door bins (3)
• Adjustable and removable door bins.
i
Figures in this user manual are schematic and may not match the product
exactly. If your freezer does not have relevant parts and/or exact figures,
the information may still apply to other models.
INFO
10
Product Specifications
OPERATION
REFRIGERATORS
PRODUCT SPECIFICATIONS (RBCRV-24/RBCRV-30)
"
>25($"+%2:%,32+%(+"$%.#:(#'%#$"%+93".#,29%#:)%.#4%:-,%
.#,93%,3"%8$-)(9,%"F#9,'4=%?7%4-($%8$-)(9,%)-"+%:-,%3#@"%
,3"%$"'"@#:,%8#$,+/%,3"%2:7-$.#,2-:%#88'2"+%,-%-,3"$%
.-)"'+=
8"3(&')10"40)(,'0+
( 2#3"45#"678"
!"#$%&'(
C,8#. ;&51#'5#.
/&0 ,11$&*,2$#3
!408 *$45# 2&'5
644. 2&'5
7 !#$#*8,2$# 5"#$0 "#&("859
7 :#,8 8.#,8#; 5,0#8< ($,559
7 =#+4%,2$# &*# *4'8,&'#.9
7 :<(&#'&* &*# 5*4419
7 !408 *$45# 2&'5 #'5@.# 2&'5 *$45# D@$< ,'; 1.41#.$<9
7 A;B@58,2$# ,'; .#+4%,2$# ;44. 2&'59
7 E,$$4' 2488$# ;44. 2&'9
L#0'+2#'$)1' 41,31-#-)%
X$8&-1)&/#&$?$+"$/"#&+-&$"" ,1(#"%
!""#$%&'
60,,"'$%"**,.$7""#$$%&'
!""#$%&'
(4.,5&'1
(")*$+,"-.$-/0,,$%&'
(89:$;9<8:$="'.
>0*.#$
7&-?.'-.#
(")*$+,"-.$%&1$%&'
@9A:$;9<8:$$="'.
"
>25($"+%2:%,32+%(+"$%.#:(#'%#$"%+93".#,29%#:)%.#4%:-,%
.#,93%,3"%8$-)(9,%"F#9,'4=%?7%4-($%8$-)(9,%)-"+%:-,%3#@"%
,3"%$"'"@#:,%8#$,+/%,3"%2:7-$.#,2-:%#88'2"+%,-%-,3"$%
.-)"'+=
8"3(&')10"40)(,'0+
( 2#3"45#"678"
!"#$%&'(
C,8#.
;&51#'5#.
/&0
,11$&*,2$#3
!408
*$45# 2&'5
644.
2&'5
7
!#$#*8,2$# 5"#$0 "#&("859
7
:#,8 8.#,8#; 5,0#8< ($,559
7
=#+4%,2$# &*# *4'8,&'#.9
7
:<(&#'&* &*# 5*4419
7
!408 *$45# 2&'5 #'5@.# 2&'5 *$45# D@$< ,'; 1.41#.$<9
7
A;B@58,2$# ,'; .#+4%,2$# ;44. 2&'59
7
E,$$4' 2488$# ;44. 2&'9
L#0'+2#'$)1'
41,31-#-)%
X$8&-1)&/#&$?$+"$/"#&+-&$"" ,1(#"%
!""#$%&'
60,,"'$%"**,.$7""#$$%&'
!""#$%&'
(4.,5&'1
(")*$+,"-.$-/0,,$%&'
(89:$;9<8:$="'.
>0*.#$
7&-?.'-.#
(")*$+,"-.$%&1$%&'
@9A:$;9<8:$$="'.
Shelving
Door bin
Water
dispenser
REF. TEMP. zone
SPE. TEMP. zone
Gallon bottle door bin
Soft-close small drawer
Flex drawers
Adjustable shelves (3)
• Heat-treated safety glass.
Stationary shelf (1)
• Stationed on top of soft-close small drawer heat-treated safety glass.
Soft-close drawers (1 small, 3 flex)
• Refrigerator drawers feature soft-close technology to ensure all drawers close properly.
• 3 large flex drawers at bottom of unit allow for varying temperature zones.
Door bins (3)
• 1 gallon bottle door bin
• 2 additional adjustable and removable door bins.
Internal water dispenser (1)
i
Figures in this user manual are schematic and may not match the product
exactly. If your refrigerator does not have relevant parts and/or exact
figures, the information may still apply to other models.
INFO
11
Keys and Controls
CONTROL PANEL – FREEZER
9" :.+%;)5"<)*0;
! " # $ !% !!
!" !#
& ' ( ) *
F G'HG00 2@884'
!#.%#5 84 5I&8*" 8"# I"4$# ,11$&,'*# G' ,'; G009
J.#55 8"# 2@884' 84 5I&8*" 4' 8"# 1.4;@*8K
8"# 1.4;@*8 I&$$ 2# 5I&8*"#; 4' &' L 5#*4';59
J.#55 8"# 4'H400 2@884' 04. F9L 5#*4';5 84 5I&8*" 4009
M
N4$;#.H
C,.+#.
2@884'
J.#55 2@884' 84 *",'(# 8"# 0.##?#. *4+1,.8+#'8 8#+1#.,8@.#
0.4+ L!>/OFL!N3 84 OFF!>/OMP!N3
A08#. 8"# 8#+1#.,8@.# .#(@$,8&4' &5 58411#;K
8"# '&Q&# 8@2# I&$$ 0$,5" 04. L 5#*4';5 ,'; 8,-# #00#*89
!@1#. 0.##?&'( 0@'*8&4' I&$$ 2# #',2$#; &0 -##1 1.#55&'(
,08#. OFF!> /OMP!N39
C"#' 8"# 5'4I 5<+24$ &$$@+&',8# 4' 8"# ;&51$,<
8"# 5@1#. 0.##?&'( 0@'*8&4' I&$$ 2# #',2$#;9
R"#S5@1#.S0.##?&'(S0#,8@.#S,55&585SI&8"S1#.&4;5S40S"&("
0.##?#.S@5#KS0@$$S(.4*#.<S$4,;5KS4.S8#+14.,.&$<S
C,.+S.44+S8#+1#.,8@.#59S
A08#.S8"#S5@1#.S*44$S*<*$#S*4+1$#8#5KS
8"#S.#0.&(#.,84.SI&$$S.#8@.'S84S&85S1.#%&4@5S5#88&'(9
T R#+19 ;&51$,<
6&51$,<5 8"# 5#8 8#+1#.,8@.# 40 8"# 0.##?#.9
>,".#'"#&8K N#$5&@5K !@1#. 0.##?#. $,+1 &$$@+&',8#9
P U4*-
J.#55 $4*- -#< *4'8&'@4@5$< 04. T 5#*4';5 ,';
8"# $4*- &*4' I&$$ $&("8 @19
J.#55 8"# $4*- -#< 04. T 5#*4';5 84 @'$4*- 8"# &*4'9
T +&'@8#5 I&8"4@8 -#< 41#.,8&4' $4*- -#<9
A$$ 40 8"# 04$$4I&'( 41#.,8&4'5 +@58 2# 1#.04.+#;
&' 8"# @'$4*-#; 58,8#9
( !"##$#"
1 2 3 9 10 11 12 13
87654
i
Figures in this user manual are schematic and may not match the product
exactly. If your product does not have relevant parts and/or exact figures, the
information may still apply to other models.
INFO
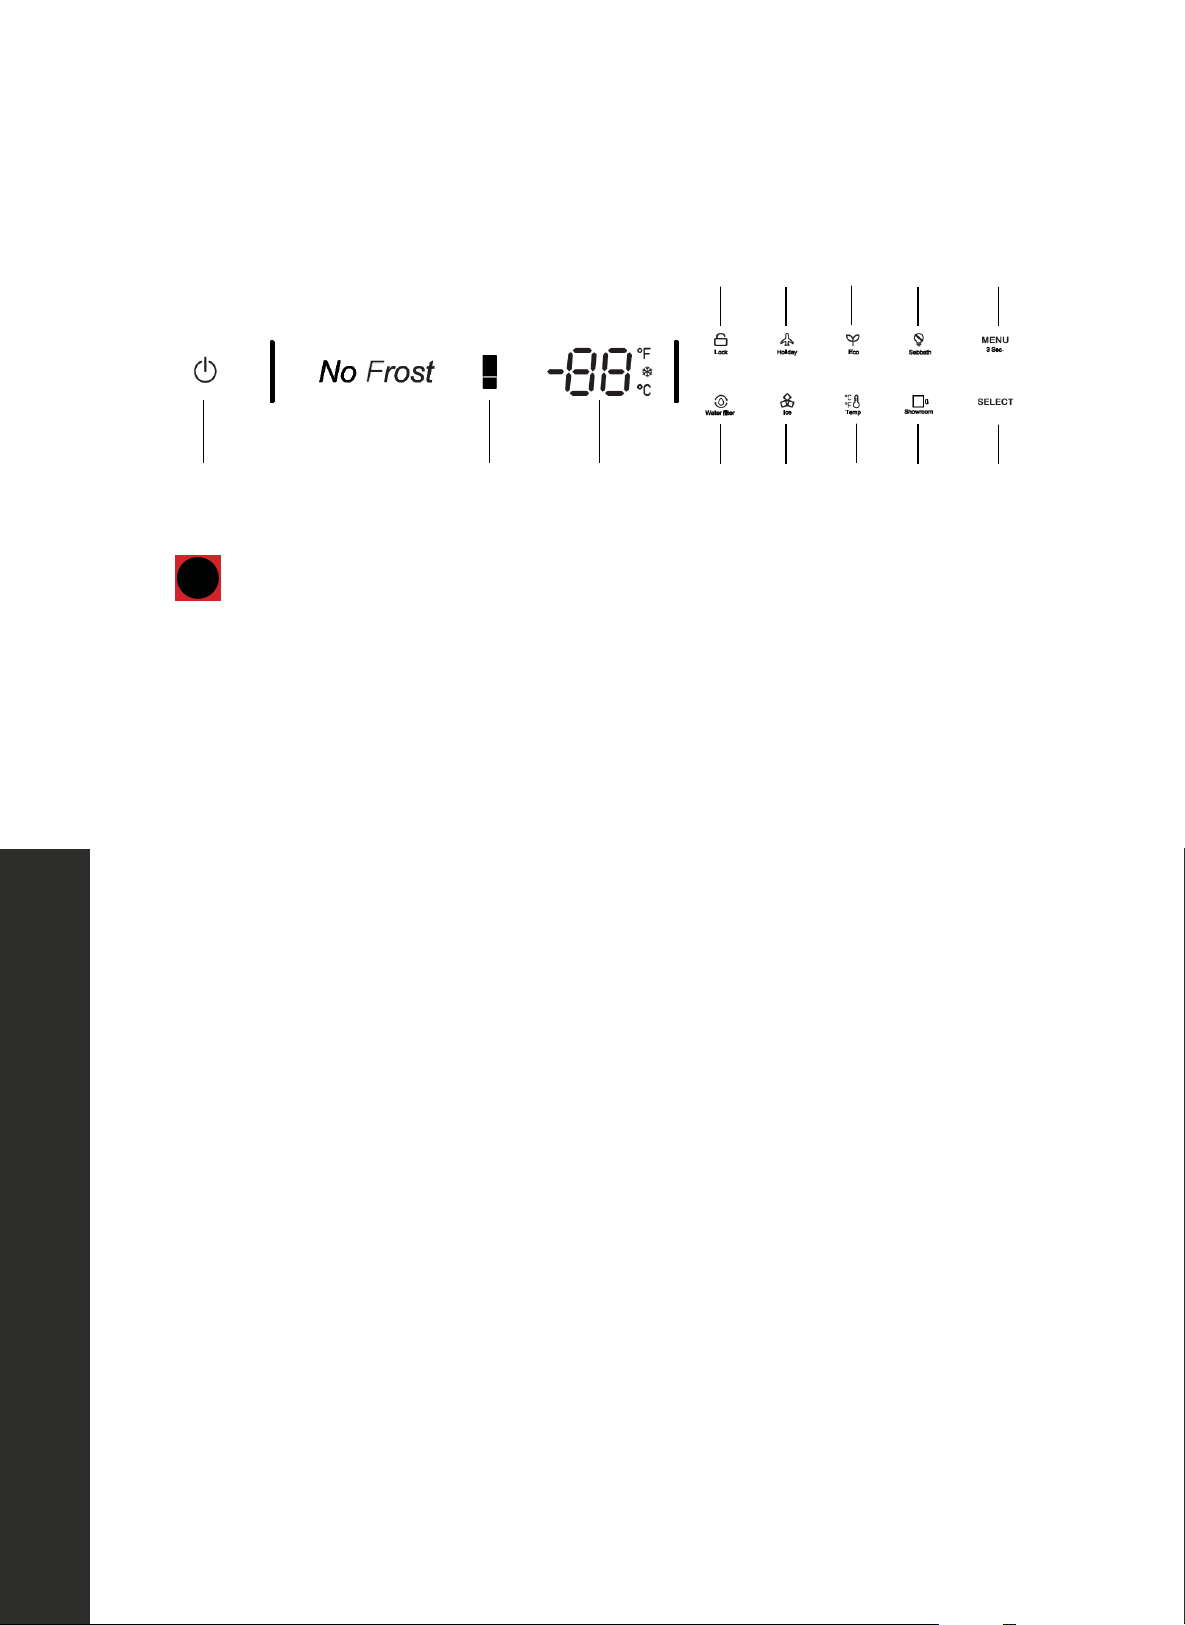
1. On/Off Button
• Serves to turn the appliance On and Off. Press the button to switch on the product —
the product will be switched on in 5 seconds. Press the On/Off button for 1.5 seconds
to switch off.
2. Temperature Button
• Press the button to adjust the freezer's overall temperature from 7 °F to -11 °F
(-14 °C to -24 °C). After the temperature regulation is stopped, the LED lights will flash for
5 seconds and take effect.
• The Super Freeze function will be enabled if you continue pressing the button after
-11 °F (-24 °C).
• When the snow symbol illuminates on the display, the Super Freeze function is enabled.
• The Super Freeze feature assists with periods of high freezer use, full grocery loads, or
temporarily warm room temperatures.
• After the Super Freeze cycle is complete, the freezer will return to its previous
temperature setting.
3. Temp. Display
• Displays the set temperature of the freezer.
• Fahrenheit, Celsius, or Super Freeze icons will illuminate here.
OPERATION

12
Keys and Controls
4. Lock
• The lock icon will be illuminated when the control panel is in the locked state.
• To unlock the controls, press and hold the MENU button for 3 seconds.
• The control panel will automatically lock itself after 3 minutes have passed with no interaction with
the control panel. This is to prevent unintentional changes to temperature or settings.
5. Holiday Mode
• Press the MENU button until the holiday symbol illuminates, then press the SELECT button to
enable the function. When the Holiday Mode function is enabled, the freezer temperature is
automatically set at 0 °F (-18 °C).
• Before leaving:
• Turn the ice maker OFF on the control panel. The ice maker will be off when the Ice symbol
is not illuminated.
• Shut off the water supply to the appliance.
• On return:
• Turn ON the ice maker. The ice maker will be on when the ice symbol is illuminated.
• Discard the first full bin of ice before use to ensure debris is cleared from water lines.
6. Eco Mode
• Press the MENU button until the Eco Mode symbol illuminates, then press the SELECT button to
enable the function.
• When the Eco Mode function is enabled, and the freezer temperature is automatically set at
5 °F (-15 °C).
7. Sabbath Mode
• Press the MENU button till the Sabbath Mode symbol illuminates
• Then press the SELECT button to enable the function.
• When Sabbath Mode is enabled, all lights, buzzers, and display panels will be turned off
8. MENU
• Pressing the MENU button for 3 seconds locks/unlocks the control panel.
• The lock is a feature for preventing children from changing product settings.
OPERATION

13
Keys and Controls
9. Water Filter (if applicable)
• The Water Filter symbol flashes and beeps to advise the user to replace the water filter.
• After the replacement is completed, reset the symbol by pressing SELECT for 5 seconds
while the control panel is locked.
• The default replacement time is 130 days.
10. Ice (if applicable)
• Press the MENU button until the ice making symbol illuminates, then press the SELECT
button to enable the function.
• When the ice making function is enabled, the ice maker will automatically operate and ice
cubes will accumulate in the ice tray below.
• NOTE: Prepare the water filter for use before using the ice maker.
• After connecting the freezer to a water source or after replacing the water filter, fill and
discard two full containers of ice before use to ensure debris is cleared from water lines.
11 . Temperature Unit
• Press the MENU button until the Celsius and Fahrenheit selection symbol illuminates to
change between Celsius and Fahrenheit. Press the SELECT button to confirm.
12. Showroom Mode
• Press the MENU button until the Showroom symbol illuminates, then press the SELECT
button to enable the function.
• This mode is used for display purposes only or if you want to turn the cooling off and
deactivate all other functions except interior lighting.
• NOTE: Do not store any food items while in Showroom Mode, as the appliance then
remains at room temperature.
13. SELECT
• After selecting MENU, press SELECT button to confirm the function.
OPERATION

14
Keys and Controls
CONTROL PANEL – REFRIGERATOR
9" :.+%;)5"<)*0;
! & ' !! !" !#
!& !'
( ) * $ !%
( 2#3"45#"678"
F G'HG00 2@884'
!#.%#5 84 5I&8*" 8"# I"4$# ,11$&,'*# G' ,'; G009
J.#55 8"# 2@884' 84 5I&8*" 4' 8"# 1.4;@*8K
8"# 1.4;@*8 I&$$ 2# 5I&8*"#; 4' &' L 5#*4';59
J.#55 8"# 4'H400 2@884' 04. F9L 5#*4';5 84 5I&8*" 4009
M
=W>9RWVJ9
?4'#
*4$;#.H
C,.+#.
\@884'
J.#55 =W>9 RWVJ 2@884' 84 ,;B@58 8#+1#.,8@.#
0.4+ T]!>/M!N3 84 P]!>/[!N39
A08#. 8"# 8#+1#.,8@.# .#(@$,8&4' &5 58411#;K
8"# '&Q&# 8@2# I&$$ 0$,5" 04. L 5#*4';5 ,'; 8,-# #00#*89
!@1#. *44$&'( 0@'*8&4' I&$$ 2# #',2$#; &0 -##1 1.#55&'(
,08#. T]!> /M!N39
C"#' 8"# 5'4I 5<+24$ &$$@+&',8# 4' 8"# ;&51$,<
8"# 5@1#. *44$&'( 0@'*8&4' I&$$ 2# #',2$#;9
R"#S5@1#.S*44$&'(S0#,8@.#S,55&585SI&8"S1#.&4;5S40S"&("
.#0.&(#.,84.S@5#KS0@$$S(.4*#.<S$4,;5KS4.S8#+14.,.&$<S
I,.+S.44+S8#+1#.,8@.#59S
A08#.S8"#S5@1#.S*44$S*<*$#S*4+1$#8#5KS
8"#S.#0.&(#.,84.SI&$$S.#8@.'S84S&85S1.#%&4@5S5#88&'(9
T R#+19 ;&51$,<
6&51$,<5 8"# 5#8 8#+1#.,8@.# 40 8"# =W>9RWVJ9?4'#
>,".#'"#&8K N#$5&@5K !@1#. *44$&'( $,+1 &$$@+&',8#9
P
!JW9RWVJ9
?4'#
*4$;#.H
C,.+#.
\@884'
J.#55 !JW9 RWVJ9 2@884' 84 ,;B@58 8#+1#.,8@.#
0.4+ TZ!>/OF!N3 84 PF!>/L!N39
A08#. 8"# 8#+1#.,8@.# .#(@$,8&4' &5 58411#;K
8"# '&Q&# 8@2# I&$$ 0$,5" 04. L 5#*4';5 ,'; 8,-# #00#*89
L R#+19 ;&51$,<
6&51$,<5 8"# 5#8 8#+1#.,8@.# 40 8"# !JW9RWVJ9?4'#
>,".#'"#&8K N#$5&@5 $,+1 &$$@+&',8#9
] U4*-
J.#55 $4*- -#< *4'8&'@4@5$< 04. T 5#*4';5 ,';
8"# $4*- &*4' I&$$ $&("8 @19
J.#55 8"# $4*- -#< 04. T 5#*4';5 84 @'$4*- 8"# &*4'9
T +&'@8#5 I&8"4@8 -#< 41#.,8&4' $4*- -#<9
A$$ 40 8"# 04$$4I&'( 41#.,8&4'5 +@58 2# 1#.04.+#;
&' 8"# @'$4*-#; 58,8#9
" #
1 2 3 4 5 11 12 13 14 15
109876
i
Figures in this user manual are schematic and may not match the product exactly.
If your product does not have relevant parts and/or exact figures, the information
may still apply to other models.
INFO
1. On/Off Button
• Serves to turn the appliance On and Off. Press the button to switch on the product — the product
will be switched on in 5 seconds. Press the On/Off button for 1.5 seconds to switch off.
2. REF. TEMP. (Refrigerator Temperature Zone)
• Press REF. TEMP to adjust the upper refrigerator temperature zone from 36 °F to 47 °F
(2 °C to 8 °C).
• After temperature regulation is stopped, the LED lights will flash for 5 seconds and take effect.
• The Super Cool function will be enabled if you continue pressing the button after 36 °F (2 °C).
• When the snow symbol illuminates on the display, the Super Cool function will be enabled.
• The Super Cool feature assists with periods of high refrigerator use, full grocery loads, or
temporarily warm room temperatures.
• After the Super Cool cycle completes, the refrigerator will return to its previous setting.
3. Temp. Display
• Displays the set temperature of the REF. TEMP. zone.
• Fahrenheit, Celsius, or Super Cool icons will illuminate here.
4. SPE. TEMP. (Flex Temperature Zone)
• Press SPE. TEMP. to adjust the lower refrigerator flex temperature zone from 30 °F to 41 °F
(-1 °C to 5 °C).
• After temperature regulation is stopped, the LED lights will flash for 5 seconds and take effect.
OPERATION

15
Keys and Controls
OPERATION
5. Temp. Display
• Displays the set temperature of the SPE. TEMP. zone.
• Fahrenheit or Celsius icons will illuminate here.
6. Lock
• The lock icon will be illuminated when the control panel is in the locked state.
• To unlock the controls, press and hold the MENU button for 3 seconds.
• The control panel will automatically lock itself after 3 minutes have passed with no interaction
with the control panel. This is to prevent unintentional changes to temperature or settings.
7. Holiday Mode
• Press the MENU button until the holiday symbol illuminates, then press the SELECT button
to enable the function.
• When the Holiday Mode function is enabled, the REF. TEMP and SEP. TEMP will be set at
63 °F (17 °C) automatically.
• NOTE: Do not place food in the refrigerator when Holiday Mode is enabled.
8. Eco Mode
• Press the MENU button until the Eco Mode illuminates, then press the SELECT button to
enable the function.
• When the Eco Mode function is enabled, the REF. TEMP will be set at 46 °F (8 °C) the SPE.
TEMP will be set at 41 °F (5 °C) automatically.
9. Sabbath Mode
• Press the MENU button until the Sabbath Mode symbol illuminates
• Then press the SELECT button to enable the function.
• When the Sabbath Mode function is enabled, all lights, buzzers, and display panels will
be turned off.
10. MENU
• By pressing MENU button for 3 seconds, you may lock/unlock the control panel.
• The lock is a feature for preventing children from changing the product settings.

16
Keys and Controls
OPERATION
11 . Water Filter (if applicable)
• The Water Filter symbol flashes and beeps to advise the user to replace the water filter.
• After the replacement is completed, reset the symbol by pressing SELECT for 5 seconds
while the control panel is unlocked.
• The default replacement time is 130 days.
12. Water Dispenser (if applicable)
• Press the MENU button until the Water Dispenser symbol illuminates,
• Then press the SELECT button to enable the function.
• When the Water Dispenser is enabled, fresh water can be provided from the dispenser
fitted on the internal wall.
• NOTE: Prepare the water filter for use before using water dispenser.
• After connecting the refrigerator to a water source or after replacing the water filter, fill and
discard 2–3 gallons of water to ensure debris is cleared from water lines.
13. Temperature Unit
• Press the MENU button until the Celsius and Fahrenheit selection symbol illuminates to
change between Celsius and Fahrenheit. Press the SELECT button to confirm.
14. Showroom Mode
• Press the MENU button until the Showroom symbol illuminates, then press the SELECT
button to enable the function.
• This mode is used for display purposes only or if you want to turn the cooling off and
deactivate all other functions except interior lighting.
• NOTE: Do not store any food items while in Showroom Mode, as the appliance then
remains at room temperature.
15. SELECT
• After selecting MENU, press SELECT button to confirm the function.

17
Water Filter
OPERATION
INSTALLING/REPLACING THE WATER FILTER
Water Filter Replacement
The water filter symbol flashes and beeps to advise the user to replace the filter. After the
replacement is completed, reset the symbol by pressing SELECT for 5 seconds while the control
panel is locked. The set replacement time is 130 days. Visit www.zlineparts.com and search
"RBCV-437A" to order a replacement.
1. All units are shipped with a water filter already installed for immediate use.
2. Remove the old filter from the housing by turning counterclockwise and pulling out, as
outlined in the figure below.
E""/0%;)-0$0*(""F)(0'"4.;(0'"
S9:&G$)#'&0+")#'&$"$',
E3" 1#,"$ 72',"$ +4.6-' 7'#+3"+ #:) 6""8+ ,- #)@2+" ,3" (+"$ ,- $"8'#9" ,3" 1#,"$
72',"$= C7,"$ ,3" $"8'#9".":, 2+ 9-.8'",")/ 8$"++ ,3" QJ]J*E 6(,,-: 7-$ U +"9-:)+ ,-
$"+",= E3" +", $"8'#9".":, ,2." 2+ W`X )#4+=
S9@&&D*$-2+-2&)*#&7$)#'&0+")#'&4$')'+(2#
E($:%,3"%1#,"$%72',"$%9-(:,"$9'-9<12+"%#:)%$".-@"=
?:+"$,%,3"%1#,"$%72',"$%k 12,3%,3"%<:-6+%#,%,3"%7$-:,%2:%#%3-$2M-:,#'%8-+2,2-:
C+%7#$%#+%2,%12''%5-/%#:)%,($:%9'-9<12+"%(:,2'%2,%+:#8+%2:=
<').)"%=:!&/'&>023"
<').)"%=:!&'-()"$?&/'&>023"
Rotate 90° counter-clockwise
Rotate 90° clockwise
3. Insert the water filter — with the knobs at the front in a horizontal position — as far as it will
go, and turn clockwise until it snaps in.
4. Re-secure the filter cover by pushing it up to locking with the button, as outlined in the
figure below.
E""/0%;)-0$0*(""F)(0'"4.;(0'"
S9:&G$)#'&0+")#'&$"$',
E3" 1#,"$ 72',"$ +4.6-' 7'#+3"+ #:) 6""8+ ,- #)@2+" ,3" (+"$ ,- $"8'#9" ,3" 1#,"$
72',"$= C7,"$ ,3" $"8'#9".":, 2+ 9-.8'",")/ 8$"++ ,3" QJ]J*E 6(,,-: 7-$ U +"9-:)+ ,-
$"+",= E3" +", $"8'#9".":, ,2." 2+ W`X )#4+=
S9@&&D*$-2+-2&)*#&7$)#'&0+")#'&4$')'+(2#
E($:%,3"%1#,"$%72',"$%9-(:,"$9'-9<12+"%#:)%$".-@"=
?:+"$,%,3"%1#,"$%72',"$%k 12,3%,3"%<:-6+%#,%,3"%7$-:,%2:%#%3-$2M-:,#'%8-+2,2-:
C+%7#$%#+%2,%12''%5-/%#:)%,($:%9'-9<12+"%(:,2'%2,%+:#8+%2:=
<').)"%=:
!
&/'&>023"
<').)"%=:!&'-()"$?&/'&>023"
Rotate 90° counter-clockwise
Rotate 90° clockwise

18
Water Filter
OPERATION
AFTER REPLACING THE WATER FILTER
Refrigerators
• Run 2-3 gallons of water to remove air from the system and to ensure any potential debris
is cleared from water lines.
• NOTE: A newly installed filter cartridge will cause water to spurt and dribble until the air is
out of the system — this is perfectly normal.
Freezers
• The ice maker may not immediately produce ice. Also, initial ice may be irregularly shaped.
Discard the first bin of ice to allow air to purge from the system and to ensure any potential
debris is cleared from water lines.
• NOTE: A newly installed filter cartridge will cause water to spurt into the ice maker body,
which could lead to ice droplets around the ice maker area — it is normal for these droplets
and initial ice production to appear discolored during the initial system flush. Ice color will
return to normal after the first bin of ice production.
INSTALLING THE WATER BYPASS PLUG (IF NECESSARY)
• If customers opt to use a reverse osmosis system or household filtration system and do not
need to use the water filter, the provided water filter bypass plug (Installation Manual, Item
No. 19) is recommended to ensure water is properly delivered to your ice maker and/or
water dispenser.
• To install, remove the water filter as outlined in on the previous page, insert the plug into the
housing, rotate clockwise until snug, and then re-secure the filter cover.

19
Food Storage
FOOD STORAGE
REFRIGERATORS – DUAL COOLING SYSTEM
Refrigerators are equipped with two separate cooling systems to cool the upper refrigerator
compartment and the lower flex compartment. Thus, the air and odor in the refrigerator
compartment and the flex compartment do not get mixed. Thanks to these two separate cooling
systems, cooling speeds are much higher than that of other refrigerators.
FREEZERS
• Take care to wrap foods or place them in a covered container before putting them in
the freezer.
• Hot foods and beverages must cool down to at least room temperature before you put
them in the freezer. Placing warm food into the freezer causes the cooling system to operate
continuously until the food is frozen solid, which is not ideal for saving energy.
• Freeze foods only that are fresh and in good quality.
• Pack the foods in an airtight manner to prevent them from drying, even if they are going to
be stored for a short time.
• Materials used for packaging must be tear-proof and resistant to cold, humidity, odor, oils,
and acids, and they must also be airtight. Moreover, they must be made from easy-to-use
materials that are suitable for deep-freezing.
• Frozen foods should be used immediately after they are thawed and should never
be refrozen.
• Do not freeze quantities of food that are too large. The quality of the food is best preserved
when it is frozen right through to the core as quickly as possible.
• Placing warm food into the freezer compartment causes the cooling system to operate
continuously until the food is frozen solid.
• Frozen foods you purchase must be stored according to the conditions and temperatures
determined by the food manufacturer.
• Check the following steps to ensure optimal food quality from the manufacturer and/or
food retailer is maintained:
1. Put packages in the freezer as quickly as possible after purchase.
2. Make sure that the content of the package is labeled and dated.
3. Check whether the "Use By" or "Best Before" date on the packaging is expired or not.
OPERATION
20
Operating Temperature
OPERATING TEMPERATURES
FREEZER UPPER REFRIGERATOR ZONE LOWER REFRIGERATOR FLEX ZONE
0 °F (-18 °C) 39 °F (4 °C) 34 °F (1 °C)
This is the recommended operating temperature for each zone.
SUPER COOL MODE: 36 °F (2 °C)
Use this function when you place fresh groceries into the refrigerator or when you need to cool
your food quickly. It is recommended that you activate the Super Cool function 4–8 hours
before placing the food inside.
SUPER FREEZE MODE: -11 °F (-24 °C)
Use this function when you wish to quickly freeze your food in a short time. Your freezer will
return to its previous mode when the process is over.
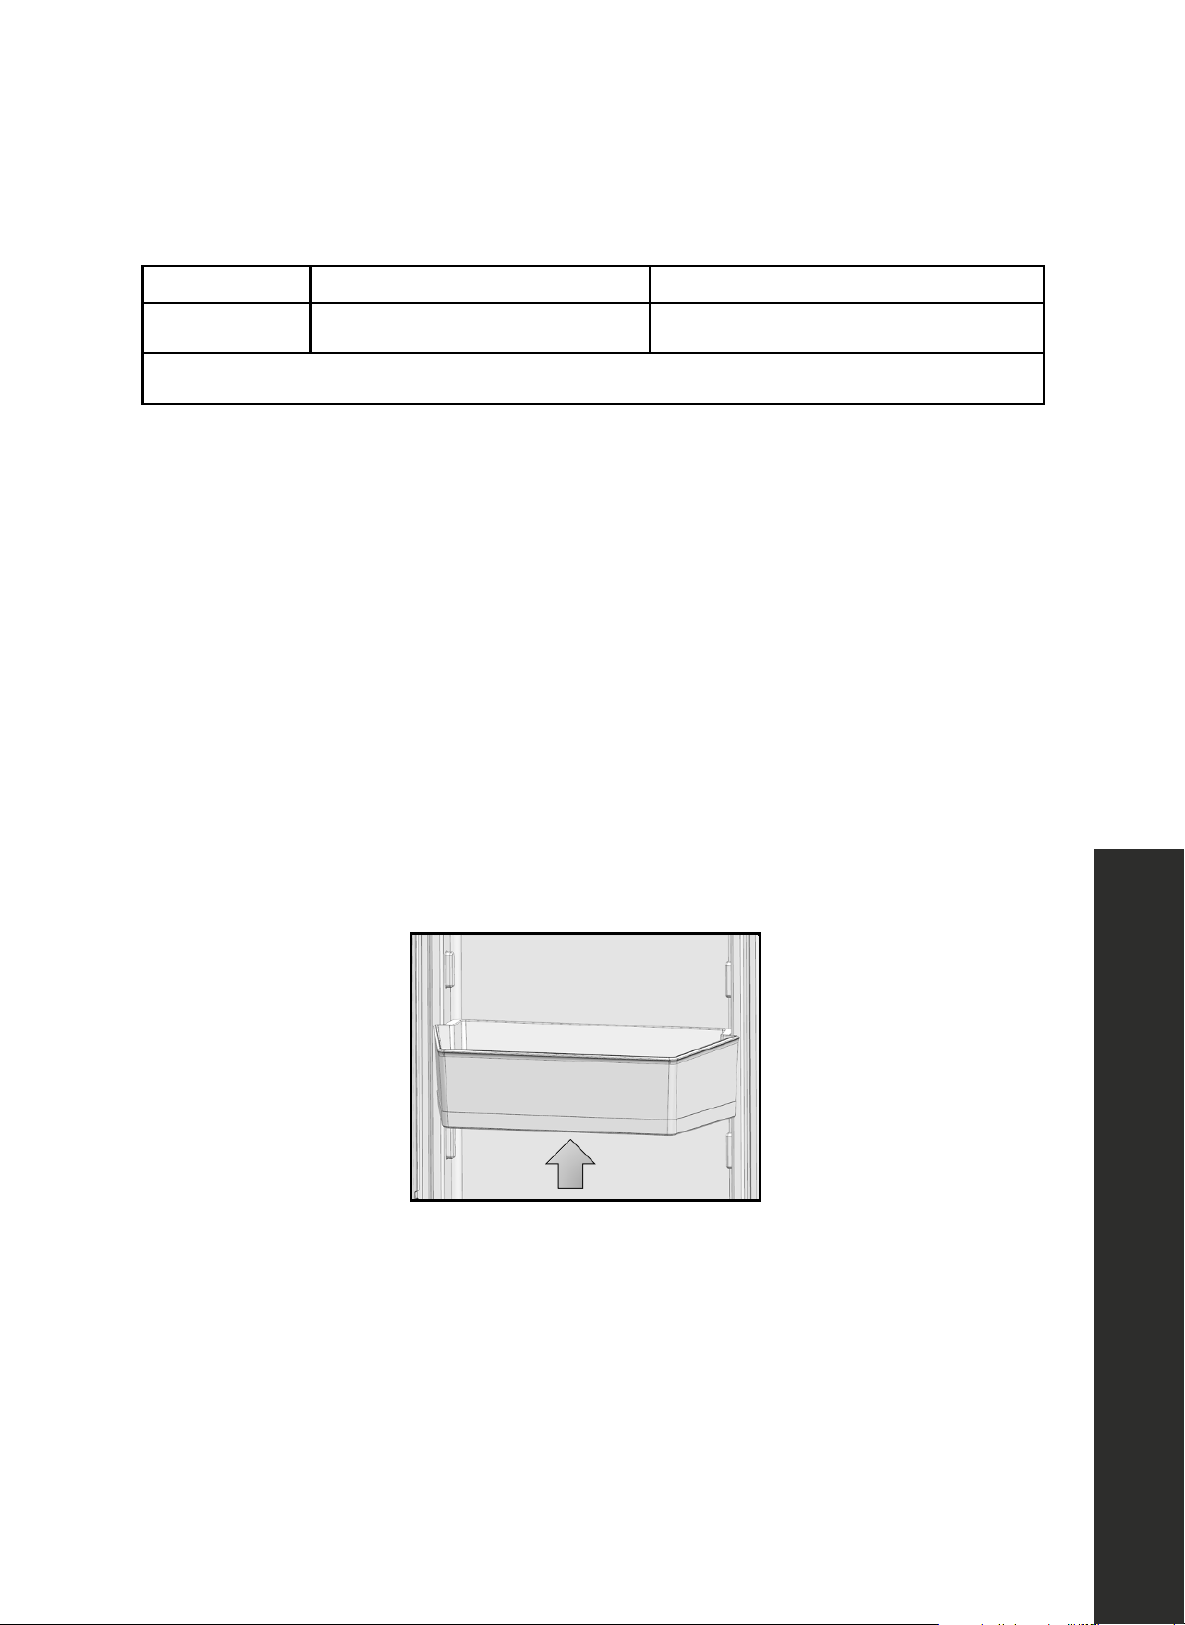
DOOR BINS
To remove, lift up the door bin to detach and then pull straight out. To replace, reverse the
process so you're putting in the bin at a slight angle, and then press down until it locks.
OPERATION

21
Glass Shelves
SHELVES AND DRAWERS
GLASS SHELVES
To remove a shelf
• Fully open the door of the refrigerator or freezer to gain better access.
• Hold the front of the shelf, and then gently lift up and slide out (see Figure 1).
To reinsert
• Hold the shelf at an angle so the front is higher than the back, and then insert the top hook
into the top shelf notch (see Figure 2).
• Put down the front slightly to lock into place.
NOTE: Use care when handling glass shelves to prevent breakage or scratching
the interior.
Figure 1 Figure 2
ATTENTION
Glass shelves must be unloaded when removing and reinstalling.
ATTENTION
You must wait for the glass shelves to reach room temperature before
immersing them in water for cleaning, or you run the risk of the glass cracking
or breaking.
ATTENTION
You cannot close the refrigerator or freezer door(s) if the door bins are
positioned at the same level as glass shelves. Make sure that the door is
closed after placing the shelves.
OPERATION
22
Drawers
DRAWERS
To remove the drawers
1. Pull the drawer out until it stops.
2. Doors must be fully opened to remove/install the drawer.
3. Slightly unclip the front section of the drawer and take it out completely.
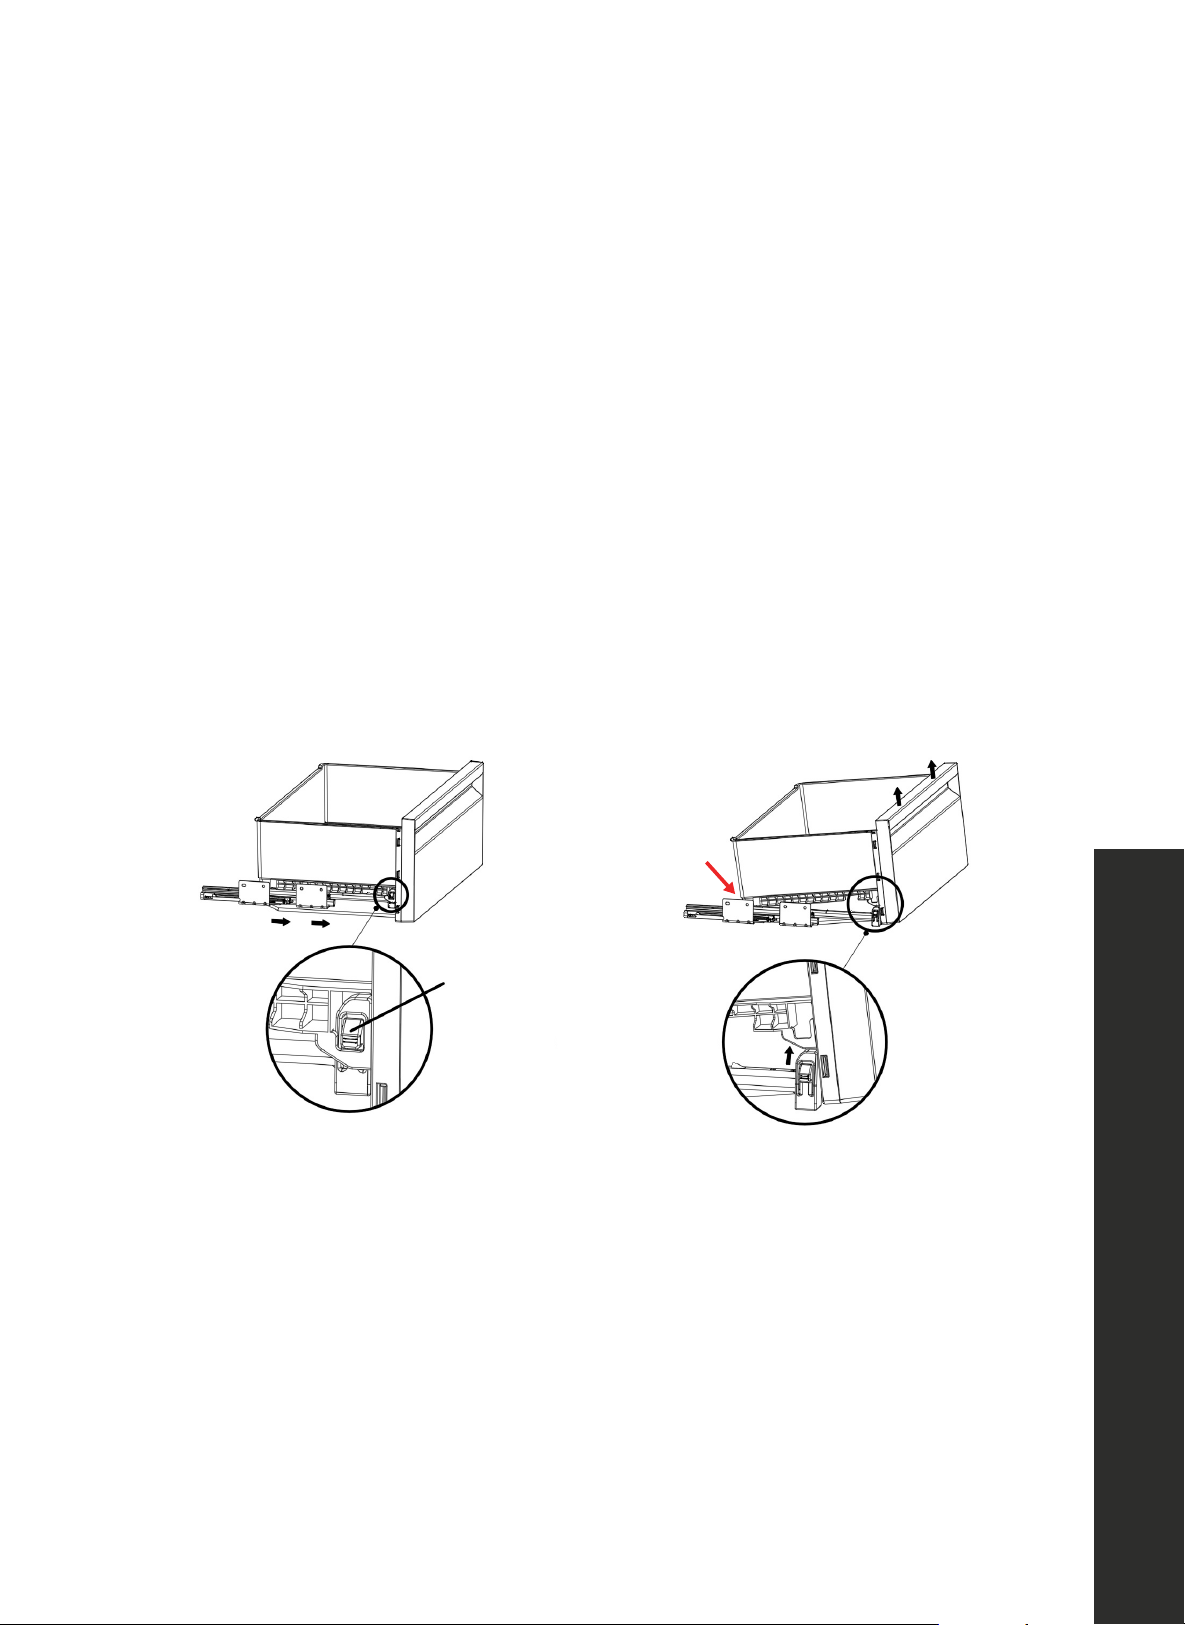
To install the drawers
1. Pull the sliding rails out completely (see Figure 1).
2. Using care to not scratch the inside of the refrigerator, place the gaps located at the bottom
rear corners of the drawer onto the small extension pieces located at the rear corners of
both rails (see Figure 2, red arrow).
3. Push the drawer down until you feel the front section clip onto the rails (see Figure 3).
M9C&Z+-%
61&'#,1?#&)*#&/+-&
T B(''%,3"%62:%(:,2'%2,%+,-8+=
T Q'253,'4%(:9'28%,3"%7$-:,%+"9,2-:%-7%,3"%62:%#:)%,#<"%2,%-(,%9-.8'","'4=
61&+-%)$""&)*#&/+-&
T B(''%,3"%$#2'+%9-.8'","'4=
T B'#9"%,3"%5#8%#,%,3"%$"#$%9-$:"$+%-7%,3"%62:%,-%,3"%)",#2'%'-9#,")%
#,%,3"%$"#$%9-$:"$+%-7%%,3"%$#2'+=
T B(+3%,3"%62:%+'-1'4%)-1:%(:,2'%4-(%7""'%2,%9'28%7$-:,%-:,-%,3"%$#2'+=
"
b#<"%+($"%,3#,%,3"%)",#2'+%#,%,3"%%$253,%#:)%'"7,T3#:)%
+2)"+%#$"%72F")%%13":%2:+,#''2:5%,3"%62:=
A"6B,.%$0*(
M9F&&<!H9&6HX!9&>1-#&41,3$'),#-)
c-(%9#:%9-:,$-'%,3"%,".8"$#,($"%2:%,32+%+"9,2-:%,-%%+,-$"%4-($%7--)
+(93%#+%72+3/%."#,/%)"'29#,"++":%8$-)(9,+=
Securing tab
A
B
Figure 1
M9C&Z+-%
61&'#,1?#&)*#&/+-&
T B(''%,3"%62:%(:,2'%2,%+,-8+=
T Q'253,'4%(:9'28%,3"%7$-:,%+"9,2-:%-7%,3"%62:%#:)%,#<"%2,%-(,%9-.8'","'4=
61&+-%)$""&)*#&/+-&
T B(''%,3"%$#2'+%9-.8'","'4=
T B'#9"%,3"%5#8%#,%,3"%$"#$%9-$:"$+%-7%,3"%62:%,-%,3"%)",#2'%'-9#,")%
#,%,3"%$"#$%9-$:"$+%-7%%,3"%$#2'+=
T B(+3%,3"%62:%+'-1'4%)-1:%(:,2'%4-(%7""'%2,%9'28%7$-:,%-:,-%,3"%$#2'+=
"
b#<"%+($"%,3#,%,3"%)",#2'+%#,%,3"%%$253,%#:)%'"7,T3#:)%
+2)"+%#$"%72F")%%13":%2:+,#''2:5%,3"%62:=
A"6B,.%$0*(
M9F&&<!H9&6HX!9&>1-#&41,3$'),#-)
c-(%9#:%9-:,$-'%,3"%,".8"$#,($"%2:%,32+%+"9,2-:%,-%%+,-$"%4-($%7--)
+(93%#+%72+3/%."#,/%)"'29#,"++":%8$-)(9,+=
Securing tab
A
B
Figure 2
Figure 3
ATTENTION
Make sure that the small extension pieces located on the rails at the right and
left-hand sides are affixed when installing the drawer.
OPERATION

23
CARE & CLEANING
• The service life of your product will extend and frequently encountered problems will
decrease if the product is cleaned periodically.
• Never use gasoline, benzene, or similar substances for cleaning purposes.
• Never use any sharp abrasive instruments, soap, household cleaners, detergent, or wax
polish for cleaning.
• The best cleaning option is to dissolve one teaspoon of baking soda in a half liter of water.
Soak a cloth in the solution and wring it thoroughly. Wipe the interior of the appliance with
this cloth and then dry thoroughly.
• Make sure that no water contacts the light fixtures or other electrical parts.
• If you plan to not use the refrigerator or freezer for a long time, unplug it, remove all food
inside, clean it, and leave the door ajar.
• Check regularly that the door gaskets are clean. If not, clean them.
• Take out all items inside the unit before removing the door and shelves for cleaning.
• Remove the door shelves by pulling them up. Slide the shelves downward to re-install them
after cleaning. Refer to pages 21–22 for directions on how to remove/install shelves
and drawers.
• Never use chloric cleaning agents or water to clean outer surfaces or chrome-coated parts
of the product. Chlorine causes abrasion on such metal surfaces.
AVOIDING BAD ODORS
• Your appliance is equipped with a permanent odor filter installed in the back of the inside of
the main compartment that helps to eliminate food-related odors. However, odors may still
emit if foods are stored improperly or if the interior of the product is not cleaned as required.
Please consider the following to avoid this problem:
• It is important that the refrigerator or freezer is kept clean.
• Food residuals, stains, etc., can cause odor. For this reason, clean your appliance
with the baking soda solution outlined above every 15 days. Never use
detergents or soap.
• Keep your foods in closed containers. Microorganisms emitted from containers
without a cover may cause unpleasant odors.
• Never keep expired or spoiled foods in your refrigerator or freezer.
MAINTENANCE AND CLEANING
Care and Cleaning

24
SURFACE CLEANING AND PROTECTION
Plastic Surfaces
• Do not put liquid oils or oil-cooked meals in your refrigerator or freezer in unsealed
containers as they damage the plastic surfaces of your appliance.
• If oil is spilled or smeared onto the plastic surfaces, clean and rinse the relevant part of the
surface with warm water immediately.
WARNING
Turn off the product before cleaning.
WARNING
It is recommended to clean the condenser every six months using gloves. You
must not use vacuum cleaners.
The Inner Surface
• To clean the inner surfaces and all removable parts, wash them with a mild solution
comprising soap, water, and carbonate.
• Rinse and dry thoroughly.
• Prevent the water from contacting the lighting means and control panel.
Stainless Steel Outer Surfaces
• Use a stainless steel cleaning agent that is non-abrasive and apply it with a lint-free, soft cloth.
• For polishing, wipe the surface softly with a damp microfiber cloth and use dry wash-leather.
• Always follow the strands of the stainless steel.
ATTENTION
Do not use vinegar, rubbing alcohol or other alcohol-based cleaning agents
on any of the inner surfaces.
MAINTENANCE AND CLEANING
Care and Cleaning

25
• Please review this list for common troubleshooting tips before calling for service, as this may
save you time and money.
• This list contains frequently encountered problems that are not results of faulty workmanship
or material use.
• Your product may not have some of the features described here.
WARNING
If a problem cannot be resolved after following the instructions in the manuals,
please contact ZLINE customer service at 1-614-777-5004. Never attempt
to repair or disassemble a faulty refrigerator sealed system as there are no
user-serviceable parts. Always consult a professional.
TROUBLESHOOTING
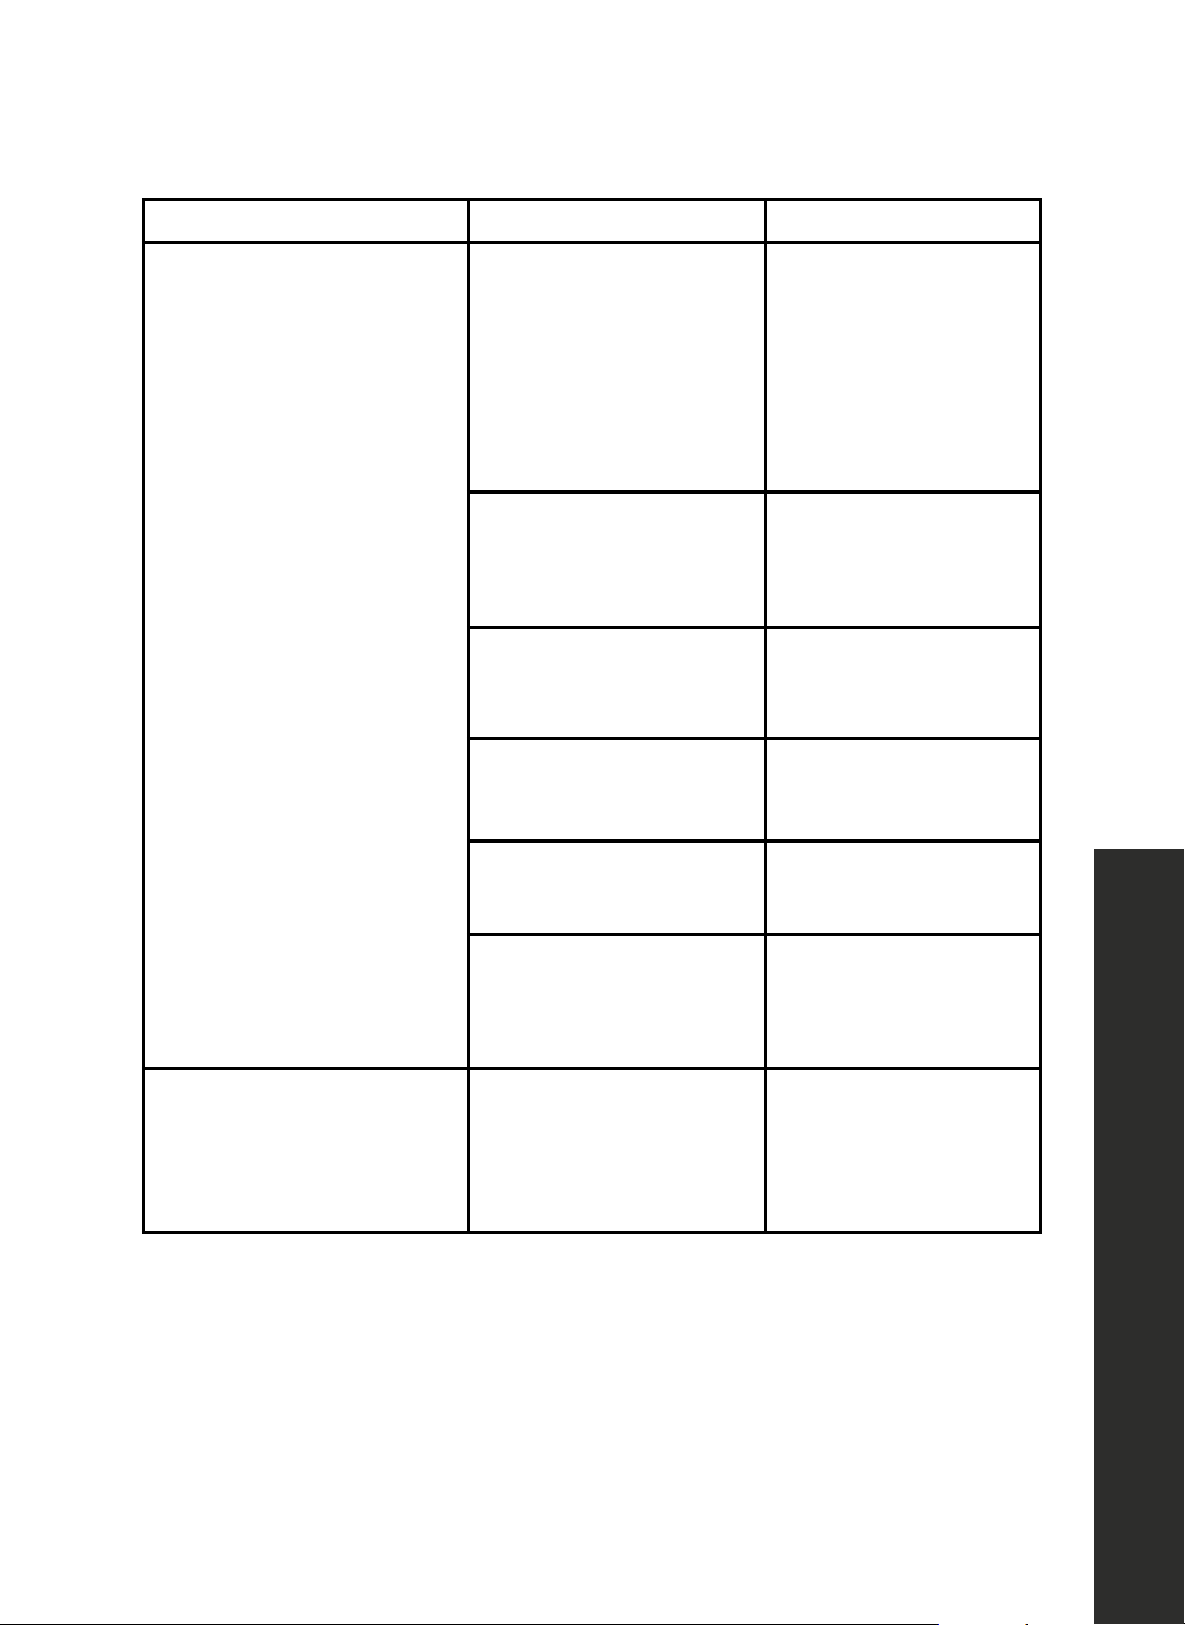
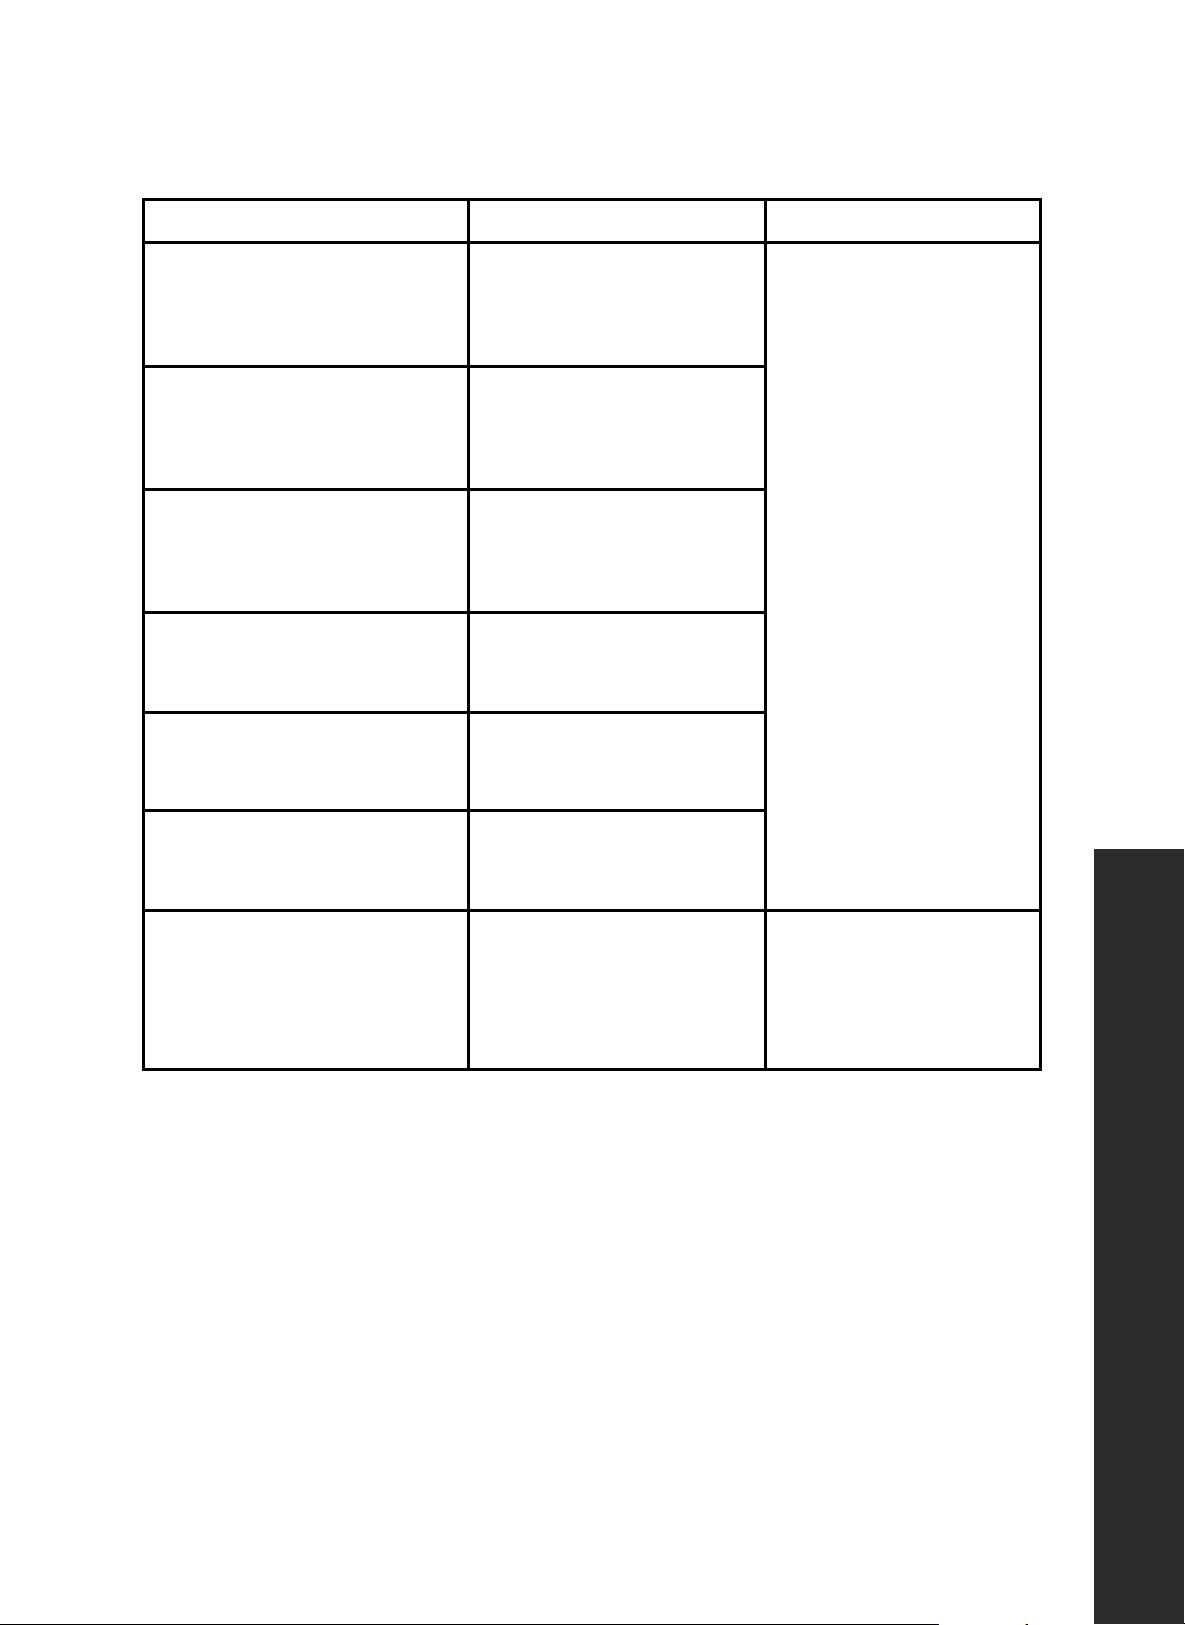
PROBLEM POSSIBLE CAUSE POSSIBLE SOLUTION
The product is not operating.
It may not be plugged
in properly.
Plug in the
product properly.
Loss of power to the outlet to
which the unit is connected.
Check the circuit breaker
or fuse may have blown.
There is condensation
in the unit.
The door may have been
opened/closed frequently.
Do not open/close the
door frequently.
The environment may
be too humid.
Do not install the product
at locations with a very
high level of humidity.
Foods containing liquid
may have been placed
into the unit in containers
without covers.
Do not place foods
containing liquid
into the unit in
unsealed containers.
The door may have
been left ajar.
Do not keep the doors
open for a long time.
Troubleshooting
26
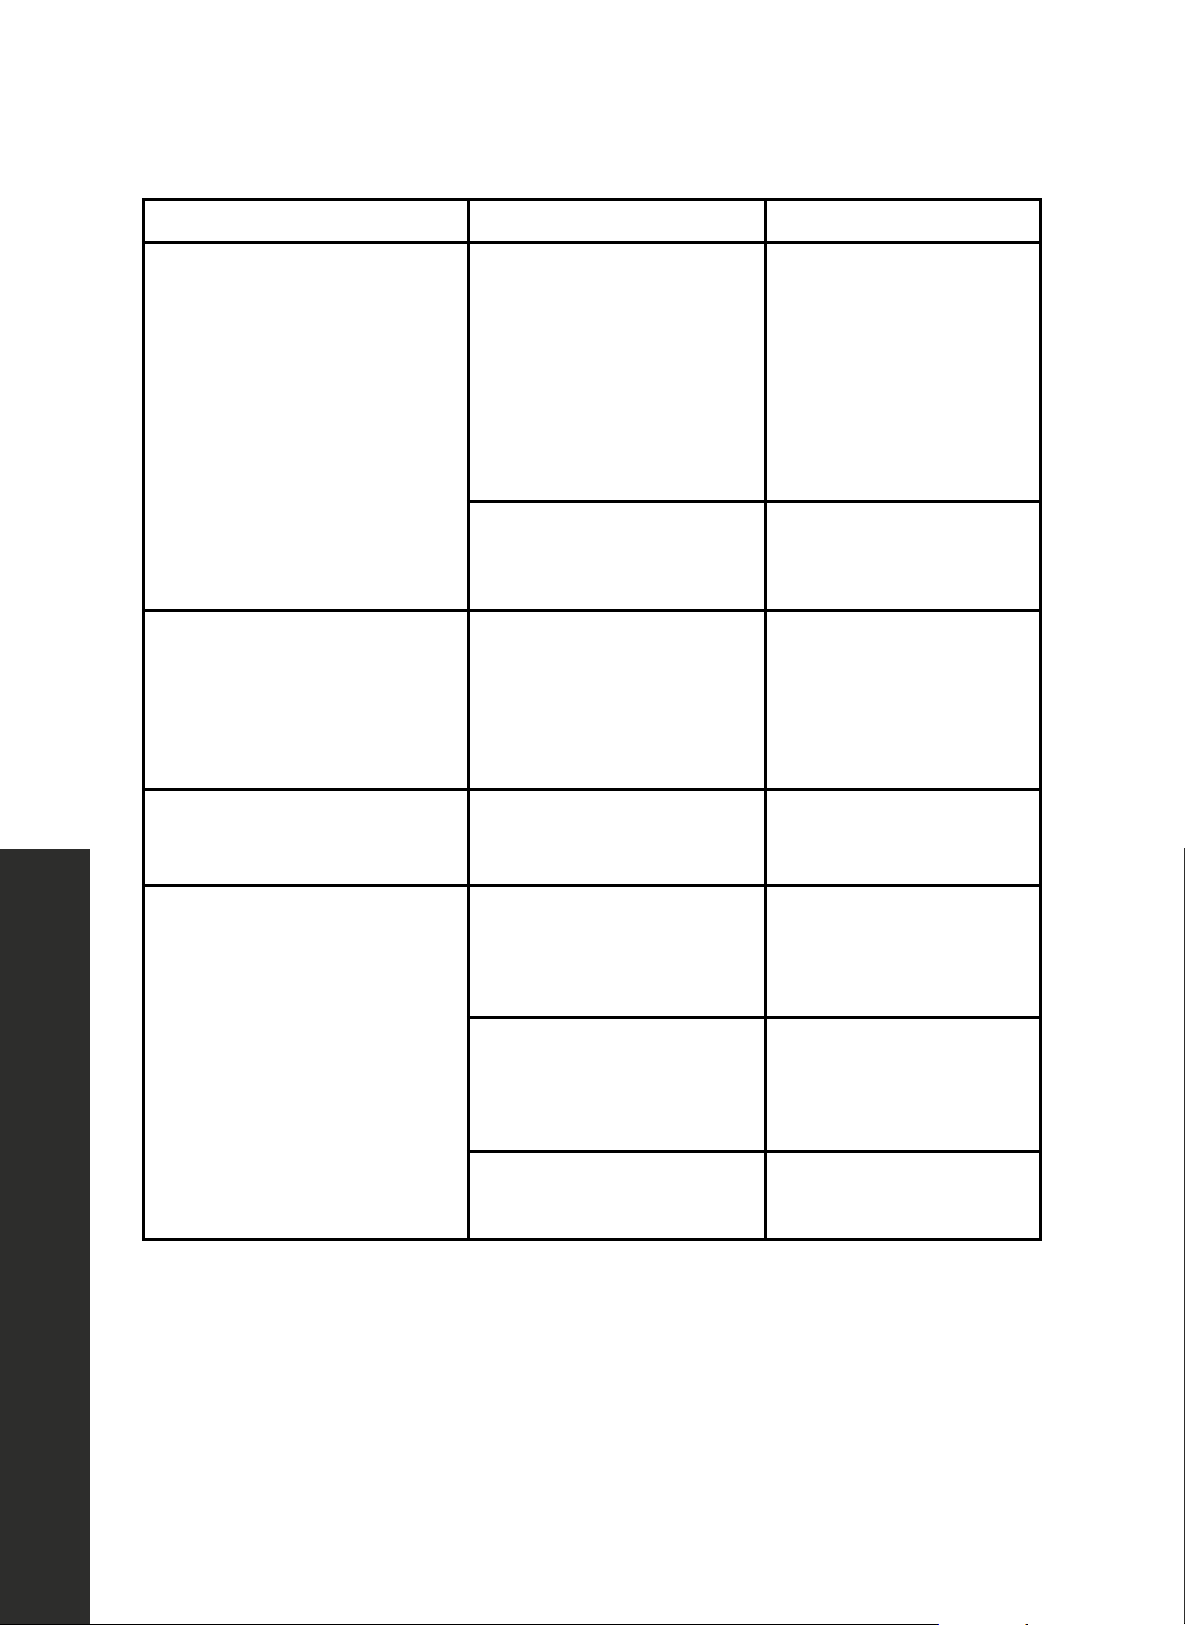
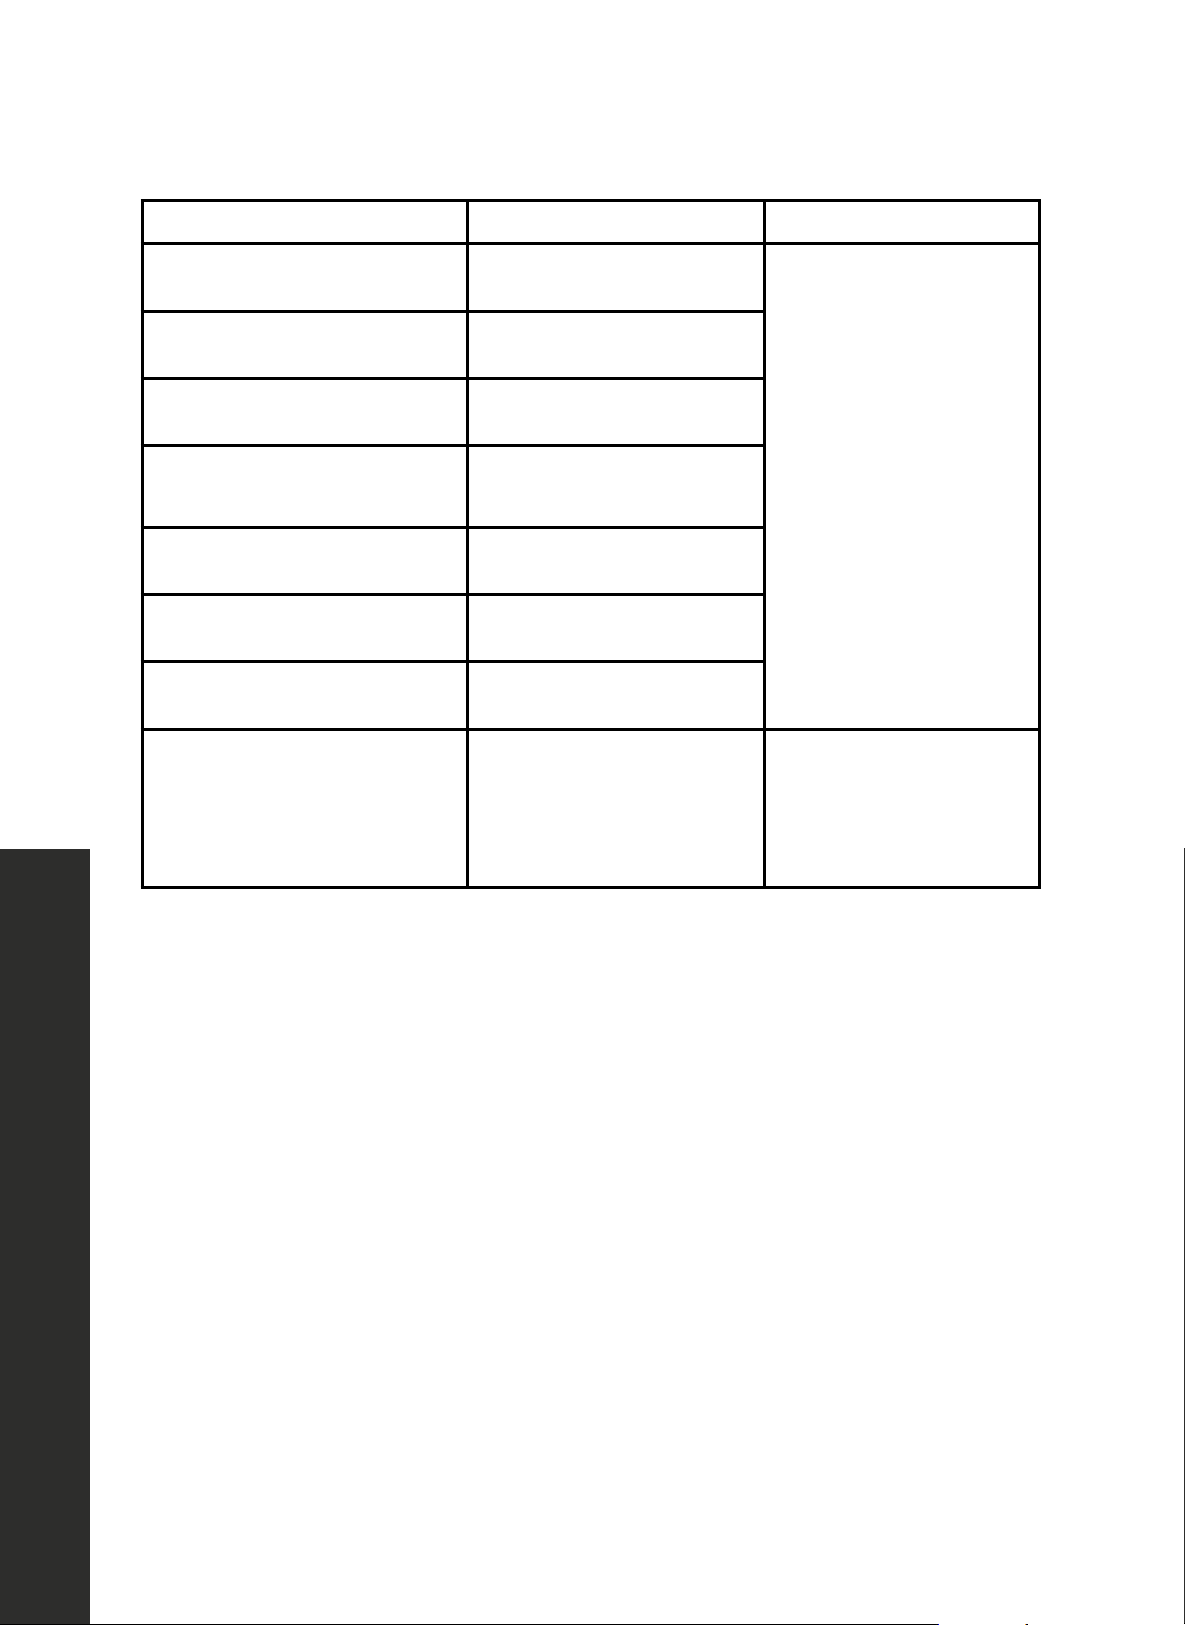
PROBLEM POSSIBLE CAUSE POSSIBLE SOLUTION
The compressor is
not operating.
The internal protector
of the compressor will
open, protecting the
compressor, and it will reset
automatically.
The unit will start running
approximately after 6
minutes. Please call ZLINE
at 1-614-777-5004 if the
unit does not start at the
end of this period.
The unit is in
defrosting cycle.
This is normal for a
unit that performs full-
automatic defrosting.
Defrosting cycle is
performed periodically.
This is normal for the unit
to defrost periodically.
The unit may not be
plugged in.
Make sure that the plug
fits the socket.
Temperature settings may
be incorrect.
Select the correct
temperature value.
Possible power failure.
The unit will start to
operate normally when
power restores.
The operation noise increases
when the unit is running.
Operating performance
of the unit may vary
based on the ambient
temperature changes.
This is normal and
not a fault.
TROUBLESHOOTING
Troubleshooting
27
TROUBLESHOOTING
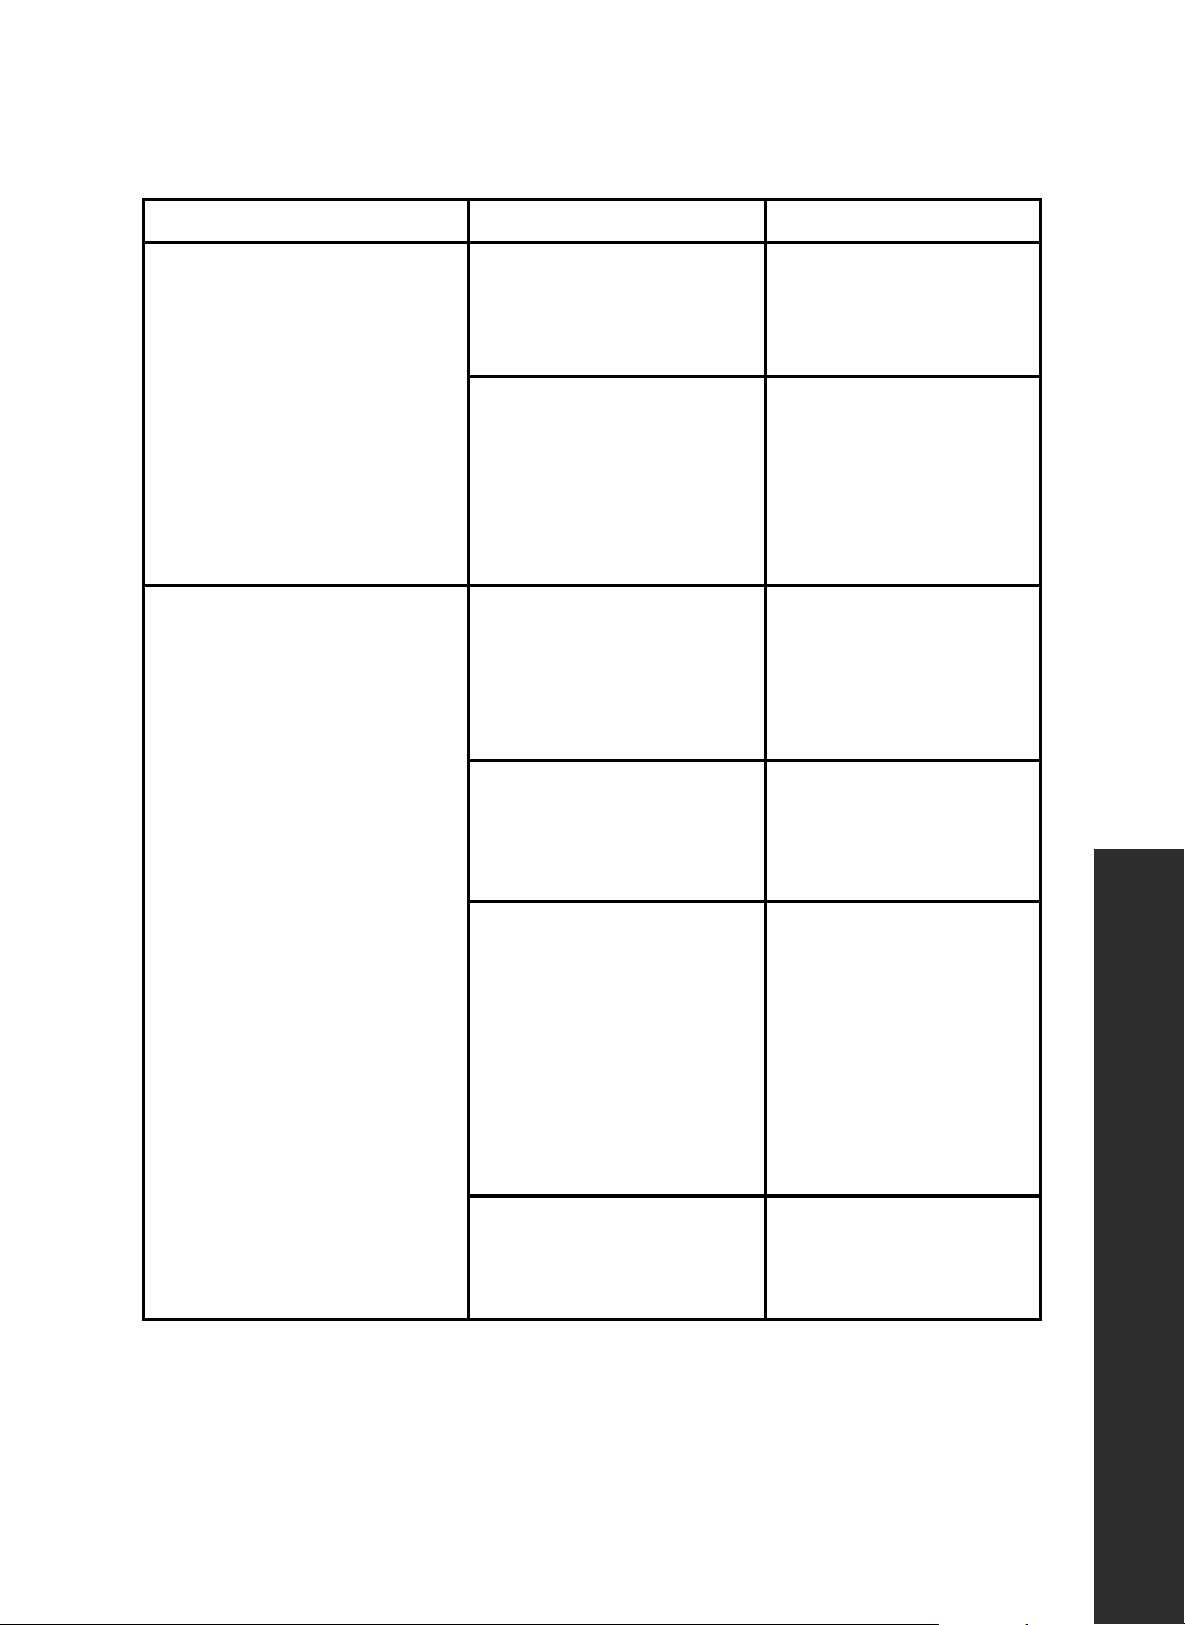
PROBLEM POSSIBLE CAUSE POSSIBLE SOLUTION
Vibration or noise.
The floor may not be
stable or level.
If you notice that the unit
shakes when moved
slightly, make sure that the
floor is level and capable
of carrying the unit. Adjust
feet as necessary.
Objects placed on top of
the unit may cause noise.
Remove the objects
on the unit.
There are noises coming from
the unit like liquid spilling
or spraying.
Liquid and gas flows occur
normally in accordance
with the operating principles
of the unit.
This is normal and
not a fault.
A whistling noise is heard
from the unit.
There are fans that are used
to cool the unit.
This is normal and
not a fault.
Condensation accumulates on
the inner walls of refrigerator.
Hot and humid weather
increases icing and
condensation.
This is normal and
not a fault.
The doors may have been
opened frequently or left
ajar for a long time.
Do not open the door
frequently. Close the
doors, if open.
The door may have
been left ajar.
Close the
door completely.
Troubleshooting
28
TROUBLESHOOTING
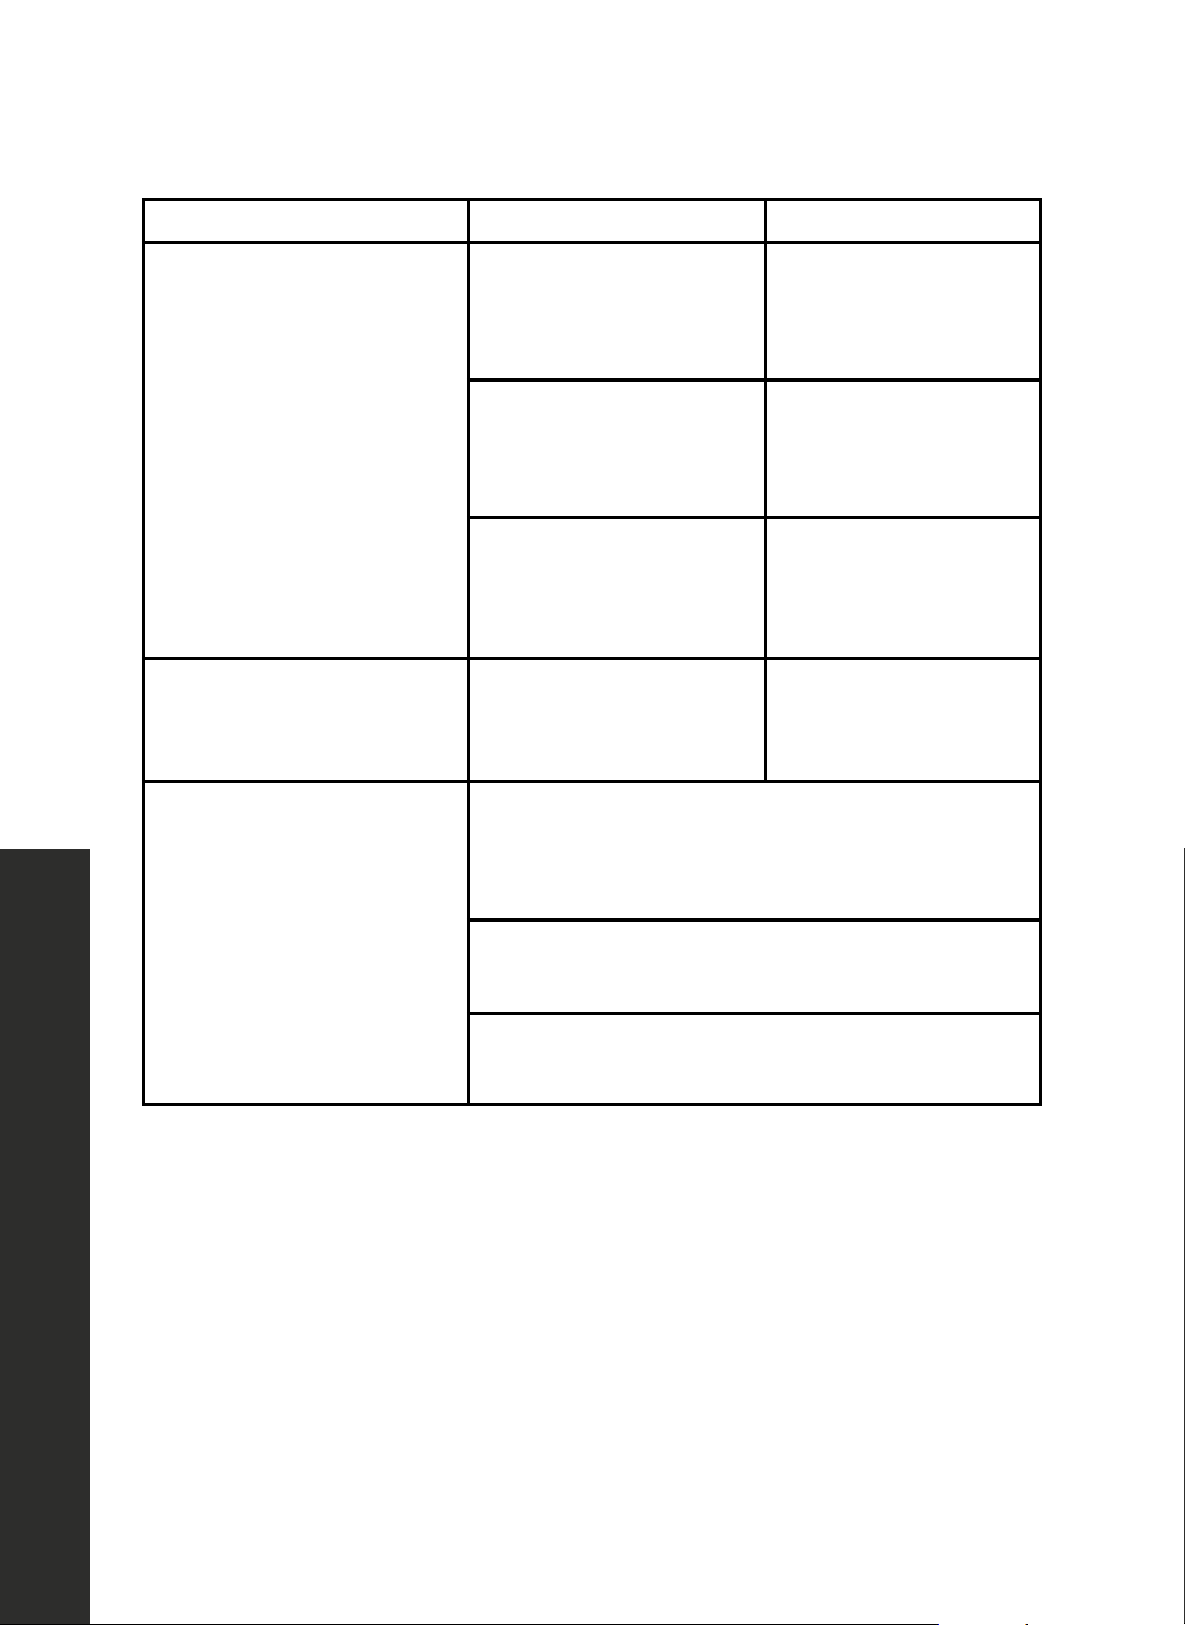
PROBLEM POSSIBLE CAUSE POSSIBLE SOLUTION
Condensations occurs on the
outer surface of the refrigerator
or between the doors.
Air might be humid.
This is quite normal in
humid weathers.
Condensation will
disappear as the humidity
level decreases.
There might be external
condensation at the section
between two doors of
the unit if you use your
product rarely.
This is normal.
Condensation will
disappear upon
frequent use.
There is a bad odor
inside the unit.
No regular cleaning may
have been performed.
Clean the inside of the
unit with a sponge and
lukewarm water or
carbonated water.
Some containers or
packaging materials may
cause the odor.
Use another container or
packaging materials from
another brand.
Foods may have been
placed into the unit in
containers without covers.
Microorganisms emitting
from containers without
a cover may cause
unpleasant odors.
Store foods in closed
containers.
Food may be
expired or spoiled.
Take out expired
or spoiled foods
from the unit.
Troubleshooting
29
TROUBLESHOOTING
PROBLEM POSSIBLE CAUSE POSSIBLE SOLUTION
The door cannot be closed.
Food packages may
be preventing the door
from closing.
Re-locate the packages
obstructing the door.
The unit may be unstable
on the floor.
Adjust the refrigerator feet
as required to keep the
unit in balance.
The floor may not be
level or solid.
Make sure that the floor
is level and capable of
carrying the unit.
Drawers are stuck.
Foods may be touching the
upper wall of the drawer.
Re-organize the foods
in the drawer.
No water is coming out of the
water dispenser
Check whether the water line is connected normally,
whether the water supply valve is opened, and whether
the water pipe is bent or creased.
The water filter or water filter bypass plug may been be
installed before water can be discharged.
Check whether the filter or water filter bypass plug is
installed properly.
Troubleshooting
30
PROBLEM POSSIBLE CAUSE POSSIBLE SOLUTION
F4 Air Freezer Probe Error
Try resetting the unit by
disconnecting it from
power and reconnecting
it after a few minutes.
If those does not work,
service may be required,
please call ZLINE
Customer Service at
1-614-777-5004.
F5 Defrost Probe Error
F6
Ambient Temperature
Probe Error
CE Communication Failure
2E Freezer Fan Error
3E Condenser Fan Error
DR
The refrigerator opens for
more than 2 minutes
Make sure the doors
are closed and that
the magnets are in
place correctly.
TROUBLESHOOTING
FREEZERS
Troubleshooting
31
Troubleshooting
PROBLEM POSSIBLE CAUSE POSSIBLE SOLUTION
F1 Air Freezer Probe Error
Try resetting the unit by
disconnecting it from
power and reconnecting
it after a few minutes.
If those does not work,
service may be required,
please call ZLINE
Customer Service at
1-614-777-5004.
F2 Defrost Probe Error
F3 Chiller Probe Error
F6
Ambient Temperature
Probe Error
CE Communication Failure
1E Fridge Fan Error
3E Condenser Fan Error
DR
The refrigerator opens for
more than 2 minutes
Make sure the doors
are closed and that
the magnets are in
place correctly.
TROUBLESHOOTING
REFRIGERATORS

COVERAGE
ZLINE Kitchen and Bath ("ZLINE") column refrigerators and freezers have a two year parts and
service warranty and a five year parts warranty on the unit's sealed cooling system.
ZLINE warranty periods begin from the original date of product delivery and solely cover the
original purchaser of the product, delivered new and in its original carton. The limited warranty
covers all parts and labor for necessary repairs if any part of the product, or the product itself,
proves to be defective in materials or workmanship.
The product must be deemed serviceable via troubleshooting with the ZLINE Customer Experience
team. All service on ZLINE products under warranty must be performed by ZLINE-approved and
ZLINE-certified service providers unless otherwise specified by ZLINE. Service will be provided
during normal business hours.
Products must be unobstructed and accessible to the service provider at the time of service. ZLINE’s
liability is limited to the original purchase price of the product. Additional injuries, losses, damages,
or other inconveniences caused by product malfunction or defects in materials are not covered
under the terms of this warranty.
TERMS
ZLINE warranties apply only to the original purchaser of a ZLINE product installed for normal
residential use. This is defined as a single-family, residential dwelling in a non-commercial setting.
Any warranty claim stemming from installation, operation, or any other use within a commercial
setting is not covered under this limited warranty. Commercial settings include, but are not limited
to: schools, churches, hotels, restaurants, vacation rentals such as Airbnb, daycare centers, private
clubs, fire stations, common areas in multi-family dwellings, nursing homes, food service locations,
and institutional food service locations such as hospitals or correctional facilities.
This warranty is non-transferable and will not under any circumstance be extended based on the
date of installation — the warranty period takes effect from the date of delivery and only covers the
original purchaser. The warranty applies only to products installed in the contiguous United States
and the District of Columbia.
WARRANTY

WARRANTY
Failure to secure certified warranty service per these terms will result in a forfeiture of the remaining
warranty. Out-of-pocket payments will not be reimbursed unless prior approval is received from
ZLINE and/or ZLINE-certified service contract partners. Unapproved out-of-pocket payments
for service will not be reimbursed. All warranty procedures must be followed to maintain
warranty coverage.
If a product qualifies within the service window provided under these warranty terms, and ZLINE
is unable to repair the product or a defective part of the product after a reasonable number of
attempts, ZLINE reserves the right to offer to replace the defective part or the product or provide
the original purchaser a full refund of the purchase price of the product (not including installation,
removal, or other charges that were not included in the original purchase price).
The original purchaser of the product must provide the original proof of purchase, including the
purchase date, when filing a claim to obtain replacement parts, service, or refunds. Additionally,
the original purchaser of the product must provide the serial number of the product when filing a
claim to obtain replacement parts, service, or refunds.
This warranty shall not apply to any ZLINE product in which the original factory serial number
has been removed, altered, or cannot be readily determined for any reason. Further, ZLINE is not
responsible for damage resulting from, but not limited to: shipment, delivery, or improper installation;
negligence or improper maintenance, misuse, or abuse of the product; unauthorized alteration,
modification, or tampering with the product; accident, fire, floods, pest infestations, pandemics,
natural disasters, or any other unpreventable or unexplained acts of nature, commonly referred
to as “acts of God”; flare-up fires or damages caused by improper electric supply, electrical line
current, voltage, or power surges; and service to correct installation not in accordance with the
instructions contained in ZLINE’s product manuals and/or with local government codes.
In the event service is dispatched, and it is discovered that the reported issue is not covered under
warranty based on the disclaimers above, the customer will be responsible for all service fees.
Failure to pay these fees will result in the forfeiture of remaining warranty coverage.

Information contained within ZLINE’s installation and user manuals, in addition to product
information included on ZLINE’s website and all related digital listings, do not cover every possible
condition and situation that may occur during the installation or operation of ZLINE products.
ZLINE reserves the right to make changes at any time to its products when considered safe,
necessary, and useful. Always check the ZLINE website for the most up-to-date version of its
product manuals: www.zlinekitchen.com/pages/manuals.
Do not install or operate any ZLINE product if it has missing or broken parts or if it arrives damaged
due to shipping. If ZLINE products arrive damaged, contact ZLINE Customer Experience at
1-614-777-5004 for help. Failure to report a damaged appliance prior to installation or operation
may void the warranty.
ZLINE disclaims responsibility for damage or injury caused by improper installation or use of
any of its products. ZLINE is under no obligation, by law or otherwise, to provide concessions,
including repairs, prorates, rebates, discounts, or replacements, once the warranty has expired.
SERIAL NUMBER LOCATION
The rating tag shows the model and serial number of your
refrigerator. The product label and rating tag are located on the
left-hand side of the cabinet. The tag is visible when the refrigerator
door is open. Do not remove permanently affixed labels,
warnings, or plates from the product. This will void the warranty.
WARRANTY

WARRANTY
SERVICE
For warranty service, please contact our Customer Service team at
1-614-777-5004 or visit www.zlinekitchen.com/contact to utilize our online
Customer Experience Portal.
Scan the QR code to view the most up-to-date version of our user manual and
installation manual.
Need to purchase a part or accessory for your ZLINE product?
Visit www.zlineparts.com, ZLINE's official parts distribution partner.