support@rayoungtek.com +86 153 618 429 11
N77
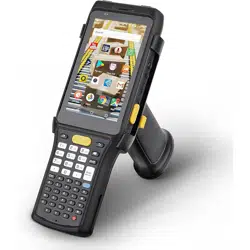
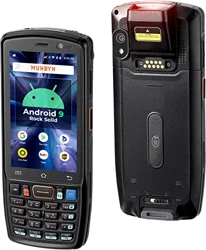
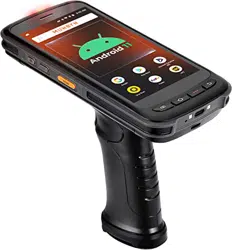
Android Barcode Scanner
User Manual
support@rayoungtek.com +86 153 618 429 11
Page 1
Thank you for choosing our Android PDA scanner.
To ensure you get the best performance,
Please note that integrating enterprise-level hardware
with various software systems can sometimes
require specic congurations.
Contact our Technical Support Team if you encounter:
1. Setup Difculties:
Any issues with initial setup, scanning congurations,
or system settings.
2. Scanning Performance:
If the device struggles to read specic barcode types in your work
environment.
3. Software Integration (SDK):
If you need developer resources, SDK packages,
or assistance integrating the scanner with your proprietary applications.
We are committed to your success.
Reach out to us for fast, Professional solutions.
Page 2
N77
Product Overview & Hardware Setup
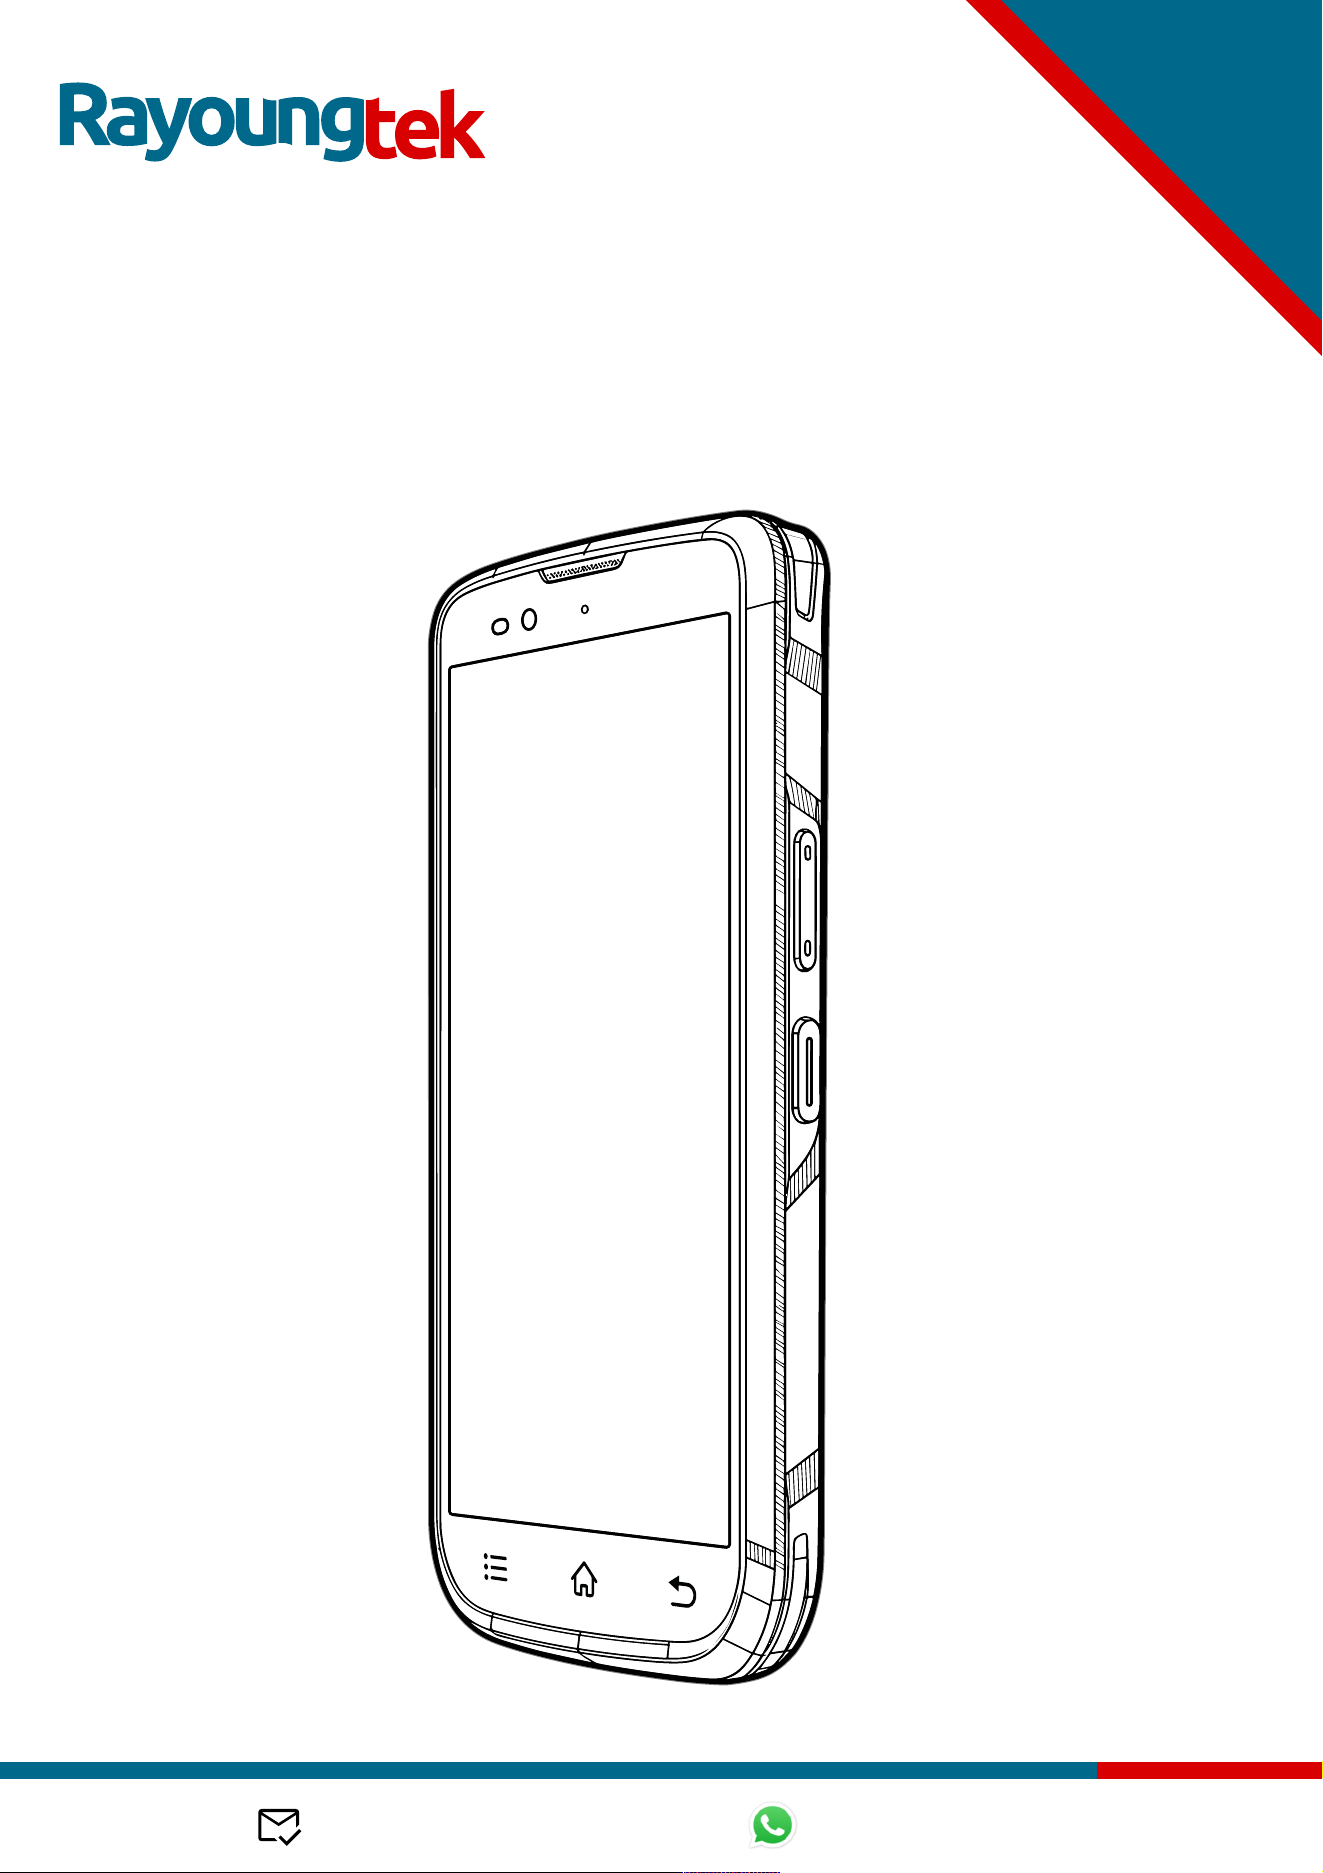
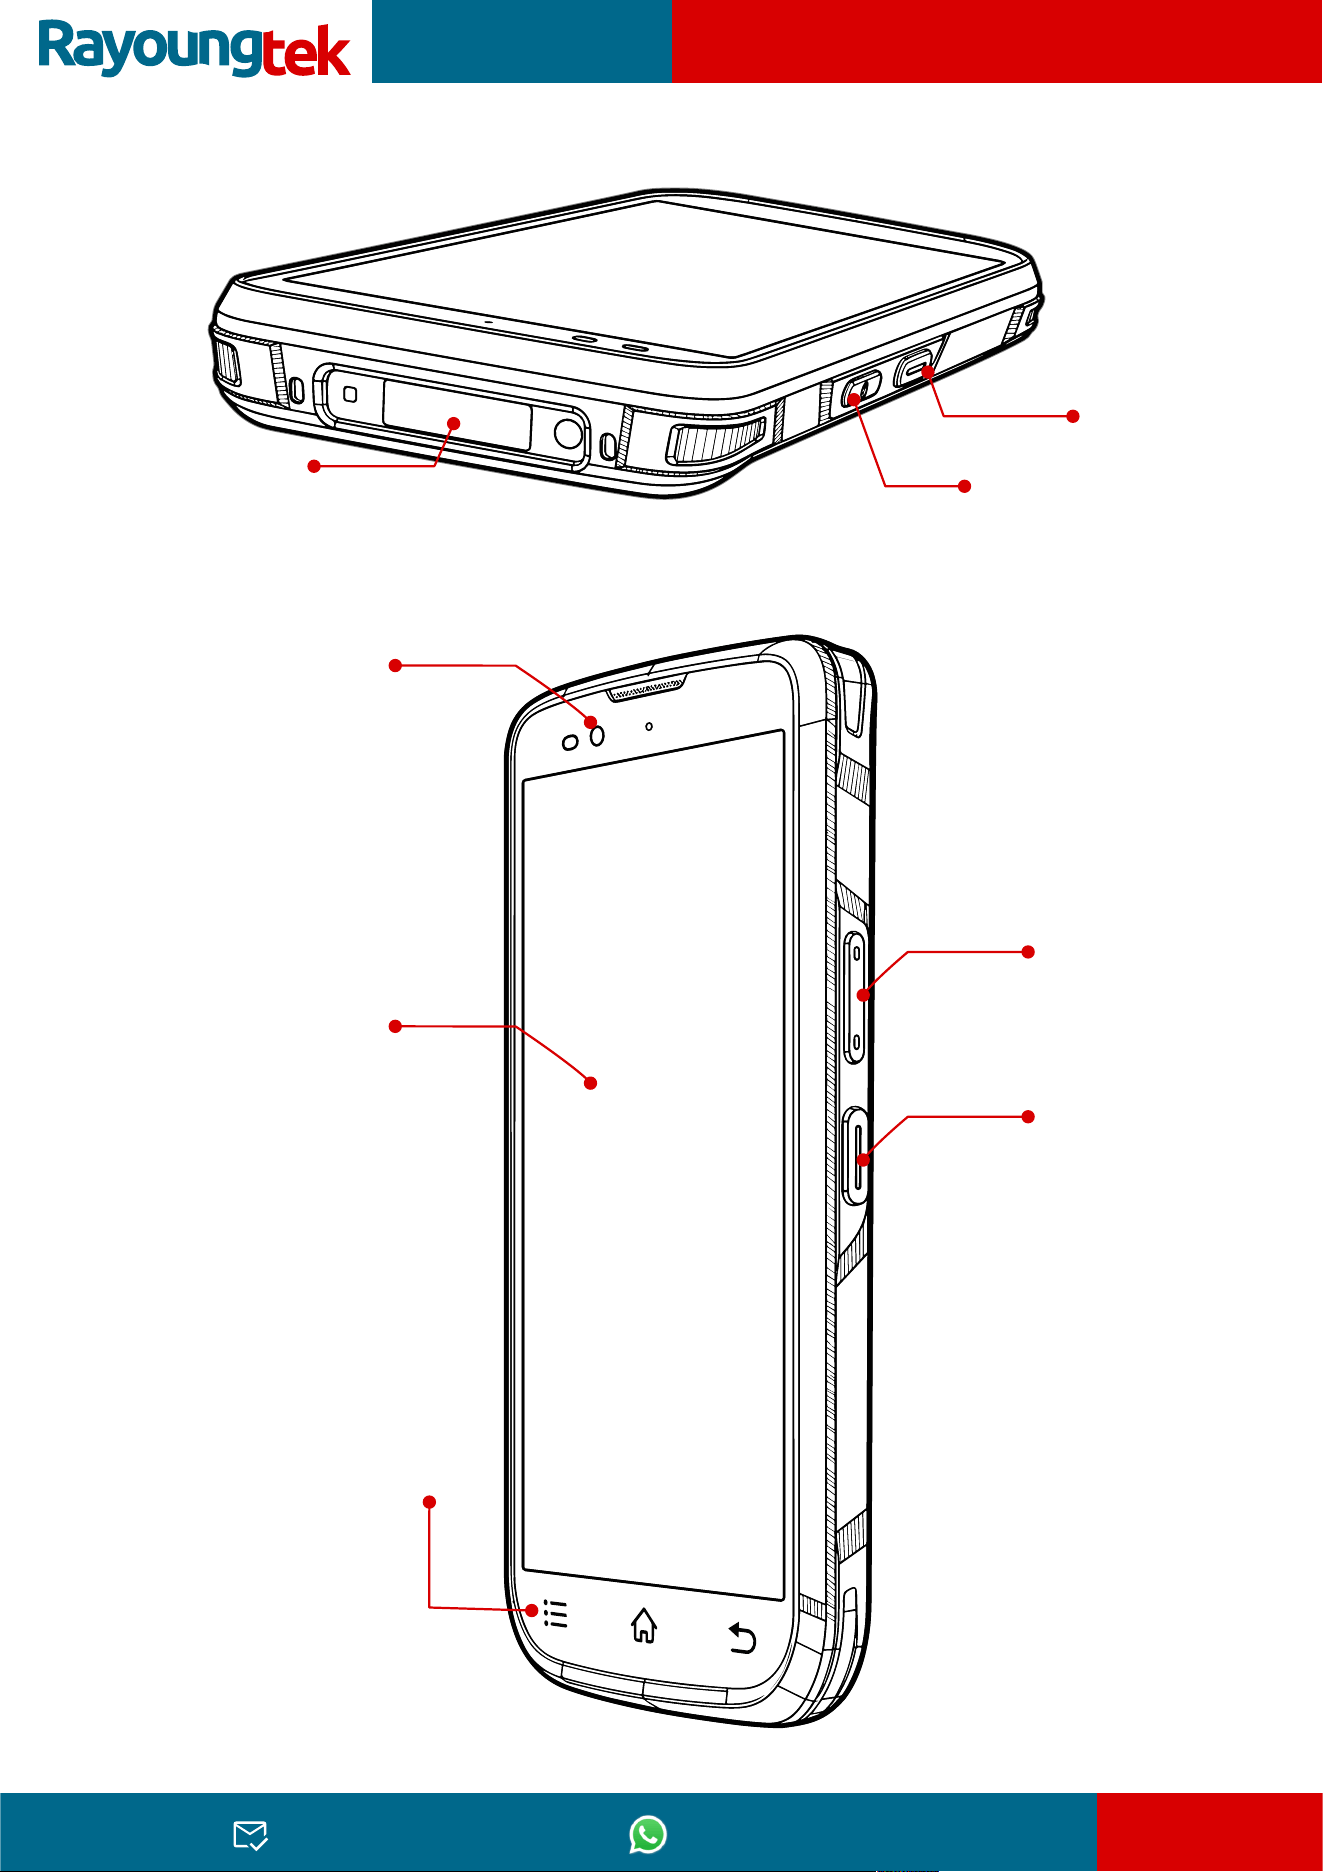
Scanner Window
The optical window for barcode scanning.
Front Camera
5MP Camera for Capturing images
6“ Touch Screen
720 x 1440 pixels Display
Home, Menu, Back Touch Buttons:
System navigation bar at the bottom
of the screen.
Power Button
Press and hold to power on/off
Volume +/- Buttons
Adjust device volume.
Scan Button
Trigger barcode scanning
( Located on both sides )
Scan Button
Trigger barcode scanning
( Located on both sides )
support@rayoungtek.com +86 153 618 429 11
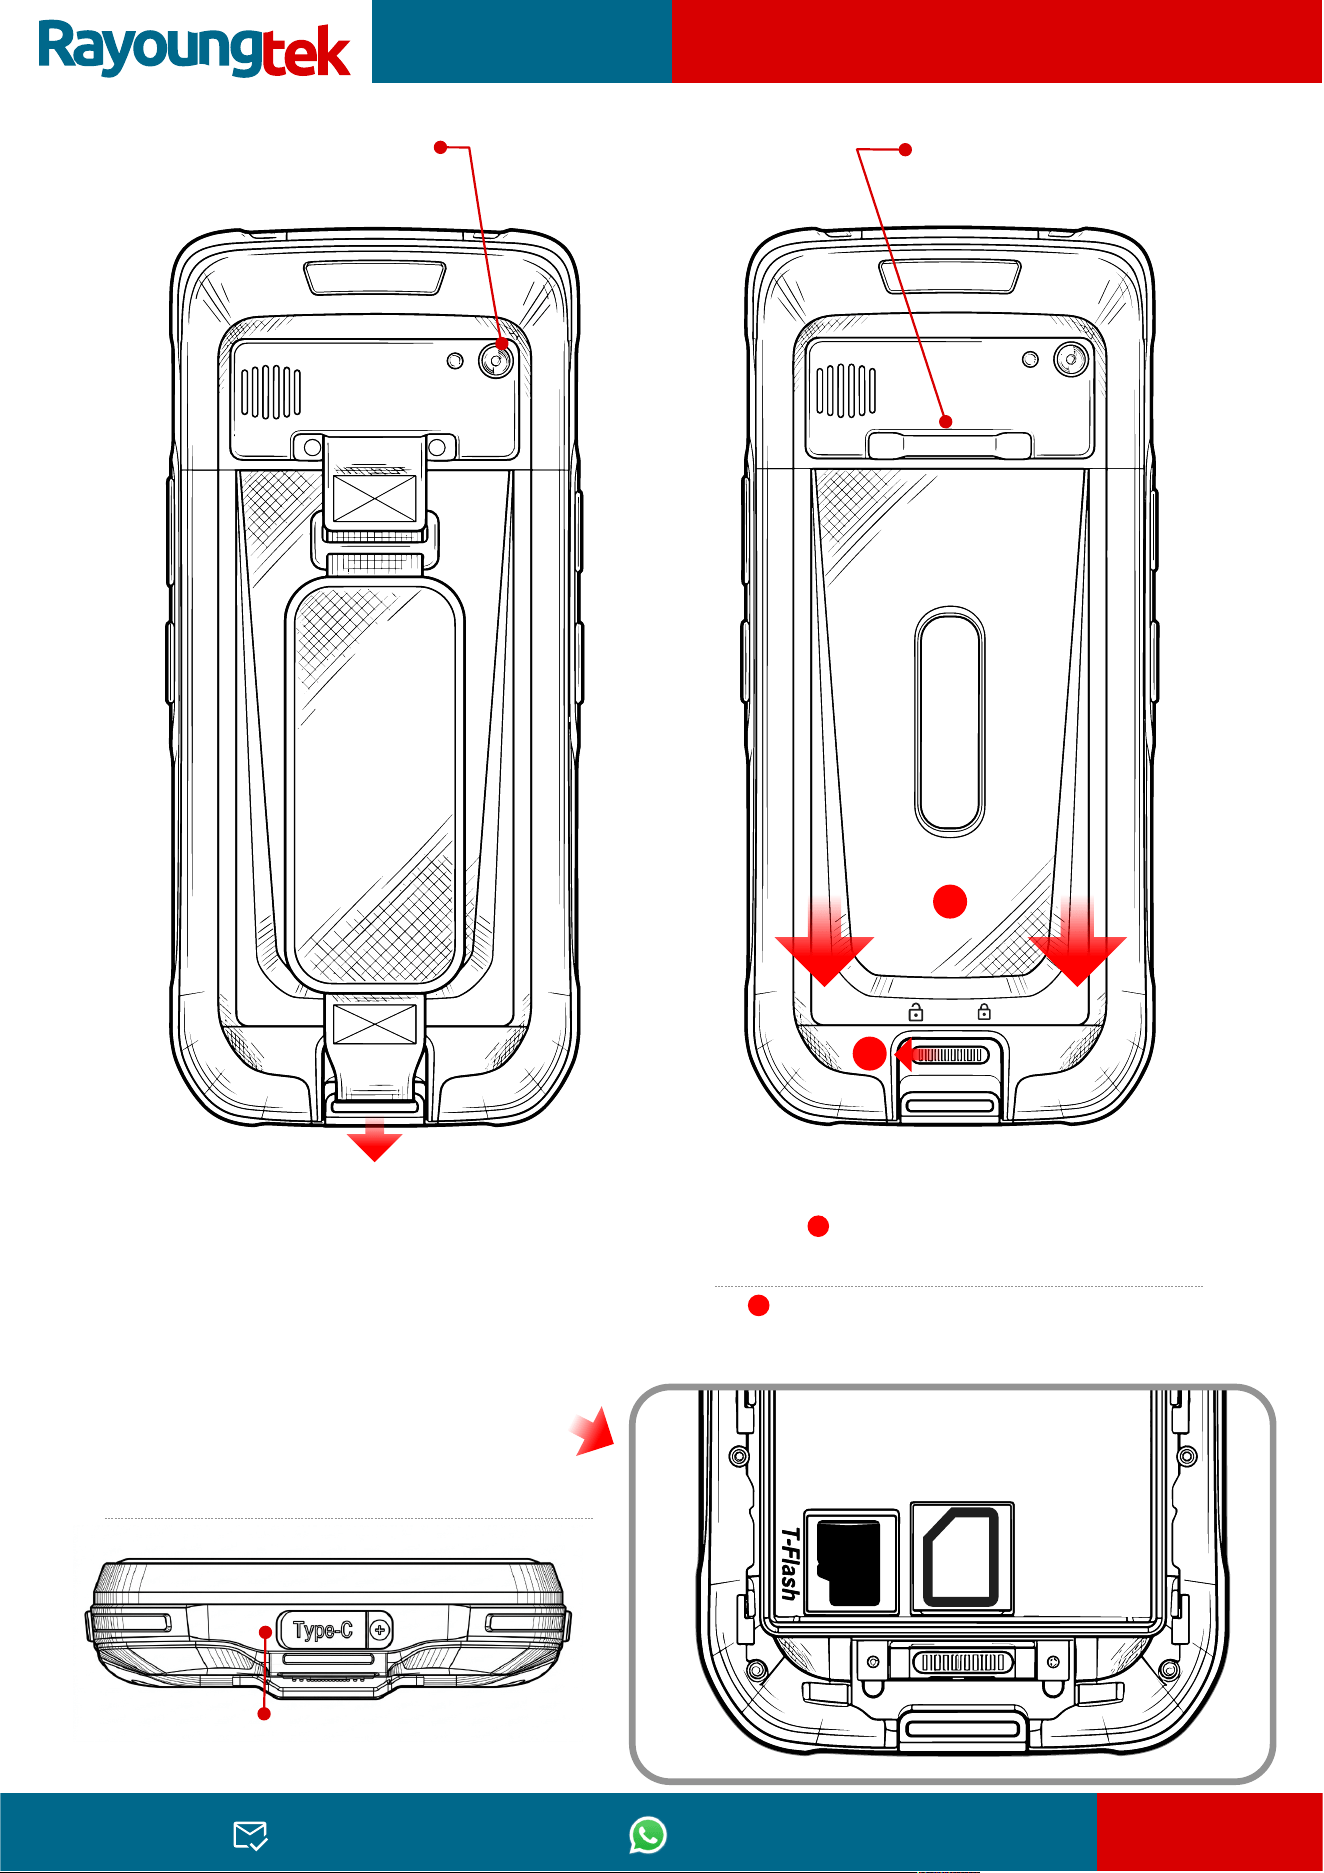
Rear Camera
support@rayoungtek.com +86 153 618 429 11
Page 3
N77
Product Overview & Hardware Setup
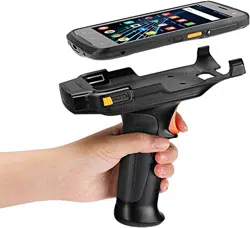
Slide the latch downward
to unfasten the hand strap.
How do I release the hand strap?
Step 1. Move the lock on the base
to the unlocked position
How to remove the battery cover?
1
1
Step 2. Push in the direction of the arrow to
remove the battery cover.
2
2
Micro SIM Card
The SIM Card Not include
After removing the battery cover
and taking out the battery,
you can install the SIM card
and TF card into their respective slots.
Installing SIM & TF Cards
13MP Camera for Capturing images
with Flash Light
NFC Reader
Area for contactless
NFC card reading.
Type-C interface
Used for charging and data transmission.
Support
TF Card
The SIM Card Not include The SIM Card Not include
Maximum supported capacity: 128 GB
Support
N77
Scanner App Operations
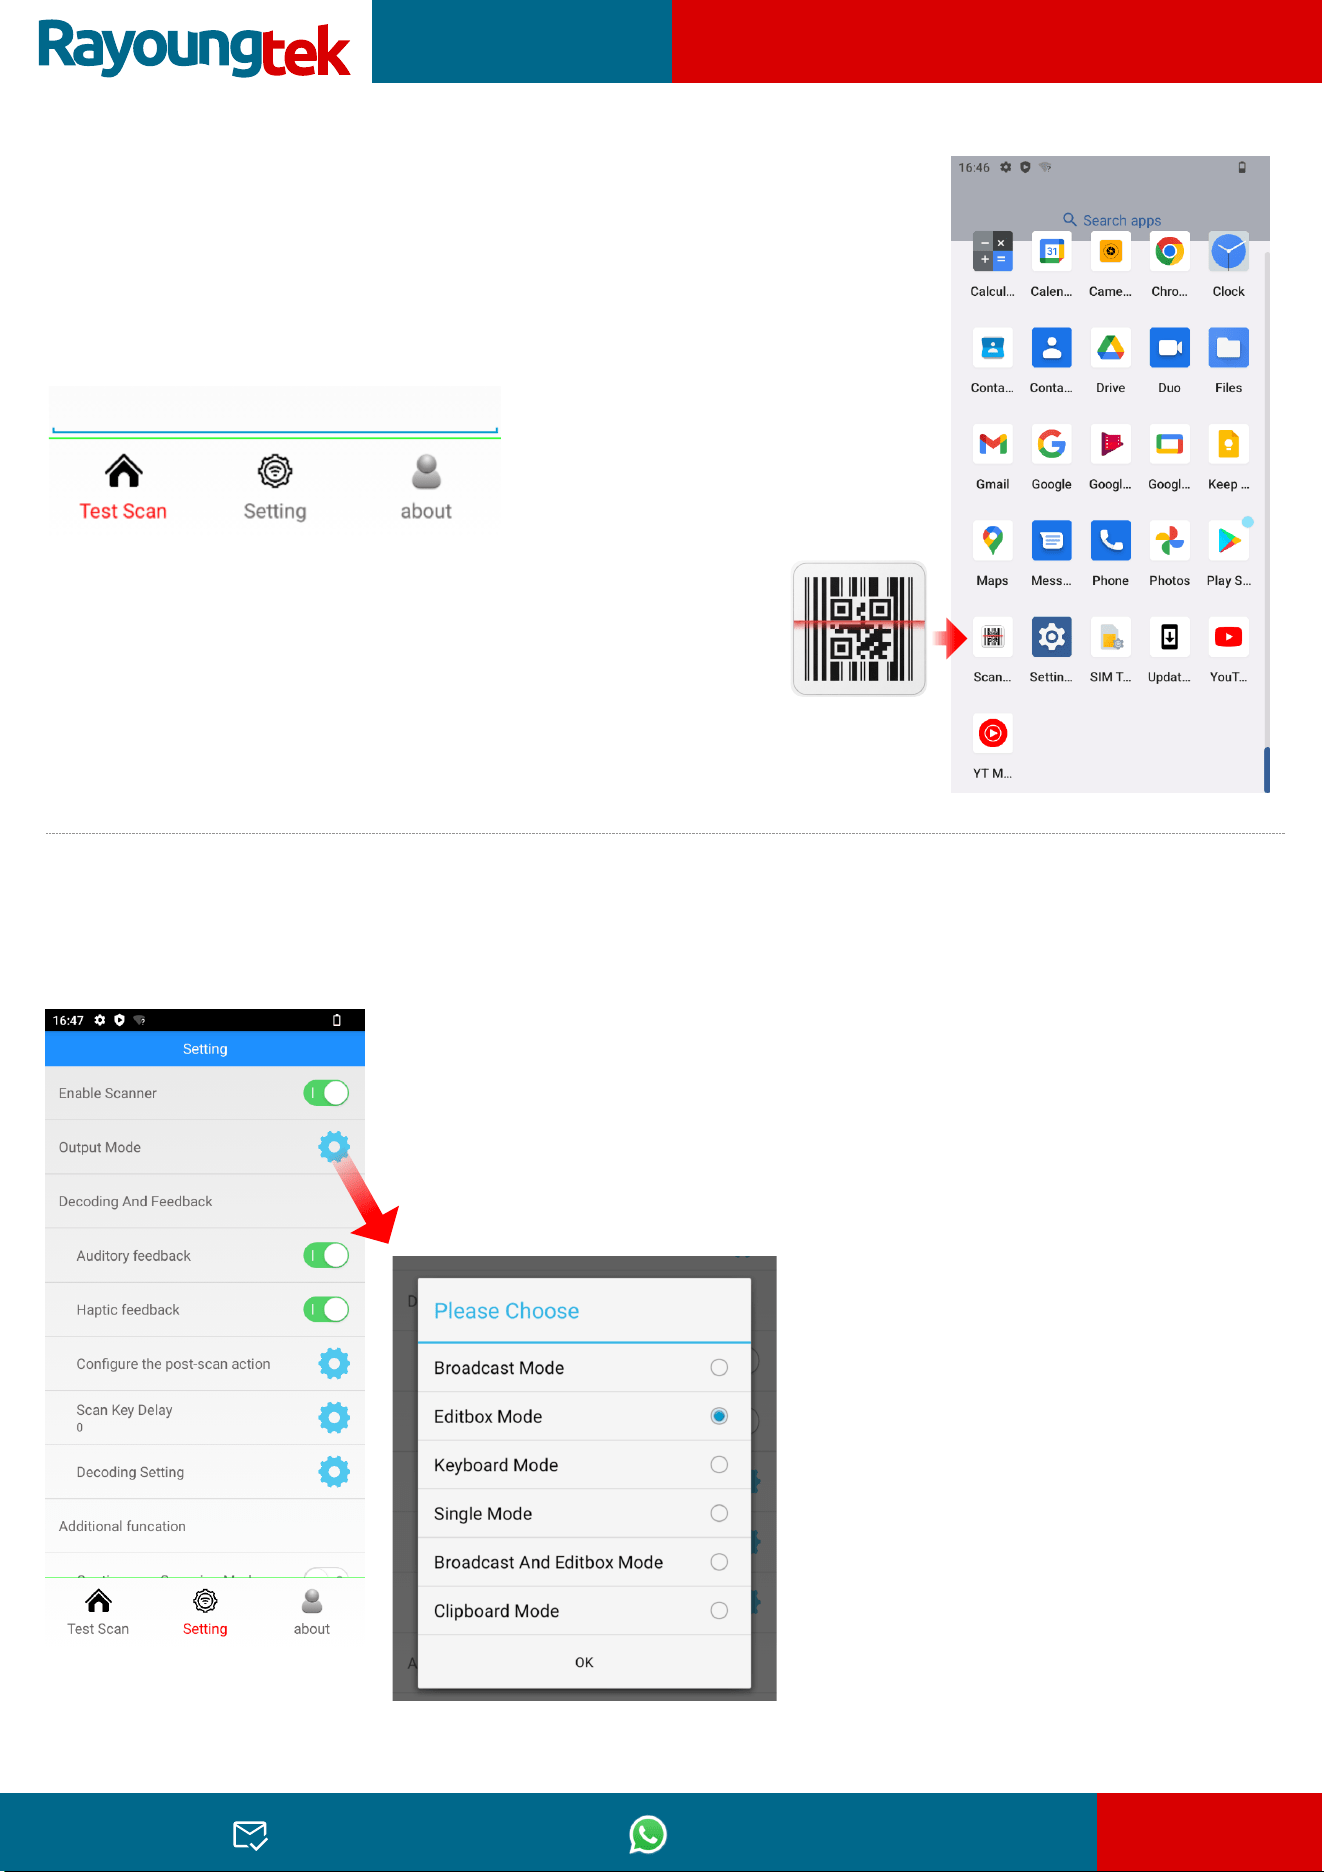
Note: The "Scanner" app comes pre-installed on the
Rayoungtek N77.
You can use this application to test, congure, and utilize
the barcode scanning functions.
The app consists of three navigation tabs at the bottom:
Test Scan, Setting, and About.
Test Scan (Content Interface)
On the Test Scan interface, press any physical Scan Button
on the device to perform a scan test. If the device is
working properly, pressing the button will emit a scanning
light from the module, and the scanned barcode text will
immediately display on the screen.
Setting
In the Setting interface, you can customize the scanning settings based
on the data processing mode of your application.
Output Mode
Select the appropriate data output
method based on your host
application.
Why Choose an Output Mode?
Different applications receive data
differently. Choosing the correct
output mode ensures the scanner
communicates perfectly with your
specic software, delivering data
accurately to the right place.
support@rayoungtek.com +86 153 618 429 11
Page 4
Output Mode Setting
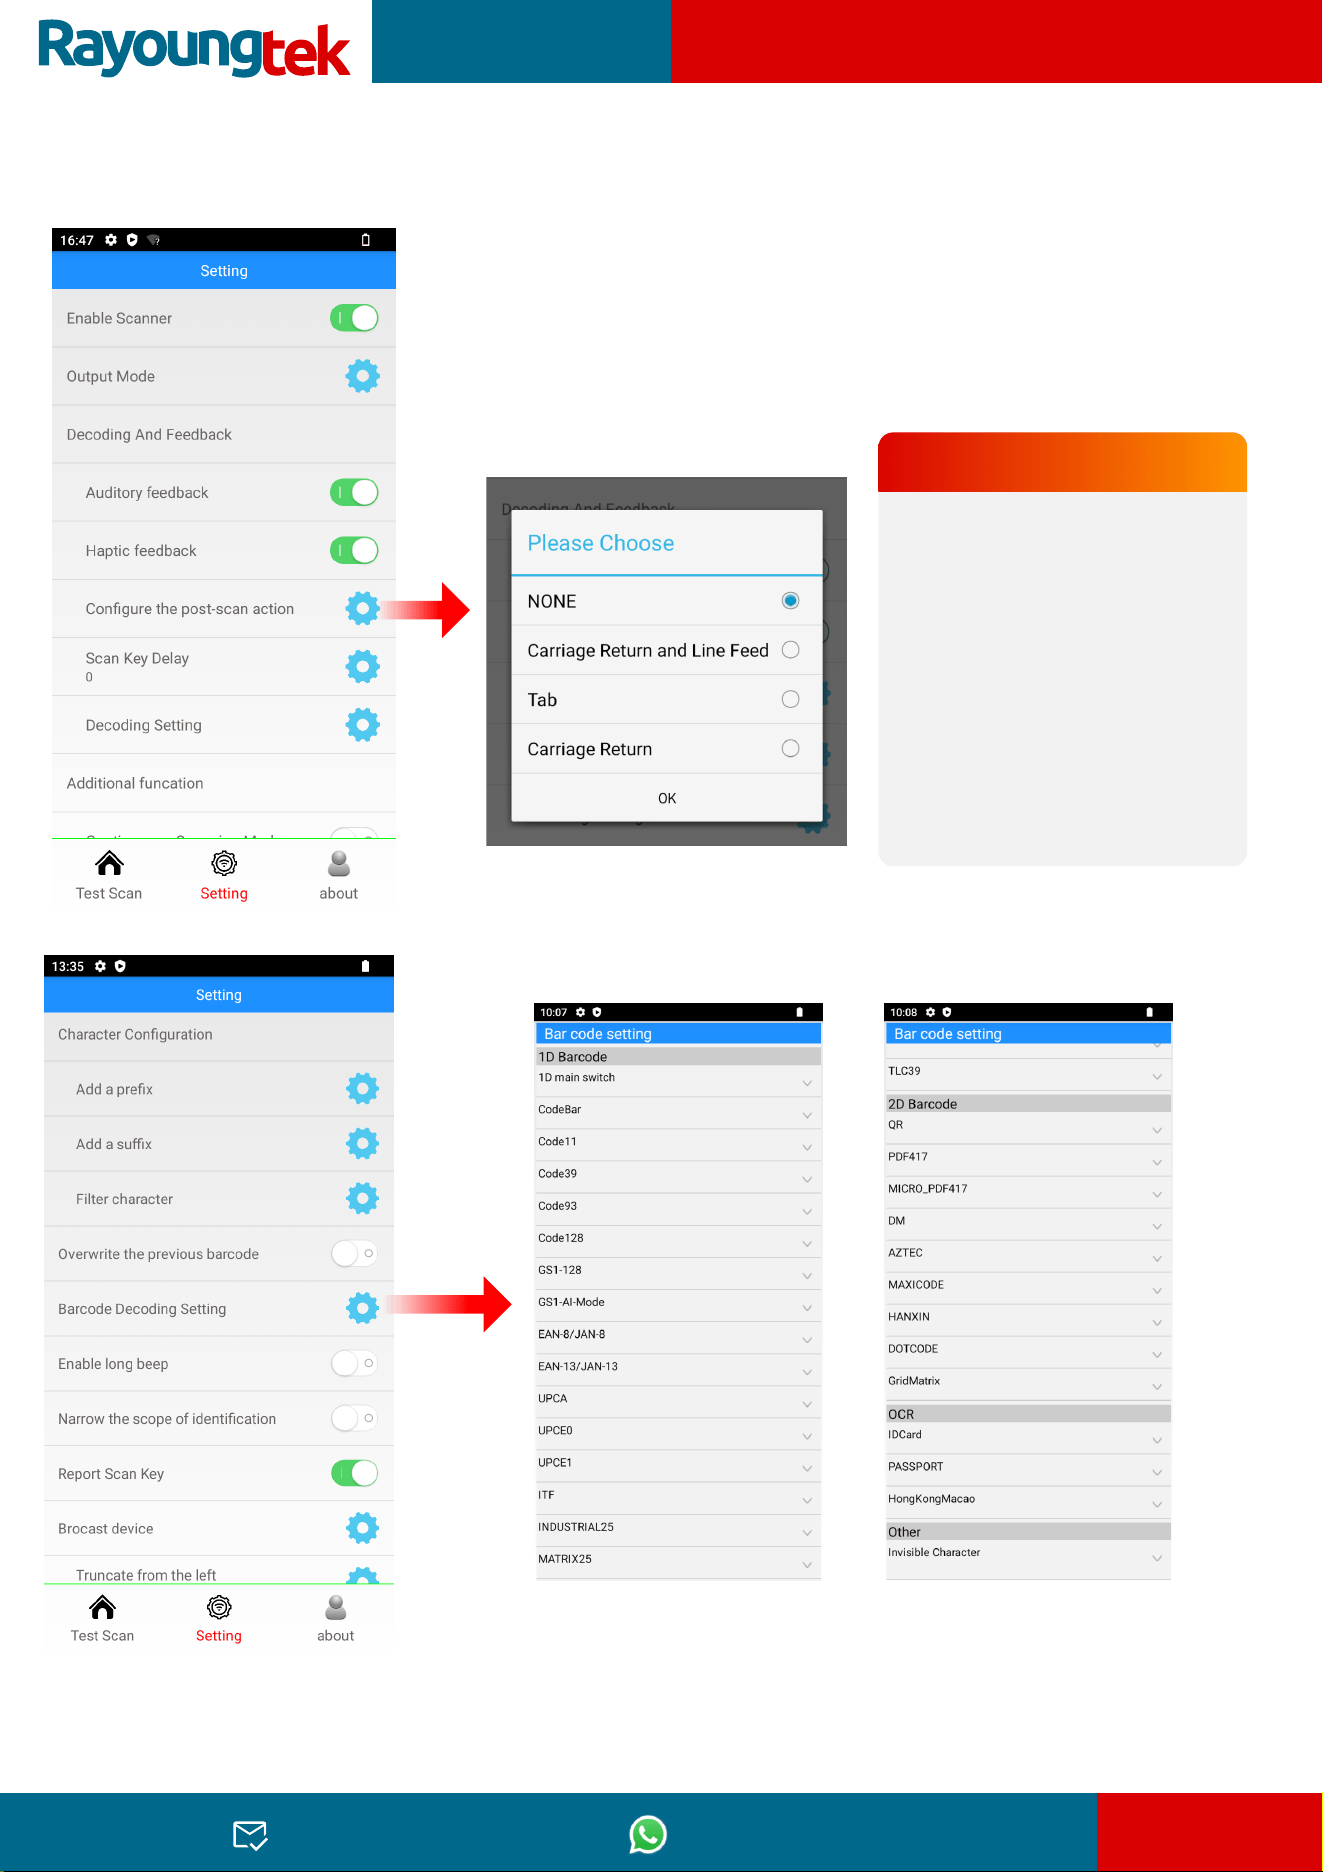
Post-Scan Action Qucik Guide
NONE:
Outputs raw barcode data only
(ideal for manual verication).
Carriage Return & Line Feed (CRLF):
Moves the cursor to the next line
Tab:
Jumps to the next form eld
(ideal for multi-eld shipping/inventory
forms).
Carriage Return (CR):
Inputs "Enter" to trigger actions
(perfect for instant database search or
item adding).
In the Decoding Setting menu, you can enable or disable
specic 1D and 2D barcode symbologies (e.g., Code-128, QR
Code, PDF417) to optimize scanning speed and accuracy
according to your actual business needs.
Decode Settings
Path: Setting -> Barcode Decoding Setting
N77
Scanner App Operations
Congure the
post-scan action
What is Post-Scan Action?
This setting allows you to congure the Post-
Scan action based on the specic input
requirements of your application, automatically
appending a sufx (such as Enter or Tab) to
route data or advance the cursor without
manual screen tapping.
support@rayoungtek.com +86 153 618 429 11
Page 5
support@rayoungtek.com +86 153 618 429 11
Page 6
N77
Scanner App Operations
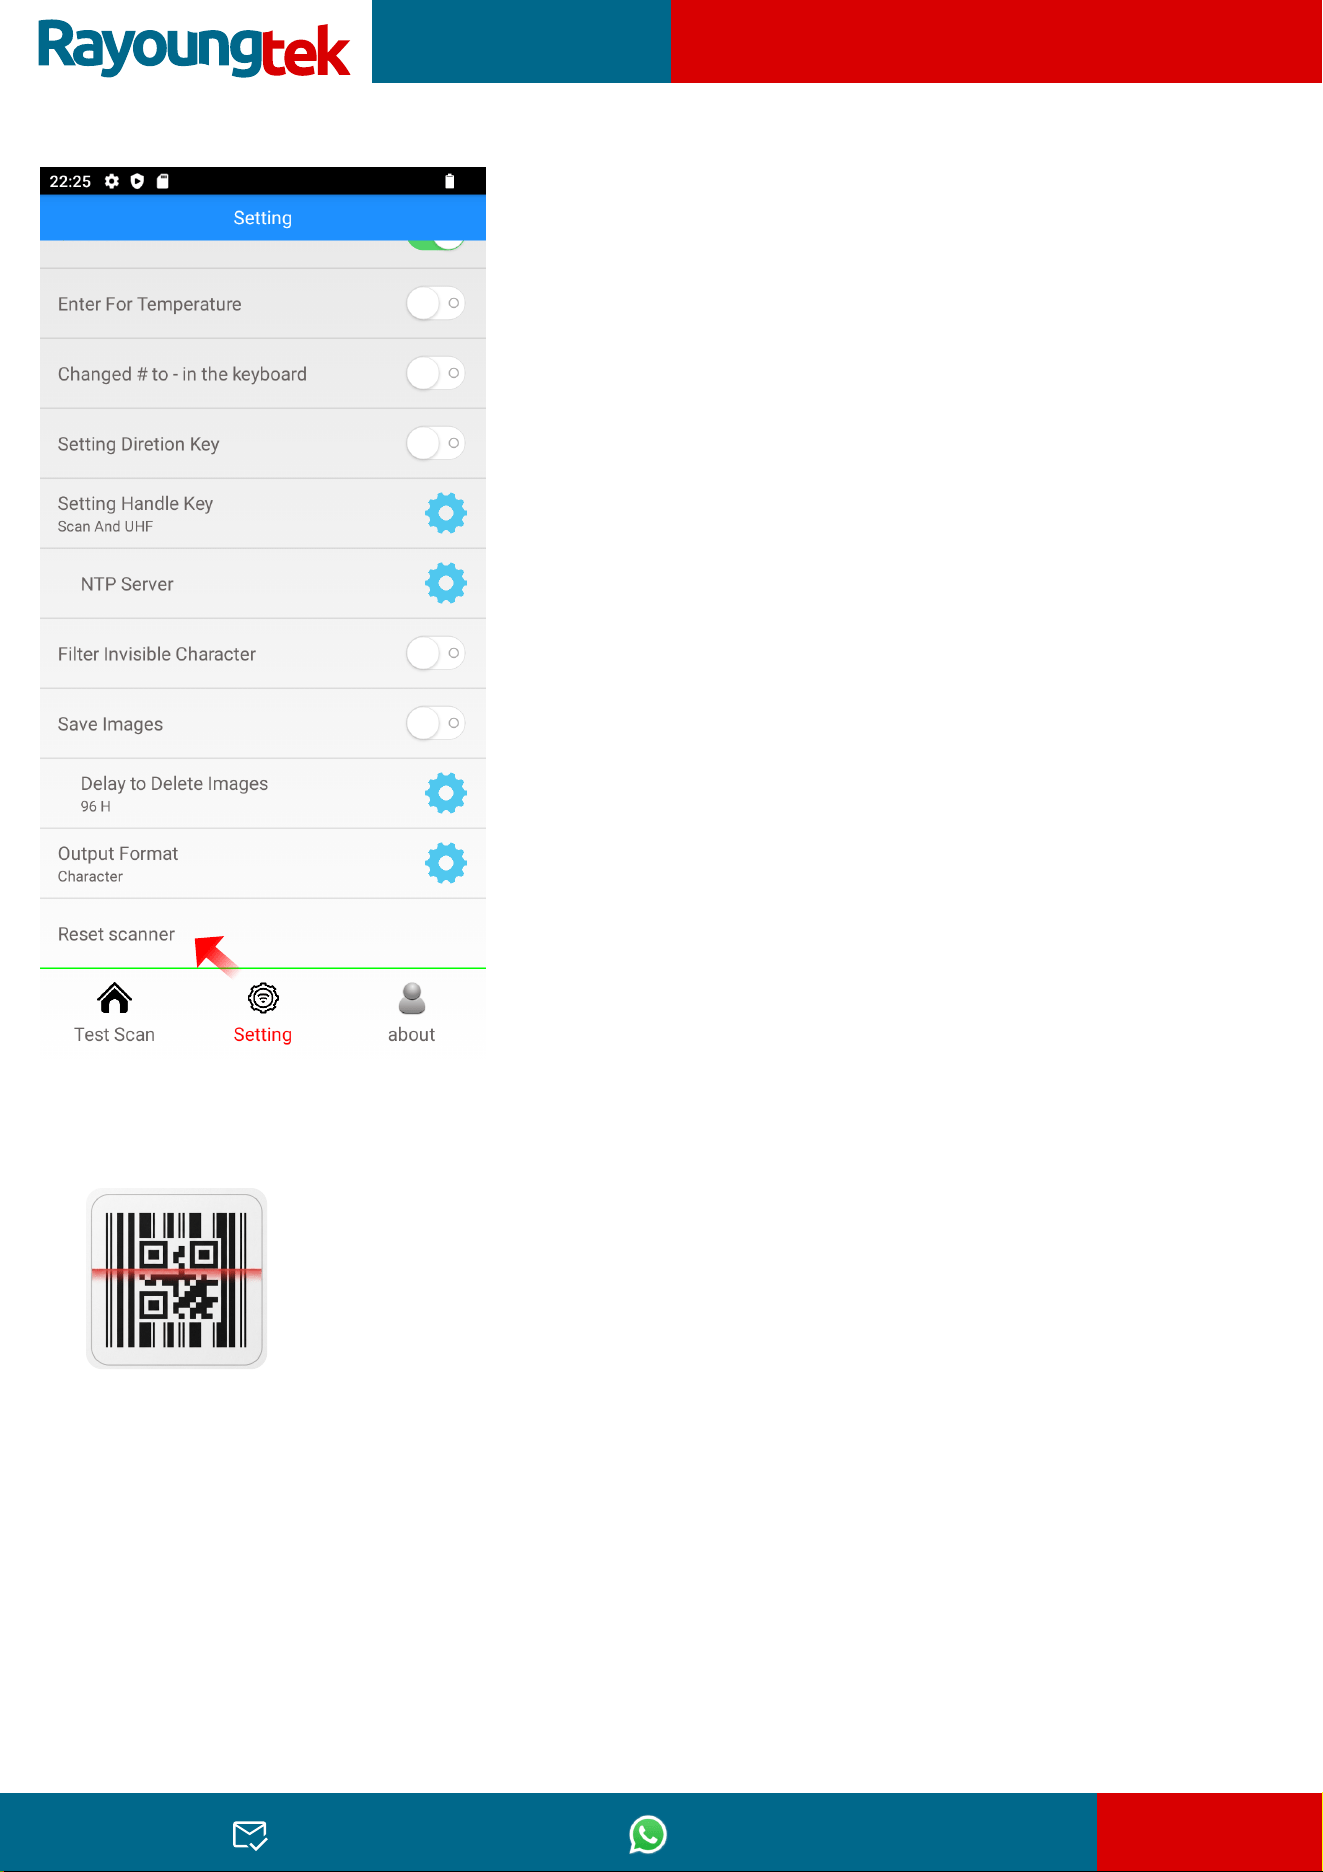
Reset Scanner
When should I reset the scanning module?
Reset the scanner if you encounter any of the
following issues:
1. No Laser Beam: Pressing the scan button fails to
emit the red light.
2. Unresponsiveness: The scanning module freezes,
hangs, or fails to decode.
3. Conguration Errors: Scanning behavior becomes
abnormal due to incorrect settings.
The Scanner App is the comprehensive control center for
the N77’s scanning engine. While this manual outlines only
the most common congurations, the app contains
extensive advanced settings.
If you encounter scanning performance issues, data format mismatches,
or software integration challenges in your daily workow, they can almost
always be resolved by adjusting the settings within this application.
N77
System Settings
The Settings app on the Android home screen enables you to
customize the system-level preferences of your N77 device.
The N77 runs on a STANDARD ANDROID OPERATING SYSTEM.
In addition to Wi-Fi and Bluetooth connectivity, the system-level Settings app
manages all general device preferences and congurations.
Through this interface, you can fully customize and control:
• Display: Adjust screen brightness, automatic sleep timeout, dark theme,
and font size.
• Sound & Vibration: Modify notication volume, system ringtones, and physical
key vibration feedback.
• Storage: Monitor internal storage usage and manage local les.
• Apps: View installed applications, monitor background running apps, and
manage app-specic permissions.
• System & Language: Congure system languages, input methods (keyboard),
date & time, and perform system backups or factory data resets.
Note: Navigating and conguring these settings is identical to using a standard
Android smartphone.
support@rayoungtek.com +86 153 618 429 11
Page 7
If you experience system anomalies, network dropouts, or software conicts, do not
rush to perform a full factory reset. The N77 running Android 12 offers three tiered
levels of reset under Settings -> System -> Reset options to solve problems safely:
Reset Wi-Fi, mobile & Bluetooth (Network Reset):
Select this rst if your Wi-Fi or Bluetooth fails to connect. Your personal data, les,
and installed apps will remain 100% safe.
Reset app preferences (App Reset):
Select this if specic apps repeatedly crash or if permissions are mismatched. No
app data or local les will be deleted.
Erase all data (Factory Reset):
Use this as a last resort for severe lag or device handover.
WARNING: This will permanently delete all les and accounts.
Back up your data before proceeding.
System Reset: Quick Reference
N77
FAQ & Troubleshooting
support@rayoungtek.com +86 153 618 429 11
Page 8
Q
A
Q
A
How can I troubleshoot if my N77 won't power on or charge?
Battery Insulation : Ensure that the yellow insulation tape/layer on the battery's metal
contacts has been completely removed.
Power Button : Press and hold the power button rmly for at least 4 seconds to check
if the screen powers on.
Deep Sleep : If the PDA has been stored for a long time without use, the battery may
have entered deep sleep. Please connect the charger and let it charge for at least 30
minutes before attempting to power it on again.
Hardware Check : Check if any charging accessories (battery, USB cable, power
adapter, or charging cradle) are physically damaged.
Please ensure you are using a USB cable that supports data transfer, not just charging.
The original USB cable included in the N77 box supports both data transfer and
charging. So please use the original cable.
Note that many third-party charging cables only support power delivery, not data transfer.
Why is data transfer between my N77 and PC not working?
Q
A
Keys Check : Press all three physical scan keys to ensure they are clicky and working
properly.
Lens & Code Status : Ensure that the scanner lens and the barcode you want to scan
are clean, unobstructed, and free of smudges or blur.
App Reset : Go to the Scanner app's setting interface, and select Reset scanner to
restore default scanner performance.
Why is my N77 unable to scan codes?
Q
A
Router Check : Ensure that the connected Wi-Fi router is working properly and has
active internet access.
Signal Range : Ensure the PDA is not too far away from the router, as low signal
strength can interrupt data transmission.
Alternative & IP Conguration : You can try installing a working Micro SIM card for
cellular mobile data, or resetting network settings. If necessary, congure a static IP
and DNS in the Wi-Fi settings matching your network topology.
If your issue remains unresolved, Please contact our support team.
We will assist you shortly.
Why can't I access the network even when my N77 is connected
to Wi-Fi?