FT107G 05/2024
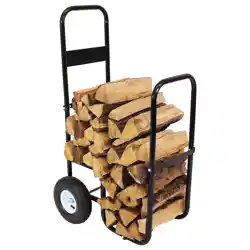
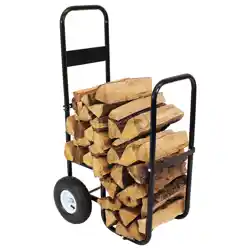
STEEL FIREWOOD CART
FSN-2081
Review all assembly and care information before using this product. Save this manual for future reference.
Assemble components on a soft, clean surface to avoid damaging the nish.
Page 1 / 3
Thank you for choosing Sunnydaze Decor. We stand behind our brand and the quality of the items we sell.
Replacement parts or products will be sent at our discretion within the 1-year warranty period. Proof of purchase, with
the date of purchase as well as photos of the merchandise defect, must be provided. Photos are used to determine
the cause of defects and for future quality control. Register your warranty at https://tiny.cc/SunnydazeWarranty
If you have any questions, comments or concerns, feel free to contact us by phone at 833-982-1977, by email:
customerservice@sunnydazedecor.com, or via our contact us page at https://tiny.cc/SunnydazeContact
Purchase Date: / / Order/Customer Reference Number:
CHOKING HAZARD — This item contains small
parts that can be swallowed. Keep children and pets
away during assembly.
WARNING
Inspect packaging to ensure all
parts are accounted for before
disposing of packing materials.
Save the packing slip.
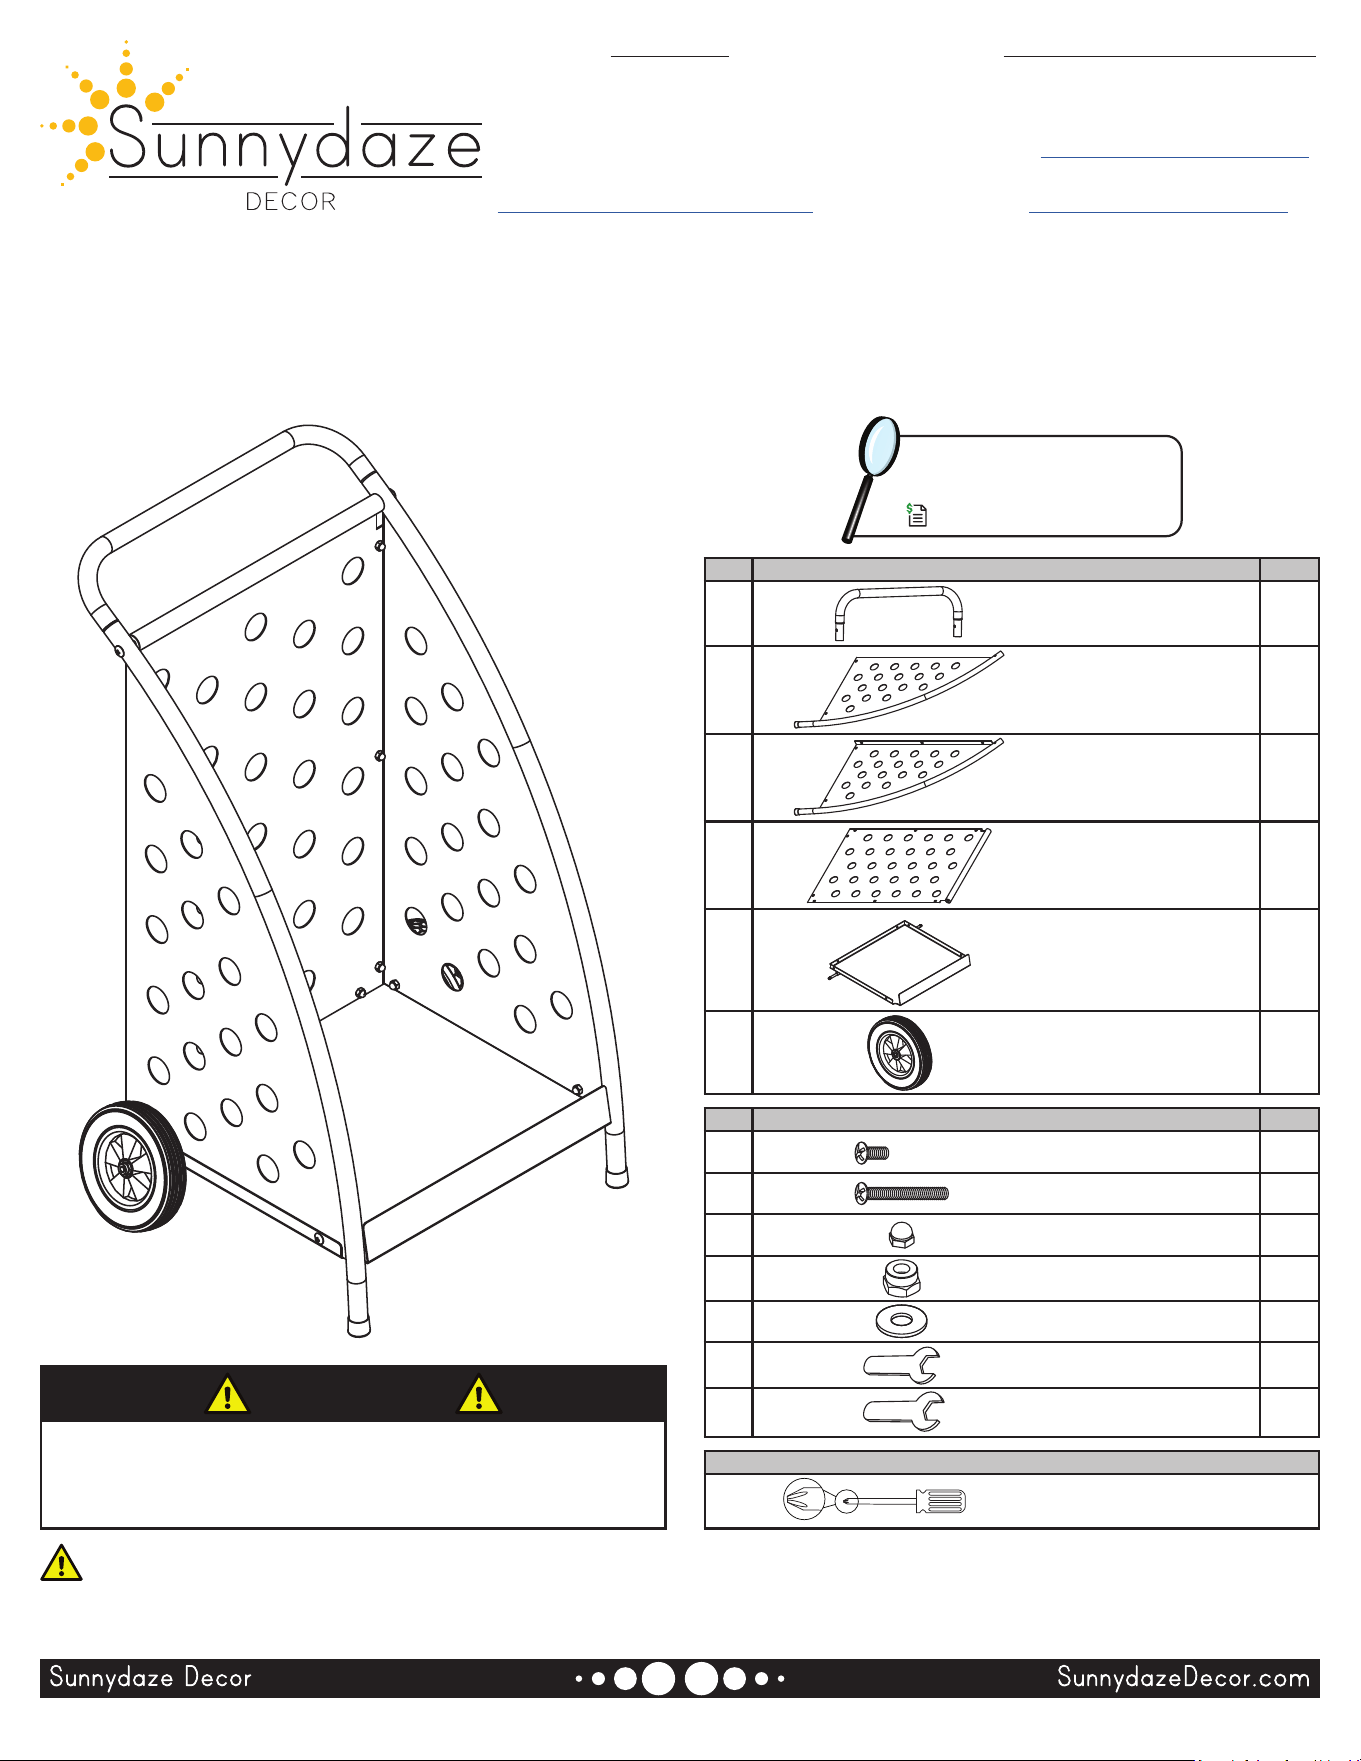
No. Parts Qty.
A Handle 1
B Left Panel 1
C Right Panel 1
D Back Panel 1
E Bottom Panel 1
F Wheel 2
No. Hardware Qty.
1 M6x10mm Bolt 12
2 M6x30mm Bolt 2
3
M6 Cap Nut 12
4 M8 Self-Locking Nut 2
5 M8 Washer 2
6 M6 Spanner 1
7 M8 Spanner 1
Tools Required
(not included)
Phillips Screwdriver
WARNING:
Manufacturer and seller expressly disclaim any and all liability from personal injury, property damage or loss, whether direct or
indirect, or incidental, resulting from the incorrect attachment, improper use, inadequate maintenance, or neglect of this product.
FT107G 05/2024 Page 2 / 3
ASSEMBLY
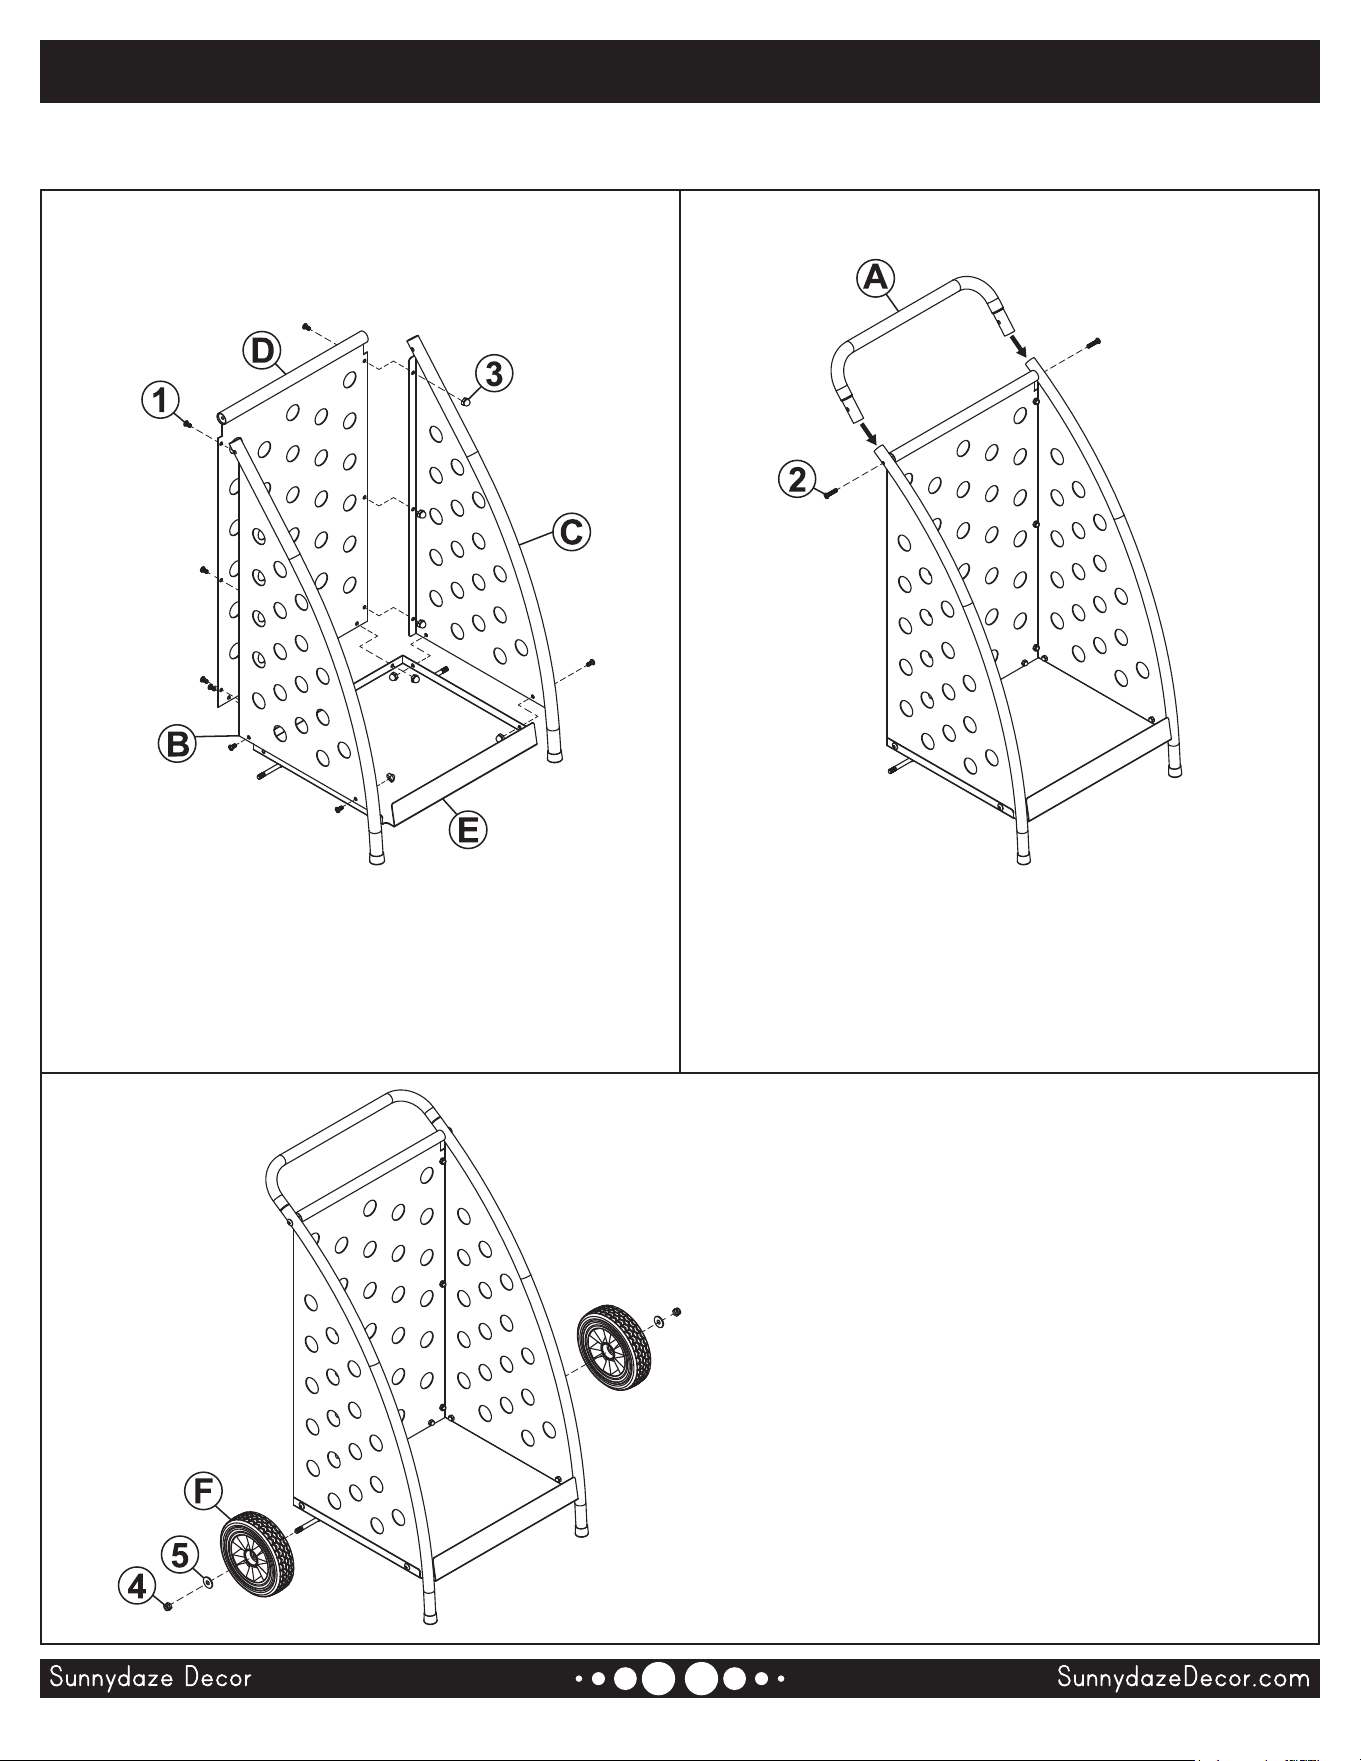
STEP 1
B: 1
C: 1
D: 1
E: 1
1: 12
3: 12
STEP 2
A: 2
2: 2
Align Back Panel (D), Left Panel (B), and Right
Panel (C), on the inside of Bottom Panel (D) and
loosely secure all components using M6x10mm
Bolts (1) and Cap Nuts (3).
Do not fully tighten hardware until step 2 is complete.
Insert Handle (A) into the side panels and secure
using M6x30mm Bolts (2).
Fully tighten all bolts.
Review all steps and understand assembly before beginning.
Do not fully tighten hardware until instructed to do so.
NOTE: Install panels so the mounting
lip(s) are on the outside of the unit.
STEP 3
F: 2
4: 2
5: 2
Place Wheels (F) and Washers (5) on the axel.
Secure each wheel using Self-Locking Nuts (4).
IMPORTANT: Tools are required to fully tighten
self-locking nuts, failure to properly tighten the
lock nuts may result in product malfunction or
personal injury.
FT107G 05/2024 Page 3 / 3
• Do not overload the log cart.
• Ensure fittings are tight before use. Periodically check and tighten hardware as necessary.
• Protect the unit from outdoor elements with a cover. Cover not included.
• Do not allow children to play with, on, or around the log rack.
• Keep unit a safe distance from heat sources such as, but not limited to, fire pits and fireplaces.
• Never transport or store flammable liquids (gasoline, kerosene, propane, etc.) on this unit.
SAFETY STATEMENTS & WARNINGS
Any modication to the product or failure to follow recommended care will void the product warranty.
WARNING!
Manufacturer and seller expressly disclaim any and all liability from personal injury, property damage
or loss, whether direct or indirect, or incidental, resulting from the incorrect attachment, improper use,
inadequate maintenance, or neglect of this product.
If you experience issues with assembly or the product was damaged during shipping,
please contact our customer service team through one of the methods mentioned at the top of page 1.
Please have the item number and order information ready to expedite response time.
Safety Precautions & Care
1. Do not exceed the weight or log capacity of the cart. The height of stacked wood must not exceed the height
of the side panels.
2. Load the cart evenly, ensuring the heaviest part of the load is on the bottom of the cart. If the load in the cart
is unbalanced or the load is too high it could possibly tip and cause injury and/or product damage.
3. Ensure the load is stable before attempting to move the cart. Wood may shift during transport; if the wood
begins to shift, stop immediately and stabilize the load.
4. For best results, only use the cart on a at surface.
5. Do not use the cart over rough ground, over curbs, stairs, etc. Use ramps whenever possible.
6. Take extra time and care when transporting wide loads.
7. NEVER allow people to ride on the cart.
8. NEVER park the cart on an incline. If parked on a slight incline, the wheels must be chocked.
9. NEVER alter the construction of the cart in any way, or use it for anything other than its intended purpose.
10. Use a soft cloth to wipe clean. Store in a clean, dry place when not in use.
11. To protect the integrity of the item, cover when not in use. Cover not included.
12. The powder coating on this unit is tough and durable, however, scratches are inevitable (even under
normal use). To avoid rust, keep scratched areas dry. Scratches can be repaired with a rust-resistant paint
(not included).
WARNING: THE ONE-YEAR WARRANTY DOES NOT COVER DAMAGES OR DEFECTS CAUSED BY THE APPLICATION OF
CHEMICAL TREATMENTS, PROTECTIVE COATINGS, TOUCH-UP PAINT, OR CLEANING PRODUCTS.