A32889301
13
22
25
26
27
28
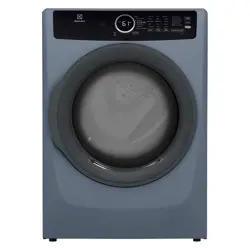
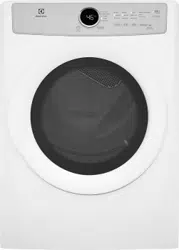
ELVW7405AW = 400 Series
SAVE THESE INSTRUCTIONS
7
7
INSTRUCTIONS
INSTRUCTIONS
WARNING
FIRE OR EXPLOSION HAZARD
Failure to follow safety warnings exactly could result
in serious injury, death, or property damage.
Do not store or use gasoline or other
ammable
vapors and liquids in the vicinity of this or any other
appliance.
WHAT TO DO IF YOU SMELL GAS:
Do not try to light any appliance.
Do not touch any electrical switch; Do not use
any phone in your building.
• Clear the room, building or area of all
occupants.
• Immediately call your gas supplier from a
neighbor’s phone. Follow the gas supplier’s
instructions.
• If you cannot reach your gas supplier, call the
re department.
Installation and service must be performed by
a quali
ed installer, service agency or the gas
supplier.
DANGER
If using Liquid Propane (LP), STOP and install the LP
kit before operating your gas dryer.
dryer
Risk of Suffocation and Injury from
Entrapment:
dryer
Do not repair or replace any part of the
appliance or attempt any servicing unless
specifically recommended in the user-
maintenance instructions or in published
user-repair instructions that you understand
and have the skills to carry out.
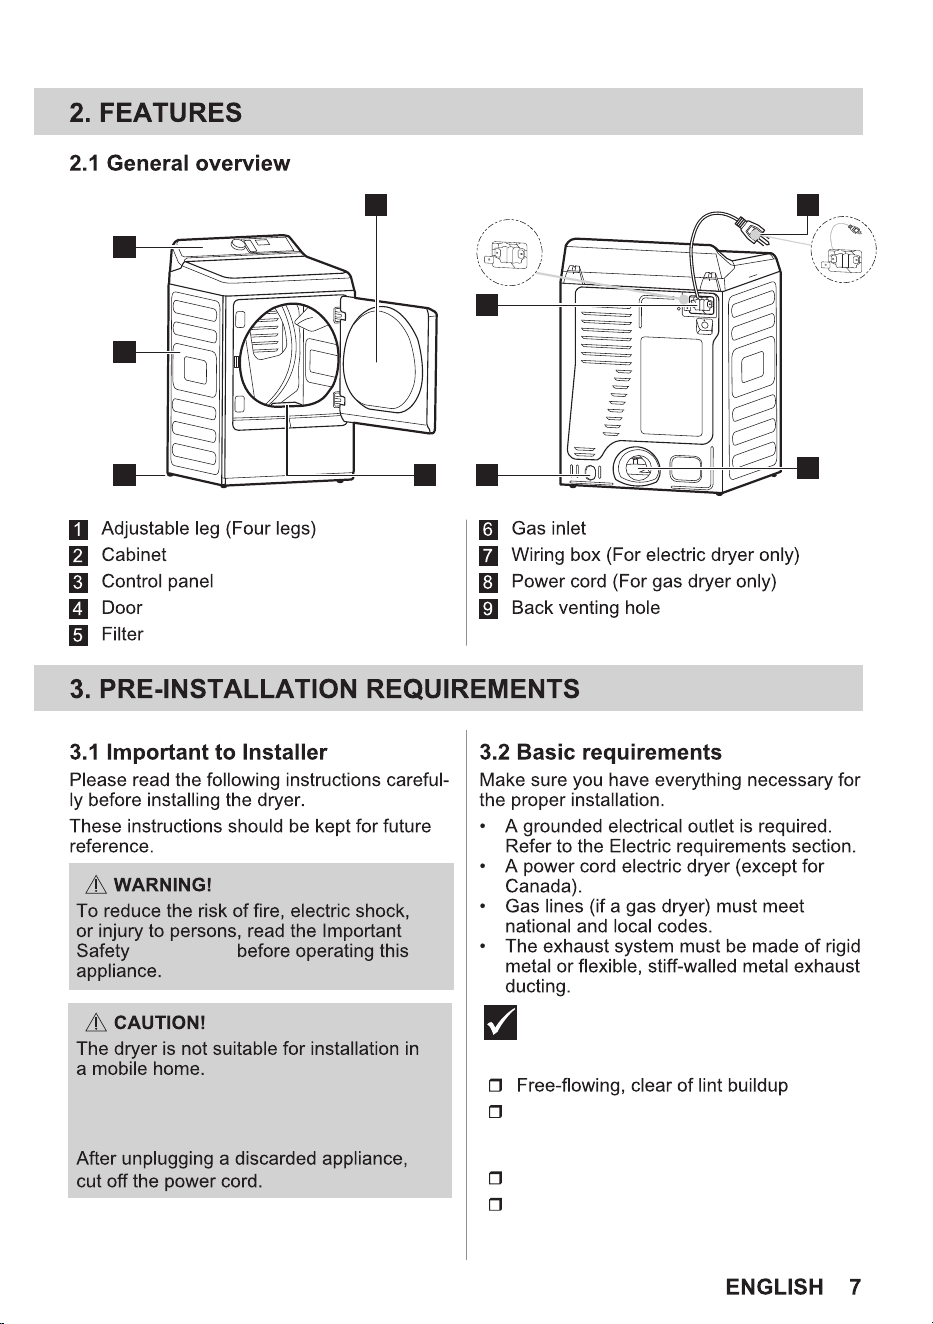
1
2
3
4
5
6
7
8
9
(For gas dryer only)
Information
Installation Checklist
Exhaust Venting
4 inch (102 mm) rigid metal or
semi-rigid metal transition ducting
of minimal length and turns
No foil or plastic venting material
Approved vent hood exhausted to
outdoors
Remove the door from all discarded and
stored appliances to avoid the danger of
a child being trapped and suffocating.
Leveling
to-back
Cabinet is sitting solid on all corners
Gas Supply (Gas Dryer)
Conversion kit for LP GAS system
# 5304541016 (not included) and
must be purchased separately
Gas supply turned on
No leaks present at all connections -
Water Hookup (Select Models)
Inspect hoses for proper placement of
Water supply is turned on
Check for leaks
Steam model dryers require use of
ASSEMBLY HOSE Kit #5304495002
(not included) and must be purchased
separately.
240v Electric Supply
(Electric Dryer)
Approved NEMA 10-30 or 14-30 service
block
Approved strain relief installed
Terminal access cover installed before
initial operation
Door Reversal
manual
Test hinge and latch for function
Electrical Power
Dryer plugged in
Final Checks
Installation Instructions and Use & Care
Manual read thoroughly
cycle starts
Registration card sent in
3.4
Exhaust Requirements
Exceeding the length of duct pipe or number
LENGTH” charts can cause an accumulation
of lint in the exhaust system. Plugging the
increase drying times.
FIRE HAZARD
Use a 4 inch (10.2 cm) diameter rigid or semi-
rigid aluminum or galvanized steel duct.
is
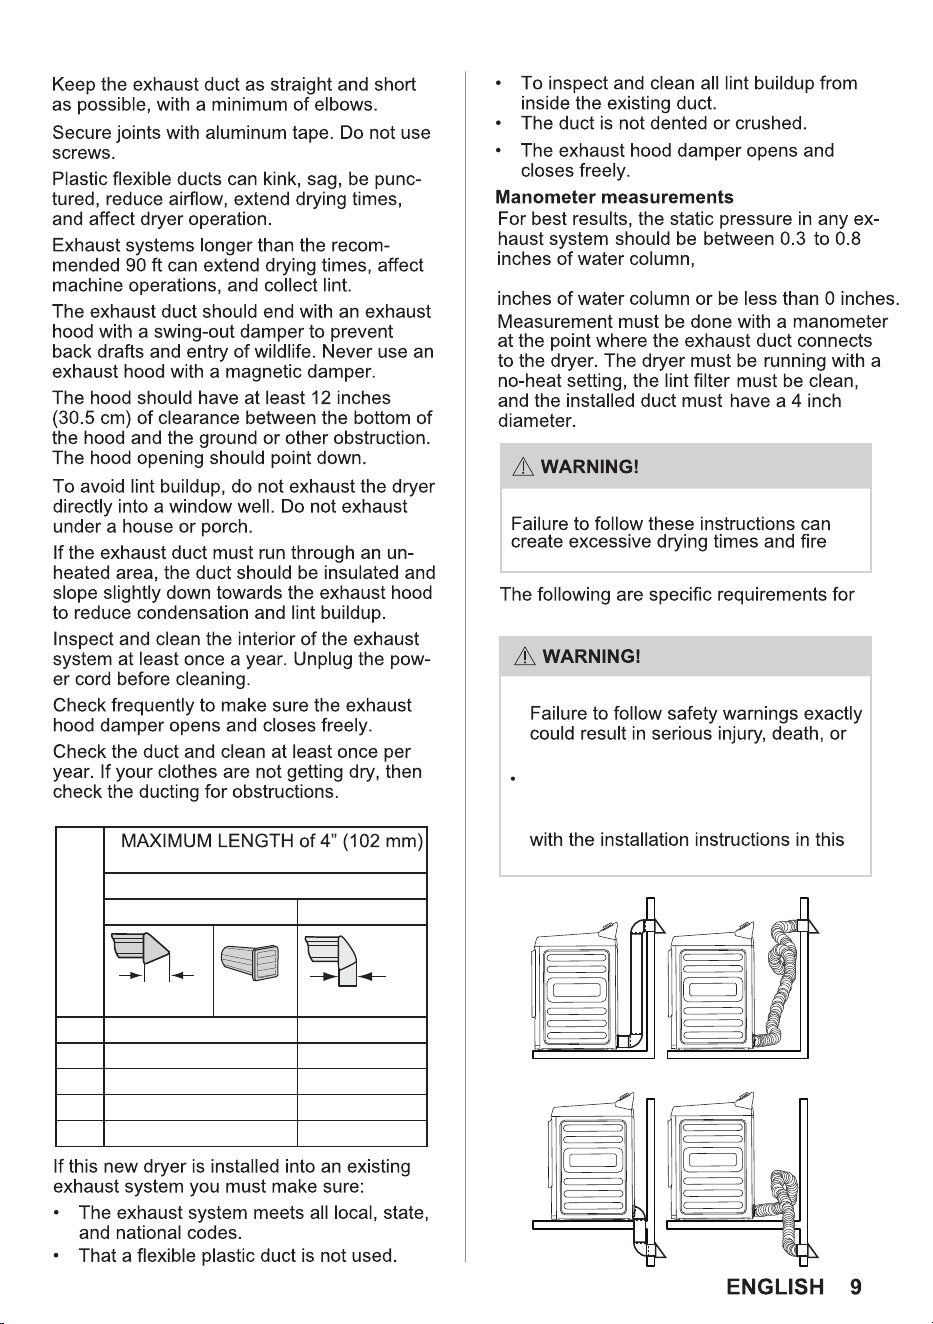
The static pressure in
any exhaust system must not exceed 0.83
Max. Number of 90°
turns
Rigid Metal Duct
VENT HOOD TYPE
(Preferred)
4” (10.2 cm) louvered 2.5” (6.35 cm)
0 115 ft. (35 m) 105 ft. (32 m)
1 105 ft. (32 m) 95 ft. (29 m)
2 95 ft. (29 m) 85 ft. (26 m)
3 85 ft. (26 m) 75 ft. (23 m)
4 75 ft. (23 m) 65 ft. (20 m)
proper and safe operation of your dryer.
FIRE HAZARD
FIRE HAZARD
•
property damage.
Do not install a booster fan in dryer
exhaust duct.
• Install all clothes dryers in accordance
manual.
hazards.
Correct Incorrect
Correct Incorrect
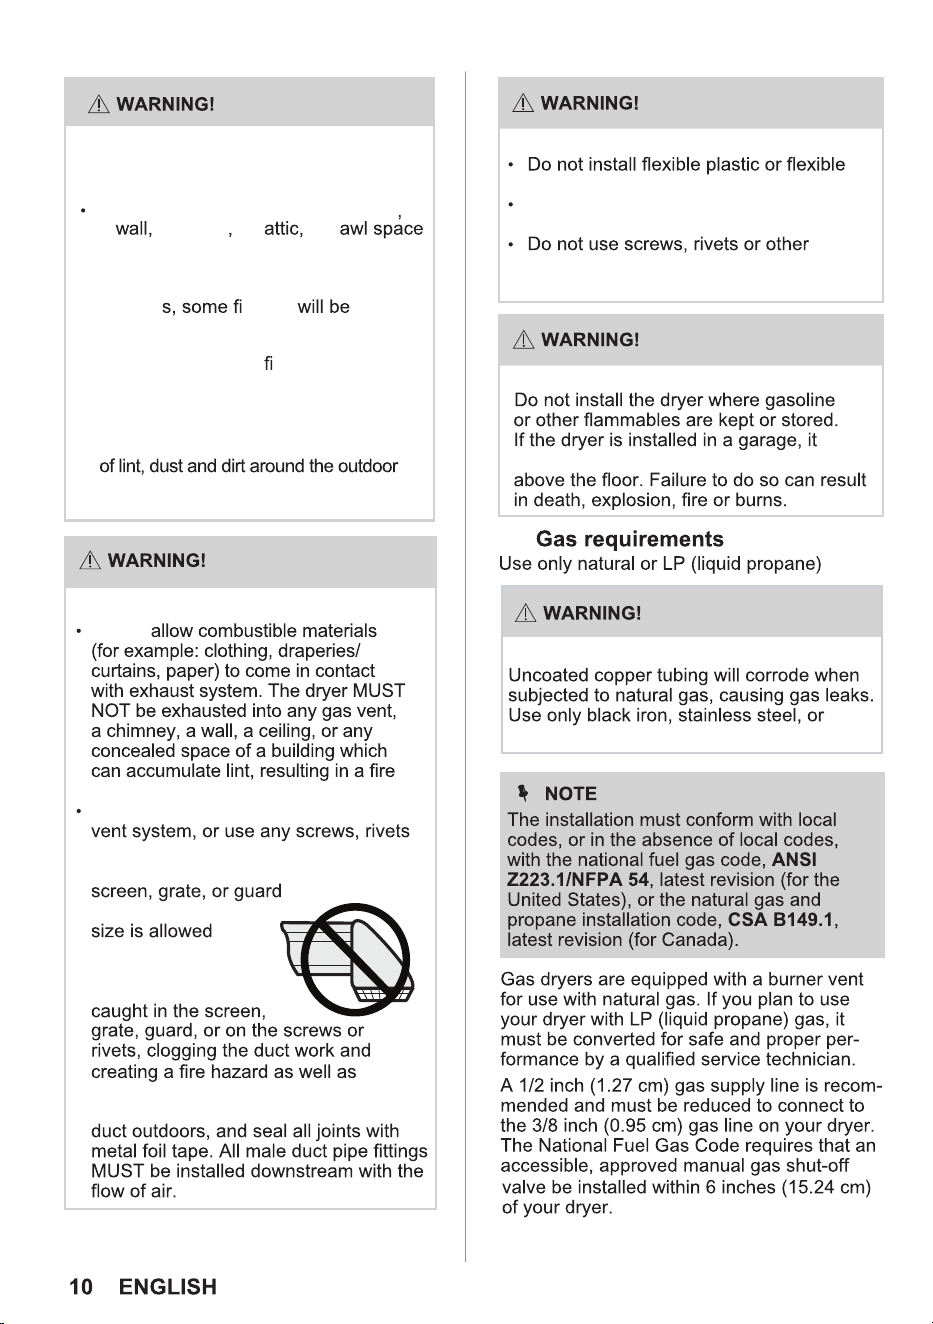
FIRE HAZARD
• A clothes dryer must be exhausted
outdoors.
Do not exhaust dryer into a chimney
a a ceiling an a cr
or any concealed space of a building.
•
A clothes dryer produces combustible
lint . If the dryer is not exhausted
outdoor
ne lint expelled
into the laundry area.
An accumulation
of lint in any area of the home can
create a health and
re hazard.
•
The dryer must be connected to an
exhaust outdoors.
•
FIRE HAZARD
Do not
hazard.
FIRE HAZARD
must be a minimum of 18 inches (45.7cm)
FIRE HAZARD
foil venting material.
Do not exceed 8 ft. (2.4 m) duct length
if installing semi-rigid venting.
fasteners that extend into the duct to
assemble the exhaust system.
3.5
EXPLOSION HAZARD
plastic-coated brass piping for gas supply.
Do not screen the exhaust ends of the
or other fasteners that extend into the
duct to assemble the exhaust system.No
of any mesh
to cover the
exhaust opening.
Lint can become
increasing drying times. Use an
approved vent hood to terminate the
Regularly inspect the outdoor exhaust
opening and remove any accumulation
exhaust opening and in the adjacent
surrounding areas.
Because of potentially inconsistent voltage
generators or any other generator other
than the local utility company is not
recommended.
3.6
3.7
The electric dryer has been designed and
certified to operate at both 240V and 208V.
normal and expected behavior and applies to
all drying cycles.
Clothes dryer installation must be performed
by a qualified installer. Install the clothes dryer
according to the manufacturer's instructions
and local codes.
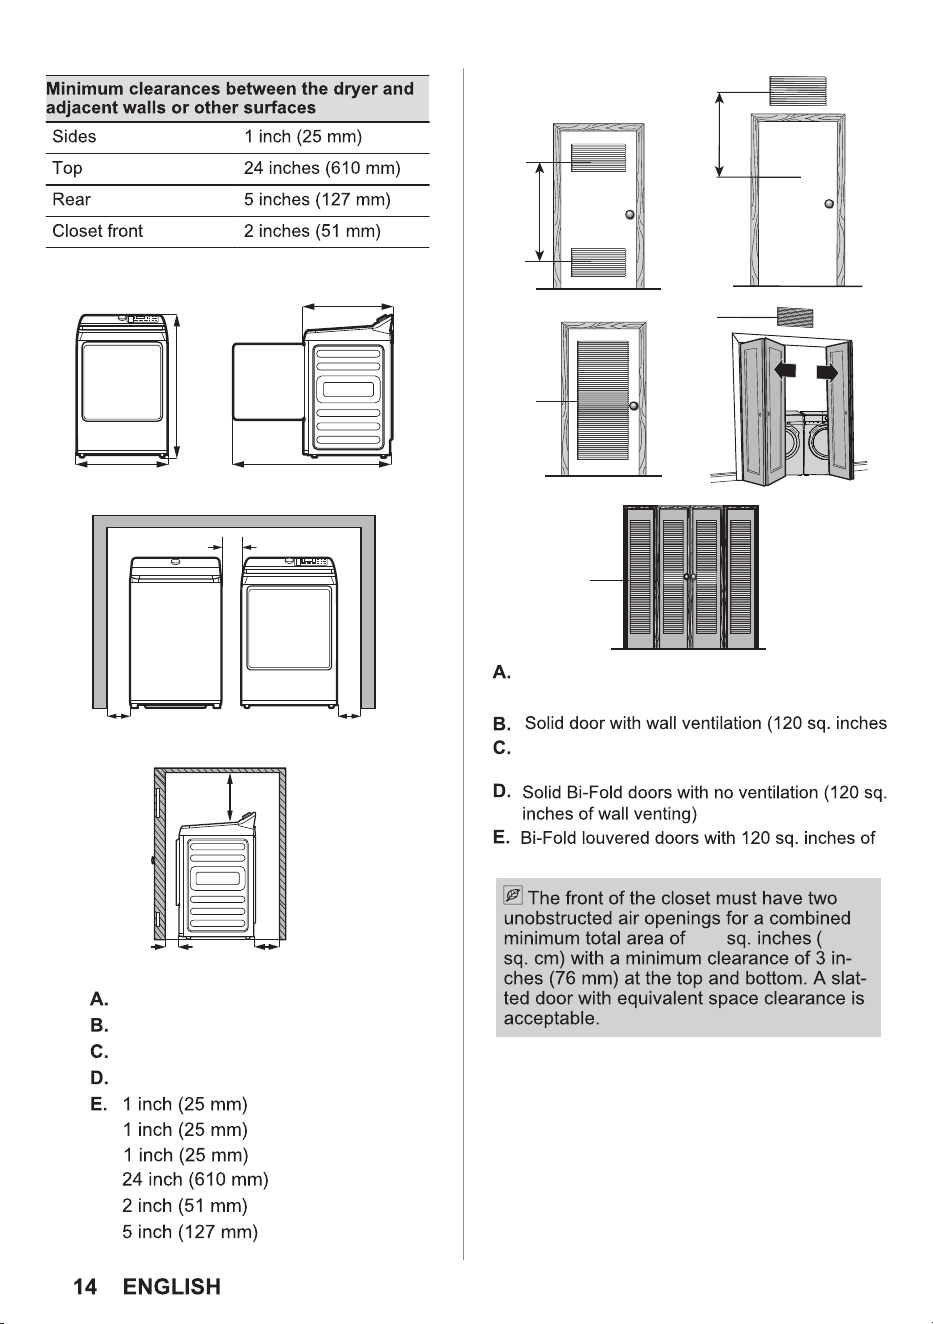
A B C D E F G H
4.5
may be required to install or move the
appliance to avoid the risk of injury.
Do not modify or alter the construction of the
or any other part of the appliance.
Do not install or use a damaged appliance to
Tools required
A
B
D
C
E
G
F
JI
H
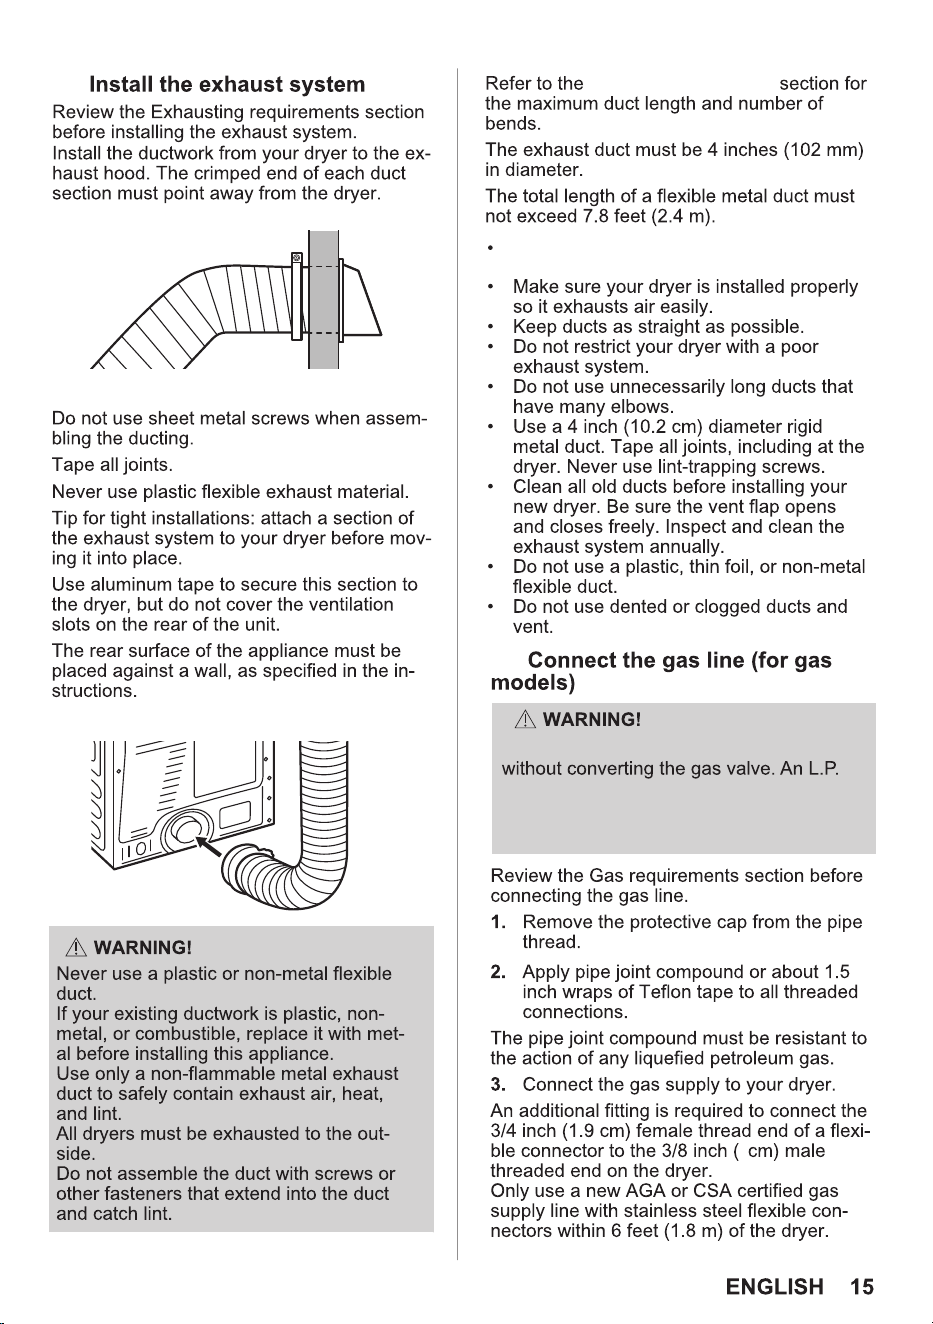
26.37 inch (670 mm)
49.29 inch (1252 mm)
28.07 inch (713 mm)
42.83 inch (1088 mm)
F.
G.
H.
I.
J.
C
D
E
120 sq. inches equally divided split vent door
(60 sq. inches each)
)
Louvered door (120 sq. inches minimum
louvered opening)
ventilation
120
774
A
B
4.6
Exhaust requirements
4.7
Do not connect the dryer to L.P. gas service
conversion kit PN# PCK4200 (not included)
must be installed by a qualified gas
technician.
The exhaust duct shall be securely fastened
to the structure.
1
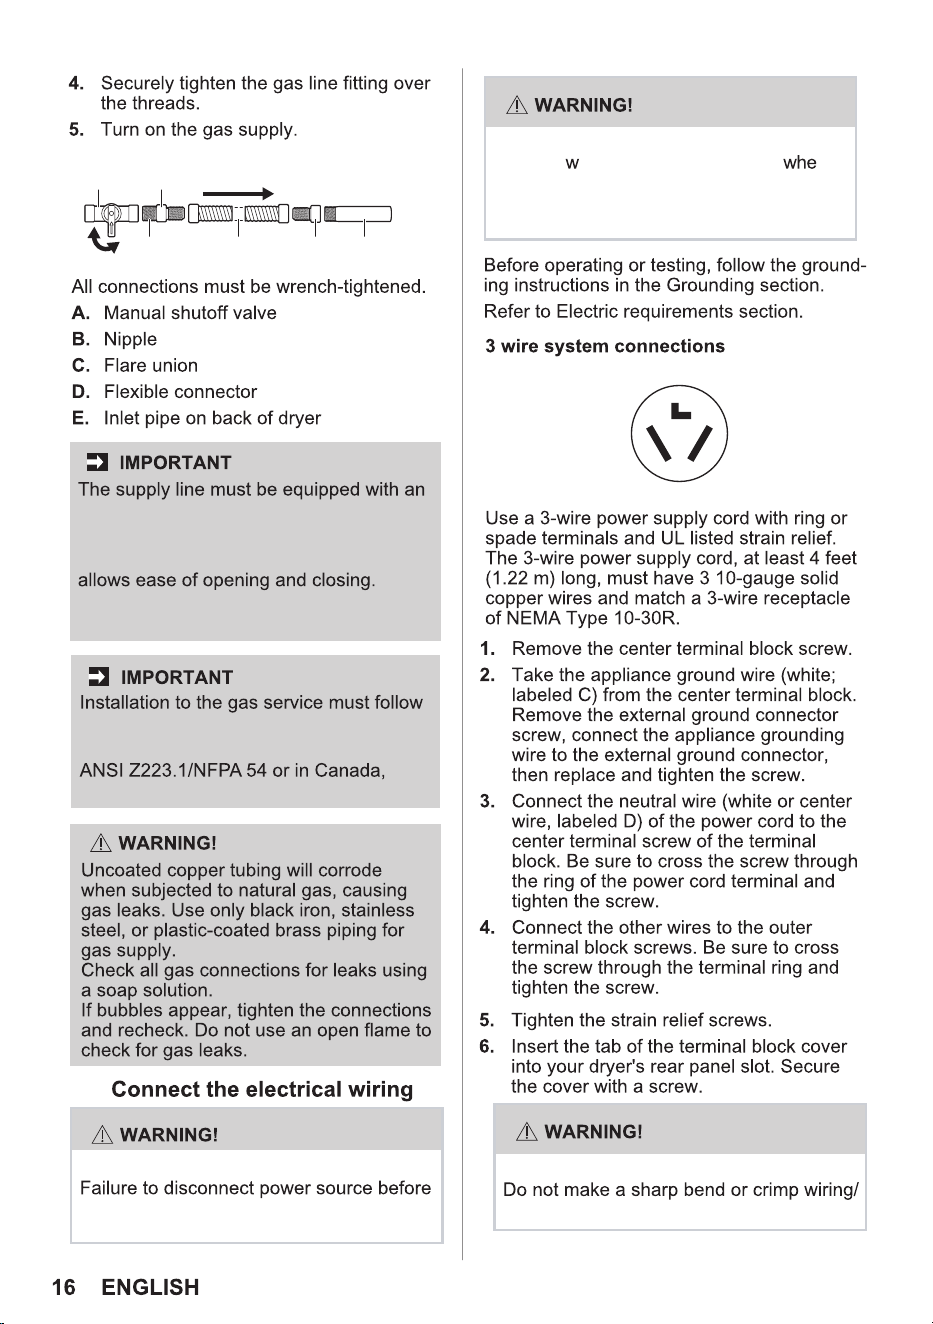
B
C
D C E
A
GAS FLOW
4.8
local codes and ordinances and the latest
edition of the National Fuel Gas Code
CSA B149.1.
approved manual shutoff valve. This valve
should be located in the same room as
the dryer and should be in a location that
Do not block access to the gas shutoff
valve.
ELECTRICAL SHOCK HAZARD
servicing could result in personal injury or
ELECTRICAL HAZARD
Label all
ires prior to disconnection n
servicing controls. Wiring errors can cause
improper and dangerous operation. Verify
proper operation after servicing.
conductor at connections.
ELECTRICAL SHOCK HAZARD
even death.
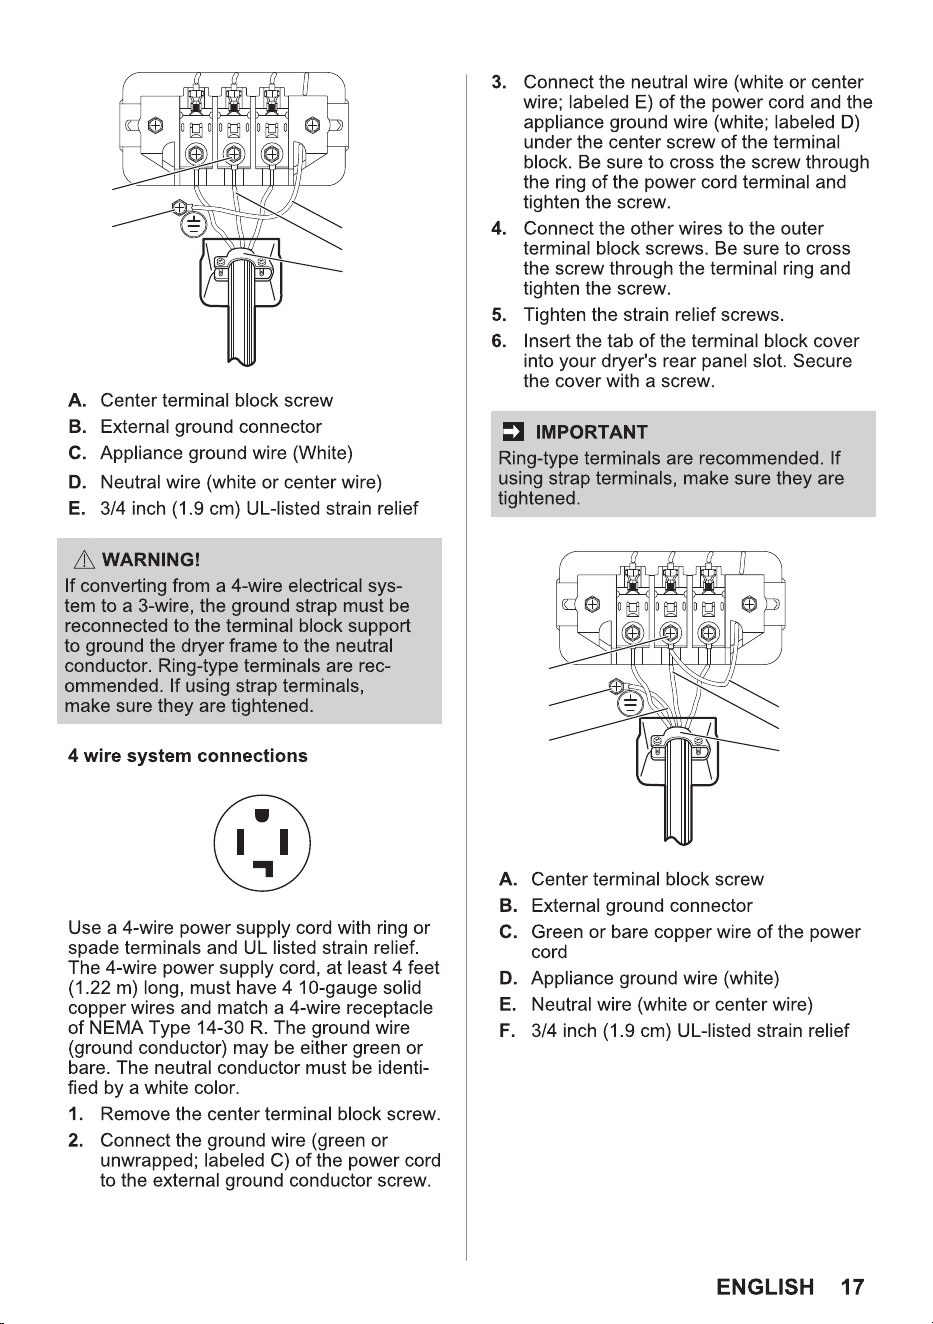
A
B
C
D
E
F
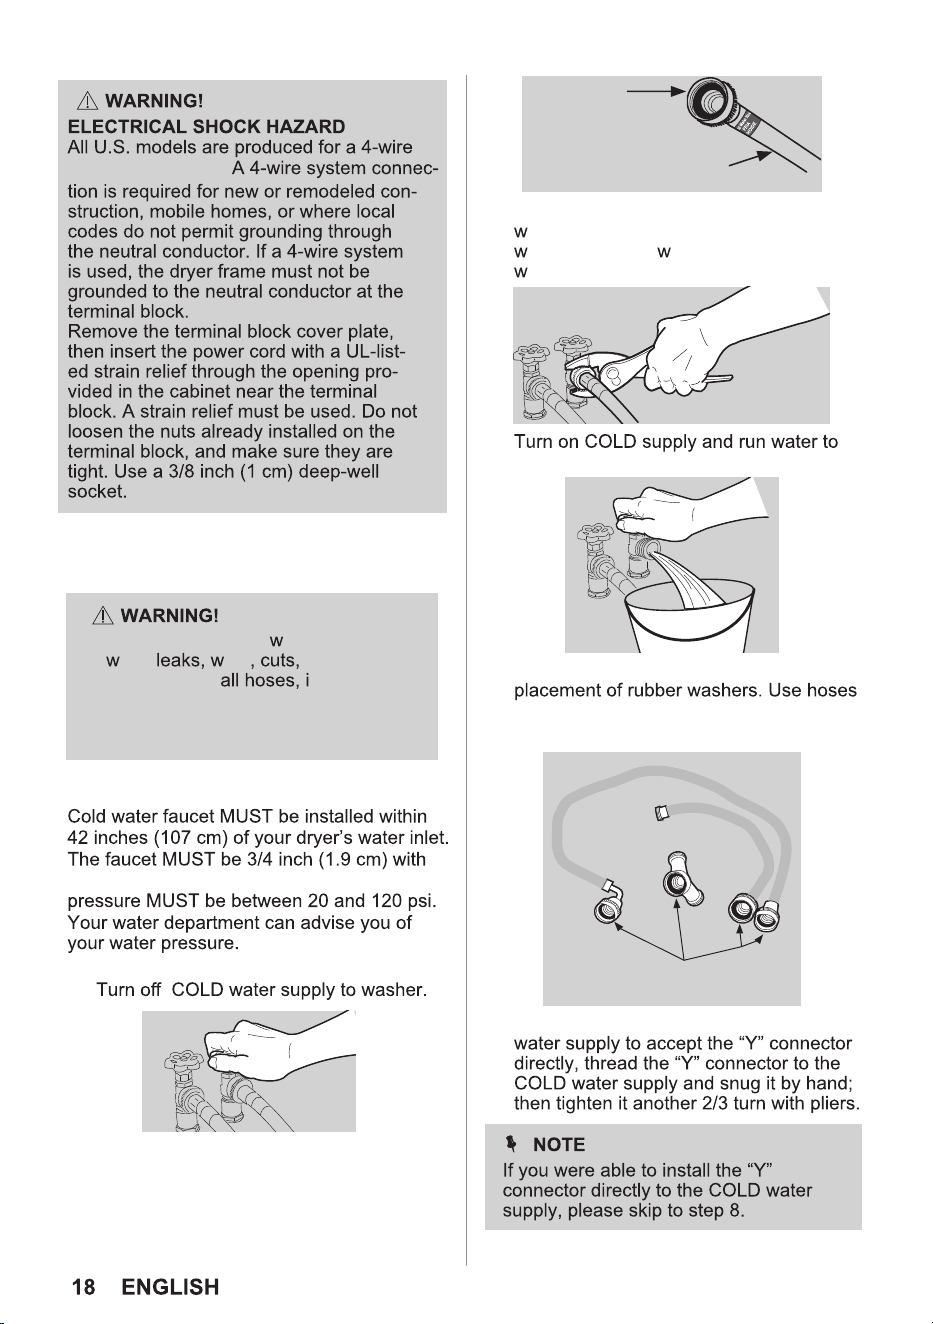
A
B C
D
E
4.9 Connecting the water
(steam models only)
Water supply requirements
threading for laundry hose connection. Water
1.
system connection.
Periodically inspect all ater inlet hoses
for
ater ear corrosion and
bulges. Replace
f any sign of
the above is visible. All hoses should be
replaced every 5 years to reduce the risk
of hose failures.
2. Remove COLD inlet hose from COLD
ater supply and inspect for rubber
asher. Replace asher if it is torn or
orn out .
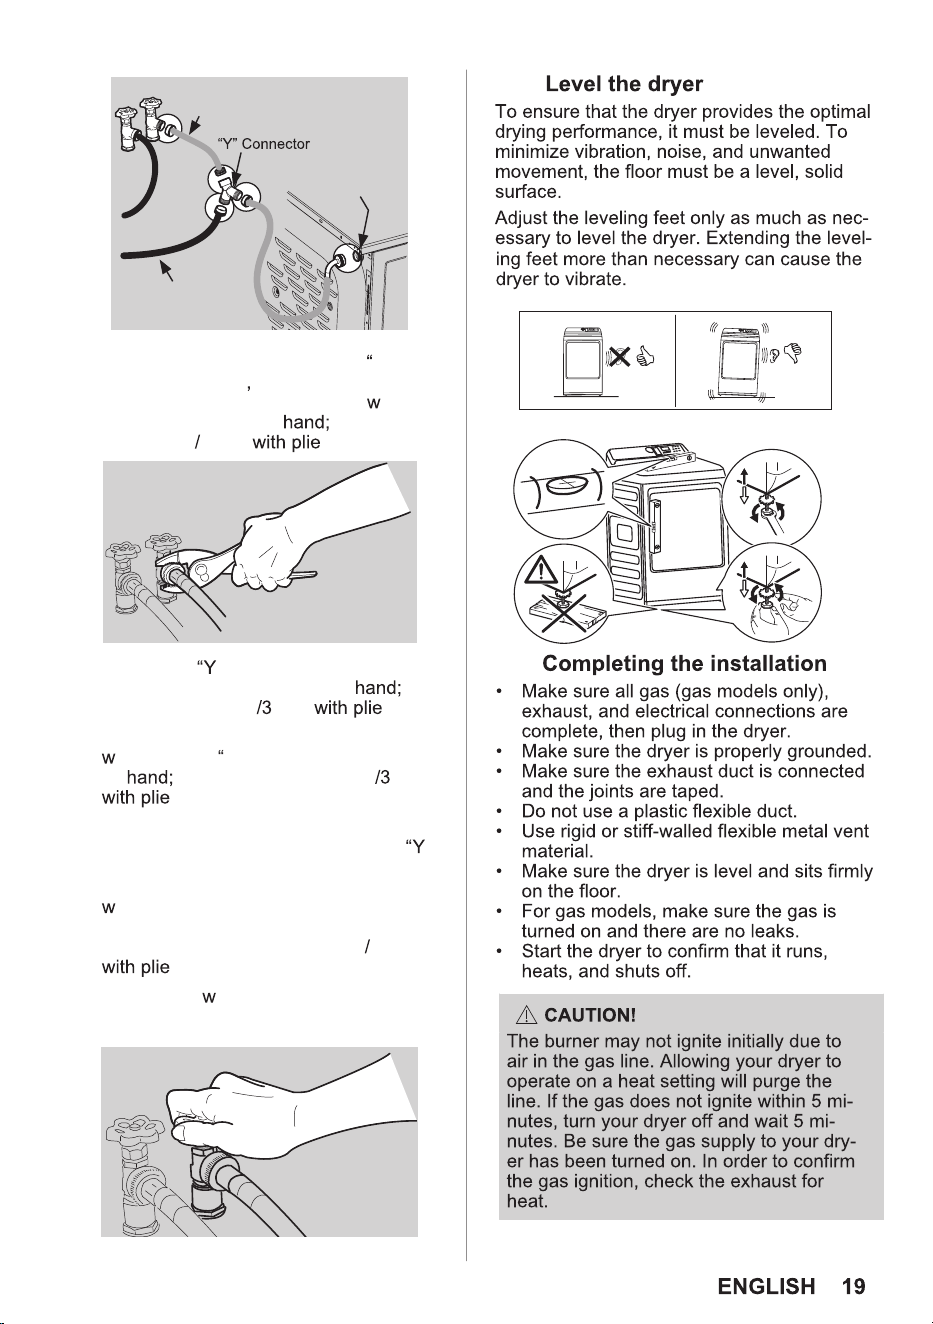
Rubber Washers
MUST BE PRESENT
4. Inspect hose couplings for proper
from ASSEMBLY HOSE KIT# 5304495002
(not included).
3.
clear any contaminants in the line.
Cold Inlet Hose
to Washer
Rubber Washer
Must be Present
and Undamaged
5. If your installation has room for the COLD
6. If there is not room to install the Y”
connector directly thread the short
extension hose on to the COLD
ater
supply and snug it by
then tighten
it another 2
3 turn rs.
7. Thread the ” connector to the short
extension hose and snug it by
then
tighten it another 2
turn rs.
8. Connect the COLD inlet hose for the
asher to the Y” connector and snug it
by
then tighten it another 2 turn
rs.
9. Connect the straight end of the long hose
from the kit to the other outlet on the
”
connector and snug it by hand. Connect
the hose’s 90° coupling to the brass
ater inlet on the back of the dryer and
snug it by hand. Tighten each connection
of the dryer inlet hose another 2 3 turn
rs.
10. Turn on the
ater and check for leaks at
all connections.
Short Hose
Water Inlet
on Dryer
Cold Water Supply
Hose to Washer
4.10
4.11
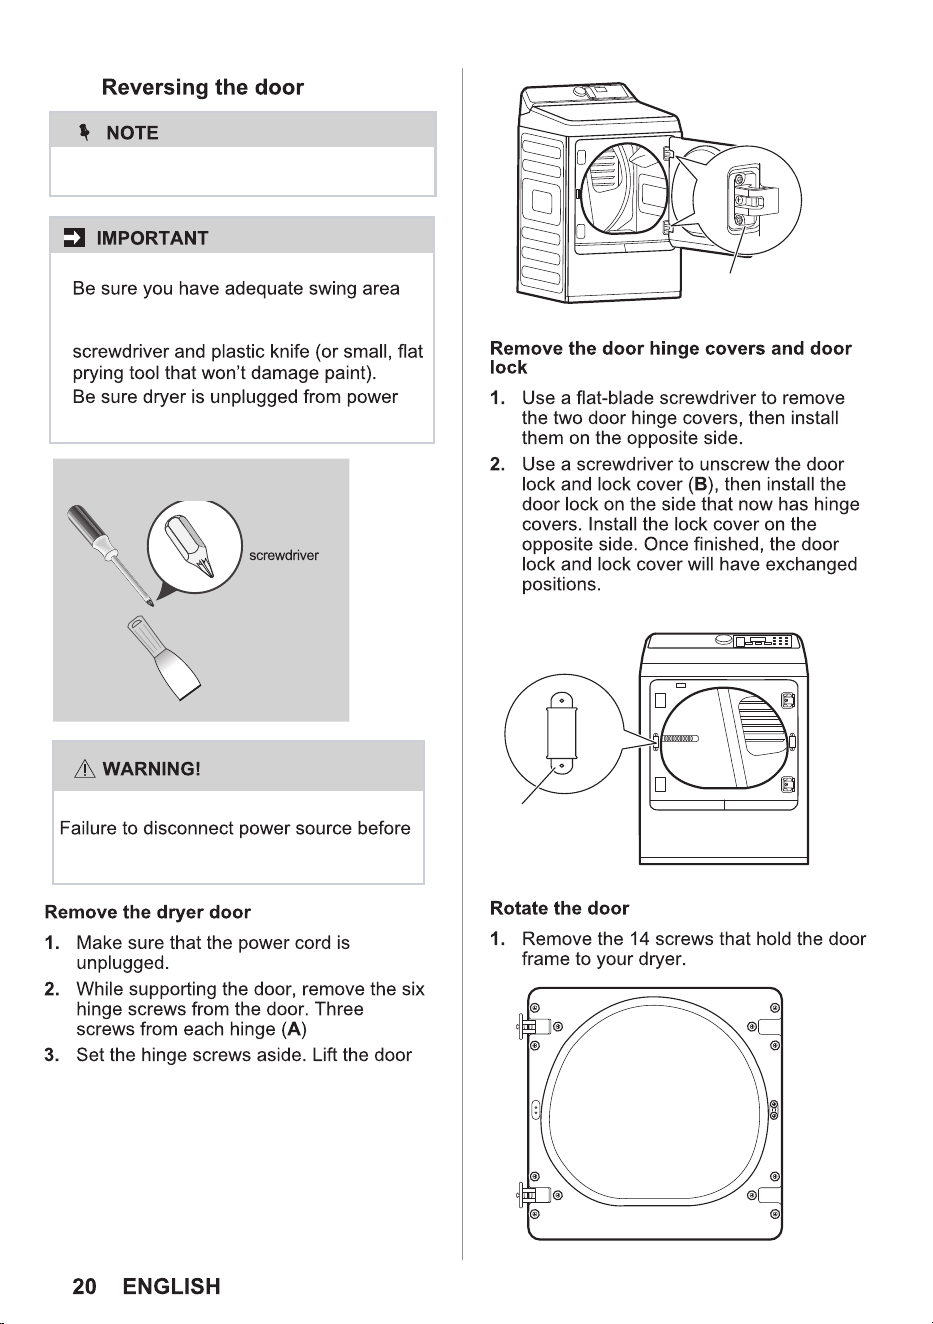
4.12
Door reversibility is available on all dryer
models.
Plastic knife
Tools needed for reversal:
ELECTRICAL SHOCK HAZARD
even death.
BEFORE YOU REVERSE YOUR DRYER DOOR:
before reversing door.
Gather your tools - including a Phillips
source!
1.
2.
3.
A
B
Phillips
to remove it and place it on a protected
surface.
servicing could result in personal injury or
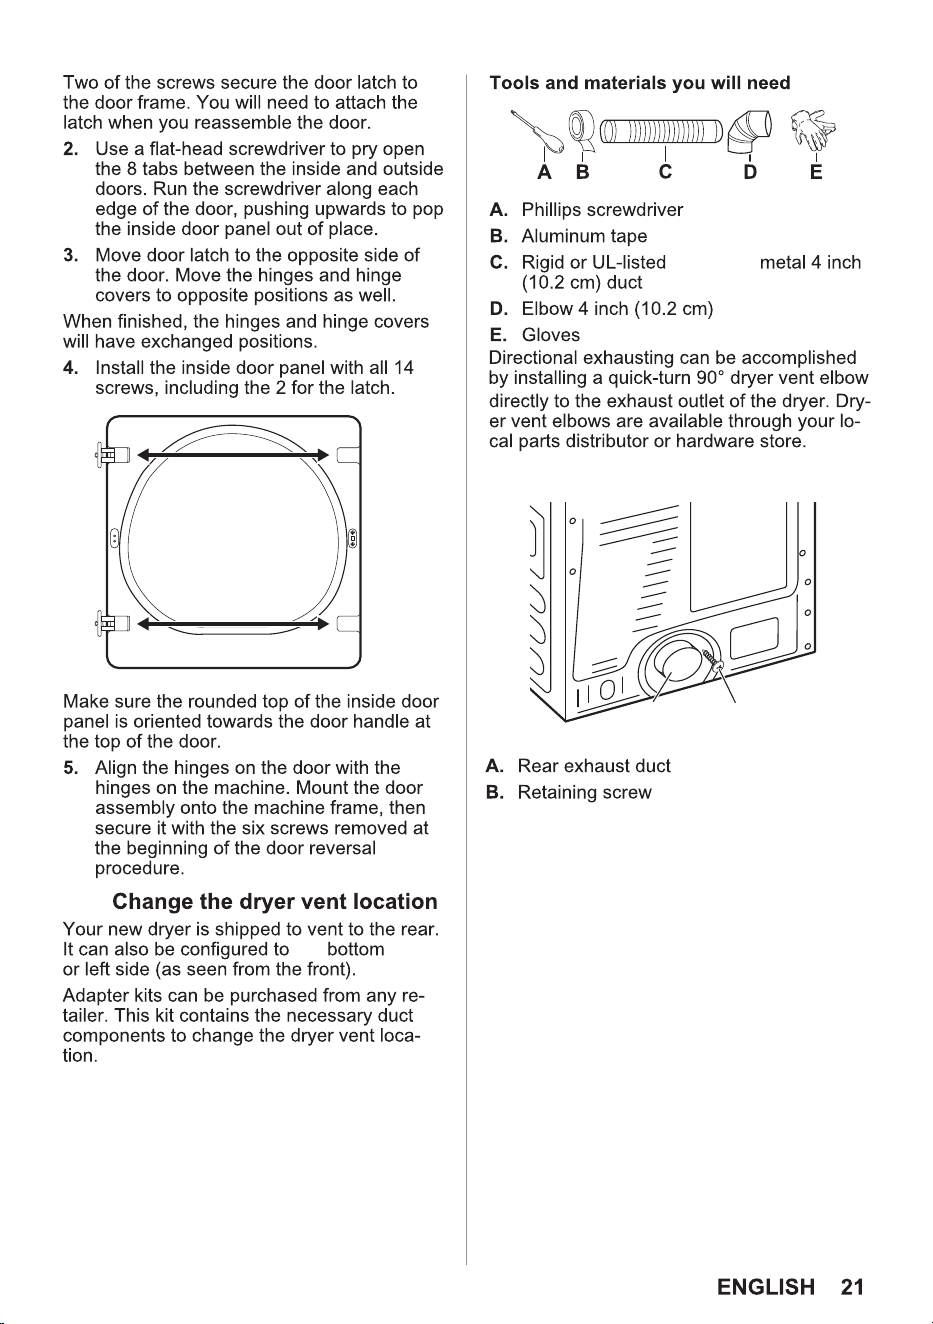
the
4.13
semi-rigid
A B
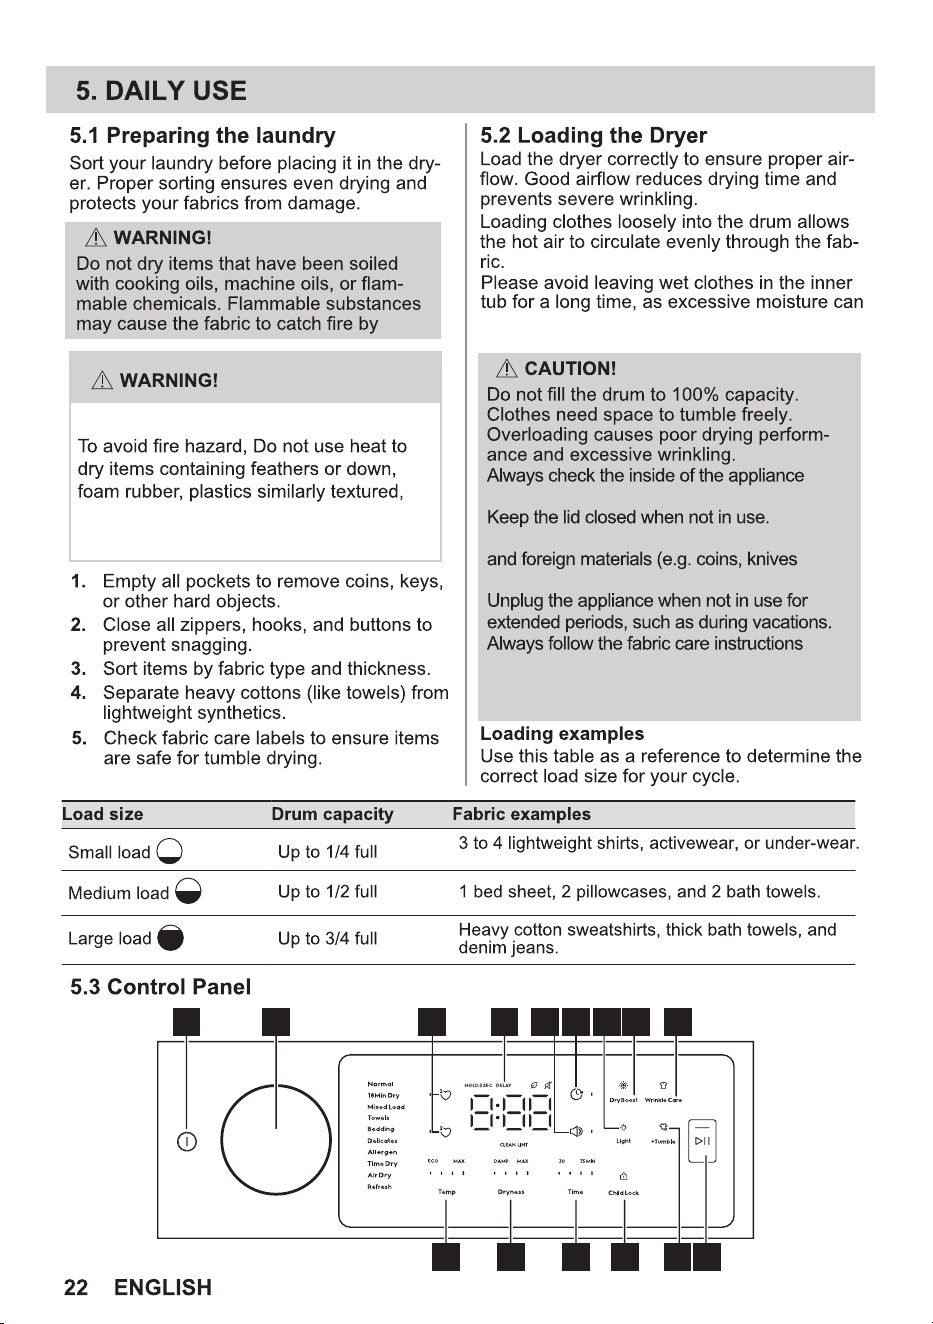
rubber-like materials. Use the time dry
cycle and the eco dry (no heat) setting.
FIRE HAZARD
corrode the inner tub surface and cause it to
lose its shine.
itself.
Do not stand or place objects on top of the
Ensure pockets are free of hard objects
supplied by the garment manufacturer.
for foreign objects before loading laundry.
and pins) to prevent appliance damage.
appliance.
1 2 3
89101112
5
6
7
4
13 1415
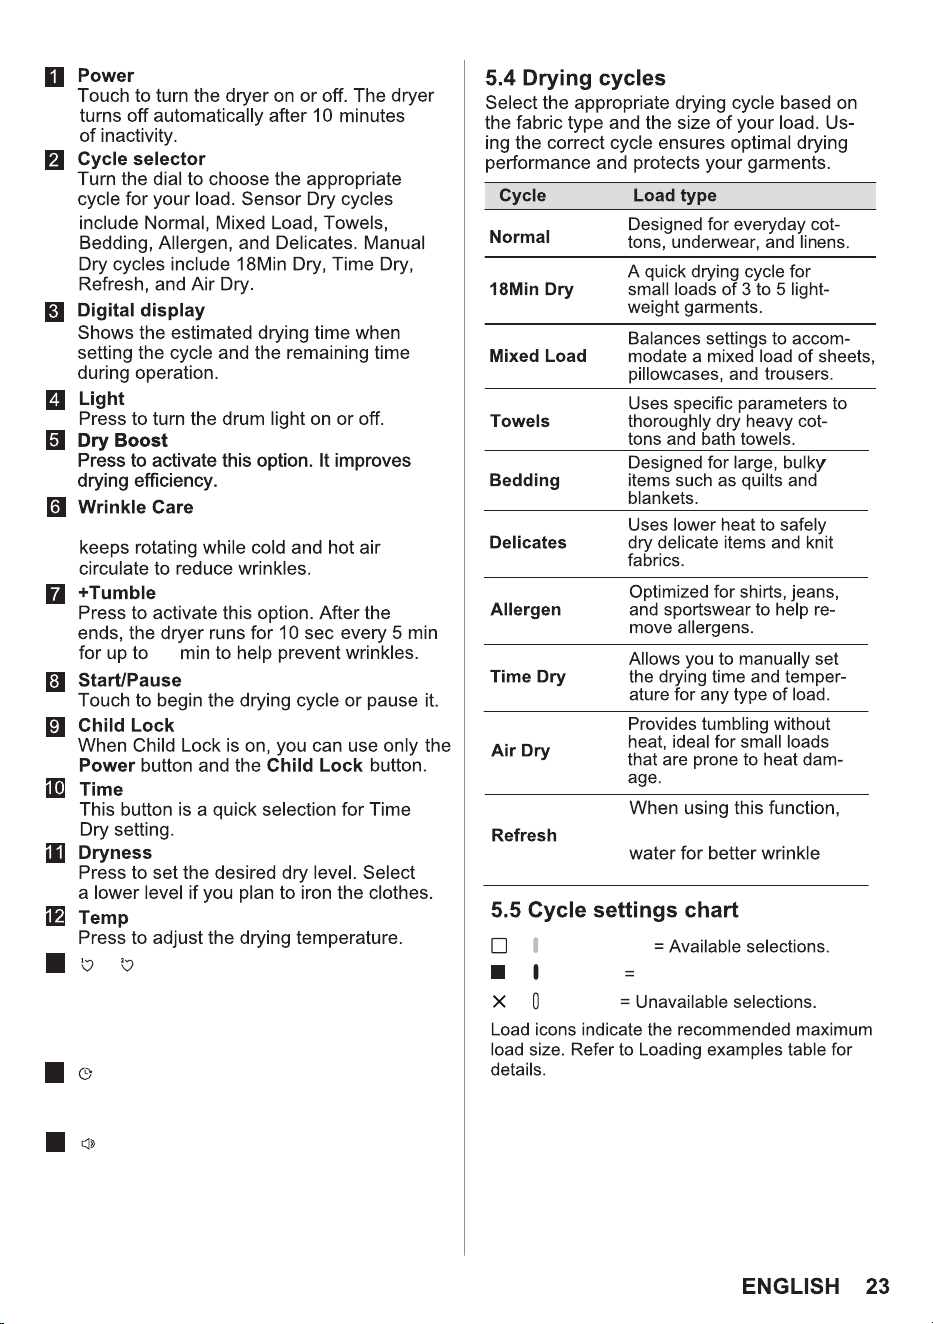
Press to activate this option. The drum
30
cycle
13
14
Press and hold for 3 seconds to remember
15
You can select a reservation time from
1 to 12 hours.
Mute/Unmute
Press the button to turn the sound on or off.
your selected cycle settings.
Press once to load your saved cycle settings.
You can save 2 different settings.
&
Favorite Cycles
Delay Time
you can manually spray
removal.
Default settings
or (Light half on)
or (Light on)
or (Light off)
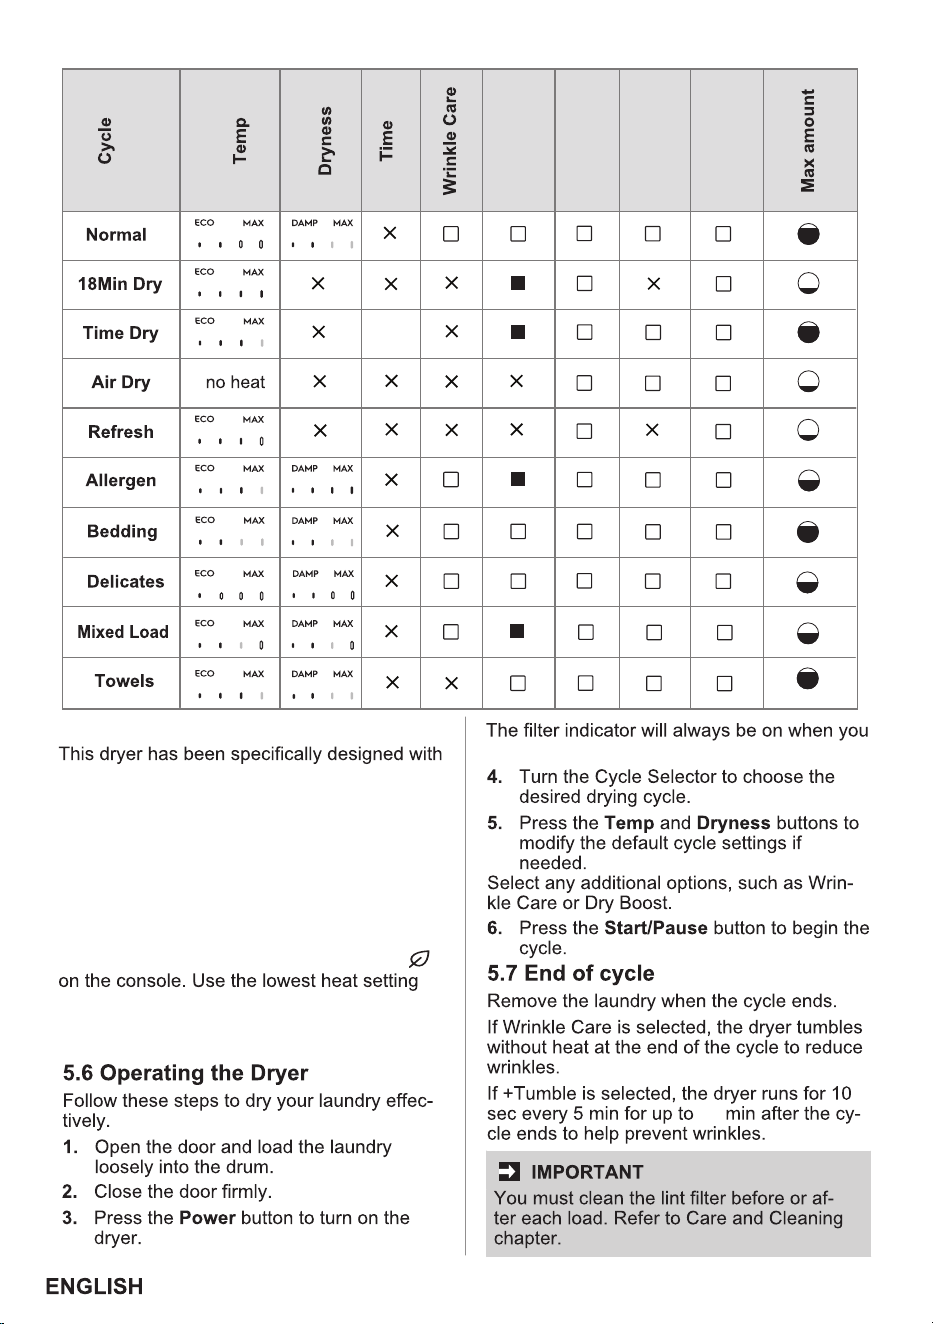
30
turn on the dryer.
Selecting the right cycle to save energy
The energy efficiency rating is based on the
Normal Cycle using Temperature with 2 LED
setting and Dryness with 2 LED setting.
Some cycles save more energy than others.
Cycles that use the least amount of heat save
the most energy and display the leaf icon
(auto and timed dry cycles) and less dry setting
(auto dry cycles) to save on energy and prevent
over drying your clothing.
options to help you save energy and at the
same time utilize the optimal drying setting
for your clothing.
24
30Min
45Min
60Min
75Min
Child Lock
Light
+Tumble
Dry Boost
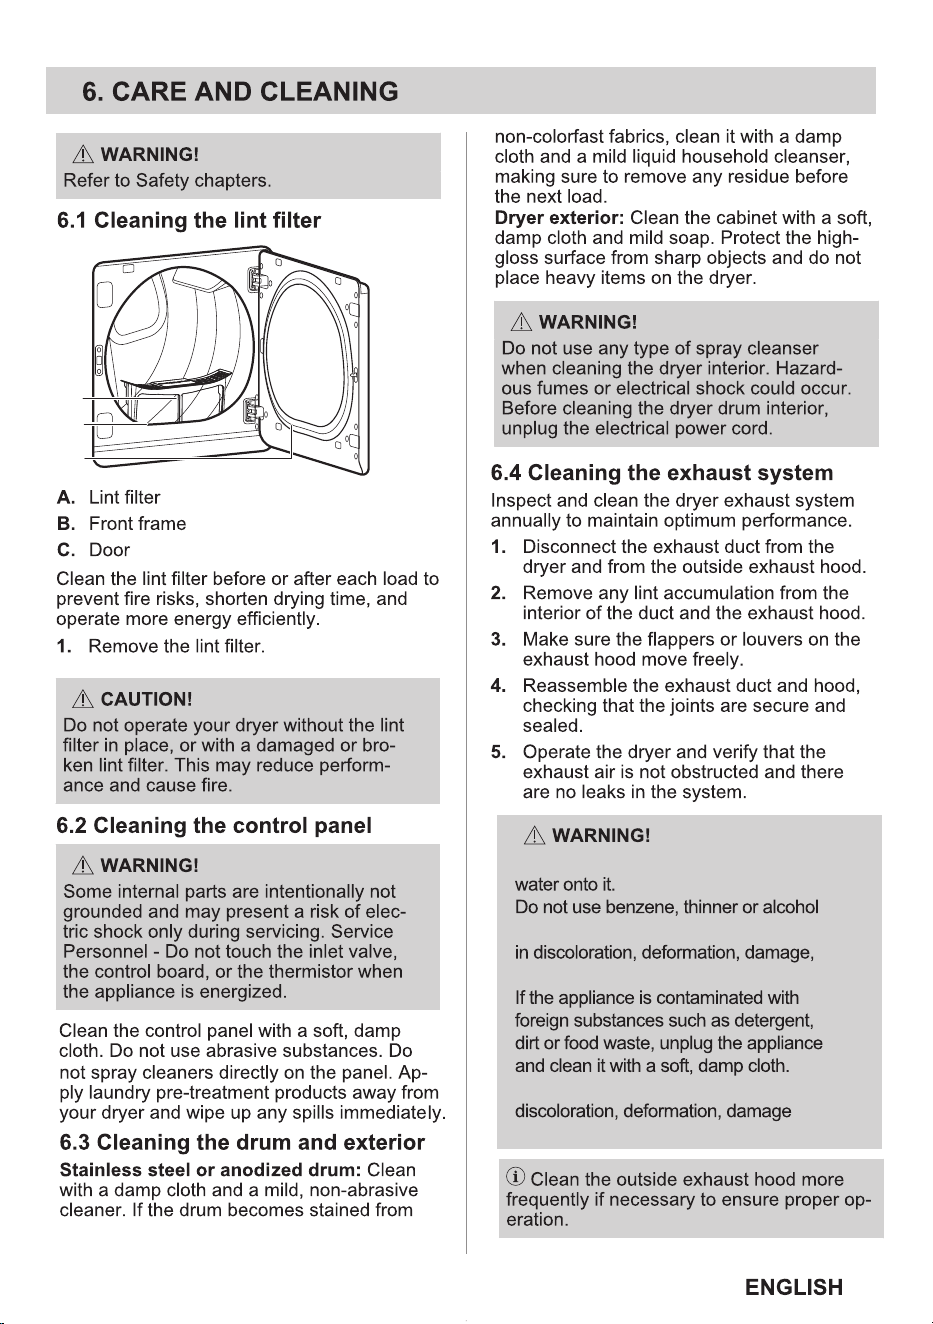
A
B
C
Do not clean the appliance by spraying
to clean the appliance. This may result
electric shock or fire.
Failure to do so may result in
or rust.
Limited use, vacation, and away from home.
25
CAUTION
or not using your dryer for extended
to the dryer.
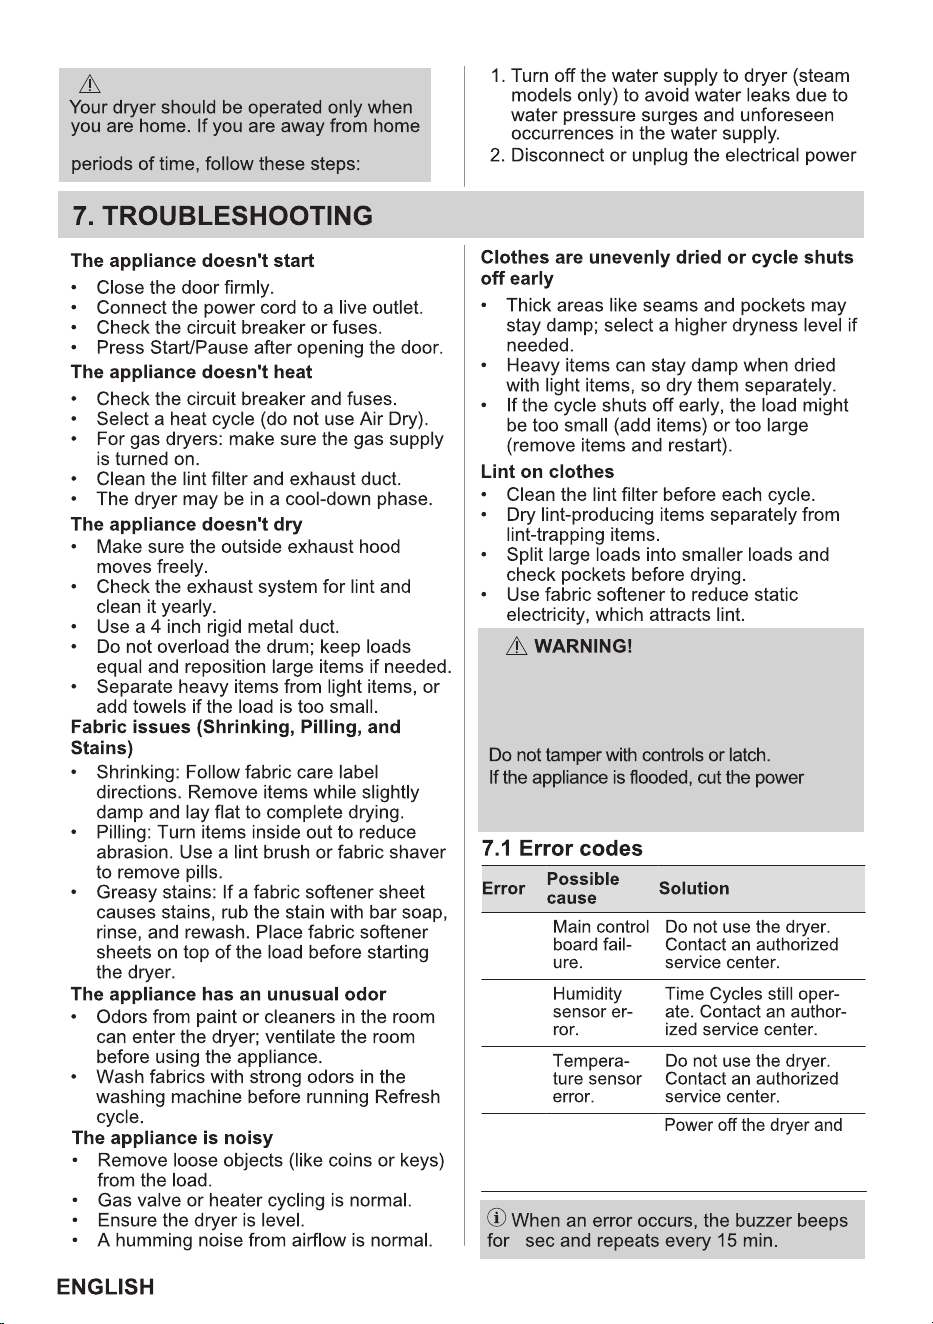
E91
E36
E71
EF1
Clogging
clean the external exhaust
duct and filter before
running the next cycle.
alarm
3
All repairs and servicing must be performed by
an authorized service technician unless
specifically recommended in this users manual.
Use only authorized factory parts.
immediately and contact your nearest service
center.
26
replace any parts of this appliance that prove
instructions.
Warranty Periods
All parts – One year including labor.
During the 2nd year from your original date
needed for this appliance that have proven
instructions.
designed to be repaired in the home.
13.
27
appropriate payment record to establish the
to obtain and keep all receipts. Service under
Electrolux at the addresses or phone numbers
Puerto Rico and Canada. In the USA and
Electrolux Canada Corp. Electrolux
authorizes no person to change or add to any
performed by Electrolux or an authorized
service company. Product features or
specifications as described or illustrated are
USA & Puerto Rico
28