
Operator's Manual 1
©Copyright 2006, Mi-T-M Corporation Form #37-0414-E/S-011823
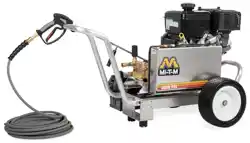
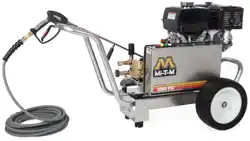
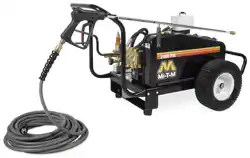
OPERATOR'S MANUAL FOR
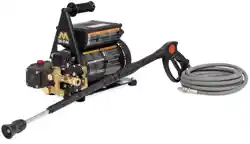
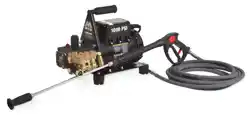
CW-PREMIUM ELECTRIC
COLD WATER BELT DRIVEN
PRESSURE WASHER
CAUTION
RISK OF INJURY!
READ MANUAL BEFORE OPERATING!
This manual is an important part of the
pressure washer and must remain with this unit!

2 Operator's Manual
WARNING: This product can expose you to
chemicals including Lead, which is known to
the State of California to cause cancer and birth
defects or other reproductive harm. For more
information go to www.P65Warnings.ca.gov
WARNING
CONTENTS
TABLE OF CONTENTS ...................................................................................................2
INTRODUCTION .............................................................................................................3
IMPORTANT SAFETY INSTRUCTIONS .........................................................................4
ELECTRICAL PRECAUTIONS ......................................................................................................................4
SPRAY PRECAUTIONS: ............................................................................................................................... 5
DETERGENT CLEANING PRECAUTIONS:
(OPTIONAL FEATURE) .................................................................................................................................6
MISCELLANEOUS SAFETY PRECAUTIONS: ..............................................................................................6
ADJUSTMENT PRECAUTIONS: ...................................................................................................................7
FEATURES .......................................................................................................................8
FEATURES LISTING ........................................................................................................8
SAFETY DECALS & PLACEMENT .................................................................................9
INSTALLATION & PREPARATION ................................................................................10
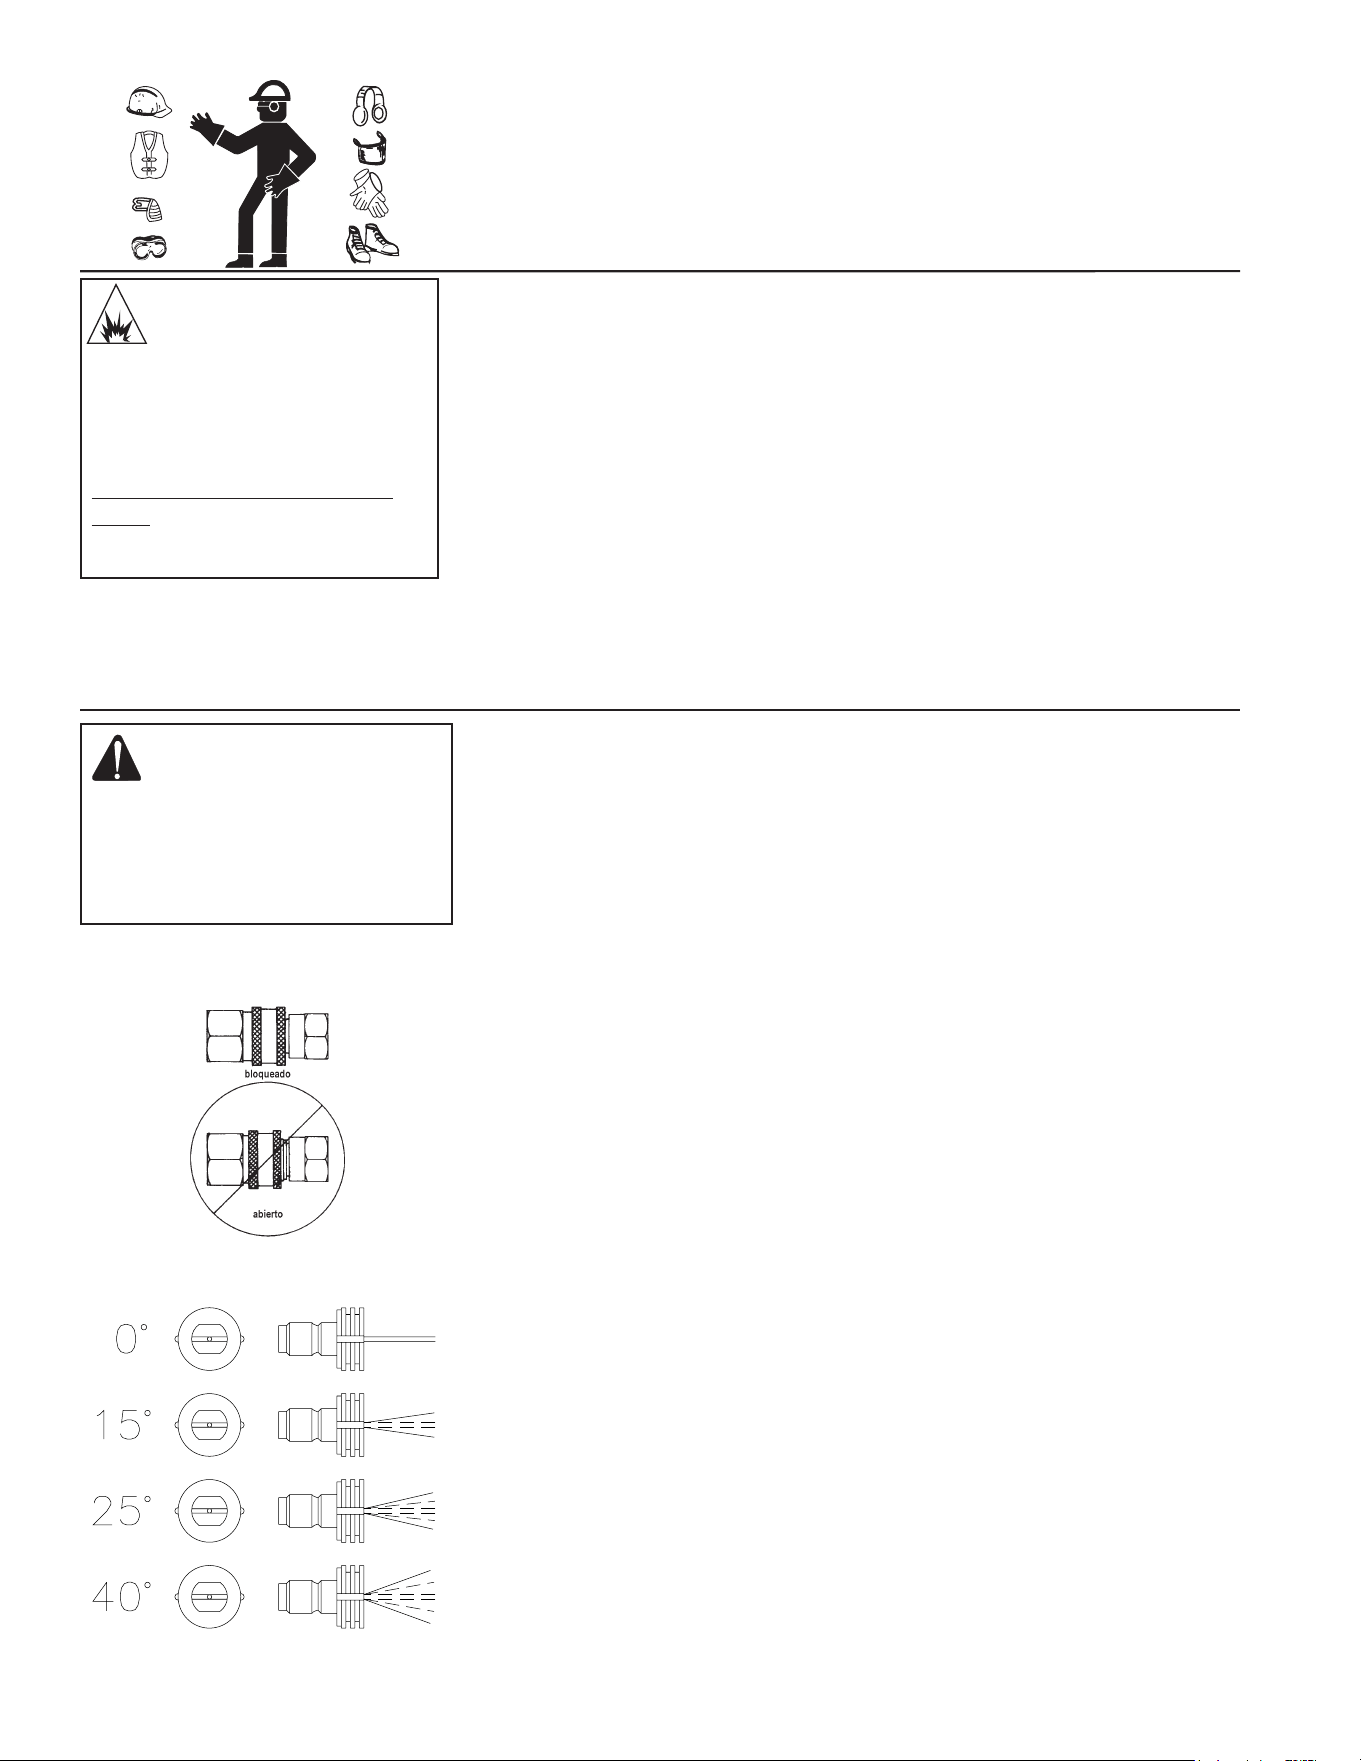
ATTIRE: .......................................................................................................................................................10
SETUP: .......................................................................................................................................................10
NOZZLE REVIEW: ....................................................................................................................................10
NOZZLE CONNECTION: ............................................................................................................................ 11
WATER SUPPLY: ........................................................................................................................................11
UNLOADER: ...............................................................................................................................................12
THERMAL RELIEF VALVE: .........................................................................................................................12
POWER CORD CONNECTION:..................................................................................................................12
PRE-START INSPECTION PROCEDURES:................................................................................................12
OPERATING INSTRUCTIONS ......................................................................................14
PRIMING THE PUMP: ................................................................................................................................14
START-UP: ..................................................................................................................................................14
CLEANING WITH DETERGENTS (OPTIONAL FEATURE): .......................................................................15
SHUTDOWN: ..............................................................................................................................................15
STORAGE & MAINTENANCE ....................................................................................... 16
SPECIFIC MAINTENANCE: ........................................................................................................................16
WINTERIZING: ............................................................................................................................................17
STATEMENT OF WARRANTY ......................................................................................20
Operator's Manual 3
INTRODUCTION
Congratulations on the purchase of your new Mi-T-M Cold Water Pressure Washer! You can be assured your pres-
sure washer was constructed and designed with quality and performance in mind. Each component has been rigor-
ously tested to ensure the highest level of acceptance.
This operator's manual was compiled for your benet. By reading and following the simple safety, installation,
operation, maintenance and troubleshooting steps described in this manual, you will receive years of trouble free
operation from your new pressure washer. The contents of this manual are based on the latest product information
available at the time of publication. Mi-T-M reserves the right to make changes in price, color, materials, equipment,
specications or models at any time without notice.
! IMPORTANT !
THESE PARAGRAPHS ARE SURROUNDED BY A "SAFETY ALERT BOX". THIS BOX IS USED TO
DESIGNATE AND EMPHASIZE SAFETY WARNINGS THAT MUST BE FOLLOWED WHEN OPERATING
THIS PRESSURE WASHER.
ACCOMPANYING THE SAFETY WARNINGS ARE "SIGNAL WORDS" WHICH DESIGNATE THE DEGREE
OR LEVEL OF HAZARD SERIOUSNESS. THE "SIGNAL WORDS" USED IN THIS MANUAL ARE AS
FOLLOWS:
DANGER: INDICATES AN IMMINENTLY HAZARDOUS SITUATION WHICH, IF NOT AVOIDED, WILL RESULT
IN DEATH OR SERIOUS INJURY.
WARNING: INDICATES A POTENTIALLY HAZARDOUS SITUATION WHICH, IF NOT AVOIDED, COULD
RESULT IN DEATH OR SERIOUS INJURY.
CAUTION: INDICATES A POTENTIALLY HAZARDOUS SITUATION WHICH, IF NOT AVOIDED MAY RESULT
IN MINOR OR MODERATE INJURY.
THE SYMBOLS SET TO THE LEFT OF THIS PARAGRAPH ARE "SAFETY ALERT SYMBOLS". THESE
SYMBOLS ARE USED TO CALL ATTENTION TO ITEMS OR PROCEDURES THAT COULD BE
DANGEROUS TO YOU OR OTHER PERSONS USING THIS EQUIPMENT.
ALWAYS PROVIDE A COPY OF THIS MANUAL TO ANYONE USING THIS EQUIPMENT. READ ALL
INSTRUCTIONS BEFORE OPERATING THIS PRESSURE WASHER AND ESPECIALLY POINT OUT THE
"SAFETY WARNINGS" TO PREVENT THE POSSIBILITY OF PERSONAL INJURY TO THE OPERATOR.
Once the unit has been uncrated, immediately write in the serial number of your unit in the space provided below.
SERIAL NUMBER_________________________________
Inspect for signs of obvious or concealed freight damage. If damage does exist, le a claim with the transportation
company immediately. Be sure that all damaged parts are replaced and that the problems are corrected prior to
operation of the unit. If you require service, contact Mi-T-M Customer Service at our toll-free number:
800-553-9053
Monday - Friday
8:00 a.m. - 5:00 p.m. Central Standard Time
Please have the following information available for all service calls:
1. Model Number
2. Serial Number
3. Date and Place of Purchase
4 Operator's Manual
ELECTRICAL PRECAUTIONS
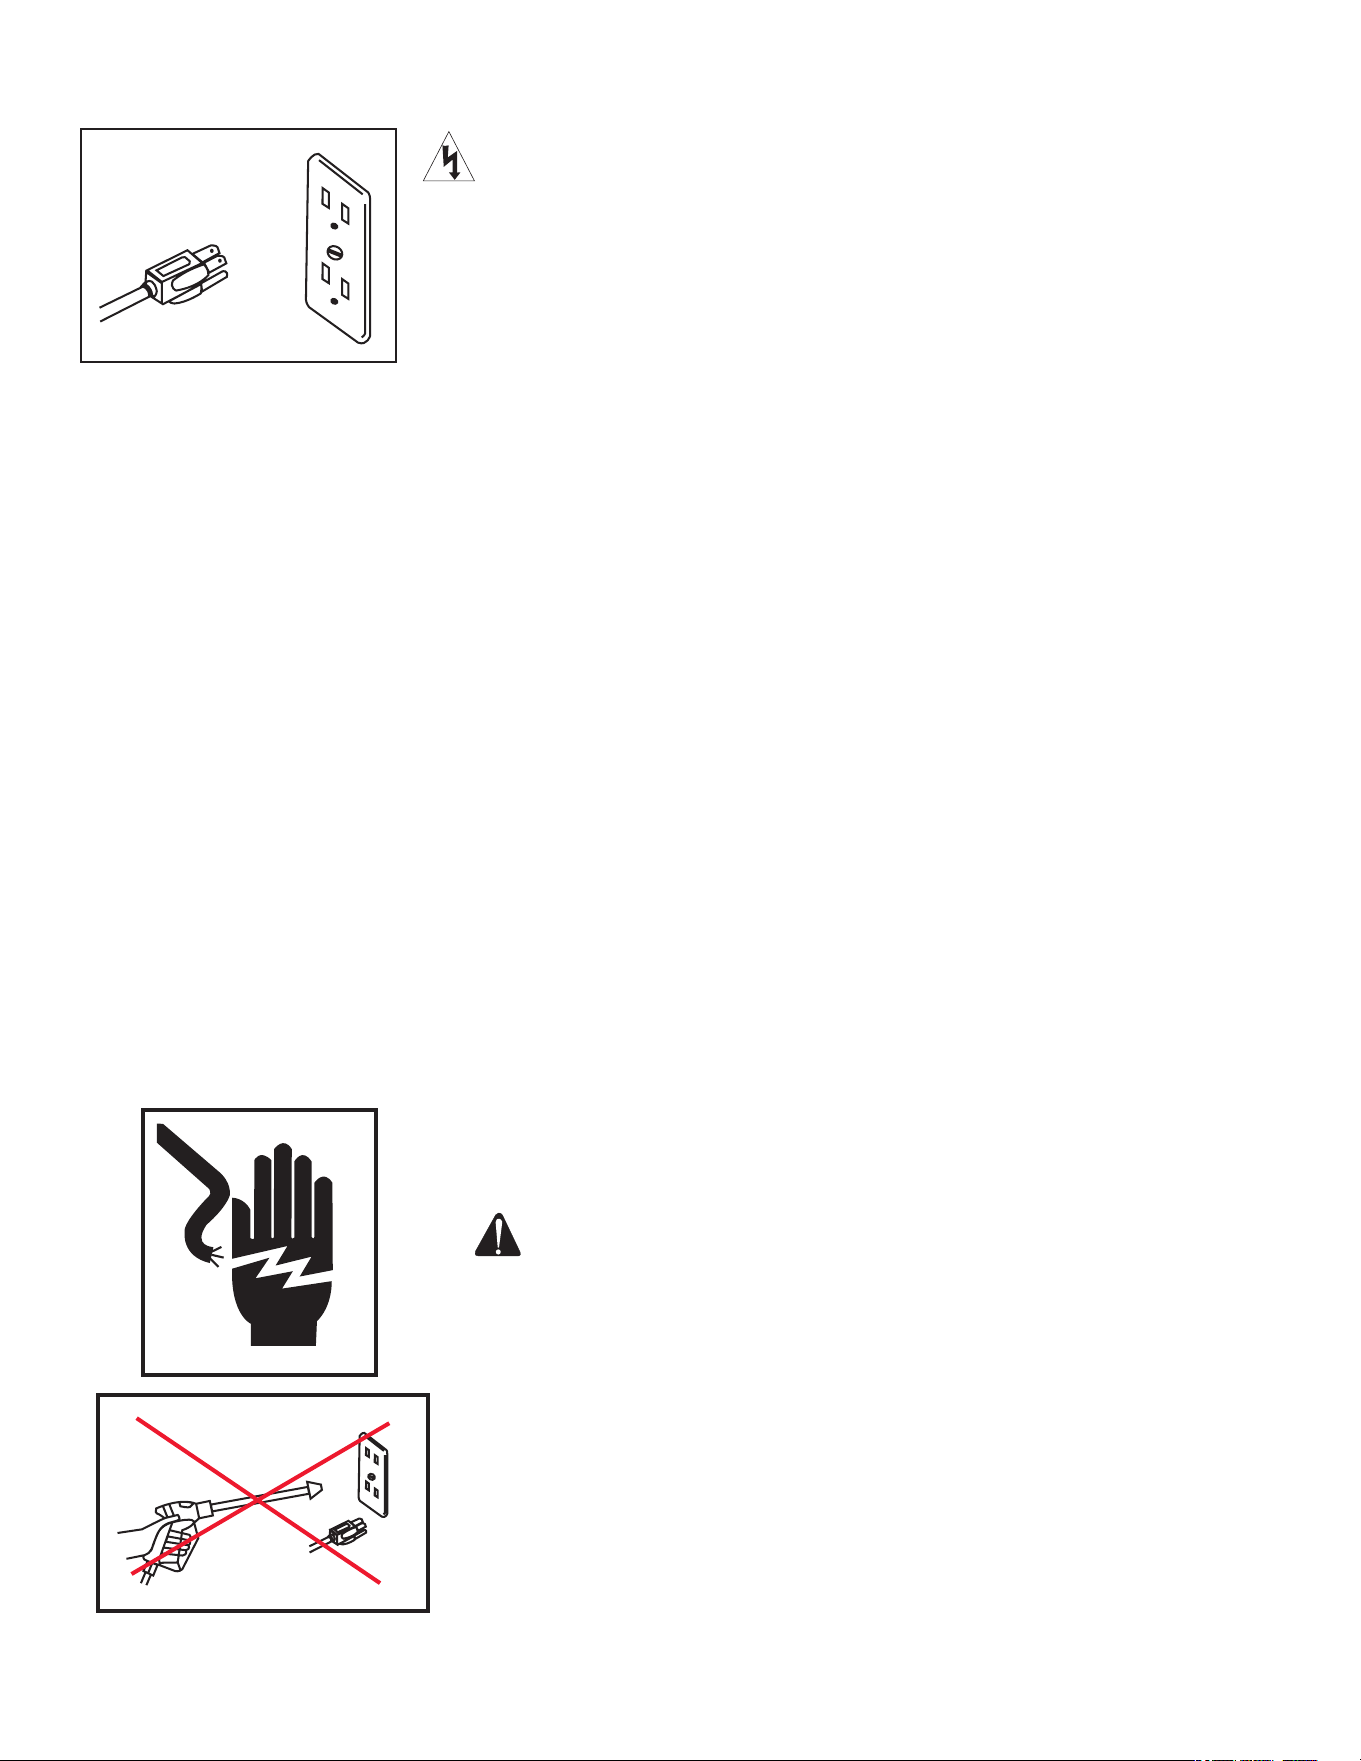
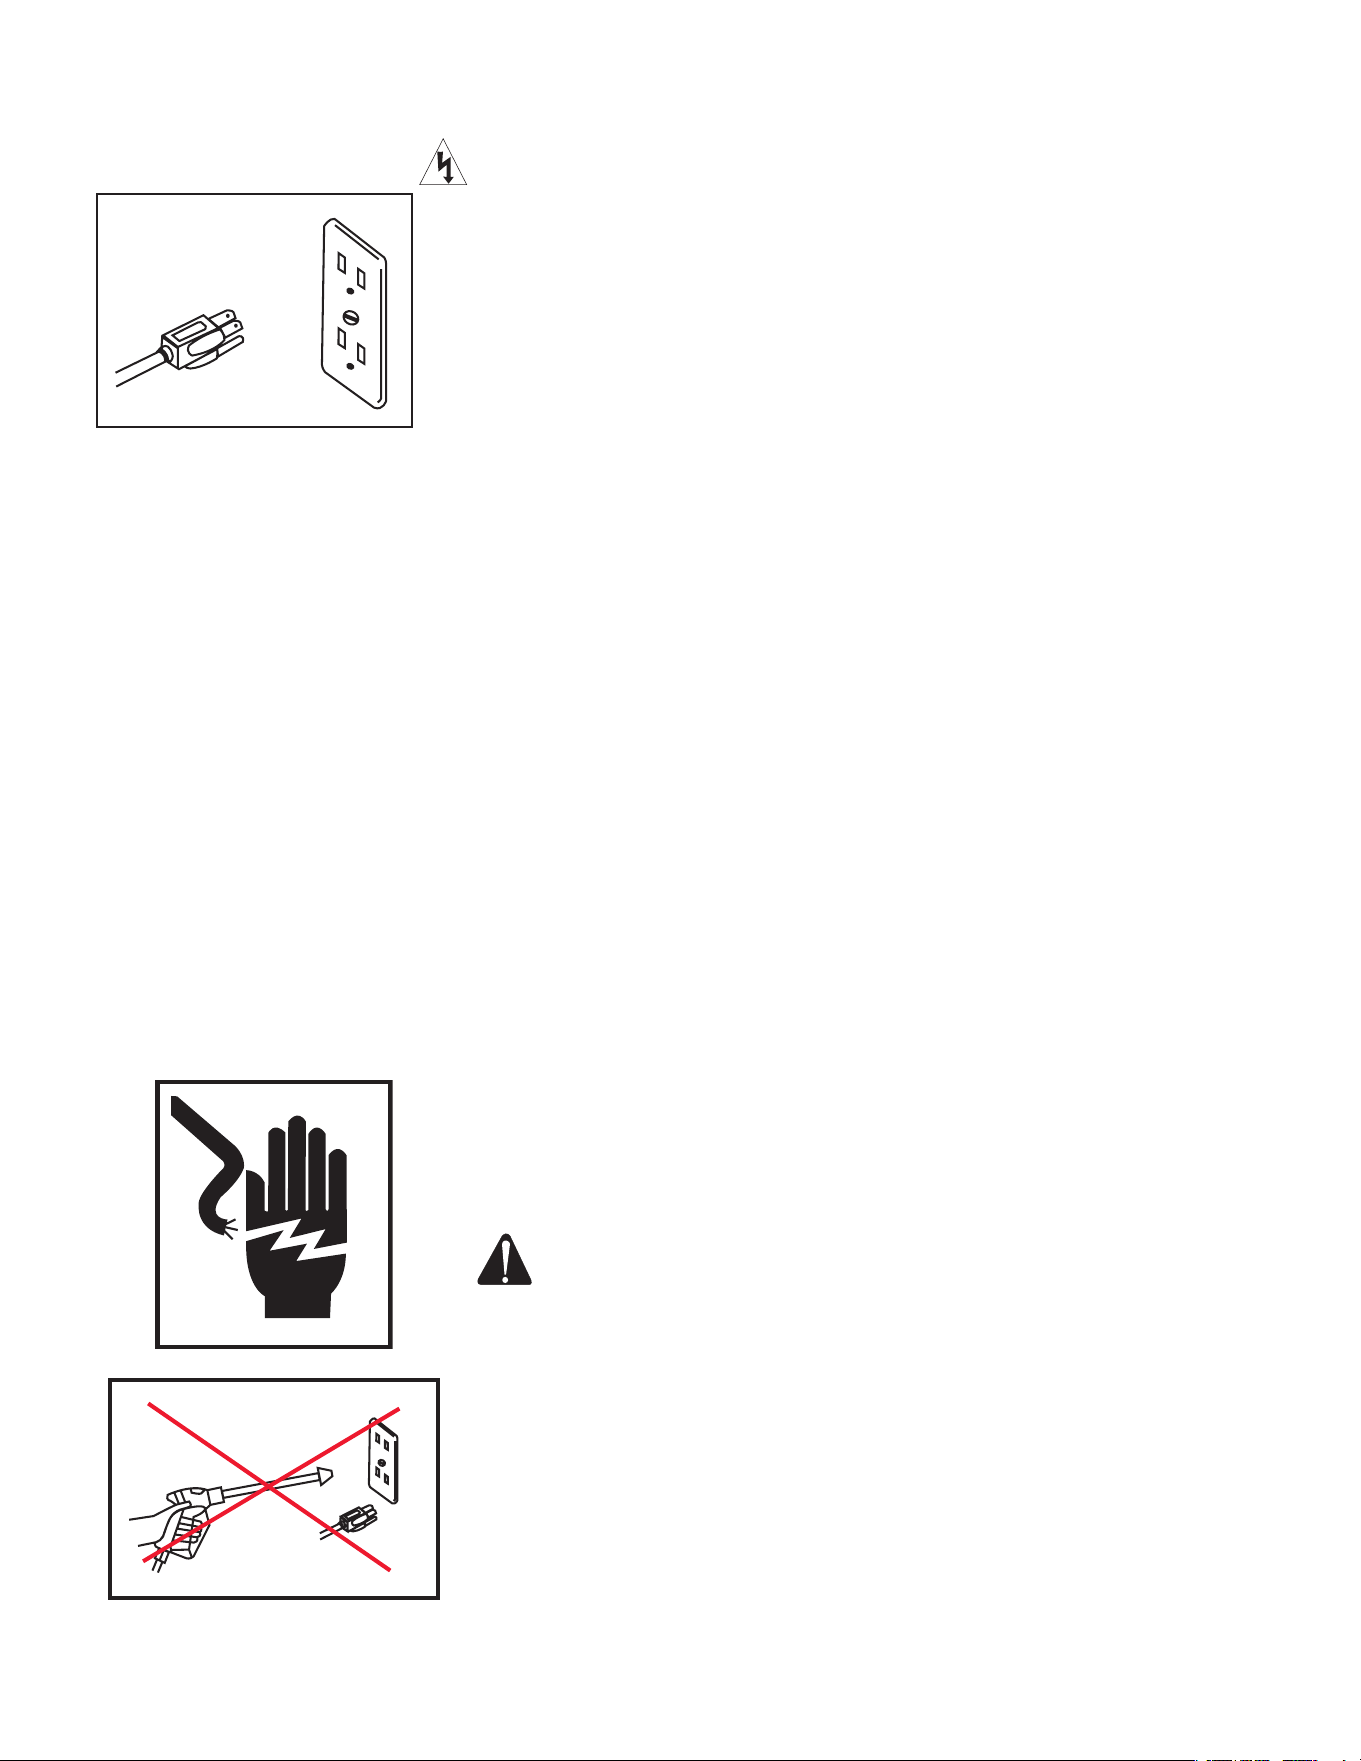
1. GROUNDING INSTRUCTIONS: This product must be grounded. If it should
malfunction or breakdown, grounding provides a path of least resistance
for electric current to reduce the risk of electric shock. This product is
equipped with a cord having an equipment-grounding conductor and a
grounding plug. The plug must be plugged into an appropriate outlet that
is properly installed and grounded in accordance with all local codes and
ordinances.
2. DANGER: Improper connection of the equipment-grounding conductor
can result in a risk of electrocution. Check with a qualied electrician or
service personnel if you are in doubt as to whether the outlet is properly
grounded. Do not modify the plug provided with the product - if it will not
t the outlet, have a proper outlet installed by a qualied electrician. Do
not use any type of adaptor with this product.
3. GROUND FAULT INTERRUPTER PROTECTION: This pressure washer may
be provided with a Ground Fault Circuit Interrupter (GFCI) built into the plug
or the power supply cord. This device provides additional protection from the
risk of electric shock. Should replacement of the cord become necessary,
use only identical replacement parts that include GFCI protection. If unit is
not provided with a GFCI, to comply with the National Electric Code (NFPA
70) and to provide additional protection from the risk of electric shock, this
pressure washer should only be connected to a receptacle that is protected
by a Ground Fault Circuit Interrupter (GFCI).
4. EXTENSION CORDS: The manufacturer DOES NOT RECOMMEND THE
USE OF EXTENSION CORDS! If use of an extension cord is unavoidable, it
must be plugged into a GFCI found in circuit boxes or protected receptacles.
When using an extension cord, consult a qualied electrician to determine
the proper wire gauge needed for the length of the extension cord. For
Single Phase units, use only 3-wire extension cords that have 3-prong
grounding-type plugs and 3-pole cord connectors that accept the plug from
the product. For Three Phase units, use only 4-wire extension cords that
have 4-prong grounding-type plugs and 4-pole cord connectors that accept
the plug from the product. Use only extension cords that are intended for
outdoor use. These extension cords are identied by a marking "Acceptable
for use with outdoor appliances; store indoors while not in use." Use only
extension cords having an electrical rating not less than the rating of the
product. Do not use damaged extension cords. Examine extension cord
before using and replace if damaged. Do not abuse extension cord and
do not yank on any cord to disconnect. Keep cord away from heat and
sharp edges. Always connect and disconnect the extension cord from
the receptacle before connecting and disconnecting the product from the
extension cord.
WARNING: TO REDUCE THE RISK OF ELECTROCUTION, KEEP ALL
CONNECTIONS DRY AND OFF THE GROUND. DO NOT TOUCH
PLUG WITH WET HANDS.
5. If your unit is equipped with a GFCI, DO NOT drop the GFCI as damage
could result. If the GFCI is accidentally dropped, be certain to test the GFCI
before using to ensure it is working properly. (Follow instructions on GFCI
for test procedures.)
6. DO NOT pull on the electrical cord to disconnect from the outlet, OR pull
the unit by the cord.
7. Check power cord for damage before using. There is a hazard of
electrical shock from crushing, cutting or heat damage.
8. Always be certain the unit is receiving proper voltage. Before plugging the
unit into a compatible power source, be certain the switch is in the "OFF"
position. Disconnect when not in use.
IMPORTANT SAFETY INSTRUCTIONS
Operator's Manual 5
9. DO NOT use the unit in an area where ammable gas vapors may be present.
An electric spark could cause an explosion or re.
10. DO NOT direct water spray on or into electrical installations of any kind.
This includes electrical outlets, light bulbs, fuse boxes, transformers, the
unit itself, etc. Severe electrical shock may occur.
11. The manufacturer does not recommend that the owner attempt any electrical
repairs to this unit.
SPRAY PRECAUTIONS:
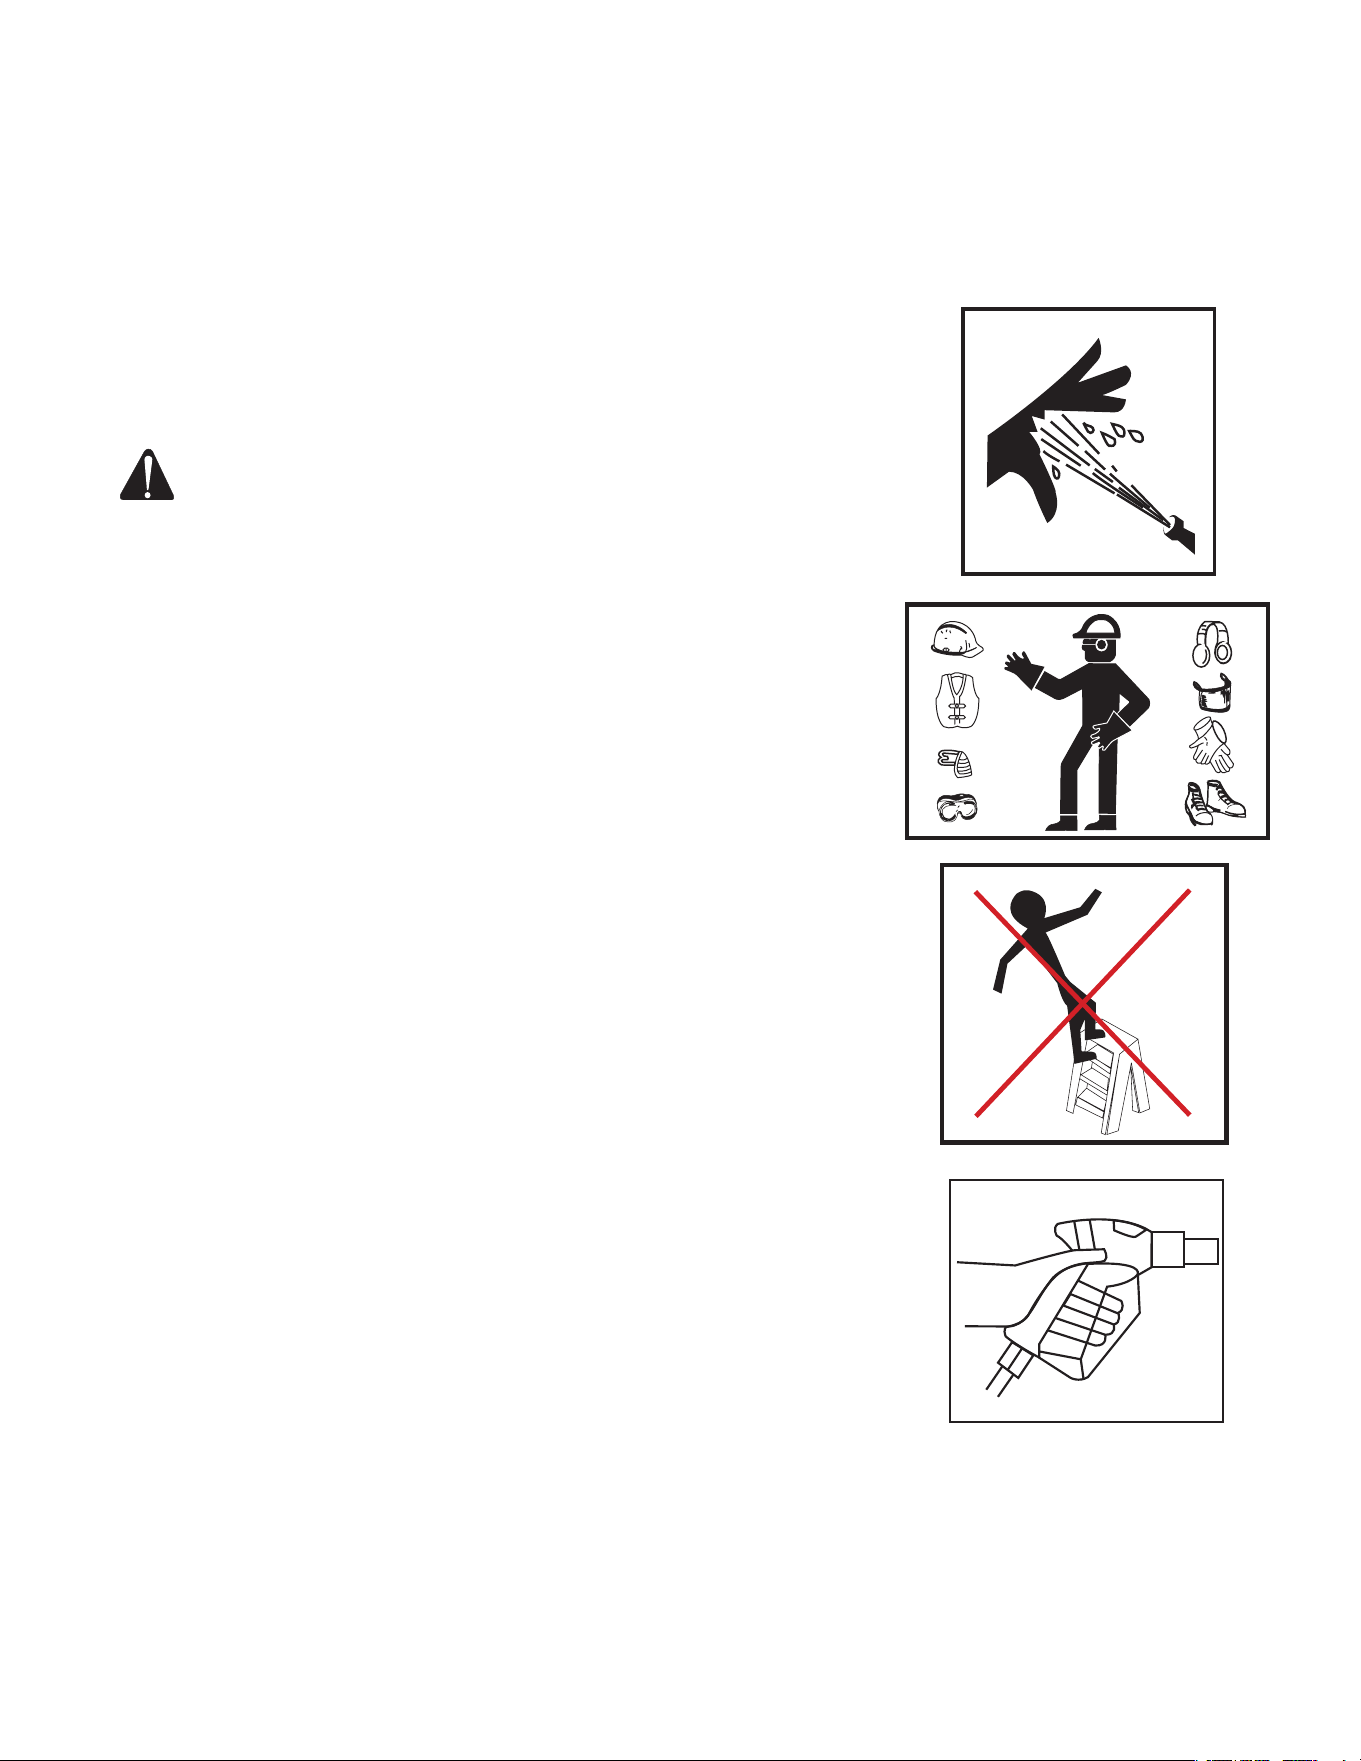
DANGER RISK OF INJECTION OR SEVERE CUTTING INJURY KEEP
CLEAR OF NOZZLE. DO NOT DIRECT DISCHARGE STREAM AT
PERSONS OR PETS. ONLY TRAINED OPERATORS SHOULD USE
THIS PRODUCT. BASIC PRECAUTIONS SHOULD ALWAYS BE
OBSERVED, INCLUDING THE FOLLOWING:
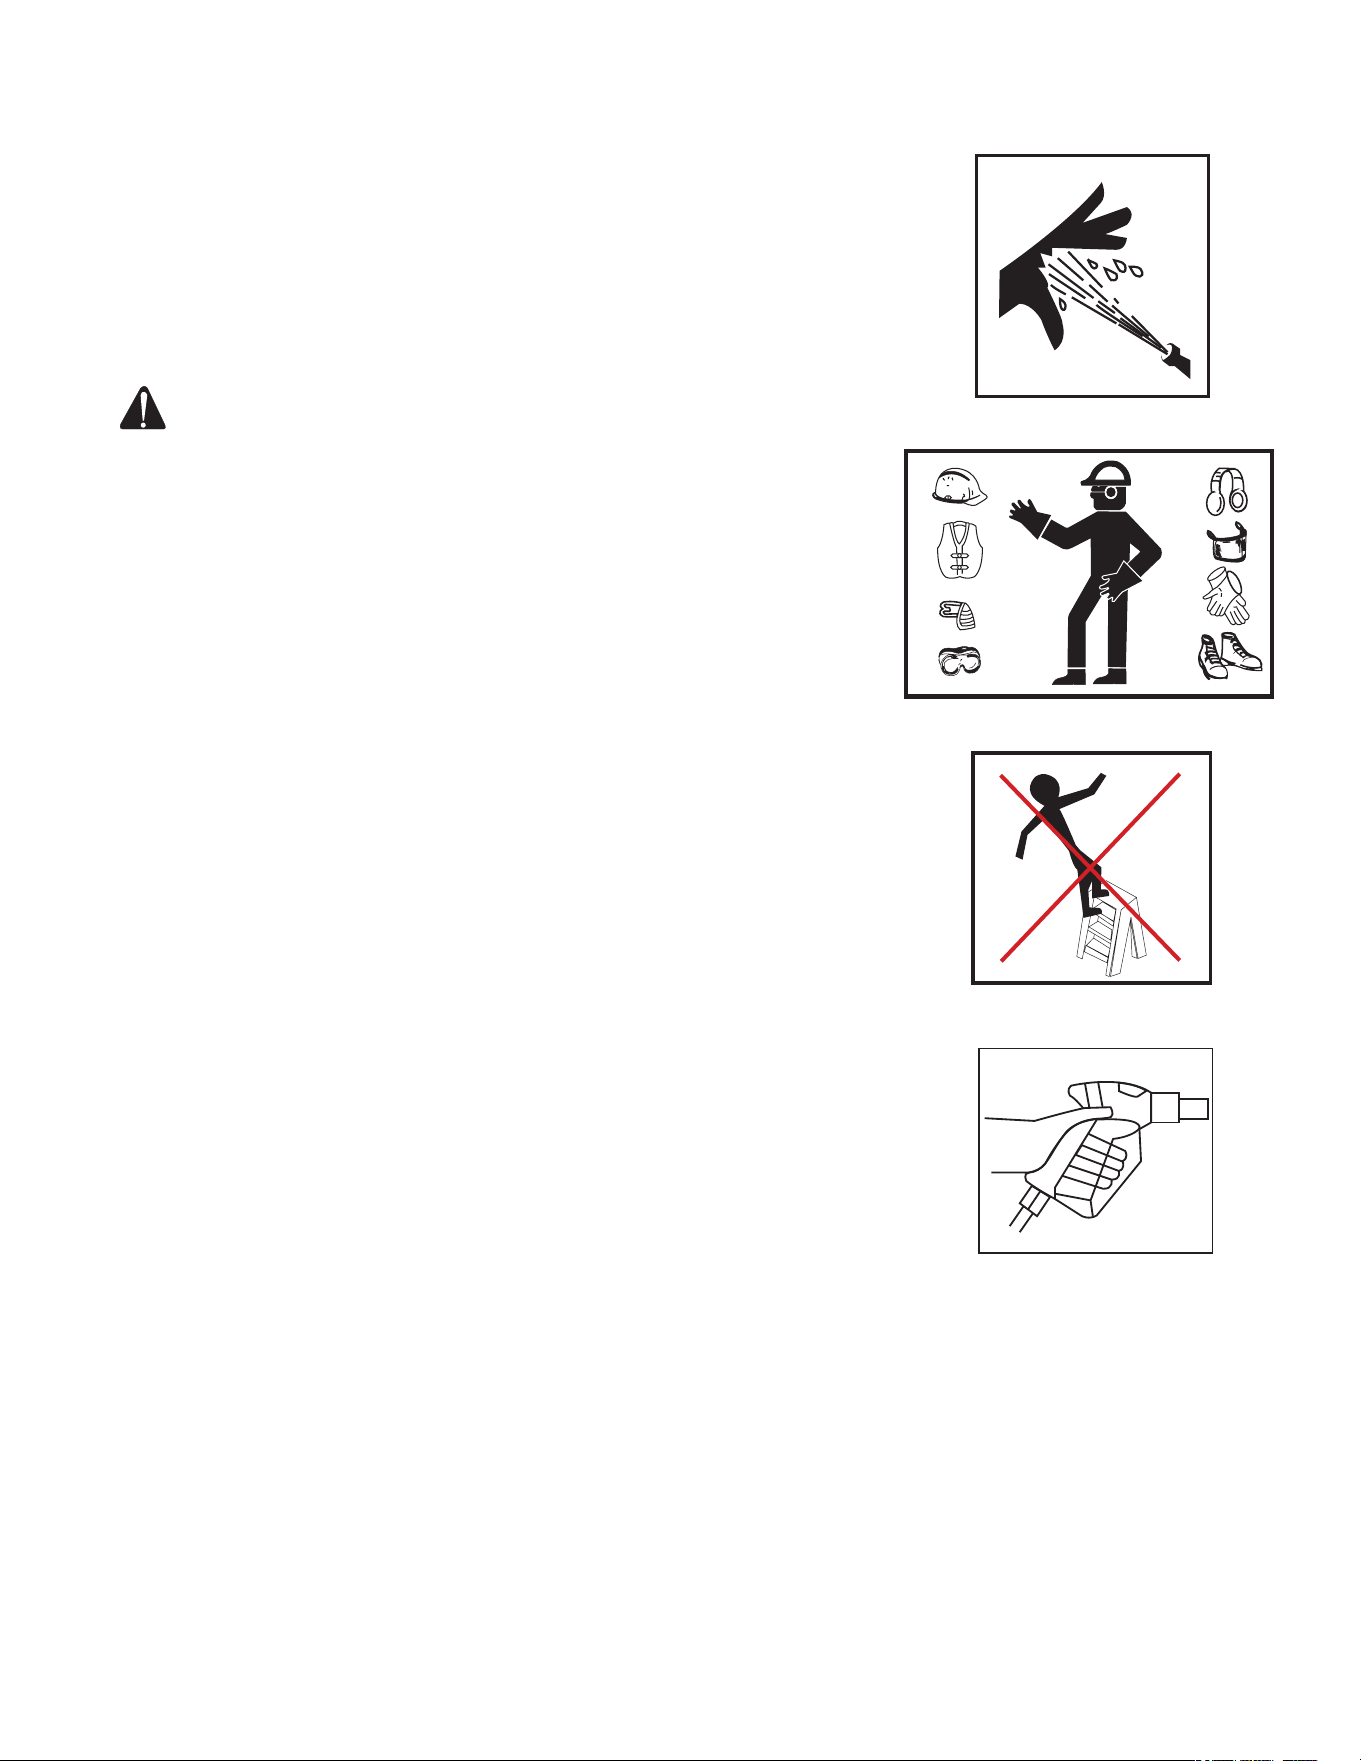
1. KEEP AWAY FROM THE SPRAY:
a. Because of the high pressure and velocity of the spray, uids can
penetrate the skin, causing serious injury.
b. Never point the gun at yourself or anyone else. Never put your hand,
ngers or body directly over the spray nozzle. Always keep operating
area clear of all persons. Use extreme caution when operating near
children.
c. If an accident does occur and the spray appears to have penetrated
the skin, SEEK EMERGENCY MEDICAL CARE. DO NOT TREAT AS A
SIMPLE CUT. If you are using cleaning agents, be prepared to tell a
physician exactly what kind.
2. ALWAYS wear protective goggles when operating the unit to shield the
eyes from ying debris and detergents. Other protective equipment such
as rubber suits, gloves and respirators are advisable, especially when using
cleaning detergents. Use extreme caution when operating near children.
3. Stay alert-watch what you are doing. Do not operate the unit when fatigued
or under the inuence of alcohol or drugs.
4. NEVER squeeze the trigger unless securely braced. The thrust from the
water traveling through the nozzle may be powerful enough to cause the
operator to lose balance if unprepared. DO NOT overreach or stand on
unstable support. Wet surfaces can be slippery, wear protective foot gear
and keep good footing and balance at all times. NEVER trigger the gun
while on a ladder or roof.
5. Caution should be used when directing spray toward fragile materials such
as glass. Shattering could result in serious injury.
6. ALWAYS hold on rmly to the gun/wand assembly when starting and
operating the unit. Failure to do so can cause the wand to fall and whip
dangerously. NEVER operate the gun with the trigger wired in the open
position. To prevent accidental discharge, the trigger gun should be securely
locked when not in use.
7. Even after you shut off the unit, there is high pressure water left in the pump,
hose and gun until you release it by triggering the gun. Before removing
the spray nozzle or servicing the unit, ALWAYS shut off the unit and trigger
the gun to release trapped pressure.
IMPORTANT SAFETY INSTRUCTIONS

6 Operator's Manual
DETERGENT CLEANING PRECAUTIONS:
(OPTIONAL FEATURE)
1. DO NOT use solvents or highly corrosive detergents or acid type cleaners
with this pressure washer. Use only mild detergents.
2. KNOW YOUR DETERGENTS! Be prepared to tell a physician exactly what
you are using in the event of an emergency. Read the Material Safety
Data Sheet (MSDS) provided with your detergent and all detergent labels.
Follow all appropriate instructions regarding preparation use, safety and
transportation. Keep ALL detergents out of the reach of children.
3. DO NOT use this pressure washer to dispense hazardous detergents.
4. DO NOT alter the detergent injection feature in any manner not prescribed
in this manual. Use only genuine manufacturer replacement parts for
necessary repairs.
MISCELLANEOUS SAFETY PRECAUTIONS:
1. NEVER ALLOW CHILDREN OR ADOLESCENTS TO OPERATE THIS UNIT!
2. Read and follow all handling, operations, maintenance and safety instructions
listed in this manual and provide such information to ANYONE who will be
operating this unit.
3. This pressure washer may be provided with a Ground Fault Circuit Interrupter
(GFCI) built into the plug of the power supply cord, Should replacement
of the cord become necessary, use only identical replacement parts that
include GFCI protection.
4. In freezing temperatures, the unit must always be warm enough to ensure
there is no ice formation in the pump. DO NOT start this unit if it has been
transported in an open or underheated vehicle without rst allowing the
pump to thaw.
5. When connecting the water inlet to the water supply mains, local regulations
of your water company must be observed. In some areas the unit must
not be connected directly to the public drinking water supply. This is to
ensure that there is no feedback of the detergents into the water supply.
(Direct connection is permitted if a back ow preventer is installed.)
6. High pressure hoses should be inspected daily for signs of wear. If evidence
of failure exists, promptly replace all suspect hoses to prevent the possibility
of injury from the high pressure spray. If a hose or tting is leaking , NEVER
place your hand directly on the leak.
7. DO NOT operate the unit if you see any pump oil or water leaks from the
machine. DO NOT resume operation until the unit has been inspected and
repaired by a qualied service person.
8. DO NOT operate the unit without all protective covers in place.
9. To reduce the risk of injury, maintain a safe distance from persons while
operating this unit. Close supervision is necessary when operating the unit
near children.
10. DO NOT leave pressurized unit unattended. Shut off the unit and release
trapped pressure before leaving.
11. DO NOT move the unit by pulling on the hose.
IMPORTANT SAFETY INSTRUCTIONS

Operator's Manual 7
ADJUSTMENT PRECAUTIONS:
1. NEVER alter or modify the equipment, be sure any accessory items and
system components being used will withstand the pressure developed.
Use ONLY genuine manufacturer parts for repair of your pressure washer.
Failure to do so can cause hazardous operating conditions and will void
warranty.
2. NEVER make adjustments to the machinery while it is connected to the
power source.
3. Know how to stop the pressure washer and bleed pressures quickly.
Be thoroughly familiar with controls.
4. Before servicing the unit; turn the unit off, relieve the water pressure,
and allow the unit to cool down. Service in a clean, dry, at area. Block
the wheels to prevent the unit from moving.
5. Follow the maintenance instructions specied in this manual.
! SAVE THESE INSTRUCTIONS !
IMPORTANT SAFETY INSTRUCTIONS
8 Operator's Manual
FEATURES
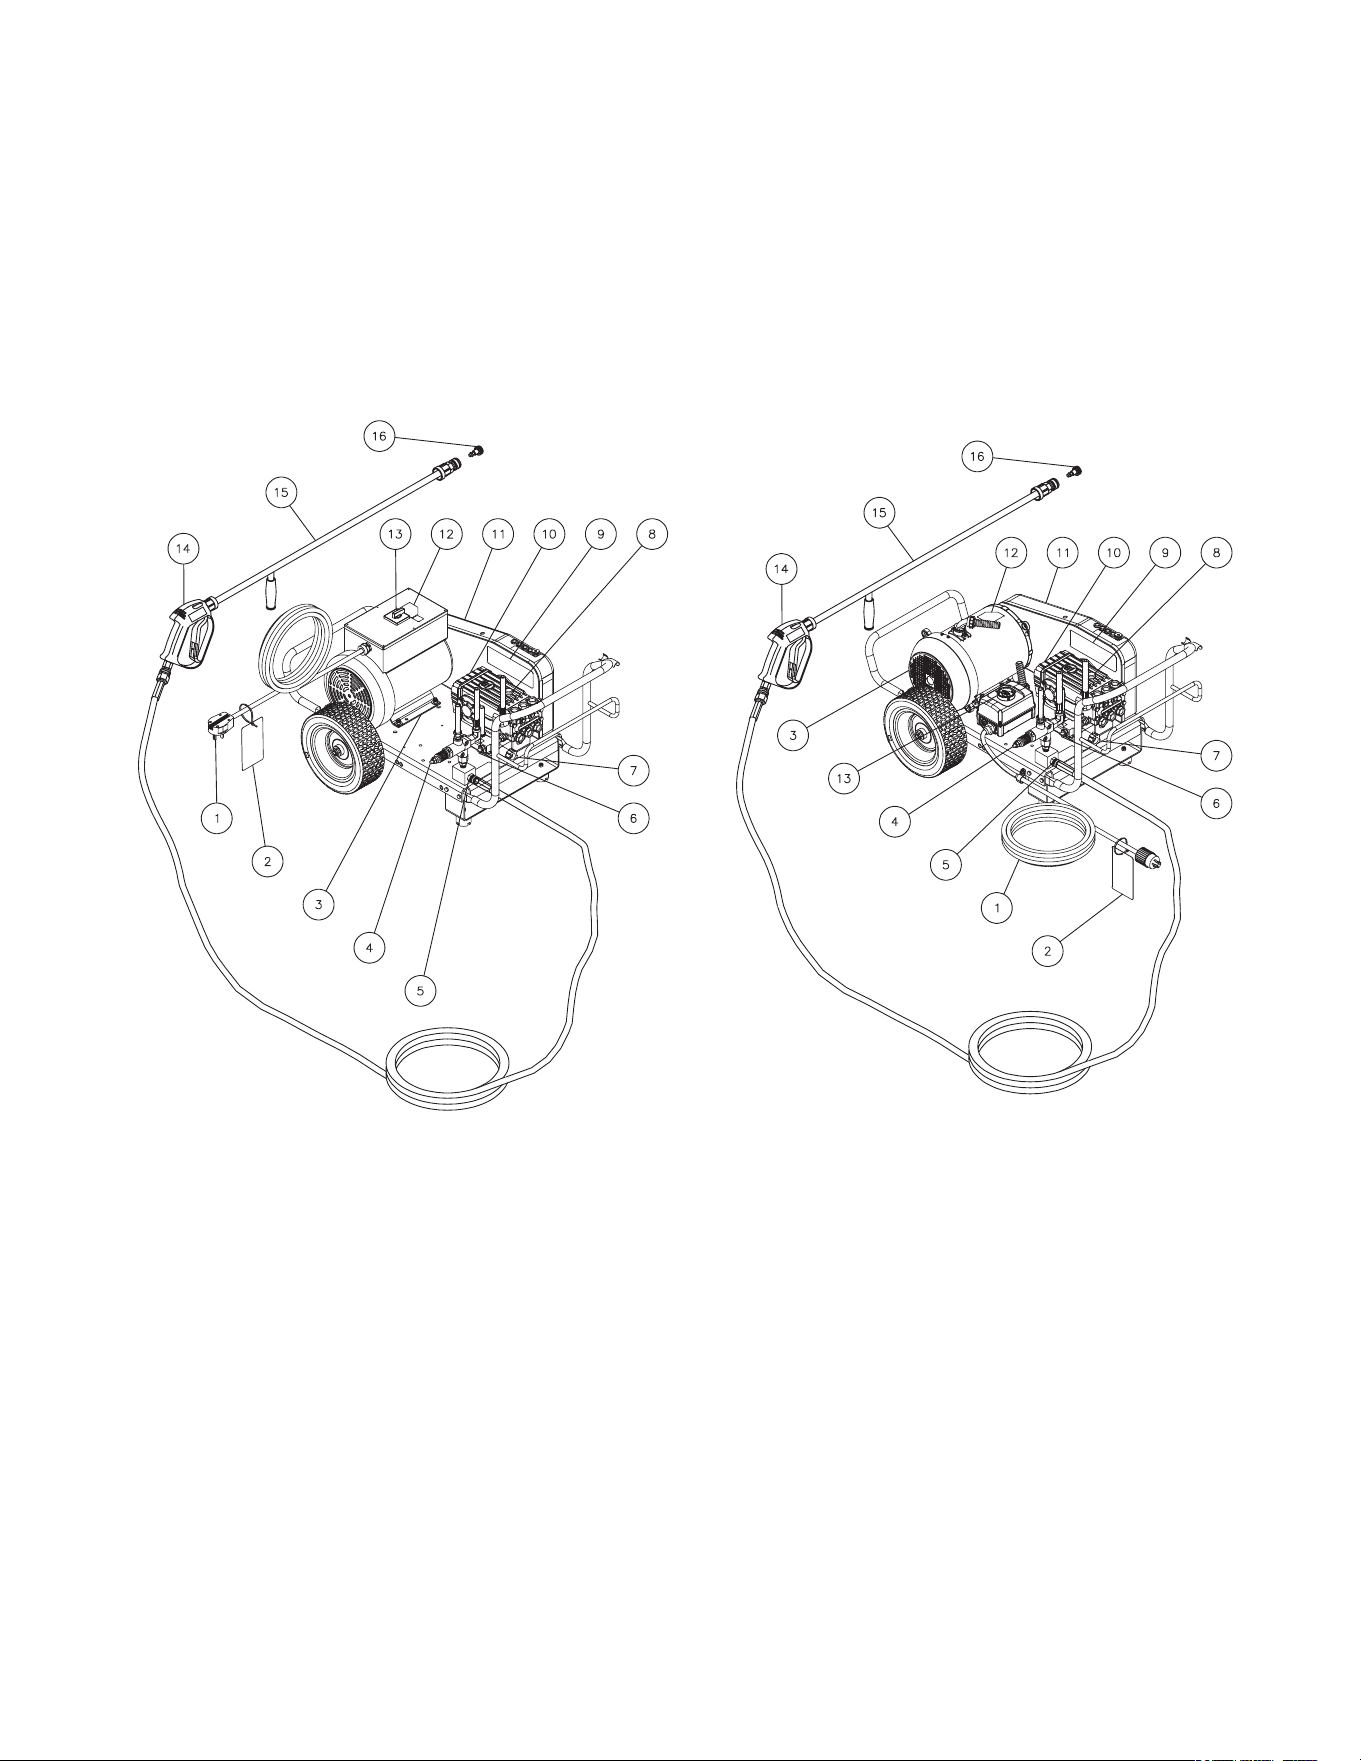
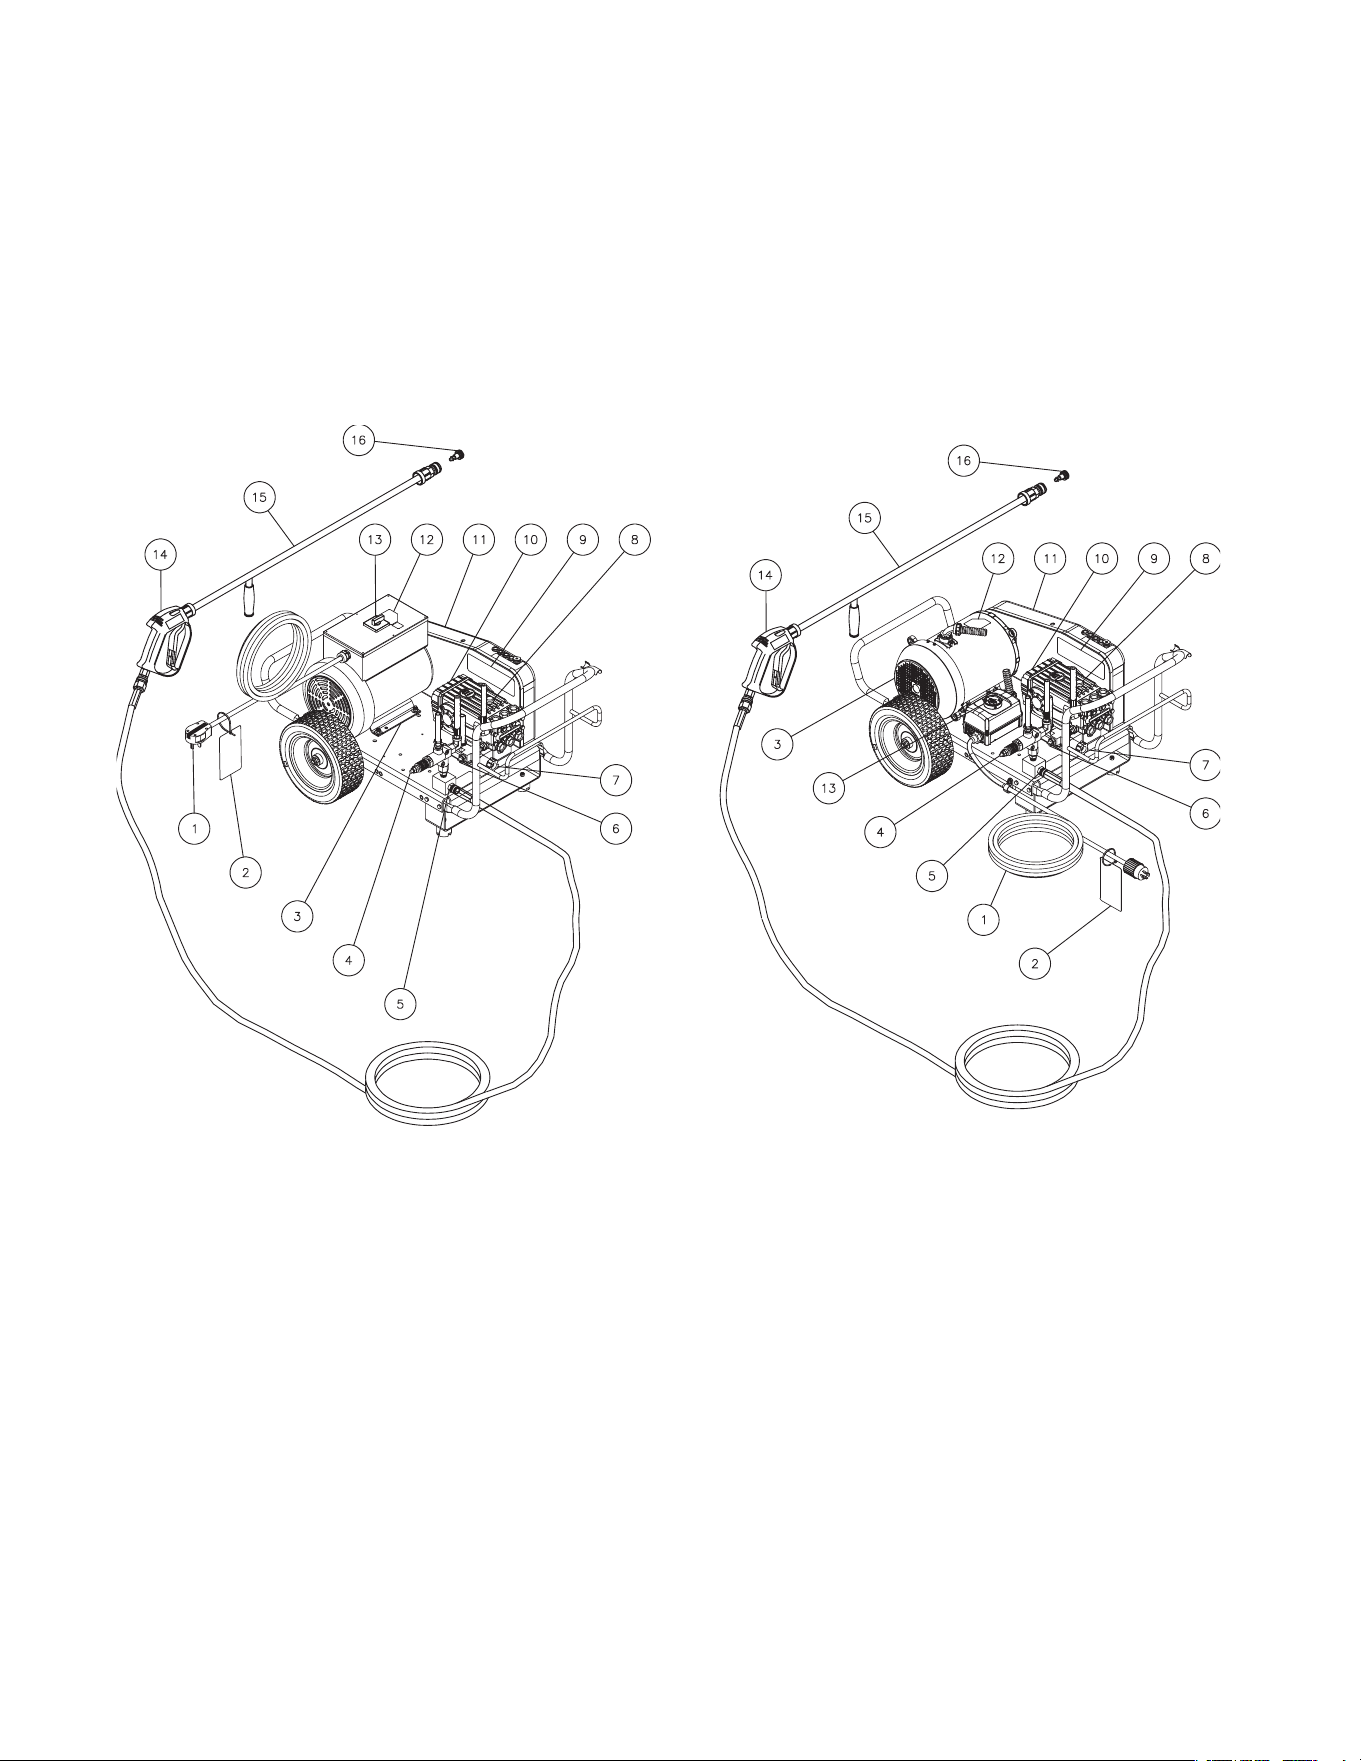
FEATURES LISTING
SINGLE PHASE
THREE PHASE
CW-ELEC FEATURES 011823
10. Oil Sight Glass
11. Beltguard
12. Decal: Caution-High Pressure Spray
13. Switch (Singlephase)
Starter (Three-phase)
14. Gun
15. Wand
16. Spray Nozzles
1. Plug Cord - 10 foot
2. Tag: Warning-Risk of Electrocution
3. Motor
4. Unloader
5. High Pressure Outlet
6. Thermal Relief Valve
7. Water Inlet
8. Oil Dipstick
9. Decal: Warning/Caution/Operating Instructions
Operator's Manual 9
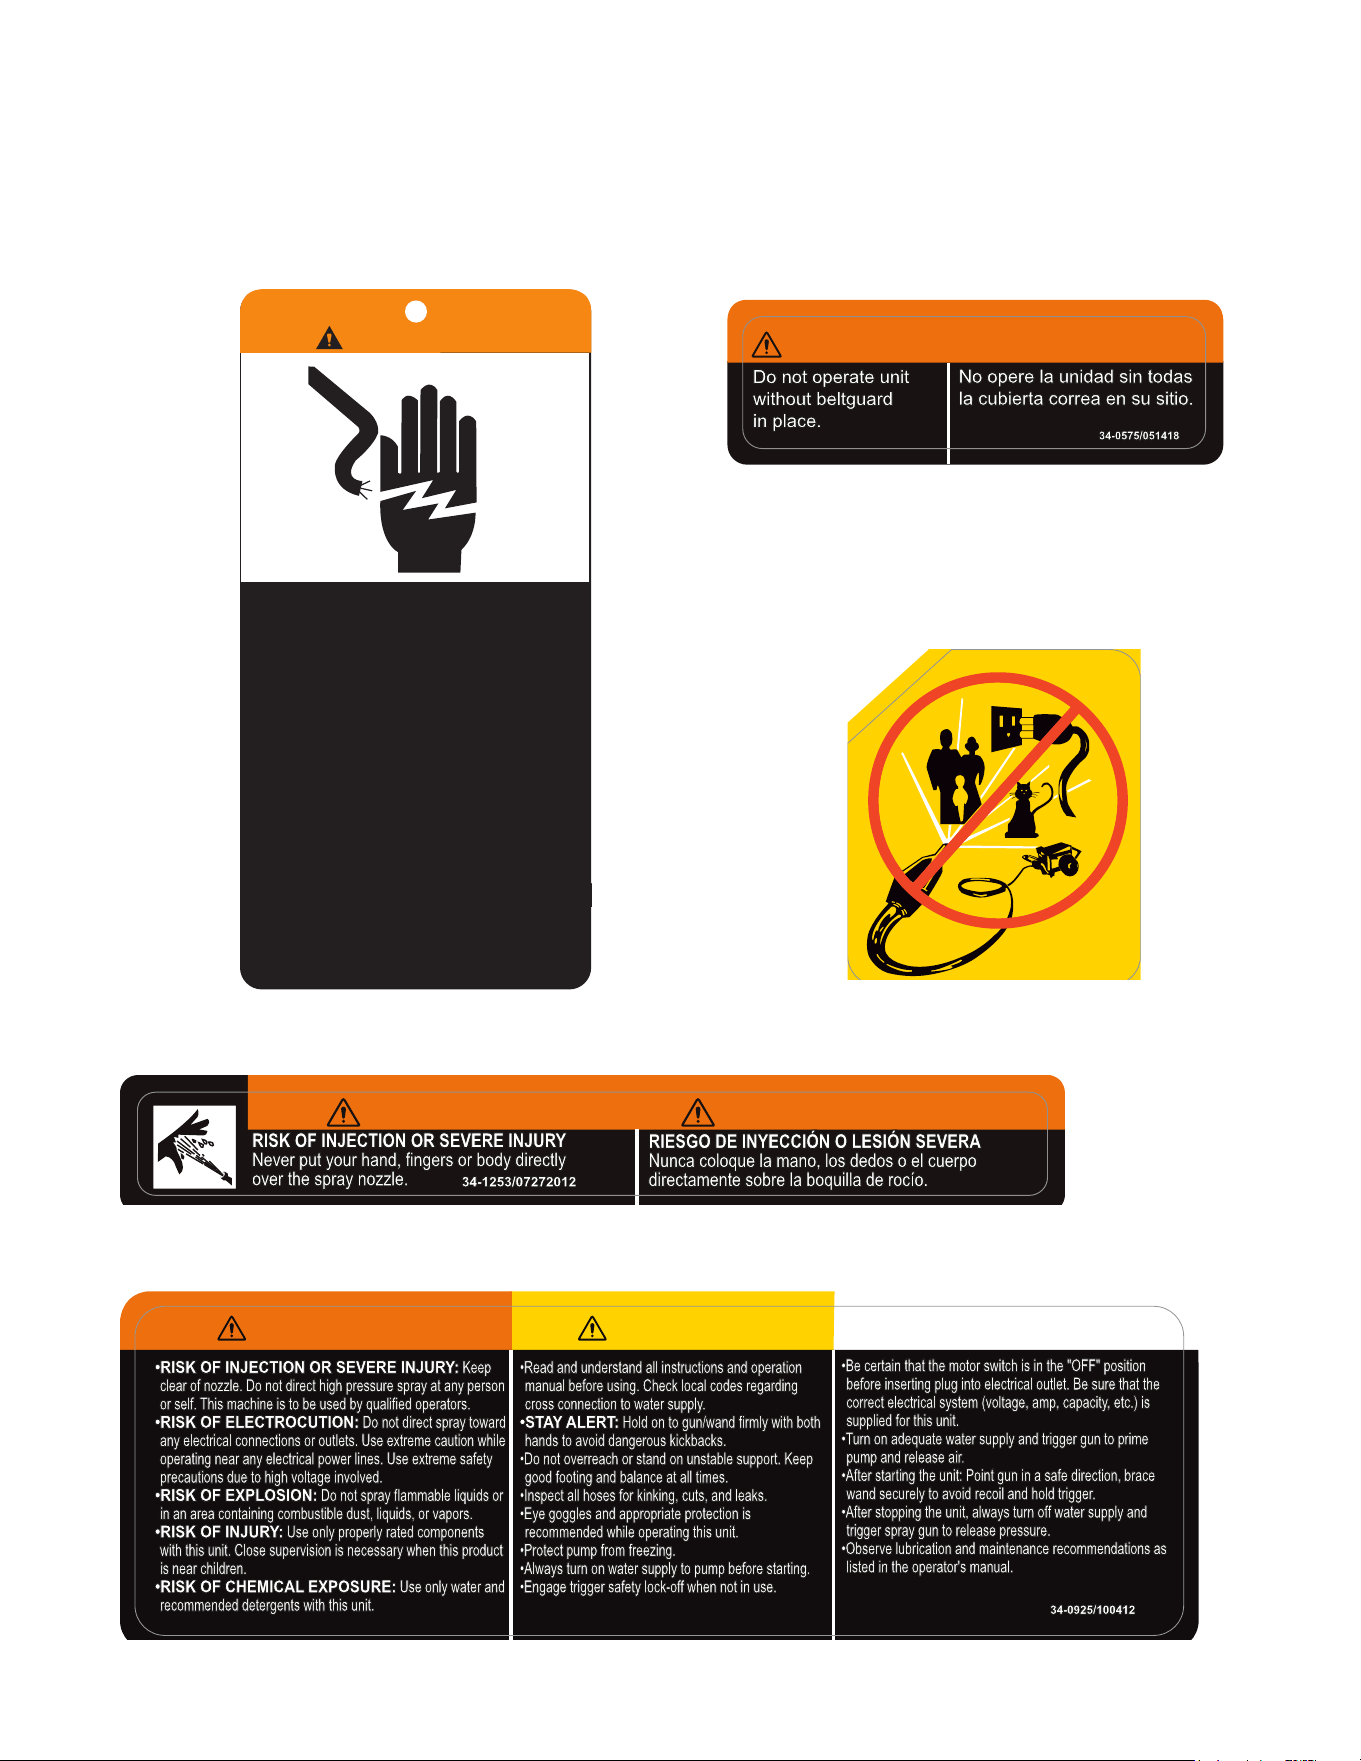
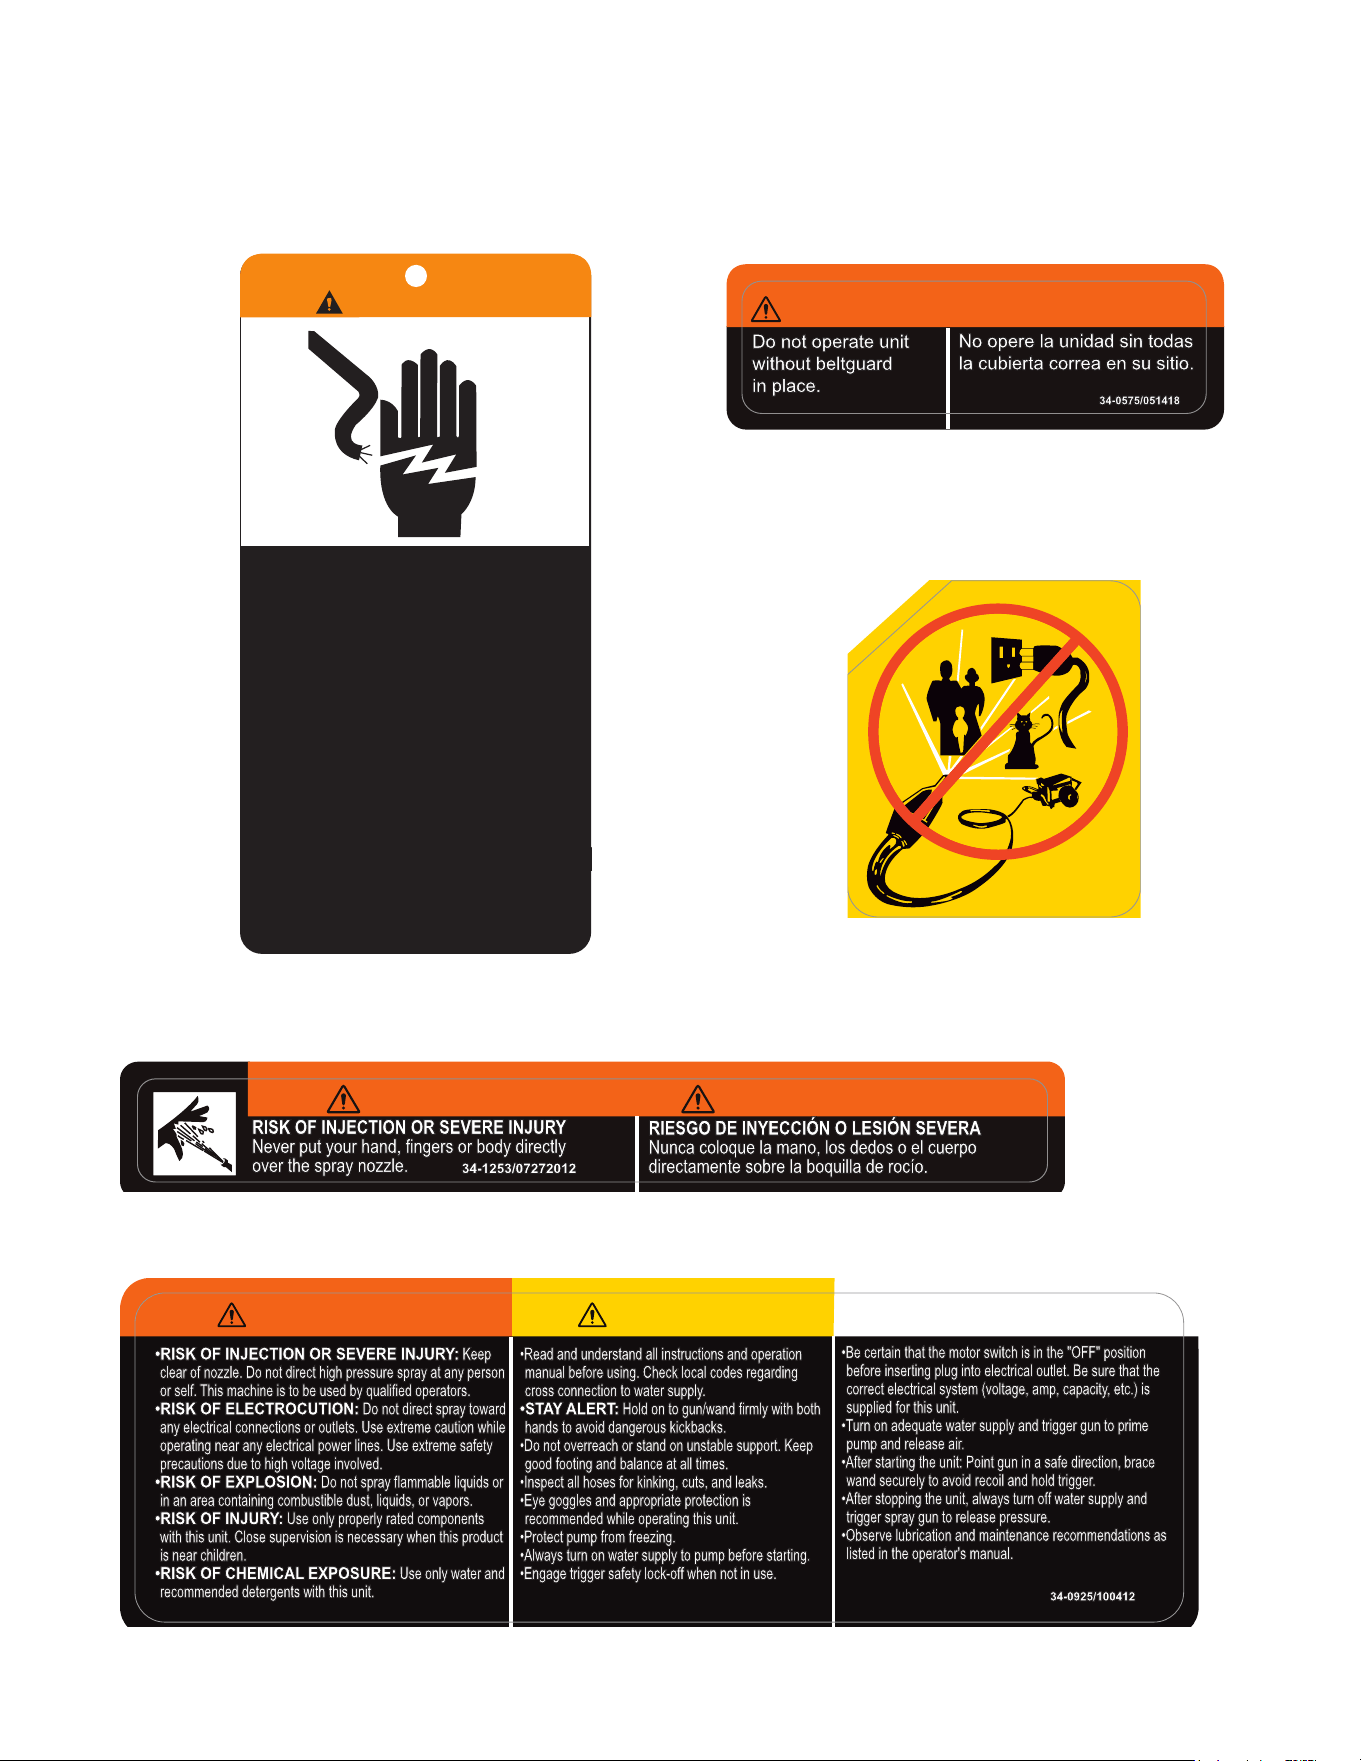
Decal: Warning: Beltguard in Place
(Part #34-0575)
Reference #10: Decal: Warning/Caution/Operating Instructions (Part #34-0925)
Decal: Do Not Spray Symbol (Part #34-0391)
Hang Tag: Warning-Risk of Electrocution (Part #34-1035)
RISK OF ELECTROCUTION.
DO NOT REMOVE THIS TAG.
FAILURE TO FOLLOW THE ABOVE
INSTRUCTIONS COULD RESULT
IN A SEVERE ELECTRICAL SHOCK.
34-1035-E/F/S-111899-ENG
1. Connect only to a properly grounded outlet. Do not
remove ground pin.
2. Inspect cord before using. Do not use if cord is
damaged.
3. Keep all connections dry and off the ground.
4. Do not touch plug with wet hands.
5. This unit may be provided with a Ground Fault Circuit
Interrupter (GFCI) built into the power cord plug. If
replacement of the plug or cord is needed, use only
identical replacement parts. If this unit is not provided
with a GFCI, this unit should only be connected to a
power supply receptacle protected by a ground fault
circuit interrupter.
6. Do not use an extension cord with this machine.
7. Read the operator's manual before using.
WARNING
34-0391/011413
•RISK OF INJECTION OR SEVERE INJURY: Keep
clear of nozzle. Do not direct high pressure spray at any person
or self. This machine is to be used by qualified operators.
•RISK OF ELECTROCUTION: Do not direct spray toward
any electrical connections or outlets. Use extreme caution while
operating near any electrical power lines. Use extreme safety
precautions due to high voltage involved.
•RISK OF EXPLOSION: Do not spray flammable liquids or
in an area containing combustible dust, liquids, or vapors.
•RISK OF INJURY: Use only properly rated components
with this unit. Close supervision is necessary when this product
is near children.
•RISK OF CHEMICAL EXPOSURE: Use only water and
recommended detergents with this unit.
•Read and understand all instructions and operation
manual before using. Check local codes regarding
cross connection to water supply.
•STAY ALERT: Hold on to gun/wand firmly with both
hands to avoid dangerous kickbacks.
•Do not overreach or stand on unstable support. Keep
good footing and balance at all times.
•Inspect all hoses for kinking, cuts, and leaks.
•Eye goggles and appropriate protection is
recommended while operating this unit.
•Protect pump from freezing.
•Always turn on water supply to pump before starting.
•Engage trigger safety lock-off when not in use.
•Be certain that the motor switch is in the "OFF" position
before inserting plug into electrical outlet. Be sure that the
correct electrical system (voltage, amp, capacity, etc.) is
supplied for this unit.
•Turn on adequate water supply and trigger gun to prime
pump and release air.
•After starting the unit: Point gun in a safe direction, brace
wand securely to avoid recoil and hold trigger.
•After stopping the unit, always turn off water supply and
trigger spray gun to release pressure.
•Observe lubrication and maintenance recommendations as
listed in the operator's manual.
WARNING
CAUTION
OPERATION
34-0925/100412
RISK OF INJECTION OR SEVERE INJURY
Never put your hand, fingers or body directly
over the spray nozzle.
34-1253/07272012
RIESGO DE INYECCIÓN O LESIÓN SEVERA
Nunca coloque la mano, los dedos o el cuerpo
directamente sobre la boquilla de rocío.
WARNING
ADVERTENCIA
SAFETY DECALS & PLACEMENT
DO NOT REMOVE SAFETY DECALS FROM UNIT UNLESS REPLACING WITH MOST CURRENT
SAFETY DECAL!!
Decal: Warning: Risk of Injection (Part #34-1253)
34-0575/051418
WARNING/ADVERTENCIA
No opere la unidad sin todas
la cubierta correa en su sitio.
Do not operate unit
without beltguard
in place.
No opere la unidad sin todas
la cubierta correa en su sitio.
Do not operate unit
without beltguard
in place.
10 Operator's Manual
INSTALLATION & PREPARATION
NOZZLE REVIEW:
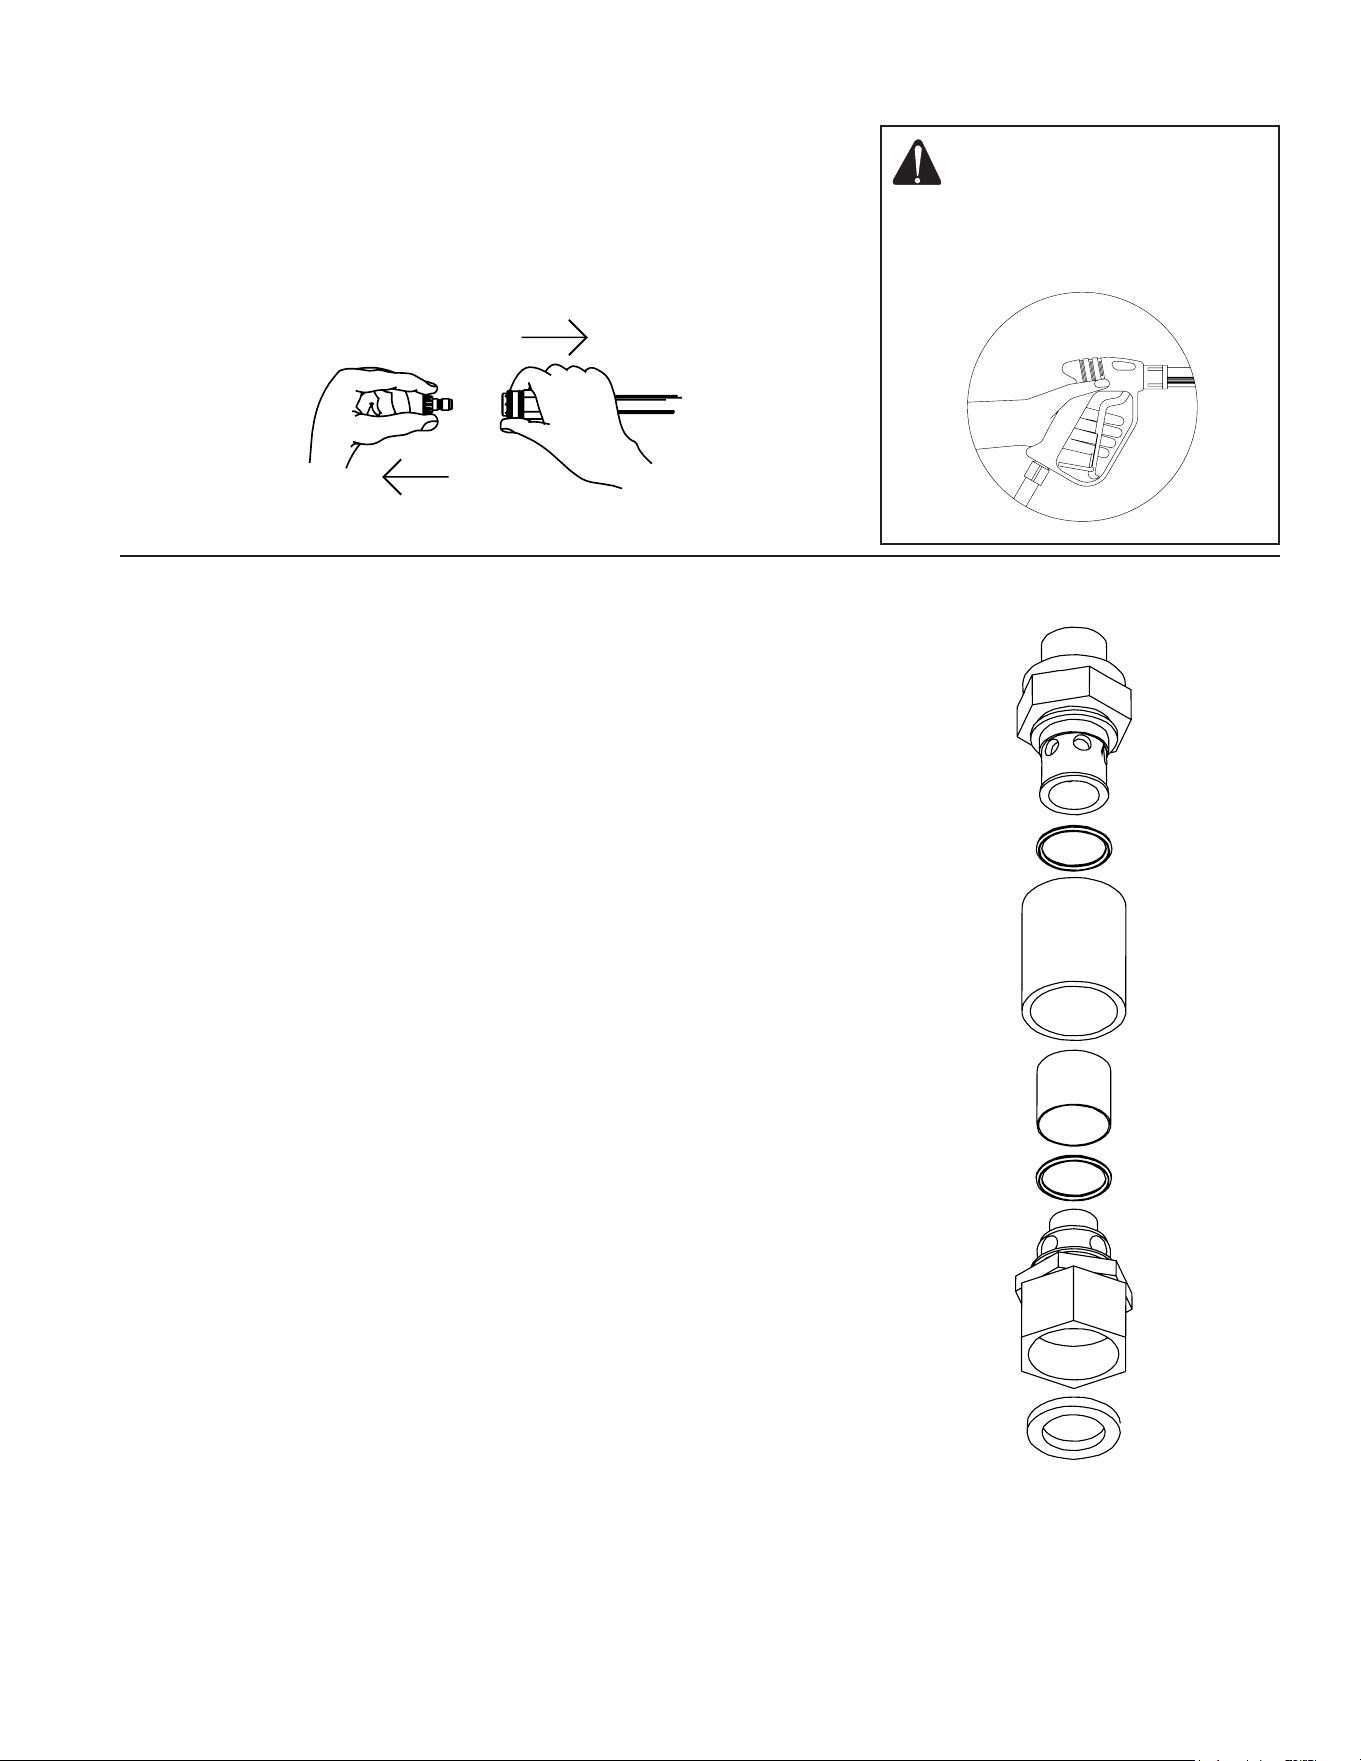
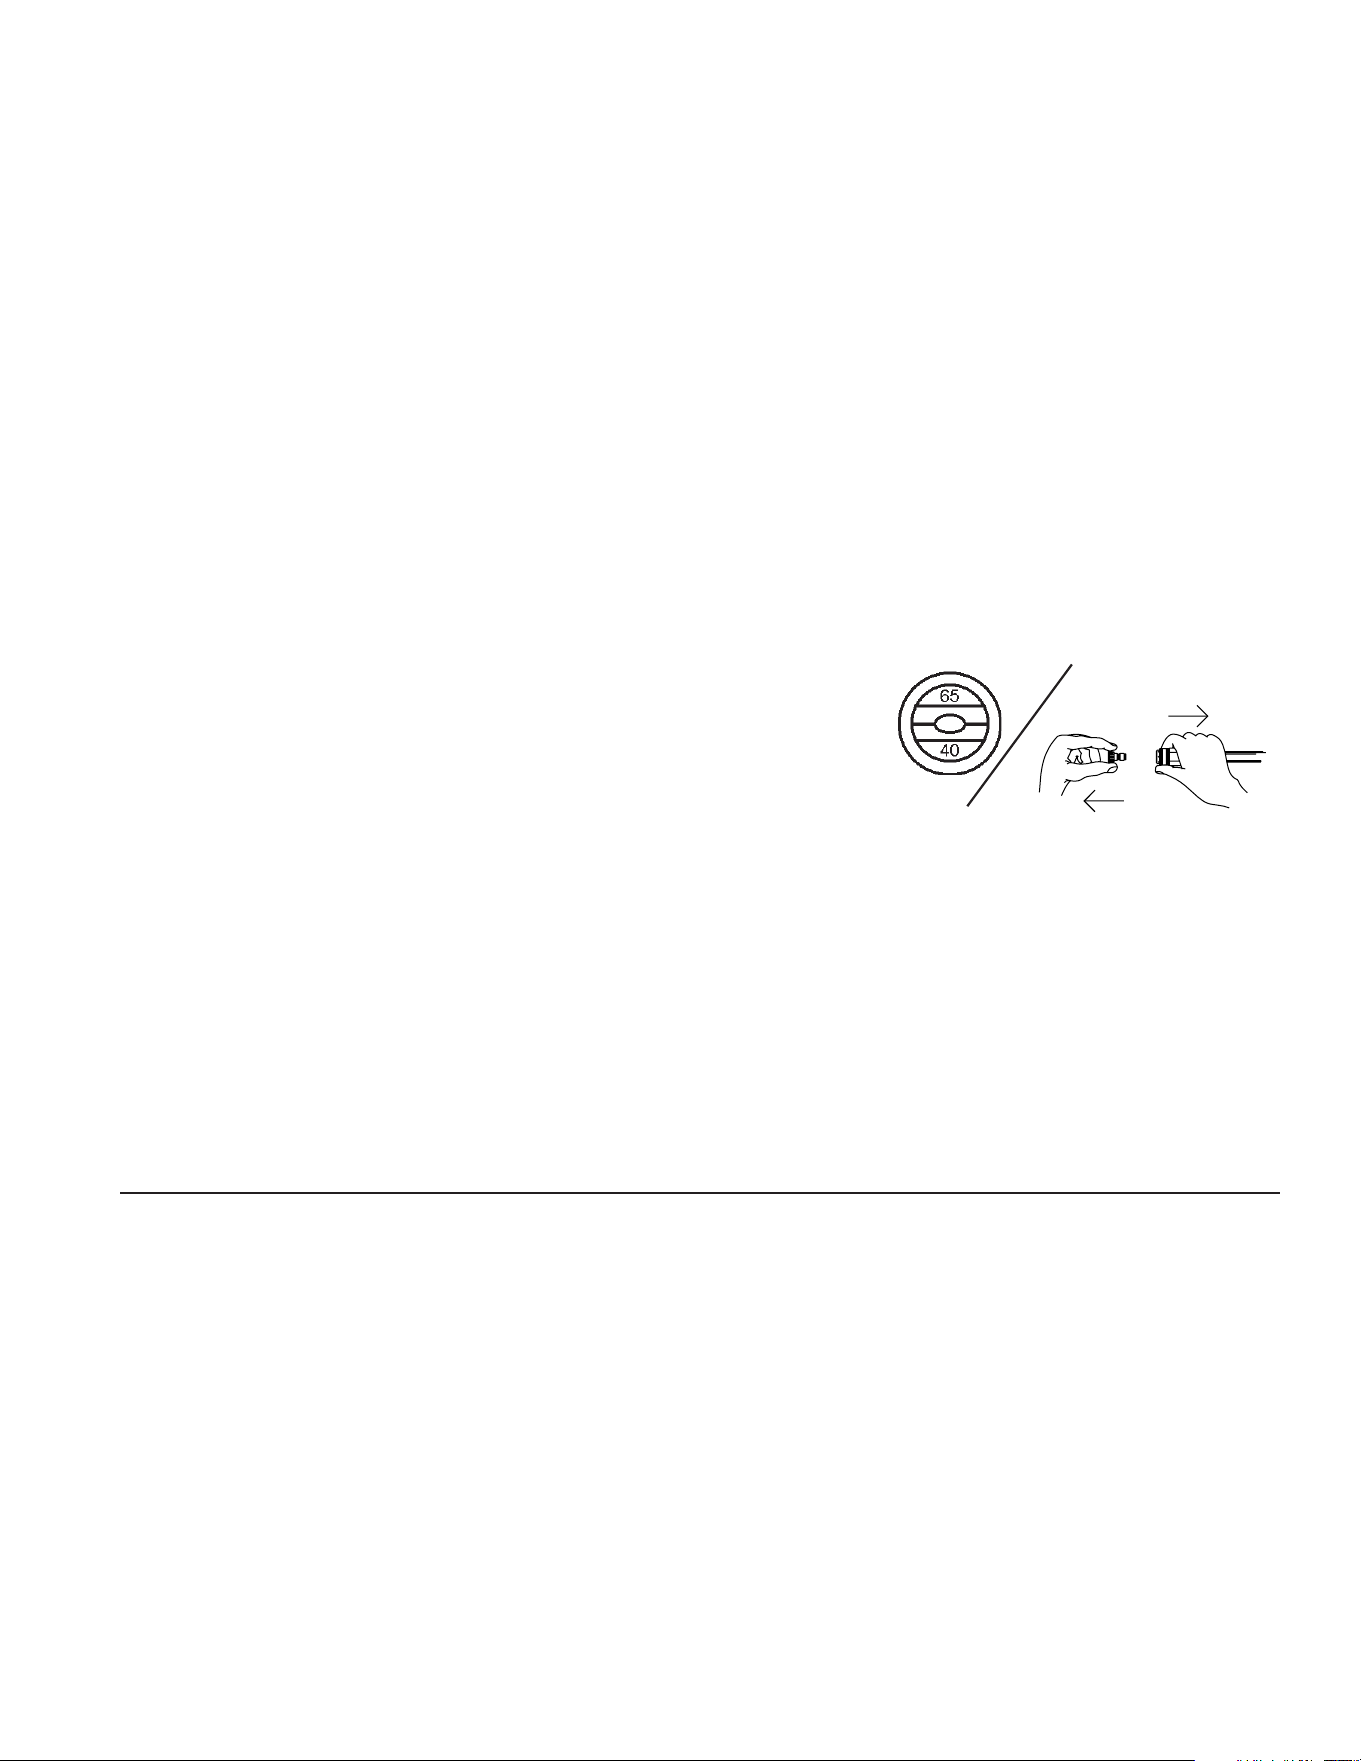
Various nozzles may be quick-connected into the end of the wand to change
the spray pattern or use the optional detergent feature. When using Quick
Connects (Q.C.), be certain the connection is securely locked. (See Figure
"Connection of Q.C. Nozzles" right.) If not, the high pressure water may
shoot the nozzle from the wand, causing severe injury or serious damage.
To determine spray fan, refer to the actual number stamped on the nozzle.
The rst two digits indicate the spray fan in degrees, i.e.; 00=0°, 15=15°,
25=25°, 40=40°.
1. The 0° nozzle (RED): This is a blasting nozzle. It delivers a very concentrated
stream of water. Care should be used to avoid gouging wood or damaging
fragile surfaces. Uses: Removing weeds from sidewalk cracks, stubborn
stains from concrete, masonry, aluminum and steel, caked mud from
equipment, and cleaning lawn mower undersides.
2. The 15° nozzle (YELLOW): This is a chiseling nozzle. The spray should
be directed at a 45° angle to the surface and used like a scraper to remove
paint, grease and dirt. Uses: Surface preparation (removing mildew) stains
and paint chips).
3. The 25° nozzle (GREEN): This is a ushing nozzle. This pattern is best
suited for ushing dirt, mud, and grime. Uses: Wet sweeping leaves from
walks, curbs and driveways, cleaning stable oors, washing swimming
pool bottoms, degreasing engines.
4. The 40° nozzle (WHITE): This is a wash nozzle. This wide spray pattern
disperses the water pressure over a large area and is recommended for
moderate washing. Uses: Washing down aluminum siding, washing
vehicles, spraying sidewalks, driveways, and patios.
ATTIRE:
Proper attire is essential to your safety. It is advised to utilize whatever
means necessary to protect eyes, ears, and skin. Additional safety attire
(such as respiratory mask) may be required when using detergent cleaning
agents with this washer.
SETUP:
1. This unit should only be placed on a level surface to ensure proper lubrication
for the water pump while operating. NEVER spray water directly on the
unit!
2. DO NOT place unit in an area:
a. where there is evidence of oil or gas leaks
b. where ammable vapors may be present.
3. Do not allow the unit to be exposed to rain, snow or freezing temperatures.
If any part of the unit becomes frozen; excessive pressure may build up in
the unit which could cause it to burst which could result in serious injury
to the operator or bystanders.
4. Pump oil level should be checked before each use to be certain the oil level
is in the center of the sight glass. If low, ll with Mi-T-M pump oil (#AW-
4085-0016). DO NOT OVERFILL!
WARNING RISK OF
EXPLOSION OR FIRE!
DO NOT OPERATE UNIT IN AN
AREA WHERE FLAMMABLE
GAS VAPORS MAY BE PRES-
ENT. A SPARK CAN CAUSE AN
EXPLOSION OR FIRE!
RISK OF UNIT BURSTING!
DO NOT STORE OR OPERATE
UNIT IN A FREEZING ENVI-
RONMENT!
QUICK CONNECT (Q.C.) NOZZLES
CONNECTION OF Q.C.
NOZZLES
WARNING RISK OF
INJECTION CAUSING
SEVERE INJURY!
NEVER LOOK DIRECTLY AT
THE NOZZLE ORIFICE UNLESS
IT IS DISCONNECTED FROM
THE GUN/WAND ASSEMBLY!
Operator's Manual 11
INSTALLATION & PREPARATION
WATER SUPPLY:
1. Select a water supply hose which is a quality grade of garden hose
measuring at least 3/4" ID and no longer than 50 feet.
2 Check the see-through water lter to ensure it is clean and free of
any obstructions. Periodic cleaning of the see-through water lter will
helpprevent pump problems. As a lter screen becomes obstructed, it
restrictsproper ow of water to the pump. This can result in cavitations
which will cause premature failure of pump packings.
a. Unscrew the garden hose inlet connection from the front of the lter
assembly.
b. Remove the clear plastic cover and clean the lter screen.
3. Connect the hoses:
a. Connect one end of the water supply hose to the water inlet of the
unit.
b. Connect the other end of the hose to your pressurized water
supply. When connecting the water inlet to the water supply mains,
local regulations of your water company must be observed. In some
areas, the unit must not be connected directly to the public drinking
water supply. This is to ensure that there is no feedback of the
detergents into the water supply. (Direct connection is permitted if
a back ow preventer is installed.)
c. Quick-connect the high pressure discharge hose to the water outlet
of the unit.
d. Connect the other end of the discharge hose to the gun.
4. Follow the incoming water requirements listed below:
a. Water pressure must be a minimum of 25 pounds per square inch
(PSI) and a maximum of 125 PSI. (A typical outdoor faucet will
generally supply this PSI if turned completely “ON”.)
b. Incoming GPM must be approximately one gallon more than the
outgoing GPM stated on the pressure washer nameplate. (You can
check GPM by timing how long it takes to ll a 5 gallon container.)
c. Incoming water temperature must not exceed 125°F. Excessive
pump damage may result if the water temperature exceeds this
acceptable level.
5. Never allow the unit to operate without the incoming water line attached
and the water supply completely turned on.
NOZZLE CONNECTION:
1. Ensure the trigger gun is locked in the "OFF" position. See WARNING,
right.
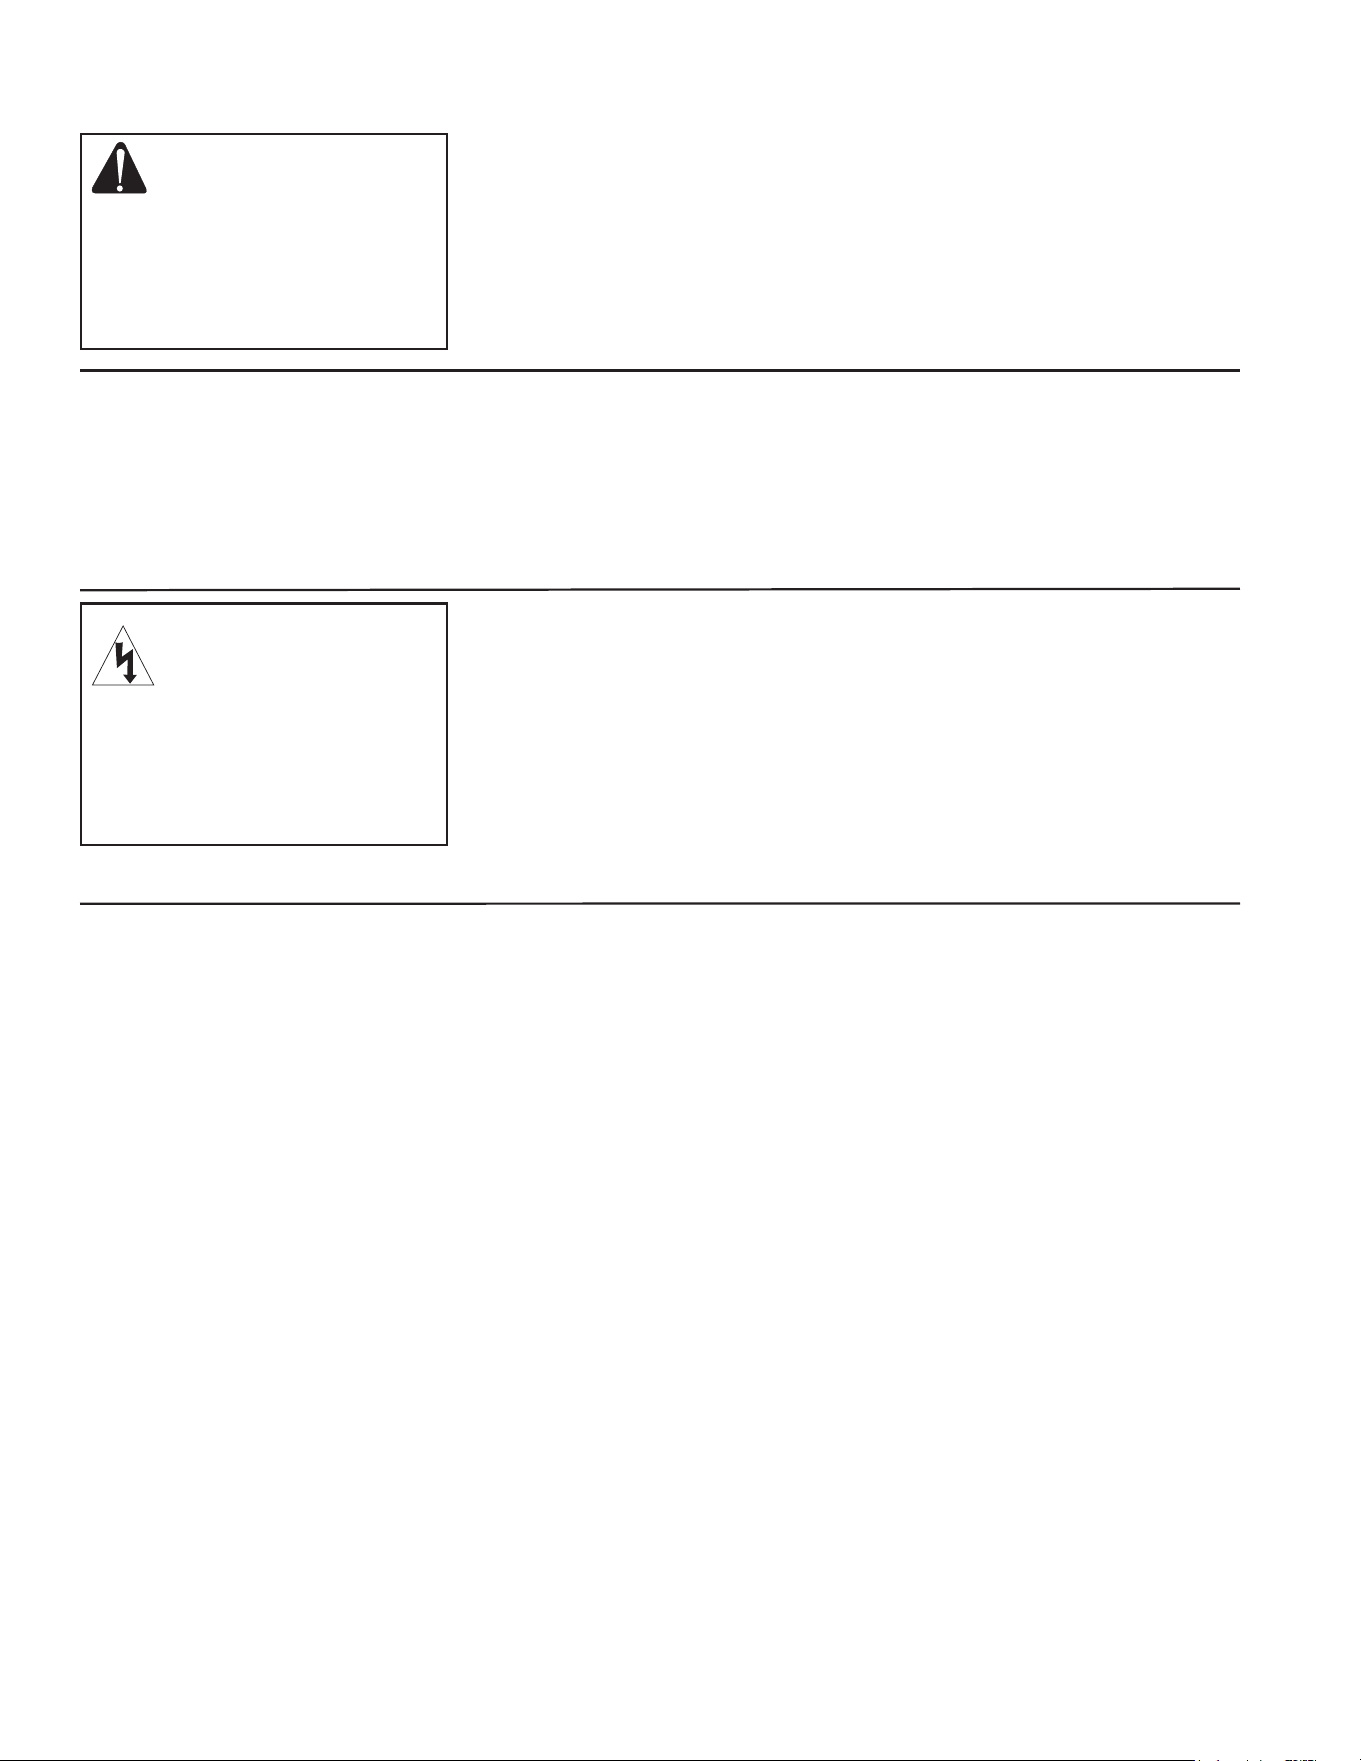
2. The quick-connect nozzle should be disconnected from the gun assembly
at this time. As shown in the drawing below, retract the locking ring on
the quick-connect tting to remove the nozzle.
WARNING RISK OF SEVERE
INJURY!
THE TRIGGER GUN SHOULD
ALWAYS BE LOCKED IN THE OFF
POSITION WHEN NOT IN USE!
12 Operator's Manual
INSTALLATION & PREPARATION
UNLOADER:
If the unloader on your machine is equipped with an adjustment knob, you
can adjust the pressure. Should less pressure be required, simply turn the
adjustment knob counterclockwise. To set back to maximum, turn adjust-
ment knob completely clockwise. DO NOT OVERTIGHTEN!
If the unloader does not have an adjustment knob, DO NOT adjust the pres-
sure on your own! The pressure has been preset at the factory and should
only be adjusted by a trained Mi-T-M Customer Service Representative.
PRE-START INSPECTION PROCEDURES:
Before starting the unit, perform the following procedures:
1. Check the oil level in the pump.
2. Inspect the inlet water strainer. Clean or replace if necessary. See "Water
Supply", #2, pg. 11.
3. Check all hose connections to ensure they are securely tightened. See
"Water Supply", #3, pg. 11.
4. Inspect for system water leaks and oil leaks. Be sure that all damaged
parts are replaced and that the mechanical problems are corrected prior to
operation of the unit. If service is needed, contact an Authorized Service
Center.
5. Inspect high pressure hose for kinking, cuts or leaks. If a cut or leak is found,
DO NOT USE HOSE! Replace hose before starting unit. See "Miscellaneous
Safety Precautions" #6, pg. 6. Be sure that all damaged parts are replaced
and that the mechanical problems are corrected prior to operation of the
unit. If you need service, contact an Authorized Service Center.
6. Inspect electrical cord for cuts. If a cut is found, DO NOT TOUCH OR USE
ELECTRICAL CORD! Replace cord before starting the unit.
THERMAL RELIEF VALVE:
To ensure that the water temperature does not exceed acceptable levels,
never allow the pressure washer to operate in the bypass mode (with the unit
running and the trigger gun closed) for more than three minutes.
A "Thermal Relief Valve" has been added to this unit to protect the pump. It
will open and release water if the water temperature in the pump has ex-
ceeded 140°F. This will allow fresh, cool water to enter the system.
POWER CORD CONNECTION:
1. Make certain the motor switch is in the "OFF" position.
2. Ensure electrical supply matches that shown on identication plate located
on unit base plate.
3. If your unit is equipped with a GFCI, test the GFCI according to the instructions
on the GFCI. Do not use if the test fails!
4. Ensure the area between the pressure washer cord and the outlet is kept
dry.
5. Insert the male plug into a properly grounded AC outlet. DO NOT use an
adapter OR remove the grounding prong!
WARNING RISK OF
ELECTROCUTION!
THIS UNIT MUST BE CON-
NECTED TO A PROPERLY
GROUNDED OUTLET. DO NOT
USE AN ADAPTER OR REMOVE
THE GROUNDING PRONG.
CAUTION RISK OF UNIT
DAMAGE!
DO NOT OVERTIGHTEN THE
UNLOADER. BREAKAGE WILL
RESULT IN IMMEDIATE LOSS
OF WATER PRESSURE AND
COSTLY REPAIRS.

Operator's Manual 13
WARNING
THE FOLLOWING PAGES CONTAIN OPERATING AND MAINTENANCE INSTRUCTIONS.
DO NOT ATTEMPT TO OPERATE THIS PRESSURE WASHER UNTIL YOU HAVE READ AND
UNDERSTOOD ALL SAFETY PRECAUTIONS AND INSTRUCTIONS LISTED IN THIS MANUAL.
INCORRECT OPERATION OF THIS UNIT CAN CAUSE SERIOUS INJURY!!
DO NOT ALTER OR MODIFY THIS EQUIPMENT IN ANY MANNER!
14 Operator's Manual
PRIMING THE PUMP:
1. It is essential to prime the pump on initial start-up and each time the water
supply is disconnected from the unit after initial use.
2. Lay the high pressure hose out to remove any loops. Water ow will constrict
the hose creating tight loops if the hose is not straight.
3. Securely connect the gun/wand assembly to the high pressure hose.
NOTE: The quick connect nozzle should NOT be connected to the gun
wand assembly at this time. See "Nozzle Connection", pg. 11.
4. With the trigger gun locked in the "OFF" position, turn the water supply
completely on. Pointing the gun in a safe direction, unlock the trigger gun
and squeeze the trigger.
5. Low pressure water will begin owing from the gun/wand assembly. This
allows the unit to prime and purge any air from the system. The unit is
primed when water ow is uninterrupted by air.
6. Once the unit is primed, release the trigger and lock the gun in the "OFF"
position. Securely connect the quick connect nozzle. (See "Connection
of Q.C. Nozzle", pg. 10)
START-UP:
1. Refer to the "Safety Precautions" pgs. 4-7 before starting the unit.
2. Locate the Safety Decals on your unit and heed their warnings.
3. With the gun locked in the "OFF" position, point the trigger gun away from
yourself or anyone else. Ensure water supply is turned completely on.
4. Disengage the safety lock-off on the gun and squeeze the trigger. Low
pressure water will begin owing from the nozzle.
5. Before starting the unit, brace yourself, as the gun will kickback from the
high pressure created by the pump once the unit has started.
6. Move the On/Off Switch in the "ON" position. Some switches include
a circuit breaker for protection of the motor. In case of excess load, the
circuit breaker will automatically move the switch to the "OFF" position.
To restart, move the On/Off Switch again.
7. Once the unit is turned on, perform the following procedures with the gun
open:
a. Inspect for system water leaks and oil leaks. If an oil leak is found, TURN
UNIT OFF IMMEDIATELY! Be sure that all damaged parts are replaced
and that the mechanical problems are corrected prior to operation of
the unit. If you require service, contact Customer Service.
b. Inspect high pressure hose for kinking cuts and leaks. If a cut or leak
is found, DO NOT TOUCH HOSE AT CUT OR LEAK!!! TURN UNIT
OFF IMMEDIATELY! Replace hose before restarting the unit. See
"Miscellaneous Safety Precautions #7, pg. 6. Be sure that all damaged
parts are replaced and that the mechanical problems are corrected
prior to operation of the unit. If you require service, contact Customer
Service.
c. Inspect electrical cord for cuts. If a cut is found, DO NOT TOUCH
ELECTRICAL CORD AT CUT!!! TURN UNIT OFF IMMEDIATELY!
8. Trigger the gun several times. Be certain to LOCK the trigger gun in the
"OFF" position whenever changing the quick connect nozzle. NEVER look
directly into the nozzle! High pressure water creates a risk of severe injury!
9. Do not allow the unit to operate in the bypass mode (with the trigger closed)
for more than 3 minutes without triggering the gun. Failure to follow this
simple rule can cause premature failure of pump packing seals, resulting
in costly pump repair.
CAUTION RISK OF
DAMAGE.
DO NOT ALLOW SPRAY PAT-
TERN TO REMAIN ON A FIXED
AREA FOR AN EXTENDED
PERIOD OF TIME. POSSIBLE
DAMAGE MAY OCCUR TO THE
AREA.
DANGER RISK OF
INJECTION CAUSING
SEVERE INJURY!
-KEEP CLEAR OF NOZZLE!
NEVER PLACE HAND OR FIN-
GERS IN FRONT OF NOZZLE!
-DO NOT DIRECT DISCHARGE
STREAM AT PEOPLE OR PETS!
-BE CERTAIN THE NOZZLE IS
SECURELY CONNECTED TO
THE WAND TO PREVENT AC-
CIDENTAL DISCHARGE.
OPERATING INSTRUCTIONS
Operator's Manual 15
10. Because your pressure washer delivers a high pressure spray and a variety
of spray patterns, there are many cleaning jobs that can be done without
the use of detergents. If a cleaning agent is required, see "Cleaning With
Detergents" pg. 15 for the correct procedures.
CLEANING WITH DETERGENTS (OPTIONAL FEATURE):
The Detergent Injection feature is an optional feature on this unit. If you wish
to add this feature to your unit, order part #AW-8300-0000.
1. Refer to "Detergent Cleaning Precautions" pg. 6, and the Detergent Injection
Manual which accompanies part #AW-8300-0000. Be certain to wear
protective safety attire as stated on pg. 10.
2. Prepare detergent solution according to label directions. Never pump acids,
alkaline, abrasive uids or solvents through the unit.
3. Connect detergent injector to the unit as directed in the Detergent Injector
Manual accompanying your unit.
4. Adjust the amount of detergent desired by rotating the adjustment knob
on the injector assembly counterclockwise. Turn the knob completely
counterclockwise to set at the maximum siphon rate.
5. Immerse the strainer into the detergent solution to allow detergent to siphon.
6. With the trigger gun locked in the "OFF" position, securely quick connect
the detergent spray nozzle (#6540 BLACK) into the end of the wand.
NOTE: This injection system was designed to apply detergents under low
pressure only. It will not allow detergent solutions to be introduced
into the system unless the detergent nozzle is installed in the wand.
7. To apply solution; unlock the trigger gun and squeeze the trigger. In a
few moments a detergent/water mixture will exit the low pressure nozzle.
Start spraying the lower portion of the surface being cleaned and move
up, using long overlapping strokes. Applying from the bottom up helps
avoid streaking. Allow to soak briey. (Avoid working on hot surfaces or
in direct sunlight to minimize the chances of the detergent drying, which
may result in damaging surfaces.) Be certain to rinse a small section at a
time.
8. To rinse; lock the trigger gun in the "OFF" position, securely quick connect
the 40° nozzle into the end of the wand. Unlock the trigger gun and spray.
It will take about 30 seconds to purge all detergent from the line. For best
rinsing results, start at the top and work down.
9. Siphon a gallon of water through the low pressure detergent injection system
after each use. This prevents the possibility of corrosion or detergent
residue causing mechanical problems during the next use.
SHUTDOWN:
1. Move the On/Off switch to the "OFF" position to turn unit off.
2. Turn the water supply "OFF".
3. Pointing the gun in a safe direction, trigger gun momentarily to relieve
any trapped pressure. Once pressure is relieved, disconnect the nozzle
assembly.
4. Disconnect the unit from the power source.
5. Disconnect and drain gun, wand and hoses.
6. Wipe unit clean and store with gun, wand and hoses in a safe area.
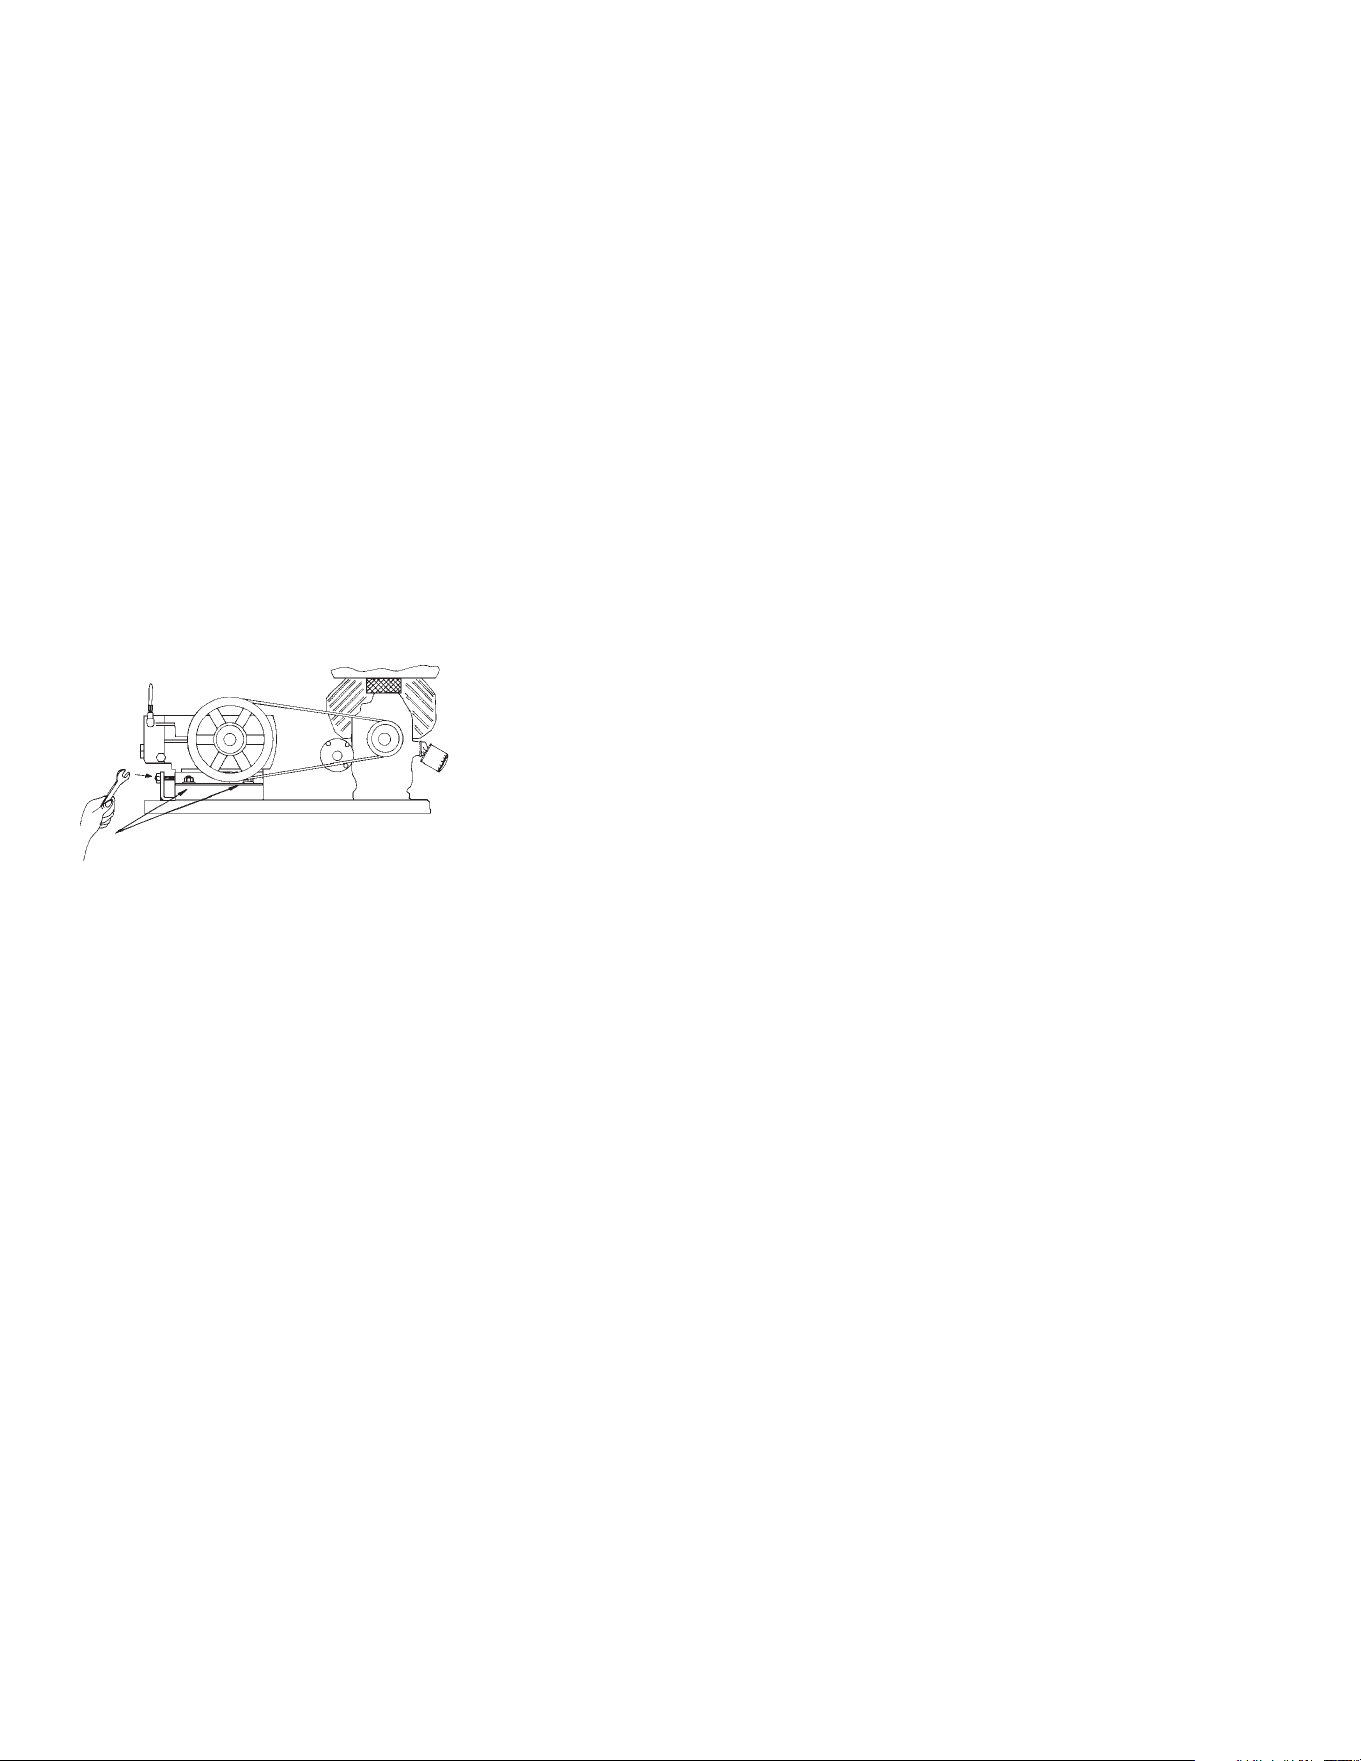
QUICK CONNECT DETERGENT
OPERATING INSTRUCTIONS
16 Operator's Manual
B
A
SPECIFIC MAINTENANCE:
PUMP: Change the pump oil after the rst 25 hours of operation. After
initial change, every 3 months or 250 hour intervals are recommended. If oil
appears dirty or milky, changes may be required in greater frequency. Use
Mi-T-M pump oil (#AW-4085-0016) and ll only to the center of the oil sight
glass.
QUICK COUPLERS: There is an o-ring seal inside the female quick-coupler.
This o-ring will deteriorate or, if the unit is allowed to pump without the high
pressure hose attached, it may be blown out occasionally. Simply insert a
replacement o-ring to correct the leak. (New o-rings can be purchased from
your dealer.)
NOZZLES: Water ow through the quick-connect spray nozzle will erode
the orice, making it larger, resulting in a pressure loss. Nozzles should be
replaced whenever pressure is less than 85% of the maximum. The frequen-
cy of replacement will depend upon such variables as mineral content in the
water and number of hours the nozzle is used.
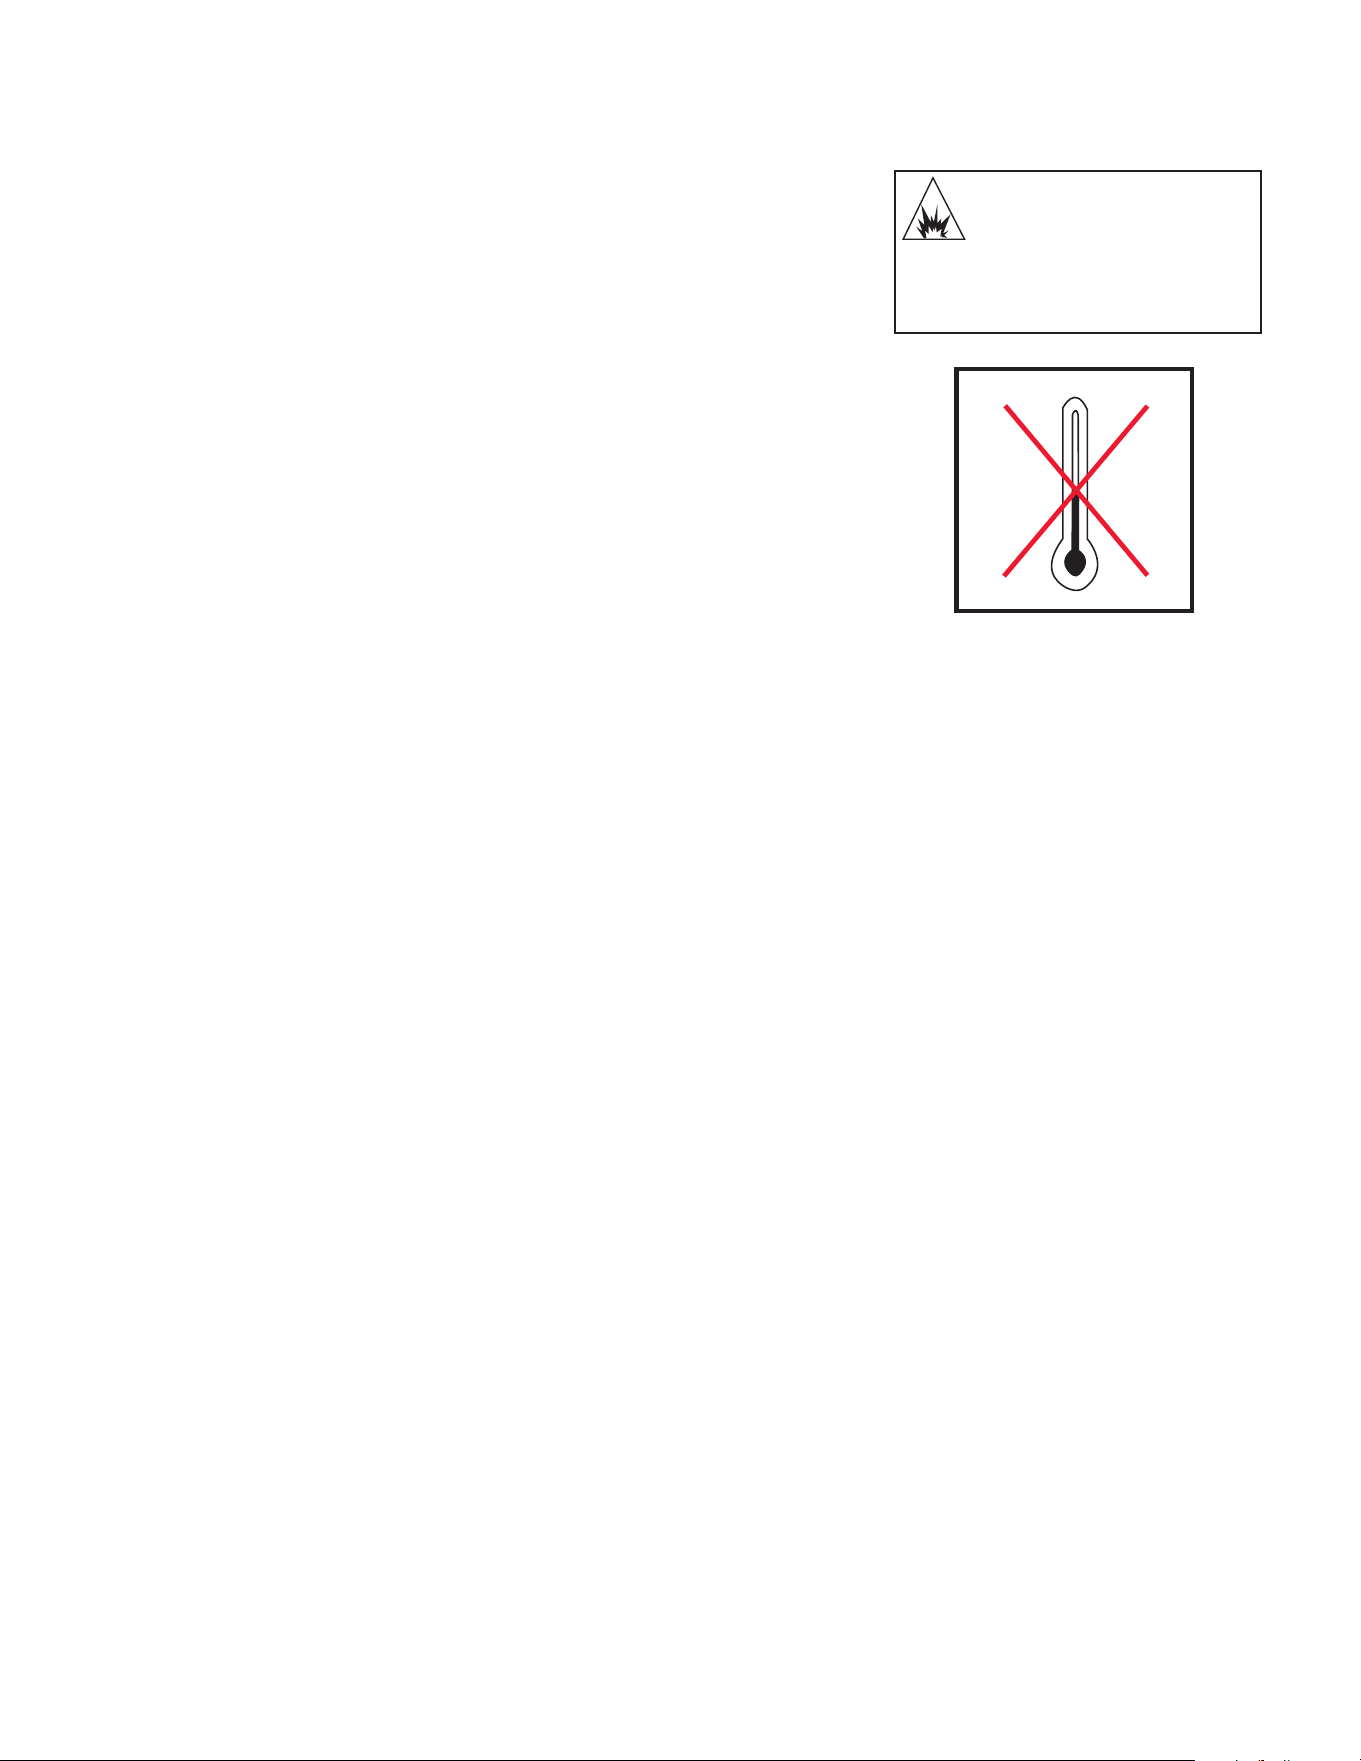
BELT TENSION ADJUSTMENT: To maintain peak performance of your
pressure washer, it may be necessary to adjust the belt tension on occasion.
Follow the procedure outlined below.
1. Remove the belt guard and loosen the two nuts on each side of the pump.
(Reference A) There are a total of 4 nuts.
2. Turn the cap screw (Reference B) clockwise until a 1/2 inch belt deection
is noticed between the pulleys.
3. Tighten the side nuts. (Reference A)
4. Put a straight edge across both pulleys. If necessary, loosen one set of
pulley screws and adjust in or out to properly align. Tighten the pulley
screws and check the tension again.
5. Replace the beltguard and tighten the fasteners securely.
BELT TENSION ADJUSTMENT
STORAGE & MAINTENANCE
Operator's Manual 17
STORAGE & MAINTENANCE
WINTERIZING:
For storage and transportation purposes in subfreezing ambient tempera-
tures, it will be necessary to winterize this unit. This unit must be protected
to the lowest incurred temperature for the following reasons:
1. If any part of the pumping system becomes frozen; excessive pressure may
build up in the unit which could cause the unit to burst resulting in possible
serious injury to the operator or bystanders.
2. The pumping system in this unit may be permanently damaged if frozen.
FREEZE DAMAGE IS NOT COVERED BY WARRANTY.
If you must store your unit in an area where the temperature may fall below
32°F, you can protect your unit by following the procedure outlined below.
1. Gather the following items:
a. Two 5 gallon containers.
b. One gallon of antifreeze. (Mi-T-M recommends an environmentally safe
antifreeze.)
c. Water supply.
d. Three foot hose, 1/2-3/4 I.D. with a 3/4 inch male garden hose tting.
2. Procedure:
a. Shut off the unit and water supply.
b. Relieve system pressure by pointing the trigger gun in a safe direction
and squeezing the trigger until water ow ceases to exit the nozzle.
c. Lock the trigger gun in an OFF position and remove the nozzle.
d. In a 5 gallon container, mix the antifreeze and water according to
manufacturer's recommendations for the temperature to which you are
winterizing.
NOTE: Proper winterizing is based on the recommended manufacture's
instructions listed on the "Protection Chart" shown on the back label
of most antifreeze containers.
e. Remove the water supply hose from the unit and attach the 3 foot hose
securely to the inlet connection. Submerge the opposite end into the
antifreeze solution.
f. Point the wand into the empty container and start the unit.
g. Trigger the gun until the antifreeze begins to exit the wand. Release
the trigger for 3 seconds, then trigger the gun for 3 seconds. Continue
cycling the gun several times until all the antifreeze mixture is siphoned
from the container.
h. Detach the 3 foot hose from the unit and drain any excess antifreeze
back into the 5 gallon container.
i. Disconnect the hose/gun/wand assembly from the unit and drain any
excess antifreeze back into the 5 gallon container.
j. Store the hose, gun and wand with the unit in a safe area.
k. Store antifreeze solution for next use or dispose of according to state
EPA laws.
3. Optional Procedure:
a. Shut off the unit and water supply.
b. Relieve system pressure by pointing the trigger gun in a safe direction
and squeezing the trigger until water ow ceases to exit the nozzle.
c. Disconnect and drain the hose, gun and wand.
d. Start the unit and allow it to run until all the water exits the unit. Once
the water has stopped owing from the unit, turn the unit off.
NOTE: When using this procedure, caution should be used as ice chips
can form from drops of water which could cause the unit to burst if
starting before completely thawed.
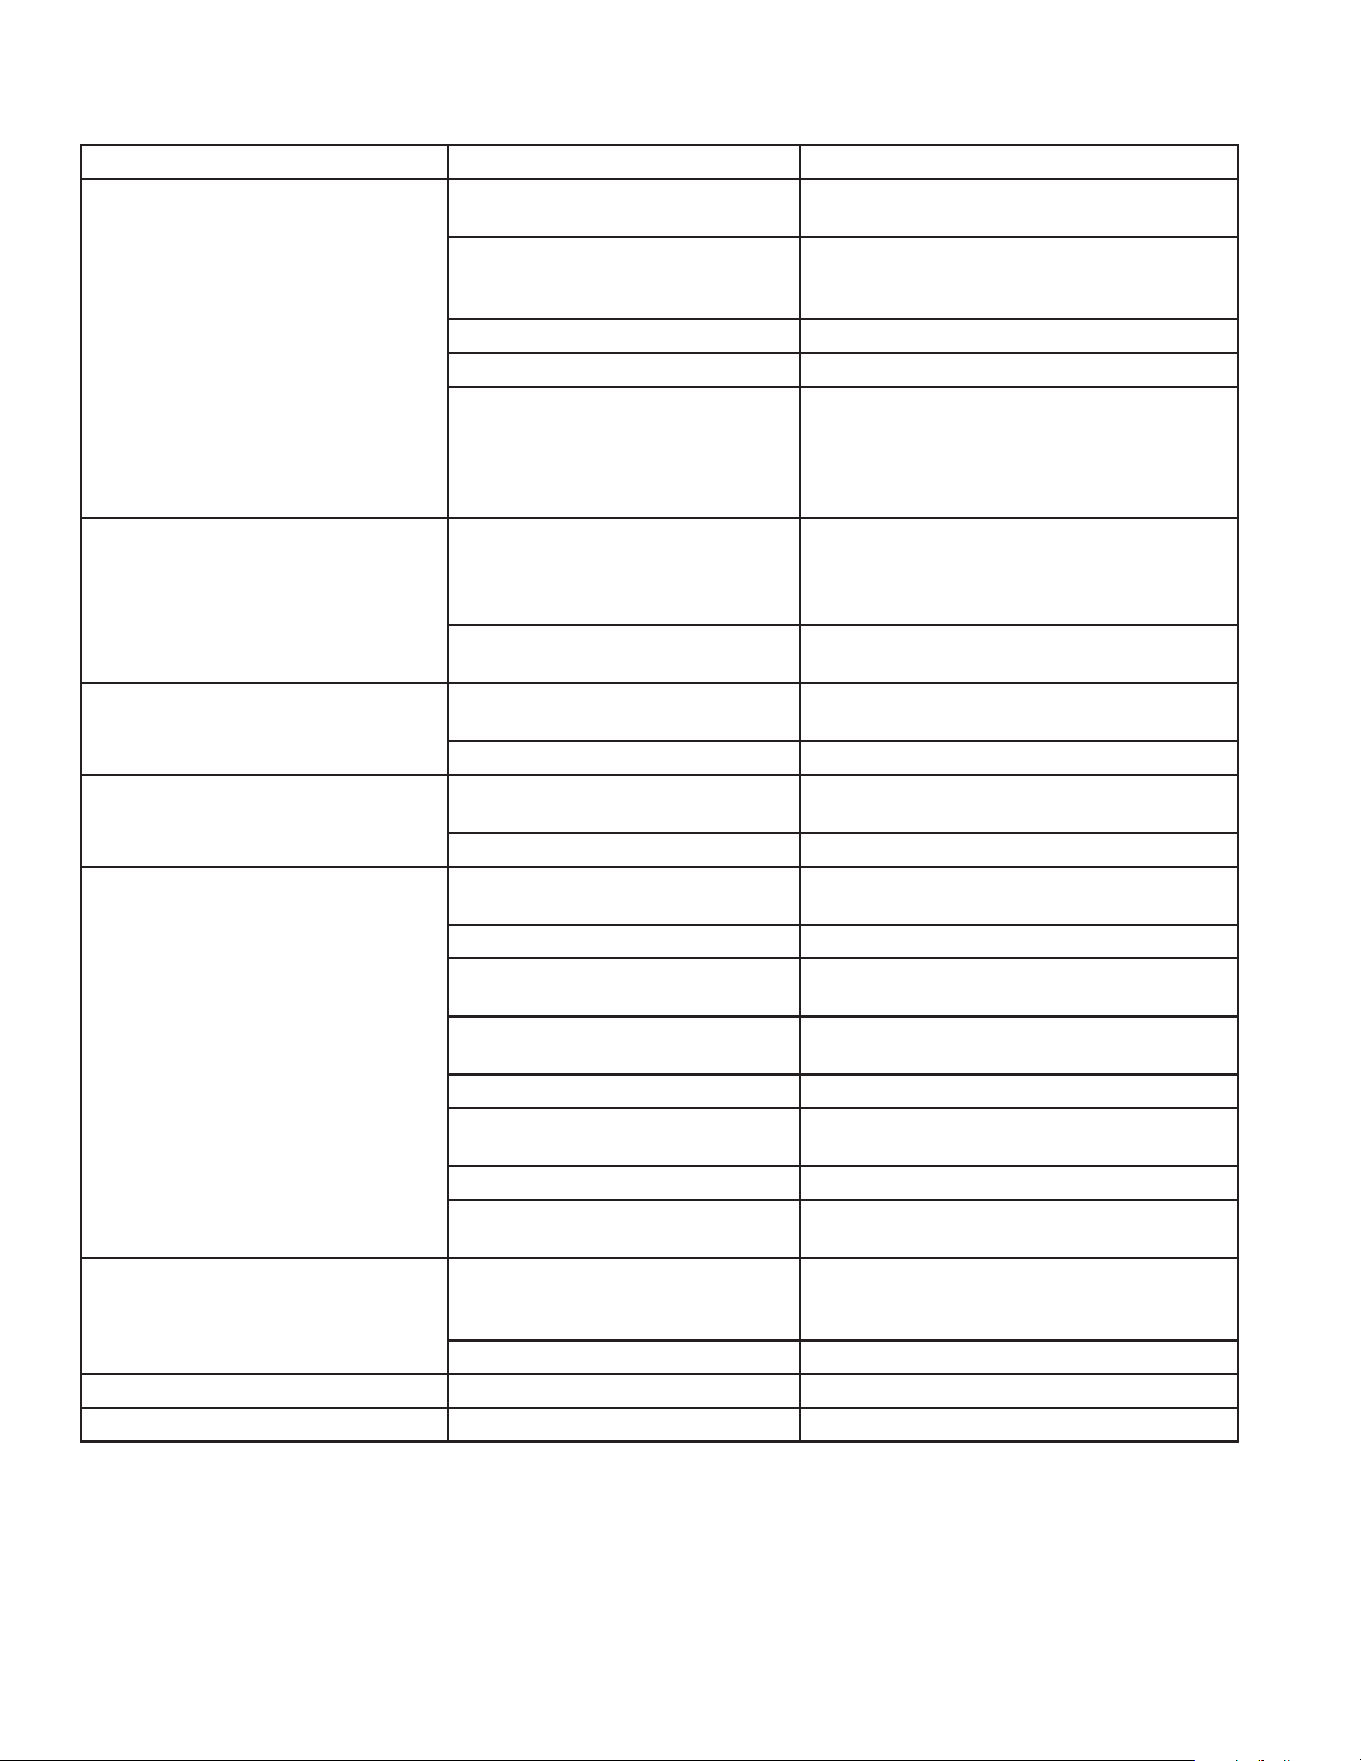
WARNING RISK OF UNIT
BURSTING!
DO NOT STORE OR OPERATE
UNIT IN A FREEZING ENVI-
RONMENT!
32˚F 0˚C
18 Operator's Manual
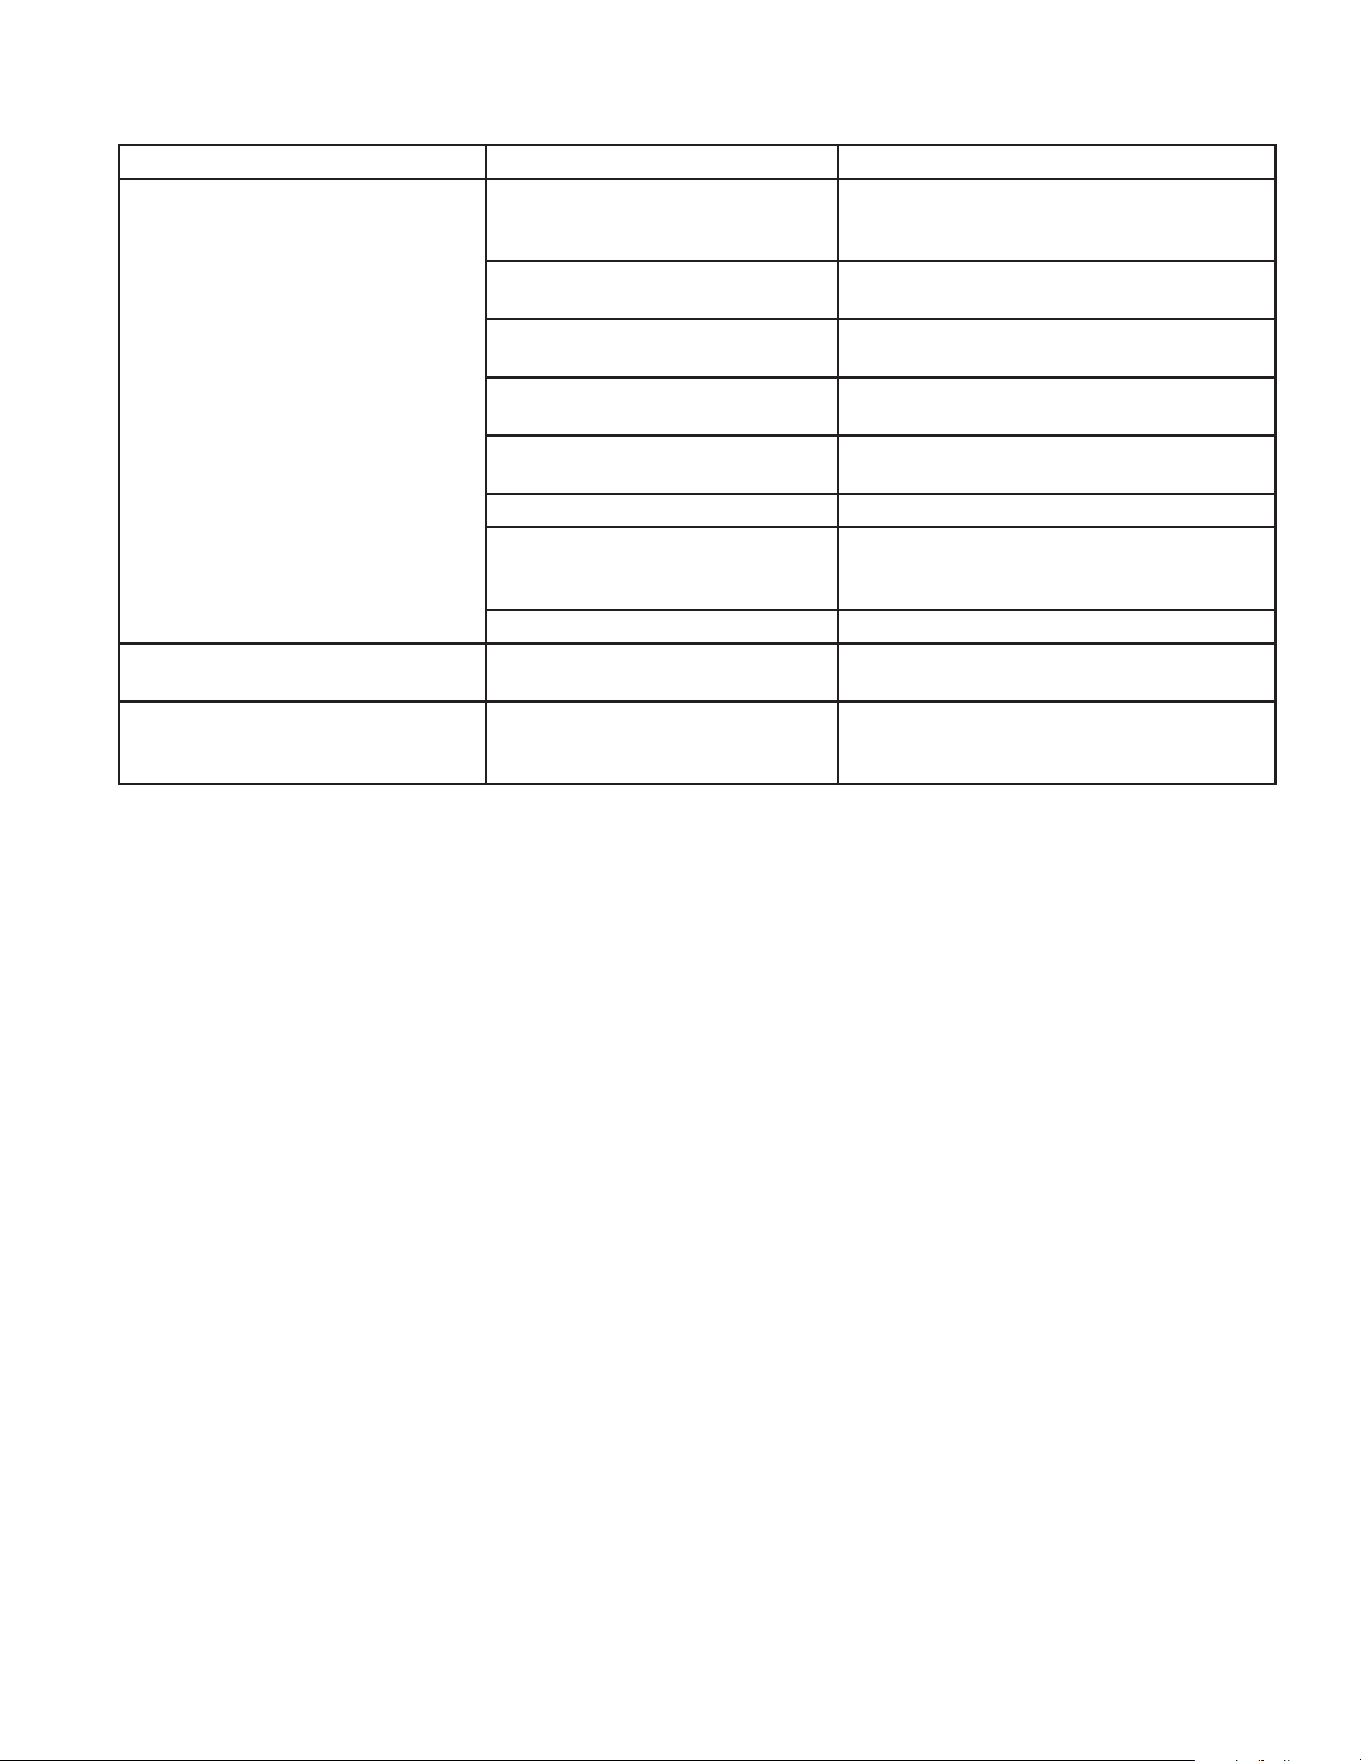
SYMPTOM PROBABLE CAUSE REMEDY
Pump motor will not start, or stops GFCI tripped. Turn unit "OFF". vTest GFCI by pressing
reset button.
Tripped circuit breaker or fuse
blown in circuit fuse box.
Disconnect all other plugs on the circuit
being used and reset circuit breaker OR
check and replace fuse
Loose or disconnected plug. Reconnect plug
Tripped circuit breaker in unit. Allow to cool and restart unit.
Unit is frozen. Allow to thaw. If any part of the unit
becomes frozen; excessive pressure may
build up in the unit which could cause the
unit to burst resulting in possible serious
injury to the operator or bystanders.
Circuit breaker trips or fuse blows
in the fuse box.
Circuit overload. Check that the circuit is rated correctly.
Disconnect all plugs on the circuit. When
connecting to a circuit protected by fuses,
use time delay fuses only.
Extension cord is too long or wire
is too small.
Use correct electrical requirements
GFCI trips. Incorrect voltage. Ensure electrical supply matches that
shown on the I.D. plate.
Electrical short to ground. Contact Customer Service.
Motor runs but there is no dis-
charge at nozzle when trigger
mechanism is squeezed.
Inadequate water supply. Ensure hose is 3/4" diameter and incom-
ing water supply is turned on.
Kink in water inlet hose. Remove kink.
Low or uctuating pressure. Kink in high pressure discharge
hose.
Replace kinked pressure hose.
Water inlet screen obstructed. Remove screen, clean or replace.
Pump sucking air. (Prime lost) Tighten all water intake connections.
Eliminate leaks in intake line.
Detergent nozzle (6540/Black) is
connected to wand.
Insert high pressure nozzle.
Obstructed or worn spray nozzle. Remove and clean, or replace.
Damaged or obstructed valve
assy.
Remove, inspect, clean or replace.
Pump packings worn. Replace
Bypass valve not operating cor-
rectly.
Repair or replace.
Water is leaking from the Heat
Dump valve
Water temperature or pressure is
too high
Do not allow unit to operate in the bypass
mode (with the gun closed) for more than
three minutes.
Defective Valve Replace
Oil appears milky or foamy. Water in oil. Change pump oil. Fill to proper level.
Oil leaking from unit. DO NOT USE!!!!! Contact Customer Service.
STORAGE & MAINTENANCE
Operator's Manual 19
SYMPTOM PROBABLE CAUSE REMEDY
Detergent will not siphon into Low
Pressure Detergent mode.
Detergent strainer is not com-
pletely submerged in detergent
solution
Check; submerge if necessary.
Detergent strainer is obstruct-
ed.
Inspect, clean or replace.
Detergent hose is obstructed or
cut.
Inspect, clean or replace.
Detergent adjusting knob turned
to the closed position.
Open by turning knob completely
counterclockwise.
Detergent nozzle (6540°/BLACK)
is not connected to the wand.
Insert correct quick connect nozzle.
Nozzle assembly is plugged. Clean or replace.
Too many high pressure hose
extensions attached to the water
outlet.
Use one extension maximum.
Ball & Spring in Venturi stuck. Remove, clean or replace.
Water ows back into detergent
container.
Ball & Spring in Venturi
reversed,missing or corroded.
Remove, clean or replace.
Water ows from the nozzle when
the trigger gun is in the "OFF"
position.
Gun is malfunctioning. Repair or replace.
STORAGE & MAINTENANCE
20 Operator's Manual
STATEMENT OF WARRANTY
Mi-T-M warrants all parts, (except those referred to below), of your new CW-ELECTRIC belt driven pressure
washer to be free from defects in materials and workmanship during the following periods:
For Lifetime against freezing and cracking:
Pump Manifold
For Seven (7) Years from the date of original purchase:
High Pressure Pump
For Two (2) Years from the date of original purchase:
Cart Assembly Pulleys
Plumbing
For One (1) Year from the date of original purchase:
GFCI Cord Selector Switch
Starter Contactor Overload
For Ninety (90) Days from the date of original purchase:
Trigger Gun/Wand High Pressure Hose
Unloader Valve Strainer/Filter
Defective parts not subject to normal wear and tear will be repaired or replaced at our option during the warranty
period. In any event, reimbursement is limited to the purchase price paid.
EXCLUSIONS
1. The motor is covered under separate warranty by its respective manufacturer and is subject to the terms
set forth therein.
2. Normal wear parts:
Pump Packings Spray Nozzles Quick Couplings/Screw Connects
Pump Valves O-rings
Detergent Valves Belts
3. This warranty does not cover parts damaged due to normal wear, misapplication, misuse, operation at
other than recommended speeds, pressures or temperature. Parts damaged or worn because of the use
of caustic liquids or by operation in abrasive or corrosive environments or under conditions causing pump
cavitation are not warranted. Failure to follow recommended operating and maintenance procedures also
voids warranty.
4. The use of other than genuine Mi-T-M repair parts will void warranty. Parts returned, prepaid to our factory
or to an Authorized Mi-T-M Service Center will be inspected and replaced free of charge if found to be
defective and subject to warranty. There are no warranties which extend beyond the description of the
face hereof. Under no circumstances shall the Mi-T-M Corporation bear any responsibility for loss of use
of the unit, loss of time or rental, inconvenience, commercial loss or consequential damages.
For Service or Warranty Consideration, contact:
Mi-T-M Corporation / 50 Mi-T-M Drive, Box 50 / Peosta, IA 52068-0050
563-556-7484 / 800-553-9053 / Fax 563-556-1235
Monday - Friday / 8:00 a.m. - 5:00 p.m. CST

Mi-T-M CW-Eléctrico Manual del Operador 21
NOTES
22 Mi-T-M CW-Eléctrico Manual del Operador
ADVERTENCIA: Este producto puede
exponerlo a productos químicos, incluido el
plomo, que el Estado de California conoce a
causar cáncer y defectos congénitos u otros
daños reproductivos. Para obtener más
información, visite www.P65Warnings.ca.gov
ADVERTENCIA
CONTENTS
NOTES ...........................................................................................................................21
TABLA DE MATERIAS ...................................................................................................22
INTRODUCCION ...........................................................................................................23
ADVERTENCIAS IMPORTANTES DE SEGURIDAD ....................................................24
PRECAUCIONES ELECTRICAS: ................................................................................................................ 24
PRECAUCIONES PARA ROCIADO: ...........................................................................................................25
PRECAUCIONES PARA LIMPIEZA CON DETERGENTES: ........................................................................ 26
PRECAUCIONES MISCELANEAS DE SEGURIDAD: .................................................................................26
PRECAUCIONES DE AJUSTE:...................................................................................................................27
ELEMENTOS Y COMPONENTES ................................................................................28
CALCOMANIAS DE SEGURIDAD Y UBICACION .......................................................29
INSTALACION Y PREPARACION .................................................................................30
PROTECCIÓN PERSONAL: .......................................................................................................................30
PREPARACIÓN: .........................................................................................................................................30
BOQUILLA DE CONEXION RAPIDA: .........................................................................................................30
CONEXION DE LA BOQUILLA: ..................................................................................................................31
SUMINISTRO DE AGUA: ............................................................................................................................31
DESCARGADOR: .......................................................................................................................................32
VALVULA DE DESCARGA TERMICA: ........................................................................................................32
CONEXIÓN DEL CABLE DE ALIMENTACIÓN ELÉCTRICA: ......................................................................32
PROCEDIMIENTOS DE INSPECCION DE PREARRANQUE: .....................................................................32
INSTRUCCIONES DE OPERACION .............................................................................33
CEBADO DE LA BOMBA: ..........................................................................................................................33
ARRANQUE: ............................................................................................................................................... 33
LIMPIEZA CON DETERGENTES ................................................................................................................34
APAGADO: .................................................................................................................................................35
ALMACENAMIENTO Y MANTENIMIENTO .................................................................36
MANTENIMIENTO ESPECIFICO: ...............................................................................................................36
LOCALIZACION DE FALLAS ........................................................................................ 38
ACCESSOIRES ..............................................................................................................40
NOTA ..............................................................................................................................41
Mi-T-M CW-Eléctrico Manual del Operador 23
INTRODUCCION
¡Felicitaciones por la compra de su nueva lavadora a presión! Puede estar seguro que su lavadora a presión fue
construida con el nivel más alto de precisión y exactitud. Cada componente ha sido probado rigurosamente por
técnicos para asegurar la calidad, la resistencia y el rendimiento de esta unidad.
Este manual del operador fue compilado para su benecio. Leyendo y siguiendo los pasos simples de seguridad,
instalación, operación, mantenimiento y localización de fallas descritos en este manual ayudará a prolongar aun más
la operación libre de fallas que usted puede esperar de su nueva lavadora a presión. El contenido de este manual
está basado en la información actualizada disponible al momento de la publicación. Mi-T-M® se reserva el derecho
de efectuar cambios en precio, color, materiales, equipo, especicaciones o modelos en cualquier momento sin
previo aviso.
¡IMPORTANTE!
ESTOS PÁRRAFOS ESTÁN RODEADOS POR UNA “CASILLA DE ALERTA DE SEGURIDAD”. ESTA CASILLA
SE USA PAR DESIGNAR Y ENFATIZAR LAS ADVERTENCIAS DE SEGURIDAD QUE DEBEN SEGUIRSE
AL OPERAR ESTA LAVADORA A PRESIÓN. ACOMPAÑANDO A LAS ADVERTENCIAS DE SEGURIDAD
ESTÁN LAS “PALABRAS DE ALERTA” QUE DESIGNAN EL GRADO O NIVEL DE SERIEDAD DE
RIESGO. LAS “PALABRAS DE ALERTA” USADAS EN ESTE MANUAL SON LAS SIGUIENTES:
PELIGRO: INDICA UNA SITUACIÓN INMINENTE RIESGOSA LA CUAL, SI NO SE EVITA, RESULTARA EN LA
MUERTE O EN LESIONES GRAVES.
ADVERTENCIA: INDICA UNA SITUACIÓN POTENCIALMENTE RIESGOSA LA CUAL, SI NO SE EVITA,
PODRIA RESULTAR EN LA MUERTE O EN LESIONES GRAVES.
PRECAUCION: INDICA UNA SITUACIÓN POTENCIALMENTE RIESGOSA LA CUAL, SI NO SE EVITA PUEDE
RESULTAR EN LESIONES MENORES O MODERADAS.
EL SÍMBOLO INDICADO A LA IZQUIERDA DE ESTE PÁRRAFO ES EL “SÍMBOLO DE ALERTA
DE SEGURIDAD”. ESTE SÍMBOLO SE USA PARA ALERTARLO ACERCA DE ARTÍCULOS O
PROCEDIMIENTOS QUE PODRÍAN SER PELIGROSOS PARA USTED U OTRAS PERSONAS USANDO
ESTE EQUIPO.
PROVEA SIEMPRE UNA COPIA DE ESTE MANUAL A CUALQUIER PERSONA QUE USE ESTE EQUIPO.
LEA TODAS LAS INSTRUCCIONES ANTES DE OPERAR ESTA LAVADORA A PRESION, OBSERVANDO
EN PARTICULAR LAS “ADVERTENCIAS DE SEGURIDAD” PARA EVITAR LA POSIBILIDAD DE
LESIONES PERSONALES AL OPERADOR.
Escriba el número de serie de su unidad en el espacio provisto abajo, una vez que la unidad haya sido desempaca-
da.
NUMERO DE SERIE___________________________
Inspeccione por daño el contenido de la caja. Si algo parece dañado, NO LA DEVUELVA AL LUGAR DE COMPRA.
Llame a su representante de servicio al cliente de al 800-553-9053.
Por favor tenga disponible la información siguiente para todas las llamadas de servicio:
1. Número de modelo
2. Número de serie
3. Fecha y lugar de compra
Mi-T-M
®
Corporation
50 Mi-T-M Drive
Peosta, IA 52068-0050
24 Mi-T-M CW-Eléctrico Manual del Operador
PRECAUCIONES ELECTRICAS:
1. INSTRUCCIONES DE CONEXION A TIERRA: Este equipo debe conectarse
a tierra. La conexión a tierra provee un camino de resistencia reducida a
la corriente eléctrica para reducir el riesgo de choque eléctrico, en caso
de malfuncionamiento o falla. Este producto está equipado con un cordón
que tiene un conductor de conexión a tierra del equipo y un enchufe de
conexión a tierra. El enchufe debe enchufarse a un tomacorriente apropiado
que esté correctamente instalado y conectado a tierra de acuerdo con
todos los códigos y ordenanzas locales.
2. PELIGRO: La conexión incorrecta del conductor de conexión a tierra del
equipo puede resultar en un riesgo de electrocución. Si usted tiene dudas
acerca de si el tomacorriente está correctamente conectado a tierra, consulte
con un electricista calicado o personal de servicio. No modique el enchufe
provisto con el producto. Haga instalar un tomacorriente apropiado por
un electricista calicado, si el enchufe no entra. No use ningún tipo de
adaptador con este equipo.
3. PROTECCION DEL INTERRUPTOR DE FALLA DE LA CONEXION A TIERRA:
La lavadora a presión está provista de un Interruptor de Falla de la Conexión
a Tierra (GFCI) incorporada al enchufe del cordón eléctrico. Este mecanismo
provee una protección adicional contra el riesgo de choque eléctrico. Use
sólo piezas de repuesto idénticas que incluyan protección GFCI, si fuera
necesario reemplazar el cordón eléctrico.
4. CORDONES DE EXTENSION:ADVERTENCIA ¡Mi-T-M® NO RECOMIENDA
EL USO DE CORDONES DE EXTENSION! Si no puede evitarse el uso de
un cordón de extensión, el mismo debe enchufarse a un GFCI ubicado
en las cajas de circuitos o receptáculos protegidos. Cuando está usando
el cordón electrico pregunte una persona electrico a ser seguro que el
cable medida que tiene es corrector para la longitud del cordón electrico.
Para las unidades singulares fases, use dolemente 3-cable cordones
electricos que tiene 3-tipo tapones fundados y 3-pole conectadores que
va a aceptar el tapón del producto. Para las unidades fases terceros, use
solemente 4-cable cordones electricos que tiene 4-punta conectadores
que va a aceptar el tapon de este producto. Use solemente cordones para
fuera del al case. Esos cordones de extensión están identicados por una
marca que dice: “Aceptable para usar con artefactos al aire libre; almacene
bajo techo mientras no se usa”. Use cordones de extensión que tengan
una clasicación nominal que no sea menor que la clasicación nominal
del producto. No use cordones de extensión dañados. Antes de usar
examine el cordón de extensión y reemplácelo si está dañado. No maltrate
el cordón de extensión y no tire del mismo para desconectarlo. Mantenga
el cordón de extensión alejado del calor y de bordes aguzados. Antes de
desconectar el equipo del cordón de extensión, desconecte siempre el
cordón de extensión del receptáculo.
ADVERTENCIA MANTENGA TODAS LAS CONEXIONES SECAS
Y ALEJADAS DE TIERRA, PARA REDUCIR EL RIESGO DE
ELECTROCUCIÓN. NO PERMITA QUE LOS CORDONES
ELÉCTRICOS Y LAS CONEXIONES PERMANEZCAN EN AGUA O
EN UNA POSICIÓN EN LA QUE EL AGUA PODRÍA ENTRAR EN
CONTACTO CON ELLOS. NO TOQUE EL ENCHUFE CON LAS
MANOS MOJADAS.
5. NO deje caer el GFCI ya que podría resultar en daños.
6. Para desconectar del tomacorriente, NO tire del cordón eléctrico, NI
transporte la unidad por el cordón.
7. Antes de usar inspeccione por daños al cordón eléctrico. Existe un riesgo
de choque eléctrico resultante de daño por aplastamiento, corte o calor.
8. ASEGURESE siempre que la unidad está recibiendo el voltaje apropiado.
Asegúrese que el interruptor está en la posición “OFF”, antes de enchufar
la unidad a una fuente de potencia compatible. Desconecte cuando no se
usa.
ADVERTENCIAS IMPORTANTES DE SEGURIDAD
Mi-T-M CW-Eléctrico Manual del Operador 25
9. NO use la unidad en un lugar donde puedan estar presentes vapores
inamables de gas. Una chispa eléctrica puede causar una explosión o
incendio.
10. NO dirija el rociado de agua a o dentro de instalaciones eléctricas de ningún
tipo. Esto incluye tomacorrientes eléctricos, lámparas eléctricas, cajas de
fusibles, transformadores, la unidad misma, etc. Puede ocurrir un choque
eléctrico grave.
11. El fabricante no recomienda que el usuario intente ninguna reparación
eléctrica a esta unidad.
PRECAUCIONES PARA ROCIADO:
¡PELIGRO! RIESGO DE INYECCION O DE LESIONES GRAVES DE
CORTE MANTENGASE ALEJADO DE LA BOQUILLA NO DIRIJA
LA CORRIENTE DE DESCARGA A LAS PERSONAS NI A LOS
ANIMALES DOMESTICOS DEBEN OBSERVARSE SIEMPRE
PRECAUCIONES BASICAS, INCLUYENDO LAS SIGUIENTES:
1. MANTENGASE ALEJADO DEL ROCIADO
a. Los uidos pueden penetrar la piel, causando lesiones graves, a causa
de la alta presión y velocidad del rociado.
b. Nunca apunte la pistola hacia usted ni hacia otra persona. Nunca
coloque su mano, dedos o cuerpo directamente sobre la boquilla de
rociado. Mantenga siempre el área de operación despejada de todas
las personas. Ejerza una precaución extrema al operar cerca de niños.
c. REQUIERA CUIDADO MEDICO DE EMERGENCIA si ocurriera un
accidente y el rocío parece haber penetrado la piel. NO LO TRATE
COMO UN CORTE SIMPLE. Si usted está usando agentes limpiadores,
esté preparado a informar a su médico exactamente de qué clase.
2. SIEMPRE use antiparras protectoras al operar la unidad, para proteger los
ojos contra desechos despedidos y detergentes. Otros equipos protectores
tales como trajes de goma, guantes y respiradores son recomendables,
especialmente al usar detergentes de limpieza. Ejerza una precaución
extrema al operar cerca de niños.
3. Esté alerta - observe lo que hace. No opere la unidad cuando esté fatigado
o bajo la inuencia de alcohol o drogas.
4. NUNCA accione el gatillo a menos que la unidad esté rmemente sujeta.
El empuje del agua recorriendo la boquilla puede ser lo sucientemente
poderoso como para causar que el operador pierda el equilibrio si no
está preparado. NO SE INCLINE ni se pare sobre un apoyo inestable.
Las supercies húmedas pueden ser resbalosas, use equipo protector
de calzado y manténgase bien parado y en equilibrio en todo momento.
NUNCA accione el gatillo de la pistola mientras esté en una escalera o en
el techo.
5. NO dirija el rociado hacia materiales frágiles tales como vidrio. El astillado
podría resultar en lesiones graves.
6. SIEMPRE sujete rmemente el conjunto de pistola/vara al arrancar y
operar la unidad. El no hacerlo puede causar que la vara caiga y azote
peligrosamente. NUNCA opere la pistola con el gatillo conectado en la
posición abierta. La pistola a gatillo debería estar bien asegurado cuando
no se usa, para evitar una descarga accidental.
7. Aun después que apague la unidad, hay agua a alta presión en la bomba,
manguera y pistola hasta que la elimine accionando el gatillo. SIEMPRE
apague la unidad y accione el gatillo para liberar la presión interna, antes
de sacar la boquilla de rociado o reparar la unidad.
ADVERTENCIAS IMPORTANTES DE SEGURIDAD

26 Mi-T-M CW-Eléctrico Manual del Operador
PRECAUCIONES PARA LIMPIEZA CON DETERGENTES:
1. NO use solventes ni detergentes altamente corrosivos, ni limpiadores de
tipo ácido con esta lavadora a presión. Use detergentes Mi-T-M® solamente.
2. ¡CONOZCA SUS DETERGENTES! En el caso de una emergencia, esté
preparado a informar al médico exactamente lo que usted está usando.
Lea La Hoja de Datos de Seguridad del Material (MSDS) provista con su
detergente Mi-T-M® y todas las etiquetas de los detergentes. Observe
todas las instrucciones apropiadas acerca de la preparación, uso, seguridad
y transporte. Mantenga TODOS los detergentes fuera del alcance de los
niños.
3. NO use esta lavadora a presión para dispensar detergentes riesgosos.
4. NO altere de ninguna manera no recomendada en este manual la
característica de inyección de detergente. Para las reparaciones necesarias
use piezas genuinas de repuesto Mi-T-M® solamente.
PRECAUCIONES MISCELANEAS DE SEGURIDAD:
1. ¡NUNCA PERMITA QUE LOS NIÑOS O ADOLESCENTES OPEREN ESTA
UNIDAD!
2. Lea y observe todas las instrucciones de manejo, funcionamiento,
mantenimiento y seguridad incluidas en este manual y facilite esta
información a TODAS LAS PERSONAS que operarán esta unidad.
3. Esta lavadora a presión está provista de un Interruptor de Circuito de Falla
a Tierra (GFCI) integrado en el enchufe del cordón de suministro eléctrico.
Use sólo piezas idénticas de repuesto que incluyan protección de GFCI,
si fuera necesario reemplazar el cordón.
4. La unidad debe estar sucientemente caliente como para asegurar que no
haya formación de hielo en la bomba, a temperaturas de congelación. NO
arranque esta unidad si ha sido transportada en un vehículo abierto o sin
suciente calefacción, sin permitir primero que la bomba se descongele.
5. Deben observarse los reglamentos locales de su compañía de agua, al
conectar la entrada de agua a las cañerías maestras de agua. En algunas
áreas la unidad no debe conectarse directamente al suministro público de
agua potable. Esto es para asegurar que no haya realimentación de los
detergentes al suministro de agua. (Se permite la conexión directa si se
instala un supresor del ujo de retroceso.)
6. Las mangueras de alta presión deberían inspeccionarse diariamente por
señas de desgaste. Si existe evidencia de falla, reemplace rápidamente
todas las mangueras sospechosas para evitar la posibilidad de lesiones
ocasionadas por rociado a alta presión. Si una manguera o adaptador está
perdiendo, NUNCA coloque su mano directamente sobre la pérdida.
7. NO opere la unidad si ve pérdidas de aceite de la bombao agua de la máquina.
NO reanude la operación hasta que la unidad haya sido inspeccionada y
reparada por una persona calicada de servicio.
8. No opere la unidad sin todas las cubiertas protectoras en su sitio.
9. NO deje desatendida la unidad presurizada. Apague la unidad y descargue
la presión interna antes de alejarse.
10. NO deje sin atención la unidad presurizada. Apague la unidad y descargue
la presión atrapada antes de alejarse.
11. NO mueva la unidad tirando de la manguera.
ADVERTENCIAS IMPORTANTES DE SEGURIDAD

Mi-T-M CW-Eléctrico Manual del Operador 27
PRECAUCIONES DE AJUSTE:
1. NUNCA altere ni modique el equipo, asegúrese que todos los artículos
accesorios y los componentes del sistema que se usan resistirán la
presión desarrollada. Use SOLO piezas genuinas Mi-T-M® para reparar
su lavadora a presión. El no hacerlo puede causar condiciones operativas
riesgosas y cancelará la garantía.
2. NUNCA efectúe ajustes a la máquina mientras esté conectada al motor,
sin sacar primero el cable de encendido de la bujía. El girar la máquina a
mano durante el ajuste o la limpieza podría arrancar el motor y la máquina,
lo que causará lesiones graves al operador.
3. Sepa cómo detener la lavadora a presión y purgar las presiones
rápidamente. Esté completamente familiarizado con los controles.
4. Apague la unidad, desconéctela de la red eléctrica, elimine la presión
de agua, y permita que la unidad se enfríe, antes de repararla. Preste
servicio en un área limpia, seca y plana. Para evitar que la unidad se
mueva, bloquee las ruedas.
5. Observe las instrucciones de mantenimiento especicadas en este manual.
¡GUARDE ESTAS INSTRUCCIONES!
ADVERTENCIAS IMPORTANTES DE SEGURIDAD
28 Mi-T-M CW-Eléctrico Manual del Operador
ELEMENTOS Y COMPONENTES
1. Cordones - 10 pie
2. Calcomanía- Advertencia: Riesgo de electrocución
3. Motor
4. Descargador
5. Salida de alta presión
6. Válvula de descarga térmica
7. Entrada de agua
8. Varilla del aceite
9. Calcomanía- Declaraciones de
Advertencia/Precaución
SINGULARES FASES FASES TERCEROS
CW-ELE. FEATURES-091599-RD
10. Vidrio de nivel de aceite
11. Correa Cubierta
12. Calcomanía- Riesgo de inyección
13. Interruptor (Para las unidades singulares fases)
Arrancador (Para las unidades fases terceros)
14. Conjunto del la pistola
15. Lanza
16. Boquillas
LISTA DE LOS ELEMENTOS Y COMPONENTES
Mi-T-M CW-Eléctrico Manual del Operador 29
CALCOMANIAS DE SEGURIDAD Y UBICACION
(NOTA: LAS CALCOMANÍAS DE SEGURIDAD ESTÁN EN INGLÉS SOLAMENTE!)
Calcomanía: Advertencia- Correa Cubierta
(Pieza No. 34-0575)
Calcomanía: Declaraciones de Advertencia/Precaución (Pieza No. 34-0925)
Calcomanía: No permita atomizador (Pieza No. 34-0391)
Calcomanía: Advertencia-Riesgo de Electrocucion
(Pieza No. 34-1035)
RISK OF ELECTROCUTION.
DO NOT REMOVE THIS TAG.
FAILURE TO FOLLOW THE ABOVE
INSTRUCTIONS COULD RESULT
IN A SEVERE ELECTRICAL SHOCK.
34-1035-E/F/S-111899-ENG
1. Connect only to a properly grounded outlet. Do not
remove ground pin.
2. Inspect cord before using. Do not use if cord is
damaged.
3. Keep all connections dry and off the ground.
4. Do not touch plug with wet hands.
5. This unit may be provided with a Ground Fault Circuit
Interrupter (GFCI) built into the power cord plug. If
replacement of the plug or cord is needed, use only
identical replacement parts. If this unit is not provided
with a GFCI, this unit should only be connected to a
power supply receptacle protected by a ground fault
circuit interrupter.
6. Do not use an extension cord with this machine.
7. Read the operator's manual before using.
WARNING
34-0391/011413
•RISK OF INJECTION OR SEVERE INJURY: Keep
clear of nozzle. Do not direct high pressure spray at any person
or self. This machine is to be used by qualified operators.
•RISK OF ELECTROCUTION: Do not direct spray toward
any electrical connections or outlets. Use extreme caution while
operating near any electrical power lines. Use extreme safety
precautions due to high voltage involved.
•RISK OF EXPLOSION: Do not spray flammable liquids or
in an area containing combustible dust, liquids, or vapors.
•RISK OF INJURY: Use only properly rated components
with this unit. Close supervision is necessary when this product
is near children.
•RISK OF CHEMICAL EXPOSURE: Use only water and
recommended detergents with this unit.
•Read and understand all instructions and operation
manual before using. Check local codes regarding
cross connection to water supply.
•STAY ALERT: Hold on to gun/wand firmly with both
hands to avoid dangerous kickbacks.
•Do not overreach or stand on unstable support. Keep
good footing and balance at all times.
•Inspect all hoses for kinking, cuts, and leaks.
•Eye goggles and appropriate protection is
recommended while operating this unit.
•Protect pump from freezing.
•Always turn on water supply to pump before starting.
•Engage trigger safety lock-off when not in use.
•Be certain that the motor switch is in the "OFF" position
before inserting plug into electrical outlet. Be sure that the
correct electrical system (voltage, amp, capacity, etc.) is
supplied for this unit.
•Turn on adequate water supply and trigger gun to prime
pump and release air.
•After starting the unit: Point gun in a safe direction, brace
wand securely to avoid recoil and hold trigger.
•After stopping the unit, always turn off water supply and
trigger spray gun to release pressure.
•Observe lubrication and maintenance recommendations as
listed in the operator's manual.
WARNING
CAUTION
OPERATION
34-0925/100412
RISK OF INJECTION OR SEVERE INJURY
Never put your hand, fingers or body directly
over the spray nozzle.
34-1253/07272012
RIESGO DE INYECCIÓN O LESIÓN SEVERA
Nunca coloque la mano, los dedos o el cuerpo
directamente sobre la boquilla de rocío.
WARNING
ADVERTENCIA
Calcomanía: Advertencia: Riesgo de inyección (Pieza No. 34-0572)
34-0575/051418
WARNING/ADVERTENCIA
No opere la unidad sin todas
la cubierta correa en su sitio.
Do not operate unit
without beltguard
in place.
No opere la unidad sin todas
la cubierta correa en su sitio.
Do not operate unit
without beltguard
in place.
30 Mi-T-M CW-Eléctrico Manual del Operador
INSTALACION Y PREPARACION
PROTECCIÓN PERSONAL:
Ponerse la protección personal adecuada es vital para la propia seguridad. Se
recomienda utilizar lo que sea necesario para protegerse los ojos, oídos y piel. Es
posible que se necesite aditamentos adicionales de seguridad (como la mascarilla de
respiración) al aplicar agentes limpiadores detergentes con esta lavadora.
PREPARACIÓN:
1. Esta unidad sólo debe colocarse en una supercie a nivel para asegurar
una lubricación adecuada de la bomba de agua durante el funcionamiento.
NUNCA rocíe agua directamente en la unidad.
2. No use la unidad en áreas:
a. donde existan señales de fugas de aceite o combustible.
b. donde pueda haber presencia de vapores de gases inamables.
3. No exponga la unidad a la lluvia, nieve o temperaturas de congelación. Si se
congela alguna parte de la unidad, puede acumularse presión excesiva, la cual
puede causar que reviente la unidad y se produzcan lesiones graves al operador
y a los circunstantes.
4. Debe revisarse el nivel de aceite de la bomba. Asegúrese de que el aceite llegue
a la marca de "lleno" de la vara de nivel o del centro de la mirilla de nivel del
aceite. Si parece bajo el nivel, llene el tanque con aceite para bomba Mi-T-M
#AW-4085-0016.
PELIGRO RIESGO DE
EXPLOSION!
NO COLOQUE LA UNIDAD EN UN
AREA DONDE PUEDAN ESTAR
PRESENTESE VAPORES INFLAM-
MABLES. UNIA CHISPA PODRIA
CAUSAR UNA EXPLOSION.
RIESGO QUE LA UNIDAD REVI-
ENTE! NO ALMACENE/OPERE LA
UNIDADA EN U ABIENTE HELADO.
PELIGRO ¡RIESGO DE
ELECTROCUCIÓN!
ESTA UNIDAD DEBE CONECTARSE
A UNA TOMA DE CORRIENTE CON
LA DEBIDA CONEXIÓN A TIERRA.
NO USE NINGÚN ADAPTADOR
NI ELIMINE EL CONTACTO DE
TIERRA.
CONEXION DE LAS BOQUILLAS
DE CONEXION RAPIDA
BOQUILLAS DE CONEXION RAPIDA
(C.R.)
BOQUILLA DE CONEXION RAPIDA:
Pueden conectarse rápidamente varias boquillas al extremo de la vara para
cambiar el patrón de rociado o para usar la característica de detergente.
Asegúrese que la conexión está seguramente calzada, al usar los conec-
tores rápidos (C.R.). En caso contrario el agua a alta presión puede despe-
dir la boquilla de la vara, causando lesiones graves o daños importantes.
Reérase al número estampado en la boquilla, para determinar el patrón de
abanico del rociado. Los primeros dos dígitos indican el patrón de abanico
del rociado en grados, por ej.: 00=0°, 15=15º, 25=25º, 65=detergente/baja
presión.
1. Boquilla de 0º (ROJA): Esta es una boquilla de disparo que emite una
corriente muy concentrada de agua. Debería ejercerse cuidado para evitar
rayar la madera o dañar supercie frágiles. Usos: eliminación de malas
hierbas de las grietas de las aceras, manchas resistentes del concreto,
mampostería, aluminio y acero, lodo endurecido en equipos, y para limpiar
el fondo de las cortadoras de césped.
2. Boquilla de 15º (AMARILLA): Esta es una boquilla biselada. El rociado
debería dirigirse a un ángulo de 45º sobre la supercie y usarse como
un raspador para sacar pintura, grasa y suciedad. Usos: preparación de
supercies (eliminación de manchas de moho y escamas de pintura).
3. Boquilla de 25º (VERDE): Esta es una boquilla de limpieza por descarga de
agua. Este patrón es más apropiado para limpiar suciedad, lodo, y hollín.
Usos: Barrido en mojado de senderos, cordones de las aceras y entradas
de garages, limpieza de suelos de los establos, lavado de los fondos de
las piscinas de natación, desengrasado de motores.
4. Boquilla de 40º (VERDE): Esta es una boquilla de lavado. Este patrón de
rociado amplio dispersa la presión de agua dobre un área grande y se
recomienda para un lavodo moderado. Usos: Lavado de recubrimientos
de aluminio de paredes limpieza de ventanas, lavado de vehiculos, rociado
de aceras, entradas de garages, y patios, limpieza de techos.
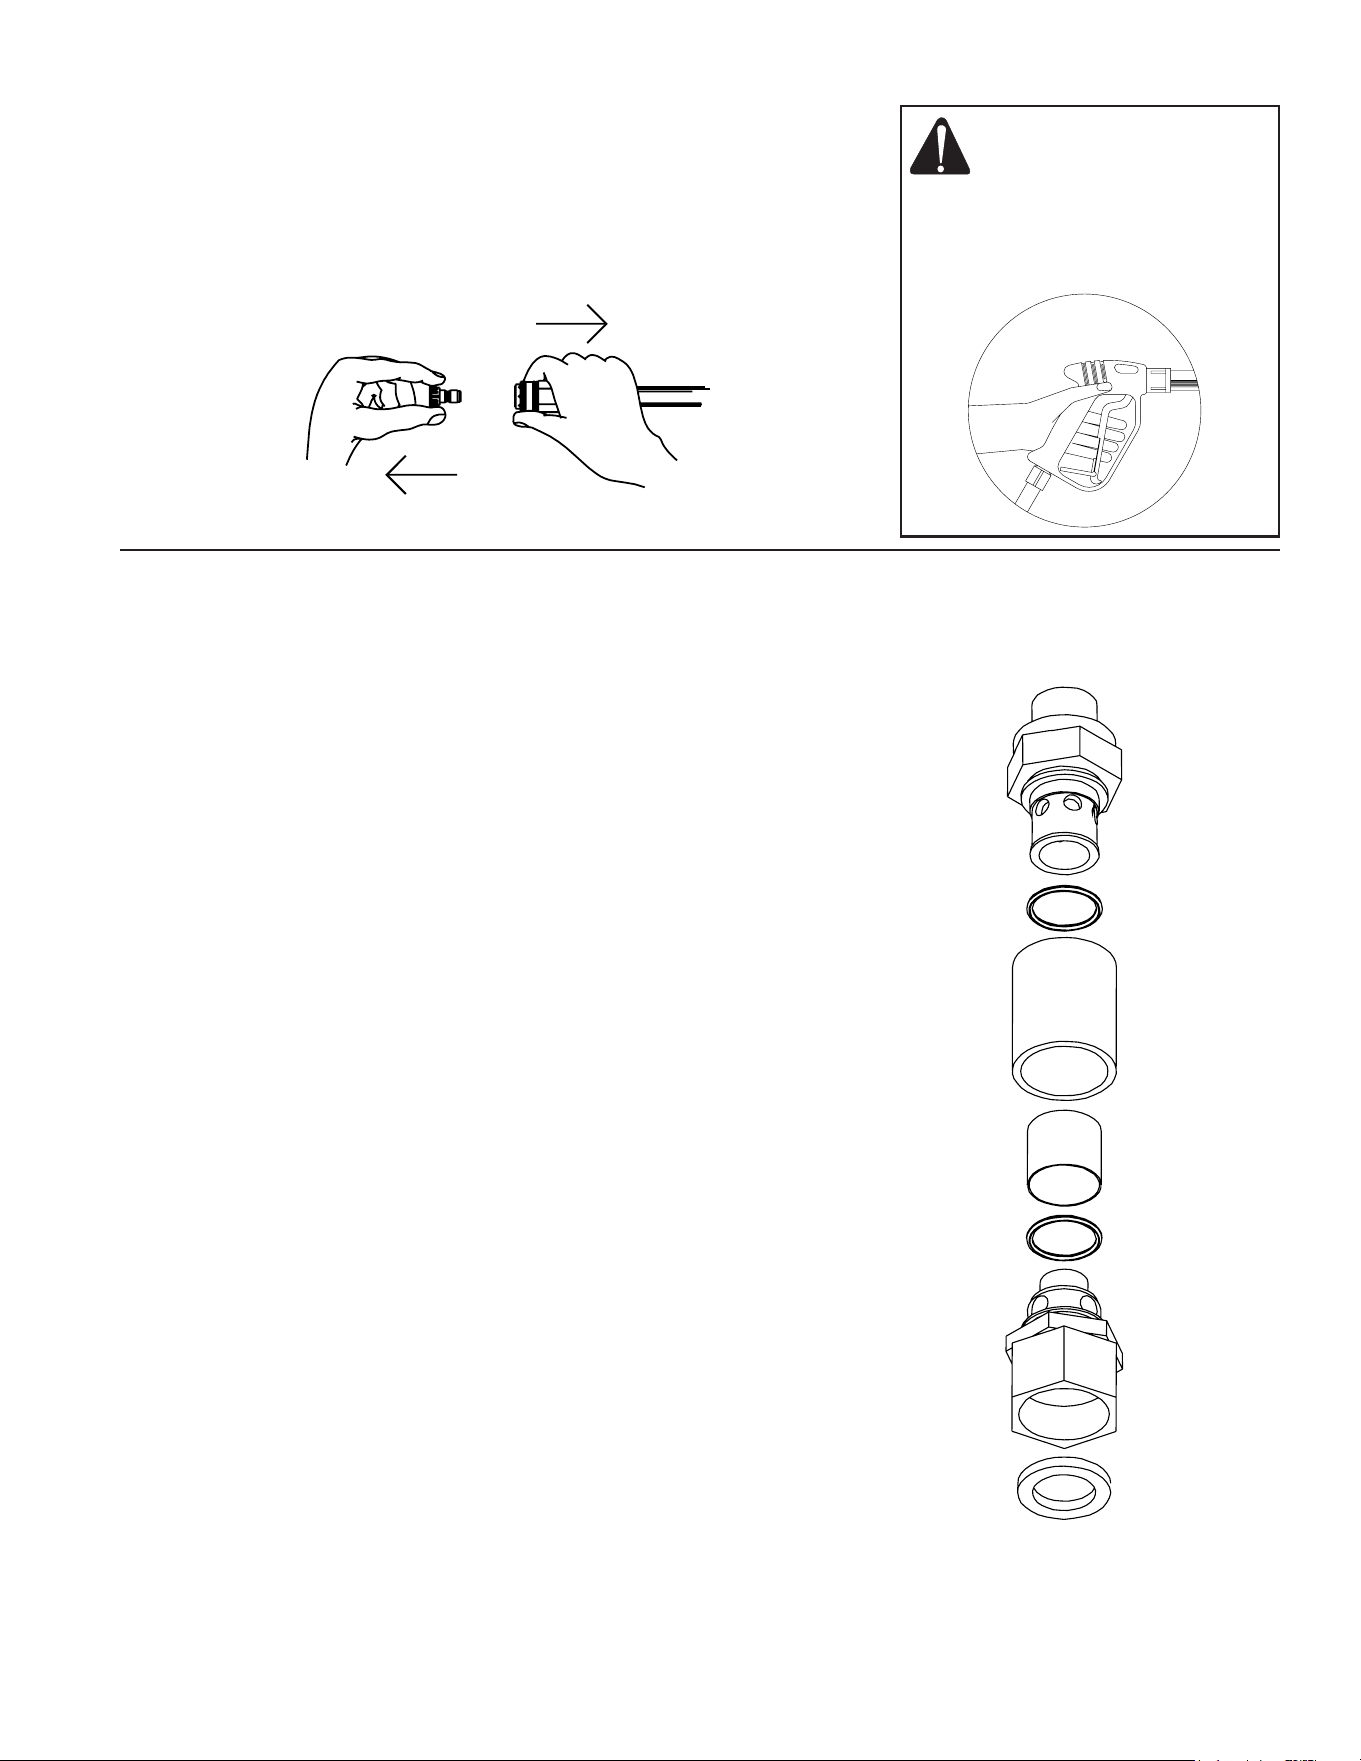
Mi-T-M CW-Eléctrico Manual del Operador 31
CONEXION DE LA BOQUILLA:
1. Asegúrese que la pistola a gatillo esté asegurada en la posición "OFF"
(DESCONECTADO). Vea la ADVERTENCIA, a la derecha.
2. Retraiga el anillo de cierre sobre el adaptador de conexión rápida para
sacar la boquilla.
ADVERTENCIA ¡RIESGO DE
LESIONES GRAVES!
¡CUANDO NO SE USA, LA PIS-
TOLA A GATILLO DEBERIA ES-
TAR SIEMPRE ASEGURADO EN
LA POSICION DESCONECTADO!
INSTALACION Y PREPARACION
MALLA FILTRANTE DE LA EN-
TRADA DE AGUA.
SUMINISTRO DE AGUA:
1. Seleccione una manguera de suministro de agua que sea de calidad de
manguera de jardín que mida 3/4” de DI por lo menos y que no sea más
larga que 50 pies.
2. Inspeccione el tamiz de ltro del agua para asegurar que esté limpio y
libre de obstrucciones. La limpieza periódica del tamiz de agua ayudará
a prevenir problemas con la bomba. El tamiz restringe el ujo apropiado
de agua a la bomba, a medida que se obstruye. Esto puede resultar en
cavitaciones que causarán la falla prematura de los empaques de las
bombas.
a. Desatornille la conexión de la entrada de la manguera del jardín del
frente del montaje de ltro.
b. Quite la cubierta de plástico claro y limpie la pantalla de ltro.
3. Conecte la mangueras:
a. Conecte un extremo de la manguera de suministro de agua a la entrada
de agua de la unidad.
b. Conecte el otro extremo de la manguera a su suministro presurizado
de agua. Cuando conectando la entrada de agua a las canerías de
suministro de agua, regulaciones locales de su companía del agua
tenga que observar. En algunas areas la unidad no tenga que conectar
directamente al suministro publico. Este es para asegurése que no
había nada retroalimentación de los detergentes entre el suministro del
agua. (Es permite que conexión directamente si instale de preventor
de corriente atraso.
c. Efectúe la conexión de la manguera de descarga de alta presión a la
salida de agua de la unidad.
d. Conecte rmemente el otro extremo de la manguera a la pistola.
4. Siga los requerimientos de agua entrante listados abajo:
a. La presión de agua debe estar a un mínimo de 25 libras por pulgada
cuadrada (PSI) y un máximo de 125 PSI. (Un grifo típico al aire libre
suministrará generalmente estas PSI si está completamente ABIERTO).
b. Los GPM (galones por minuto) entrantes deben ser ser 1 galón más
aproximadamente que los GPM salientes deben indicados en la placa
de nombre de la lavadora a presión. (Usted puede inspeccionar los
GPM observando el tiempo requerido para llenar un recipiente de 5
galones.)
c. La temperatura del agua de entrada no debe exceder 125°F. Puede
resultar un daño excesivo a la bomba si la temperatura del agua excede
este nivel aceptable.
5. Nunca permita que la unidad opere sin que esté conectada la tubería de
agua de entrada y el suministro de agua completamente abierto.
32 Mi-T-M CW-Eléctrico Manual del Operador
PROCEDIMIENTOS DE INSPECCION DE PREARRANQUE:
Efectúe los procedimientos siguientes antes de arrancar la unidad:
1. Inspeccione el nivel de aceite en la bomba y en el motor.
2. Inspeccione el tamiz de entrada de agua. Limpie o reemplace si fuera
necesario. Vea “Suministro de agua”, #2, pág. 15.
3. Inspeccione todas las conexiones de las mangueras para asegurar que
estén bien ajustadas. Vea “Suministro de agua”, #3, pág. 15.
4. Inspeccione por pérdidas de combustible del sistema. Asegúrese que se
reemplacen todas las piezas dañadas y que se corrijan todos los problemas
mecánicos antes de operar la unidad. Consulte con el Servicio al Cliente
de Mi-T-M, si usted requiere servicio.
5. Inspeccione las mangueras de alta presión por dobleces, cortes y pérdidas.
Asegúrese que se reemplacen todas las piezas dañadas y que se corrijan los
problemas mecánicos antes de operar la unidad. Consulte con el Servicio
al Cliente de Mi-T-M, si usted requiere servicio.
6. Inspeccione los cordones electricos para cortes. Si encuentre unos cortes,
NO TOQUÉ NI USE CORDÓN! Antes de arrancar reponza el cordon.
CONEXIÓN DEL CABLE DE ALIMENTACIÓN ELÉCTRICA:
1. El interruptor debe estar en la posición de apagado (OFF).
2. La fuente de voltaje debe ser idéntica a las especicaciones indicadas en
la placa de datos de la lavadora.
3. Si esta lavadora a presión cuenta con un Interruptor de circuito de falla a
tierra (Ground Fault Circuit Interrupter, GFCI) incorporado en el enchufe o
en el cordón de alimentación, pruebe el GFCI siempre que se enchufe en
un tomacorriente según las instrucciones del GFCI. NO use la lavadora a
presión si falla la prueba!
4. Debe manterse seca el área existente entre la lavadora de chorro a presión
y la toma de corriente.
5. Inserte la clavija en una toma de corriente alterna (CA). ¡¡NO use adaptadores
NI retire la clavija de conexión a tierra!!
ADVERTENCIA ¡RIESGO DE
ELECTROCUCIÓN!
ESTA UNIDAD DEBE CO-
NECTARSE A UNA TOMA DE
CORRIENTE CON LA DEBIDA
CONEXIÓN A TIERRA. NO
USE NINGÚN ADAPTADOR NI
ELIMINE EL CONTACTO DE
TIERRA.
INSTALACION Y PREPARACION
DESCARGADOR:
Usted puede ajustar la presión, si el descargador de su máquina está equi-
pado con una perilla de ajuste. Si se requiere menos presión, simplemente
gire la perilla de ajuste en sentido contrario a las agujas del reloj. Para retor-
nar al máximo, gire completamente la perilla de ajuste en el sentido de las
agujas del reloj. ¡NO AJUSTE EN EXCESO!'
¡Si el descargador no tiene una perilla ajustable, no ajuste la presión en sus
el propios! La presión se ha preestablecido en la fábrica y se debe ajustar
solamente por un representante/delegado técnico entrenado Mi-T-M.
PRECAUCION ¡RIESGO DE
DAÑO A LA UNIDAD!
NO AJUSTE EN EXCESO EL
DESCARGADOR. LA ROTURA
RESULTARA EN UNA PERDIDA
INMEDIATA DE PRESION DE
AGUA Y REPARACIONES COS-
TOSAS.
VALVULA DE DESCARGA TERMICA:
Nunca permita que la lavadora a presión opere en el modo de derivación
durante más de tres minutos (con la unidad funcionando y la pistola a gatillo
cerrado), para asegurar que la temperatura del agua no exceda niveles
aceptables.
Se ha agregado una válvula de descarga térmica a esta unidad para proteger
la bomba. Puede comenzar a abrirse y permitir la salida de agua si la tem-
peratura del agua en la bomba ha excedido los 140°F. Esto permitirá que
agua fresca y fría entre al sistema.
Mi-T-M CW-Eléctrico Manual del Operador 33
ADVERTENCIA
LAS PAGINAS SIGUIENTES CONTIENEN INSTRUCCIONES DE OPERACION Y MANTENIMIENTO
NO TRATE DE OPERAR ESTA LAVADORA A PRESION HASTA QUE HAYA LEIDO Y ENTENDIDO TODAS
LAS PRECAUCIONES E INSTRUCCIONES DE SEGURIDAD LISTADAS EN ESTE MANUAL.
¡¡LA OPERACION INCORRECTA DE ESTA UNIDAD PUEDE CAUSAR LESIONES GRAVES!!
¡¡DE NINGUNA MANERA ALTERE O MODIFIQUE ESTE EQUIPO!!
CEBADO DE LA BOMBA:
1. Es esencial cebar la bomba en el arranque inicial y cada vez que se
desconecta el suministro de agua de la unidad después del uso inicial.
2. Desplieque la manguera de alta presión para eliminar los dobleces. El ujo
de agua endurecerá la manguera, creando bucles rígidos si la manguera
no está recta.
NOTA: El conjecto de la boquilla NO debería conectarse al conjunto de la pistola en este
momento. Vea “Conexión de la boquilla”.
3. Abra completamente el suministro de agua, con la pistola a gatillo asegurado
en la posición “OFF”. Suelte el seguro de la pistola a gatillo y accione este
último, apuntando la pistola en una dirección segura.
4. Comenzará a uir agua a baja presión del conjunto de manguera/pistola.
Esto permite que la unidad se cebe y purgue todo el aire del sistema. Esta
unidad está cebada cuando el ujo de agua no esté interrumpido por el
aire.
5. Suelte el gatillo y asegure la pistola en la posición “OFF”, una vez que la
unidad esté cebada. Conecte seguramente el conjunto de la boquilla.
(Vea "Conexión de la boquilla")
ARRANQUE:
1. Reérase a las “Precauciones de seguridad”, págs. 24-27 antes de arrancar
la unidad.
2. Ubique las calcomanías de seguridad en su unidad y obedezca sus
advertencias.
3. Apunte la pistola a gatillo alejado de usted o de cualquier otra persona, con
el mismo asegurado en la posición “OFF”. Asegúrese que el suminstro de
agua esté completamente abierto.
4. Desenganche el seguro de la pistola y accione el gatillo. Comenzará a uir
agua a baja presión de la boquilla.
5. Afírmese ya que la pistola retrocederá violentamente a causa de la alta
presión causada por la bomba una vez que haya arrancado el motor.
6. Mueva el interruptor On/Off a la posición “ON”. Este interruptor incluye un
interruptor de circuitos para la protección del motor. El interruptor de circuito
moverá automáticamente el interruptor a la posición “OFF”, en caso de
carga excesiva. Para volver a arrancar, mueva nuevamente el interruptor
On/Off a la posición “ON”.
7. Efectúe los procedimientos siguientes una vez que haya arrancado el motor
con la pistola en la posición abierta:
a. Inspeccione por pérdidas de aceite y de agua del sistema. ¡APAGUE
INMEDIATAMENTE LA UNIDAD, si encuentra una pérdida! Antes de
operar la unidad, asegúrese que se hayan reemplazado todas las piezas
dañadas y que se hayan corregido todos los problemas mecánicos.
Consulte con el Servicio, si usted requiere servicio.
INSTRUCCIONES DE OPERACION
ADVERTENCIA ¡RIESGO DE
INYECCION CAUSANTE
DE LESIONES GRAVES!
¡MANTENGASE ALEJADO DE
LA BOQUILLA! ¡NUNCA COLO-
QUE LA MANO NI LOS DEDOS
ENFRENTE DE LA BOQUILLA!
¡NO DIRIJA LA CORRIENTE
DE DESCARGA HACIA LAS
PERSONAS O LOS ANIMALES
DOMESTICOS!
¡PARA PREVENIR UNA DES-
CARGA ACCIDENTAL ASE-
GURESE QUE EL CONJUNTO
DE LA BOQUILLA AJUSTABLE
ESTE SEGURAMENTE CO-
NECTADO A LA VARA!
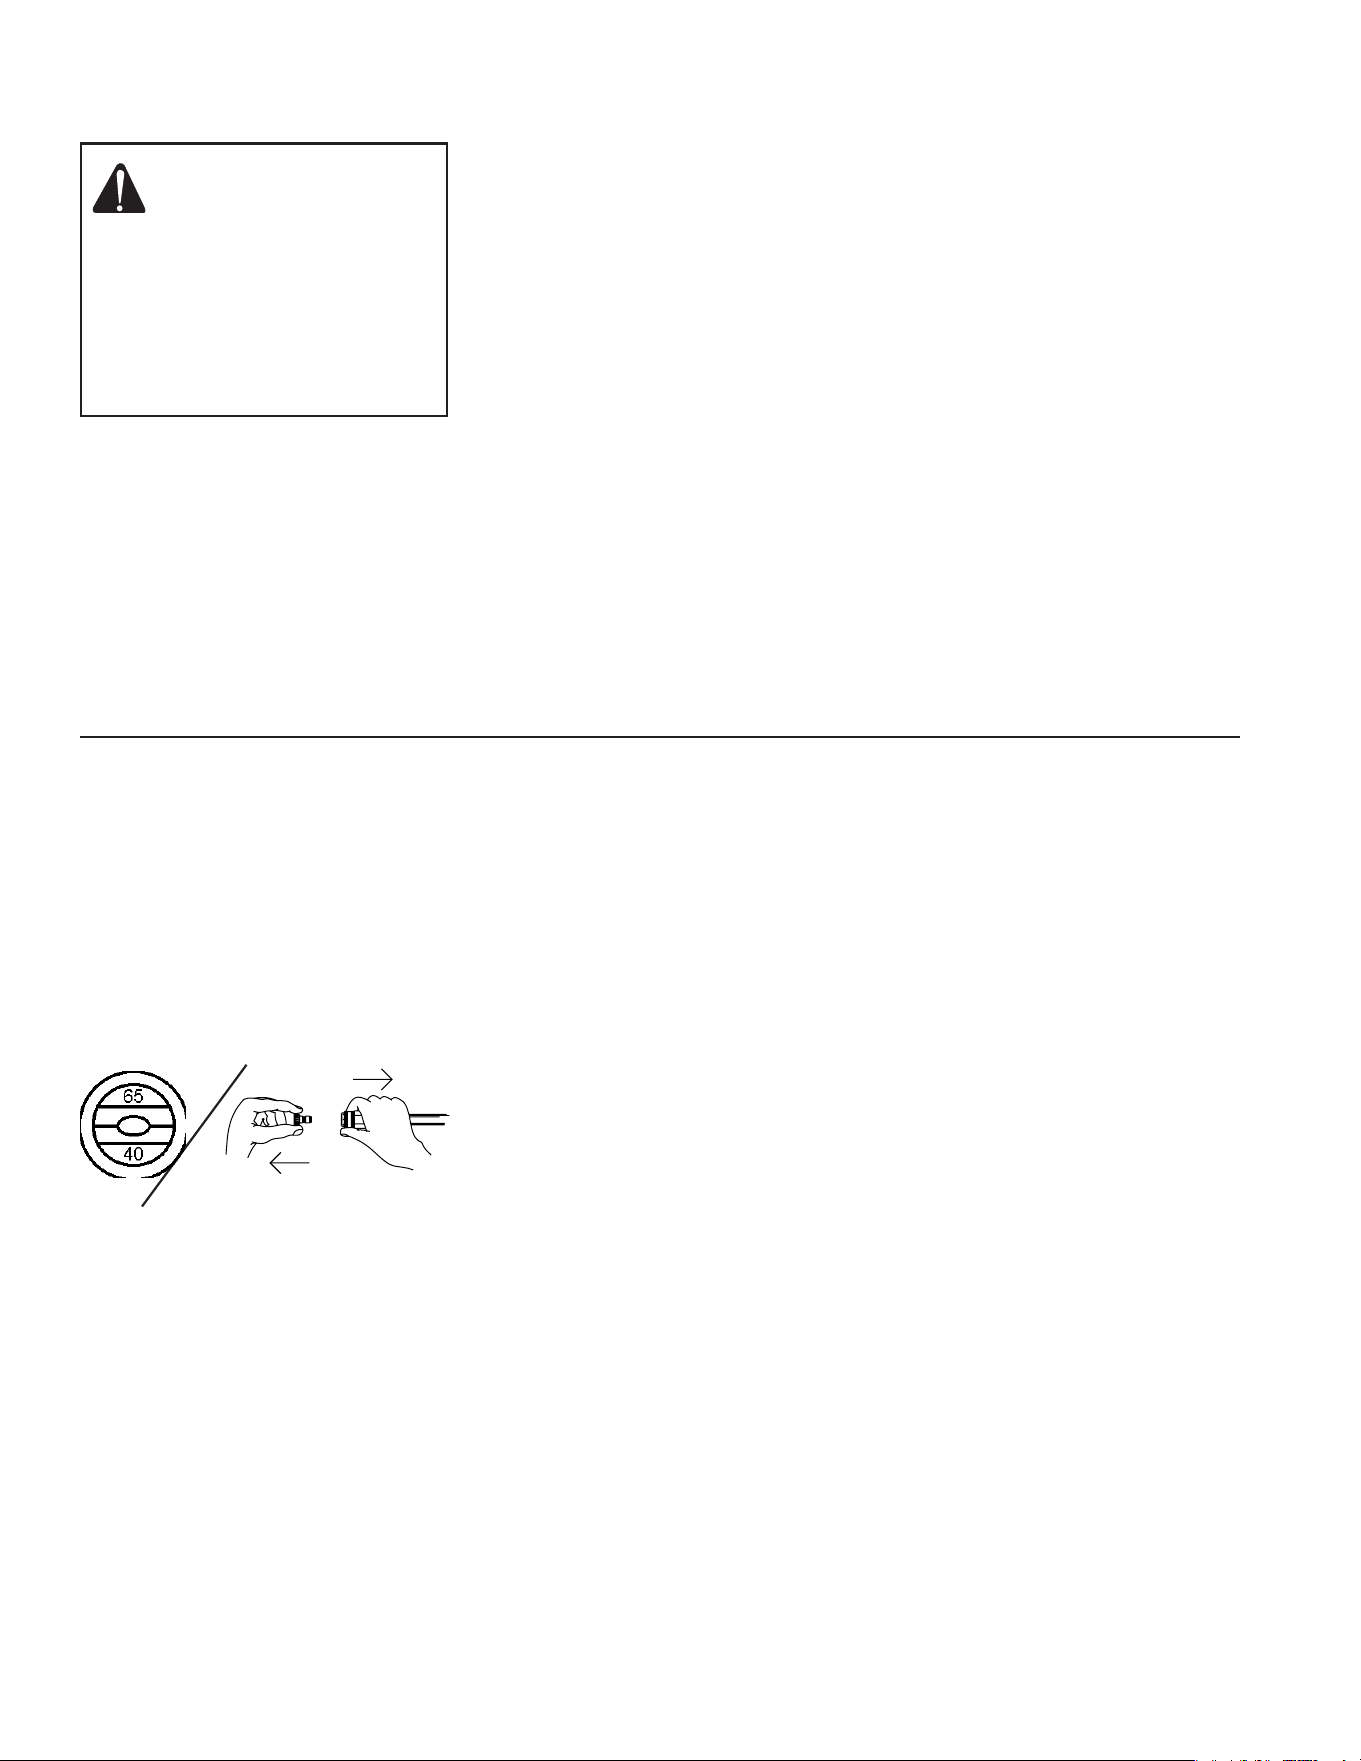
34 Mi-T-M CW-Eléctrico Manual del Operador
CONEXION RAPIDA PARA
DETERGENTES
INSTRUCCIONES DE OPERACION
b. Inspeccione las mangueras de alta presión por dobleces, cortes y
pérdidas. ¡¡¡NO TOQUE LA MANGUERA EN LA PERDIDA, si encuentra
un corte o una pérdida!!! ¡APAGUE INMEDIATAMENTE LA UNIDAD!
Antes de arrancar nuevamente la unidad, reemplace la manguera.
Antes de operar la unidad, asegúrese que se hayan reemplazado todas
las piezas dañadas y que se hayan corregido todos los problemas
mecánicos. Consulte con el Servicio, si usted requiere servicio.
c. Inspeccione el cordón eléctrico por cortes. ¡NO TOQUE NI USE EL
CORDON ELECTORCO, si se halla un corte! Remplace el cordón
antes de arrancar la unidad. Consulte con el Servicio al Cliente si usted
requiere servicio.
8. ASEGURE la pistola a gatillo en la posición “OFF” siempre que cambie las
boquillas de conexión rápida. ¡NUNCA mire directamente en la boquilla!
¡El agua a alta presión crea un riesgo de lesiones graves!
9. No permita que la unidad funcione en un modo de derivación (con el gatillo
cerrado) por más de tres minutos sin accionar el gatillo de la pistola. El no
seguir esta simple regla puede causar la falla prematura de los sellos del
empaque de la bomba, resultando en una reparación costosa a la misma.
10. Puede haber muchas tareas de limpieza que pueden efectuarse sin el uso
de detergentes, a causa que la lavadora a presión suministra un rociado
a alta presión y una variedad de patrones de rociado. Vea "Limpieza con
detergents", para los procedimientos correctos, si se requiere un agente
de limpieza.
LIMPIEZA CON DETERGENTES
(CARACTERÍSTICA OPCIONAL): La característica detergente de la inyec-
ción es una característica opcional en esta unidad. Si usted desea agregar
esta característica a su unidad, ordene Mi-T-M # AW-8300-0000.
1. Reérase a las “Precauciones de limpieza con detergentes”, y el manual
detergente de la inyección que acompaña la parte # AW-8300-0000.
Asegúrese de usar vestimenta protectora de seguridad según lo mencionado.
2. Prepare la solución de detergente de acuerdo con las instrucciones del
rótulo. Nunca bombee ácidos, alcalinos, uidos abrasivos o solventes a
través de la unidad.
3. Conecte el inyector detergente con la unidad según lo dirigido en el manual
detergente del inyector que acompaña su unidad.
4. Ajuste la cantidad de detergente deseada rotando la perilla del ajuste en
el montaje del inyector a la izquierda. Dé vuelta a la perilla totalmente a la
izquierda al sistema en la tarifa máxima del sifón
5. Sumerja el tamiz dentro de la solución del detergente para permitir que
este último circule por sifón.
6. Usando el conector rápido, conecte bien la boquilla de rociado de detergente
(#6540º NEGRA) al extremo de la vara, con la pistola a gatillo asegurado
en la posición “OFF”.
NOTA: Este sistema de inyección está diseñado para aplicar detergentes a baja presión
solamente. No permitirá que se introduzcan soluciones de detergente en el sistema
a menos que la boquilla del detergente esté instalada en la vara.
7. Desenganche la pistola a gatillo y accione el gatillo, para aplicar la solución.
Una mezcla de detergente/agua saldrá de la boquilla de baja presión en unos
pocos momentos. Comience rociando la porción inferior de la supercie
que está siendo limpiada y muévase hacia arriba usando pasadas largas
superpuestas. El aplicar desde abajo hacia arriba ayuda a evitar el estriado.
Permita que se empape brevemente. (Para minimizar la posibilidad de que
se seque el detergente, lo que puede resultar en daños a las supercies
pintadas, evite trabajar sobre supercies calientes o bajo la luz directa del
sol.) Asegúrese de enjuagar una sección pequeña por vez.
PRECAUCION RIESGO DE
DAÑO
NO DIRIJA CONTINUAMENTE
EL PATRON DE ROCIADO EN
UNA SECCION DE LA SUPER-
FICIE DURANTE UN PERIODO
PROLONGADO DE TIEMPO.
PUEDEN OCURRIR POSIBLES
DAÑOS.

Mi-T-M CW-Eléctrico Manual del Operador 35
8. Para enjuagar: asegure la pistola a gatillo en la posición “OFF”, y usando el
conector rápido, conecte seguramente la boquilla de alta presión al extremo
de la vara. Desenganche la pistola a gatillo y rocíe. Llevará 30 segundos
aproximadamente purgar todo el detergente de la tubería. Comience en la
parte superior y trabaje hacia abajo, para obtener los mejores resultados
del enjuague.
9. Después de cada uso, extraiga por sifón un galón de agua del sistema de
inyección de detergente a baja presión. Esto evita la posibilidad de corrosión
o de que el residuo de detergente cause problemas mecánicos durante el
próximo uso.
APAGADO:
1. Para apagar la unidad, mueva el interruptor On/Off a la posición “OFF”.
2. CIERRE el suministro de agua.
3. Accione momentáneamente el gatillo de la pistola para descargar toda la
presión interna, apuntando la pistola en una dirección segura. Desconecte
el conjllunto de la boquilla, una vez que se haya eliminado la presión.
4. Desconecte la unidad de la fuente de potencia.
5. Drene la pistola, la vara y las mangueras. Desconecte las mangueras, una
vez drenado.
6. Limpie la unidad con un paño y almacene con la pistola, la vara y las
mangueras en un área segura.
INSTRUCCIONES DE OPERACION
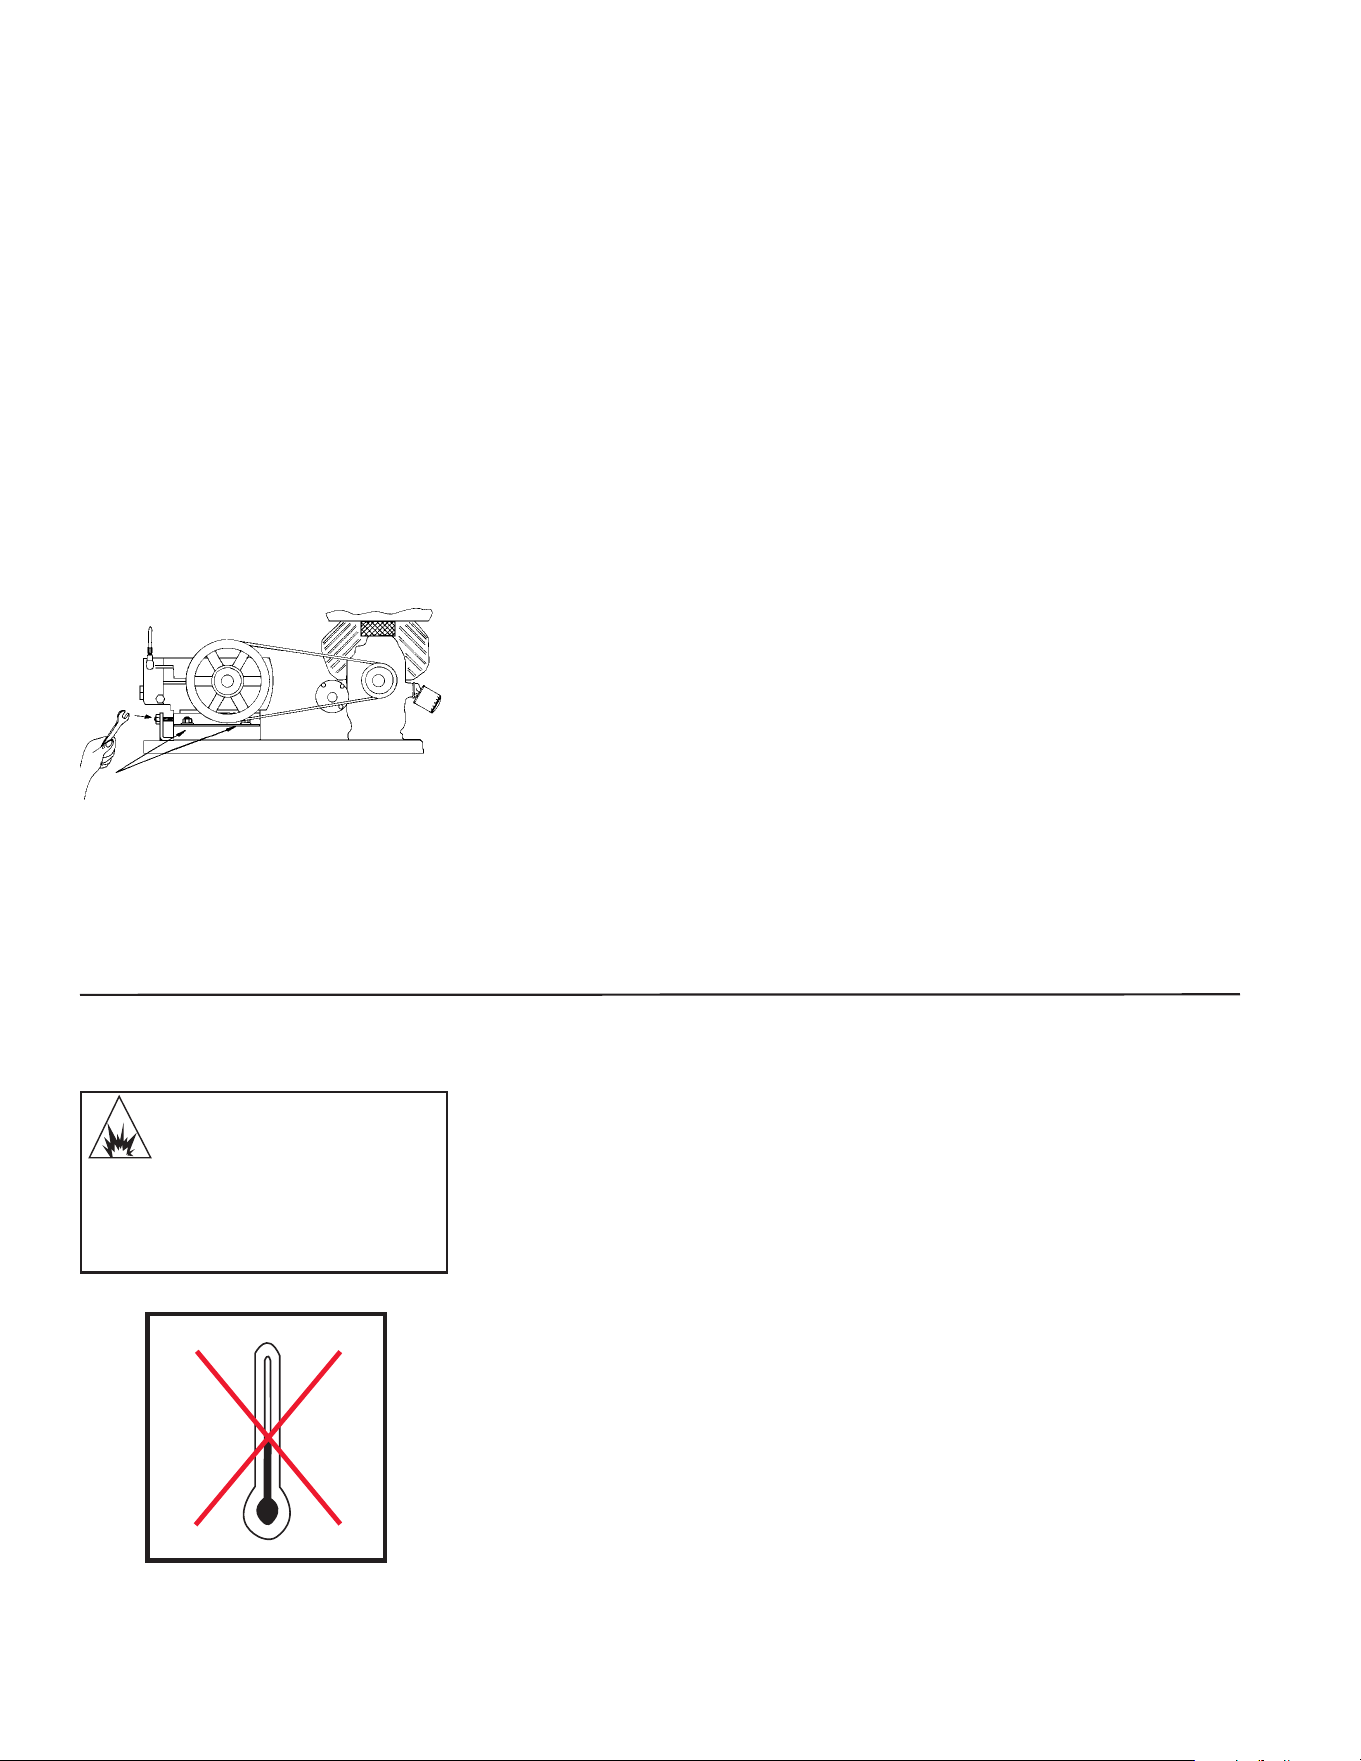
36 Mi-T-M CW-Eléctrico Manual del Operador
B
A
MANTENIMIENTO ESPECIFICO:
BOMBA: El aceite de la bomba debe ser cambiado después de las primeras
25 horas de operación en todas las unidades. Se recomienda intervalos
de 250 horas, después de la carga inicial. Pueden requerirse cambios con
mayor frecuencia, si el aceite parece sucio o lechoso. Use aceite para bom-
bas de Mi-T-M (Pieza No. AW-4085-0016) y llene sólo hasta la marca en el
vidrio. NO llene en exceso.
BOQUILLAS: El agua que uye a través de la boquilla de rociado de con-
exión rápida desgastará y agrandará el oricio, resultando en una pérdida
de presión. Deberían reemplazarse las boquillas siempre que la presión sea
menor que el 85% del máximo. La frecuencia de reemplazo dependerá de
tales variables tales como el contenido mineral en el agua y el número de
horas que se usa la boquilla.
ACOPLES RAPIDOS: Hay un sello del anillo en O dentro de acople rápido
hembra en la salida de agua de su unidad. Este anillo en O se deteriorará,
o se saldrá de lugar si se permite que la unidad bombee sin la manguera
de alta presión. Simplemente inserte un anillo de repuesto para corregir la
pérdida.
AJUSTE DE TENSIÓN DE CORREAS: Para mantener la máxima eciencia
de su lavadora de alta presión, puede ser necesario ajustar la tensión de las
correas ocasionaimente. Siga el procedimiento que se describe a continu-
ación.
1. Quite el protector de correas y aoje las tuercas que están a los lados de
la bomba (Referencia A). Hay un total de 4 tuercas.
2. Gire el tornillo (Referencia B) en el sentido de las manecillas del reloj hasta
observar que la correa se exiona una 1/2 pulgada (1,3 cm) entre las poleas.
3. Apriete las tuercas laterales (Referencia A).
4. Ponga una regla tocando el costado de ambas oleas. Si es necesario, aoje
los tornillos de una polea y muévala hacia adentro o hacia afuera para que
quede correctamente alineada. Apriete los tornillos de la polia y verique
otra vez la tensión.
5. Vuelva a poner la protección y apriete los sujetadores rmemente.
PREPARACION PARA EL INVIERNO:
Será necesario preparar esta unidad para el invierno, para nes de Alma-
cenamiento y transporte en temperaturas ambiente inferiores al punto de
congelación. Esta unidad debe protegerse contra la temperatura más baja
incurrida por las siguientes razones:
1. Si se congela cualquier parte del sistema de bombeo puede acumularse una
presión excesiva en la unidad, lo que podría causar que la misma reviente
resultando en lesiones posibles graves al operador o a los observadores.
2. El sistema de bombeo de esta unidad puede resultar dañado
permanentemente si se congela. LOS DAÑOS POR CONGELACION NO
ESTAN CUBIERTOS POR LA GARANTIA.
Usted puede proteger su unidad siguiendo el procedimiento indicado abajo,
si debe almacenarla en un lugar donde la temperatura puede descender por
debajo de los 32°F.
1. Reúne los artículos siguientes:
a. Dos recipientes de 5 galones.
b. Un galón de anticongelante. (Mi-T-M recomienda un anticongelante
seguro para el medio ambiente.)
c. Suministro de agua.
d. Una manguera de tres pies de largo con un D.I. de 1/2-3/4 y con un
adaptador macho de manguera de jardín de 3/4 de pulgada.
ADVERTENCIA ¡RIESGO
QUE LA UNIDAD
REVIENTE!
¡NO ALMACENE/OPERE LA
UNIDAD EN UN AMBIENTE
HELADO!
AJUSTE DE TENSION DE CORREAS
32˚F 0˚C
ALMACENAMIENTO Y MANTENIMIENTO

Mi-T-M CW-Eléctrico Manual del Operador 37
ALMACENAMIENTO Y MANTENIMIENTO
2. Procedimiento:
a. Después de hacerla funcionar y cebarla.
b. Elimine la presión del sistema apuntando la pistola a gatillo hacia una
dirección segura y accionando el gatillo hasta que el ujo de agua cese
de salir por la boquilla.
c. Asegure la pistola a gatillo en la posición OFF y retire la boquilla.
d. En un recipiente de cinco galones, mezcla el anticon-gelante y água
según las recomendaciones del fabricante para la temperatura loque
esta preparando para el invierno.
NOTA: La preparación apropiada para el invierno está basada en las instrucciones
recomendadas del fabricante incluidas en la “Tabla de Protección” mostrada en el
rótulo posterior de la mayoría de los recipientes de anticongelantes.
e. Retire la manguera de suministro de agua de la unidad y je seguramente
la manguera de 3 pies a la conexión de entrada. Sumerja el otro extremo
de la manguera del anticongelantes.
f. Apunte la vara hacia el recipiente vacío.
g. Accione el gatillo de la pistola hasta que el anticongelante comience a
salir por la vara. Suelte el gatillo por 3 segundos, a continuación accione
el gatillo de la pistola por 3 segundos. Continúe ciclando la pistola
varias veces hasta que toda la mezcla anticongelante es extraída del
recipiente por la acción de sifón.
h. Separe la manguera de 3 pies de la unidad y drene todo el exceso
restante de anticongelante dentro del reciente de 5 galones.
i. Desconecte el conjunto de manguera/pistola/vara de la unidad y drene
todo el exceso restante de anticongelante dentro del recipiente de 5
galones.
j. Almacene la manguera, la pistola y vara junto con la unidad, en un lugar
seguro.
k. Almecene la solución anticongelante para un uso ulterior o descártela
de acuerdo con las leyes de protección del medio ambiente
correspondientes.
3. Procedimiento opcional:
a. Apague la unidad y corte el suministro de agua.
b. Elimine la presión del sistema apuntando la pistola a gatillo hacia una
dirección segura y accionando el gatillo hasta que el ujo de agua cese
de salir por la boquilla.
c. Desconecte y drene la manguera, la pistola y la vara.
d. Arranque la unidad y permita que funcione hasta que toda el agua
salga de la misma. Apague una vez que el agua ha cesado de uir de
la unidad.
NOTA: Debe ejercerse precaución al usar este procedimiento, ya que pueden formarse
plaquitas de hielo de las gotas de agua, lo que podría causar que la unidad reviente
si se arranca antes de estar completamente descongelada.
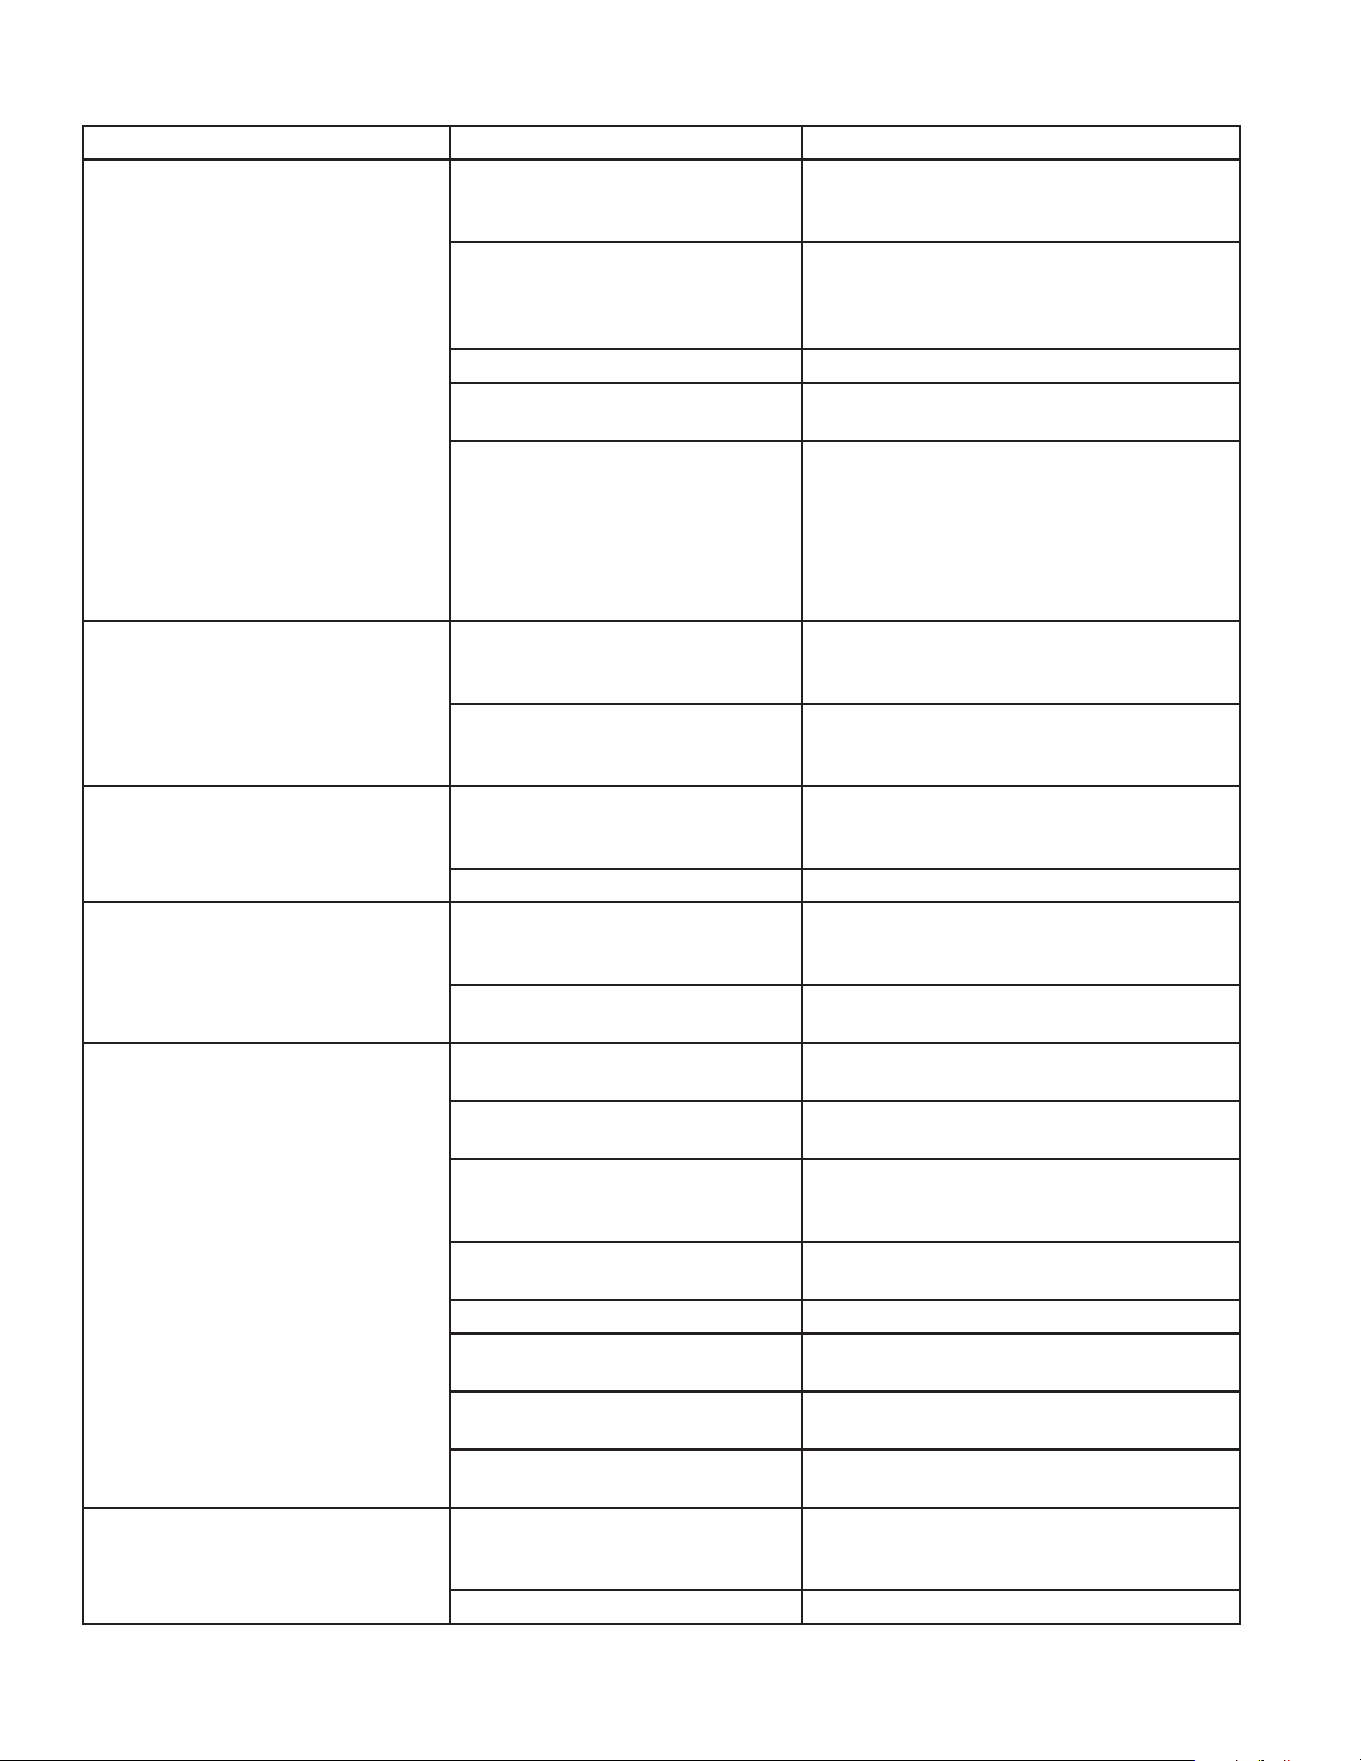
38 Mi-T-M CW-Eléctrico Manual del Operador
SINTOMA CAUSA PROBABLE SOLUCION
El motor de la bomba no arranca
o se apaga durante el funciona-
miento.
GFCI activado o no se volvió a
ajustar.
Apague la unidad. Oprima el botón de
reposición del GFCI después que seha
enchufado a la fuente eléctrica.
Interruptor de circuito activado
o circuito quemado en la caja de
fusibles.
Desconecte todos los otros enchufes del
circuito que está siendo usado y reponga
el interruptor de circuito o inspeccione y
reemplace el fusible
Enchufe ojo o desconectado. Vuelva a conectar el enchufe.
Interruptor de circuito activado
en la unidad
Permita que la unidad se enfríe y vuelva a
arrancar.
La unidad están congelados. Permita que se descongele. Si alguna
parte de sla unidada se condgela, es
posible que se acumule la presión, lo cual
podría ocasionar que la unidad reviente
y consecuentement provoque lesiones
graves al operador o las personas que se
encuentren alrededor.
Se activa el interruptor de circuito
o se quema el fusible en la caja de
fusibles
Sobrecarga del circuito. Verique que el circuito esté clasicado a
15 amperios o más. Desconecte todos los
enchufes en el circuito.
El cordón de extensión es de-
masiado largo o el conductor es
demasiado
Observe los requerimientos eléctricos
correctos indicados
Se activa el GFCI. Voltaje incorrecto. Asegúrese que el suministro eléctrico sea
de 120 Voltios/15 Amperios/60 Hertz/
Monofásico.
Corto circuito interno. Consulte con el Centro de Servicio.
El motor funciona pero no hay
descarga en la boquilla cuando se
acciona el mecanismo del gatillo.
Suministro inadecuado de agua. Asegure que la manguera tenga ¾” de
diámetro y que esté abierto el suministro
de agua entrante.
Doblez en la manguera de en-
trada de agua
Elimine el doblez
Presión baja o uctuante. Doblez en la manguera de discar-
ga de alta presión.
Reemplace la manguera.
Está obstruido el tamiz de la
entrada de agua.
Retire el ltro, limpie o reemplace
La bomba absorbe aire (elimi-
nado elcebado).
Ajuste todas las conexiones de toma
de agua. Elimine pérdidas en la línea de
toma.
Detergent nozzle (6540/Black) is
connected to wand.
Insert high pressure nozzle.
Oricio obstruido o gastado. Retire y limpie, o reemplace.
La válvula de derivación no está
funcionando correctamente.
Repárelos o cámbielos.
Empaques de la bomba des-
gastados.
Cambie los empaques.
La válvula de derivación no está
funcionando correctamente.
Repárelos o cámbielos.
Fuga de agua en la válv. de desc.
térm.
Temperatura o presión del agua
de muy alta.
No deje a la unidad trabajar en modo
desviación (con la pistolacerrada) más de
5 minutos.
Válvula defectuosa. Reemplace
LOCALIZACION DE FALLAS
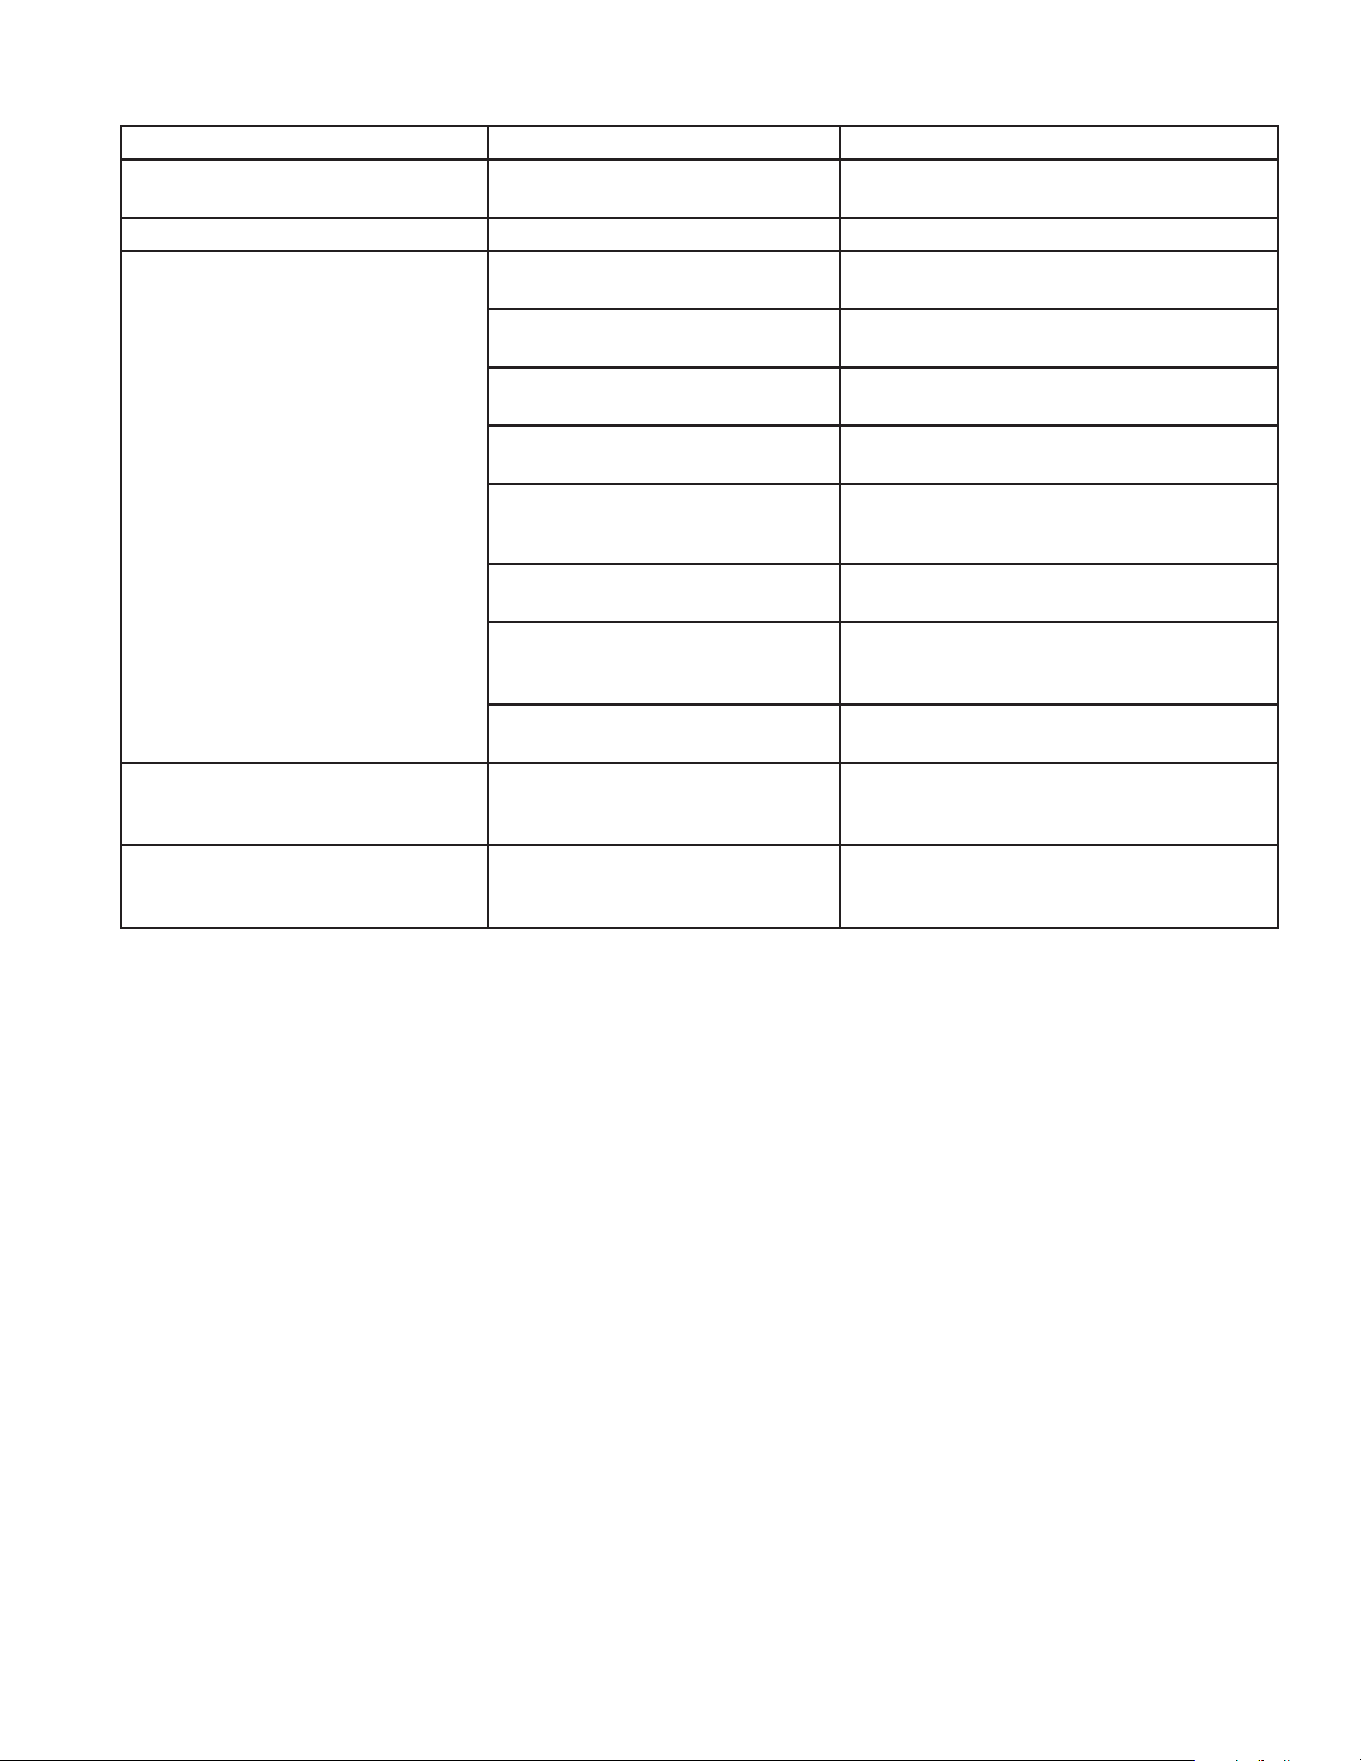
Mi-T-M CW-Eléctrico Manual del Operador 39
SINTOMA CAUSA PROBABLE SOLUCION
Aceite lechoso o espumoso. Hay agua en el aceite. Cambie el aceite de la bomba.Llénela al
nivel adecuado.
Fugas de aceite de la unidad. ¡¡¡¡¡NO UTILICE!!!!! Contactar Servicio al Cliente.
El detergente no uirá por sifón
en el modo de detergente a baja
presión.
El tamiz de detergente no está
completamente sumergido en la
Inspeccione; sumerja si fuera necesario
El tamiz del detergetne está
obstruido.
Inspecciione, limpie or reemplace.
La manguera de detergente es-
táobstruida o cortada.
Inspecciione, limpie or reemplace.
Perilla de ajuste de deterg. está
en cerrada
Abra la perilla.
Inyector detergente (6540°/Ne-
gro). no está conectado con la
varita.
Inserte rápido correcto conectan el inyec-
tor
La boquilla del detergente está
taponado
Limpie o reemplace.
Hay demasiadas extensiones de
lasmangueras de alta presión
conectadasa la salida de agua.
mangueras de alta presión conectadas
a la salida de agua.
Están atascados la bolilla y el
resorte del Venturi.
Saque, limpie o reemplace.
El ujo de agua retrocede al recipi-
ente del detergente.
La esfera y el resorte en el
Venturi están invertidos, faltano
están desgastados
Saque, limpie o reemplace.
Cuando la pistola de gatillo está
asegurado en la posición "OFF", el
agua uye desde la boquilla.
La pistola funciona mal. Repair or replace.
LOCALIZACION DE FALLAS
40 Mi-T-M CW-Eléctrico Manual del Operador
ACCESSOIRES
*Se debe especicar presión (PSI) y volumen (GPM) al hacer el pedido.
Detergentes de Mi-T-M son detergentes expecialmente para usar con lavadoras a presion de Mi-T-M y estan enva-
sando en dimensiones varios. Para mas llame lose servicios para clientes a 800-553-9053.
CW-2004
CW-2405
CW-3004
15-0006 MANGUERA DE ALIMENTACION DE 3/4"
X X X
851-0007 MANGUERA DE EXTENSION DE 50' DE 3000PSI
X X X
AW-3000-0000 CORREADOR DE ARENA-PUNTE DE CARBURO
X X X
AW-3020-0000 CORREADOR DE ARENA-PUNTE DE CERAMICA
X X
AW-4085-0016 PETROLEO DE BOMBA
X
AW-7003-1500 CEPILL A GIRATORA
X X X
AW-7004-0045 BOQUILLA GIRATORIA
X
AW-7008-4055 G-FUERZA BOQUILLA GIRATORIA
X
AW-7025-8000 CEPILLO CON MANGO DE 25" (INCLUYE CINCO BOQUILLAS DE 80)
X X X
AW-7035-8000 CEPILLO CON MANGO DE 35" (INCLUYE CINCO BOQUILLAS DE 80)
X X X
AW-7103-1800 VARA DE EXTENSION DE 18"
X X X
AW-7103-3600 VARA DE EXTENSION DE 36"
X X X
AW-7103-7200 VARA DE EXTENSION DE 72"
X X X
AW-8007-0000 INYECTOR DE DETERGENTE DE ALTA PRESION
X X X
AW-8300-0000 INYECTOR DE DETERGENTE DE BAJO PRESION
X X X

Mi-T-M CW-Eléctrico Manual del Operador 41
NOTA

42 Mi-T-M CW-Eléctrico Manual del Operador
NOTA
Mi-T-M CW-Eléctrico Manual del Operador 43
DECLARACIÓN DE GARANTÍA
Mi-T-M
®
garantiza que todas las piezas (excepto aquellas a las que se hace referencia abajo), de su nueva
lavadora a presión libres de defectos en materiales y mano de obra durante los periodos siguientes:
Para un curso de la vida contra congelar y agrietarse:
Colector de bomba
Por siete (7) años a partir de la fecha original de compra
Bomba de Alta Presión
Por dos (2) años a partir de la fecha original de compra:
Carreta unidad Cañerías
Polea
Por una (1) años a partir de la fecha original de compra:
GFCI Encender de selector
Contacto de entrada Sobrecarga
Por noventa (90) días a partir de la fecha original de compra:
Manguera de alta Presión Pistola de Gatillo
Descargador Filtro
Las piezas defectuosas que no están sujetas a deterioro causado por el uso serán reparadas o reemplazadas
a nuestra opción durante el periodo de garantía. En todo caso, el reembolso está limitado al precio de compra
pagado.
EXCLUSIONES
1. El motor está cubierto bajo una garantía separada proporcionada por el fabricante respectivo y está sujeta
a los términos en ella establecidos.
2. Partes de desgaste normal:
Empaques de las Bombas Válvulas de la Bomba
Boquillas Válvulas del Detergente
Círculo Connexión Rapida/Conectar un tornillo
Correa
3. Esta garantía no cubre las piezas dañadas debido al deterioro normal causado por el uso, mala aplicación,
mal uso, operación a velocidades, presiones o temperaturas diferentes a las recomendadas. Las piezas
dañadas o gastadas a causa del uso de líquidos cáusticos o por la operación en medios ambientes
abrasivos o corrosivos o bajo condiciones que causan cavitación de la bomba no están garantizadas.
La falla en seguir los procedimientos recomendados de operación y mantenimiento también cancela la
garantía.
4. El uso de piezas de repuesto diferentes a las genuinas Mi-T-M cancelará la garantía.Las piezas devueltas,
con franqueo pagado a un Centro de Servicio Autorizado
Mi-T-M serán inspeccionadas y reemplazadas, libre de cargos, si se determina que están defectuosas y
sujetas a la garantía. No existen garantías que se extiendan más allá de la descripción contenida aquí.
Bajo ninguna circunstancia Mi-T-M
®
Corporation será responsable por la pérdida de uso de la unidad,
pérdida de tiempo, inconvenientes, pérdida comercial o daños consecuentes.
PARA SERVICIO O CONSIDERACION DE LA GARANTIA CONSULTE CON:
Mi-T-M
®
Corporation/50 Mi-T-M Drive, Box 50/Peosta, IA 52068-0050
Telefono: 563-556-7484/Telefone gratis en los EE. UU.: 800-553-9053
Fax 563-556-1235 Lunes - Viernes 8:00 a.m. - 5:00 p.m. CST

44 Mi-T-M CW-Eléctrico Manual del Operador
Manufactured by Mi-T-M
50 Mi-T-M Drive, Peosta IA 52068
563-556-7484/ Fax 563-556-1235