WKL 6/2024
8070 St Andrews Ave #107 San Diego, California 92154 (858) 566-7465
Web Site: www.breezaire.com Email: info@breezaire.com
WKL SERIES
(USA ONLY)
--INSTALLATION INSTRUCTIONS--
Thank you for choosing a BREEZAIRE cooling unit. We believe our products are
the best on the market and will provide many years of trouble-free service.
Please take a few minutes and read these entire instructions before installation.
Breezaire requires that all units be tested for a min of 30min before installation.
Before removing the cooling unit from the box, please inspect for damage which might have
occurred during shipping. If damage is found, notify your dealer and Breezaire immediately.
BREEZAIRE is not responsible for any damage during shipping.
Breezaire recommends installing an appliance grade surge protector.
MODEL SERIAL NUMBER
INSTALLED BY DATE
While great effort has been made to provide accurate guidelines, BREEZAIRE cannot warrant its units to properly cool
a particular enclosure. Customers are cautioned that enclosure construction, unit location and many other factors can affect
the operation and performance of the unit. Therefore, the suitability of the unit for a specific enclosure or application must
be determined by the customer and cannot be warranted by BREEZAIRE.
*All Breezaire units can be modified for a list, visit the website or contact Breezaire and your dealer for help.
BREEZAIRE Products Company
8070 St Andrews Ave #107 - San Diego, CA USA 92154 - (858) 566-7465
Web Site: www.breezaire.com Email : info@breezaire.com
WKL 6/2024
PG 2
INSTALLATION INSTRUCTIONS FOR WKL SERIES
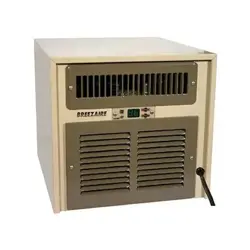
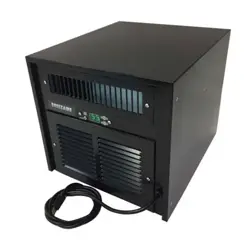
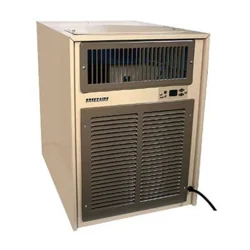
The BREEZAIRE WKL Series cooling units are designed to, when installed in a properly constructed enclosure, provide a
constant, selectable temperature between approximately 48°F and 63°F while reducing the excess relative humidity to the
proper 50% to 75%. BREEZAIRE cooling units are designed to lower the temperature, while removing only excessive
moisture. In a properly constructed enclosure this process can raise the relative humidity. The unit does not add moisture
to the enclosure. The unit does not include a heating system and will not warm the enclosure. The WKL Series is not
intended to cool service cabinets, which are maintained at lower temperatures and opened or entered frequently.
The WKL Model has a digital electronic (Sentry III) thermostat that adds additional safety and convenience features:
Large, easy to read, green LED display.
Accurate, easy to adjust (no tools needed), readable set points with continuous reading of enclosure temperature or
displaying of set point when changing enclosure temperatures.
Power outage protection, which delays unit start up after power outages.
Blocked airflow protection, which shuts down unit and protects wine in case of high temperatures caused by condenser
blockage.
Controls temperature by enclosure air sensors or optional bottle probe.
All Breezaire units can be modified for a list visit the website or contact Breezaire and your dealer for help.
ENCLOSURE CONSTRUCTION
To use the below SIZING GUIDE, the enclosure to be cooled must be built to the following minimum specifications. If the
enclosure cannot be built to these minimum specifications, consult your BREEZAIRE dealer for assistance in choosing the
correct unit. BREEZAIRE cooling units are not warranted to cool a specific enclosure.
All walls, floors and ceilings should have a vapor barrier. This vapor barrier should be installed on the warm side of the
insulation. All interior walls and floors should be lined with a minimum of R-11 insulation and exterior walls and ceiling
insulation value should be a minimum of R-19. There should be no glass doors and/or windows.
All joints, door frames, electrical outlets or switches and any pipes or vents which go through the enclosure should be
sealed to prevent air and moisture leakage into the room. Concrete and brick are not insulation or moisture barriers.
Doors into the enclosure should be of minimum size, insulated to R-11 and be tightly sealed with a high-quality
weather stripping. Be sure to seal the bottom of the door and behind the door frame's molding.
Enclosure lighting should be of low wattage, with a timer to ensure lights are not left on when the enclosure is
unoccupied. Recessed lighting should not be used, as they will allow outside air to enter the enclosure.
If the ambient temperature surrounding the enclosure should exceed the desired cellar's temperature by more than
25°F, the unit will produce less than its stated BTUs. No enclosure wall should receive direct sunlight or strong wind.
This is a mechanical piece of equipment; it will make noise and produce heat on the warm side exterior condenser
grille (Fig. 3). Remember, unit installation location is not only important inside the wine cellar, but just as important is
where the warm side exhaust air is being rejected.
Note: Glass doors and/or windows are not included in our calculations and should not be used in a wine enclosure.
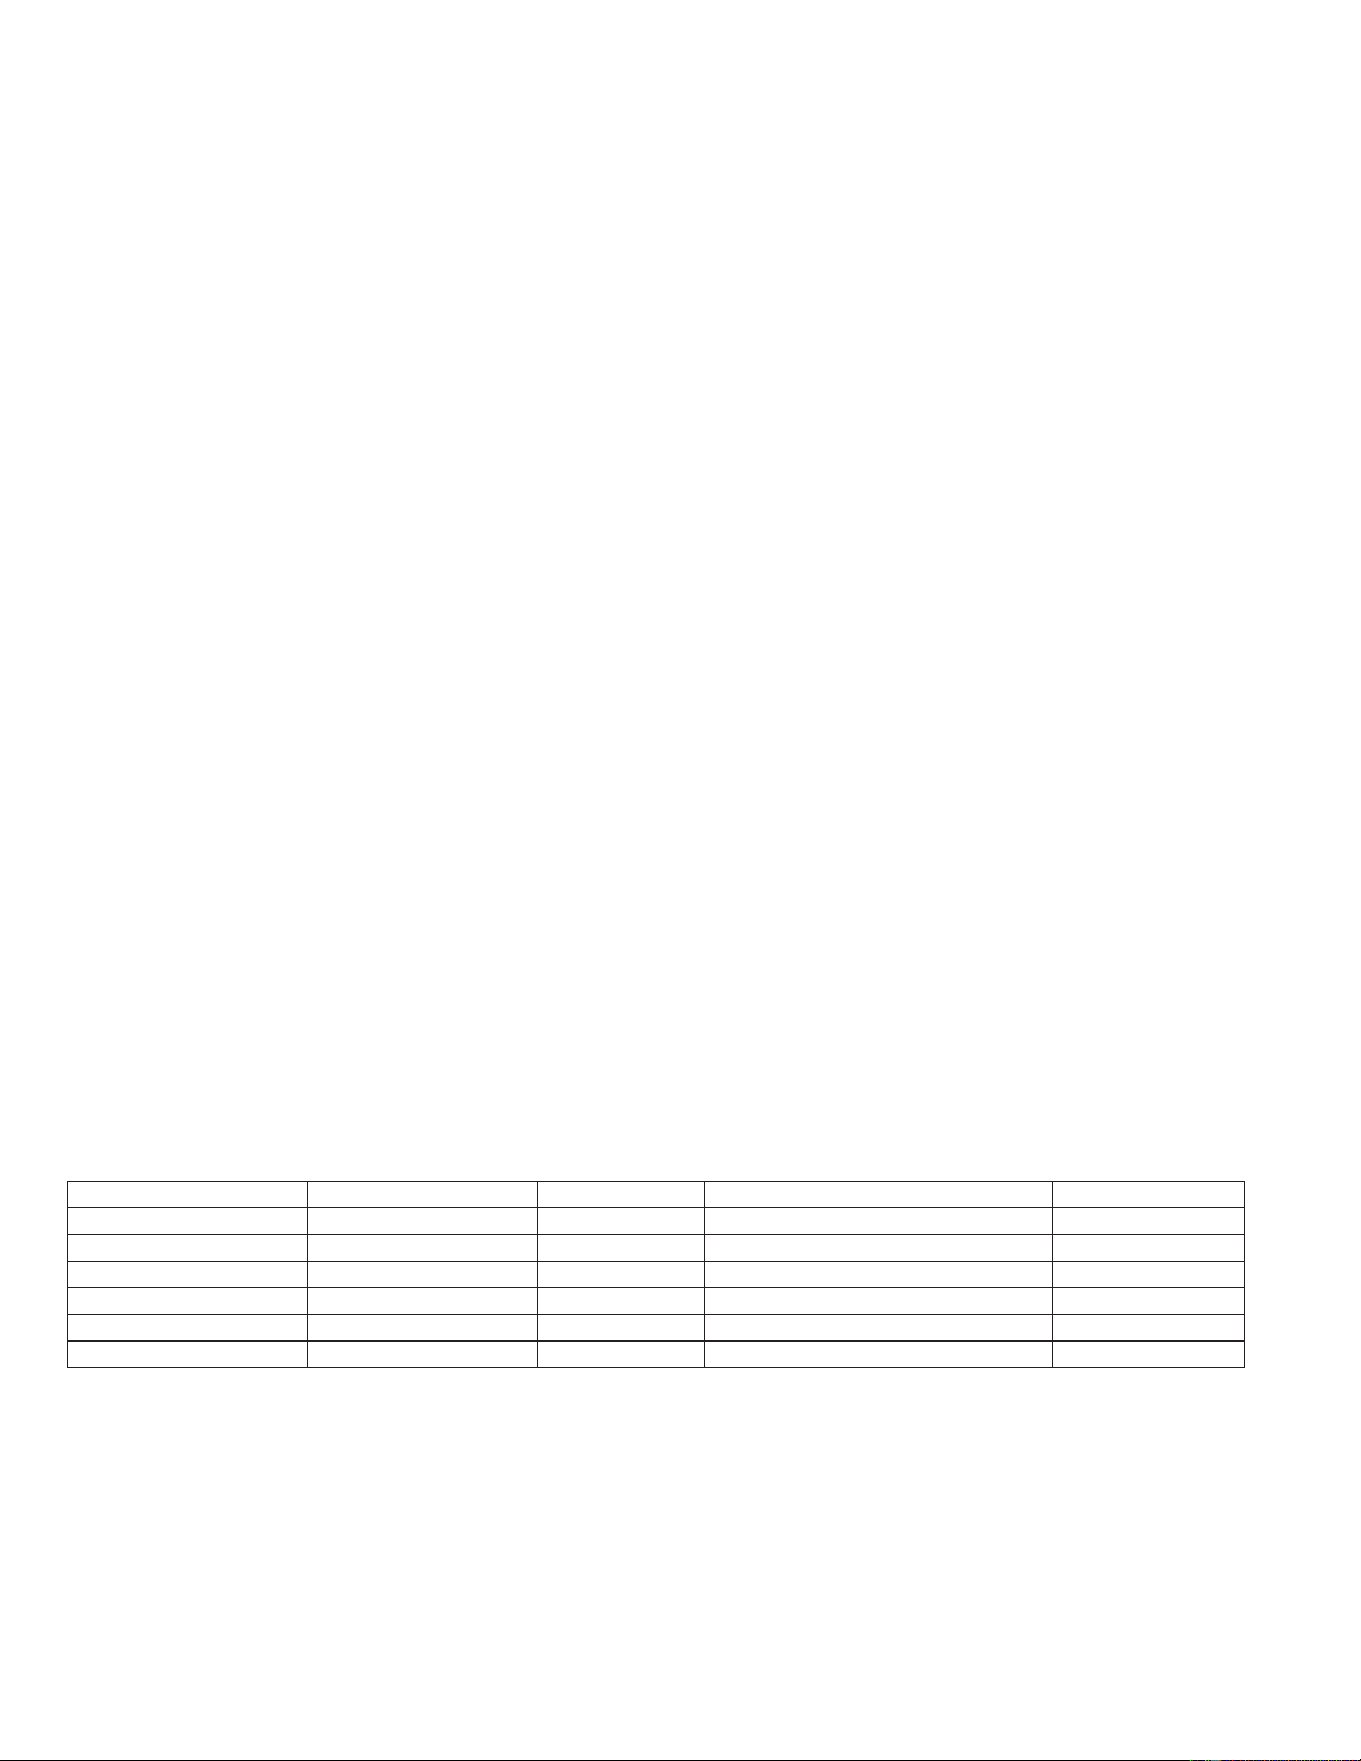
SIZING GUIDE & SPECIFICATIONS
This guide to be used only for enclosures meeting the above construction requirements. All units are 115 Volt, 60 Hz.
*All units should be plugged into a GFCI outlet and on its own circuit.
INSTALLATION
Before installing the unit, inspect it again for any shipping damage. Test the unit by placing it in a room where the
temperature is above 65°F. Position the unit to allow cold air to flow from evaporator outlet. (See Fig. 1) Plug the unit's
electrical cord into a properly grounded electrical GFCI outlet of adequate capacity (see unit specification for unit
electrical requirements) and on its own circuit. Recommend installing an appliance grade surge protector. The Sentry III
has no "off" position; therefore, it will begin to run within 5 minutes of being plugged in. Allow it to run for a minimum of 15
minutes. There should be a flow of cool air from the evaporator side upper grille (see Fig. 1) and warm air should be
flowing from the upper opening on the warm air exhaust (condenser) grille (see Fig. 3).
BREEZAIRE Model
Enclosure Volume
Electrical
Dimensions (inches)
Weight
WKL 1060
140 cu.ft.
3 Amp
14.25W x 13.25H x 16.38D
45 lb.
WKL 2200
265 cu.ft.
4 Amp
14.25W x 13.25H x 16.38D
55 lb.
WKL 3000
650 cu.ft.
5 Amp
14.25W x 19.75H x 21.63D
76 lb.
WKL 4000
1000 cu.ft.
7 Amp
14.25W x 19.75H x 21.63D
81 lb.
WKL 6000
1500 cu.ft.
9.5 Amp
16.25W x 22.00H x 21.63D
101 lb.
WKL 8000
2000 cu.ft.
10 Amp
16.25W x 22.00H x 21.63D
101 lb.
WKL 6/2024
PG 3
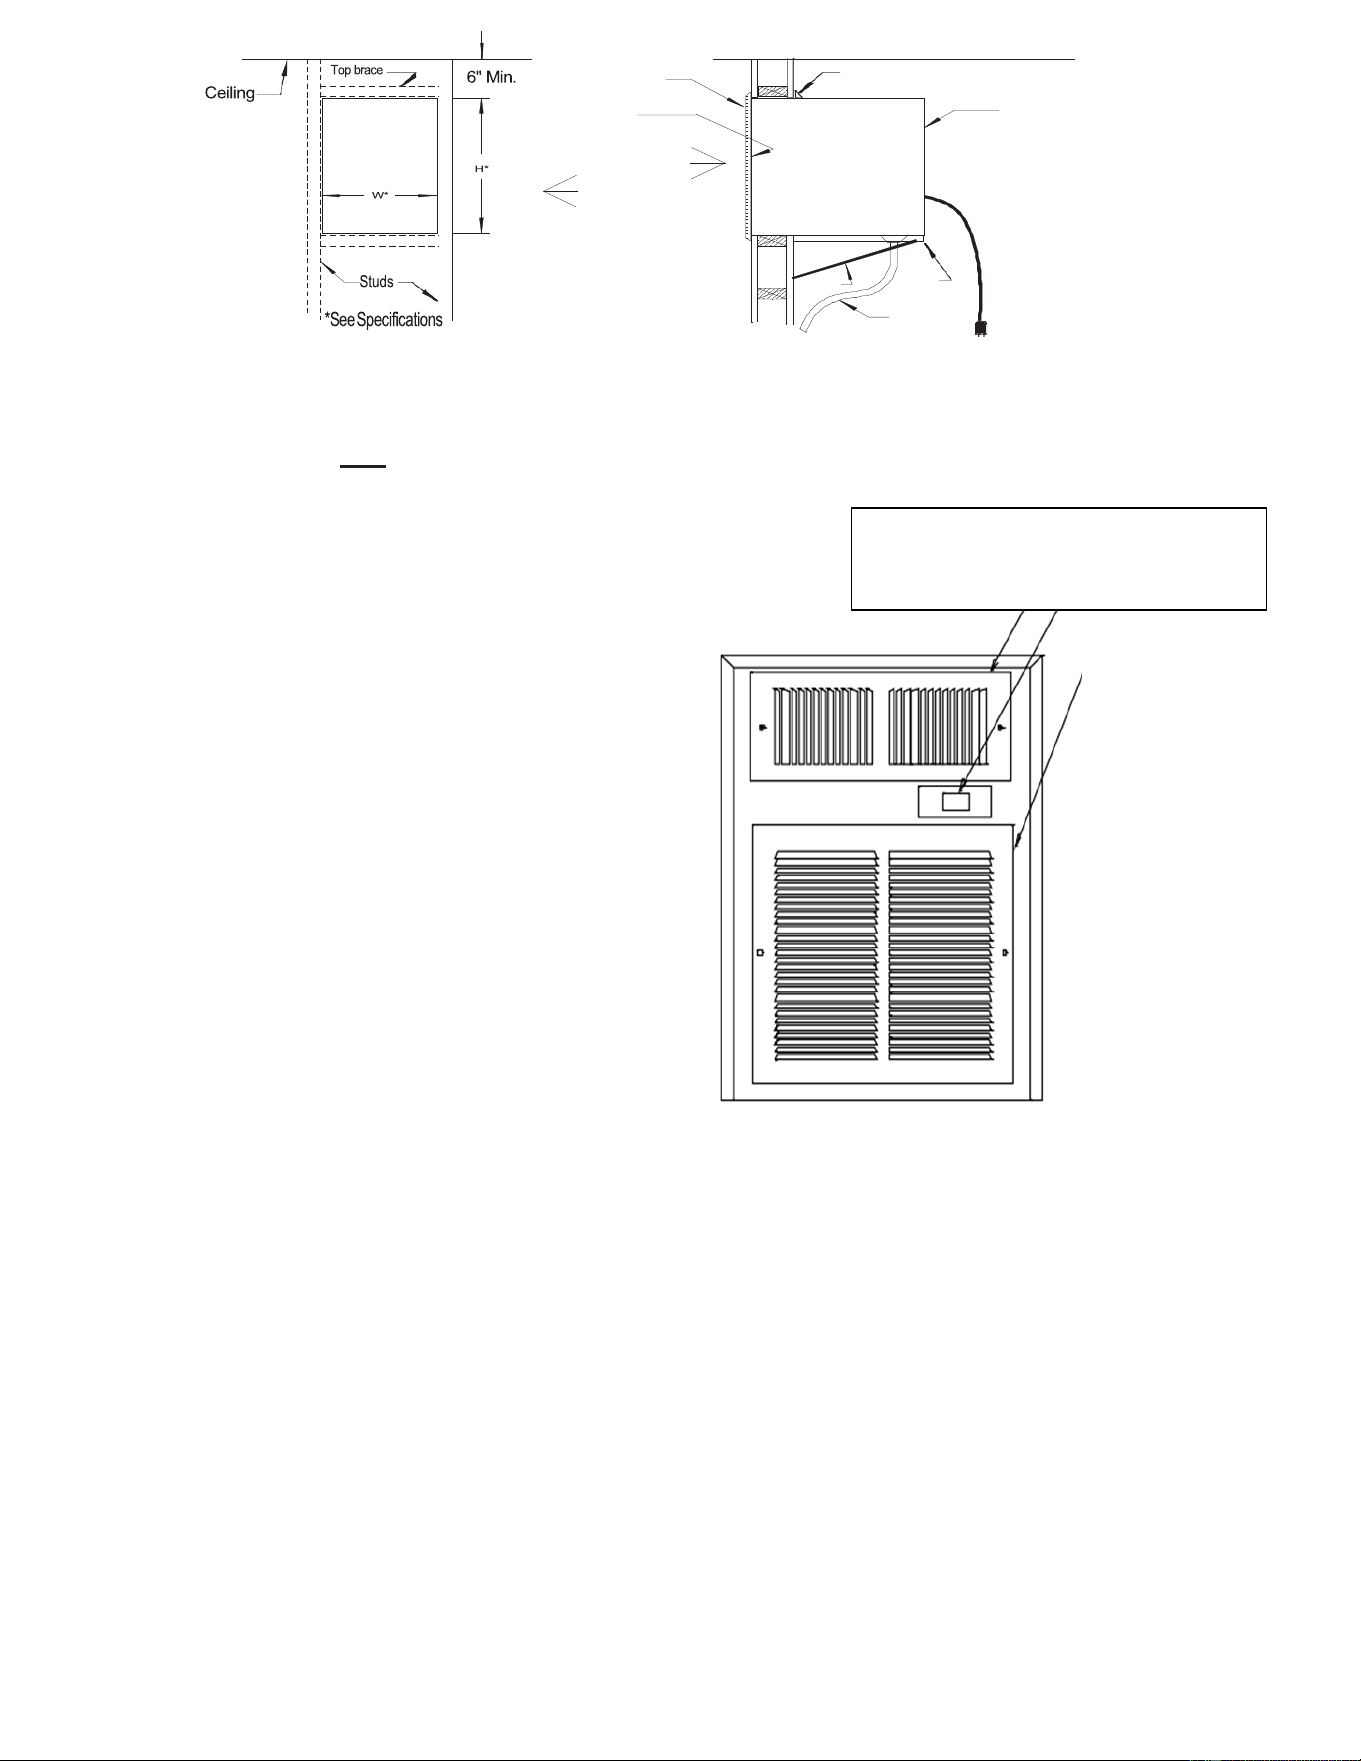
Warm Air Exhaust
(Condenser) Grill
Seal
Molding
WK(L) Cooling Unit
MINIMUM
CLEARANCE
3 FEET
Warm Air Exhaust
(Condenser Side)
Wine Room
Evaporator Side
Figure 2
Brace
Figure 3
Shelf
BREEZAIRE units should NOT be installed in a fire rated
wall without consulting your local building inspector and
building codes.
If your installation cannot be performed in accordance
with these instructions contact your dealer.
The unit must be installed in the upright position and is
not designed to have ductwork on either the warm air or
cold air sides. Do not drill any holes in the cooling unit. It
may damage the unit, promotes rust, and will void the
warranty. Do not install the unit so that its removal will
be difficult or impossible. It may be necessary to
periodically remove the unit to clean the condenser coil.
Select a place to mount the unit where the airflow from the
warm air exhaust is unobstructed for a minimum of 3 feet.
The area into which the unit exhausts must be well
ventilated. If not, the unit will be unable to reject the
excessive moisture and heat, resulting in unsatisfactory
performance.
An inappropriate location for the warm air exhaust includes
unventilated laundry rooms, closets, bathrooms, garages,
crawl spaces, attics, and humid basements.
Make sure that the warm air exhaust condenser grille can
be properly attached to the unit (see Fig. 3).
Make a hole through the wall as illustrated in Fig. 2. The
dimensions of the hole should be approximately 1/4 inch
larger than the width and height given in the specifications.
If the unit is to be installed above floor level, construct a shelf as shown in Fig. 3. This shelf must be capable of supporting
the weight indicated in the specifications. NOTE: Insulation placed between the unit and the shelf will reduce additional
noise and help reduce condensate from forming on the underside of the unit.
Cut a hole in the shelve that corresponds to the Pull-down drain tube's location on the underside of the unit. Refer to
section "ENCLOSURE PROBLEMS".
Place the unit through the opening with the warm air exhaust side, flush to the outside of the wall (see Fig. 3). Attach the
warm air exhaust condenser grille to the unit and to the wall with screws supplied with grille. Note: the unit may be installed
with the cold side flush to the inside wall, however, two provisions must be made. First, insure the warm air exhaust grille
will be installed. Second, insulate and vapor barrier the framed opening to prevent moisture in the wall from condensing on
the cold surface of the cooling unit. Please remember that in all cases the warm air exhaust condenser grille must be
directly attached to the warm side of the unit. Do not leave an air gap between the unit's surface and the warm air exhaust
condenser grille. The unit will not work properly without this grille. The exhaust condenser grille has only a white
primer coat. If the exhaust condenser grille is installed on an outside wall it should be coated with an appropriate paint.
Seal the opening around the unit with high quality weather stripping and cover with an appropriate molding. Attach
the molding to the wall, not the unit. Plug the unit's electrical cord into a properly grounded electrical outlet of adequate
capacity (see unit specification for unit electrical requirements)
Figure 1
TOP Cold Air Discharge
MIDDLE Sentry III Controller
BOTTOM Wine Cellar Intake Air

WKL 6/2024
PG 4
Operation
On initial start-up the cooling unit will reduce the temperature of the enclosure slowly. The unit may run constantly or cycle
off for short periods. The time required to reach the desired temperature will vary, depending on the enclosure construction
and contents.
The Sentry III is factory set to approximately 55°Fahrenheit. Unless the temperature falls below that which is desired, do
not change the thermostat setting for at least 3 days.
During normal operation the Sentry III readout will display the temperature of the air entering the intake of the cooling unit.
If the optional bottle probe is installed the intake air sensor will be disconnected and the temperature of the probe will be
displayed. The temperature being displayed is also the temperature used by the control system to turn the cooling unit on
and off.
After initial cool down, the "on-off" cycle should be relatively constant. The percentage of "off " time will depend on
enclosure's construction, placement of unit, contents, and surrounding outside temperatures. If it is necessary to adjust the
temperature of the enclosure; adjust the thermostat to a colder temperature while the unit is running and to a warmer
temperature while the unit is off. The set point can be adjusted no lower than 48°F or higher than 63°F. NOTE: If the
enclosure is not cooling to the current set point, lowering the set point temperature further will not help. (See ENCLOSURE
PROBLEMS section)
The Sentry III set point, desired enclosure temperature, may be changed by pressing and holding the "SET" button while
momentarily pressing the "COOLER" or "WARMER" button. When the "SET" button is pressed the readout will
automatically change and display the current set point temperature
Should the operation of the cooling unit be interrupted by a power outage or by raising the set point temperature while the
unit is running the Sentry III's internal delay will be activated, and the unit will not restart for approximately three (3)
minutes. NOTE: This delay may also occur on initial power-up. Please see the Sentry III+ Owner’s Manual.
MAINTENANCE
The BREEZAIRE cooling unit requires very little maintenance. To maintain optimal performance, the condenser coil should
be inspected and cleaned every 3 months. Remove the exhaust condenser grille located outside the enclosure and use a
vacuum (with brush attachment) to remove dirt and lint from the fins of the condenser coil.
If the condenser coil becomes blocked preventing proper air flow the unit will over heat causing a loss in cooling
efficiency and will result in a failure of the unit not covered under warranty.
ENCLOSURE PROBLEMS
BREEZAIRE is extremely proud of the quality and reliability of its products. Experience has shown that of the small number
of problems encountered, the large majority are due to improper unit selection or enclosure construction. Should the
cooling system be suspected of malfunctioning, check the temperature of the air being exhausted from the upper part of the
warm air exhaust condenser grille. If it is warm, the unit is working. A further check may be made by comparing the air
temperature entering the lower grille on the cold side (Evaporator side) with that leaving the upper cold side grille. (see Fig.
1) If the air leaving the unit is 6°F or more degrees colder than the temperature entering, the unit is working properly. In
some cases, improper placement or installation may cause the unit's performance to be compromised. In situations where
the ambient relative humidity is very low, the desired enclosure relative humidity may not be achieved without adding
moisture. To add moisture to the enclosure only use slow, natural evaporation from a small porous water container. Do not
use a humidifier.
Improper placement or installation may cause the unit's performance to be degraded. If the unit is exhausted into a confined
area with poor ventilation or duct work, it will not be able to reject the heat and moisture it is removing from the enclosure
and a malfunctioning unit will be suspected. If an obstruction to the flow of fresh air into or from the cooling unit (see Fig. 3)
is stopped or restricted for any reason the unit could heat rather than cool the enclosure.
NOTE: Should this condition develop the Sentry III will turn the unit off when the enclosure temperature rises to
approximately 75°F, the unit will not restart until the enclosure temperature is lowered to approximately 65°F or the unit is
disconnected and then re-connected to the power supply. This feature is disabled for approximately 45 minutes after the
unit is connected or re-connected to a power supply to allow initial cooling of enclosure. Please see the Sentry III+
Owner's Manual.
All Breezaire units can be modified for a list visit the website or contact Breezaire and your dealer for help.
WKL 6/2024
PG 5
Proper sealing of the enclosure through the use of a vapor barrier and weather stripping cannot be over emphasized. The
unit will not be able to maintain the proper conditions if fresh; moisture-laden air is constantly being introduced into an
improperly sealed enclosure. Symptoms of this condition are; unit runs all the time with only a slight reduction in enclosure
temperature and/or water overflows from the unit. One way of discovering gross air leaks is to stand inside the enclosure
with the lights off, allow your eyes to adapt to the dark and look for light showing through cracks in the walls or around the
door. Also close the door on a piece of paper, if you can pull the paper through the door seal, it means air and moisture are
also entering into your enclosure. Because of the temperature difference between the inside and outside, very small cracks
can allow large amounts of outside air into the enclosure. Please be aware that moisture will pass through solid concrete,
brick, paint, paper and wood. A newly constructed room may contain fresh wood, paint, concrete and other building
materials containing large amounts of moisture. This condition can cause symptoms similar to a poorly sealed enclosure,
but will gradually go away.
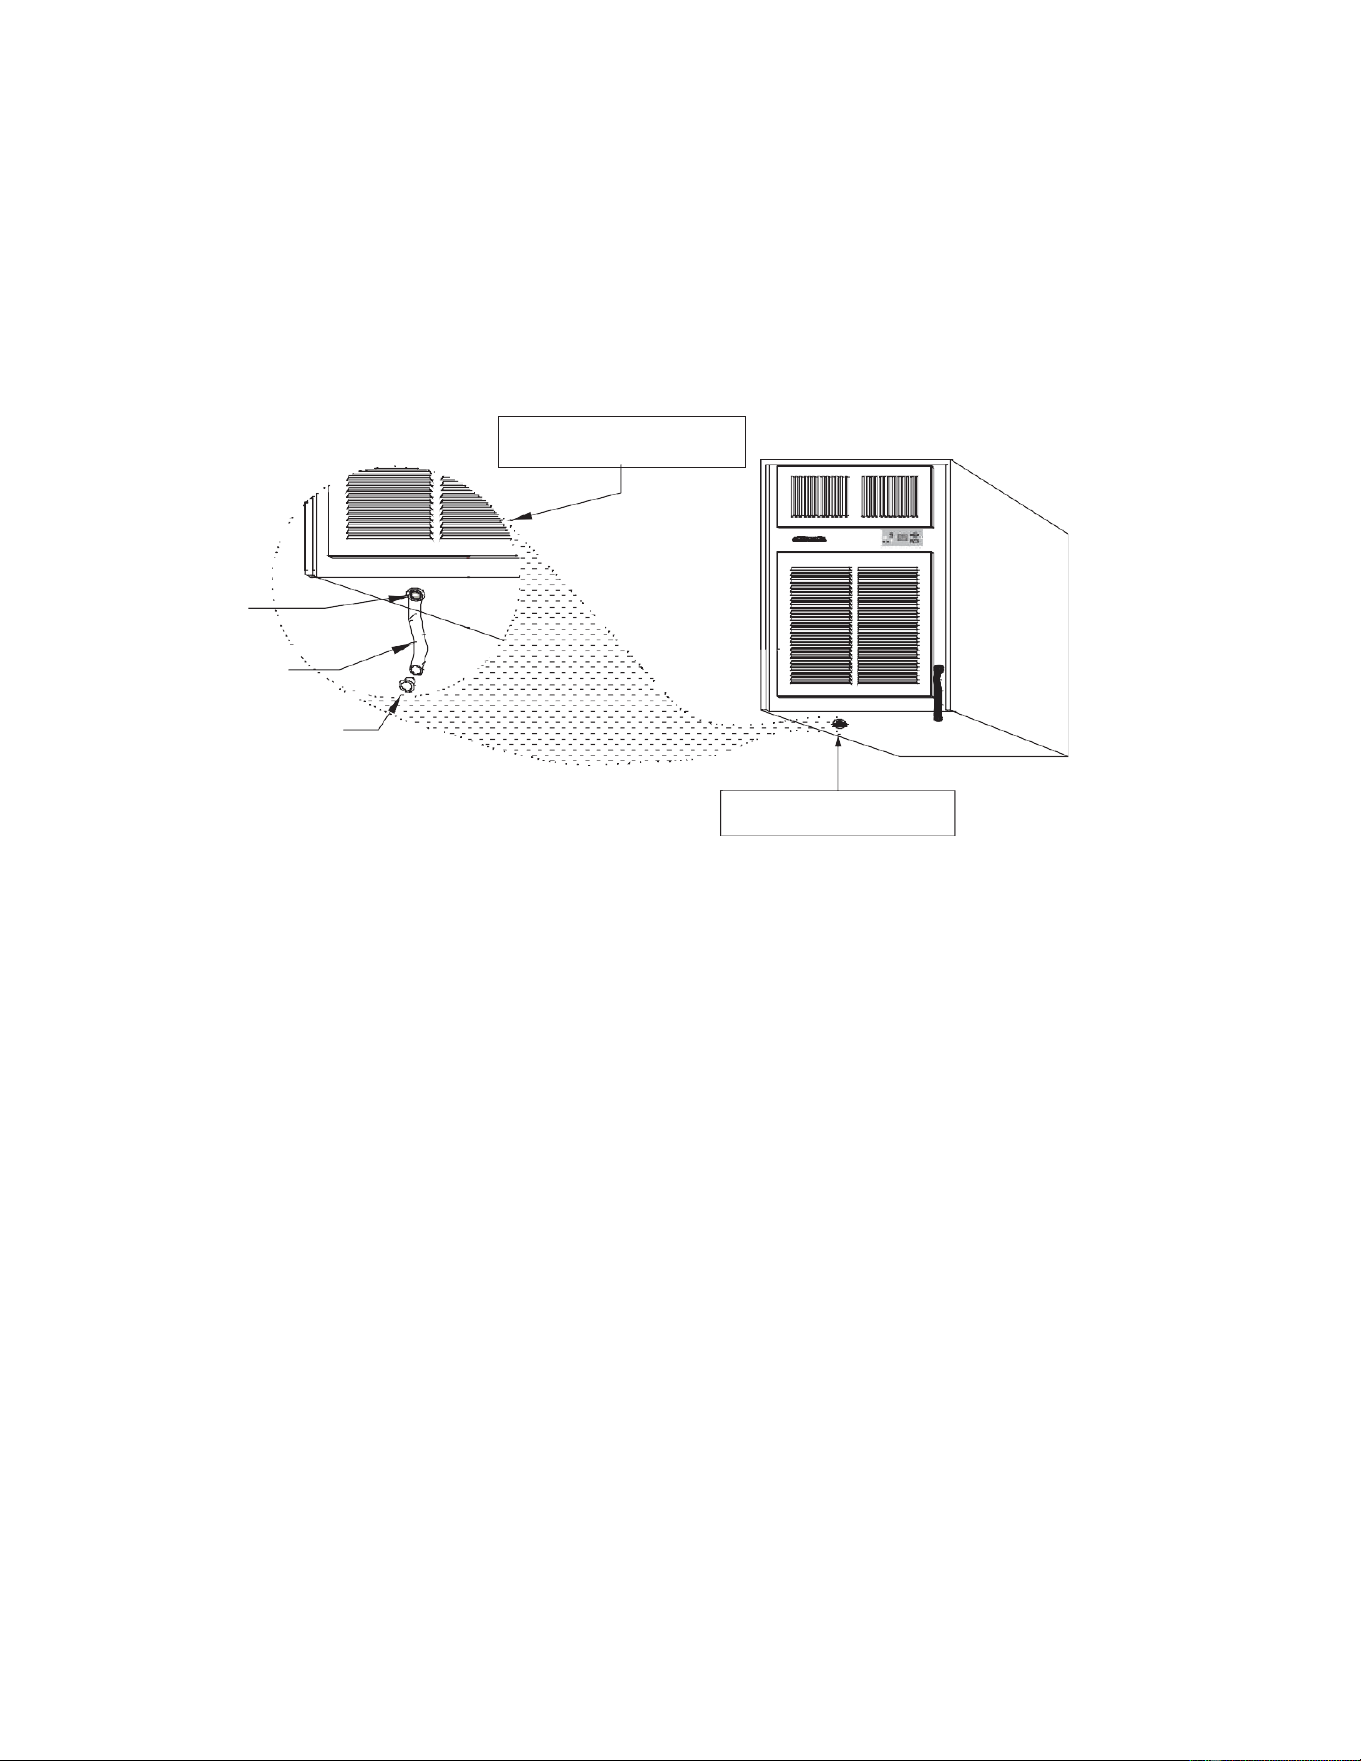
GREY OR RED
FITTING
CLEAR TUBING
RED PLUG
Figure 4
NON EXTENDED DRAIN
(TUBE LOCATION)
EXCESS CONDENSATE DRAIN TUBE: Your unit is equipped with a Pull-down Drain tube to prevent condensate
overflow. This tube should only be used to temporarily drain excess amounts of condensate caused by excessive
moisture laden air entering the enclosure. The source of this air must be eliminated.
EXTENDING THE DRAIN TUBE: To extend and open the drain, use a pair of small pliers to grab the red plastic plug and
vinyl tubing. Pull the plug and tubing down approximately 6 inches until it snaps into the locked position and the "Grey
Fitting" is visible through the drain hole (see Fig. 4). Remove the bottom red plug. Now the cooling unit will drain any
condensate that is standing above 1/4 inch deep in the base pan.
CLOSING THE DRAIN TUBE: To close the drain tube, simply replace the "Red stopper" and push the vinyl tubing back up
into the bottom of the cooling unit. This action extends the top of the tube above the water line preventing it from draining.
CAUTION: Do not push the entire length of tubing back up into the drain hole.
INSTALLING A DRAIN LINE: To extend the drain tube into a basement drain or container, acquire a length of vinyl tubing
with an inside diameter of 1/2 inch from a local hardware store. Slip this larger piece of tubing over the Pull-down drain
tube. CAUTION: Always have the extended drain line running "downhill". This is a gravity flow system. If a horizontal run
is encountered, an air vent or condensate pump may be required to maintain drainage.
Do not drill or tap the drain hole. Doing so will result in rusting of the metal base and void the unit's warranty.
All Breezaire units can be modified for a list visit the website or contact Breezaire and your dealer for help.
EXTENDED DRAIN TUBE
VIEW