CHECK FOR CONCEALED DAMAGE
FILE CLAIM WITH DELIVERING FREIGHT CARRIER
Installation & Trouble Shooting
Instructions for
7-PS-104
ELECTRONIC SOAP DISPENSER
WARNING: Equipment that includes a faucet may expose you to chemicals, including lead, that are known to the State of California to cause cancer or birth defects or other reproductive harm. For more Info.,visit www.p65warnings.ca.gov.
WARNING: Equipment that includes a faucet may expose you to chemicals, including lead, that are known to the
State of California to cause cancer or birth defects or other reproductive harm. For more Info.,visit www.p65warnings.ca.gov.
WARNING: Faucets on this page may expose you to chemicals, including lead, that are known to the State of California to cause cancer or birth defects or other reproductive harm. For more Info.,visit www.p65warnings.ca.gov.
DISPENSER CARE:
1. When cleaning, use a damp cloth on outside of dispenser. Do not
submerge soap dispenser in water. Alcohol for metal parts can be
used if needed.
2. Use warm water to clean the inside of tank and be sure to drain out
all the water before refilling.
IMPORTANT TIPS:
• Only use liquid style soap in dispenser. This dispenser has a capacity
of 20.25 oz. (600 ml.)
• Activate soap dispenser several times during first time use to release
any air inside it.
• Flashing front light indicates batteries are low. Be sure to replace them
immediately with 4 “AA” type batteries.
• Remove batteries if not to be used for a long time.
• Do not place electronic soap dispenser in direct sunlight, near
halogens, or other very bright lights to avoid senor interference.
• Always keep soap dispensing outlet clean to prevent blockage
(Located at the bottom of dispenser).
• Distance below the bottom soap dispenser MUST BE 12” (30 cm) OR
MORE and have no other interferences in order to function properly.
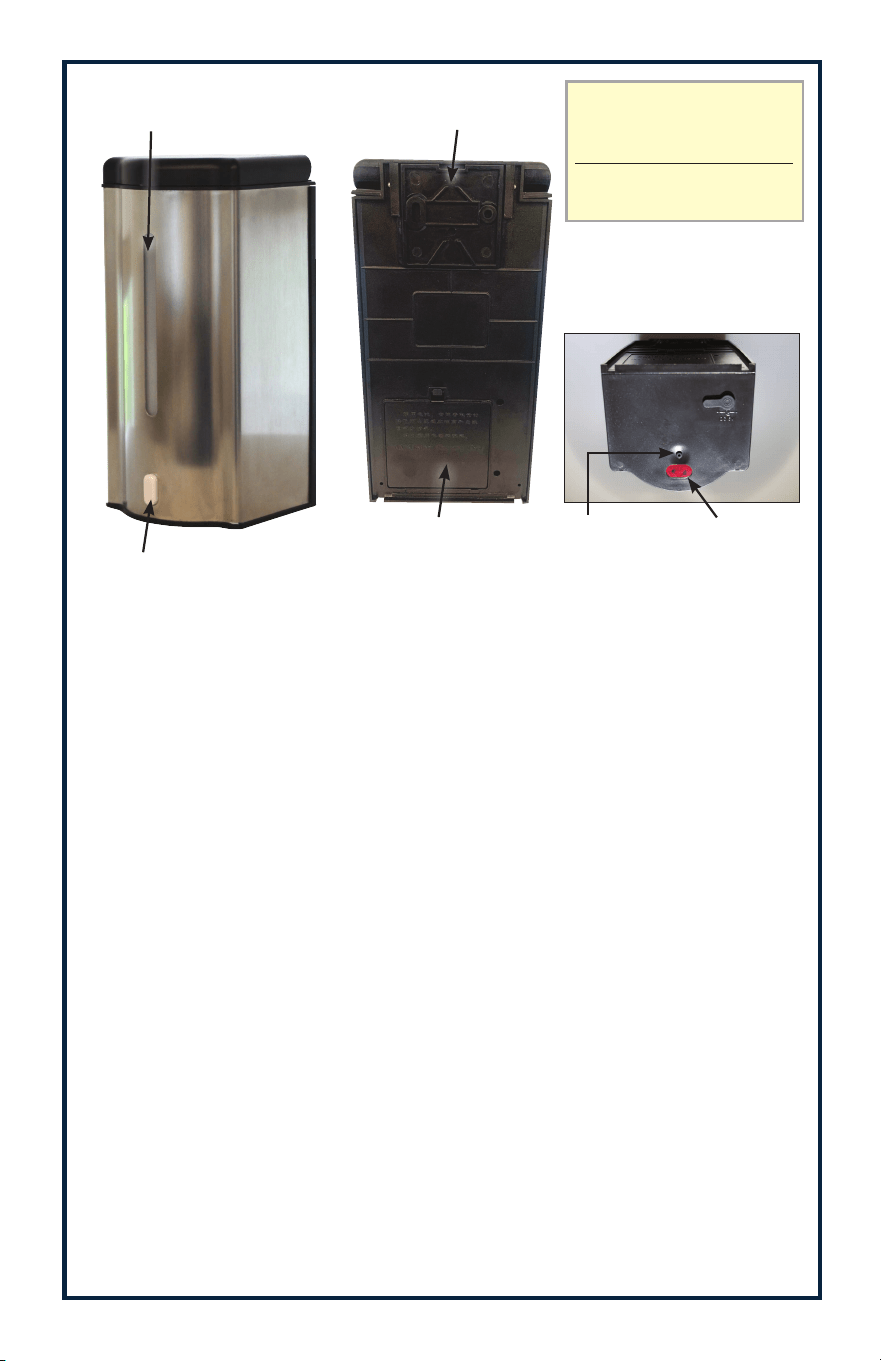
Indicator/Manual Switch
Capacity Window
Mounting Plate
Sensor
Soap
Outlet
Battery
Compartment
(4 “AA”)
Contents Include:
Soap Dispenser
Mounting Hardware
Batteries Not Included
(Requires 4 “AA” Batteries)
TROUBLE SHOOTING:
• Change batteries to be sure there is full power.
• Is the dispenser to close to the counter or near obstructions? Be sure
dispenser has 12” (30 cm) or more distance below it. Make sure there
is nothing under or to close to the dispenser’s senor.
• Be sure there are no bright lights or sun reflections. This can cause the
dispenser to halt. Try relocating dispenser to another area.
• Check the sensor below the dispenser. Clean off any possible soap
build up or other liquids that may be blocking the sensor or clogging
the soap outlet.
• Make sure the users hand is placed close to the detection area.
INDICATOR LIGHT INFORMATION:
• Green light flashing once every three seconds - Stand By Mode.
• Solid green light - Power on and working.
• Red light flashing quickly - Interference with sensor signal.
• Red light flashing slowly - Low batteries.
• Solid red light - Low soap level.
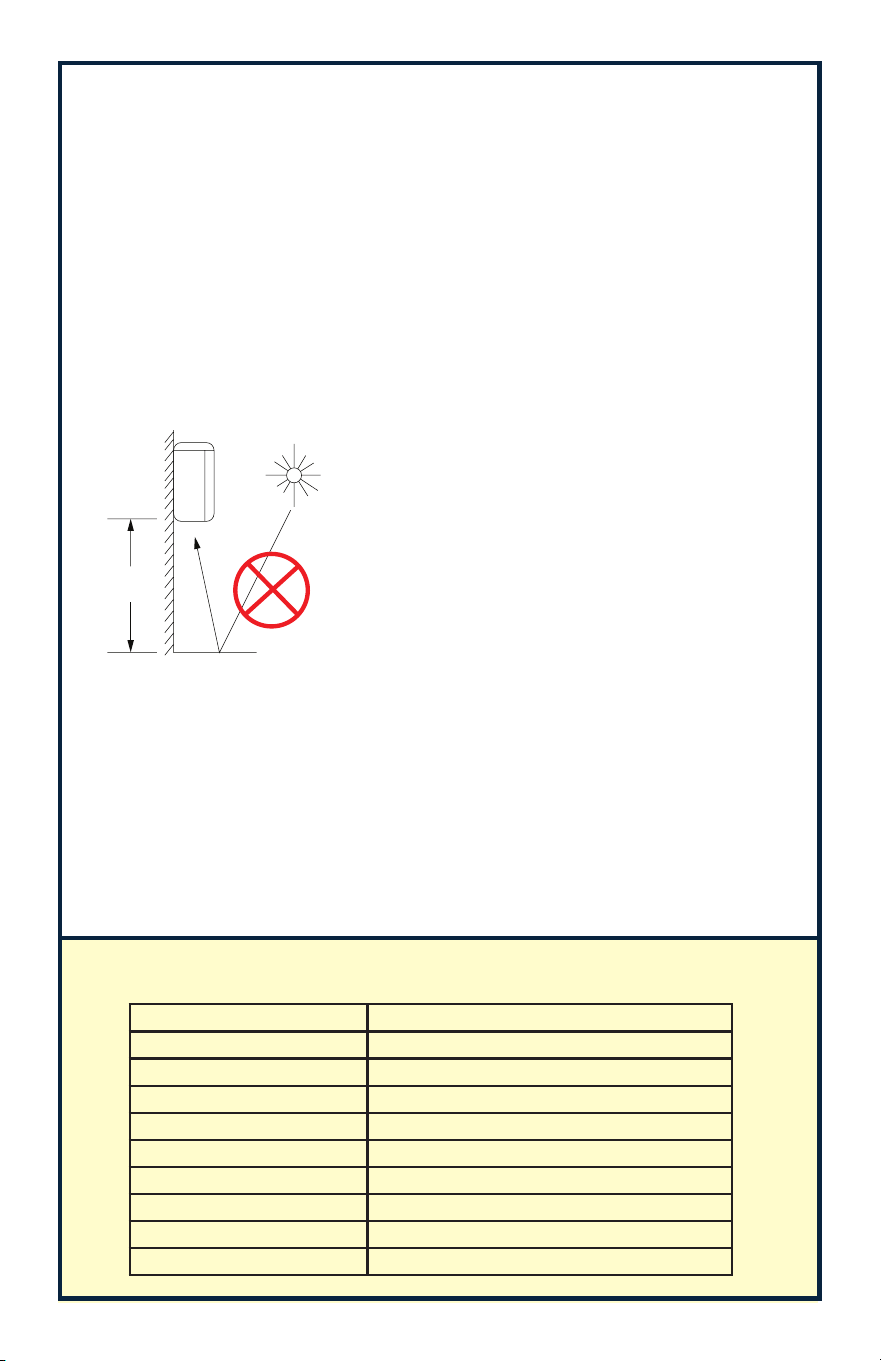
12” Min.
(30 cm)
IMPORTANT NOTE:
The dispenser bottom MUST have a
clearance of 12” (30 cm) or more below
the sensor without interference. This can
cause the dispenser to halt. Remove any
interference or relocate. The dispenser
will be in auto-power on.
TECHNICAL SPECS:
Detection Infra-Red Sensors
Power 4 “AA” Batteries (Not Included)
Detection Distance Preset at 1-3” (2.5-7.5 cm)
Activation Time 1 second
Working Time 1 Second
Capacity 20 oz. (600 ml)
Material Stainless Steel/ABS
Installation Wall Mounted
Dimensions 3.75”x4”x8” (95x100x203 mm)
Weight 1 lb. (540 kg)
JULY 2020
Hauppauge, New York 11788
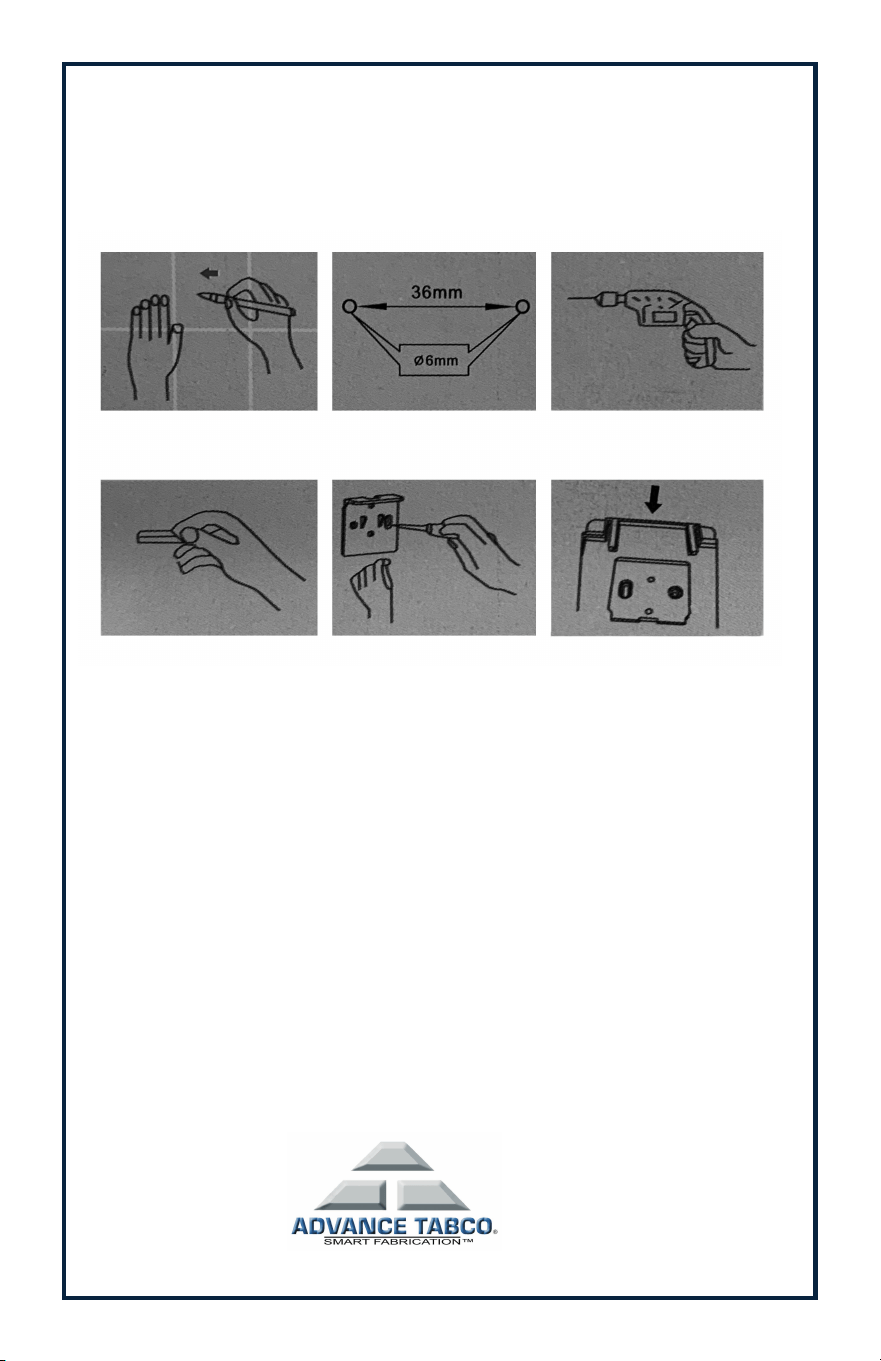
WALL MOUNT INSTALLATION:
PLEASE NOTE:
If installing under a cabinet or shelf, You MUST have 3” clearance
ABOVE the soap dispenser in order to be able to install, remove or fill.
1. Locate position where to mount the dispenser (Figure 1).
Dispenser MUST have 12” (30” cm) or more clearance below for
dispenser to function properly.
2. Make a straight line and mark two holes with a distance between the
holes of 1-7/16 (36 mm) (Figure 2).
3. Drill holes using a 1/4” (6mm) drill bit (Figure 3).
4. If needed, insert plastic anchor (included) in the wall (Figure 4).
5. Line up wall holes with the wall mounting bracket holes. Recessed
holes should be facing you. Insert screws (included) but do not
tighten at this time (Figure 5).
6. Level the bracket, then tighten screws.
7. \Insert 4 “AA” batteries into battery compartment located on the back.
Slide the soap dispenser onto the mounted bracket (Figure 6).
(Figure 2) (Figure 3)
(Figure 4) (Figure 5) (Figure 6)
(Figure 1)

