SONANCE
991 Calle Amanecer, San Clemente, CA 92673 USA | Phone: (949) 492-7777 | Fax: (949) 361-5151 | Technical Support: (949) 492-7777
©2020 Sonance. All rights reserved. Sonance is a registered trademarks of Dana Innovations. Due to continuous product improvement,
all features and specications are subject to change without notice. For the latest Sonance product specication information visit our
website: www.sonance.com
FOR SONANCE PROFESSIONAL SERIES IN-CEILING:
PS-C43RT
|
PS-C63RT
|
PS-C83RT
|
PS-C83RWT | PS-C43RTLP | PS-C63RTLP
PROFESSIONAL SERIES IN-CEILING
RETRO RING INSTALLATION MANUAL
IMPORTANT: Tile support rails and C-bracket (included with the PS-C63RT or PS-C43RTLP In-Ceiling Speakers) must be
used in all Retro Ring installations (both hard lid and drop ceiling) to provide back support for the Roto-Lock Clamps.
SAFETY PRECAUTION: Attaching the seismic tab to a support line is highly recommended for additional safety.
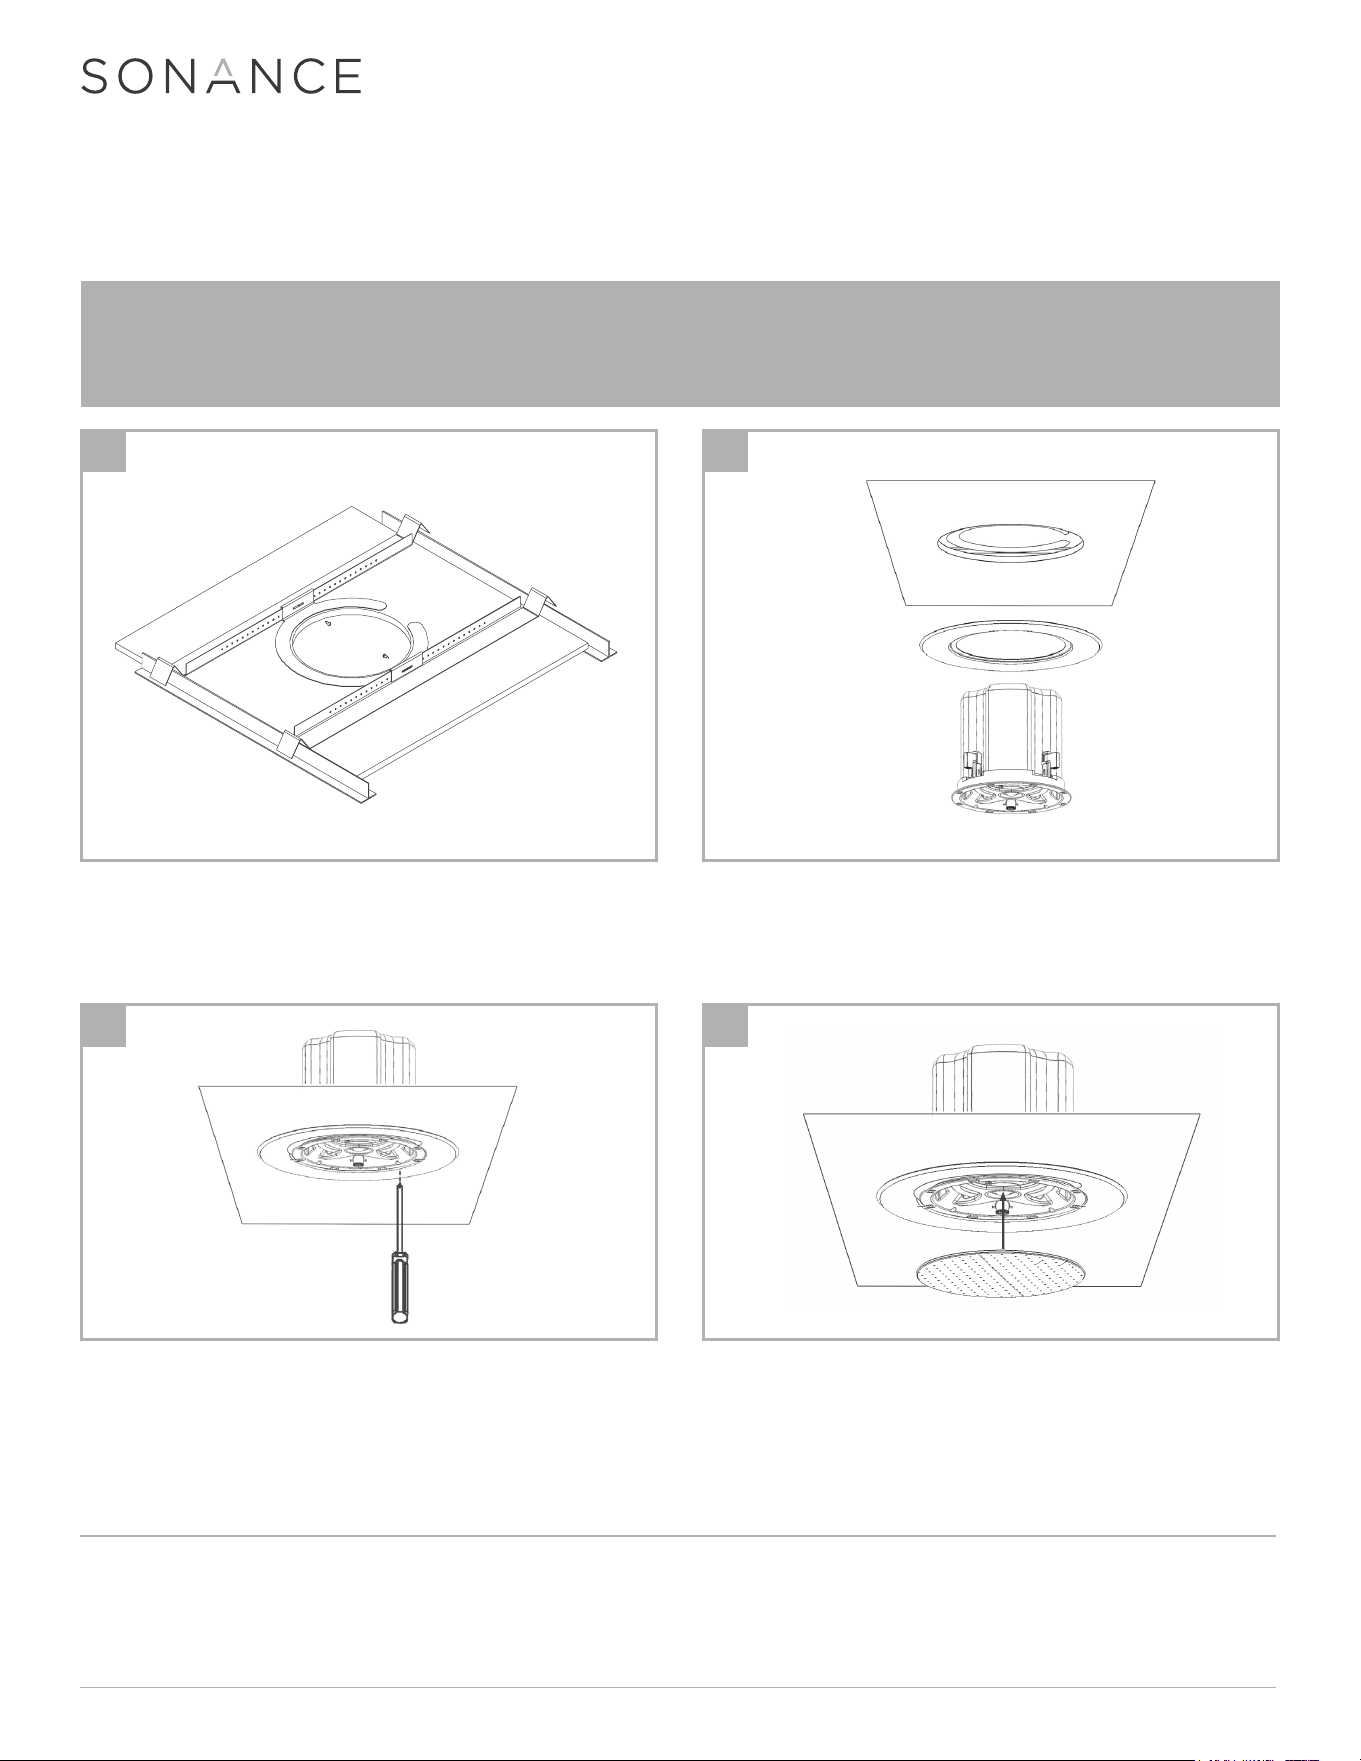
Insert the two tile support rails and C-bracket through the hole
you have cut, placing them as shown. Using the two screws that
are supplied, screw the C-bracket to the tile support rails as
shown.
1
Connect Speaker wires as per In-Ceiling Speaker Installation
Manual then insert the speaker through the Retro Ring and then
slide up into the hole in the ceiling and through the C-bracket.
2
Tighten the four screws on the front of the bafe. The Roto-Lock
Clamps will rotate into position automatically and begin clamping.
When you notice resistance on the four screws, the speaker has
been clamped successfully. The ange is designed to ex and
conform to any small imperfections in the ceiling surface.
3
After the speaker is installed, and the transformer tap and
tweeter angle adjustments are made as per the In-Ceiling Speaker
Installation Manual, the grille can be installed. The grille is held in
place by several small, powerful magnets on the speaker frame.
Place the grille against the speaker and the magnets will hold it
rmly in place.
4
