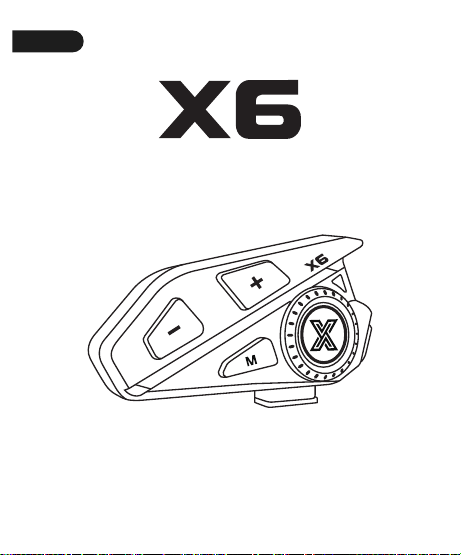
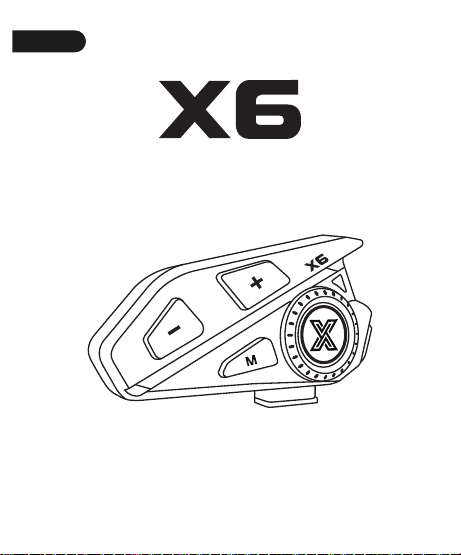
User Manual
Helmet Bluetooth Headset
Please read this manual carefully
before using the product
English
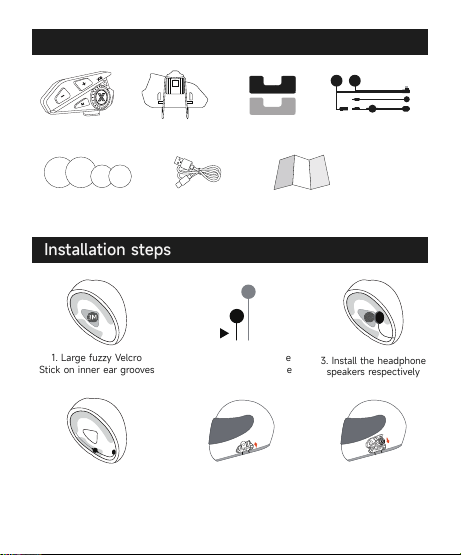
Accessories content
Installation steps
Main unit Steel clip base
Base velcro
2-in-1 microphone
Velcro for
Speaker & Mic
Type-C
charging cable
Product manual
1. Large fuzzy Velcro
Stick on inner ear grooves
4. Stick the fuzzy side Velcro of
the microphone in the appropriate
position inside, then install mic
5. Clip the clip-on base to
left helmet, right spot
6. Insert the main unit into
the base from top to bottom
2. Install the shorter wire
in the helmet ear groove
on the main unit side
3. Install the headphone
speakers respectively
【1】
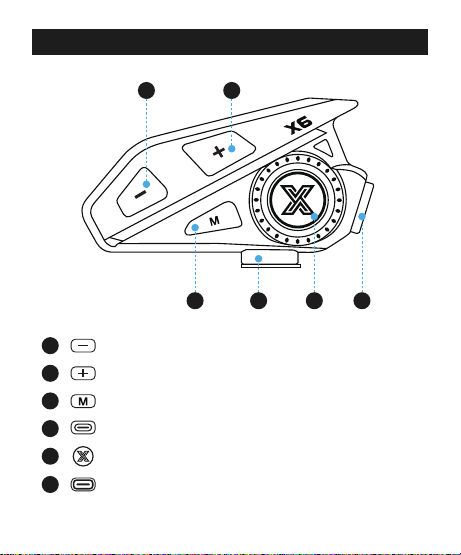
Product Overview
1 2
3 5 64
1
2
3
4
5
RGB light mode switch / Voice assistant
Volume down / Previous track / Auto answer calls
Volume up / Next track / RGB light mode switch
Power on/off/ Answer/hang up calls / Play/pause
6
Type-C charging port
Type-C headphone jack
【2】
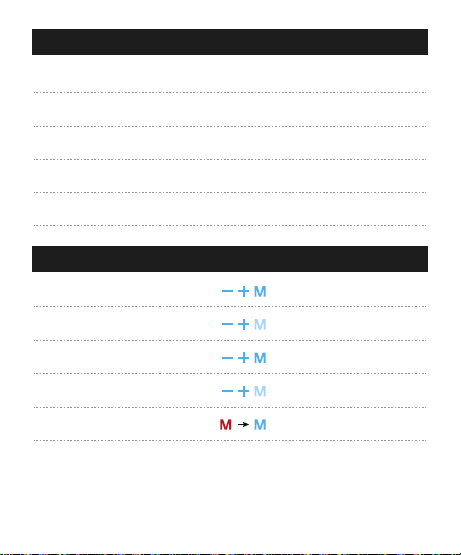
Specifications
Status Indicator Light
Bluetooth Name: X6
Bluetooth Version: 6.0
Battery Capacity: 1000mAh
Working Time: ~35h
Waterproof Grade: IP67
Charging Time: 1~2h
Charging Port: Type-C
Charging Voltage: 5V 1A/2A
Standby Time: ~300h
Battery Type: Lithium-polymer 3.7v
Bluetooth waiting
Bluetooth connected
Incoming call
On call
Charging (auto off)
Blue fast flash
Blue slow flash
Blue fast flash
Blue slow flash
Red steady, full turns blue
【3】
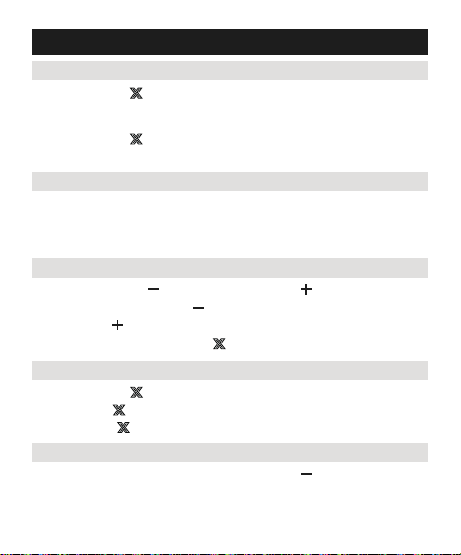
Operation Instructions
Power on/off
Press and hold “ ” for 3s to turn on/off (with power-on/off prompt).
(The current battery level is announced automatically on power-on;
status light flashes rapidly. Status light turns off when powered off)
Press and hold “ ” for 10s to restart the device.
(*Auto power-off if Bluetooth unconnected for 5 mins after startup)
Bluetooth Connection
After powering on, enable phone Bluetooth, search for and select
the device named “X6” to connect. A slow blue flash of the status
light indicates successful connection.
Song switching / Volume adjustment
Song switch: Hold “ ” for previous track, hold “ ” for next track.
Volume adjust: Short press “ ” to turn volume down,
short press “ ” to turn volume up.
Play/Pause: Short press button “ ”.
Incoming Call
Press and hold “ ” for 2s to reject the call;
Short press “ ” to answer/end the call;
Double click “ ” to call back the last dialed contact.
Auto Answer for Incoming Calls
Default on after power-on; double press button “ ” to toggle;
prompt “Auto answer on/off”.
【4】
Connect to Two Phones Simultaneously
After powering on: Connect to the first phone’s Bluetooth then
disconnect it, connect to the second phone’s Bluetooth (no need to
disconnect), then re-enable Bluetooth on the first phone and connect
it to complete the setup.
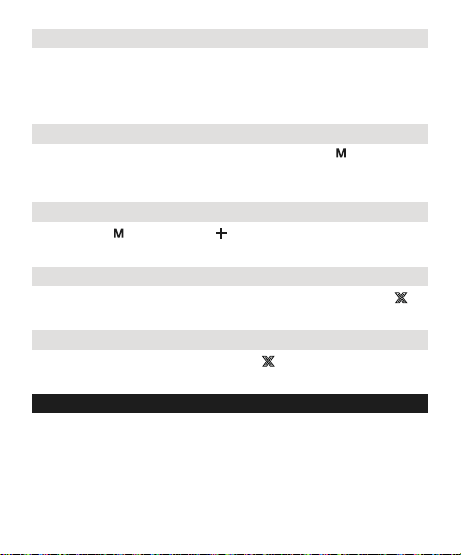
Activate AI Voice Assistant
After powering on and connecting Bluetooth, hold the “ ” key to launch
the phone voice assistant.
(When using the voice assistant for the first time,
you must allow access to your phone’s content; ignore this if no prompt appears.)
RGB Light Effect Switch & Off (Default Open)
Short press “ ” or double tap “ ” to switch light effects.
Cycle order: Flowing RGB light – Solid red – Solid blue – Solid green – Off
Prompt Language Switch
After power on, when Bluetooth is not connected, double tap the “ ”
key to switch prompt language.
Factory Reset
Under power-on state, quickly press the “ ” key five times to restore
factory settings.
1. Do not expose to high temperatures (contains a lithium battery).
2. Charge using a rated-voltage power source.
3. Secure the main unit to prevent damage from dropping.
4. Keep the waterproof/dustproof cover closed.
5. Do not disassemble/modify (no serviceable components).
6. Long storage: Dry, monthly charge, no extreme temp/dust.
Warnings & Precautions
【5】
Español
Manual de Usuario del
Auricular Bluetooth para Casco
Por favor, lea este manual cuidadosamente
antes de usar el producto.
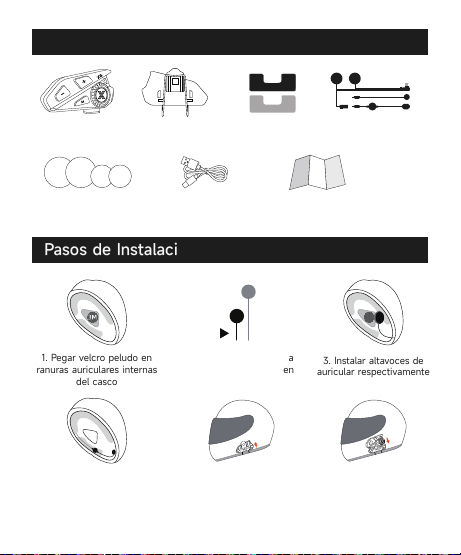
Contenido de Accesorios
Pasos de Instalación
Unidad principal Base con clip
de acero
Velcro de la base
Micrófono 2 en 1
Velcro para altavoz
y micrófono
Cable de carga
Type-C
Manual del producto
1. Pegar velcro peludo en
ranuras auriculares internas
del casco
4. Pegar velcro peludo del
micrófono en casco y montar
micrófono
5. Enganchar base de clip
en el lateral izquierdo
del casco
6. Inserte la unidad
principal en la base de
arriba hacia abajo
2. Conectar cable corto a
unidad principal y fijar en
ranura auricular
3. Instalar altavoces de
auricular respectivamente
【1】
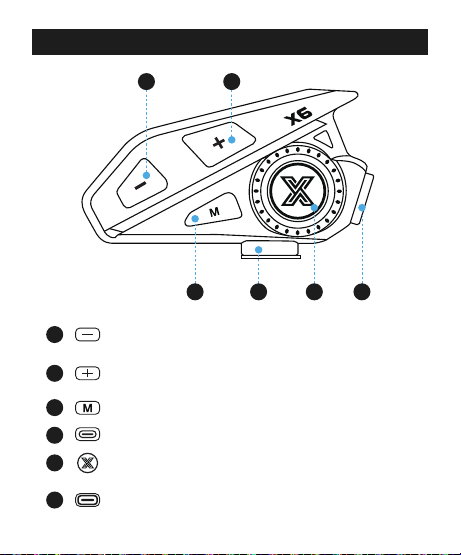
Descripción general del producto
1 2
3 5 6
4
1
2
3
4
5
Cambiar modo de luces RGB / Asistente de voz
Bajar volumen / Canción anterior
/ Contestación automática
Subir volumen / Canción siguiente
/ Cambiar modo de luces RGB
Encender/apagar/ Contestar/colgar llamada
/ Reproducir/pausar
6
Puerto de carga Type-C
Puerto de auriculares Type-C
【2】
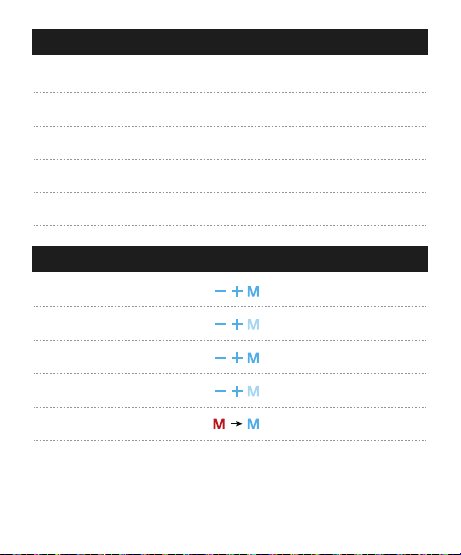
Especificaciones Técnicas
Luz indicadora de estado
Nombre del Bluetooth: X6
Versión Bluetooth: 6.0
Capacidad batería: 1000mAh
Tiempo uso: ~35h
Impermeabilidad: IP67
Tiempo carga: 1–2h
Puerto carga: Type-C
Voltaje carga: 5V 1A/2A
Tiempo espera: ~300h
Tipo batería: 3.7V Polímero litio
Espera Bluetooth
Bluetooth conectado
Llamada entrante
En llamada
Cargando (apagado auto)
Parpadeo azul rápido
Azul parpadeo lento
Azul parpadeo rápido
Azul parpadeo lento
Rojo fijo, lleno cambia azul
【3】
Instrucciones de funcionamiento
Encender/Apagar
Mantenga presionado el “ ” 3s para encender/apagar (con aviso sonoro).
Al encender, anuncia batería automáticamente y luz de
estado parpadea rápido; al apagar, la luz se apaga.
Presiónelo 10s para reiniciar. (Sin conexión Bluetooth en 5 minutos
post encendido, apagado automático)
Conexión Bluetooth
Encendido, activa Bluetooth del teléfono, busca y selecciona “X6”
para conectar. Luz de estado azul parpadeando lentamente indica
conexión exitosa.
Cambio de canción / Ajuste de volumen
Cambio de canción: Mantén pulsado “ ” para canción anterior,
mantén pulsado “ ” para canción siguiente.
Ajuste de volumen: Pulsa brevemente “ ” para bajar volumen,
pulsa brevemente “ ” para subir volumen.
Reproducir/Pausar: Pulsa brevemente el botón “ ” .
Llamada entrante
Mantener presionado el “ ” 2s para rechazar llamada entrante;
Pulsar brevemente el “ ” para contestar/cortar llamada;
Doble pulsar el “ ” para marcar último contacto.
Contestación Automática de Llamadas
Predeterminadamente activado al encender; pulsa dos veces el
botón “ ” para activar/desactivar; aviso “Contestación automática
activada/desactivada”.
【4】
Conectar Dos Teléfonos Simultáneamente
Después de encender: Conecte el Bluetooth del primer teléfono y
desconéctelo, luego conecte el del segundo (sin necesidad de
desconectar) y active nuevamente el del primero para completar
la configuración.
Activar Asistente de Voz AI
Después de encender y conectar el Bluetooth, mantén pulsada la tecla
“ ” para abrir el asistente de voz del móvil.
Al primer uso del asistente,
permite acceso a datos del móvil o no funcionará; ignora si no hay aviso.
RGB Cambio y Apagado (Activado por Defecto)
Pulsa corto “ ” o doble toque “ ” para cambiar luces.
Secuencia: Multicolor dinámico – Rojo – Azul – Verde – Apagado
Cambio de Idioma de Notificación
Tras encender, si el Bluetooth no está conectado, haz doble toque en la
tecla “ ” para cambiar el idioma de los avisos.
Reset de fábrica
Con el dispositivo encendido, pulsa rápidamente cinco veces la tecla
“ ” para restablecer la configuración original.
1. No exponer a altas temperaturas (contiene batería de litio)
2. Cargar con fuente de voltaje nominal
3. Asegurar unidad principal para evitar caídas
4. Mantener tapa impermeable/antipolvo cerrada
5. No desmontar/modificar
6. Almacenamiento a largo plazo: Mantener seco, carga mensual,
evitar ambientes extremos.
Advertencias y Precauciones
【5】
FCC Caution:
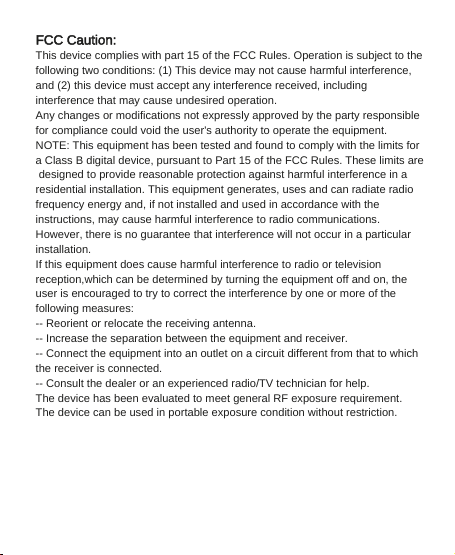
This device complies with part 15 of the FCC Rules. Operation is subject to the
following two conditions: (1) This device may not cause harmful interference,
and (2) this device must accept any interference received, including
interference that may cause undesired operation.
Any changes or modifications not expressly approved by the party responsible
for compliance could void the user's authority to operate the equipment.
NOTE: This equipment has been tested and found to comply with the limits for
a Class B digital device, pursuant to Part 15 of the FCC Rules. These limits are
designed to provide reasonable protection against harmful interference in a
residential installation. This equipment generates, uses and can radiate radio
frequency energy and, if not installed and used in accordance with the
instructions, may cause harmful interference to radio communications.
However, there is no guarantee that interference will not occur in a particular
installation.
If this equipment does cause harmful interference to radio or television
reception,which can be determined by turning the equipment off and on, the
user is encouraged to try to correct the interference by one or more of the
following measures:
-- Reorient or relocate the receiving antenna.
-- Increase the separation between the equipment and receiver.
-- Connect the equipment into an outlet on a circuit different from that to which
the receiver is connected.
-- Consult the dealer or an experienced radio/TV technician for help.
The device has been evaluated to meet general RF exposure requirement.
The device can be used in portable exposure condition without restriction.