
*Select Models Only
ENGLISH/FRANÇAIS/
ESPAÑOL
Write the model and serial
numbers here:
Model # _________________
Serial # _________________
Find these numbers on a label
on the left side, near the middle
of the refrigerator compartment.
Pub No. 49-1000472 Rev. 6 01-24
GE and GE Profile
Models 18, 19, 21, 22, 24, 25,
26 & 27 cuft
OWNER’S MANUAL &
INSTALLATION
INSTRUCTIONS
REFRIGERATORS
Bottom Freezer
GE is a trademark of the General Electric Company. Manufactured under trademark license.
SAFETY INFORMATION .....3
OPERATING INSTRUCTIONS
Features ..........................6
Controls ..........................8
Sabbath Modes ................... 12
Dispenser* ....................... 13
Water Filter - XWFE ..............14
Shelves and Bins .................. 16
Pans ............................ 17
Freezer Drawer* .................. 18
Freezer Compartment ............. 19
Automatic Icemaker ...............20
CARE AND CLEANING ...... 21
Replacing the Lights ..............22
INSTALLATION INSTRUCTIONS
Preparing to Install the
Refrigerator .....................23
Appliance Dimensions .............24
Installing the Refrigerator ..........25
Installing the Water Line ...........40
TROUBLESHOOTING TIPS
Normal Operating Conditions ......43
Troubleshooting ..................44
LIMITED WARRANTY .......47
CONSUMER SUPPORT
Water Filter Limited Warranty .....48
Performance Data Sheets ..........49
Appliance Communication .........50
Consumer Support ................52

2 49-1000472 Rev. 6
THANK YOU FOR MAKING GE APPLIANCES A PART OF YOUR HOME.
Whether you grew up with GE Appliances, or this is your first, we’re happy to have you in the family.
We take pride in the craftsmanship, innovation and design that goes into every GE Appliances
product, and we think you will too. Among other things, registration of your appliance ensures that we
can deliver important product information and warranty details when you need them.
Register your GE appliance now online. Helpful websites and phone numbers are available in the
Consumer Support section of this Owner’s Manual. You may also mail in the pre-printed registration
card included in the packing material.
49-1000472 Rev. 6 3
SAFETY INFORMATION
IMPORTANT SAFETY INFORMATION
READ ALL INSTRUCTIONS BEFORE USING THE APPLIANCE
CAUTION
To reduce the risk of injury when using your refrigerator, follow these basic safety precautions.
Ŷ 'RQRWFOHDQJODVVVKHOYHVRUFRYHUVZLWKZDUP
water when they are cold. Glass shelves and
covers may break if exposed to sudden temperature
changes or impact, such as bumping or dropping.
Tempered glass is designed to shatter into many
small pieces if it breaks.
Ŷ .HHSILQJHUVRXWRIWKH³SLQFKSRLQW´DUHDV
clearances between the doors and between the
doors and cabinet are necessarily small. Be careful
closing doors when children are in the area.
Ŷ 'RQRWWRXFKWKHFROGVXUIDFHVLQWKHIUHH]HU
compartment when hands are damp or wet, skin
may stick to these extremely cold surfaces.
Ŷ 'RQRWUHIUHH]HIUR]HQIRRGVZKLFKKDYHWKDZHG
completely.
Ŷ ,QUHIULJHUDWRUVZLWKDXWRPDWLFLFHPDNHUVDYRLG
contact with the moving parts of the ejector
mechanism, or with the heating element that
UHOHDVHVWKHFXEHV'RQRWSODFHILQJHUVRUKDQGV
on the automatic ice making mechanism while the
refrigerator is plugged in.
READ AND SAVE THESE INSTRUCTIONS
WARNING
To reduce the risk of fire, explosion, electric shock, or injury when using your refrigerator, follow
these basic safety precautions:
Ŷ 7KLVUHIULJHUDWRUPXVWEHSURSHUO\LQVWDOOHG
DQGORFDWHGLQDFFRUGDQFHZLWKWKH,QVWDOODWLRQ
,QVWUXFWLRQVEHIRUHLWLVXVHG
Ŷ 8QSOXJWKHUHIULJHUDWRUEHIRUHPDNLQJUHSDLUVRU
cleaning.
NOTE: Power to the refrigerator cannot be
disconnected by any setting on the control panel.
NOTE: Repairs must be performed by a qualified
Service Professional.
Ŷ 5HSODFHDOOSDUWVDQGSDQHOVEHIRUHRSHUDWLQJ
Ŷ 'RQRWXVHDQH[WHQVLRQFRUG
Ŷ 'RQRWVWRUHRUXVHJDVROLQHRURWKHUIODPPDEOH
vapors and liquids in the vicinity of this or any other
appliance.
Ŷ 'RQRWVWRUHH[SORVLYHVXEVWDQFHVVXFKDVDHURVRO
cans with a flammable propellant in this appliance.
Ŷ 7RSUHYHQWVXIIRFDWLRQDQGHQWUDSPHQWKD]DUGV
WRFKLOGUHQUHPRYHWKHUHIULJHUDWRUDQGIUHH]HU
doors from any refrigerator before disposing of it or
discontinuing its use.
Ŷ 7RDYRLGVHULRXVLQMXU\RUGHDWKFKLOGUHQVKRXOGQRW
stand on, or play in or with the appliance.
Ŷ &KLOGUHQDQGSHUVRQVZLWKUHGXFHGSK\VLFDOVHQVRU\
or mental capabilities or lack of experience and
knowledge can use this appliance only if they are
supervised or have been given instructions on safe
XVHDQGXQGHUVWDQGWKHKD]DUGVLQYROYHG
Ŷ 7KLVDSSOLDQFHLVLQWHQGHGWREHXVHGLQKRXVHKROG
and similar applications such as: staff kitchen areas
LQVKRSVRIILFHVDQGRWKHUZRUNLQJHQYLURQPHQWV
IDUPKRXVHVE\FOLHQWVLQKRWHOVPRWHOVEHG
EUHDNIDVWDQGRWKHUUHVLGHQWLDOHQYLURQPHQWV
catering and similar non-retail applications.
Ŷ 'RQRWDSSO\KDUVKFOHDQHUVWRWKHUHIULJHUDWRU
Certain cleaners will damage plastic which may
cause parts such as the door or door handles to
detach unexpectedly. See the Care and Cleaning
section for detailed instructions.
Ŷ &RQQHFWWRSRWDEOHZDWHUVXSSO\RQO\$FROGZDWHU
supply is required for automatic icemaker operation.
The water pressure must be between 40 and 120 psi
(275-827 kilopascals).
INSTALLATION
WARNING
FIRE AND EXPLOSION HAZARD
.HHSIODPPDEOHPDWHULDOVDQGYDSRUVDZD\IURPUHIULJHUDWRU)DLOXUHWRGRVRFDQUHVXOWLQILUHH[SORVLRQRUGHDWK
4 49-1000472 Rev. 6
SAFETY INFORMATION
IMPORTANT SAFETY INFORMATION
READ ALL INSTRUCTIONS BEFORE USING THE APPLIANCE
READ AND SAVE THESE INSTRUCTIONS
PROPER DISPOSAL OF YOUR OLD REFRIGERATOR
Do not, under any circumstances, cut or remove the third (ground) prong from the power cord. For
personal safety, this appliance must be properly grounded.
The power cord of this appliance is equipped with a
3-prong (grounding) plug which mates with a standard
SURQJJURXQGLQJZDOORXWOHWWRPLQLPL]HWKH
SRVVLELOLW\RIHOHFWULFVKRFNKD]DUGIURPWKLVDSSOLDQFH
Have the wall outlet and circuit checked by a qualified
electrician to make sure the outlet is properly
grounded.
Where a standard 2-prong wall outlet is encountered, it
is your personal responsibility and obligation to have it
replaced with a properly grounded 3-prong wall outlet.
'RQRWXVHDQDGDSWHU
The refrigerator should always be plugged into its own
individual electrical outlet which has a voltage rating
that matches the rating plate.
$9ROW$&+]RUDPSIXVHGJURXQGHG
electrical supply is required. This provides the best
performance and also prevents overloading house
ZLULQJFLUFXLWVZKLFKFRXOGFDXVHDILUHKD]DUGIURP
overheated wires.
Never unplug your refrigerator by pulling on the power
cord. Always grip plug firmly and pull straight out from
the outlet.
,PPHGLDWHO\GLVFRQWLQXHXVHRIDGDPDJHGVXSSO\
FRUG,IWKHVXSSO\FRUGLVGDPDJHGLWPXVWEH
replaced by a qualified service professional with an
DXWKRUL]HGVHUYLFHSDUWIURPWKHPDQXIDFWXUHU
When moving the refrigerator away from the wall, be
careful not to roll over or damage the power cord.
CONNECTING ELECTRICITY
WARNING
ELECTRICAL SHOCK HAZARD
Plug into a grounded 3-prong outlet
'RQRWUHPRYHWKHJURXQGSURQJ
'RQRWXVHDQDGDSWHU
'RQRWXVHDQH[WHQVLRQFRUG
)DLOXUHWRIROORZWKHVHLQVWUXFWLRQVFDQUHVXOWLQGHDWKILUHRUHOHFWULFDOVKRFN
WARNING
SUFFOCATION AND ENTRAPMENT HAZARD
)DLOXUHWRIROORZWKHVHGLVSRVDOLQVWUXFWLRQVFDQUHVXOWLQGHDWKRUVHULRXVLQMXU\
IMPORTANT: Child entrapment and suffocation
are not problems of the past. Junked or abandoned
refrigerators are still dangerous even if they will sit
IRU³MXVWDIHZGD\V´,I\RXDUHJHWWLQJULGRI\RXUROG
refrigerator, please follow the instructions below to help
prevent accidents.
Before You Throw Away Your Old Appliance
Ŷ7DNHRIIWKHUHIULJHUDWRUDQGIUHH]HUGRRUV
Ŷ Leave the shelves in place so that children may not
easily climb inside.
WARNING
REFRIGERANT AND FOAM DISPOSAL:
'LVSRVHRIRUUHF\FOH\RXUDSSOLDQFHLQDFFRUGDQFHZLWK)HGHUDODQG/RFDO5HJXODWLRQV)ODPPDEOHUHIULJHUDQW
and insulation material used requires special disposal procedures. Contact your local authorities for the
environmentally safe disposal or recycling of your refrigerator.
49-1000472 Rev. 6 5
SAFETY INFORMATION
IMPORTANT SAFETY INFORMATION
READ ALL INSTRUCTIONS BEFORE USING THE APPLIANCE
READ AND SAVE THESE INSTRUCTIONS
Check the rating label for refrigerant type. If R600a, follow the warning instructions below.
WARNING
FIRE OR EXPLOSION HAZARD Flammable Refrigerant
This appliance contains isobutane refrigerant,
also known as R600a, a natural gas with high
environmental compatibility. However, it is also
combustible. Adhere to the warnings below to
reduce the risk of injury or property damage.
1. When handling, installing and operating the
appliance, care should be taken to avoid damage to
the refrigerant tubing.
2. 6HUYLFHVKDOORQO\EHSHUIRUPHGE\DXWKRUL]HG
VHUYLFHSHUVRQQHO8VHRQO\PDQXIDFWXUHUDXWKRUL]HG
service parts.
3. 'LVSRVHRIUHIULJHUDWRULQDFFRUGDQFHZLWKWKH
)HGHUDODQG/RFDO5HJXODWLRQV7KHIODPPDEOH
refrigerant and insulation material used in this
product require special disposal procedures. Contact
your local authorities for the environmentally safe
disposal of your refrigerator.
4. .HHSYHQWLODWLRQRSHQLQJVLQWKHDSSOLDQFH
enclosures or in the built-in structure clear of
obstruction.
5. To remove frost, scrape with a plastic or wood
VSDWXODRUVFUDSHU'RQRWXVHDQLFHSLFNRUDPHWDO
or sharp-edged instrument as it may puncture the
IUHH]HUOLQHUDQGWKHQWKHIODPPDEOHUHIULJHUDQW
tubing behind it.
6. 'RQRWXVHHOHFWULFDODSSOLDQFHVLQVLGHWKHIRRG
storage compartment of the appliance.
7. 'RQRWXVHDQ\HOHFWULFDOGHYLFHWRGHIURVW\RXU
IUHH]HU
6 49-1000472 Rev. 6
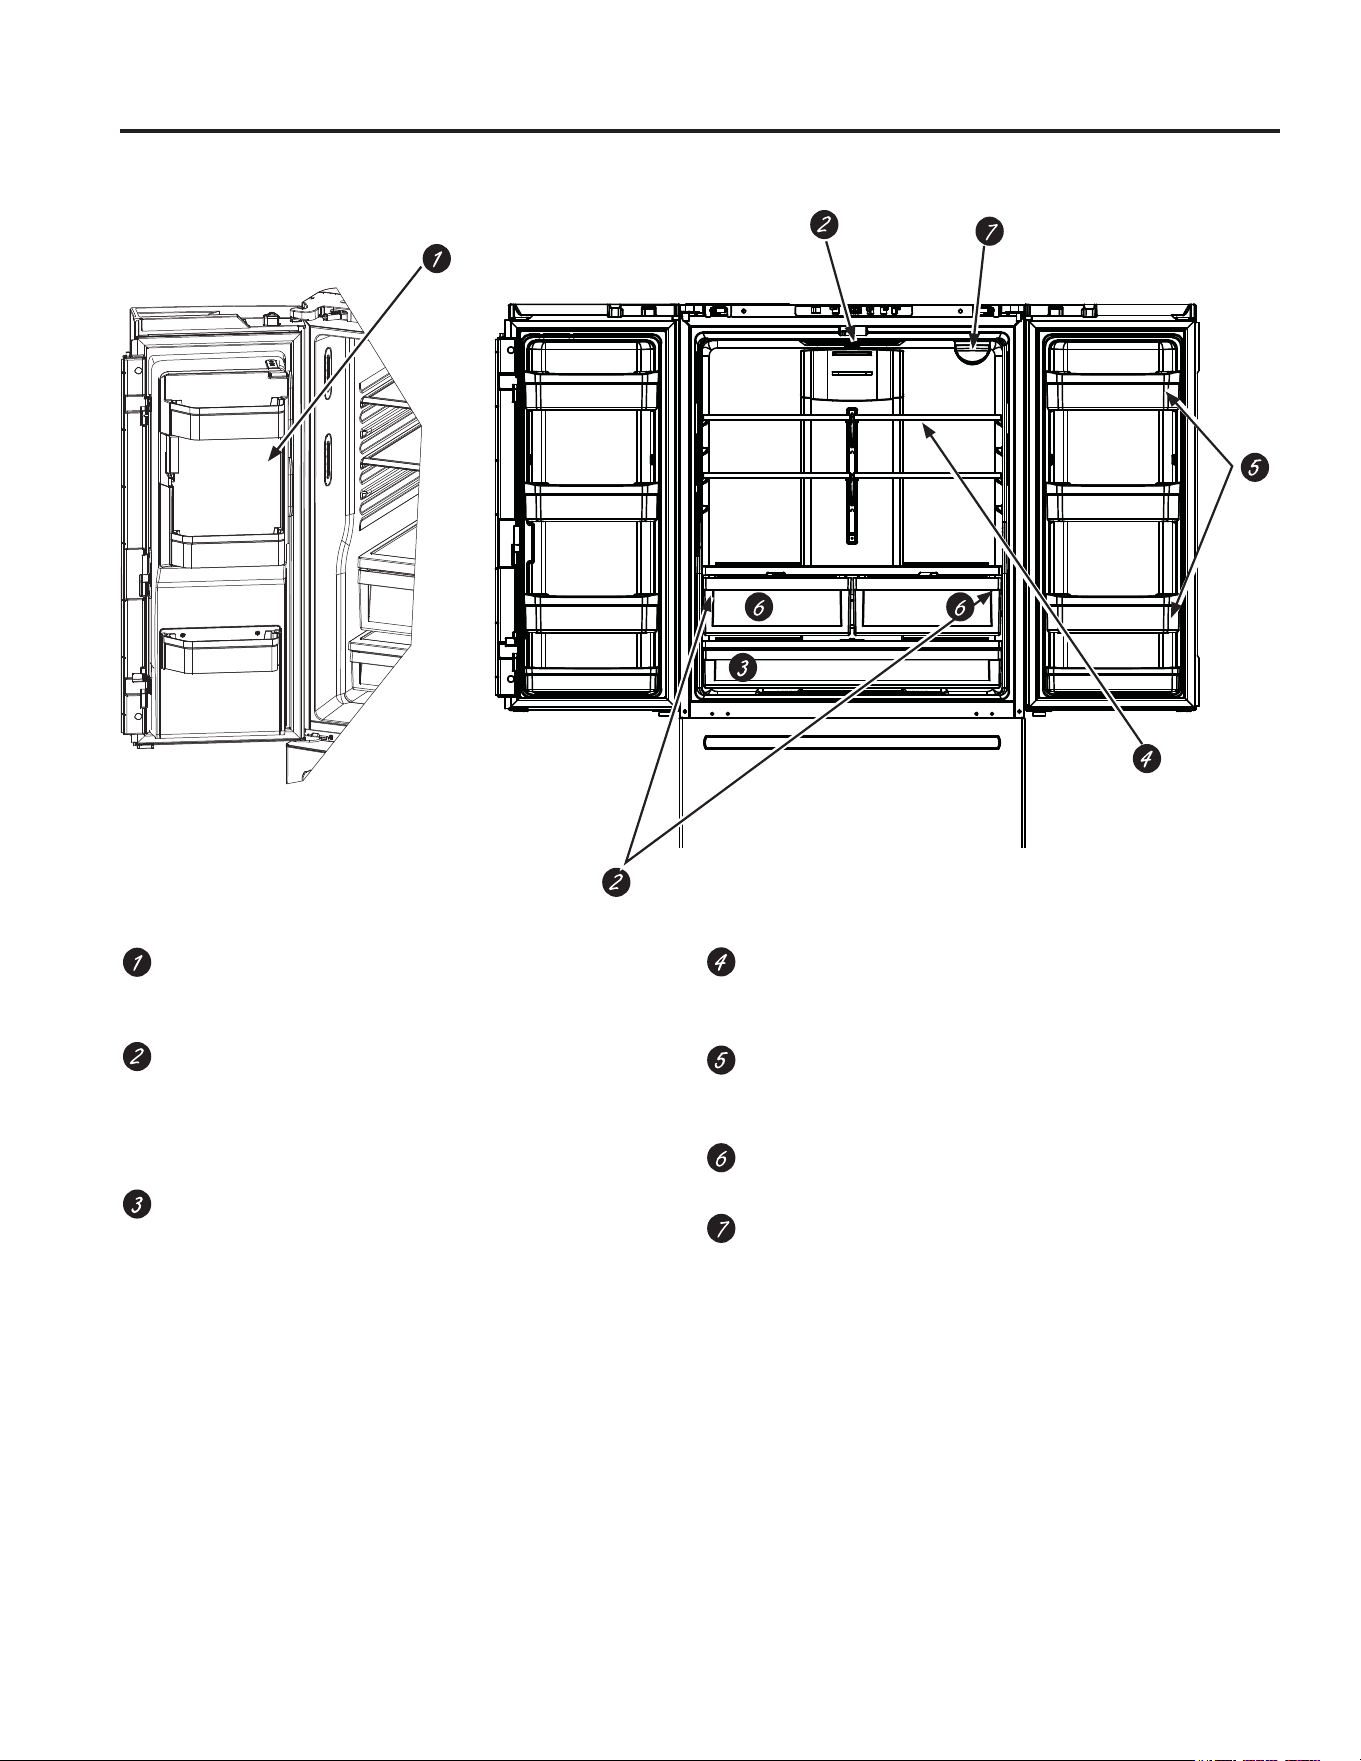
Features
Space-saving icemaker (on some models)
,FHPDNHUDQGELQDUHORFDWHGRQWKHGRRUFUHDWLQJ
more usable storage space.
LED lighting
/('OLJKWVLQWKHUHIULJHUDWRUFRPSDUWPHQWDUH
located at the top center and on the left and right
sides of FOLPDWH]RQHSDQV/('OLJKWVDUHDOVR
ORFDWHGLQWKHIUHH]HUVHHSDJH
Full-width drawer
A full-width drawer that can accommodate larger
items is located at the bottom of the refrigerator
compartment.
QuickSpace™ shelf (on some models)
)XQFWLRQVDVDQRUPDOIXOOVL]HGVKHOIZKHQQHHGHG
and easily slides back to store tall items below.
Removable/adjustable door bins
Can be moved up or down to accommodate your
needs.
Climate zone drawers
Separate pans for produce storage.
Water filter
Accessible for easy replacement.
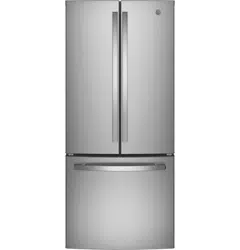
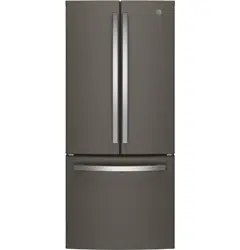
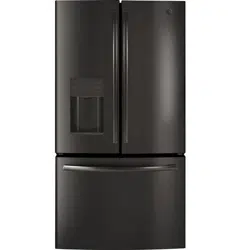
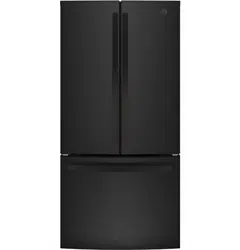
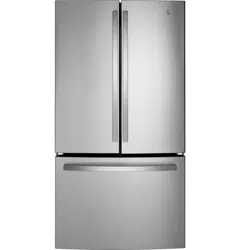
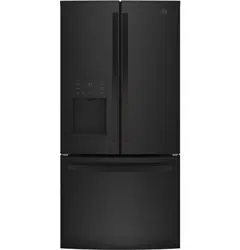
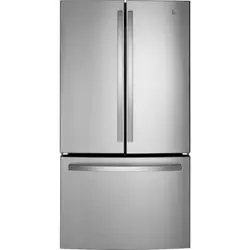
French Door Models
USING THE REFRIGERATOR:)HDWXUHV
49-1000472 Rev. 6 7
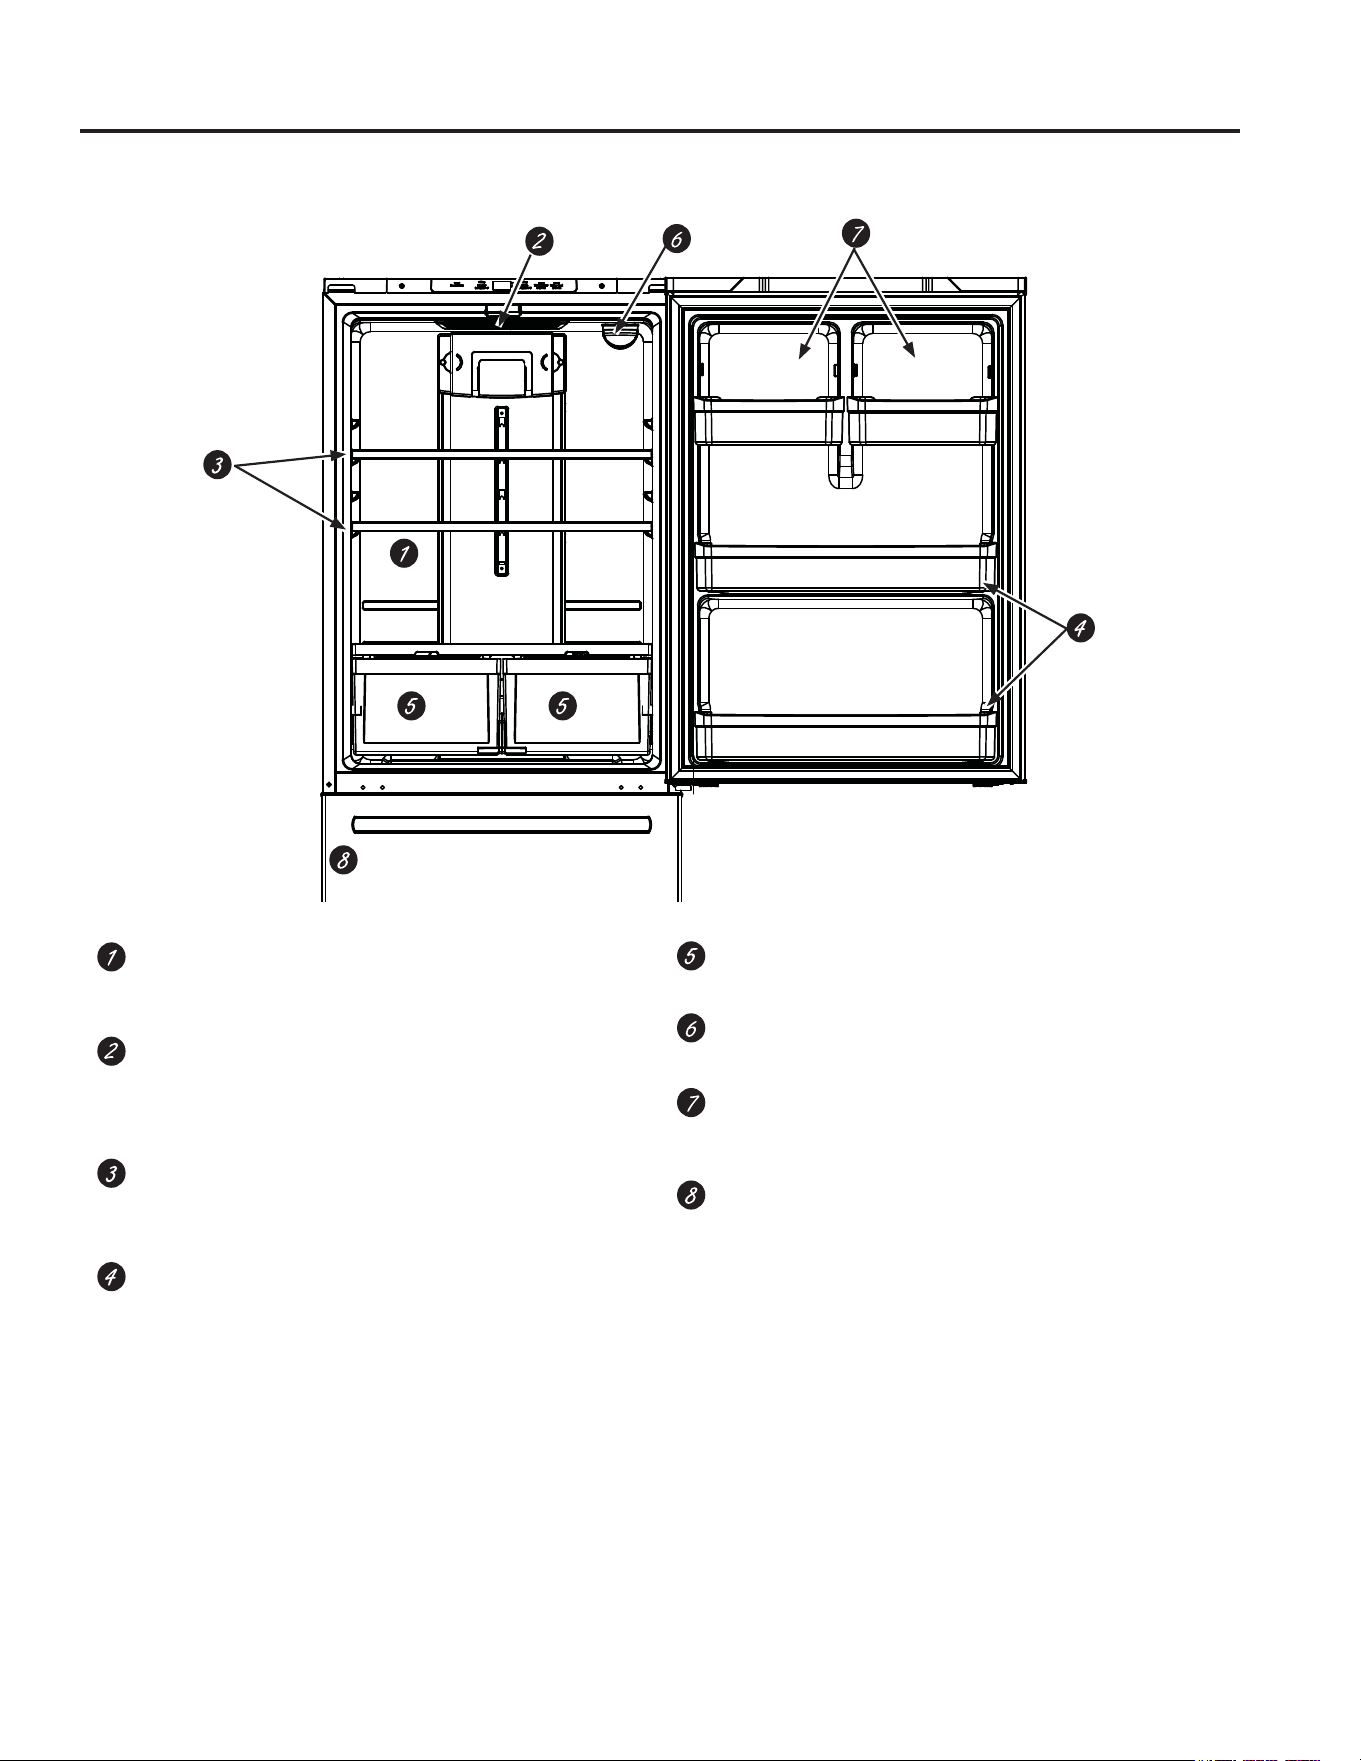
USING THE REFRIGERATOR: )HDWXUHV
Features
Floating snack pan
Can be moved to different locations to best serve
your needs.
LED lighting
/('OLJKWLVORFDWHGDWWKHWRSRIWKHrefrigerator
FRPSDUWPHQW/('OLJKWVDUHDOVRORFDWHGLQWKH
IUHH]HUVHHSDJH
Full-width shelves
)XOOZLGWKVKHOYHVWKDWFDQDFFRPPRGDWHODUJHU
items.
Full-width gallon door bins
Nonadjustable full-width door bins that will hold
gallon containers.
Climate zone pans
Separate bins for produce storage.
Water filter (on some models)
Accessible for easy replacement.
Adjustable door bins
Can be moved up or down to accommodate your
needs.
Icemaker (on some models)
,FHPDNHULVORFDWHGLQWKHIUHH]HURQVRPH
PRGHOV,FHPDNHU.LW,0'LVDYDLODEOHIRU
PRGHOVWKDWDUHLFHPDNHUUHDG\)RULQVWDOODWLRQ
LQVWUXFWLRQVVHHWKH,0'RZQHU¶VPDQXDOIRXQG
at GEAppliances.com.
Single Door Models
8 49-1000472 Rev. 6
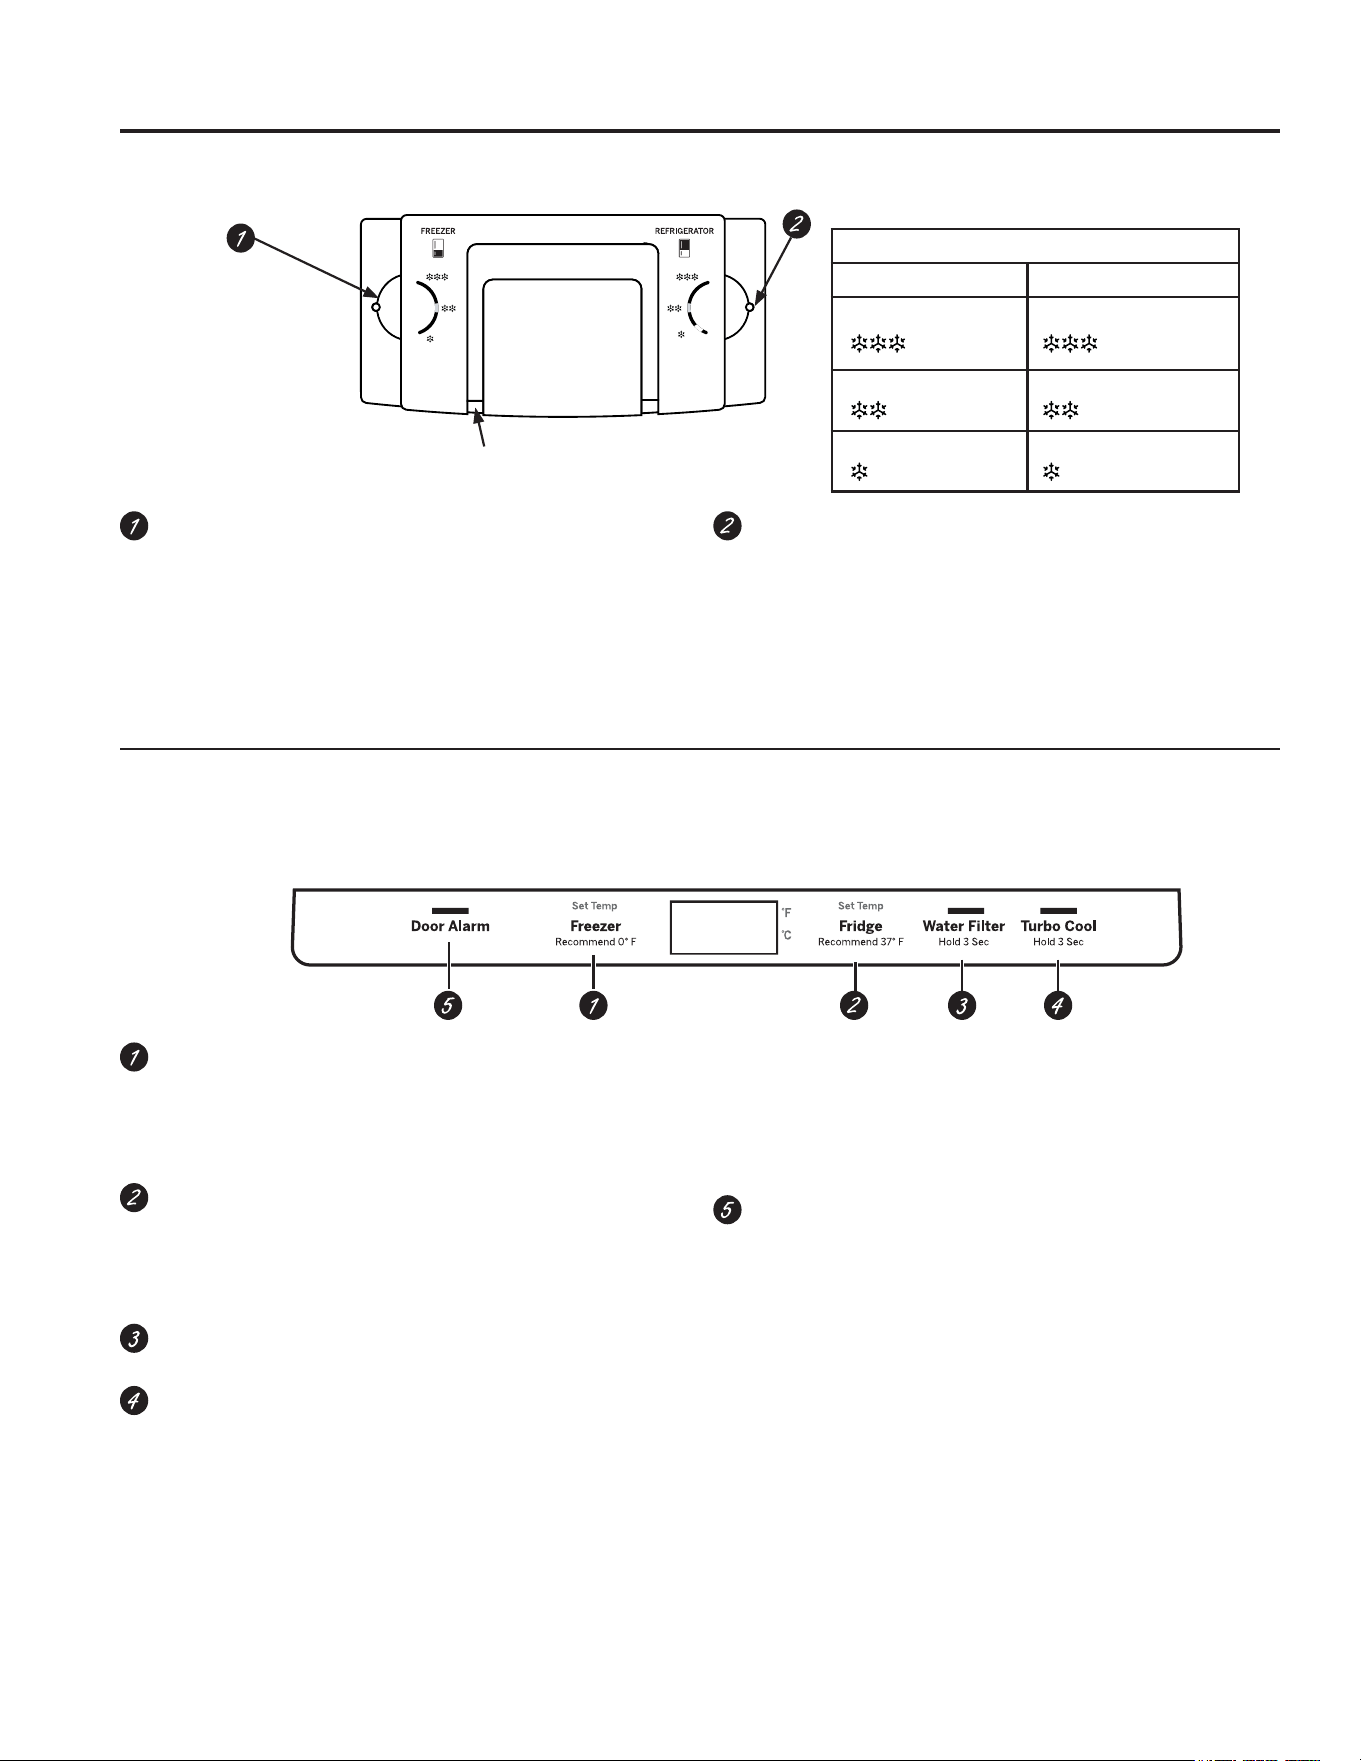
Controls
Figure B
Freezer Compartment Temperature Control
$GMXVW IUHH]HU FRPSDUWPHQW WHPSHUDWXUH 7KH
IUHH]HU WHPSHUDWXUH LV SUHVHW LQ WKH IDFWRU\ DW WKH
Colder position. Allow 24 hours for temperature to
VWDELOL]H WR WKH SUHVHW UHFRPPHQGHG VHWWLQJ
Refrigerator Compartment Temperature Control
Adjust refrigerator compartment temperature. The
refrigerator temperature is preset in the factory at the
Colder position. Allow 24 hours for temperature to
VWDELOL]H WR WKH SUHVHW UHFRPPHQGHG VHWWLQJ
NOTE: Power to the refrigerator cannot be disconnected
by any setting on the control panel.
Freezer Compartment Temperature Control
$GMXVW IUHH]HU FRPSDUWPHQW WHPSHUDWXUH 7KH
IUHH]HU WHPSHUDWXUH LV SUHVHW LQ WKH IDFWRU\ DW 0°F
(-17.8°C) $OORZ KRXUV IRU WHPSHUDWXUH WR VWDELOL]H
to the preset recommended setting.
Refrigerator Compartment Temperature Control
Adjust refrigerator compartment temperature. The
refrigerator temperature is preset in the factory
at 37°F (2.8°C). Allow 24 hours for temperature to
VWDELOL]H WR WKH SUHVHW UHFRPPHQGHG VHWWLQJ
Water Filter
3UHVV DQG KROG VHFRQGV WR UHVHW WKH :DWHU )LOWHU
Turbo Cool
To set the TurboCool™, press the Turbo Cool pad
for 3 seconds. The display will show tc.
TurboCool™ rapidly cools the refrigerator
compartment in order to more quickly cool foods.
8VH TurboCool™ when adding a large amount of
the food to the refrigerator compartment, putting
away foods after they have been sitting out at room
WHPSHUDWXUH RU ZKHQ SXWWLQJ DZD\ ZDUP OHIWRYHUV ,W
can also be used if the refrigerator has been without
power for an extended period.
NOTE: The refrigerator temperature cannot
be changed during TurboCool™ 7KH IUHH]HU
temperature is not affected during Turbo Cool.
When opening the refrigerator door during
TurboCool™, the fans will continue to run if they
have cycled on.
Door Alarm
To set the alarm, press the Door Alarm pad. This
alarm will sound if either door is open for more than
2 minutes. The beeping stops when you close the
door.
NOTE: To put the refrigerator control in the OFF position,
simultaneously touch the words Freezer and Fridge
for 3 seconds. Power to the refrigerator cannot be
disconnected by any setting on the control panel.
Changing °F to °C or °C to °F: Press and hold the
'225 $/$50 DQG )5((=(5 EXWWRQV VLPXOWDQHRXVO\
IRU VHFRQGV WR VHW & WR ) RU ) WR &
GBE21D, GBE21A ,QWHUQDO &RQWURO
GDE21D, GDE21E, GDE25E, GNE21D, GNE21F, PNE21N, GWE19J, GWE22J,
GNE25D, GNE25J, PNE25N, GNE27J, GNE27E
Top Control (some models)
Knob Position Temperature Guide
Refrigerator Freezer
Coldest )
(1.1°C)
Coldest )
(-21.1°C)
Colder )
(2.8°C)
Colder )
(-17.8°C)
Cold )
(6.7°C)
Cold )
(-14.4°C)
0 - OFF
Figure A
Note: 'R QRW EORFN DLU RXWOHW E\ SODFLQJ IRRG LWHPV
directly against it. Erratic temperatures may result.
USING THE REFRIGERATOR: Controls
49-1000472 Rev. 6 9
USING THE REFRIGERATOR: Controls
Controls
Figure B
Freezer Compartment Temperature Control
$GMXVW IUHH]HU FRPSDUWPHQW WHPSHUDWXUH 7KH
IUHH]HU WHPSHUDWXUH LV SUHVHW LQ WKH IDFWRU\ DW 0°F
(-17.8°C) $OORZ KRXUV IRU WHPSHUDWXUH WR VWDELOL]H
to the preset recommended setting.
Refrigerator Compartment Temperature Control
Adjust refrigerator compartment temperature. The
refrigerator temperature is preset in the factory
at 37°F (2.8°C). Allow 24 hours for temperature to
VWDELOL]H WR WKH SUHVHW UHFRPPHQGHG VHWWLQJ
Filter Status
Press the Filter Status pad to display the water
filter's life percentage (%).
Turbo Cool
To set the TurboCool™, press the Turbo Cool pad
for 3 seconds. The display will show tc.
TurboCool™ rapidly cools the refrigerator
compartment in order to more quickly cool foods.
8VH TurboCool™ when adding a large amount of
the food to the refrigerator compartment, putting
away foods after they have been sitting out at room
WHPSHUDWXUH RU ZKHQ SXWWLQJ DZD\ ZDUP OHIWRYHUV ,W
can also be used if the refrigerator has been without
power for an extended period.
NOTE: The refrigerator temperature cannot
be changed during TurboCool™ 7KH IUHH]HU
temperature is not affected during TurboCool. When
opening the refrigerator door during TurboCool™,
the fans will continue to run if they have cycled on.
Door Alarm
To set the alarm, press the Door Alarm pad. This
alarm will sound if either door is open for more than 2
minutes. The beeping stops when you close the door.
NOTE: To put the refrigerator control in the OFF position,
simultaneously touch the words Freezer and Fridge
for 3 seconds. Power to the refrigerator cannot be
disconnected by any setting on the control panel.
Changing °F to °C or °C to °F: Press and hold the
'225 $/$50 DQG )5((=(5 EXWWRQV VLPXOWDQHRXVO\
IRU VHFRQGV WR VHW & WR ) RU ) WR &
GDE21D, GDE21E, GDE25E, GNE21D, GNE21F, PNE21N, GWE19J, GWE22J,
GNE25D, GNE25J, PNE25N, GNE27J, GNE27E
Top Control (some models)
10 49-1000472 Rev. 6
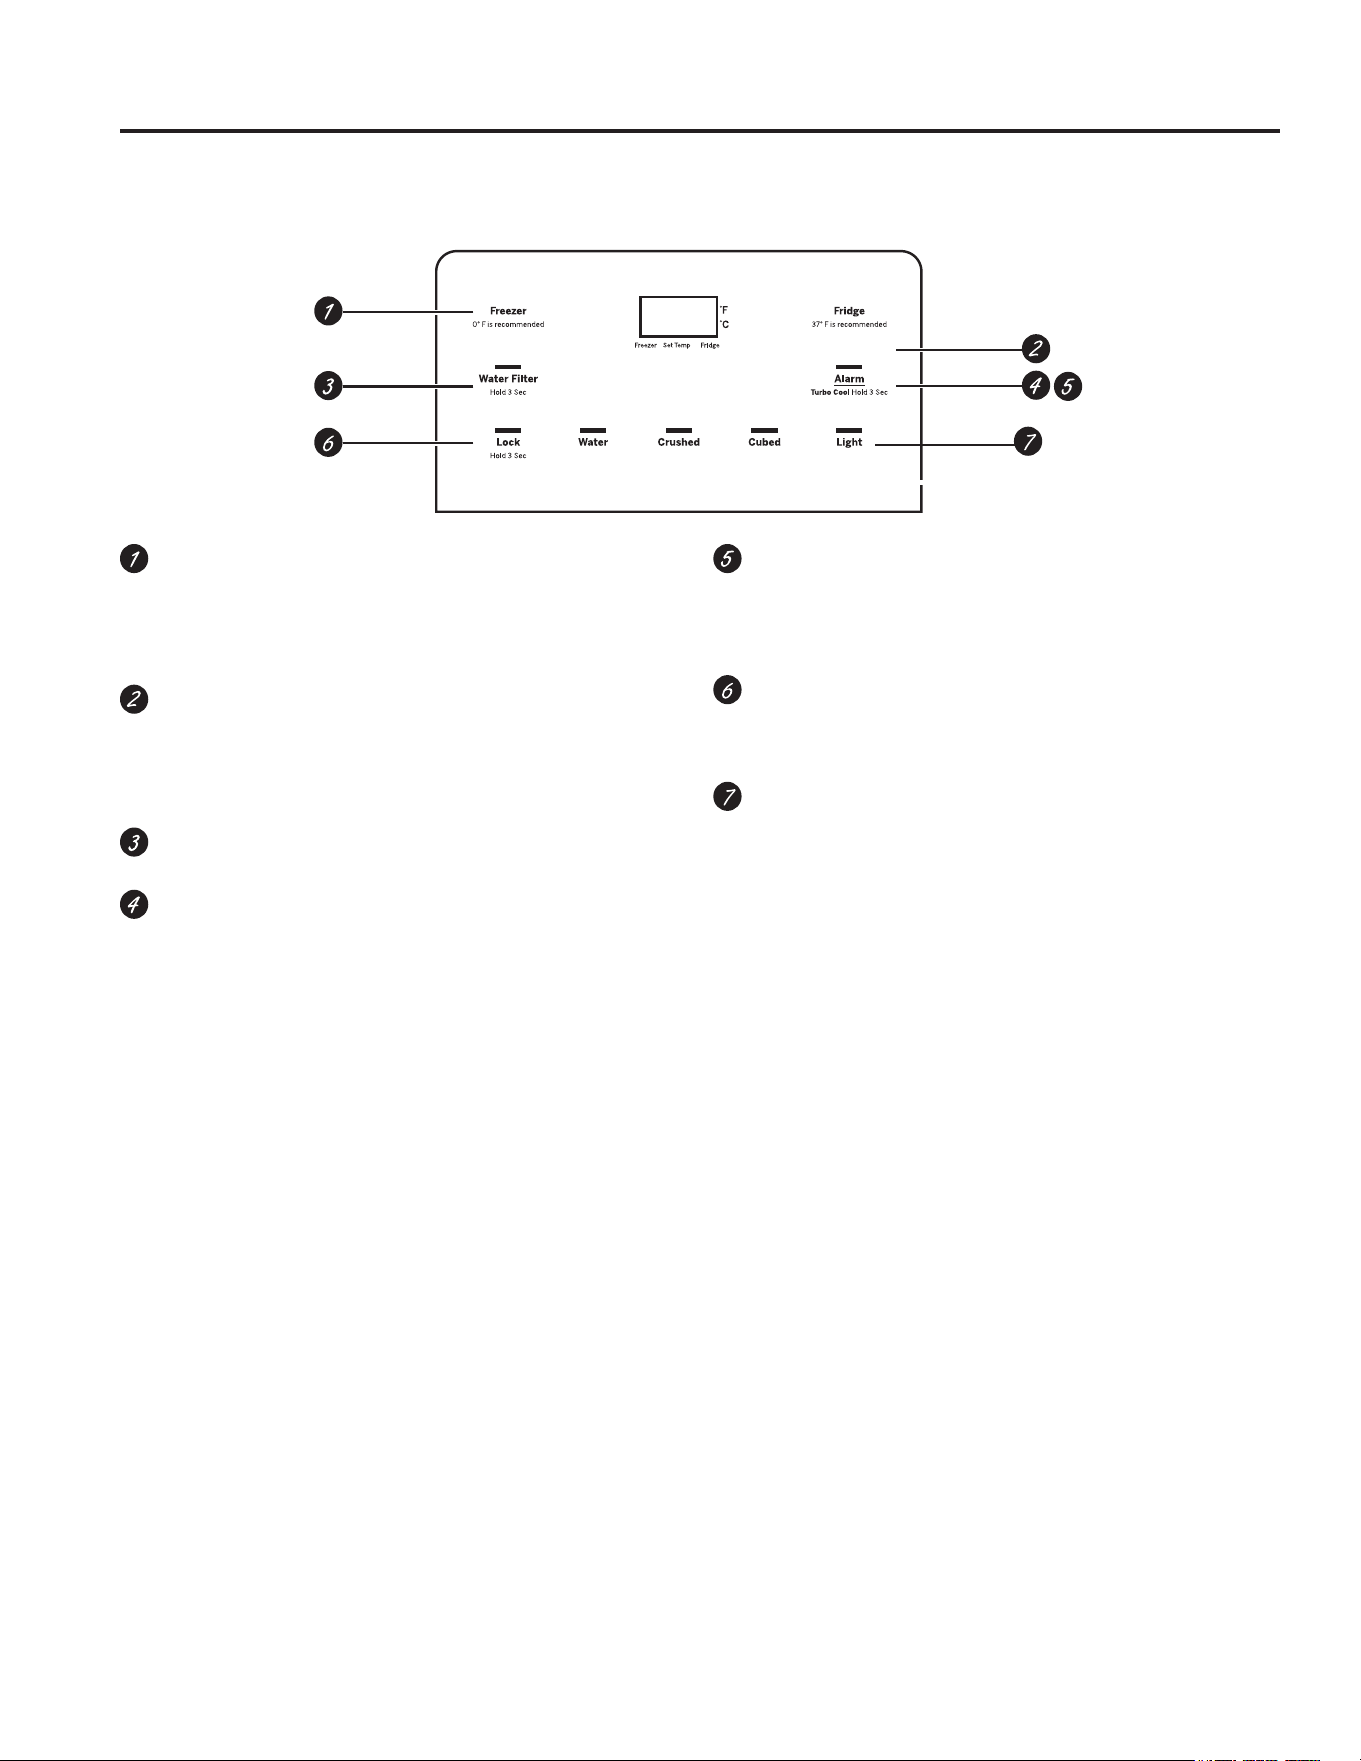
Controls
Figure C
GYE18J, GYE21J, PYE18H, GFE24J, PFE24H, GFE26J
External Control (some models)
Freezer Compartment Temperature Control
$GMXVW IUHH]HU FRPSDUWPHQW WHPSHUDWXUH 7KH
IUHH]HU WHPSHUDWXUH LV SUHVHW LQ WKH IDFWRU\ DW 0°F
(-17.8°C) $OORZ KRXUV IRU WHPSHUDWXUH WR VWDELOL]H
to the preset recommended setting.
Refrigerator Compartment Temperature Control
Adjust refrigerator compartment temperature. The
refrigerator temperature is preset in the factory
at 37°F (2.8°C). Allow 24 hours for temperature to
VWDELOL]H WR WKH SUHVHW UHFRPPHQGHG VHWWLQJ
Water Filter
3UHVV DQG KROG VHFRQGV WR UHVHW WKH :DWHU )LOWHU
Turbo Cool
To set the Turbo Cool™, press the Alarm pad for 3
seconds. The display will show tc.
Turbo Cool™ rapidly cools the refrigerator
compartment in order to more quickly cool foods.
8VH Turbo Cool™ when adding a large amount of
the food to the refrigerator compartment, putting
away foods after they have been sitting out at room
WHPSHUDWXUH RU ZKHQ SXWWLQJ DZD\ ZDUP OHIWRYHUV ,W
can also be used if the refrigerator has been without
power for an extended period.
NOTE: The refrigerator temperature cannot
be changed during Turbo Cool™ 7KH IUHH]HU
temperature is not affected during Turbo Cool. When
opening the refrigerator door during Turbo Cool™,
the fans will continue to run if they have cycled on.
Alarm
Press the Alarm pad to toggle the door alarm
between off and on. The alarm will sound if either
door is left open for more than 2 minutes. The
beeping stops when you close the door.
Lock
Press and hold the Lock pad for 3 seconds to lock
out ice and water dispenser and all other controls.
Press and hold to unlock the controls.
LED dispenser Light
Press the Light pad to turn your dispenser light on
and off.
NOTE: To put the refrigerator control in the OFF
position, simultaneously touch the words Freezer and
Fridge for 3 seconds. Power to the refrigerator cannot
be disconnected by any setting on the control panel.
Changing °F to °C or °C to °F: Press and hold the
)5((=(5 DQG $/$50 EXWWRQV VLPXOWDQHRXVO\ IRU
VHFRQGV WR VHW & WR ) RU ) WR &
NOTE: The refrigerator is shipped with protective
film covering the temperature controls.
,I WKLV ILOP ZDV QRW UHPRYHG GXULQJ LQVWDOODWLRQ
remove it now.
USING THE REFRIGERATOR: Controls
49-1000472 Rev. 6 11
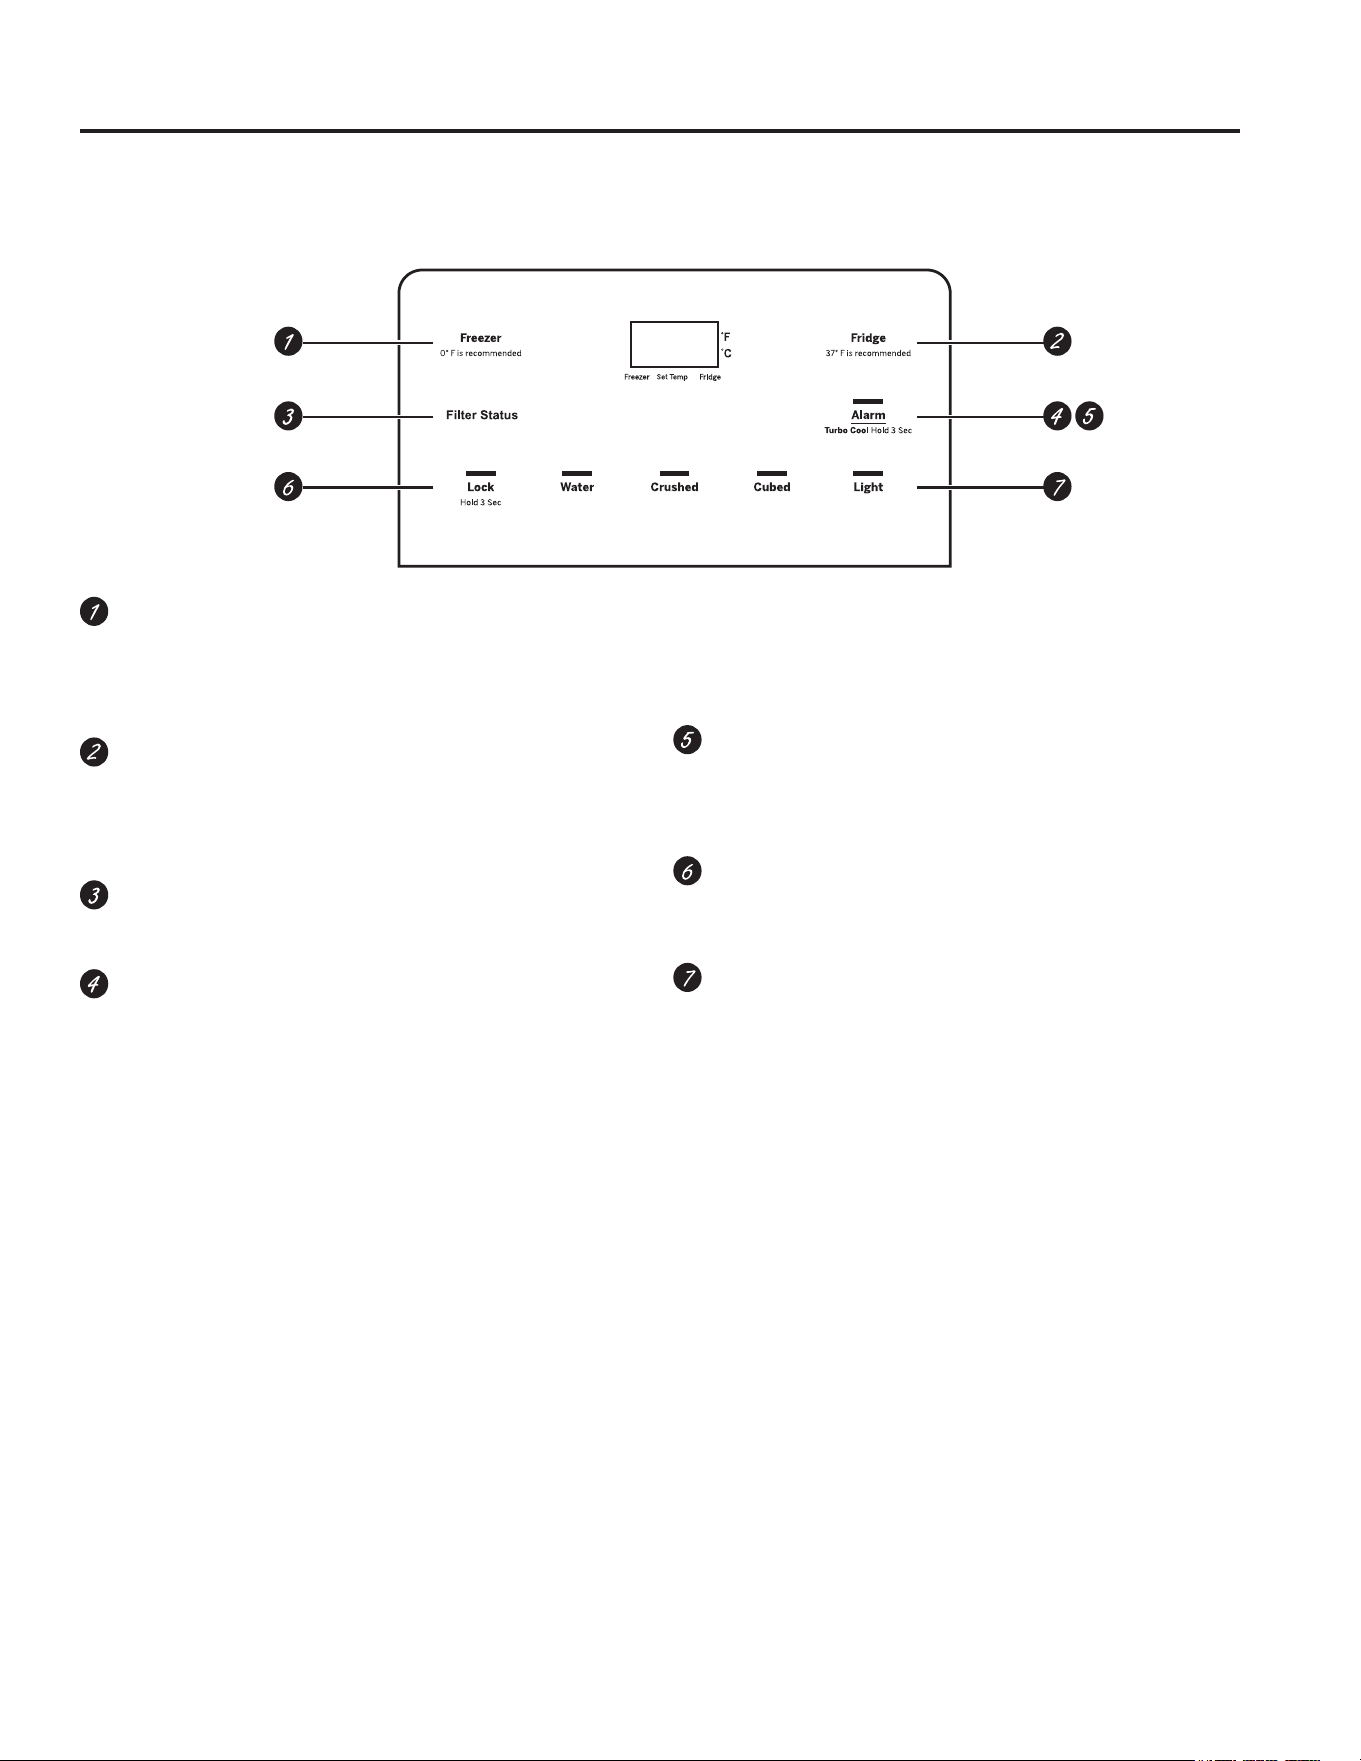
USING THE REFRIGERATOR: Controls
GYE18J, GYE21J, PYE18H, GFE24J, PFE24H, GFE26J
External Control (some models)
NOTE:7KH UHIULJHUDWRU LV VKLSSHG ZLWK SURWHFWLYH ILOP FRYHULQJ WKH WHPSHUDWXUH FRQWUROV ,I WKLV ILOP ZDV QRW UHPRYHG
during installation, remove it now.
Figure C
Freezer Compartment Temperature Control
$GMXVW IUHH]HU FRPSDUWPHQW WHPSHUDWXUH 7KH
IUHH]HU WHPSHUDWXUH LV SUHVHW LQ WKH IDFWRU\ DW 0°F
(-17.8°C) $OORZ KRXUV IRU WHPSHUDWXUH WR VWDELOL]H
to the preset recommended setting.
Refrigerator Compartment Temperature Control
Adjust refrigerator compartment temperature. The
refrigeratortemperature is preset in the factory at
37°F (2.8°C). Allow 24 hours for temperature to
VWDELOL]H WR WKH SUHVHW UHFRPPHQGHG VHWWLQJ
Filter Status
Press the Filter Status pad to display the water
filter's life percentage (%).
Turbo Cool
To set the TurboCool™, press the Alarm pad for 3
seconds. The display will show tc.
TurboCool™ rapidly cools the refrigerator
compartment in order to more quickly cool foods.
8VH TurboCool™ when adding a large amount of
the food to the refrigerator compartment, putting
away foods after they have been sitting out at room
WHPSHUDWXUH RU ZKHQ SXWWLQJ DZD\ ZDUP OHIWRYHUV ,W
can also be used if the refrigerator has been without
power for an extended period.
NOTE: The refrigerator temperature cannot
be changed during TurboCool™ 7KH IUHH]HU
temperature is not affected during TurboCool. When
opening the refrigerator door during TurboCool™,
the fans will continue to run if they have cycled on.
Alarm
Press the Alarm pad to toggle the door alarm
between off and on. The alarm will sound if either
door is left open for more than 2 minutes. The
beeping stops when you close the door.
Lock
Press and hold the Lock pad for 3 seconds to lock
out ice and water dispenser and all other controls.
Press and hold to unlock the controls.
LED dispenser Light
Press the Light pad to turn your dispenser light on
and off.
NOTE: To put the refrigerator control in the OFF
position, simultaneously touch the words Freezer
and Fridge for 3 seconds. Power to the refrigerator
cannot be disconnected by any setting on the control
panel.
Changing °F to °C or °C to °F: Press and hold the
)5((=(5 DQG $/$50 EXWWRQV VLPXOWDQHRXVO\ IRU
VHFRQGV WR VHW & WR ) RU ) WR &
Controls
12 49-1000472 Rev. 6
Sabbath Modes (on some models)
Activate Sabbath Mode to turn off the temperature control
DQGDGYDQFHGIHDWXUHVH[GRRUDODUP'HSHQGLQJ
on the model, the interior lights will be off, or on low
brightness regardless of whether the door is open or
closed. The compressor will run on a timed defrost when
in Sabbath mode.
Models with Figure B controls
Ŷ'HSHQGLQJRQWKHPRGHOSUHVVDQGKROGWKHAlarm
and Water Filter or the Alarm and Filter Status
simultaneously for 5 seconds to enter and exit the
Sabbath mode
Ŷ7KHLFHPDNHUPXVWEHWXUQHGRIIPDQXDOO\GXULQJ
Sabbath mode. To turn off the icemaker,
VHWWKHVZLWFKWRWKH2))SRVLWLRQ7RWXUQWKHLFHPDNHU
on, set the switch to the ON position.
Model with Figure C controls
Ŷ3UHVVDQGKROGWKHLOCK and LIGHT buttons
simultaneously for 5 seconds to enter/exit Sabbath
Mode.
Ŷ7KHLFHPDNHUPXVWEHWXUQHGRIIPDQXDOO\GXULQJ
Sabbath mode. To turn off the icemaker, set the switch
WRWKH2))SRVLWLRQ7RWXUQWKHLFHPDNHURQVHWWKH
switch to the ON position.
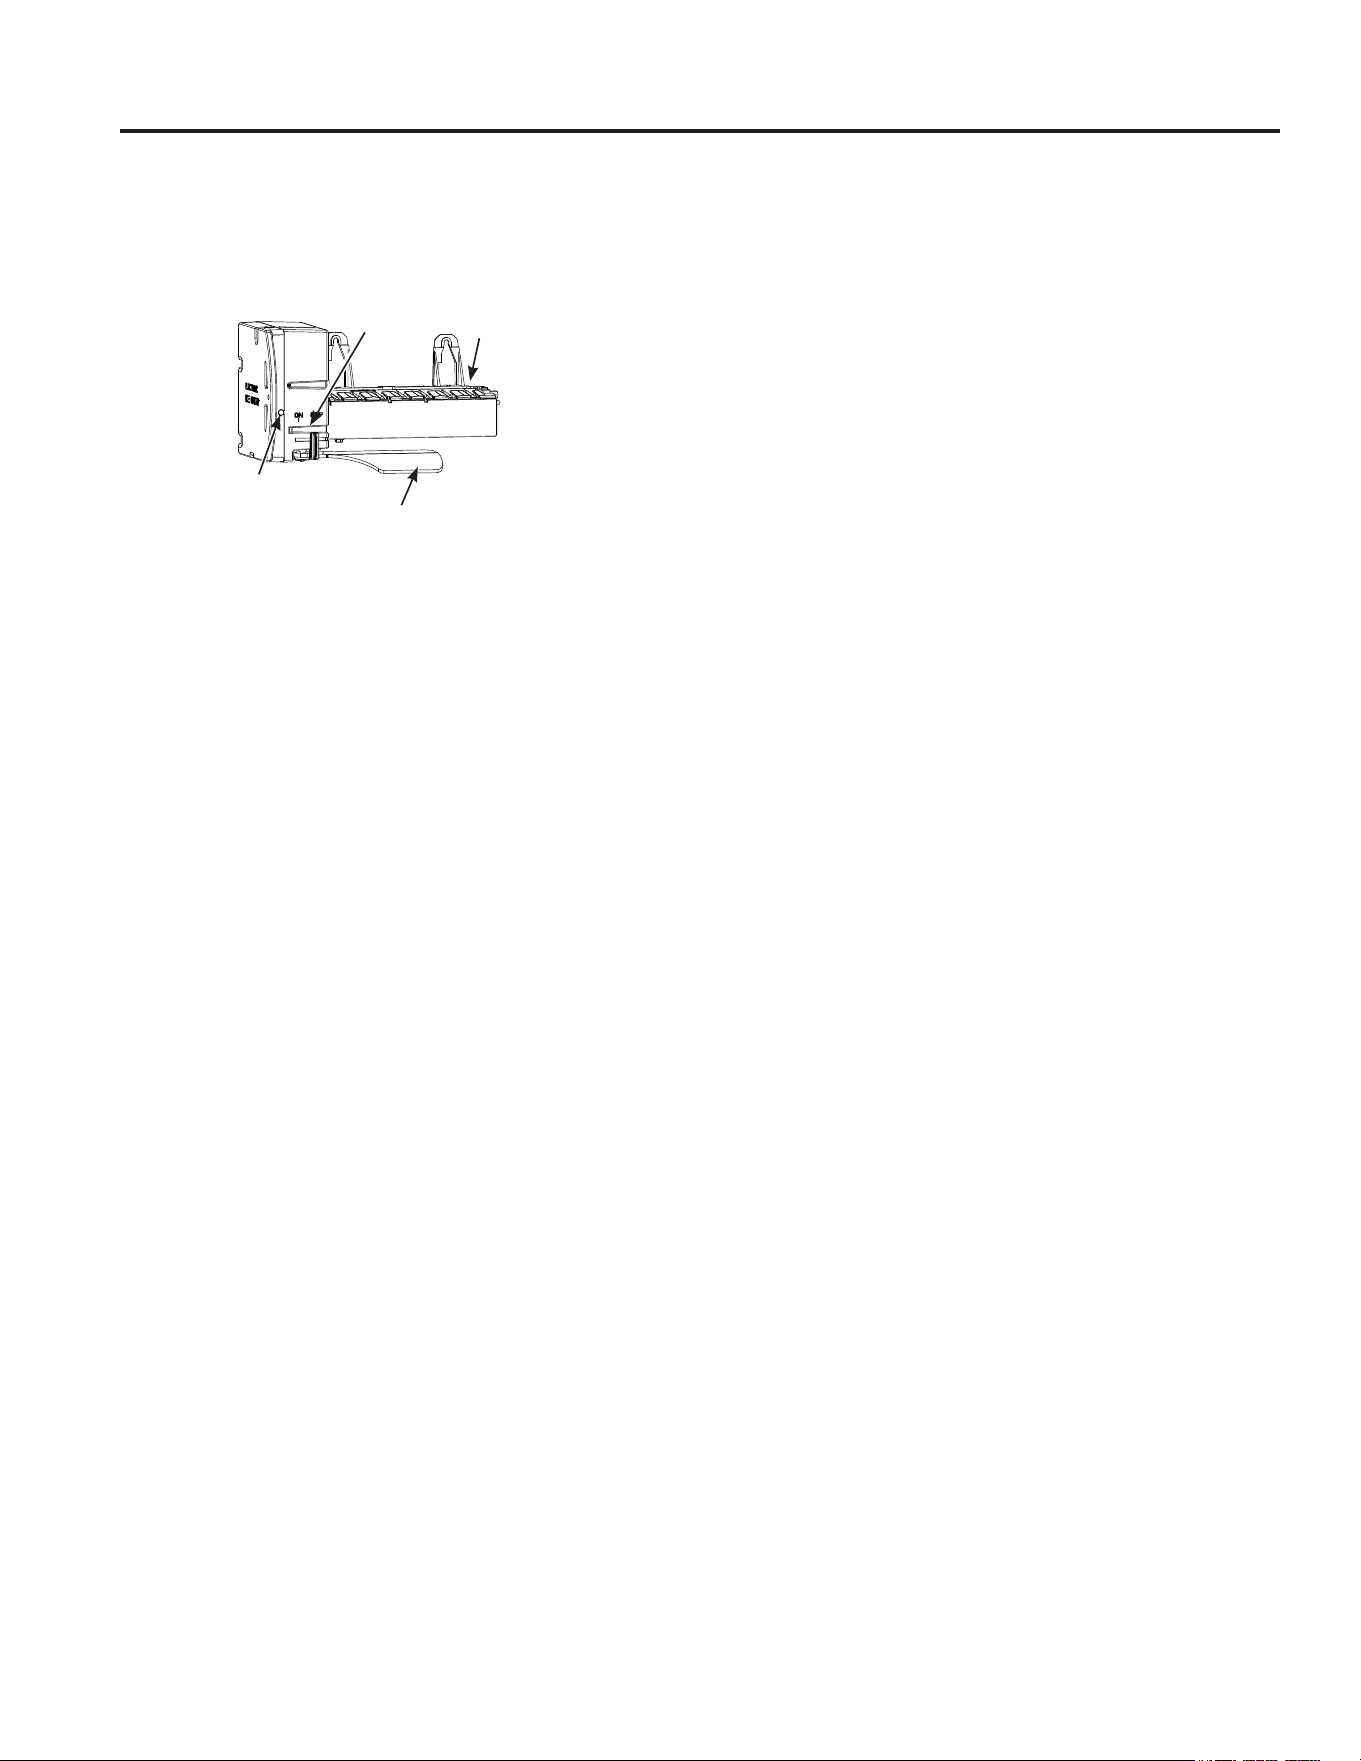
,FHPDNHU
)HHOHU$UP
Switch
Green
Power Light
(On some models)
USING THE REFRIGERATOR: Sabbath Modes
49-1000472 Rev. 6 13
USING THE REFRIGERATOR: 'LVSHQVHU(on some models)
Dispenser (on some models)
Water & Ice Dispenser
(See Controls)
Press the glass gently against the dispenser cradle.
The spill shelf is not self-draining. To reduce water
spotting, the shelf should be cleaned regularly.
,IQRZDWHULVGLVSHQVHGZKHQWKHUHIULJHUDWRULVILUVW
installed, there may be air in the water line system.
Press the dispenser paddle for at least five minutes to
remove trapped air from the water line and to fill the
water system. To flush out impurities in the water line,
throw away the first six full glasses of water.
CAUTION
Laceration Hazard
Ŷ1HYHUSXWILQJHUVRUDQ\RWKHUREMHFWLQWRLFHFUXVKHU
GLVFKDUJHRSHQLQJ'RLQJVRFDQUHVXOWLQFRQWDFWLQJ
the ice crushing blades and lead to serious injury or
amputation
Ŷ8VHDVWXUG\JODVVZKHQGLVSHQVLQJLFH$GHOLFDWH
glass may break and result in personal injury.
To remove Dispenser Tray
Ŷ3XOO'LVSHQVHU7UD\RXW
To reinstall Dispenser Tray
Ŷ3XVKLQXQWLOLWLVILUPO\LQSODFH
Door Ice Bin
1. Open left refrigerator door.
2. Pull down latch to release bin
door.
8VLQJKDQGKROGOLIWLFHEXFNHW
up and out to clear locators in
bottom of bin.
4. To replace the ice bucket, set
it on the guide brackets and
push until the ice bucket seats
properly.
,IEXFNHWFDQQRWEHUHSODFHG
URWDWHWKH,FH%XFNHW)RUNWXUQFORFNZLVH
Internal Water Dispenser
(on some models)
The water dispenser is located on the left wall inside the
refrigerator compartment.
To dispense water:
1. Hold the glass against the recess.
2. Push the water dispenser button.
3. Hold the glass underneath the
dispenser for 2–3 seconds after
releasing the dispenser button.
Water may continue to dispense
after the button is released.
,IQRZDWHULVGLVSHQVHGZKHQWKHUHIULJHUDWRULVILUVW
installed, there may be air in the water line system. Press
the dispenser button for at least 5 minutes to remove
trapped air from the water line and to fill the water
V\VWHP'XULQJWKLVSURFHVVWKHGLVSHQVHUQRLVHPD\EH
loud as the air is purged from the water line system. To
flush out impurities in the water line, throw away the first
6 glassfuls of water.
NOTE: To avoid water deposits, the dispenser should
be cleaned periodically by wiping with a clean cloth or
sponge.
Important Facts About Your Dispensers
Ŷ'RQRWDGGLFHIURPWUD\VRUEDJVWRWKHGRRULFHPDNHU
EXFNHW,WPD\QRWFUXVKRUGLVSHQVH
Ŷ$YRLGRYHUILOOLQJJODVVZLWKLFHDQGXVHRIQDUURZ
glasses. Backed-up ice can jam the chute or cause the
GRRULQWKHFKXWHWRIUHH]HVKXW,ILFHLVEORFNLQJWKH
chute remove the ice bucket, poke it through with a
wooden spoon.
Ŷ%HYHUDJHVDQGIRRGVVKRXOGQRWEHTXLFNFKLOOHGLQWKH
door icemaker bin. Cans, bottles or food packages in
the storage drawer may cause the icemaker or auger
to jam.
Ŷ7RNHHSGLVSHQVHGLFHIURPPLVVLQJWKHJODVVSXWWKH
glass close to, but not touching, the dispenser opening.
Ŷ6RPHFUXVKHGLFHPD\EHGLVSHQVHGHYHQWKRXJK\RX
selected CUBED ICE. This happens occasionally when
a few cubes accidentally get directed to the crusher.
Ŷ$IWHUFUXVKHGLFHLVGLVSHQVHGVRPHZDWHUPD\GULS
from the chute.
Ŷ6RPHWLPHVDVPDOOPRXQGRIIURVWZLOOIRUPRQWKH
door in the ice chute. This condition is normal and
usually occurs when you have dispensed crushed ice
repeatedly.
'LVSHQVHU
Tray
,FHEXFNHW
fork
Latch
,FHEXFNHW
14 49-1000472 Rev. 6
Water Filter Cartridge - XWFE (on some models)
WATER FILTER CARTRIDGE
The water filter cartridge holder is located in the back
upper-right corner of the refrigerator refrigerator
compartment.
6HOHFWPRGHOVXVHUDGLRIUHTXHQF\LGHQWLILFDWLRQ5),'
WRGHWHFWOHDNVDQGPRQLWRUILOWHUVWDWXV7KH5),'
WHFKQRORJ\ LV FHUWLILHG E\ WKH )&&
WHEN TO REPLACE THE FILTER
,I WKHUH LV D UHSODFHPHQW LQGLFDWRU OLJKW IRU WKH ZDWHU ILOWHU
cartridge on the dispenser, the red filter light will start
blinking to tell you that you need to replace the filter soon.
)RUH[WHUQDOFRQWUROPRGHOVWKHILOWHUOLJKWZLOOEOLQN
while you are dispensing until the filter is replaced.
)RUWRSFRQWUROPRGHOVWKHILOWHUOLJKWZLOOEOLQNZKLOH
the door is open until the filter is replaced.
)RU PRGHOV WKDW GRQ¶W KDYH WKH LQGLFDWRU OLJKW WKH ILOWHU
cartridge should be replaced every six months, or earlier
if the flow of water to the dispenser or icemaker
decreases.
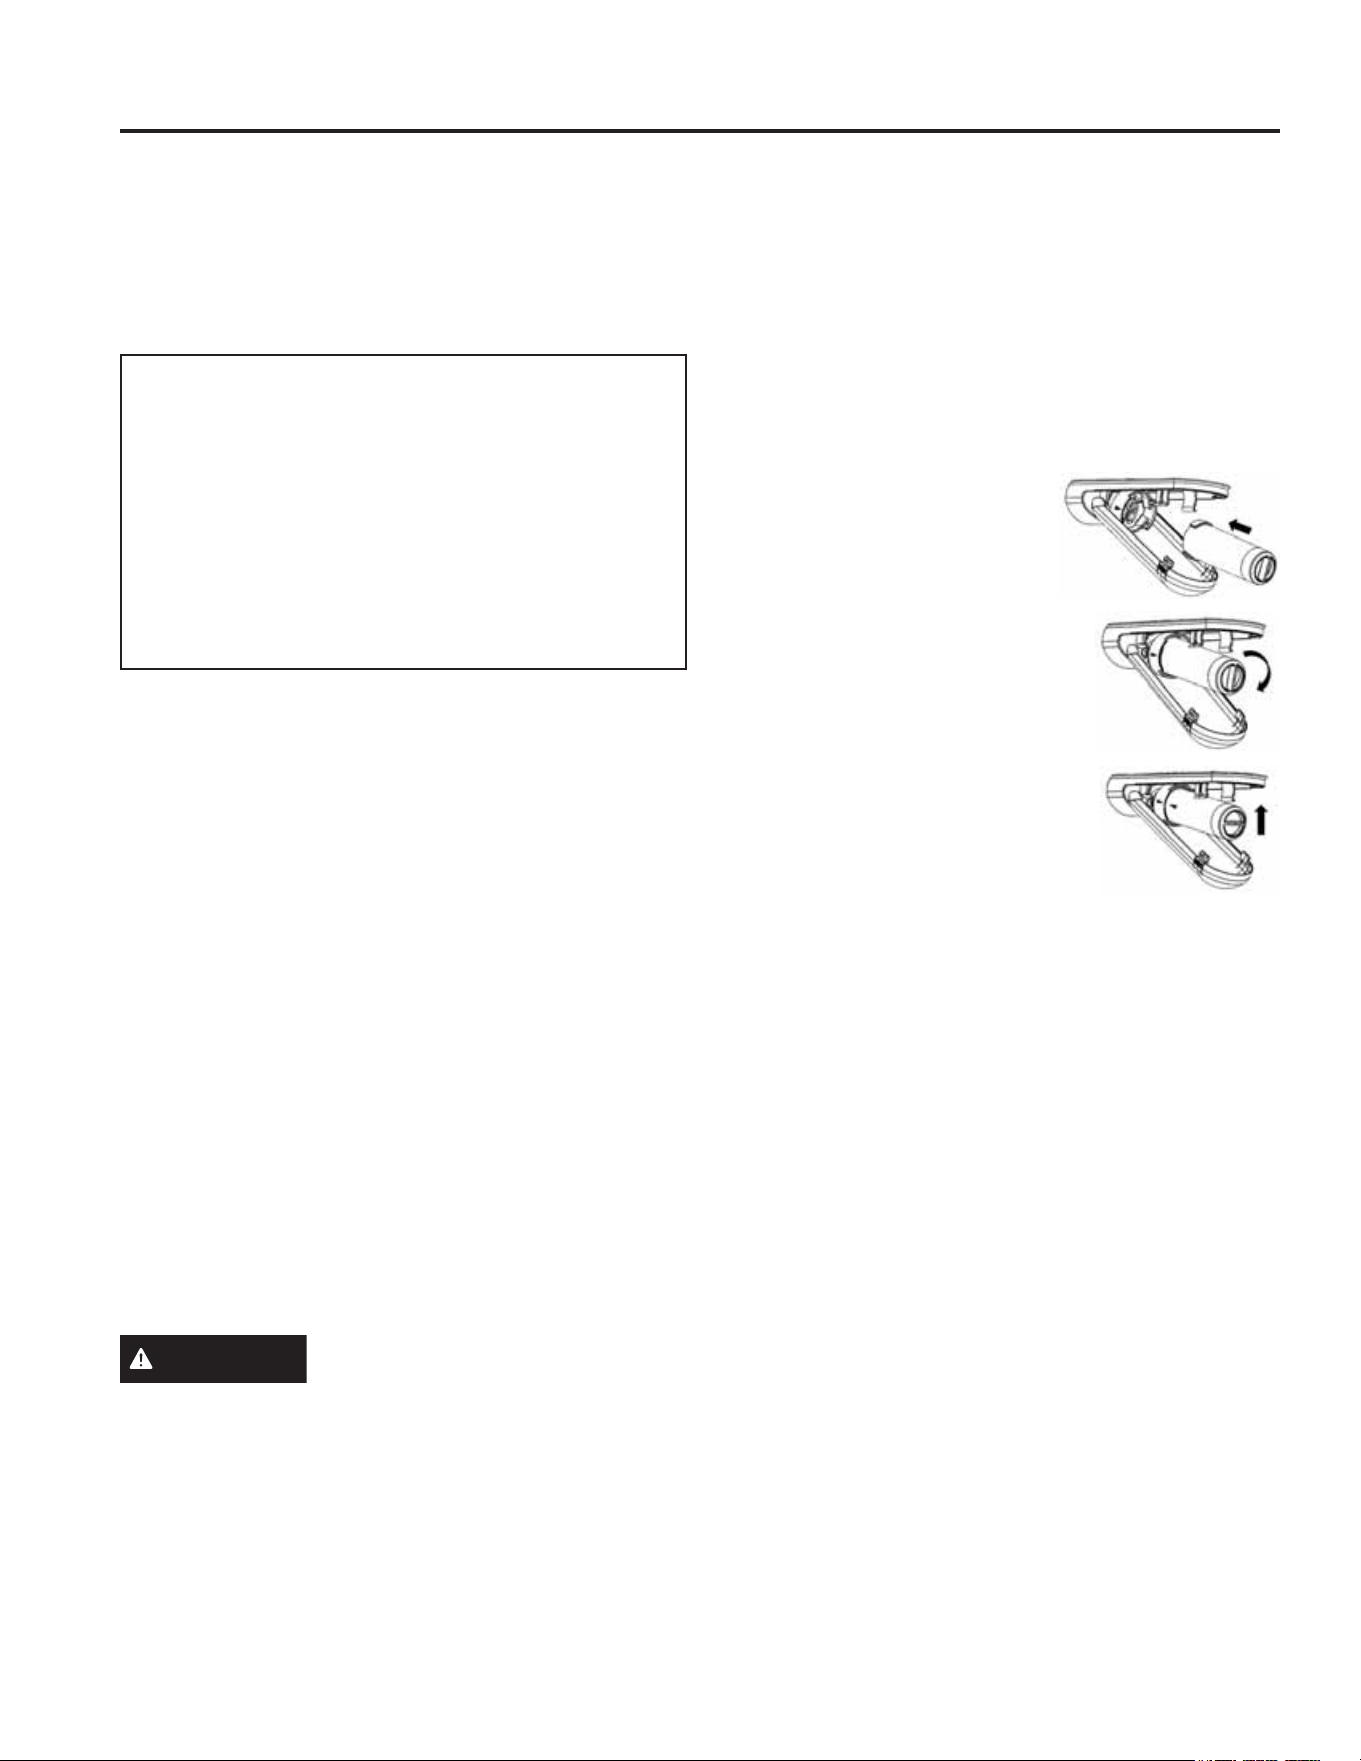
REMOVING THE FILTER
,I \RX DUH UHSODFLQJ WKH ILOWHU ILUVW UHPRYH WKH SUHYLRXV
RQH 2SHQWKHILOWHUFDUWULGJHKRXVLQJE\VTXHH]LQJ
the 2 front tabs and gently pulling down.
2. Rotate the filter down.
3. Gently grasp the filter and slowly turn it
counterclockwise about a ¼ turn. The filter should
automatically release itself when you have rotated it far
enough to the left. A small amount of water may drip
down.
CAUTION
,IDLUKDVEHHQWUDSSHGLQWKHV\VWHP
WKHILOWHUFDUWULGJHPD\EHHMHFWHGDVLWLVUHPRYHG8VH
caution when removing.
FILTER BYPASS PLUG
To reduce the risk of property damage due to water
OHDNDJH \RX 0867 XVH WKH ILOWHU E\SDVV SOXJ ZKHQ D
replacement filter cartridge is not available. Some models
do not come equipped with the filter bypass plug. To obtain
D IUHH E\SDVV SOXJ FDOO *(&$5(6 ,Q &DQDGD FDOO
800.561.3344. The dispenser and icemaker will not operate
without either the filter or bypass plug installed. The bypass
plug is installed in the same way as a filter cartridge.
INSTALLING THE FILTER IN A BOTTOM
FREEZER REFRIGERATOR
1. Open the filter cartridge housing
E\VTXHH]LQJWKHIURQWWDEVDQG
gently pulling down.
2. Line up the ports on the filter
with the ports on the filter
cartridge holder, and gently
insert the filter.
3. Slowly turn the filter to the
ULJKW XQWLO LW VWRSV '2 127
29(57,*+7(1 $V \RX WXUQ
the filter, it will automatically
adjust itself into position. The
filter will move about a ¼ turn or
90 degrees, until the arrow on
the filter aligns with the arrow on
the filter cartridge holder.
4.
Slowly push the filter up into the clips.
5. Close the filter cartridge housing by gently pushing the
lid upwards until the tabs lock into place.
6. For dispenser-only models - Run water from the
dispenser for 2 gallons (7.6 liters) or approximately 5
minutes to clear the system. Water may spurt out and
DLUEXEEOHVPD\EHYLVLEOHGXULQJWKLVSURFHVV,IZDWHU
is not flowing, check to make sure the filter has been
fully rotated to the right.
For icemaker-only models - 'LVFDUGWKHILUVWELQ
of ice to allow air to purge from the system. A newly
installed filter cartridge will cause water to spurt into
the icemaker body, which could lead to ice droplets
around the icemaker area. NOTE: ,W LV QRUPDO IRU
these droplets and initial ice production to appear
GLVFRORUHG GXULQJ WKH LQLWLDO V\VWHP IOXVK ,FH FRORU ZLOO
return to normal after the first bin of ice production.
7. Press and hold the RESET WATER FILTER button on
the dispenser for 3 seconds. On select models, filter
reset will be automatic when a new filter is installed.
Contains
FCC ID: ZKJ-294D2018 IC: 10229A-294D2018
“This device complies with part 15 of the FCC Rules.
Operation is subject to the following two conditions:
(1) This device may not cause harmful interference, and (2)
this device must accept any interference received, including
interference that may cause undesired operation.”
“This device complies with Industry Canada licence-exempt
RSS standard(s). Operation is subject to the following two
conditions: (1) this device may not cause interference,
and (2) this device must accept any interference, including
interference that may cause undesired operation of the
device.”
USING THE REFRIGERATOR: :DWHU )LOWHU &DUWULGJH ;:)(
49-1000472 Rev. 6 15
Water Filter Cartridge - XWFE (on some models)(Cont.)
USING THE REFRIGERATOR: :DWHU)LOWHU&DUWULGJH;:)(
WARNING
To reduce the risk associated with choking, do not allow children under 3 years of age to
have access to small parts during the installation of this product. The disposable filter cartridge should be
replaced every 6 months at the rated capacity, or sooner if a noticeable reduction in flow rate occurs.
)RUWKHPD[LPXPEHQHILWRI\RXUILOWUDWLRQV\VWHP*($SSOLDQFHVUHFRPPHQGVWKHXVHRI*($SSOLDQFHVEUDQGHG
ILOWHUVRQO\8VLQJ*($SSOLDQFHVEUDQGHGILOWHUVLQ*($SSOLDQFHVDQG+RWSRLQWUHIULJHUDWRUVSURYLGHVRSWLPDO
performance and reliability. GE Appliances filters meet rigorous industry standards for safety and quality that are
important for products that are filtering your water. GE Appliances has not qualified non-GE Appliances-branded
filters for use in GE Appliances and Hotpoint refrigerators and there is no assurance that non-GE Appliances-
branded filters meet GE Appliances standards for quality, performance and reliability.
If you have questions, or to order additional filter cartridges, visit our website at gewaterfilters.com
or call GE Appliances Parts and Accessories, 877.959.8688. ,Q&DQDGDFDOO
6HUYLFH)ORZ 0.5 gpm (1.89 lpm)
Water Supply Potable Water
Water Pressure 25-120 psi (172-827 kPa)
Water Temperature ))&&
Capacity 170 gallons (643.5 liters)
Sign-up for TEXT REMINDERS by texting REPLACE to 70543.
Application Guidelines/Water Supply
16 49-1000472 Rev. 6
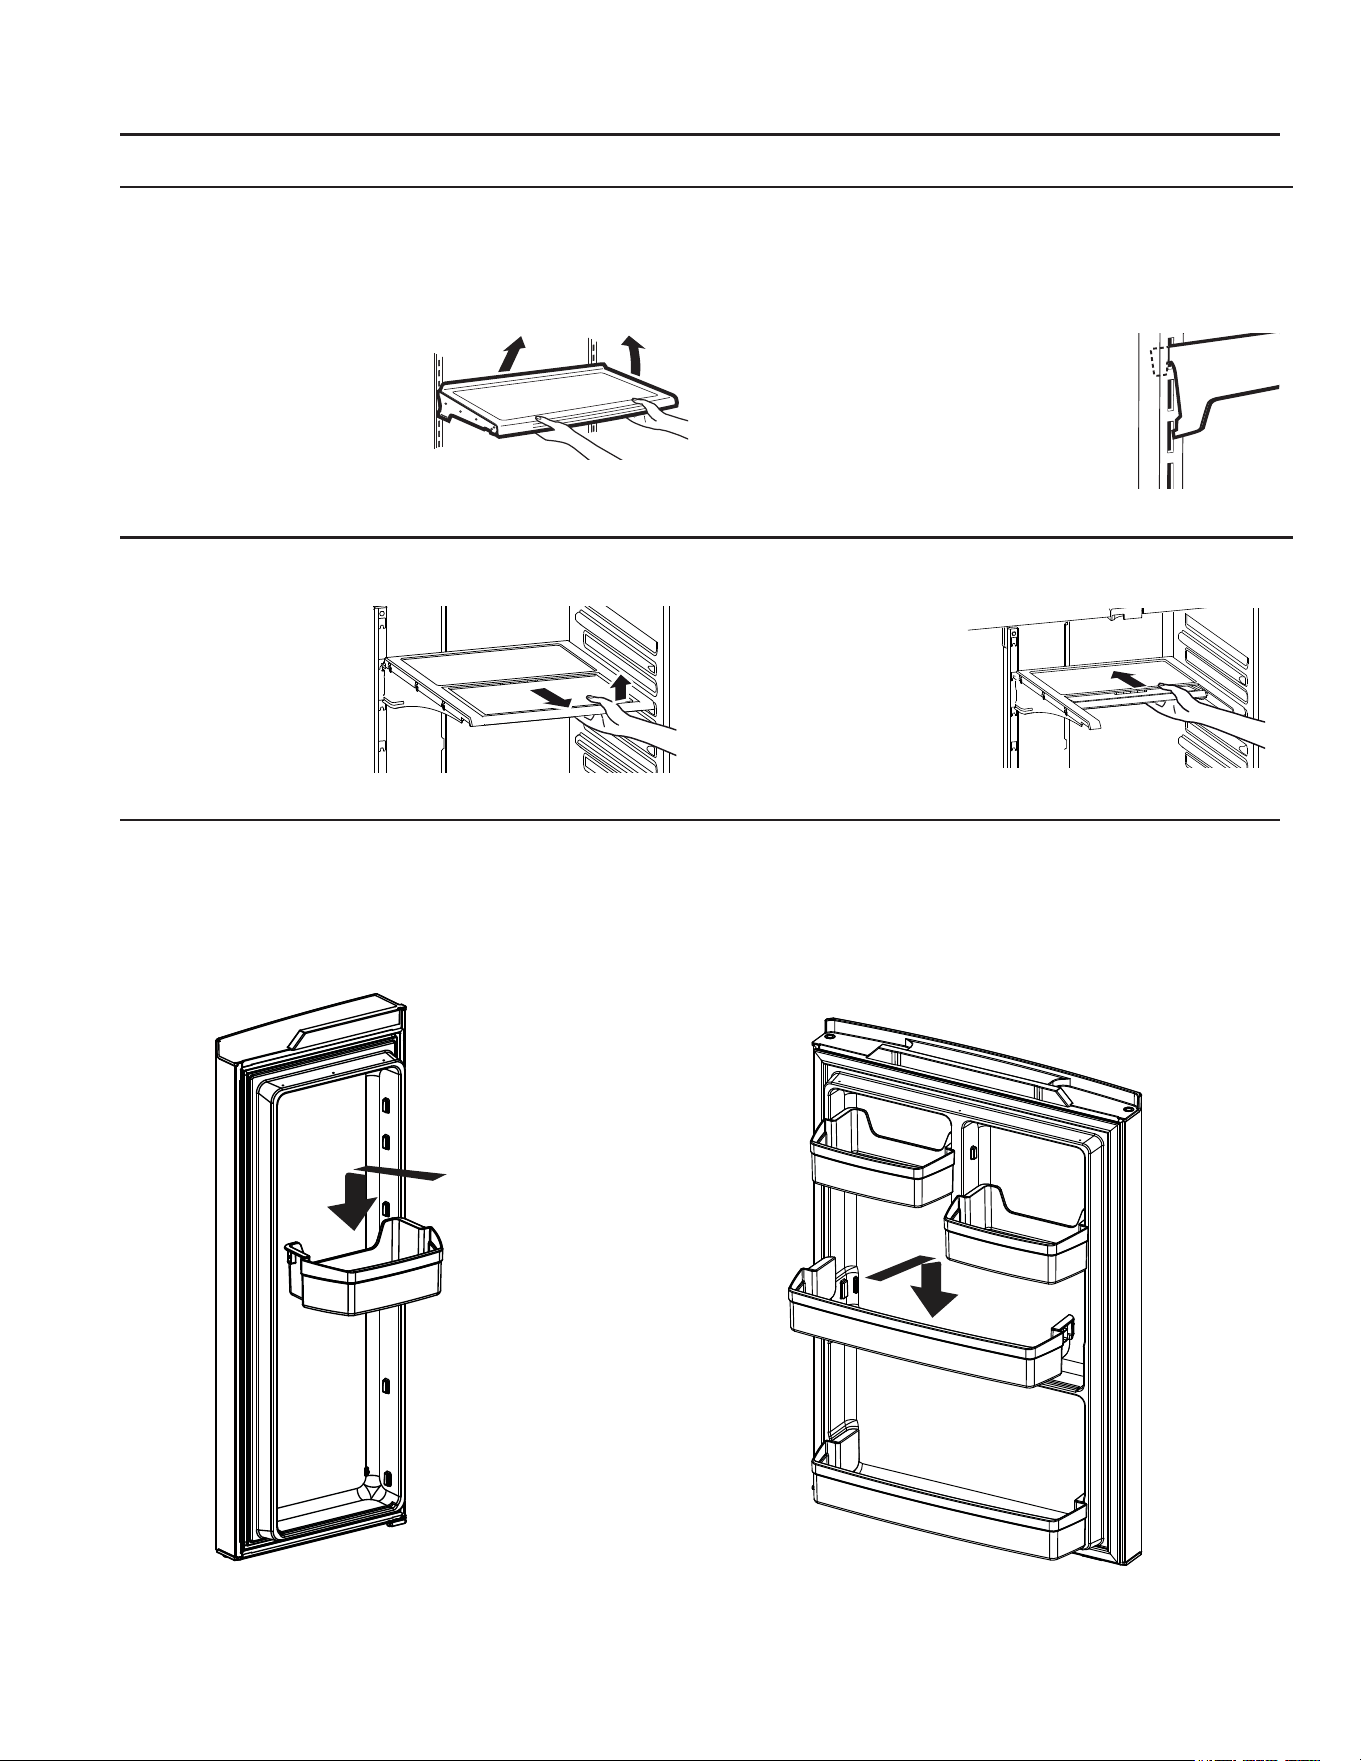
USING THE REFRIGERATOR: Shelves and Bins
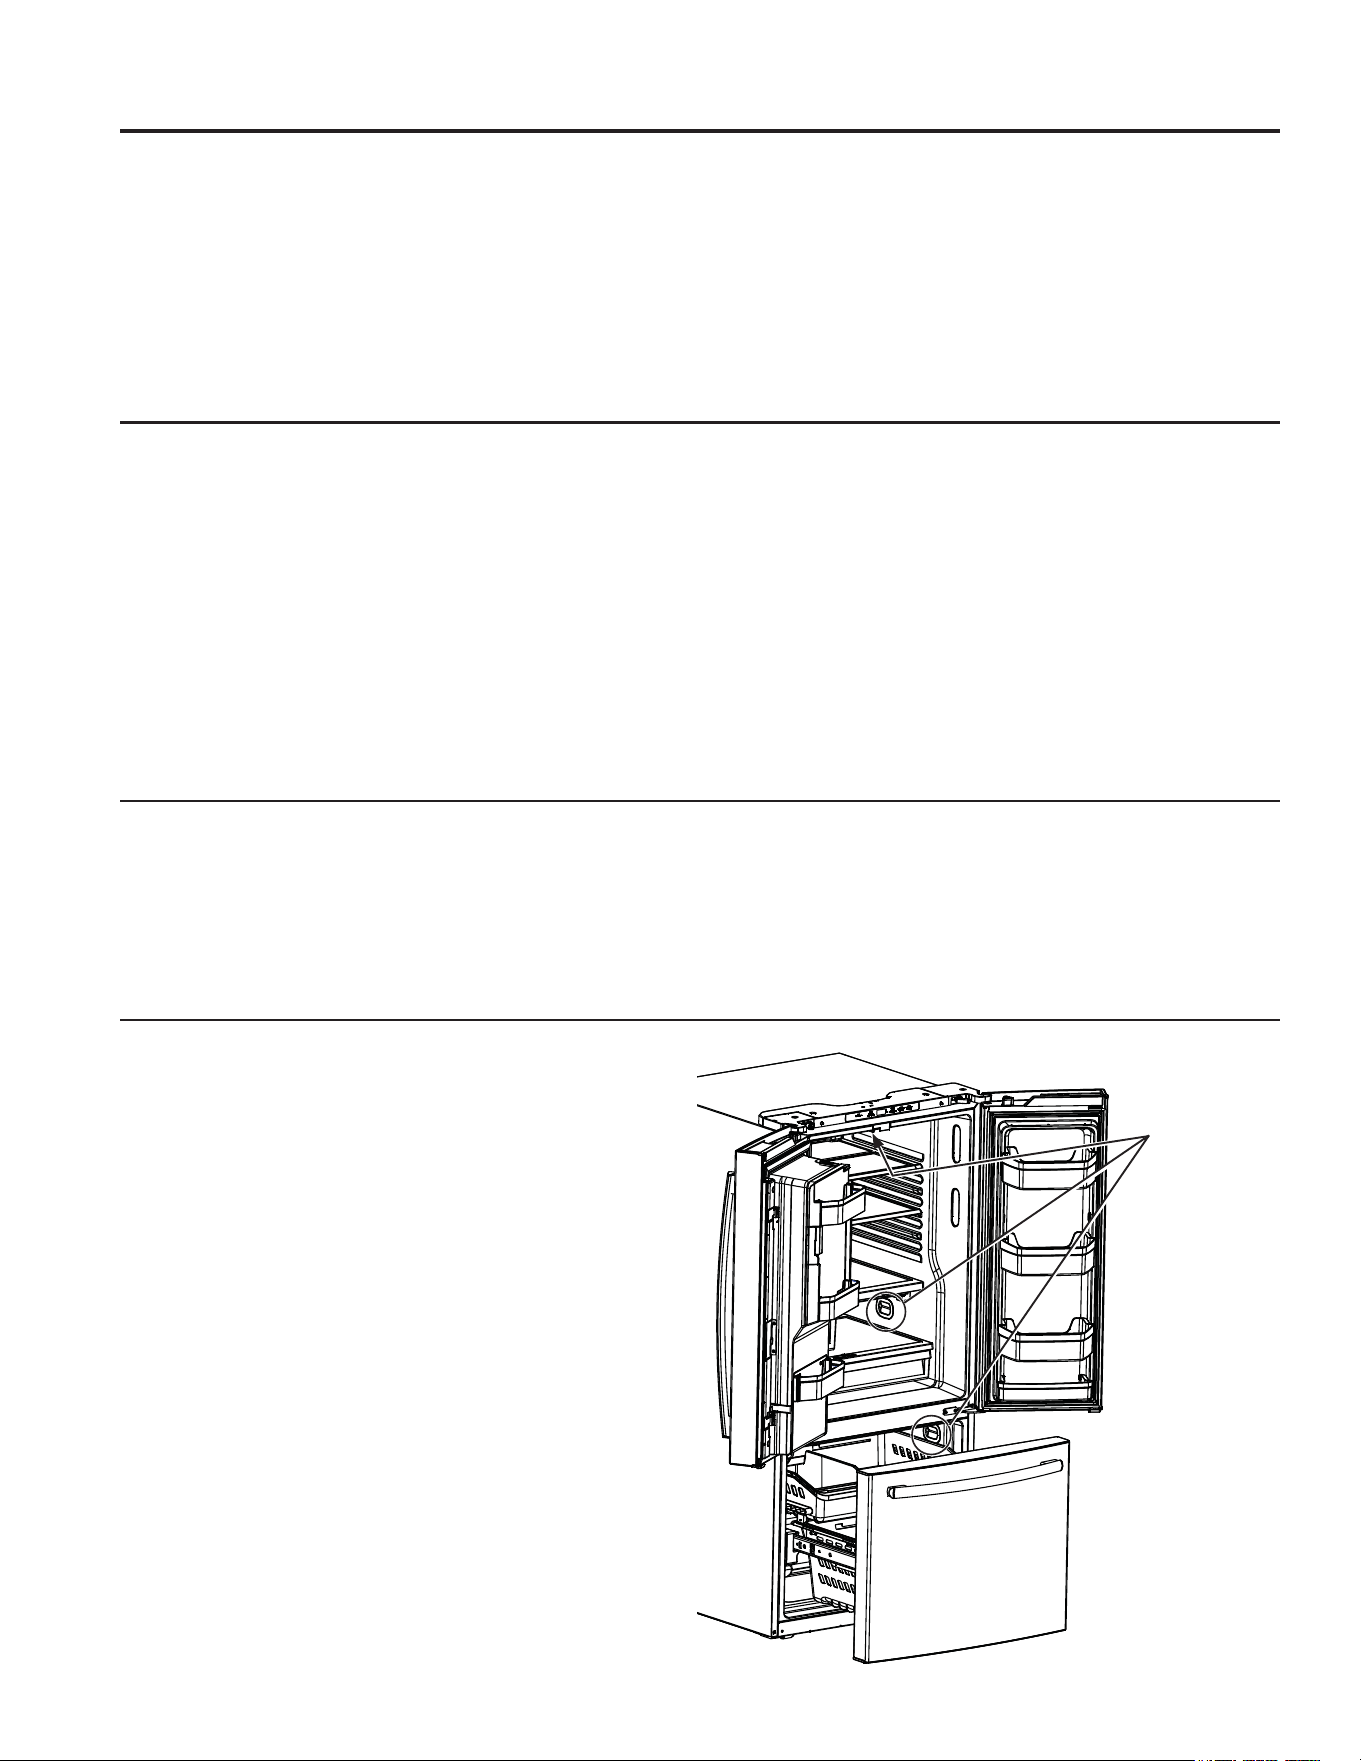
Shelves and Bins
Rearranging the Refrigerator Shelves
Shelves in the refrigerator compartment are adjustable.
To remove the shelves:
1. Remove all items from the
shelf.
2. Tilt the shelf up at the
front.
3. Lift the shelf up at the back
and bring the shelf out.
To replace the shelves:
1. While tilting the shelf up, insert the
top hook at the back of the shelf in
a slot on the track.
2. Lower the front of the shelf until
the bottom of the shelf locks into
place.
Adjustable Door Bins (on some models)
To remove: /LIWWKHELQVWUDLJKWXSWKHQSXOORXW
To replace: Engage the bin in the molded supports on
the door and push down to lock in place.
Non-Adjustable Gallon Door Bins (on some
models)
To remove: /LIWWKHELQVWUDLJKWXSWKHQSXOORXW
To replace: Engage the bin in the molded supports on
the door and push down to lock in place.
Not all features are on all models.
Quick Space Shelf (on some models)
This shelf splits in half
and slides under itself
for storage of tall items
on the shelf below.
This shelf can be
removed and replaced
or relocated.
NOTE: The back half of
the Quick Space Shelf is
not adjustable.
49-1000472 Rev. 6 17
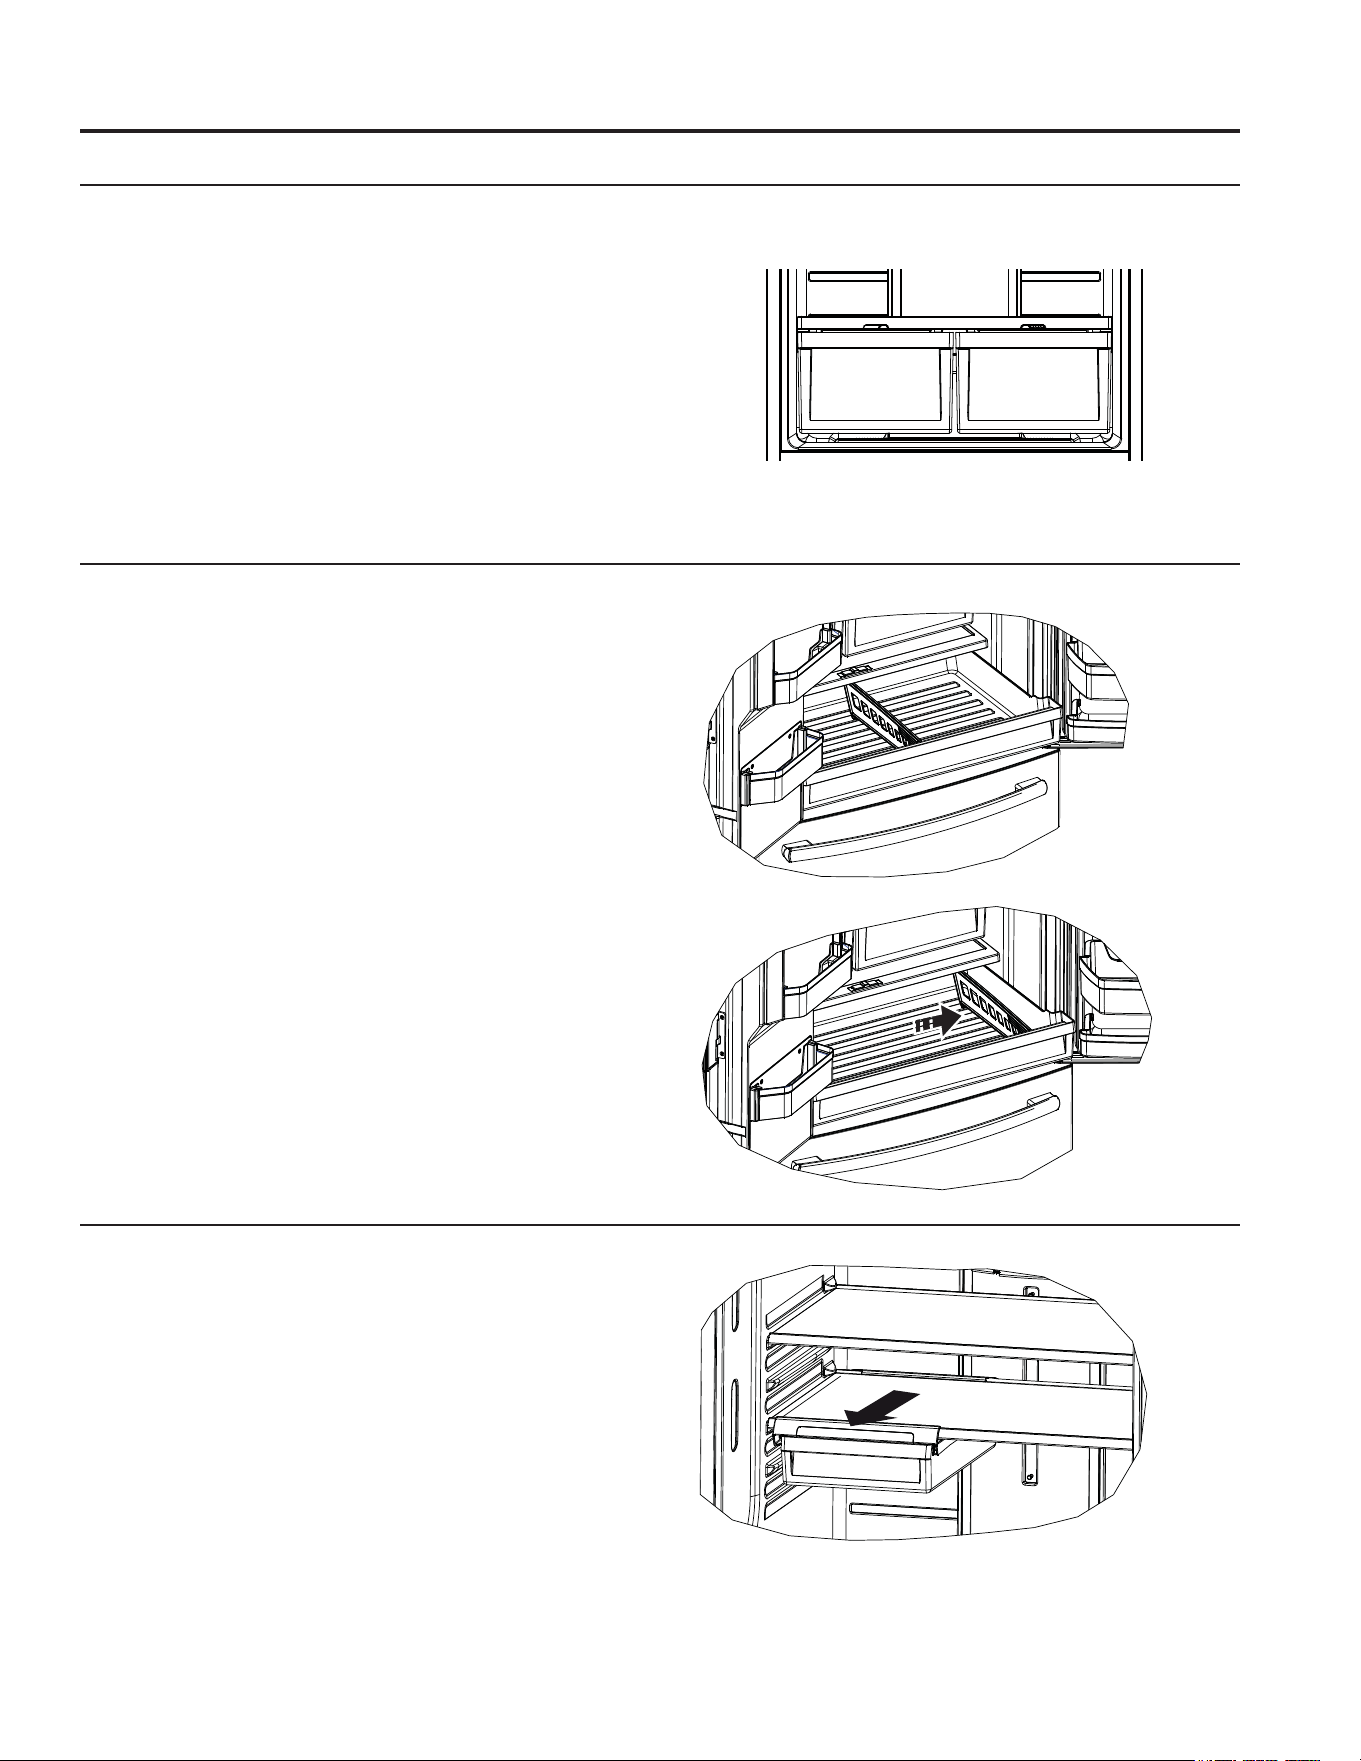
USING THE REFRIGERATOR: Pans
Pans
Climate Zone Pans
.HHSIUXLWVDQGYHJHWDEOHVRUJDQL]HGLQVHSDUDWH
compartments for easy access. Excess water that may
accumulate in the bottom of the drawers or under the
drawers should be wiped dry.
To remove pan:
Slide the pan out to the stop position, lift the pan up and
past the stop position and pull forward.
Floating Snack Pan (on some models)
This pan can be moved to the most useful location for
your family’s needs.
To remove, slide the pan out to the stop position, lift the
pan up and past the stop position and lift it out.
Full -Width Pan (on some models)
To remove pan:
1. Pull the pan out to the stop position.
2. Lift the front of the drawer up and out.
To replace pan:
1. Place back of the drawer in first and rotate drawer
front down to seat it on the slides.
2. Push the drawer in to the closed position.
How to Remove and Replace Drawer Divider
To remove:
1. Pull the drawer out to the stop position.
2. Slide pan divider to right to release it from pan.
To replace:
Reverse steps 1 and 2 to replace drawer divider.
Not all features are on all models.
18 49-1000472 Rev. 6
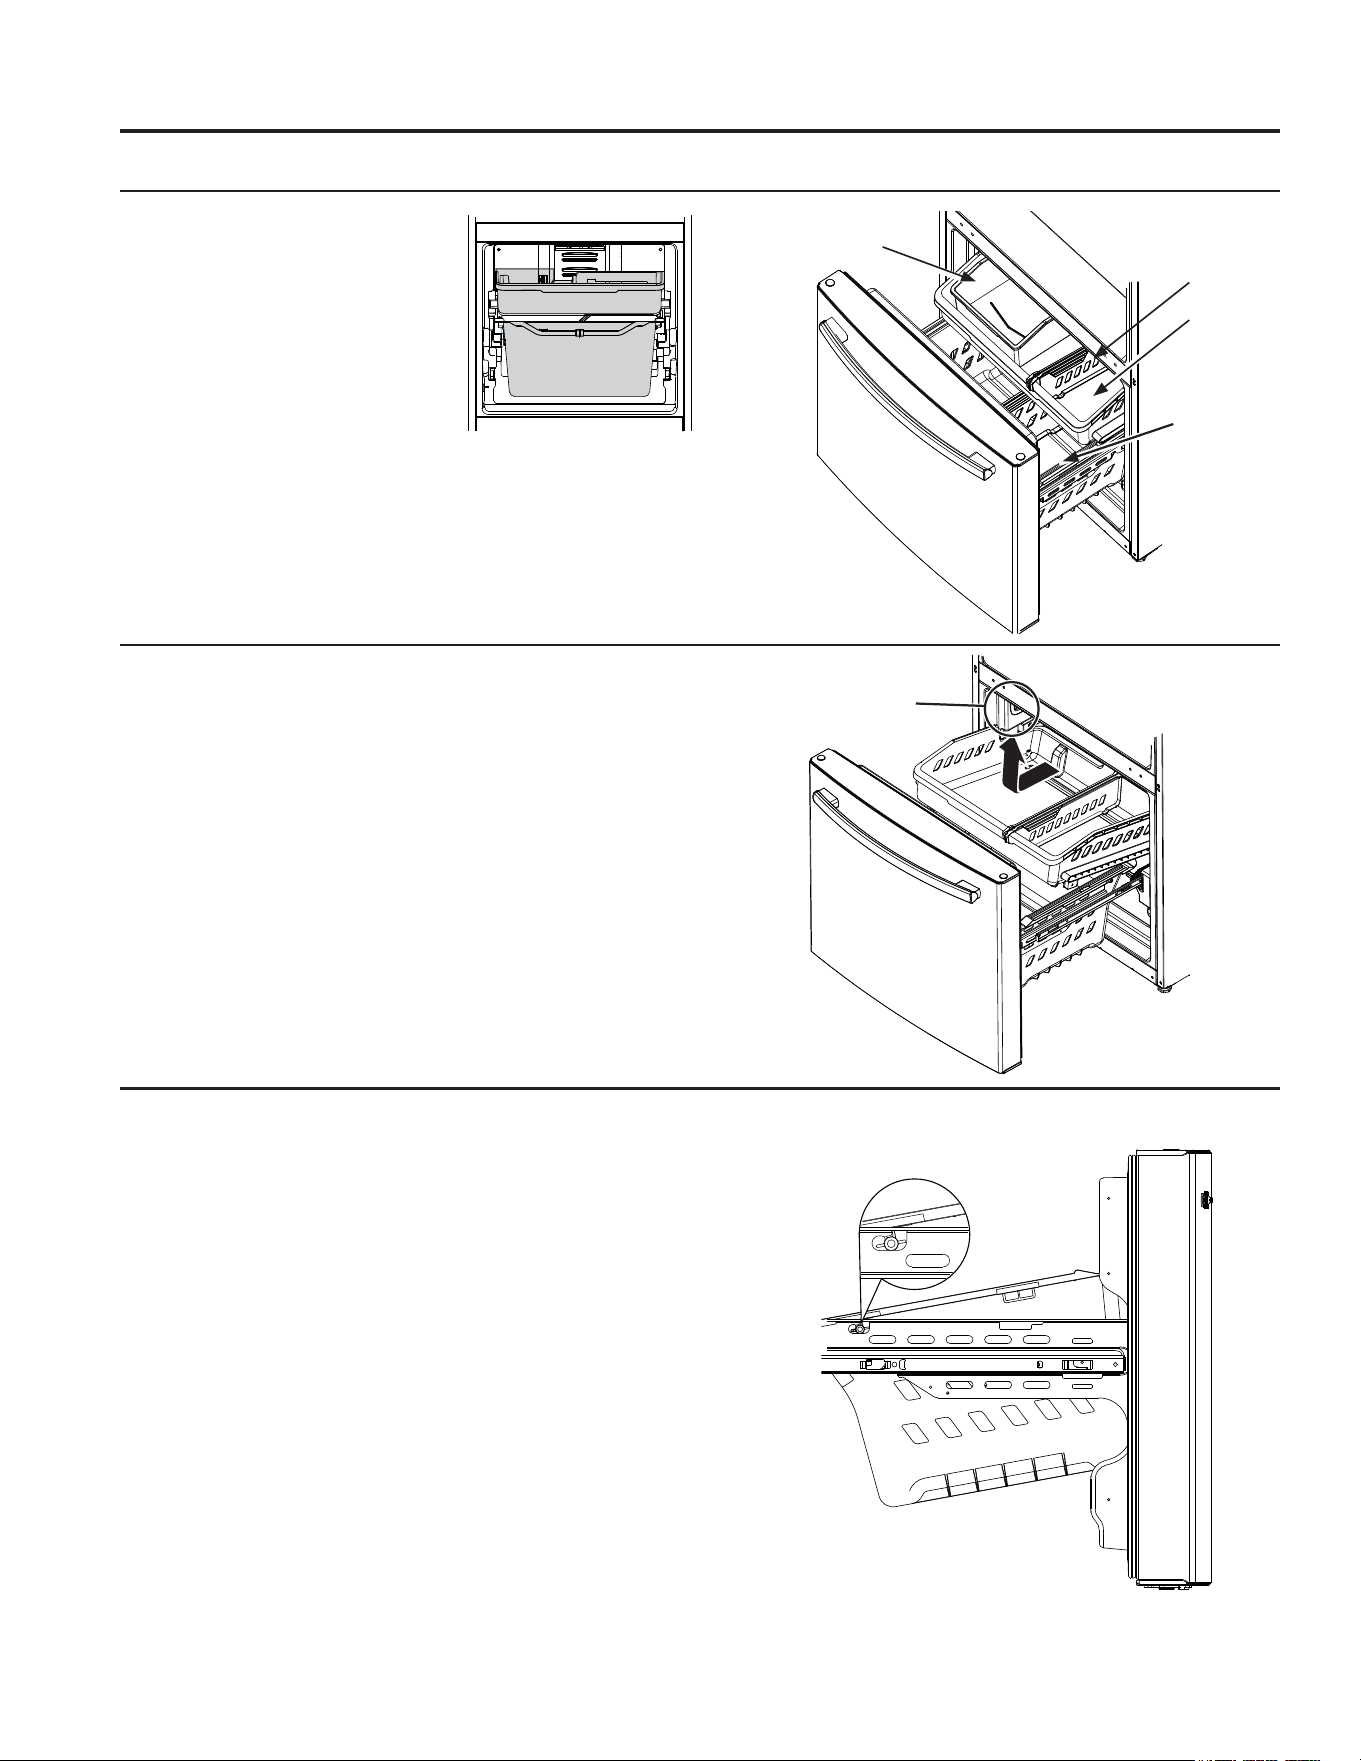
USING THE REFRIGERATOR:)UHH]HU'UDZHU
Freezer Drawer (on some models)
FREEZER BASKETS
1. An ice bucket in the top basket
(on some models).
2. A top full-width basket.
3. A bottom full-width basket (with
divider - in some models).
NOTE: 'RQRWILOOEDVNHWVKLJKHU
than the rim of the basket. This
may cause baskets to stick or jam
when opening or closing.
Top Basket Removal
To remove the top full-width basket on freezer
drawer models:
1. Pull the basket out to the stop location.
2. Lift basket up to release it from the slides.
When replacing the basket, make sure that the basket
remains mounted on the side rails and over the slides of
the bottom basket.
NOTE: Always be sure to fully close this basket.
Bottom Basket Removal
To remove the bottom full-width basket on freezer
drawer models:
2SHQWKHERWWRPIUHH]HUGUDZHUXQWLOLWVWRSV
5HPRYHWKHWRSIUHH]HUEDVNHW
7KHERWWRPIUHH]HUEDVNHWUHVWVRQWKHLQVLGHWDEVRQ
the drawer slides.
4. Lift the front of the basket and pull forward.
5. Release the pin from the slot to remove the basket.
When replacing the bottom full-width basket, tilt the
basket back and lower it into the drawer. Rotate the
EDVNHWWRDKRUL]RQWDOSRVLWLRQDQGSUHVVGRZQ0DNH
sure to place the pin back into the slot.
NOTE: Always be sure that the basket is seated on
the bracket tabs before sliding the drawer back into the
IUHH]HU
Not all features are on all models.
Appearance and features
may vary
1
2
3
,FH%XFNHW
(on some models)
/('OLJKWVDUHORFDWHGRQ
ERWKVLGHVRIWKHIUHH]HU
Top Basket
Top Basket
'LYLGHU
Bottom
Basket
49-1000472 Rev. 6 19
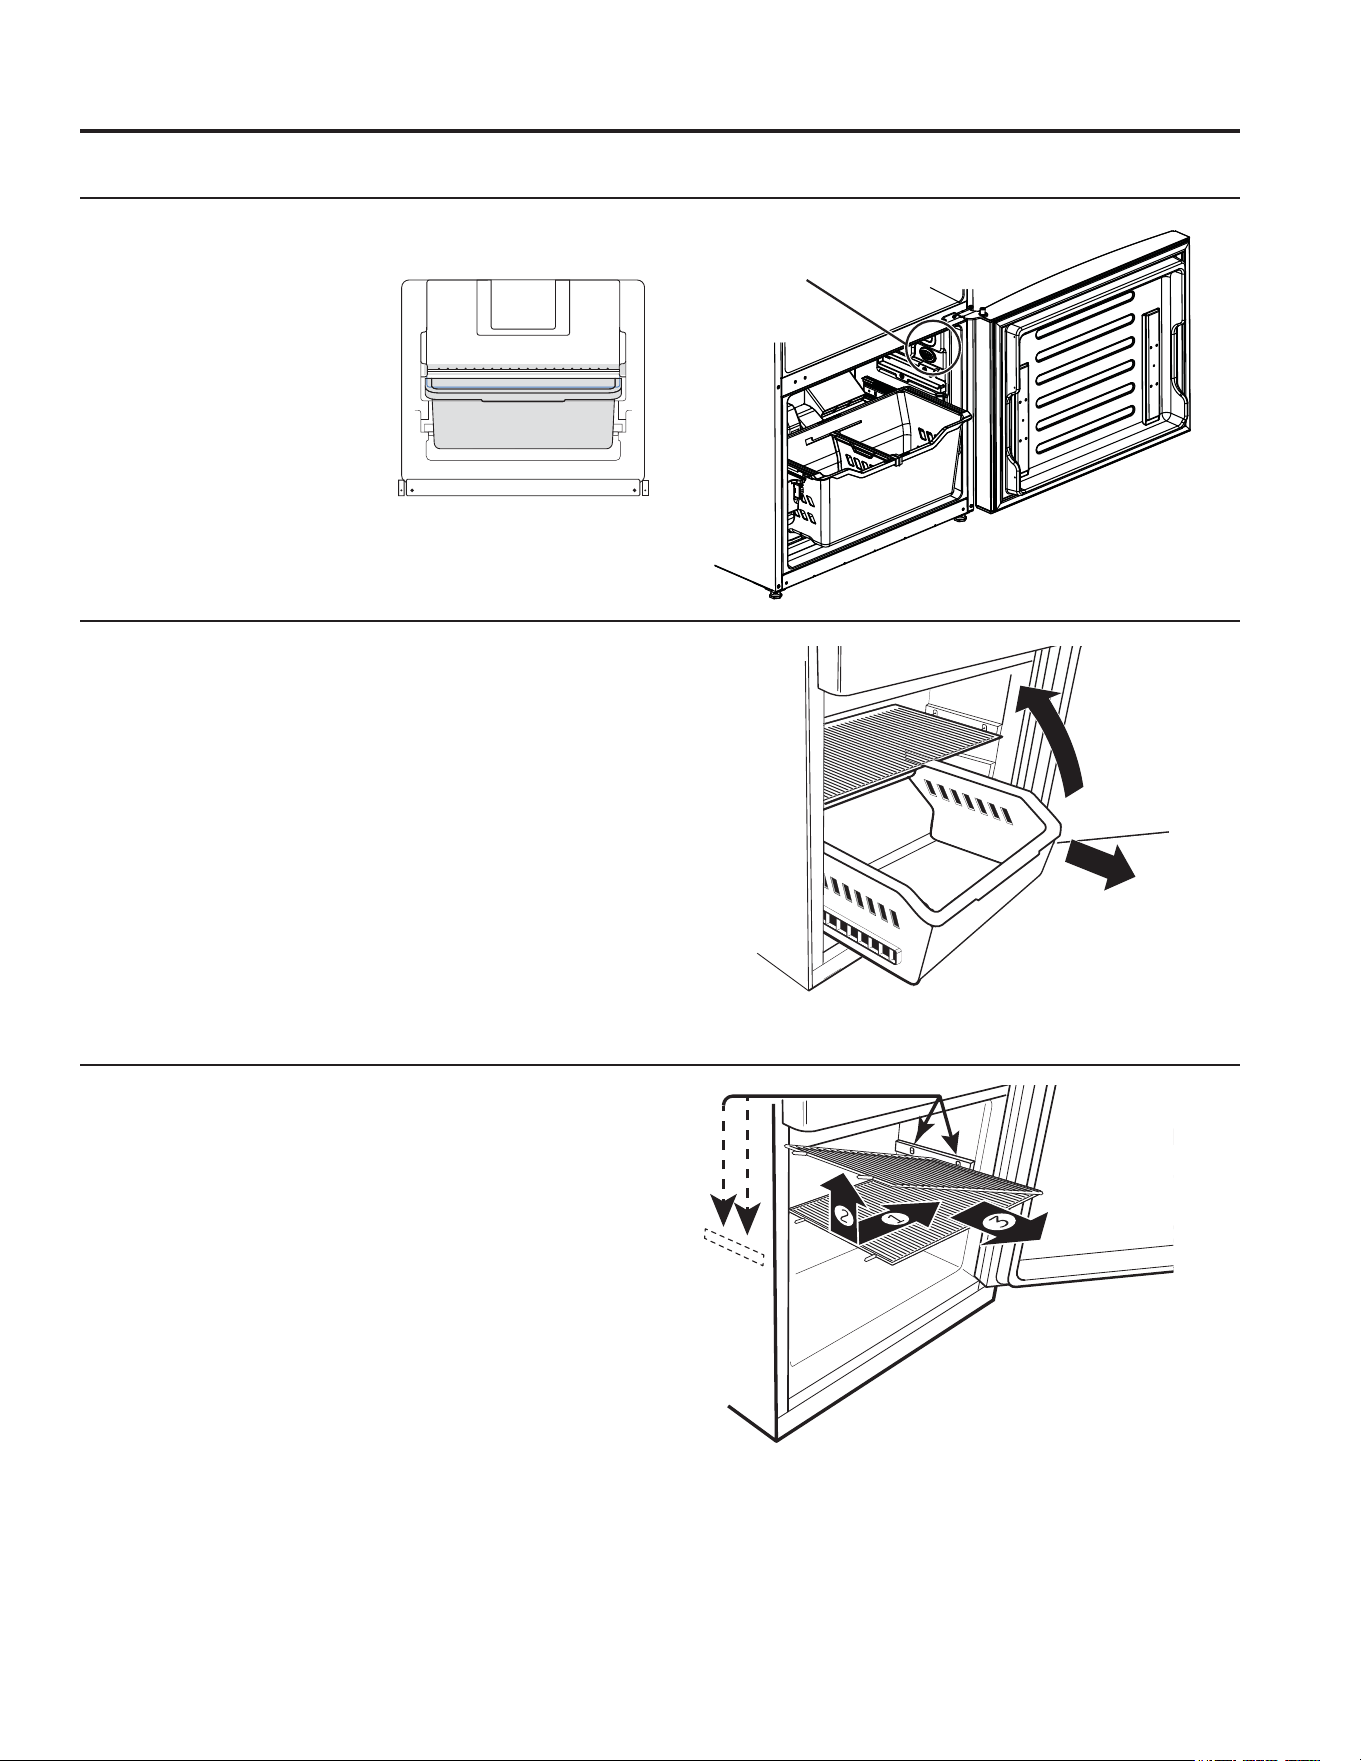
USING THE REFRIGERATOR:)UHH]HU&RPSDUWPHQW
Freezer Compartment
FREEZER SHELF AND BASKET
1. A full-width fixed wire shelf
2. A full-width sliding plastic
basket
NOTE: 'RQRWILOOEDVNHWV
higher than the rim. This may
cause basket to stick or jam
when opening or closing.
Basket Removal
To remove the full-width sliding basket on freezer
door models:
1. Open the basket out to its full extension.
2. Lift up the front of the basket and pull straight out to
remove.
When replacing the basket, insert the plastic basket
into the lower liner rails and push back into place.
Fixed Shelf Removal
NOTE: The full-width wire shelf is not intended to slide.
To remove for cleaning, push the shelf to one side
while then pull up on the opposite side and out to
remove.
To replace the full-width wire shelf, insert one side of
the shelf into the supports, pushing the shelf to that side
until the opposite side will fit into its supports.
Not all features are on all models.
1
2
/('OLJKWVDUHORFDWHG
on both sides of the
IUHH]HU
20 49-1000472 Rev. 6
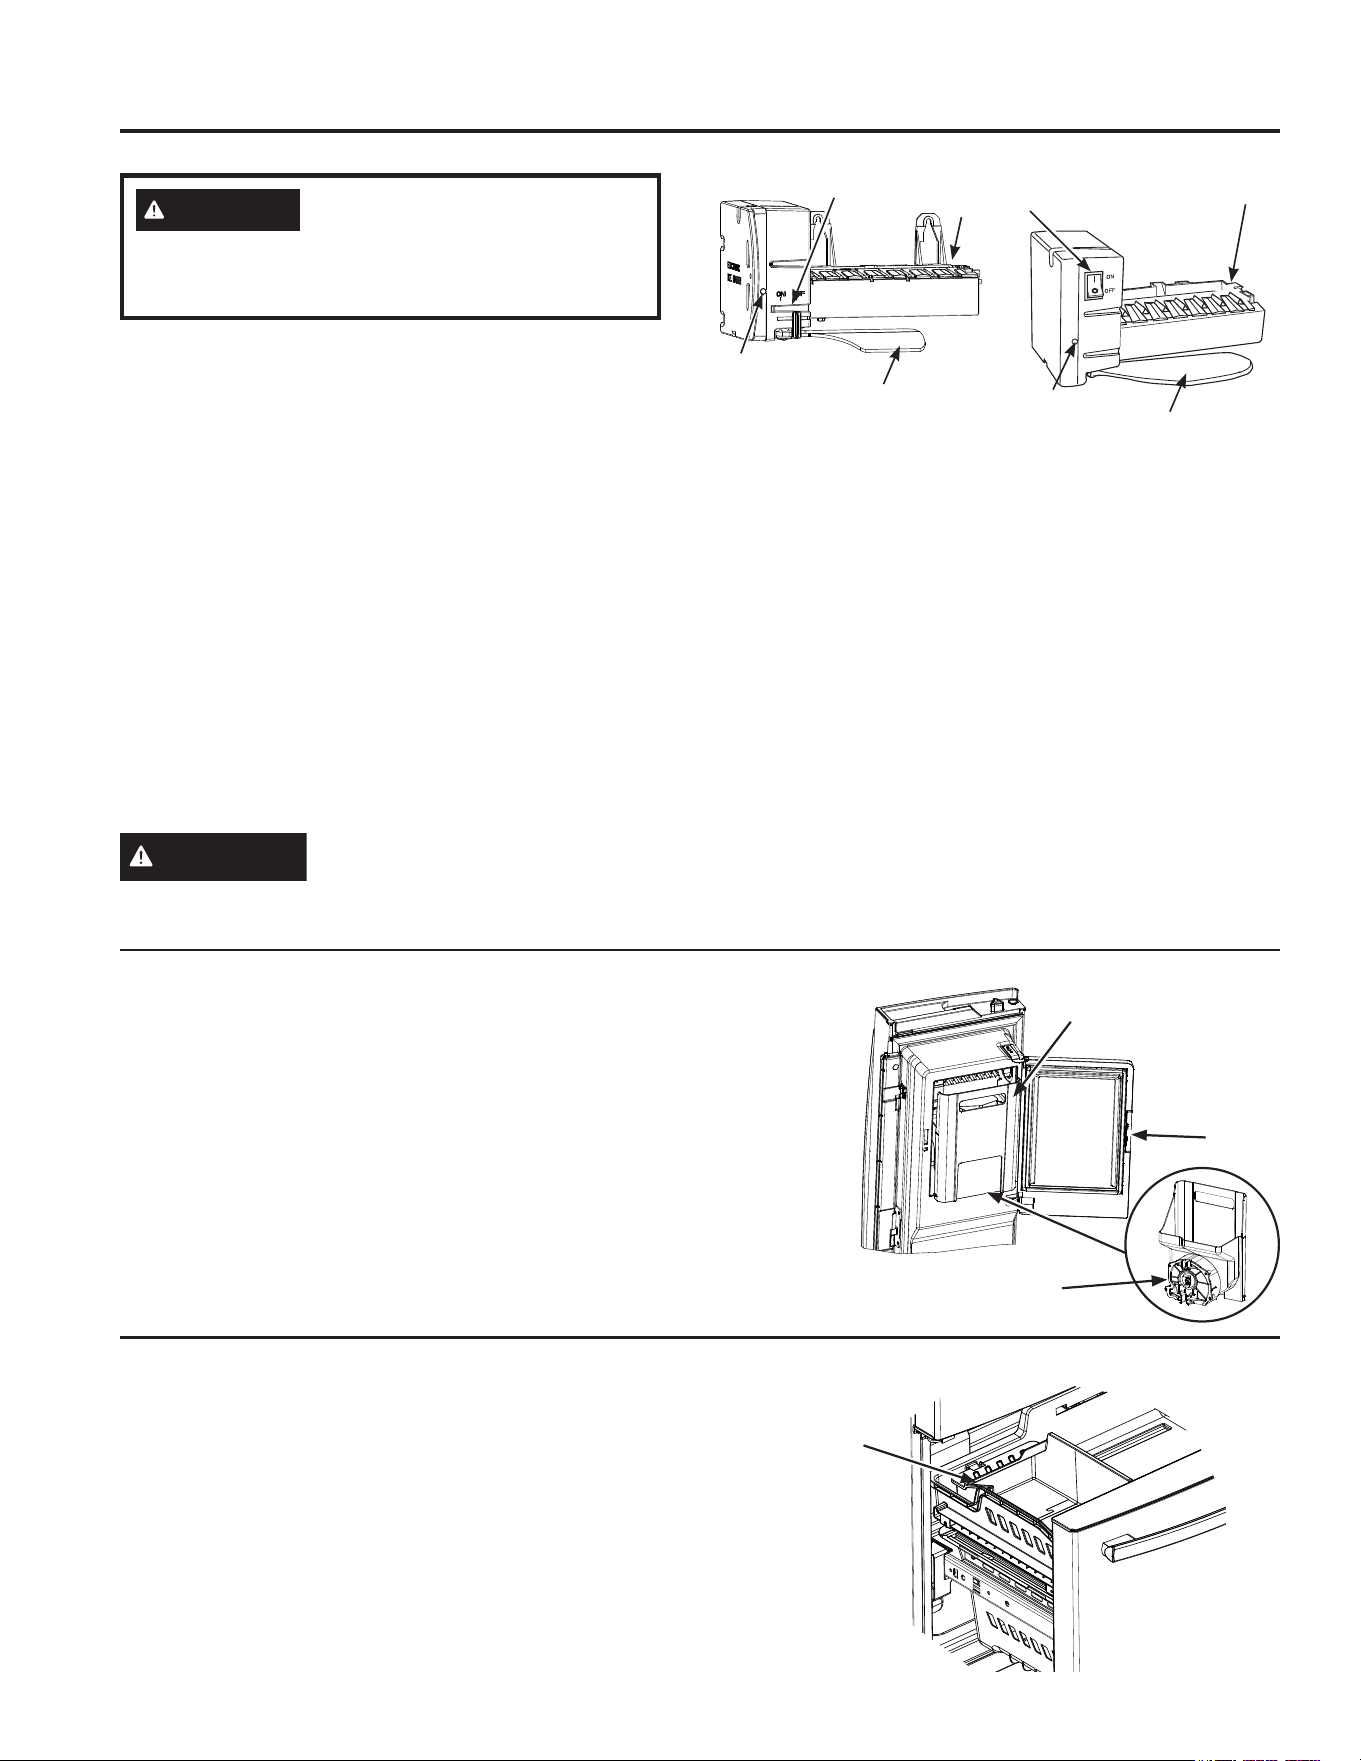
USING THE REFRIGERATOR: $XWRPDWLF,FHPDNHU
Automatic Icemaker
A newly installed refrigerator may take 12 to 24 hours to begin making ice.
Automatic Icemaker (on some models)
The icemaker will produce seven cubes per cycle
approximately 100–130 cubes in a 24-hour period,
GHSHQGLQJRQIUHH]HUFRPSDUWPHQWWHPSHUDWXUHURRP
temperature, number of door openings and other use
conditions.
,IWKHUHIULJHUDWRULVRSHUDWHGEHIRUHWKHZDWHUFRQQHFWLRQ
is made to the icemaker, set the switch in the OFF
position.
When the refrigerator has been connected to the water
supply, set the switch to the ON position.
7KHLFHPDNHUZLOOILOOZLWKZDWHUZKHQLWFRROVWR)
(–10°C). A newly installed refrigerator may take 12 to 24
hours to begin making ice cubes.
<RXPD\KHDUDEX]]LQJVRXQGHDFKWLPHWKHLFHPDNHU
fills with water.
Throw away the first few batches of ice to allow the
water line to clear.
Be sure nothing interferes with the sweep of the feeler
arm.
When the bin fills to the level of the feeler arm, the
LFHPDNHUZLOOVWRSSURGXFLQJLFH,WLVQRUPDOIRUVHYHUDO
cubes to be joined together.
,ILFHLVQRWXVHGIUHTXHQWO\ROGLFHFXEHVZLOOEHFRPH
cloudy, taste stale and shrink.
NOTE: ,QKRPHVZLWKORZHUWKDQDYHUDJHZDWHU
pressure, you may hear the icemaker cycle multiple
times when making one batch of ice.
For Refrigerator Models with Icemaker in the Door
Ice Bucket and Dispenser
• Open the ice box door on inside of the left door.
• Pull up and out on the ice bucket in the left hand door
to remove it from the compartment .
• To replace the ice bucket, set it on the guide brackets
and push until the ice bucket seats properly.
,IEXFNHWFDQQRWEHUHSODFHGURWDWHWKHLFHEXFNHWIRUN
1/4 turn clockwise.
,FHPDNHUFDQEHWXUQHGRQDQGRIIXVLQJWKLVGLVSOD\
(see Controls on pages 8 and 9.)
For Refrigerator Models with Icemaker in the Freezer Compartment
Some models come with an icemaker installed in the
IUHH]HUFRPSDUWPHQW)RUWKRVHPRGHOVWKDWFRPH
LFHPDNHUUHDG\\RXFDQSXUFKDVH.LW,0'Visit our
website at GEAppliances.com or call GE Appliances
Parts and Accessories, 877.959.8688 (in Canada
visit geappliances.ca/en/products/parts-filters-
accessories or call 1.800.661.1616).
7KHUHLVLFHVWRUDJHLQWKHIUHH]HUFRPSDUWPHQWORFDWHG
on the left side of the upper basket. Pull the upper basket
forward to remove the ice bucket.
CAUTION
7RPLQLPL]HWKHULVNRISHUVRQDOLQMXU\DYRLGFRQWDFWZLWKWKHPRYLQJSDUWVRIWKHHMHFWRU
PHFKDQLVPRUZLWKWKHKHDWLQJHOHPHQWWKDWUHOHDVHVWKHFXEHV'RQRWSODFHILQJHUVRUKDQGVRQWKHDXWRPDWLFLFH
making mechanism while the refrigerator is plugged in.
,FHEXFNHWIRUN
Latch
,FHEXFNHW
,FHEXFNHW
,FHPDNHU
)HHOHU$UP
Switch
Green
Power Light
,FHPDNHU
)HHOHU$UP
Switch
Green
Power Light
(on some models)
(on some models)
WARNING
Connect to potable water supply
only. A cold water supply is required for automatic
icemaker operation. The water pressure must be
between 40 and 120 psi (275-827 kilopascals).
49-1000472 Rev. 6 21
Care and Cleaning
Cleaning the Inside
Unplug the refrigerator before cleaning.
,IWKLVLVQRWSUDFWLFDOZULQJH[FHVVPRLVWXUHRXWRI
sponge or cloth when cleaning around switches, lights or
controls.
8VHDQDSSOLDQFHZD[SROLVKRQWKHLQVLGHVXUIDFH
between the doors.
8VHZDUPZDWHUDQGEDNLQJVRGDVROXWLRQ²DERXWD
tablespoon (15 ml) of baking soda to a quart (1 liter) of
ZDWHU7KLVERWKFOHDQVDQGQHXWUDOL]HVRGRUV5LQVHDQG
wipe dry.
To clean the inside metal panel, open the outer door
XVLQJWKH'RRULQ'RRU/DWFK&OHDQWKHSDQHOZLWKD
PLOGGHWHUJHQWDQGWKHQZLSHGU\ZLWKDVRIWFORWK'RQRW
use any stainless steel cleaner on the panel as it may
damage the surrounding plastic.
CAUTION
'RQRWFOHDQJODVVVKHOYHVRUFRYHUV
with warm water when they are cold. Glass shelves and
covers may break if exposed to sudden temperature
changes or impact such as bumping or dropping.
Tempered glass is designed to shatter into many small
pieces if it breaks.
CARE AND CLEANING
DO USE DO NOT USE
Soft, clean cloth or sponge
Microfiber cloth
Abrasive cloths, paper towels, scrubbing sponges (with or without soap),
scouring or steel wool pads
Mild detergent mixed with warm
water
Abrasive powders, liquids, or sprays
Window sprays, ammonia, or bleach
Citrus or plant oil-based cleaners
Acidic or vinegar-based cleaners
Oven cleaners
Alkaline cleaners
Stainless steel cleaners
DO NOT use Stainless Steel cleaners on the door surfaces.
IMPORTANT:7KHXVHRILQFRUUHFWSURGXFWVPD\GDPDJHWKHRXWHUILQLVKRI)LQJHUSULQW5HVLVWDQW6WDLQOHVVDQG
Black Stainless models. Please follow these instructions and use only the appropriate items below to clean your
appliance surfaces.
Ɣ&OHDQLQWHULRUH[WHULRUVXUIDFHVZLWKZDUPZDWHUPLOGVRDSRUGHWHUJHQWDQGDVRIWRUPLFURILEHUFORWKWRDYRLG
damage.
Ɣ:LSHWKHDSSOLDQFHVXUIDFHGU\ZLWKDVRIWFOHDQFORWKRUPLFURILEHUWRZHOWRDYRLGVWUHDNLQJRUZDWHUVSRWWLQJ
DO USE DO NOT USE
Soft, clean cloth or sponge Abrasive cloths, scrubbing sponges (with or without
soap), scouring or steel wool pads
Mild detergent mixed with warm water
$SSURYHGVWDLQOHVVVWHHOFOHDQHUV9LVLWWKH*(
Appliances parts store for approved stainless steel
cleaners: GEApplianceparts.com or call 877.959.8688
&OHDQHUVZLWKR[DOLFDFLGVXFKDV%DU.HHSHUV)ULHQG6RIW
Cleanser™ can be used to remove surface rust, tarnish
and small blemishes on stainless steel surfaces only.
Abrasive powders or sprays
Window Sprays or Ammonia
Citrus or plant oil-based cleaners
Acidic or vinegar-based cleaners
Oven cleaners
Cleaners containing acetone (propanone)
$Q\FOHDQHUZLWK:$51,1*DERXWSODVWLFFRQWDFW
NOTE: DO NOT allow stainless steel cleaner to come in contact with any plastic parts such as trim pieces, handle
KDUGZDUHDQGOLQHUV,IXQLQWHQWLRQDOFRQWDFWRIFOHDQHUVZLWKSODVWLFSDUWVGRHVRFFXUFOHDQSODVWLFSDUWZLWKD
sponge and mild detergent mixed with warm water.
STAINLESS STEEL - Outside surfaces, door handles, and trim
FINGERPRINT RESISTANT STAINLESS STEEL*, BLACK STAINLESS, SLATE, DARK
SLATE, PAINTED - Outside surfaces, door handles, and trim
Cleaning the Outside
*Easily wipe away smudges and fingerprints.
22 49-1000472 Rev. 6
CARE AND CLEANING
Care and Cleaning
Replacing the Lights
7KHUHLV/('OLJKWLQJLQWKHUHIULJHUDWRUFRPSDUWPHQW
at the top center and on the left and right sides above
WKHFOLPDWH]RQHSDQVRQWKHIUHQFKGRRUPRGHOV
/('OLJKWLQJLVORFDWHGDWWKHWRSRIWKHUHIULJHUDWRU
compartment on the single door models.
/('OLJKWVDUHDOVRORFDWHGDWWKHWRSRIWKHOHIWDQGULJKW
VLGHVRIWKHIUHH]HULQDOOPRGHOV
$QDXWKRUL]HGWHFKQLFLDQZLOOQHHGWRUHSODFHWKH/('
light.
,IWKLVDVVHPEO\QHHGVWREHUHSODFHGFDOO*(
$SSOLDQFHV6HUYLFHDWLQWKH8QLWHG
States or 1.800.561.3344 in Canada.
/('VORFDWLRQV
may vary by
model)
Preparing to Move
Secure all loose items such as shelves and drawers by
taping them securely in place to prevent damage.
When using a hand truck to move the refrigerator, do not
rest the front or back of the refrigerator against the hand
truck. This could damage the refrigerator.
Handle only from the sides of the refrigerator.
Be sure the refrigerator stays in an upright position
during moving.
Preparing for Vacation
)RUORQJYDFDWLRQVRUDEVHQFHVUHPRYHIRRGDQG
unplug the refrigerator. Clean the interior with a baking
soda solution of one tablespoon (15 ml) of baking soda
to one quart (1 liter) of water. Leave the doors open.
,IWKHWHPSHUDWXUHFDQGURSEHORZIUHH]LQJKDYHD
qualified service technician drain the water supply
system to prevent serious property damage due to
flooding.
1) Turn refrigerator off (pages 8 and 9) or unplug the
refrigerator.
2) Empty ice bucket
3) Turn water supply off
If you cut the water supply off, turn off the icemaker
(pg. 20).
8SRQUHWXUQLQJIURPYDFDWLRQ
1) Replace the water filter.
2) Run 2 gallons of water through the cold water
dispenser (about 5 minutes) to flush the system.
Behind the Refrigerator
Be careful when moving the refrigerator away from
the wall. All types of floor coverings can be damaged,
particularly cushioned coverings and those with
embossed surfaces.
Raise the leveling legs located at the bottom front of the
refrigerator.
Pull the refrigerator straight out and return it to position
by pushing it straight in. Moving the refrigerator in a side
direction may result in damage to the floor covering or
refrigerator.
Lower the leveling legs until they touch the floor.
When pushing the refrigerator back, make sure you
don’t roll over the power cord or water supply line.