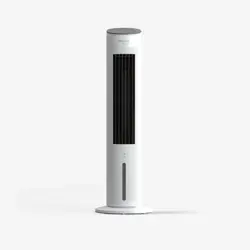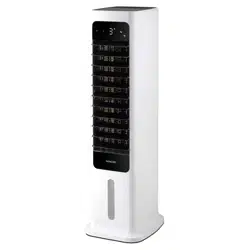
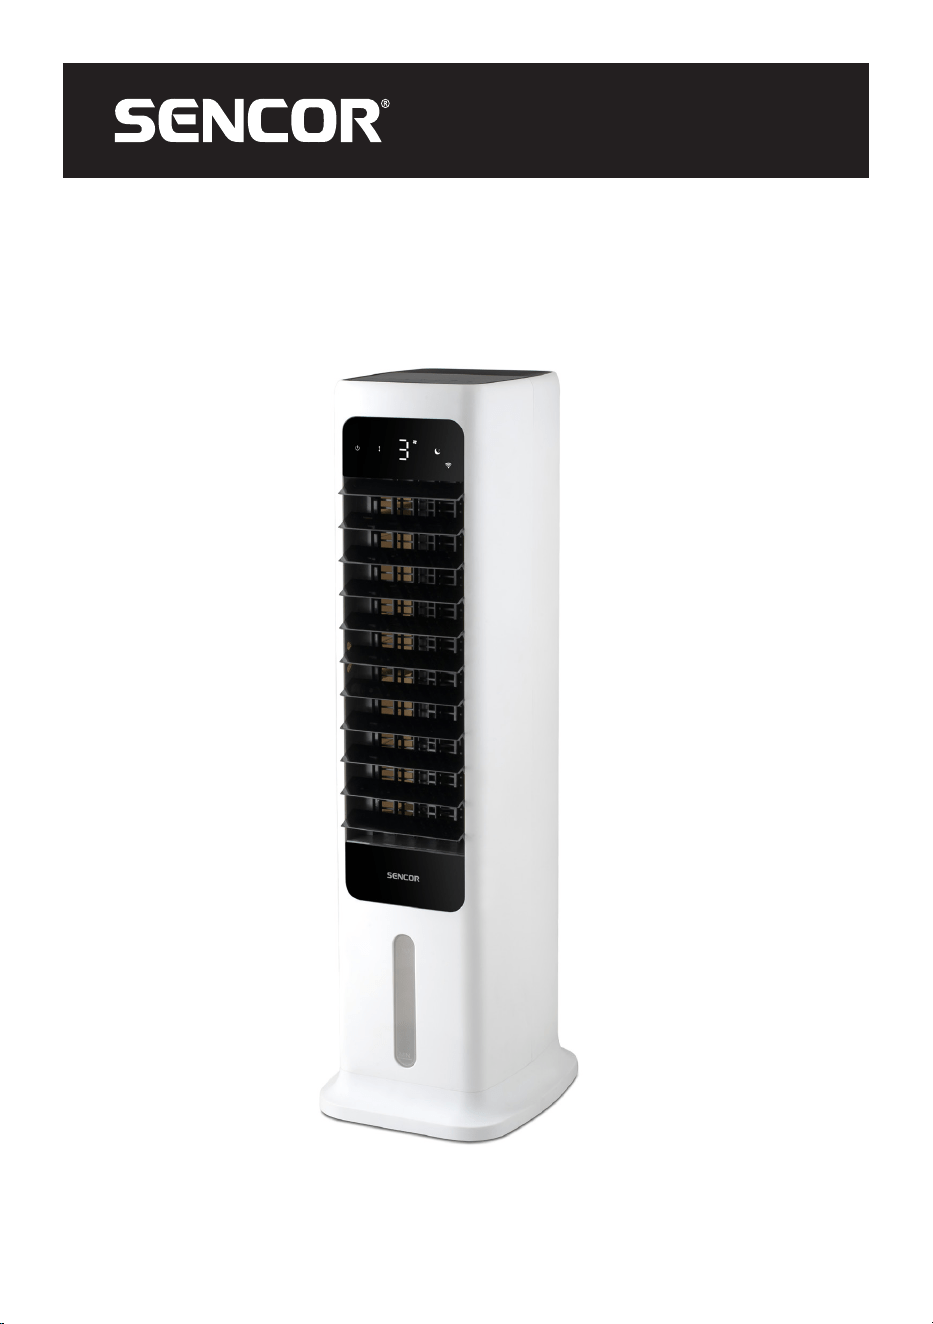
SFN 9025WH
EN
SMART TOWER AIR COOLER
Translation of the original manual
SFN 9025WH
A
1
2
3
4
5
7
9
10
11
14
8
15
12
13
6
B
1 2 3 4 5 6 7
C
1 2 3 4 5 6 7
10 11
8 9
D
1
2
3
4
5
6
7
8
E
E1 E2
E
E4
MAX
MIN
E3
F

- 1 -
12/2024
2024, .
EN
Smart Tower Air Cooler
User Manual
Important Safety Instructions
READ CAREFULLY AND STORE FOR FUTURE USE.
• This appliance may be only used by children aged 8
years and older and by persons with physical, sensory or
mental impairments or lack of experience and knowledge,
if they are supervised or have been instructed on the safe
use of the appliance and understand the potential hazards.
• Children must not play with the appliance. Cleaning and
maintenance must not be performed by children without
supervision.
• If the power cord is damaged, have it replaced in
aprofessional service centre in order to prevent
adangerous situation. It is forbidden to use the appliance
with the power cord damaged.
• The water tank is marked with minimum andmaximum
level lines. Always make sure that the water reaches
at least the minimum mark. Never fill the tank over the
maximum level line.
• Pay attention when using the appliance as it produces
steam.
• Disconnect the appliance by pulling the plug from the
socket before filling or cleaning.
• High humidity values can promote the growth of biological
organisms in theenvironment.
• Do not allow the area around the appliance to become
damp or wet. If there is increased humidity (dew),
AIR COOLER

- 2 -
12/2024
2024, .
switch the appliance to alower power. If the power of
the appliance cannot be reduced, use the appliance
intermittently. Do not allow absorbent materials, such as
carpets, curtains, drapes or tablecloths to become damp.
• Never leave water in the appliance if not in use.
• Empty andclean the appliance before storing. Clean the
appliance before further use.
• The appliance is designed for use in household, office and
similar types of areas. It is not intended for commercial
purposes.
• Do not use the appliance in rooms where flammable or
explosive chemicals are stored, in industrial environments
or outdoors.
• Place the appliance only on aclean, flat, dry, smooth and
stable surface. Do not place the appliance on unstable
surfaces such as carpets with very long and thick fibres.
• Do not place the appliance in the vicinity of an open flame
or appliances that are sources of heat.
• Do not use the appliance to support various items.
Clean the water tank every 3 days.
. . . . . . . . . . . . . . . . . . . . . . . . . . . . . . . . . . . . . . . . . . . . . . . . . . . . . . . . . . . . . . . . . . . . . . . . . . . . . . . . . . . . . . . . . . . . . . . . . . . . . . . . . . . . . . . . . . . . . . . . . . . . . . . . . . . . . . . . . . . .
Additional Important Safety Instructions forUse of the Appliance
• Before connecting the appliance to apower socket, check that the nominal voltage on the appliance'srating label matches the electrical voltage in
the socket.
• Connect the appliance only to agrounded power socket. The power socket to which you connect the appliance must be freely accessible so that it is
possible to quickly disconnect the power cord from the power source if necessary.
• Install the power cord in such away that it is not tripped over.
• If the appliance is equipped with castors, take extra care when handling it, e.g. to prevent it from falling down stairs or sliding off asloping surface. To
avoid tipping the appliance over, do not try to roll the castors over the carpet.
• Do not touch an appliance that is connected to the mains socket with wet hands.
• Do not use the appliance near ashower, swimming pool, etc., do not spray water or any other liquid on it or submerge it in water or any other liquid.
• Do not cover the air inlet or outlet openings or insert objects into them. This could damage the appliance.
• Adequate space must be provided for air circulation around the appliance during operation.
• Do not use the appliance without the water or dust filter properly installed.
• Only fill the tank with clean, cold water. Do not add any other additives such as air fresheners, essential oils, etc. to the appliance. Otherwise damage
to the appliance may occur. Do not fill the tank above the maximum level line.
- 3 -
12/2024
2024, .
• Before operating the appliance in cooling and humidifying mode, make sure that the water level in the tank is at least at the minimum level.
• Use the appropriate button on the control panel or remote control to switch off the appliance. Do not switch off the appliance by disconnecting the
power cord from the socket.
• For health reasons, do not expose yourself or animals to direct cold air for long periods of time.
• Always switch off and unplug the appliance before assembling or disassembling it when not in use, before filling, cleaning or moving it.
• Perform the cleaning in accordance with the instructions in the Cleaning and maintenance chapter.
• Move, store and transport the appliance in an upright position.
• Do not attempt to remove the outer case of the appliance.
• Unplug the appliance from the power socket by pulling the plug, not the power cord. Otherwise, damage to the power cable or the socket may occur.
• Do not use the appliance if it is not working correctly, if it has been damaged or has been submerged in water. To avoid the danger of injury by
electrical shock, do not repair the appliance yourself or make any adjustments to it. All repairs should be carried out by an authorised service centre.
Tampering with the appliance may result in the loss of your legal rights regarding faulty performance or warranty for quality.
. . . . . . . . . . . . . . . . . . . . . . . . . . . . . . . . . . . . . . . . . . . . . . . . . . . . . . . . . . . . . . . . . . . . . . . . . . . . . . . . . . . . . . . . . . . . . . . . . . . . . . . . . . . . . . . . . . . . . . . . . . . . . . . . . . . . . . . . . . . .
EXPLANATION OF SYMBOLS PLACED ON THE PRODUCT OR INTHE ACCOMPANYING DOCUMENTATION
The product meets all the basic requirements of the applicable EU directives.
This symbol on products or original documents means that used electric or electronic products must not be added to ordinary municipal
waste.
Safety Class for Electric Shock Protection:
Class II – Electric shock protection is provided by double or heavy-duty insulation.
DISPOSAL OF USED BATTERIES
Batteries contain environmentally damaging compounds and therefore do not belong in standard municipal waste. Take used batteries for
proper disposal at adesignated battery collection point.
. . . . . . . . . . . . . . . . . . . . . . . . . . . . . . . . . . . . . . . . . . . . . . . . . . . . . . . . . . . . . . . . . . . . . . . . . . . . . . . . . . . . . . . . . . . . . . . . . . . . . . . . . . . . . . . . . . . . . . . . . . . . . . . . . . . . . . . . . . . .
- 4 -
12/2024
2024, .
• Thank you for purchasing our SENCOR product; we hope it will serve
to your satisfaction.
• Prior to using this appliance, please read the user manual thoroughly,
even in cases when you are already familiar with the use of similar
types of appliances. Use the appliance only as described in this
user manual. Keep the manual for future reference. If you pass the
appliance on to another person, ensure that this user manual is
included.
• Carefully unpack the appliance and make sure not to discard any part
of the packaging material until you have found all its components. It
is recommended to keep the original packaging, packing material,
receipt and confirmation of the extent of the seller'sliability or warranty
certificate at least for the duration of the legal right of defective
performance or quality guarantee. When transporting the appliance,
we recommend packaging it again in the original box provided by the
manufacturer.
. . . . . . . . . . . . . . . . . . . . . . . . . . . . . . . . . . . . . . . . . . . . . . . . . . . . . . . . . . . . . . . . . . . .
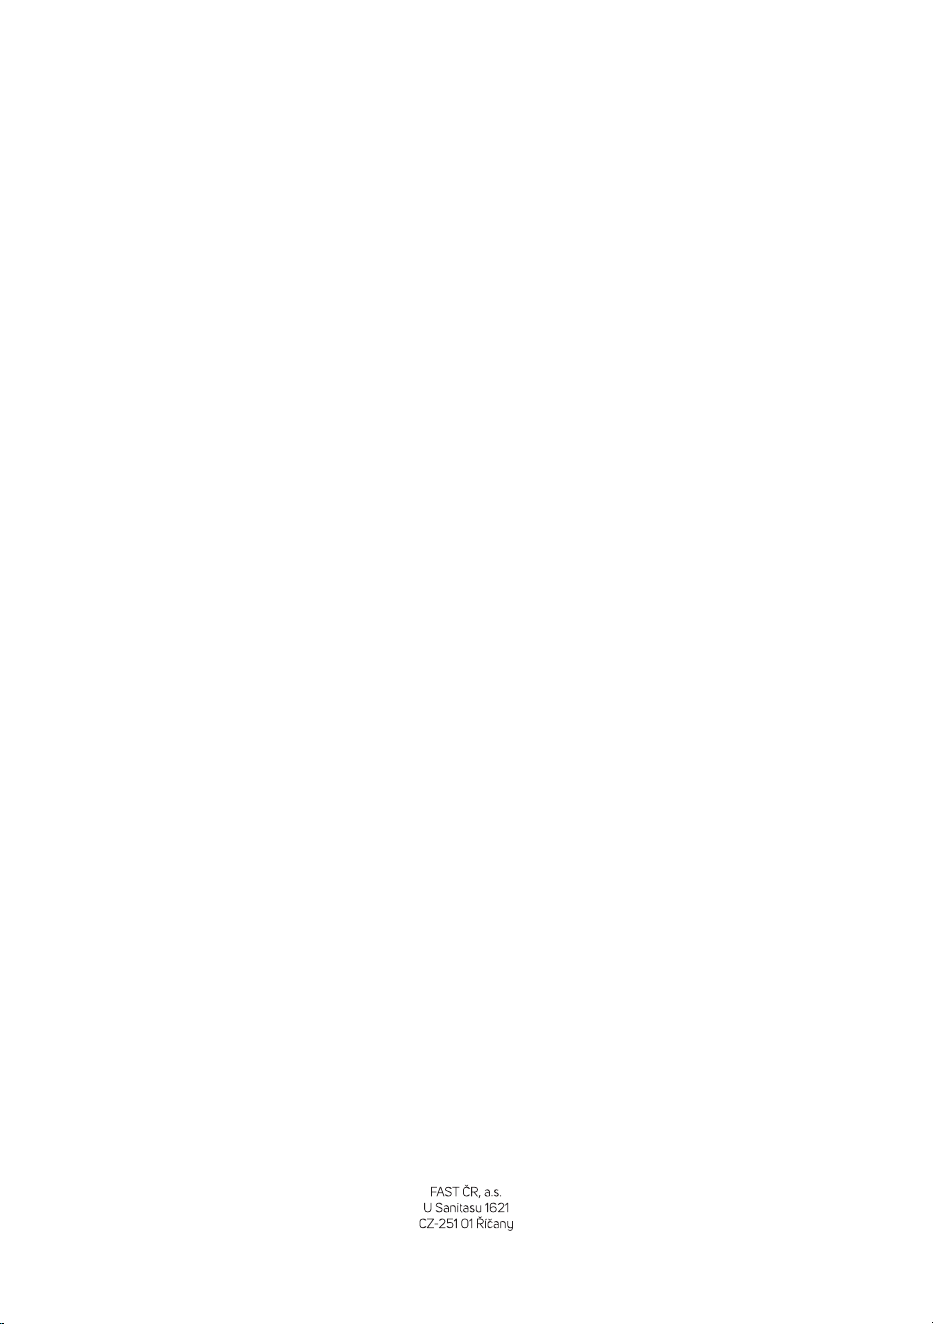
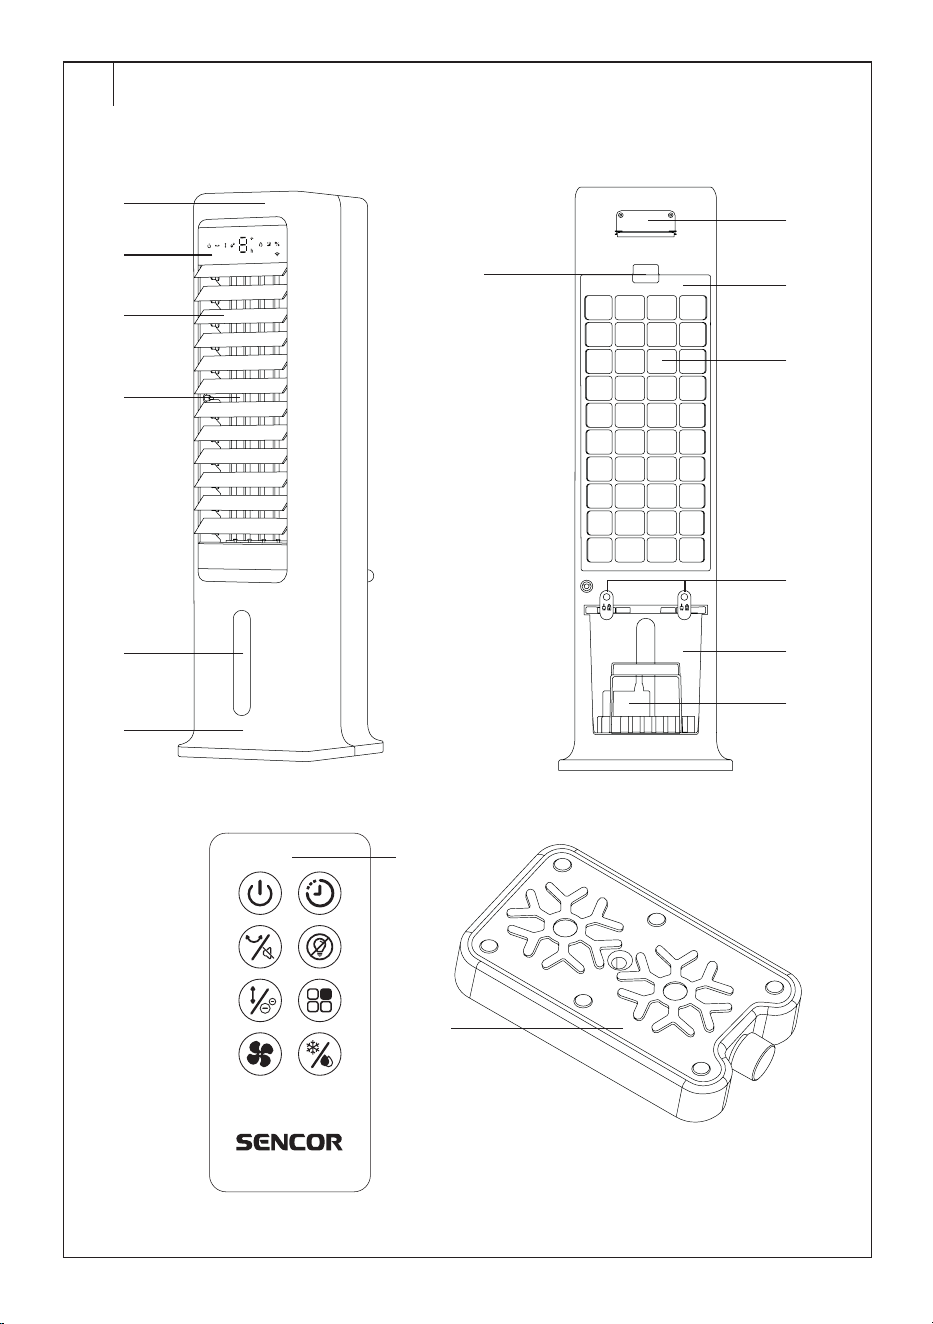
DESCRIPTION OF THE APPLIANCE
A1 Control panel
A2 Display
A3 Movable horizontal slats
A4 Movable vertical slats (located
inside)
A5 Water level indicator with MIN
and MAX marks
A6 Cooler base
A7 Handle / storage space for the
remote control
A8 Latch to release the rear grille
A9 Rear grille
A10 Filter (located behind the rear
grille)
A11 Water tank swivel lock
A12 Removable water tank
A13 Pump
A14 Remote control
A15 Cooling boxes (2 pcs)
. . . . . . . . . . . . . . . . . . . . . . . . . . . . . . . . . . . . . . . . . . . . . . . . . . . . . . . . . . . . . . . . . . . .
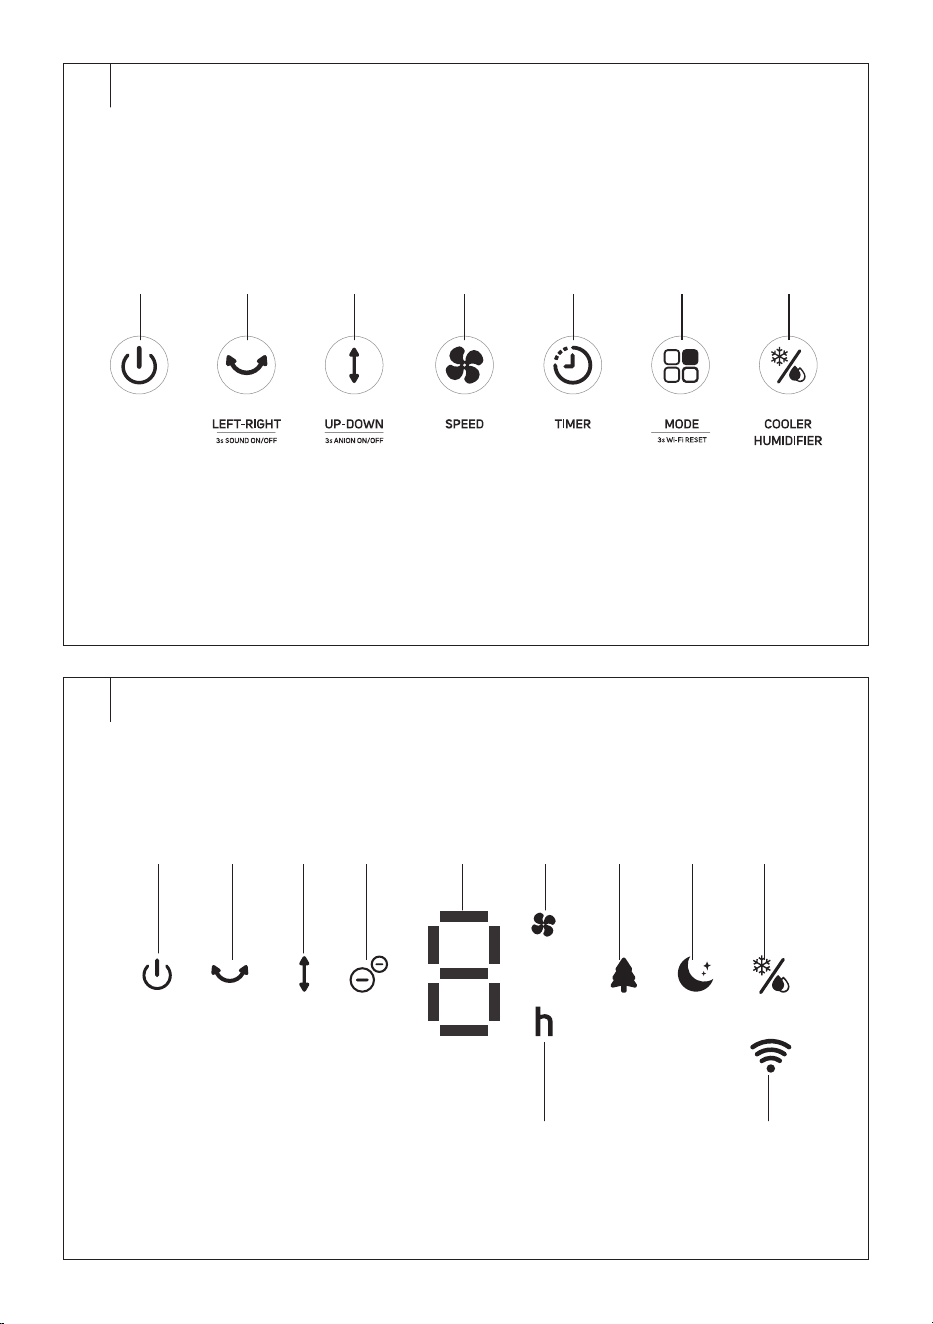
DESCRIPTION OF THE CONTROL PANEL
B1 On/Off button
B2 Button tomove the
vertical slats to the left and
to the right; switch the sound
alert on/off (press for 3 s)
B3 Button tomove the
horizontal slats up anddown;
activate/deactivate the
ionisation function (press for 3
s)
B4 Button to adjust fan speed
B5 Button to set the timer
B6 Button toselect the
operating mode; reset Wi-Fi
(press for 3 s)
B7 Cooling andhumidifying
mode selection button
. . . . . . . . . . . . . . . . . . . . . . . . . . . . . . . . . . . . . . . . . . . . . . . . . . . . . . . . . . . . . . . . . . . .
DESCRIPTION OF THE DISPLAY
C1 On/Off icon
C2 Vertical slats movement
icon
C3 Horizontal slats movement
icon
C4 Ionisation icon
C5 Numeric display
C6 Fan icon
C7 Natural breeze mode icon
C8 Sleep mode icon
C9 Cooling and humidifying
mode icon
C10 Timer on icon
C11 Wi-Fi icon
. . . . . . . . . . . . . . . . . . . . . . . . . . . . . . . . . . . . . . . . . . . . . . . . . . . . . . . . . . . . . . . . . . . .
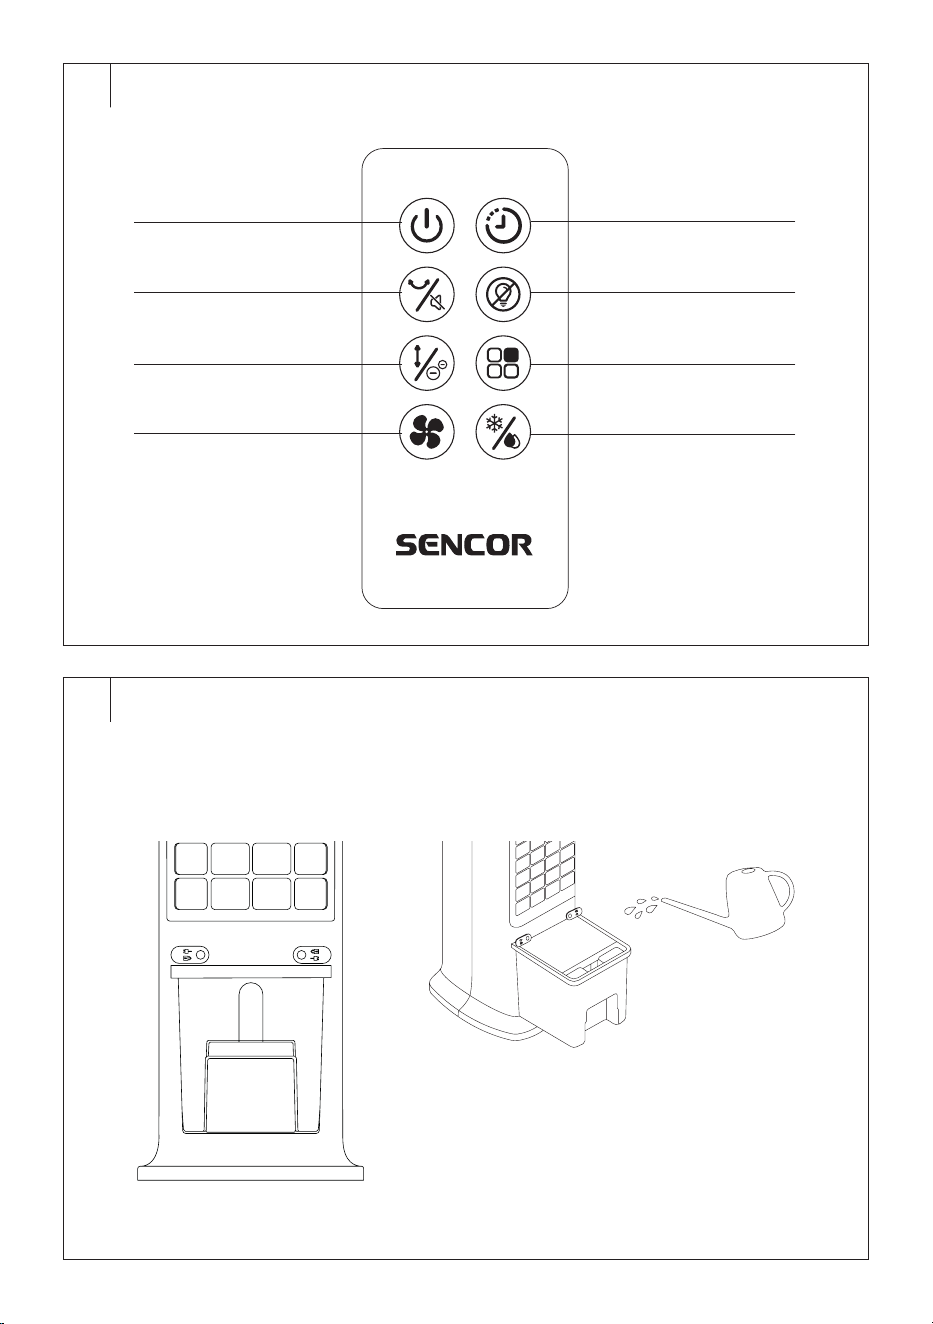
REMOTE CONTROL DESCRIPTION
D1 On/Off button
D2 Button tomove the
vertical slats to the left and
to the right; switch the sound
alert on/off (press for 3 s)
D3 Button tomove the
horizontal slats up anddown;
activate/deactivate the
ionisation function (press for 3
s)
D4 Button to set the fan speed
D5 Button to set the timer
D6 Button to switch the
control panel on/off
D7 Button toselect the
operating mode
D8 Cooling andhumidifying
mode selection button
. . . . . . . . . . . . . . . . . . . . . . . . . . . . . . . . . . . . . . . . . . . . . . . . . . . . . . . . . . . . . . . . . . . .
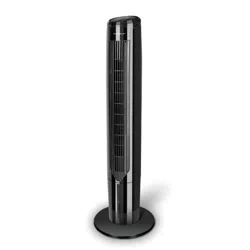
PURPOSE OF USE
• The air cooler is designed to cool the air in the room. The warm air is
drawn in at the rear of the cooler, passes through acooling insert that
cools and humidifies it, and is then discharged into the surroundings
via afan at the front.
• The air cooler can be connected to the SENCOR Home app on
your smart mobile phone, so you can control it remotely directly via
theapp.
. . . . . . . . . . . . . . . . . . . . . . . . . . . . . . . . . . . . . . . . . . . . . . . . . . . . . . . . . . . . . . . . . . . .
BEFORE FIRST USE
• Before first use, remove the appliance and its accessories form the
packaging and discard all promotional labels and tags. Check that
neither the appliance nor any of its components is damaged.
• Remove the water tank from the back of the air cooler. Wipe the tank
with asoft sponge slightly dampened with warm water and neutral
detergent. Wipe dry with aclean cloth. Place the tank back into the
air cooler.
. . . . . . . . . . . . . . . . . . . . . . . . . . . . . . . . . . . . . . . . . . . . . . . . . . . . . . . . . . . . . . . . . . . .
INSTALLATION
• Locate the appliance on an even, dry and stable surface within reach
of aproperly grounded power socket.
• Toensure sufficient air circulation, leave aclear space of at least 30
cm on all sides of the appliance.
. . . . . . . . . . . . . . . . . . . . . . . . . . . . . . . . . . . . . . . . . . . . . . . . . . . . . . . . . . . . . . . . . . . .
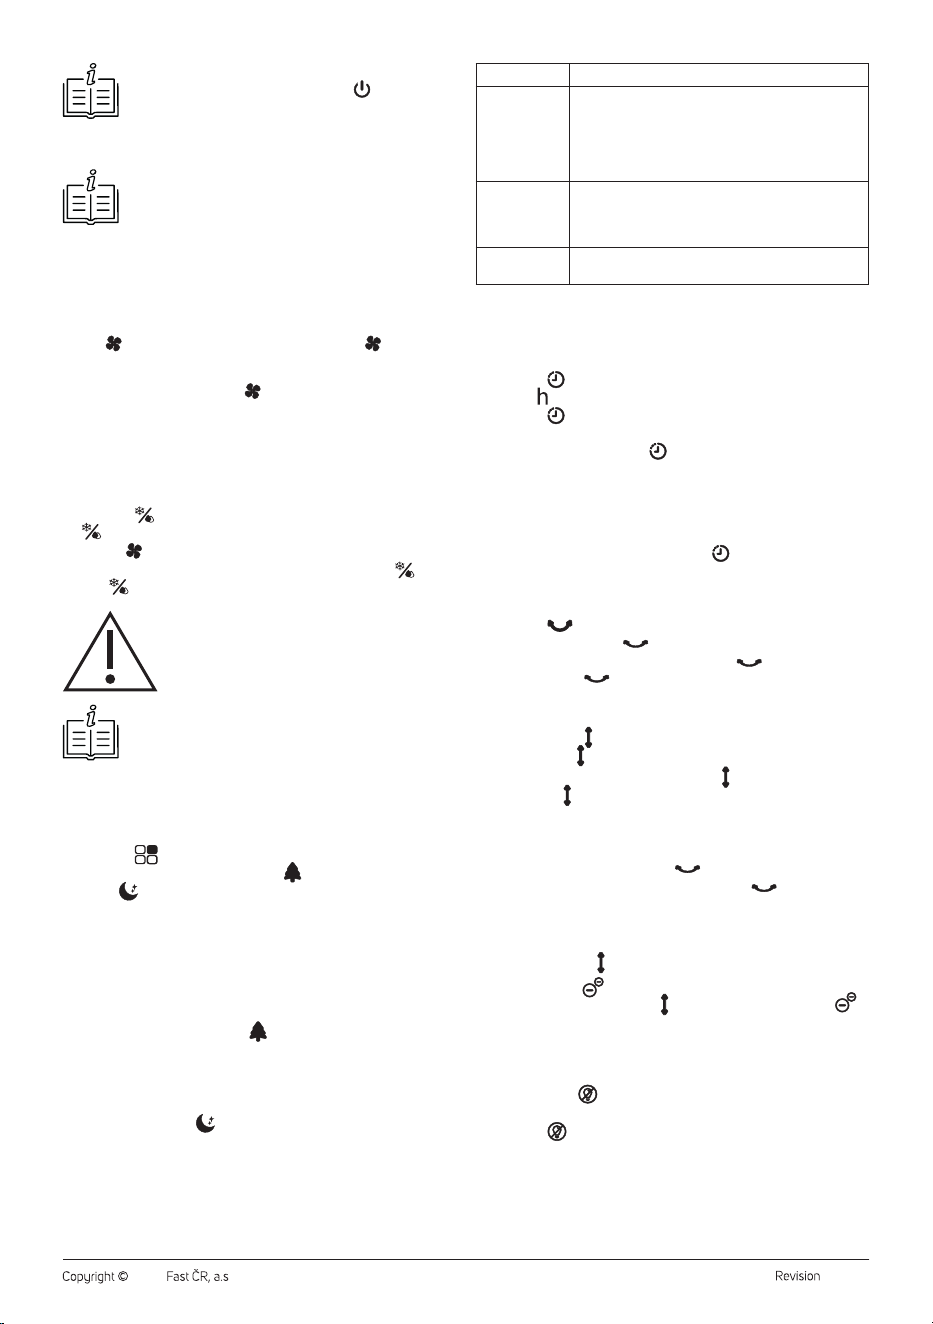
OPERATING THE APPLIANCE
Commissioning
• Fully unwind the power cord and connect the power cord plug in the
mains socket. An audible warning sounds and the air cooler switches
to standby mode.
Switching the Appliance On/Off
• Press the button briefly to switch the air cooler on. It will start by
default:
- Low fan speed (the fan mode icon is on; “1” will appear on the
display).
- Normal operating mode (no operating mode icon on).
- Other icons on the display are off.
• The horizontal slats will open automatically.
• Toswitch off the air cooler, press the button. An audible warning
sounds and the air cooler switches to standby mode. The horizontal
slats will close automatically. To switch off completely, disconnect
from the mains socket.
EN
Smart Tower Air Cooler
User Manual
- 5 -
12/2024
2024, .
Fan settings SLEEP Mode Progression
High speed
The cooler will run for 30minutes innormal mode
at high fan speed. After 30minutes the high fan
speed switches to the medium speed. After another
30minutes the fan speed will be reduced to the low
speed. The air cooler will remain running at alow
fan speed.
Medium speed
The cooler will run for 30minutes innormal mode
when the medium fan speed is set. After 30minutes
the medium fan speed goes to the low speed. The air
cooler will remain running at alow fan speed.
Low speed
The appliance will be innormal mode when the fan is
set to low speed.
• In sleep mode, the fan speed changes as the fan speed switches.
Timer Setting
• Set the amount of time that cooler will run and after which it will switch
off and go into standby mode.
• Press the button to switch on the timer. The display will flash “1”
and the icon will light up.
• Press the button repeatedly to set the timer time from 0 to 9
hours. The display will show the timer value.
• Press any button (except the button) or wait about 5 seconds and
the timer time will be stored in memory. The countdown will start
and the display will alternate between the timer time and the set fan
speed.
• After the timer period has elapsed, the air cooler switches off and
enters standby mode.
• If you need to cancel the timer, press the button repeatedly until
display shows “0”.
Turning of Horizontal Slats
• Press the button and the horizontal slats will start to rotate to the
right andto the left. The icon will light up.
• To stop the horizontal slats rotating, press the button, the rotation
will stop and the icon will go out.
Turning of Vertical Slats
• Press the button and the vertical slats will begin to rotate up
anddown. The icon will light up.
• To stop the vertical slats rotating, press the button, the rotation will
stop and the icon will go out.
Switching off Sound Alert
• Ashort sound (abeep) is made each time abutton is pressed. To turn
the sound alert off, hold down the button for 3 seconds.
• To turn this function back on, press andhold the button for
3seconds.
Ionisation Function
• Press and hold the button for 3 seconds and the ionisation function
will turn on. The icon will light up. If you need to turn the ionisation
function off, press and hold the button for 3 seconds. The icon
will go out.
Switching off the Control Panel andDisplay Backlight (Remote Control
Only)
• Short press the button and the control panel and display backlight
will turn off.
• Press the button again or press any button on the control panel
and the backlight will light up.
. . . . . . . . . . . . . . . . . . . . . . . . . . . . . . . . . . . . . . . . . . . . . . . . . . . . . . . . . . . . . . . . . . . .
Note:
When the cooler is switched off with the button and
switched to standby mode, the last settings are stored in
memory (except for the timer and operating sleep mode). If
you disconnect the cooler from the mains socket, it will start
by default when you switch it on again.
Note:
If you control the cooler via the mobile app, do not
disconnect it from the power source. Otherwise it will not be
possible to control the cooler.
Control Panel andDisplay Brightness Dimming
• The control panel anddisplay will automatically dim the brightness
by1/3 after 1 minute of inactivity. To make it bright again, press any
button.
Fan Speed Setting
• The button is used to set the fan speed. Press the button
repeatedly to set the desired fan speed: low speed – medium
speed – high speed. The display will show the numerical value of the
respective speed (1–2–3). The icon will light up regardless of the
set speed.
Setting the Cooling and Humidifying Mode
• Before starting this mode, you need to fill the tank with water. To fill
the water tank, follow the instructions inthe “FILLING THE WATER
TANK” section.
• Press the button to turn on the cooling andhumidifying mode. The
icon lights up on the display and the pump starts.
• Use the button to adjust the fan speed.
• Turn off the cooling andhumidifying mode by pressing the button.
Thet icon goes out and the pump goes off.
Warning:
If the cooler detects alack of water in the tank, after
ashort while the cooling and humidifying mode will
automatically switch off to avoid damaging the pump
and an audible warning will sound (10 short beeps).
Note:
To increase the cooling efficiency, you can put cooling
boxes (not supplied with the cooler), which you let cool in
the freezer beforehand, in the water. Store the cooling boxes
on the other side of the pump in thetank. Otherwise, the
part of the water pump that is immersed in the water could
be damaged.
Setting the Operating Mode
• Press the button repeatedly to select the operating mode in the
following order: natural breeze mode ( ) – normal mode – sleep
mode ( ). For natural breeze and sleep modes, the corresponding
indicator light will illuminate; for normal mode, no operating mode light
will illuminate.
1. Normal Operating Mode
• Inthis mode, the fan speed is set by the user and the fan speed is
constant.
2. Natural Breeze Operating Mode
• In natural breeze mode, the airflow speed is controlled automatically
from high to low speed depending on the selected default fan speed.
This achieves anatural breeze effect.
3. Sleep operating mode
• Depending on the fan speed set by the user and the preset rules
of this mode, the speed is regularly reduced, which reduces the
uncomfortable feeling caused by the strong flow and increases
comfort during sleep.
- 6 -
12/2024
2024, .
REMOTE CONTROL
• The functions of the buttons on the remote control and the control
panel are identical. If you wish to use the remote control, point it at
the signal receiver at thefront of the cooler under the display. The
maximum range of the signal sent from the remote control is 5 m.
Note:
If there are obstacles located between the remote control
and the signal receiver, the signal may not be transmitted.
Inserting and Replacing Battery
• From the bottom part of the remote control pull out the battery
compartment andinsert the 3V CR2032 battery into it. When
inserting the battery, make sure the polarity is correct.
• If the battery in theremote control is discharged, replace it with anew
battery of the same type.
• If you will not be using the remote control for an extended period of
time, we recommend removing the battery. If the battery were to leak
into the interior of the remote control, it could be damaged.
Note:
Never put batteries in afire, short-circuit or damage them
in any way. Dispose of them in an environmentally friendly
manner at the end of their lifespan. Never dispose of
batteries in municipal waste.
. . . . . . . . . . . . . . . . . . . . . . . . . . . . . . . . . . . . . . . . . . . . . . . . . . . . . . . . . . . . . . . . . . . .
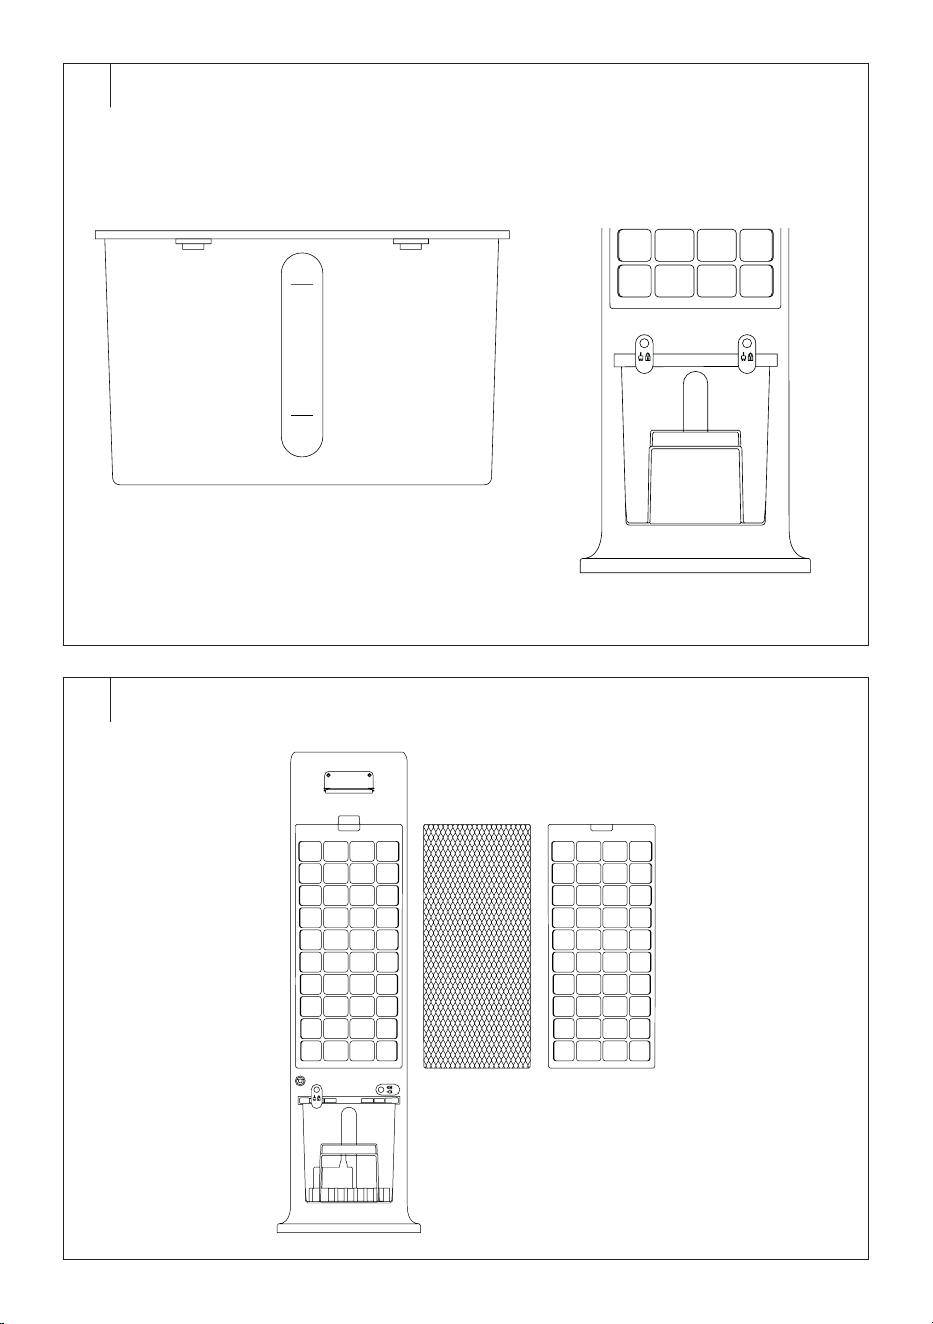
FILLING THE WATER TANK
• Before filling the tank, turn off the air cooler, disconnect it from the
power socket andsecure the castors.
• Turn the lock on the tank to the horizontal position – see figure E1.
• Pull the water tank out abit andrefill it with clean, cold water – see
figure E2. When filling, observe the minimum and maximum marks on
the tank – see figure E3.
• Carefully insert the tank back into the cooler.
• Turn the lock on the tank to the vertical position – see figure E4.
• Apump is attached to the bottom of the tank. If you need to remove
the tank completely fromthe cooler body, proceed as follows:
• Turn the lock on the tank to the horizontal position.
• Pull out the tank abit andturn the pump lock by90° to the right. Then
release the pump from the bottom of the tank.
• Carefully pull the tank out ofthe cooler body.
• When inserting the tank back, attach the pump to the bottom of the
tank andturn the lock by90° to the left. Carefully insert the tank back
into the cooler.
Warning:
Do not remove the tank from the cooler body without
first disconnecting the pump. Otherwise damage to
the cooler might occur.
Warning:
Do not let the water stand in it for more than
aday to prevent the growth of unwanted bacteria,
microorganisms or mould. When filling, make sure
that the water level reaches at least to the minimum
line but does not exceed the maximum line.
. . . . . . . . . . . . . . . . . . . . . . . . . . . . . . . . . . . . . . . . . . . . . . . . . . . . . . . . . . . . . . . . . . . .
CONTROL THROUGH THE Sencor HOME APP
• The cooler can be controlled via the Sencor HOME app.
• Download the app to your smart phone, register yourself and control
the cooler via the app. If the app is already installed, add the cooler to
your devices.
Adding the Cooler to the List of Devices via Bluetooth
• You can add the cooler to the Sencor HOME app by pairing via
Bluetooth.
• Turn on the Bluetooth function on your mobile phone.
• Turn the cooler on.
• Open the app and on the app'shome page, click the “+” icon.
• The device itself will offer the “Do not add / Go to add” options.
• Click on “Go to add” and the app will automatically guide you through
the addition.
Note:
If the Bluetooth connection fails or is not possible, make
sure there are no solid obstacles between your phone and
the cooler and that the two devices are close together.
Adding the Cooler to the Device List viaQR Code
• The cooler can also be added to the Sencor HOME app using the QR
code provided below. On the home page, click on the “+” icon and
select "[–] Scan QR Code" in the top right corner. After scanning the
QR code, you will be prompted to select aWi-Fi network (in the 2.4
GHz band). Select the network, enter your password andclick “Next”.
• You will be prompted toreset the device. Press and hold the
button for 3 seconds. The Wi-Fi indicator light blinks. This indicates
that the cooler is ready for pairing. Instructions can also be found on
the application screen.
• Inthe app, confirm that the (Wi-Fi) light is blinking, then click “Next”.
• Click on “Connect”. Then, in the Wi-Fi settings on your mobile device,
connect the Wi-Fi to thecooler. Then go back to the app andwait for
the cooler to pair.
• In the device list on the main screen, click on the cooler icon to enter
its control.
QR Code for Adding the Control Panel of the Cooler to the Sencor HOME
App
Manually add the cooler to the device list
• On the main screen, click on “Add Device” or the “+” in the top right
corner, and then click on "Add Device".
• Ascreen with appliance categories and alist of appliances will appear.
• Click “Cooling” and select the cooler model from the list of products.
• On the next screen, you will be prompted toselect aWi-Fi network (in
the 2,4 GHz band). Select the network, enter your password andclick
“Next”.
• You will be prompted toreset the device. Press and hold the
button for 3 seconds. The Wi-Fi indicator light blinks. This indicates
that the cooler is ready for pairing. Instructions can also be found on
the application screen.
• Inthe app, confirm that the (Wi-Fi) light is blinking, then click “Next”.
- 7 -
12/2024
2024, .
• Click on “Connect”. Then, in the Wi-Fi settings on your mobile device,
connect the Wi-Fi to thecooler. Then go back to the app andwait for
the cooler to pair.
• In the device list on the main screen, click on the cooler icon to enter
its control.
Wi-Fi Reset
• Press and hold the button for 3 seconds. The Wi-Fi icon on the
cooler control panel will start flashing. If it does not start flashing, press
again.
. . . . . . . . . . . . . . . . . . . . . . . . . . . . . . . . . . . . . . . . . . . . . . . . . . . . . . . . . . . . . . . . . . . .
CLEANING AND MAINTENANCE
• Disconnect the power plug from the power socket before cleaning.
• Do not use abrasive cleaning agents, solvents, etc. to clean any parts
of the appliance, as these could damage the surface of the appliance.
Warning:
To prevent the risk of electric shock, do not immerse
the appliance, power cable, or plug into water or any
other liquid. Only the pump attached to the bottom of
the tank is used for immersion in water.
. . . . . . . . . . . . . . . . . . . . . . . . . . . . . . . . . . . . . . . . . . . . . . . . . . . . . . . . . . . . . . . . . . . .
Cleaning the Water Tank
• After use, empty the tray andrinse it with clean water andwipe it with
aclean cloth. When removing the tank, follow the instructions inthe
“FILLING THE WATER TANK” section, especially the instructions
fordisconnecting the pump before removing the tank.
• At least once amonth, wipe the reservoir with asoft sponge slightly
dampened with warm water and aneutral detergent to remove
calcium deposits and prevent the growth of unwanted bacteria,
microorganisms or mould. Then rinse it properly with clean water and
wipe dry with aclean cloth.
CLEANING THE REAR GRILLE AND FILTER (Fig. F)
• Release the lock atthe top of the rear grille. Lift the grille out andpull it
away from the cooler body. Take out the filter.
• Wipe the back grille with aslightly damp cloth and wipe dry.
• Shake the filter out and wipe it with alightly damp cloth. You can
alsouse avacuum cleaner with abrush nozzle attached and low
power setting to remove dirt and dust.
Warning:
The filter must not be soaked in water for cleaning.
Note:
We recommend to shake the filter out outside the living
area.
• When cleaning, check the condition of the filter. If it is damaged or
worn out, replace it. Do not use the filter if damaged.
• Insert the clean filter back into the cooler body andinstall the rear
grille. First, put on the bottom part of it, andthen close the top part until
you hear aclick.
Warning:
Before inserting the filter into the cooler body, check
that the filter is dry. Never use the cooler with awet or
damp filter or without it.
Note:
To purchase anew filtermarked SFX 9025, please contact
your dealer.
. . . . . . . . . . . . . . . . . . . . . . . . . . . . . . . . . . . . . . . . . . . . . . . . . . . . . . . . . . . . . . . . . . . .
DRYING FUNCTION
• The drying function is used to dry the filter e.g. before storing the air
cooler for alonger period of time.
• While the cooler is on, press and hold the button for 3 seconds to
activate the drying function. The fan speed will automatically change
to high speed and the function will run for 20minutes. The air cooler
then automatically switches off and enters standby mode.
• It is not possible to change the air cooler settings during this time.
Only the button will work. If you switch the air cooler off during the
drying period and then switch it on, the appliance will start the drying
function from the beginning.
. . . . . . . . . . . . . . . . . . . . . . . . . . . . . . . . . . . . . . . . . . . . . . . . . . . . . . . . . . . . . . . . . . . .
CLEANING THE OUTER CASING
• To clean the outer casing, use acloth slightly dampened with
lukewarm water and neutral detergent.
Storage
• If you will not be using the appliance for an extended period of time,
unplug the plug from the mains socket and clean it according to the
instructions in the chapter “Cleaning and Maintenance”.
• Before storing, ensure that the appliance and all accessories are
thoroughly clean and dry.
• Remove the battery from the remote control.
• The power cord can be wrapped around the locks of the removable
tank.
• Store the appliance in adry, clean, and well-ventilated place away
from extreme temperatures and out of the reach of children or pets.
. . . . . . . . . . . . . . . . . . . . . . . . . . . . . . . . . . . . . . . . . . . . . . . . . . . . . . . . . . . . . . . . . . . .
TECHNICAL SPECIFICATIONS
Rated voltage range ...............................................................................220−240V~
Rated frequency ...................................................................................................50 Hz
Rated input power ..................................................................................................60W
Maximum fan flow rate .........................................................................4.66 m
3
/min
Fan wattage ........................................................................................................ 49.2 W
Operating value ............................................................................. 0.09 (m
3
/min)/W
Standby power consumption ........................................................................ 0.32 W
Seasonal energy consumption ........................................................16.1 kWh/year
Fan sound power level ............................................................................ 60.9 (dB) A
Maximum air velocity .........................................................................................1.1 m/s
Dimensions .....................272.8 × 309.8 × 890 mm (width × height × depth)
Weight .....................................................................................................................6.7 kg
Water tank capacity ...........................................................................6 l (MAX: 5.5 l)
Recommended room size .......................................................................... 18-46 m
2
Standard for measuring operational value ............ (EU) No 206/2012 + (EU)
2016/2282
EN ISO 5801:2017
EN 50564:2011
EN IEC 60704-1:2021
EN IEC 60704-2-7:2020
Contact for further information
FAST ČR, a.s., USanitasu 1621, 251 01 Říčany, Czech Republic
The declared noise emission level of the appliance is 60.9 dB(A), which
represents alevel Aof acoustic power with respect to areference acoustic
power of 1 pW.
Original Consumable Accessories
SRX 9025 Spare filter
. . . . . . . . . . . . . . . . . . . . . . . . . . . . . . . . . . . . . . . . . . . . . . . . . . . . . . . . . . . . . . . . . . . .
- 8 -
12/2024
2024, .
INSTRUCTIONS AND INFORMATION ON DISPOSAL OF USED
PACKAGING MATERIAL
Dispose of used packaging material at the location designated by the
municipality for waste disposal.
DISPOSAL OF USED ELECTRICAL AND ELECTRONIC EQUIPMENT
Used electrical andelectronic products must not be added to ordinary
municipal waste. For proper disposal and recycling of these products,
deliver them to designated collection points. Alternatively, in some
European Union states or other European countries the products can be
returned to the local retailer when buying an equivalent new product. By
properly disposing of this product, you help preserve valuable natural
resources and contribute to preventing potential negative impacts on the
environment and human health resulting from improper waste disposal.
For further details, contact your local authorities or the nearest collection
point. Fines may be imposed for improper disposal of this type of waste in
accordance with national regulations.
For Business Entities in European Union States
To dispose of electric or electronic equipment, request necessary
information from your retailer or supplier.
Disposal in Other Countries Outside the European Union
To dispose of this product elsewhere, request necessary information on
the correct disposal method from local authorities or your retailer.
. . . . . . . . . . . . . . . . . . . . . . . . . . . . . . . . . . . . . . . . . . . . . . . . . . . . . . . . . . . . . . . . . . . .
Changes to text and technical parameters are reserved.