1 2
Instruction For Installation And Use
Model: RC25G / RC40G / RC80G
Mini Tank Water Heaters
Radiant Electric Cooktop
Instruction For Installation And Use
Model: EPS2V-12-CC / EPS4V-24-CC
EPS4V-30-CC / EPS5V-30-CC / EPS5V-36-CC
ranein.net

1 2
Thank you very much for choosing our Radiant Electric Cooktop. Please read these
instructions carefully before using your new appliance. This manual contains all the
essential information you need to operate your cooktop safely and eciently, helping you
avoid potential hazards and equipment damage.
Should you have any questions about using your Radiant Electric Cooktop, our customer
service team is always available to assist you. We are committed to providing you with the
highest quality support and service. For your convenience, please store this manual in a
safe place for future reference.
www.ranein.net
CAUTION
A potentially hazardous situation that may result in minor or moderate injury.
A potentially hazardous situation that could result in death or serious injury and/or
damage to property.
WARNING
Attention is called to observe a specied procedure or maintain a specic condition.
NOTICE
CATALOGS
Important Safety Instructions......................................................... 1-4
Specifications Table................................................................................ 5-6
Installation............................................................................................. 6-7
Ventilation and safety distances............................................................ 7-8
Electrical Connections............................................................................ 8-9
Compatible Cookware.................................................................................... 10-11
Control Panel......................................................................................... 11-12
Operating the Cooktop........................................................................ 12-14
Cleaning and Maintenance................................................................ 14-15
Trouble Shooting......................................................................................... 15-16
Error Codes........................................................................................................ 16
Customer Care Service.................................................................................. 16
service@ranein.net
w ww.ranein.net
CAUTION
Read the instructions carefully and keep for future reference.
Thanks for purchase this product. Please read the user manual thoroughly before
operating the product. The manufacturer reserves the right to make the final
interpretation of this manual. The appearance of the product may dier from the images
shown, and will be based on the actual product you receive. Kindly note that we will
not notify you separately regarding any future technology or software updates to the
product.
Important Safety Information
Read This Manual
This manual contains many helpful tips for correctly using and maintaining your Radiant
Electric Cooktop. With a few simple preventive maintenance measures, you can save both
time and money throughout the lifespan of your cooktop. For solutions to common issues,
please refer to the "Trouble Shooting." By rst checking the “Troubleshooting Tips” chart,
you may be able to avoid the need for service calls.
Read the Safety Information
To ensure your safety and the safety of others, we have included important safety warnings
throughout this manual. All safety messages are accompanied by a safety symbol and will
be marked with one of the following words:“CAUTION”, “WARNING”, or “NOTICE”.
These words mean:
Safety:
• Read all instruction carefully before installation and operation of the appliance.
• Failure to follow these warnings could result in a re or explosion that causes property
damage, personal injury or death.
GENERAL SAFETY INSTRUCTIONS
•
Use this cooktop only for its intended purpose as described in this Owner's Manual.
•
Be sure your cooktop is properly installed and grounded by a qualified installer in
accordance with the provided installation instructions.
•
Do not attempt to repair or replace any part of your cooktop unless it is specically
recommended in this manual. All other servicing should be performed by a qualied
technician.
•
Before performing any service, unplug the cooktop or disconnect the power supply
at the household distribution panel by removing the fuse or switching o the circuit
breaker.
•
Do not leave children alone-children should not be left alone or unattended in an
area where the cooktop is in use. They should never be allowed to climb, sit or stand
on any part of the cooktop.
•
CAUTION: Do not store items of interest to children above the cooktop children
climbing on the cooktop to reach items could be seriously injured
•
Do not allow pans to boil dry or heat empty pans.
WARNING

3 4
KEEP FLAMMABLE MATERIALS AWAY FROM THE COOKTOP
•
Do not store or use ammable materials near the cooktop, including paper, plastic,
pot holder’s linens, wall coverings, curtains, drapes and gasoline or other ammable
vapors and liquids.
•
Never wear loose-fitting or hanging garments while using the cooktop. These
garments may ignite if they contact hot surfaces causing severe burns.
•
Do not let cooking grease or other ammable materials accumulate in or near the
cooktop Grease on the cooktop may ignite.
COOKTOP SAFETY INSTRUCTIONS
•
In the event of a re, do not use water or grease on res. Never pick up a aming pan.
Turn the controls o. Smother a aming pan on a surface unit by covering the pan
completely with a well-fitted lid, cookie sheet or flat tray. Use a multi-purpose dry
chemical or a foam-type re extinguisher.
•
Never leave the surface units unattended at medium or high heat settings. Boilover
cause smoking and greasy spillovers that may catch on re.
•
Never leave oil unattended while frying. If allowed to heat beyond its smoking point,
oil may ignite resulting in re that may spread to surrounding cabinets. Use a deep fat
thermometer whenever possible to monitor oil temperature.
•
To avoid spillover and fire, use a minimum amount of oil when shallow pan-frying
and avoid cooking frozen foods with excessive amounts of ice.
•
Use the proper pan size-select cookware having at bottoms large enough to cover
the surface heating element. The use of undersized cookware will expose a portion
of the surface unit to direct contact and may result in ignition of clothing. Proper
relationship of cookware to surface unit will also improve eciency.
•
To minimize the possibility of burns, ignition of flammable materials and spillage,
the handle of a container should be turned toward the center of the range without
extending over nearby surface units.
COOKTOP SAFETY INSTRUCTIONS
•
Only certain types of glass, glass/ceramic, earthenware or other glazed containers
WARNING
WARNING
WARNING
•
Do not allow cord to touch a hot surface.
•
Never use your cooktop for warming or heating the room.
•
Do not touch surface elements. These surfaces may be hot enough to burn even
though they are dark in color. During and after use, do not touch, or let clothing or other
ammable materials contact the surface elements or areas nearby the surface elements;
allow sucient time for cooling rst.
•
Potentially hot surfaces include the cooktop and areas facing the cooktop.
•
Do not heat unopened food containers. Pressure could build up and the container could
burst, causing an injury.
SAVE THESE INSTRUCTIONS
are suitable for cooktop service; others may break because of the sudden change in
temperature.
•
Be careful when touching the cooktop. The glass surface may retain heat even after the
controls are turned o.
•
Do not cook on a broken cooktop. If the glass surface breaks, cleaning solutions and
spillovers may penetrate the damaged area, creating a risk of electric shock. Contact a
qualied technician immediately.
•
Avoid scratching the glass cooktop. It can be scratched by items such as knives, sharp
instruments, rings, jewelry, or rivets on clothing.
•
Do not place or store items that can melt or catch re on the glass cooktop, even when
it is not in use. If the cooktop is inadvertently turned on, these items may ignite. Residual
heat from the cooktop or oven vent after use may also cause them to ignite.
•
To eliminate the risk of burns or fire from reaching over heated surface units, avoid
placing cabinet storage space above the cooktop. If cabinet storage is necessary, the
risk can be reduced by installing a range hood that extends at least 5 inches beyond the
bottom of the cabinets.
•
Storage in or on the appliance – Flammable materials should not be stored in the oven
or near the surface units.
•
Use proper pan size – this appliance is equipped with one or more surface units of
dierent sizes.
•
Select utensils with at bottoms that are large enough to cover the surface unit heating
element. Using undersized utensils will expose part of the heating element to direct
contact, increasing the risk of clothing ignition. Proper matching of utensil size to burner
size will also improve cooking eciency.
•
Make sure reector pans or drip bowls are in place. Their absence during cooking may
expose wiring or components underneath to damage.
•
Protective liners – do not use aluminum foil to line surface unit drip bowls or oven
bottoms, except as recommended in the manual. Improper installation of liners may
create a risk of electric shock or re.
•
Glazed cooking utensils – only certain types of glass, glass-ceramic, ceramic,
earthenware, or other glazed utensils are suitable for range-top use without breaking
due to sudden temperature changes.
•
Utensil handles should be turned inward and not extend over adjacent surface units
to reduce the risk of burns, ignition of flammable materials, and spillage caused by
unintentional contact.
•
Do not cook on a broken cooktop. If the cooktop breaks, cleaning solutions and
spillovers may penetrate the damaged surface, creating a risk of electric shock. Contact
a qualied technician immediately.
•
Clean the cooktop with caution. If a wet sponge or cloth is used to wipe spills on a hot
surface, be careful to avoid steam burns. Some cleaners can produce noxious fumes if
applied to a hot cooktop.
•
If the malfunction light turns on or an audible signal (such as a bell or buzzer) sounds,
the appliance is malfunctioning. Turn o or disconnect the appliance from the power
supply and have it serviced by a qualied technician.
5 6
Specications Table
Model EPS2V-12-CC
Electrical 240V
~
60Hz
Number of Burners 2 radiant burners
Total Power / Levels 3000W
Power Levels 16A
Rear Burner 1800W Front Burner 1200W
Product Dimensions 20.08"x11.61"x2.91"
Cut-out Dimensions 10.63"x19.29"
Model EPS4V-24-CC
Electrical 240V
~
60Hz
Number of Burners 4 radiant burners
Total Power 7200W
Power Levels 16A
Left Rear Burner 2000W Right Rear Burner 1800W
Left Front Burner 1100W/2200W, 2rings Right Front Burner 1200W
Product Dimensions 23.23"x20.47"x2.91"
Cut-out Dimensions 22.05"x19.29"
Model EPS4V-30-CC
Electrical 240V
~
60Hz
Number of Burners 4 radiant burners
Total Power 7900W
Power Levels 16A
Left Rear Burner 1200W Right Rear Burner 1100W/2000W, 2 rings
Left Front Burner
900W/1800W/2700W, 3 rings
Right Front Burner 1000W/2000W, 2 rings
Product Dimensions 30.31"x20.47"x2.83"
Cut-out Dimensions 29.13"x19.29"
Model EPS5V-30-CC
Electrical 240 V
~
60 Hz
Number of Burners 5 radiant burners
Total Power 8800 W
Power Levels 16 A
Left Rear Burner 1200 W Right Rear Burner
1200W
Left Front Burner 800W/1600W/2400W, 3 rings Right Front Burner
2000W
Middle Burner 1100W/2000W, 2 rings
Product Dimensions 30.31"x20.47"x2.83"
Cut-out Dimensions 29.13"x19.29"
Model EPS5V-36-CC
Electrical 240V
~
60Hz
Number of Burners 5 radiant burners
Total Power 8800W
Power Levels 16A
Left Rear Burner 1200W Right Rear Burner 1200W
Left Front Burner 800W/1600W/2400W, 3 rings Right Front Burner 2000W
Middle Burner 1100W/2000W, 2 rings
Product Dimensions 35.43"x20.47"x2.83"
Cut-out Dimensions 34.25"x19.29"
Installation
Intended Use
• This appliance is designed for built-in household use only.
• Do not use it outdoors.
• Do not use the appliance to heat a room.
Installing the cooktop
• Visually inspect the cooktop for any damage. Also, ensure that all screws on the cooktop
are securely tightened.
• Ensure that the wall coverings, countertop, and cabinets surrounding the cooktop can
withstand heat up to 200°F (95°C).
• Before cutting the countertop, verify that the dimensions in the diagram match the
The installation must be carried out by a suitably qualied person in accordance with
local electrical and building regulations, as well as the instructions provided in this
manual.
NOTICE
7 8
If sealing the cooktop to the countertop, ensure that the cooktop remains removable in
case service is required.
NOTICE
actual dimensions of the product.
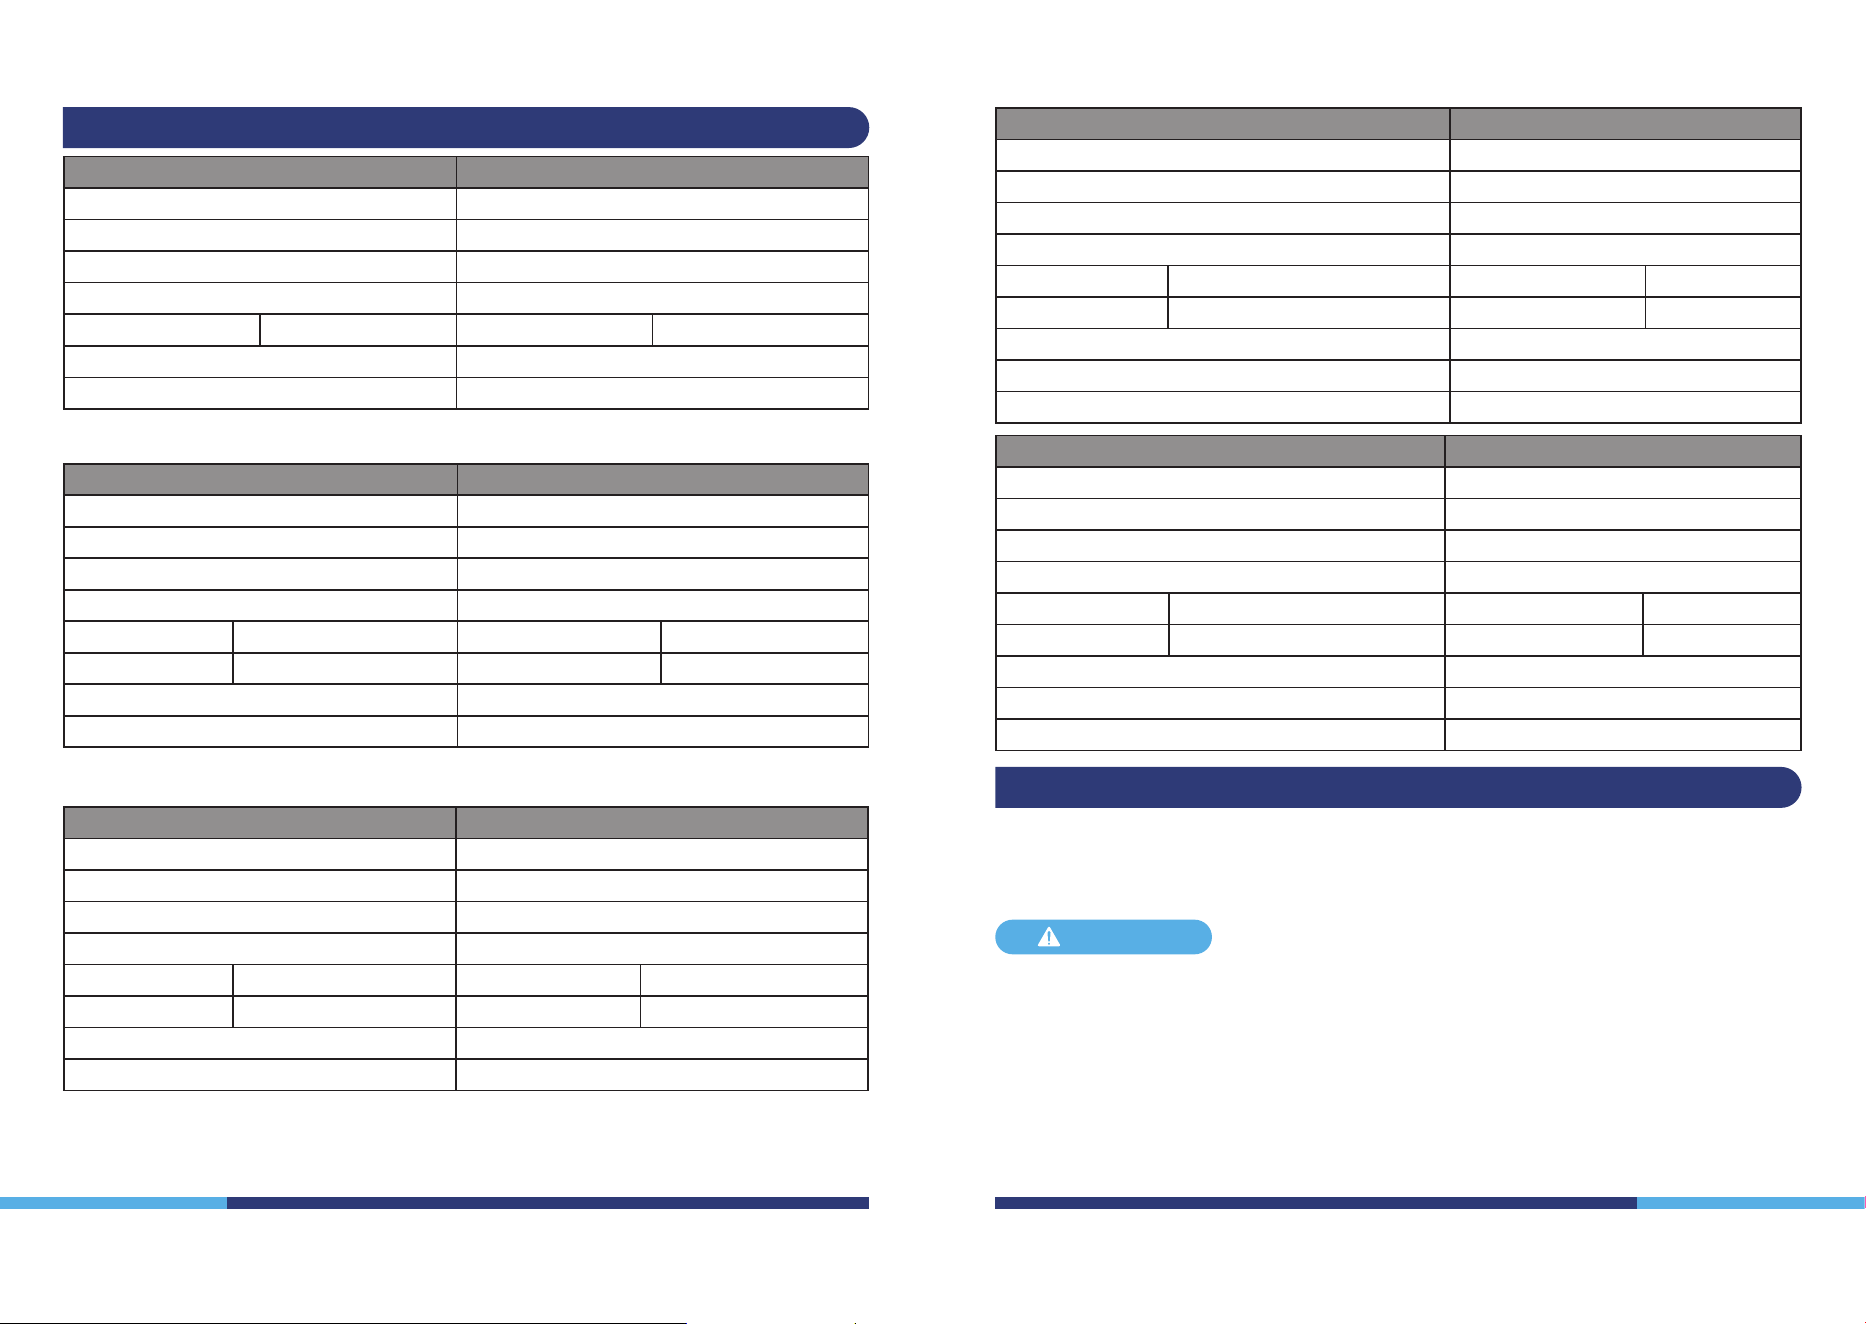
• Make sure the work surface is heat-resistant and at least 30 mm (1.18") thick.
• Ensure that there is a safety distance of at least 3 mm (0.12") between the sides of the
cooktop and the inner edge of the countertop.
• Maintain a clearance of at least 50 mm (1.97") around the cut-out area.
• Complete all cutting of the unit and work surface, and thoroughly remove any shavings
or sawdust before installing the appliance.
• The electric cooktop must be installed into the cabinet before it is used or tested.
• Gently lower the cooktop into the prepared cut-out on the countertop.
• Prepare the cut-out as specied (see installation dimensions).
Ventilation and safety distances
• Ensure that the following conditions are met to provide adequate ventilation for the
cooktop and that neither the supply nor exhaust air is obstructed:
• The safety distance between the cooktop and the cabinet or vent hood must be at least
762 mm (30").
• If the cooktop is installed above an oven, the oven must be equipped with its own
cooling fan.
Cooktop Dimensions Cutout and Spacing
Model W (Width) D (Depth) H (Height) A B X F
EPS2V-12-CC
11.61" 20.08" 2.91" 10.63" 19.29" Min 1.97" Min 0.12"
EPS4V-24-CC
23.23" 20.47" 2.91" 22.05" 19.29" Min 1.97" Min 0.12"
EPS4V-30-CC
30.31" 20.47" 2.83" 29.13" 19.29" Min 1.97" Min 0.12"
EPS5V-30-CC
30.31" 20.47" 2.83" 29.13" 19.29" Min 1.97" Min 0.12"
EPS5V-36-CC
35.43" 20.47" 2.83" 34.25" 19.29" Min 1.97" Min 0.12"
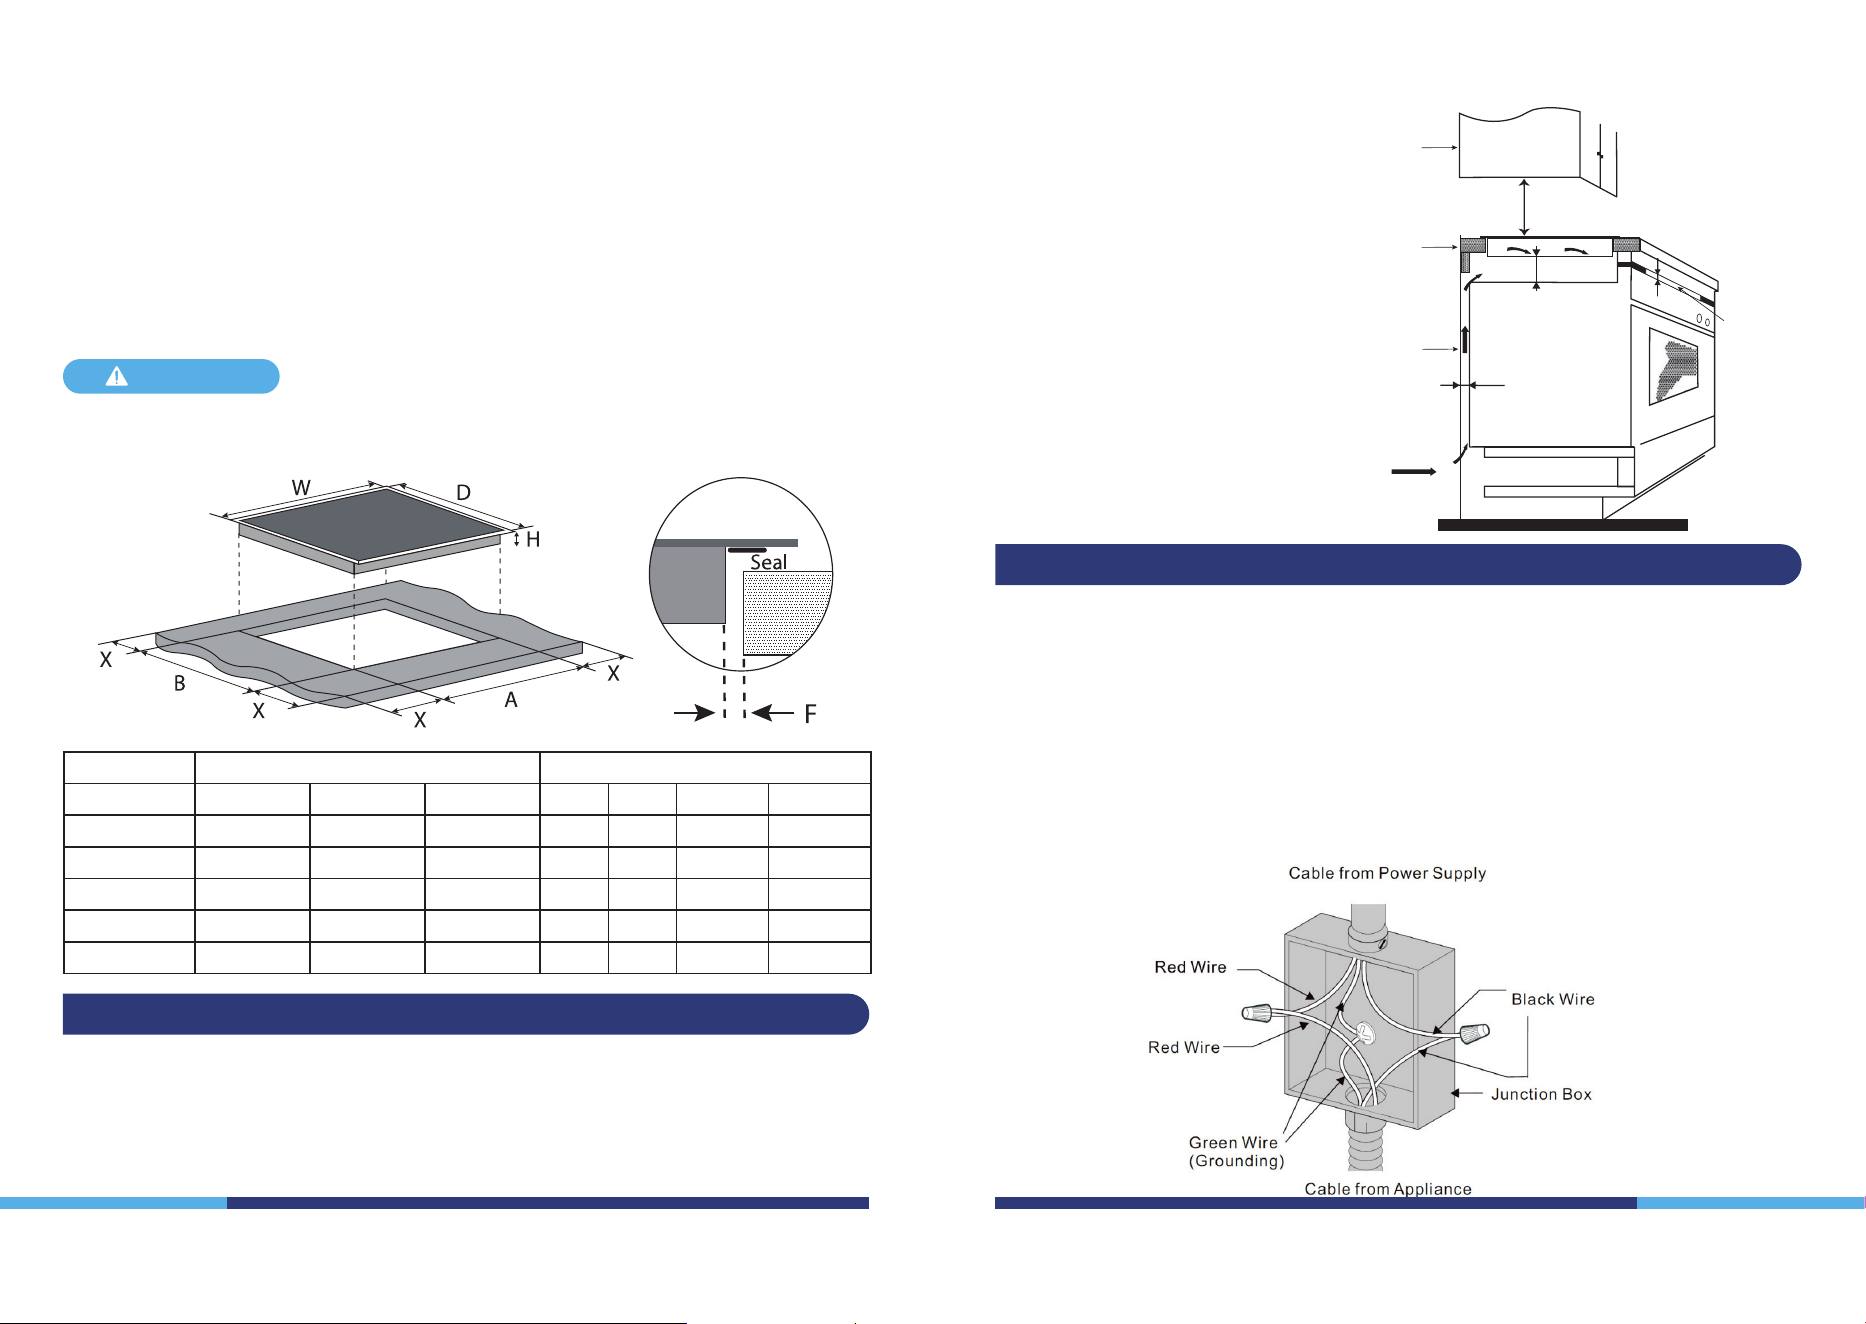
• The safety distance between the
bottom of the cooktop and the top
of the oven must be at least 50.8
mm (2").
• The installation must comply
with all applicable clearance
requirements and local regulations.
Vent Hood
Cooktop
Oven
Air gap /
Intake
Exhaust air
min 1/2"
30"
2"
1"
IMPORTANT:
To prevent overheating, it is
recommended to maintain a clearance
of at least 12.7 mm (1/2") on all four
sides between the cooktop and the
surrounding cabinet.
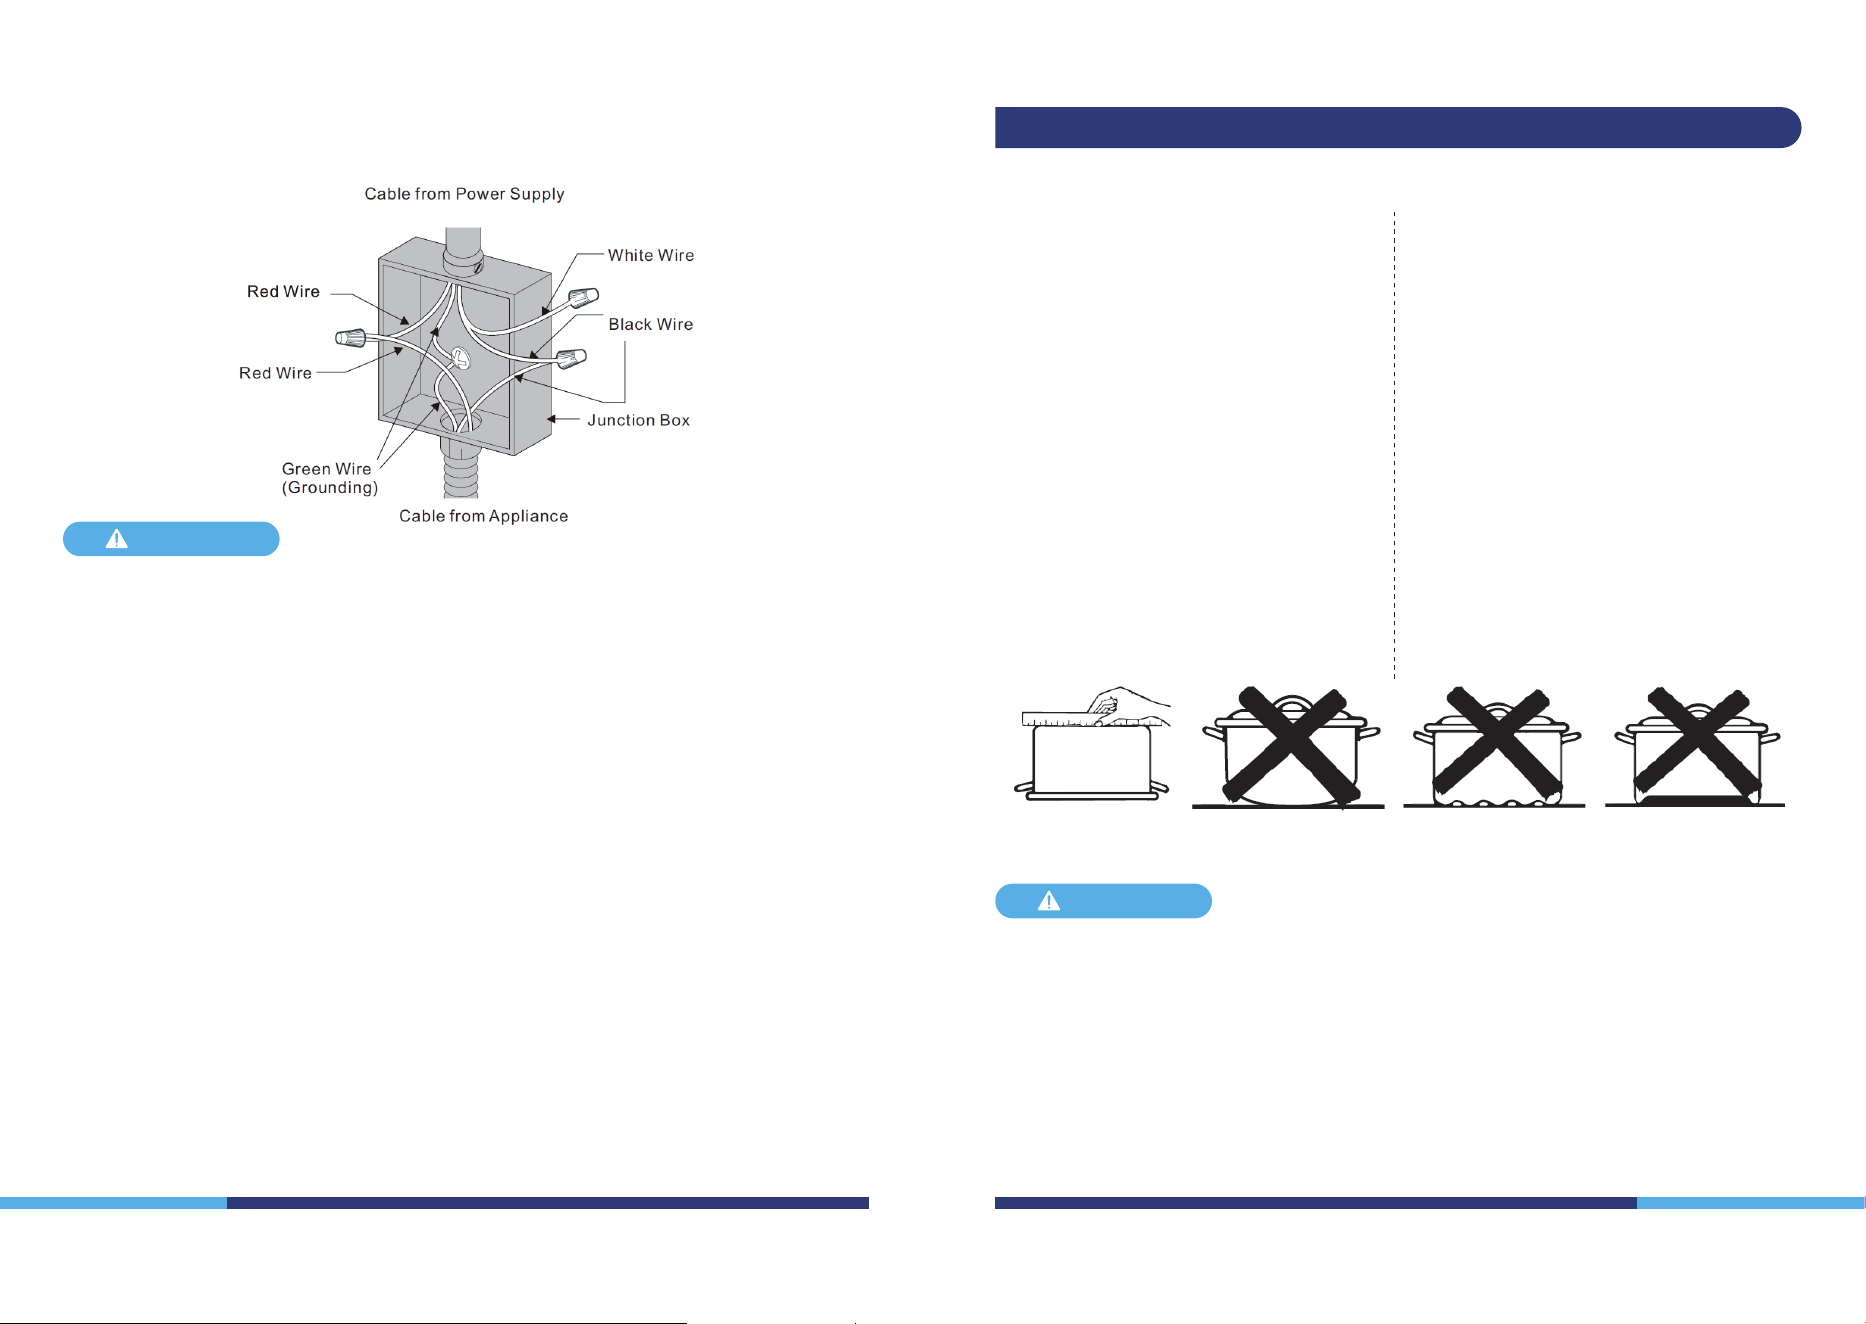
Electrical Connections
The cooktop must be connected to a separate, grounded, single-phase AC-only electrical
supply with its own circuit breaker. Installation must comply with the National Electrical
Code (NEC) as well as all applicable state, municipal, and local regulations. The appliance
must be supplied with the correct voltage, frequency, and amperage, and protected by a
properly sized circuit breaker or time-delay fuse.
Voltage : AC 240V Frequency: 60Hz (See below gure).
The cable from appliance is equipped with 3-wires
If 3-Wire Cable from Home Power Supply
IMPORTANT: Use the 3-wire cable from Home Power Supply where local codes
permit a 3-wire connection.
9 10
•
The electric cooktop must be installed by a qualied installer.
•
Do not place the cooktop next to open ames, heaters, or other sources of heat.
•
Ensure that the mains connection cable is neither damaged nor compressed beneath
the cooktop.
•
Ensure that the mains connection cable does not come into contact with sharp
edges or hot surfaces.
•
The cooktop should be connected to a power source that is securely fastened.
•
Do not install the cooktop above a dishwasher or washing machine, as steam or
moisture could come into contact with the electronic circuits and cause damage.
•
Before connecting the cooktop, check whether the voltage indicated on the type
plate corresponds to the voltage supply in your home. An incorrect connection may
cause serious damage to the cooktop and result in injury.
•
The cooktop surface is made of temperature-resistant ceramic. If it becomes
damaged—even a minor crack—immediately disconnect the cooktop from the
power supply and contact customer service.
•
We recommend not placing any metal kitchenware, cookware, pan lids, knives, or
other metal objects on the cooktop. These items may heat up when the cooktop is
turned on.
•
Do not place any magnetic objects, such as credit cards, cassette tapes, etc., on the
glass surface while the cooktop is in operation.
•
To prevent overheating, do not place aluminum foil or metal plates on the cooktop.
•
Do not insert objects such as wires or tools into the ventilation slots.
Warning: This may cause electric shock.
•
Do not touch the hot surfaces of the cooktop.
•
Unopened tins must not be heated on the cooktop, as the buildup of pressure may
cause them to explode. Always open the tin before heating.
NOTICE
If 4-Wire Cable from Home Power Supply
IMPORTANT: Use the 4-wire cable from Home Power Supply where local codes
do not allow grounding through neutral.
The following information will help you choose cookware that performs well
on a glass cooktop.
Stainless Steel: Recommended.
Aluminum: Heavy-weight aluminum is
recommended for its good conductivity.
However, aluminum residues may
sometimes appear as scratches on the
cooktop surface. These can be removed
if cleaned immediately. Due to its low
melting point, thin-weight aluminum
cookware should not be used.
Copper Bottom: Recommended.
Copper may leave residues that appear as
scratches. These residues can be removed
if the cooktop is cleaned immediately.
However, do not allow these pots to
boil dry. Overheated metal can bond to
the glass cooktop, and an overheated
copper-bottom pot may leave a residue
that permanently stains the surface if not
promptly removed.
Compatible Cookware
Always follow the manufacturer's recommendations when using any type of cookware
on a ceramic cooktop.
NOTICE
Check pans for flat
bottoms by using a
straight edge.
Pans with rounded,
curved, ridged or
warped bottoms are
not recommended.
Porcelain Enamel on Cast Iron:
Recommended if the bottom of the pan is
coated.
Porcelain Enamel on Steel: Not
recommended.Heating empty pans can
cause permanent damage to the cooktop
glass, as the enamel may melt and bond to
the ceramic surface.
Glass-Ceramic: Not recommended.
Poor performance and the potential to
scratch the surface.
Stoneware: Not recommended.
Poor performance and may scratch the
surface.
Cast Iron: Not recommended, unless
specically designed for glass cooktops.
Poor conductivity and slow heat absorption
can scratch the cooktop surface.
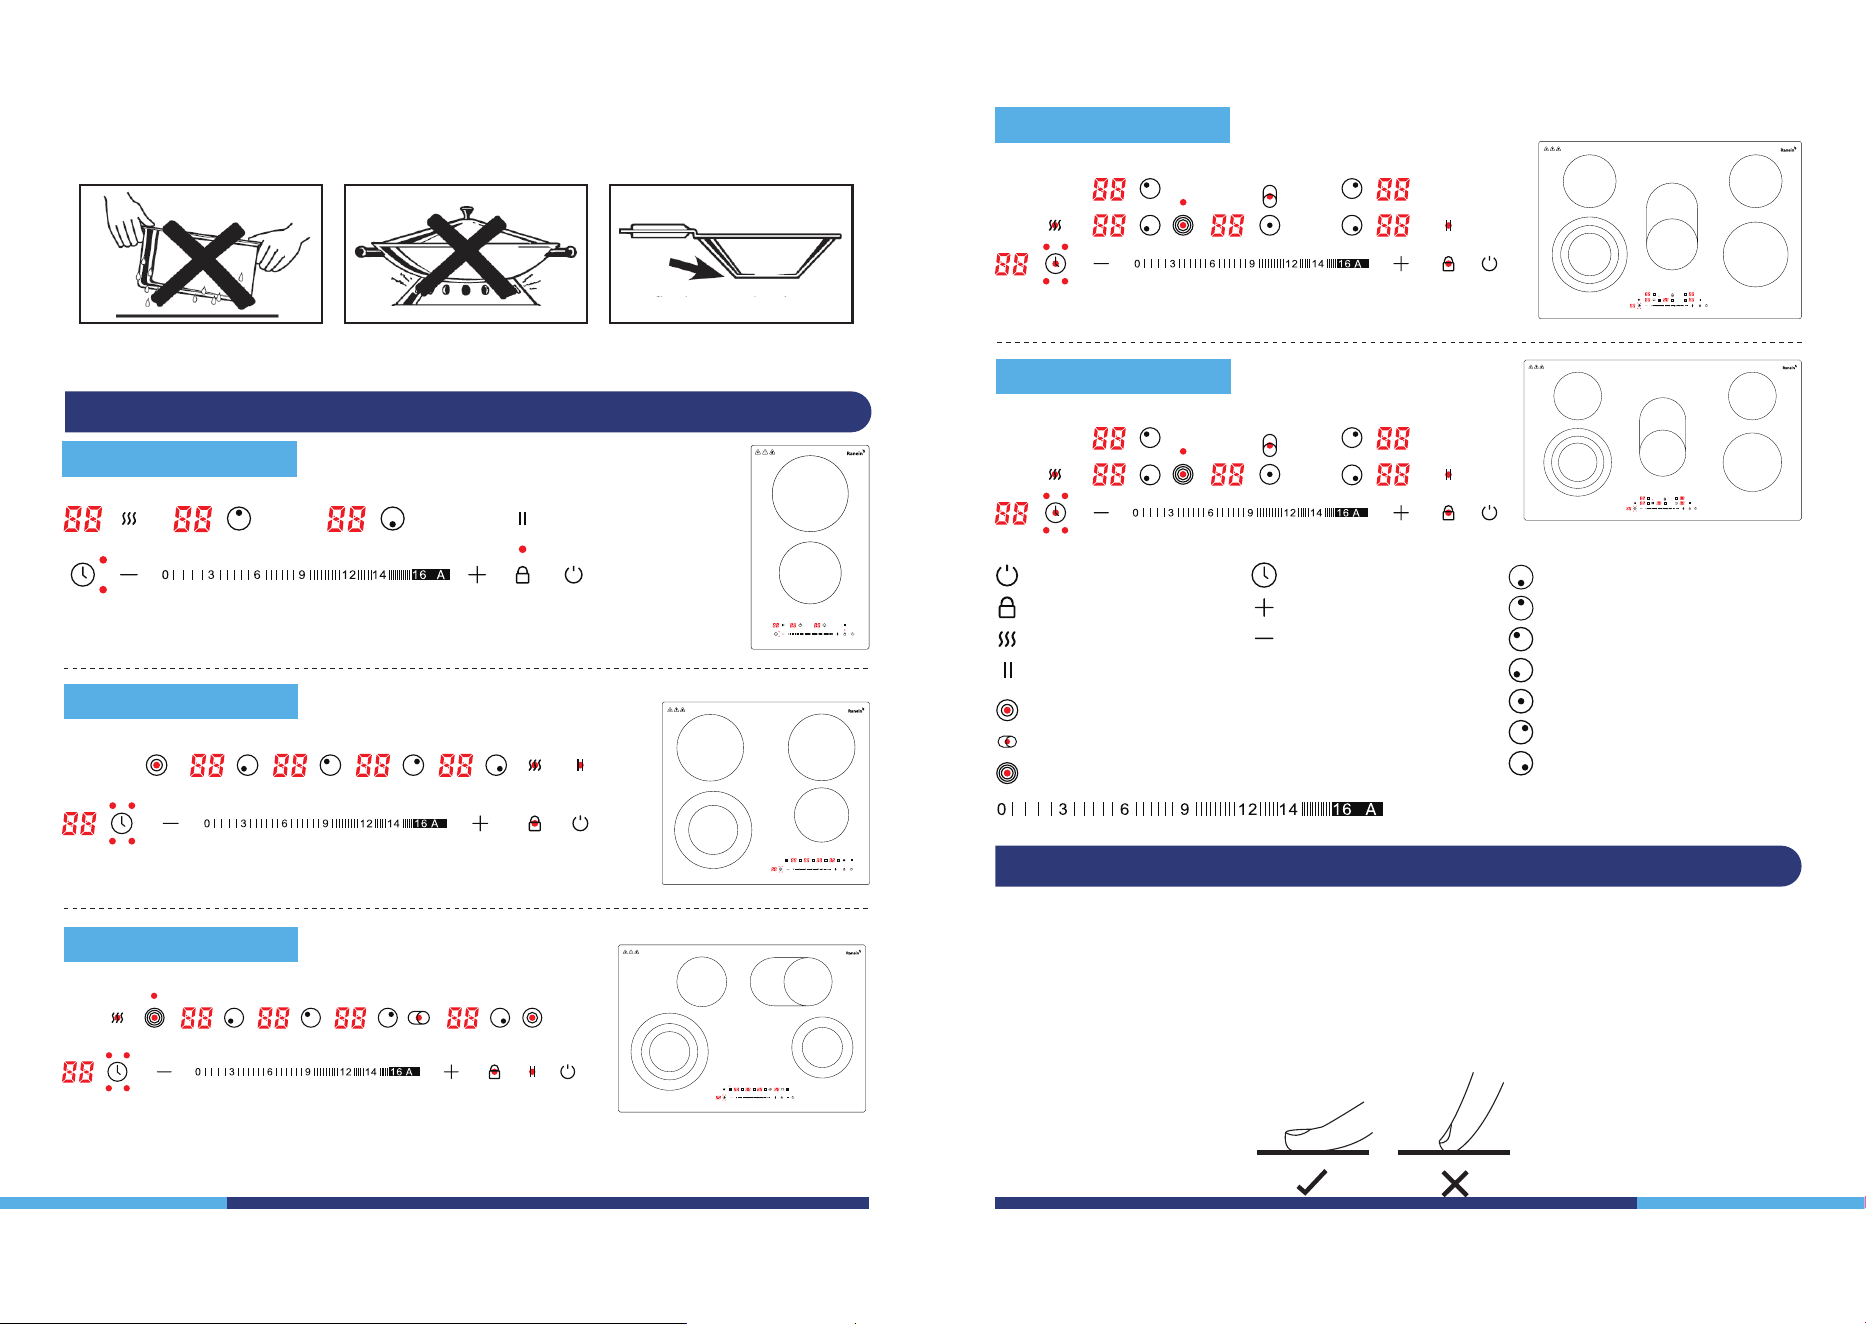
For Best Results
•
Place only dry pans on the surface elements. Do not place lids, especially wet ones,
directly on the surface elements. Wet pans or lids may stick to the cooktop as it cools.
•
Do not use woks with support rings. These types of woks are not suitable for glass
surface elements and will not heat properly.
•
We recommend using flat-bottomed woks only. These are available at most local
retailers. The bottom of the wok should match the diameter of the surface element to
ensure proper contact and heating eciency.
11 12
Do not place wet pans on the
glass cooktop.
Do not use woks with support
rings on the glass cooktop.
Use flat-bottomed woks on the
glass cooktop.
•
Certain cooking procedures, such as pressure cooking or deep-fat frying, require specic
types of cookware. Regardless of the type, all cookware used must have flat bottoms
and be of the appropriate size for the heating element.
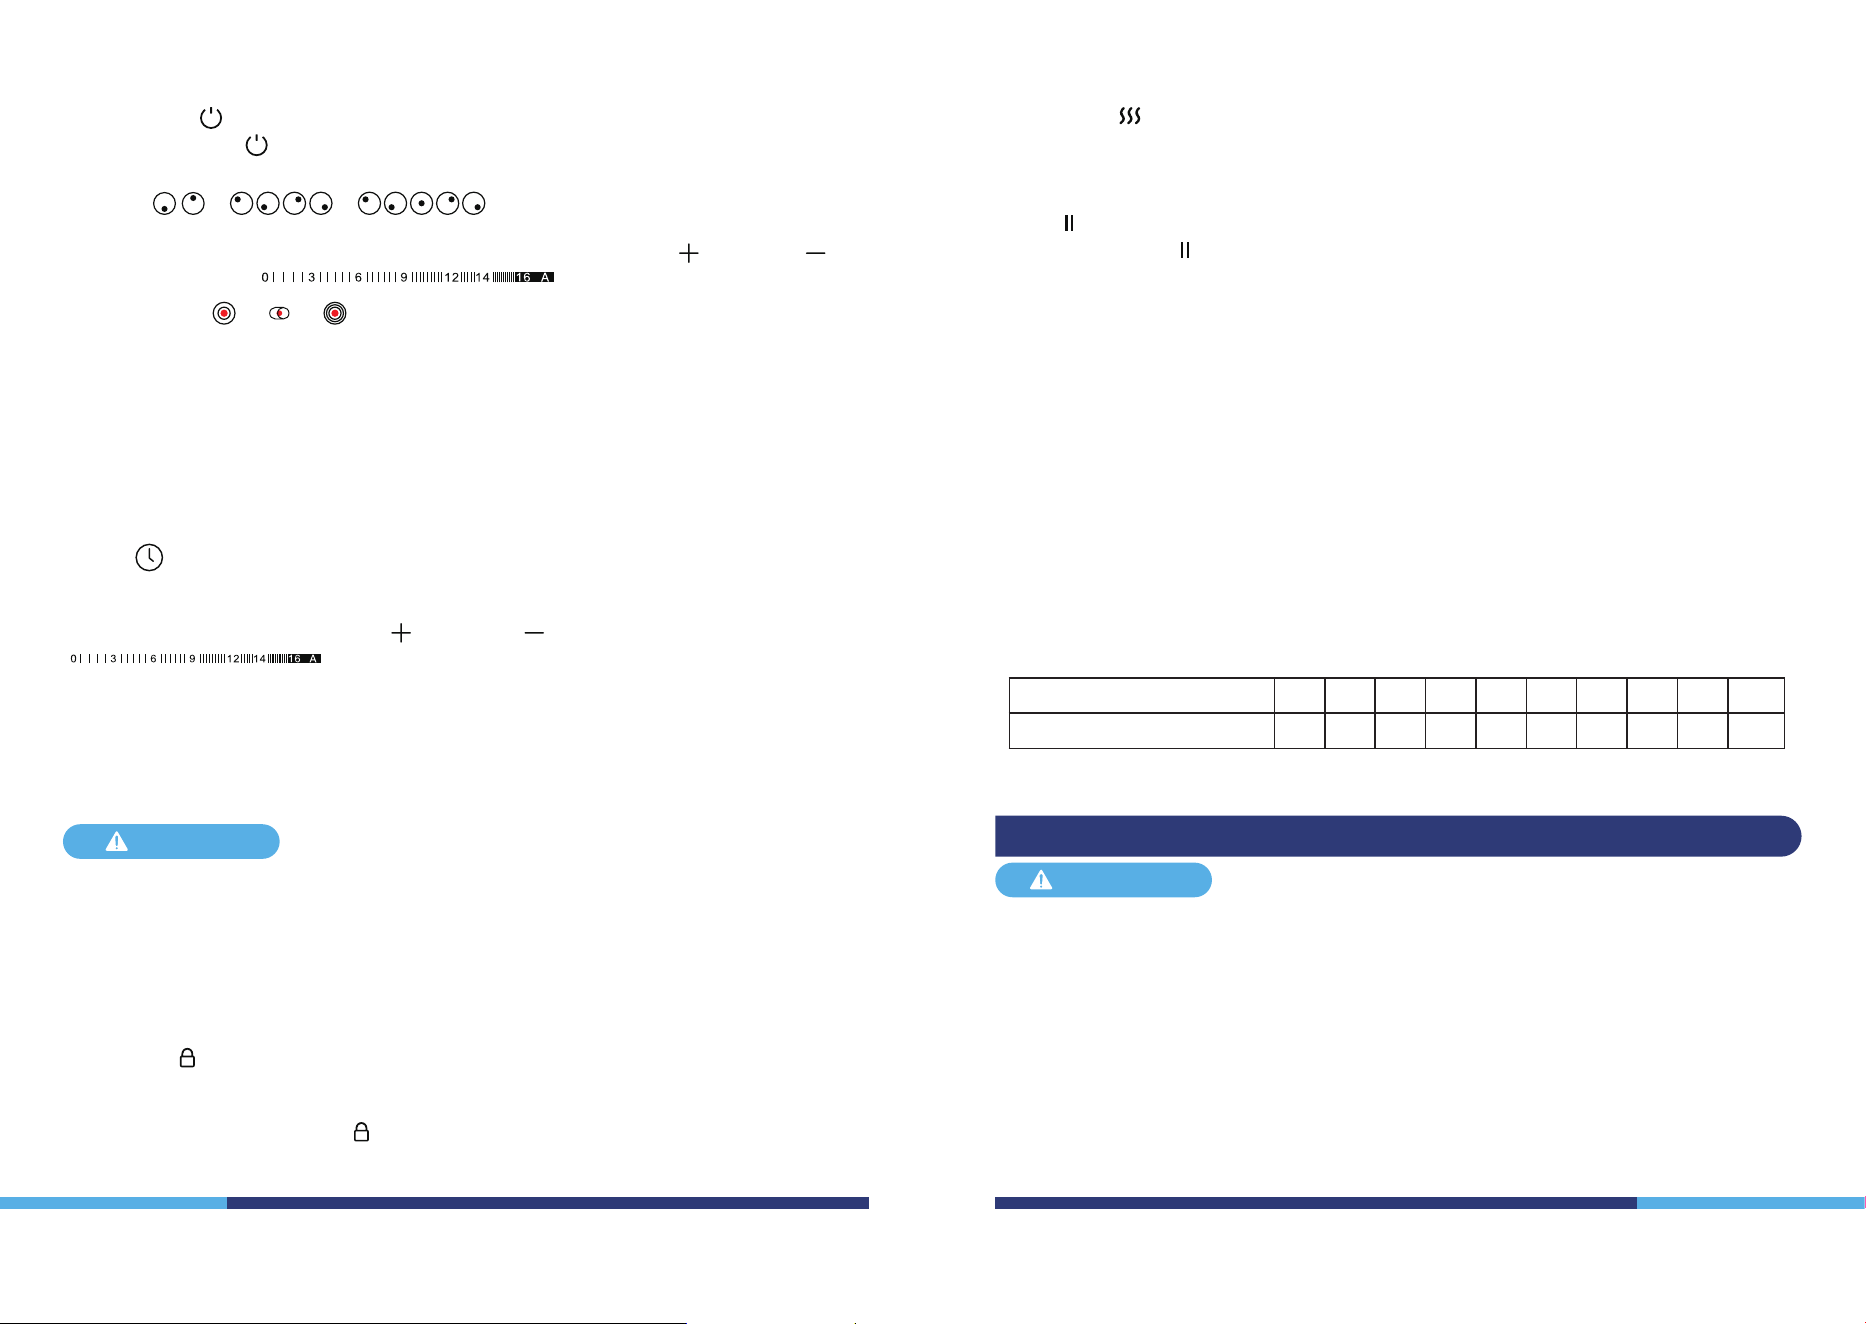
Control Panel
Model: EPS2V-12-CC
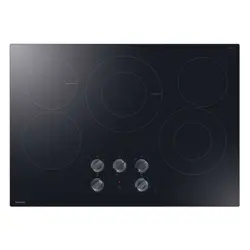
Model: EPS4V-24-CC
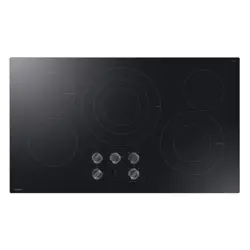
Model: EPS4V-30-CC
Model: EPS5V-30-CC
Model: EPS5V-30-CC
Slider
Double Rings Selection for Right Front Zone
Double Rings Selection for Right Rear Zone
Three Rings Selection for Left Front Zone
Power
Child Lock
Keep Warm
Pause
Timer
Increase
Decrease
Front Burner Selection
Rear Burner Selection
Left Rear Burner Selection
Left Front Burner Selection
Middle Burner Selection
Right Rear Burner Selection
Right Front Burner Selection
Operating the Cooktop
Ensure the cooktop is connected to a functional power supply.
Place suitable cookware on the cooktop.
Using the Touch Controls
•
Use the ball of your nger, not the tip.
•
A beep will sound each time a touch is successfully registered.
•
Ensure the controls are always clean and dry, and that no objects (e.g., utensils or cloths)
are covering them. Even a thin lm of water can interfere with proper operation.
13 14
Timer
Press the Timer key to activate the timer for either burner. Each time the Timer key is
pressed, the indicator light for either the front or rear burner will illuminate. Once the
burner is selected, press the increase or decrease keys, or use the slider
on the control panel to set the cooking time in minutes. The
remaining time will be displayed on the digital screen, and the numbers will count down
as the time progresses. If multiple burners are selected, the time displayed will reect the
shortest cooking time.
To cancel the timer, press the Timer key to select the burner to cancel. Then slide the slider
on the control panel to set the time to "00". Alternatively, press the Timer key for 3 seconds,
and the timers for all burners will be canceled.
Burners / /
To select a burner and adjust the power level, press the burner key for the desired burner.
You can increase or decrease the power level by pressing the increase or decrease keys,
or by using the slider.
Residual Heat Indicator
After the cooktop has been operating for some time, residual heat may remain. When the
surface temperature reaches approximately 140°F (60°C) or higher, an “H” will appear on the
display. This indicator will turn o once the cooktop has suciently cooled down.
Double Rings or or
Press the corresponding burner selection key; you will see ashing lines on the display. You
can adjust the power level by sliding the slider or pressing a number.
When the display is ashing, press the double ring key once or twice to select either the
inner heating circle (for a smaller pot or lower power) or the full larger heating circle.
Each burner on the cooktop is equipped with a safety temperature sensor that
automatically switches off the cooktop if excessive heat is detected. This feature is
designed to protect the electronics from overheating.
Wait for the cooktop to cool down before using it again. If any cracks appear on the
surface of the cooktop, immediately disconnect it from the power supply.
If the cooktop is left on accidentally, it will automatically switch o after a certain period
of time.
NOTICE
Child Lock
To ensure the safety of children, the cooktop controls can be locked to prevent children
from changing the settings.
To lock: Hold the Child Lock key for 3 seconds until "L0" appears on the display, and the
other keys will be disabled, except for the On/Off Power key. To unlock: Hold down the
Child Lock key for 3 seconds, and the cooktop will return to normal operation.
Keep Warm
Press the Keep Warm key to activate the burner at a low temperature and keep the food
warm. The display will show " " the Keep Warm symbol.
Press the key again to cancel the Keep Warm feature.
Pause
Press the Pause key" "to temporarily stop heating. Press the key again to resume cooking.
The Pause feature remains active for up to 2 hours. After this time, the burner will
automatically turn o.
Safety systems
To protect the electronics from overheating, if the control unit detects excessive heat, it will
automatically switch o the cooktop closest to the sensors, and the letter "H" will appear
on the display. The cooktop can be reactivated once the temperature of the electronics
returns to normal.
Each cooktop is equipped with an internal temperature limiter that switches off the
cooktop if the radiant surface is excessively heated.
If any cracks appear in the radiant surface, immediately disconnect the cooktop from
the power supply. Do not use any part of the cooktop until the radiant surface has been
replaced.
Main Power
Press the Power key" " to turn on the cooktop.
You will hear a beep and see ashing lines on the displays next to both burners.
Auto Shutdown Protection
Auto shut-down is a safety protection feature of the induction hob.The hob will
automatically switch off if it is left on for an extended period without user interaction.
The default operating times for each power level are shown in the table below:
When the pot is removed, the induction hob stops heating immediately and will
automatically switch o after 1 minute.
Power level 1 2 3 4 5 6 7 8 9 Boost
Default working timer (hour) 2 2 2 2 3 2 2 2 2 2
Cleaning and Maintenance
CAUTION
•
Cleaning should only be performed when the cooktop is completely cool. Always
disconnect the appliance from the power supply before beginning any cleaning.
•
Before cleaning, ensure all cooking zones are switched o and that the residual heat
indicator (“H”) is no longer visible.
•
IMPORTANT: Do not use abrasive sponges or scouring pads, as they may
permanently damage the glass surface.
•
Use a mild detergent and a damp cloth to wipe down the cooktop.
•
If plastic or sugar spills onto the surface, carefully scrape it o with a suitable scraper
while the surface is still hot, using caution to avoid burns.
•
Using dirty pots or pans may cause discoloration or burnt-on stains.
•
Do not use benzene, thinner, scrubbing brushes, or polishing powder to clean the
cooktop.
15 16
•
Do not use flammable, acidic, or alkaline substances near the cooktop, as they may
shorten its lifespan or lead to combustion when the cooktop is in use.
•
Clean the glass surface regularly when it is cool, using dishwashing liquid and a damp
cloth.
•
Use a vacuum cleaner to remove dust from the intake and exhaust vents.
•
Do not use a steam cleaner to clean your cooktop.
•
Never pour or spray water directly over the unit, as it may cause malfunction.
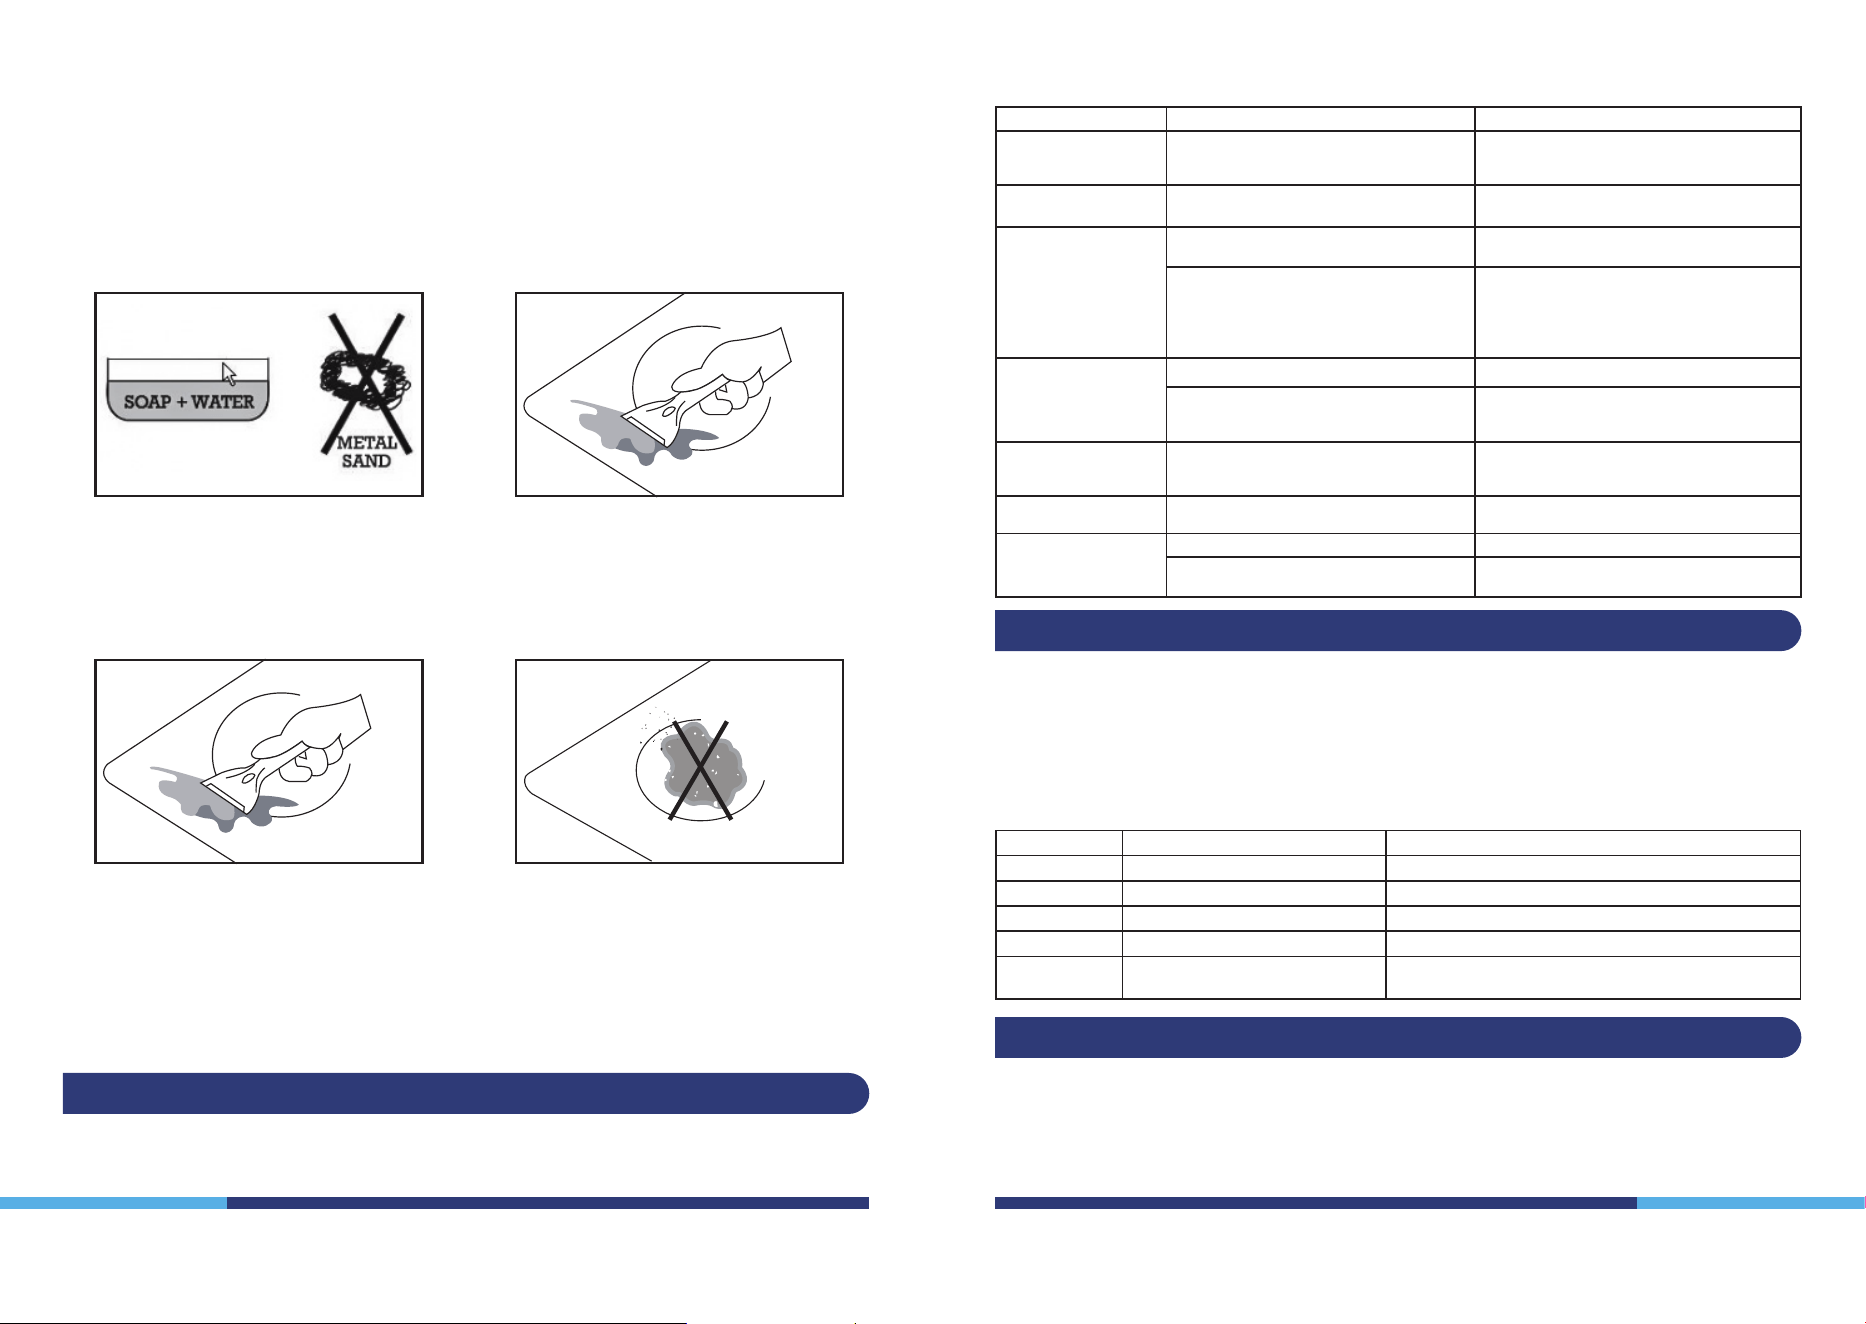
Clean the radiant glass surface
frequently. when it is cool.
Never use abrasive products or pads,
Clean with a wet cloth.
Once a week, clean thoroughly with
specific products that preserve and
protect the cooktops.
Scrape o stuck on stuck dirt with a
scraper.
If sugar (or sugary matter) or plastic
is accidentally burnt on the cooktop,
remove at once with the scraper
while still hot.
Otherwise it may leave a permanent
mark.
Do not use the cooktop as a work
surface.
Be particularly careful with dirt or
dust from vegetables, cleaning
powders, etc.
which may scratch the surface when
pans are slid over it.
INMEDIATELY
Trouble Shooting
In most cases, when your cooktop fails to operate, the issue can be easily resolved without
the need to call a technician. Before requesting assistance, always check the following
points. Repairs should only be performed by an authorized service agent.
Problem Possible Cause Solution
Surface elements will
not maintain a rolling
boil or cooking is slow.
Improper cookware being used.
Use pans that are absolutely flat and match
the diameter of the surface unit selected. If
possible, please cover the cookware cap.
Surface elements do
not work properly
Cooktop controls improperly set.
Check to be sure the correct control is set for
the surface element you are using.
Scratches on cooktop
glass surface
Incorrect cleaning methods being used. Use recommended cleaning procedures. See
the Cleaning and maintenance section.
Cookware with rough bottoms being
used or coarse particles (salt or sand) were
between the cookware and the surface of
the cooktop. Cookware has been slid across
the cooktop surface.
To avoid scratches, use the recommended
cleaning procedures. Make sure bottoms of
cookware are clean before use, and use
cookware with smooth bottoms.
Areas of discoloration
on the cooktop
Food spillovers not cleaned before next use. See the Cleaning and maintenance section.
Hot surface on a model with a light-colored
glass cooktop.
This is normal. The surface may appear
discolored when it is hot. This is temporary
and will disappear as the glass cools.
Plastic melted to the
surface
Hot cooktop came into contact
with plastic placed on the hot
cooktop.
See the Glass surface-potential for permanent
damage section in the Cleaning and
maintenance section.
Pitting (or indentation)
of the cooktop
Hot sugar mixture spilled on the cooktop. Call a qualied technician for replacement.
Unresponsive control
panel
Control panel is dirty. Clean the control panel.
A fuse may be blown or the circuit breaker
tripped.
Replace the fuse or reset the
circuit breaker.
Error Codes
Customer Care Service
Information codes may be displayed to help you understand better what is wrong with the
appliance. Read and follow the instructions given in the section “Instructions for use”.
•
Check that the electricity supply has not been shut o.
•
Dry the hob thoroughly after cleaning it.
•
If, when the hob is switched on, alphanumeric codes appear on the display, consult the
following table for instructions.
•
If the hob cannot be switched o after using it, disconnect it from the power supply.
If a fault occurs, please follow these steps before contacting After-Sales Service:
•
Check that the appliance is properly plugged in or that the hardwiring is correctly
connected.
•
Refer to the fault code and display table above.
If you are still unable to resolve the issue, switch o the appliance. Do not attempt to
dismantle it. Contact After-Sales Service for further assistance.
Error Codes Possible Cause Solution
E0 No pan or incorrect pan on burner. Place correct pan on burneron it.
E2 NTC short or not connected. Contact the after-sales service and specify the error code.
E3 Over-high voltage. Ensure voltage is below this range.
E4 Over-low voltage. Ensure voltage is above this range.
CC-C-C-C Liquid ow on the control panel Please clean the control panel, after 2mins, re-power the
stove to work again.