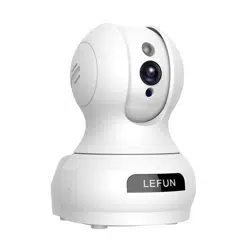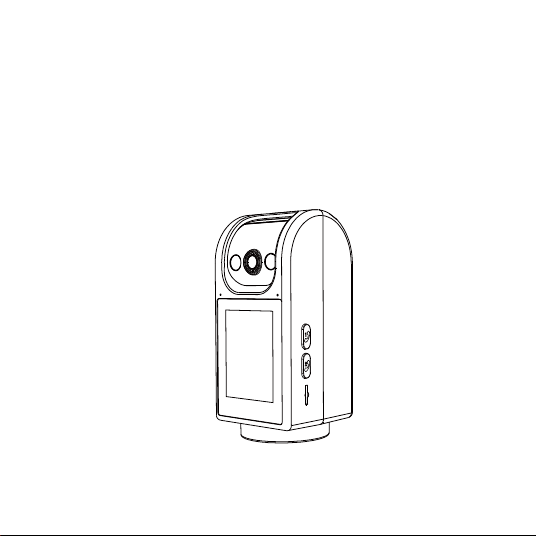
C520M Wireless IP Camera
Quick Start Guide
Please read before use and keep for reference. Actual contents may vary as
the product updates.
1
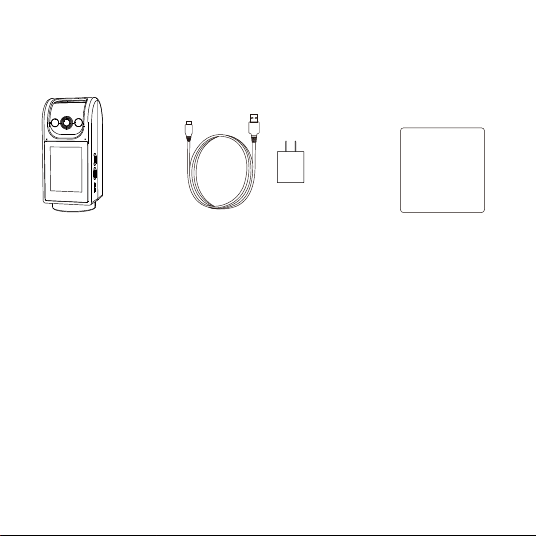
What’s in the Box
Camera Power Adapter Quick Start Guide
Quick Start Guide
NOTE: The number of accessories may vary by model.
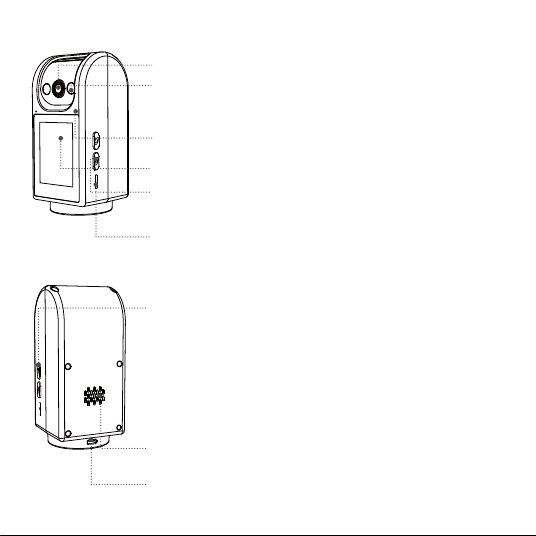
Camera Introduction
Lens/ Lente
Infrared/White Light
Screen/ Pantalla
Microphone/ Micrófono
Call Button/ Botón de Llamada
Micro SD Card Slot/ Ranura para Tarjeta MicroSD
Reset: (When connecting the power cable, press and hold both buttons for 5
seconds to reset.)
Reset: (Mantenga pulsados ambos botones al mismo tiempo durante 5
segundos para reiniciar al conectar la fuente de alimentación.)
Speaker/ Altavoz
Type-C Power Port/ Conector de Alimentación Tipo-C
2
Preparation Before Use
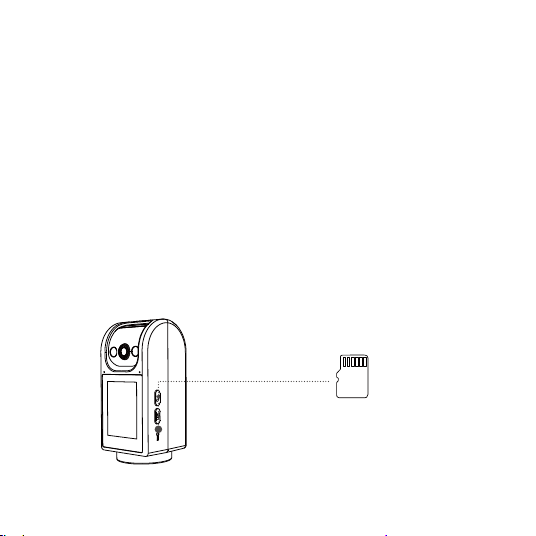
1. Install the Micro SD Card
EN: Power off the camera. Insert the Micro SD card into the slot on the right side,
with the contact side facing inward.
NOTE: Insert or remove the card only when the camera is off. Use a FAT32-for-
matted Micro SD card from a reputable brand, with at least U1/Class10 speed.
ES: Asegúrese de que la cámara está apagada, la ranura de la tarjeta Micro SD
está en el lado derecho del producto, inserte la tarjeta MicroSD con el lado de
contacto hacia adentro en la ranura.
Nota: cuando instale o extraiga la tarjeta MicroSD, la cámara debe estar apagada
y sin alimentación para evitar dañar la tarjeta MicroSD. Por favor, utilice una tarjeta
MicroSD de un fabricante habitual. La cámara sólo admite tarjetas con formato
Fat32, así que asegúrese de que su tarjeta MicroSD tiene formato Fat32.
Recomendamos utilizar una tarjeta con una velocidad de lectura y escritura
superior a U1/Clase10.
MicroSDCardSlot
Ranura para tarjeta Micro SD
3
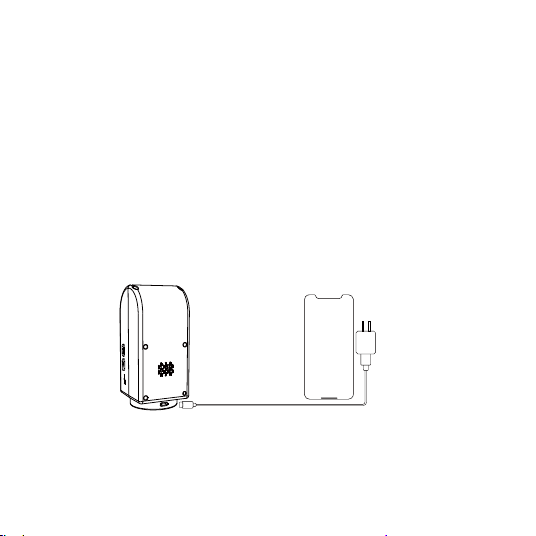
2. Power On the Device
EN: Connect the power cable to the Type-C port on the back of the camera. The
camera will power on automatically.
NOTE: During startup, the camera will rotate automatically. Do not manually
adjust the camera. The self-check takes about 30 seconds.
ES: Conecte el cable de alimentación al conector Tipo-C (conector de
alimentación) en la parte posterior de la cámara, la cámara se encenderá
automáticamente.
Nota: La cámara girará automáticamente durante el proceso de arranque, por
favor, no fuerce para ajustar la cámara manualmente, la auto-prueba es de
aproximadamente medio minuto.
4
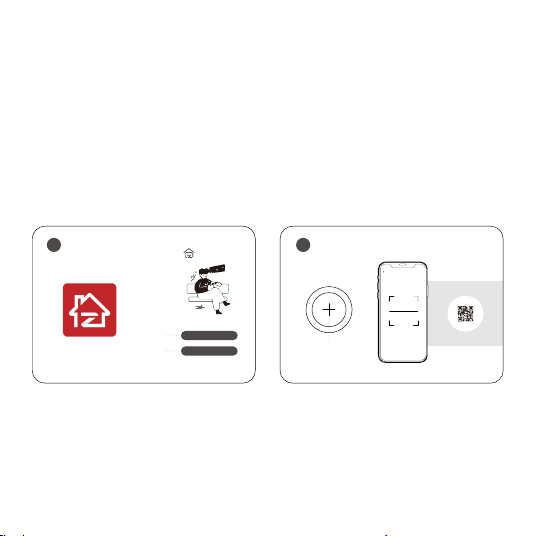
2. Add the Device
EN:
A. Open the Zosi Smart App, then follow the prompts to register and log in.
B. Tap the "+" icon to add your device, and follow the in-app instructions to set up
the network and complete the device adding.
NOTE: Allow the App to access all required permissions to ensure full
functionality during use.
ES:
A. Abra la aplicación Zosi Smart y siga las instrucciones para registrarse e iniciar
sesión.
B. Haga clic en «+» para añadir un dispositivo, siga las indicaciones de la
aplicación para configurar la red y completar la adición del dispositivo.
Initial Setup via Zosi Smart App
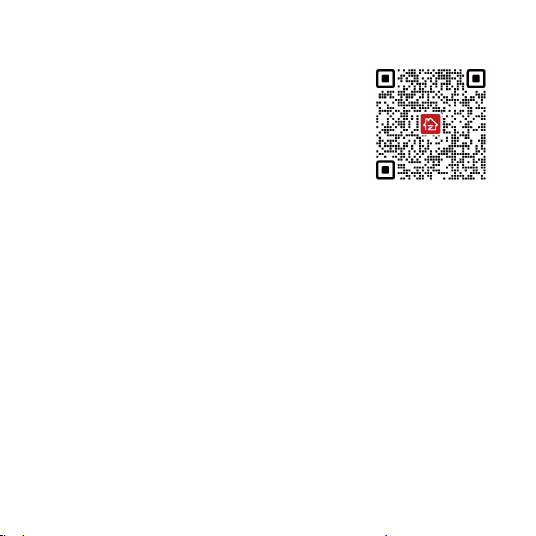
1. Download the App
EN: Search for Zosi Smart in App store, or scan the
QR code with your browser or camera to download.
ES: Puede descargar la aplicación buscando
«ZosiSmart» en el mercado de aplicaciones
móviles, o escaneando el código QR de arriba para
descargarla.
Android/IOS
5
02
Add device
QR code on device
Scan QR code
on device
01
Sign up
Language
Log in Log in
New users should register first
and then log in.
Sign up
ZosiSmart
ZosiSmart
EN:
Follow the App's instructions to complete installation, registration, and login.
Ensure you grant all necessary permissions during setup, as some features may
not work if permissions are denied.
ES:
Siga las instrucciones de la APP para completar la instalación, el registro y el
inicio de sesión. En el proceso de instalación y uso de la APP, por favor permita
que la APP obtenga todos los permisos requeridos, de lo contrario algunas
funciones no estarán disponibles durante el uso del producto.
6
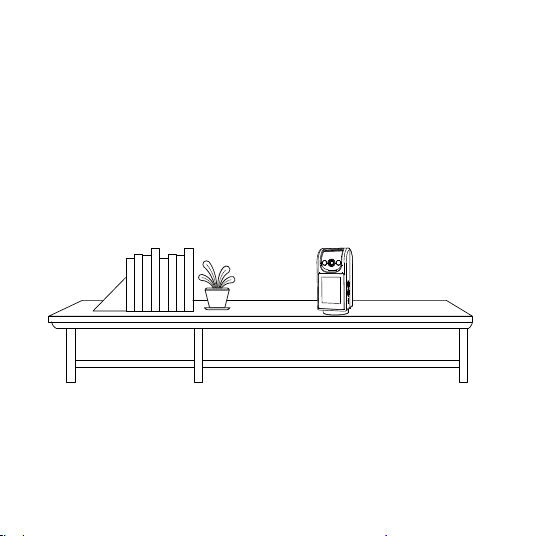
Install the Camera
EN:
1. Before installation, ensure the camera has been successfully added to the
App.
2. Installation method: The camera can be placed on flat surfaces such as a
desk, coffee table, or shelf.
ES:
1. Antes de la instalación, asegúrese de que la cámara se ha añadido
correctamente en la APP.
2. Instalación: puede poner la cámara en el escritorio del ordenador, mesa de
café, armario y otras superficies planas.
7

Safety Information
EN:
1. Do not install this camera outdoors (including under eaves or covered areas).
2. For indoor installation, keep it away from humid or high-temperature areas.
3. Avoid prolonged exposure to direct sunlight.
4. Regularly clean the lens with a soft cloth, and ensure the power port is kept
dry and free of dirt or obstructions.
5. The App will be updated periodically to enhance the user experience. Follow
the in-app instructions for any updates.
ES:
1. Este modelo no debe ser instalado al aire libre (incluyendo pero no limitado a
aleros, compuestos techados, etc.).
2. La instalación en interiores necesita prestar atención para mantenerse alejada
de ambientes húmedos o con altas temperaturas.
3. Cuando se utilice este producto, evite la luz solar directa durante mucho
tiempo.
4. Se recomienda limpiar la lente regularmente con un paño suave, y asegurarse
de que el puerto de alimentación no está expuesto al agua o la humedad, o
bloqueado por la suciedad u otras cosas.
5. Con el fin de mejorar la experiencia del producto, la APP se actualizará y
mejorará de vez en cuando, el funcionamiento específico será ligeramente
diferente, por favor, siga las instrucciones de la APP.
8

FAQ
EN:
Q: Why is the device offline?
Check if the device is connected to the network, if the router is functioning
properly, and if the router is set to automatically obtain an IP address.
ES:
P: ¿Por qué el aparato no está conectado a Internet?
Por favor, compruebe si el aparato ha sido conectado a la red, si el router
funciona normalmente para acceder a Internet y si el router está habilitado para
obtener la dirección IP automáticamente.
EN:
Q: Why can't I find video recording files?
Check if the micro SD card is damaged, verify that the date you're searching is
correct, and ensure the device's system time is set properly.
ES:
P: ¿Por qué no encuentro el archivo de grabación de vídeo?
Compruebe si la tarjeta SD está dañada, si la fecha del archivo de búsqueda es
válida y si la hora de configuración del sistema del dispositivo es correcta.
EN:
Q: Why isn't the two-way audio function working?
Ensure all necessary App permissions were granted when installing the App on
your phone.
ES:
P: ¿Por qué no puedo utilizar la función de intercomunicador?
Por favor, compruebe si todos los permisos de la aplicación están permitidos
cuando instale la APP en su teléfono móvil.
9

EN:
Q: Why am I not receiving alarm notifications on the mobile App?
Check if the App's notification settings are enabled, and confirm that your phone
allows notifications from the App.
ES:
P: ¿Por qué la APP del teléfono móvil no recibe mensajes de alarma?
Por favor, compruebe si el interruptor de mensaje de la APP está activado y si el
teléfono móvil permite a la APP enviar alertas de notificación.
EN:
Q: Why can't I add the device to the App?
Verify that the WiFi name and password are correct, and try resetting the device
before adding it again.
ES:
P: ¿Por qué no se puede añadir el dispositivo en la APP?
Por favor, compruebe si el nombre WiFi y la contraseña WiFi añadidos por el
dispositivo se introducen correctamente, puede restablecer el dispositivo para
añadir de nuevo.
10
11
Notification of Compliance
Simplified EU Declaration of Conformity
ZOSI declares that the device is in compliance with the essential requirements
and other relevant provisions if Directive 2014/53/EU.
Correct Disposal of this Product
This marking indicates that this product cannot be disposed with other
household wastes throughout the EU. To prevent possible harm to the
environment or human health from uncontrolled waste disposal and promote the
sustainable reuse of material resources, please recycle it responsibly. To return
your used device, please visit the Return and Collection System or contact the
retailer from whom
the product was purchased. They can take this product away for environmental-
ly safe recycling.
12
Notificación de Cumplimiento
Declaración de Cumplimiento de la FCC
Este dispositivo cumple con la Parte 15 de las Normas de la FCC.
La operación está sujeta a las siguientes dos condiciones:
(1) Este dispositivo no puede causar interferencias perjudiciales,
(2) Este dispositivo debe aceptar cualquier interferencia recibida, incluidas las
inferencias que puedan provocar una operación no deseada.
Declaración de Conformidad de UE Simplificada
ZOSI declara que el dispositivo cumple con los requisitos esenciales y otras
disposiciones relevantes de la Directiva 2014/53/UE.
Eliminación Correcta de este Producto
Esta marca indica que este producto no se puede desechar con otros residuos
domésticos en toda la UE. Para evitar posibles daños al medio ambiente o la
salud humana por la eliminación descontrolada de desechos y promover la
reutilización sostenible de los recursos materiales, recíclelo de manera
responsable. Para devolver su dispositivo usado, visite el Sistema de Devolución
y Recolección o comuníquese con el minorista donde compró el producto.
Pueden llevarse este producto para un reciclaje seguro para el medio ambiente.

13
NOTE: This equipment has been tested and found to comply with the limits for
a Class B digital device, pursuant to part 15 of the FCC Rules. These limits are
designed to provide reasonable protection against harmful interference in a
residential installation. This equipment generates, uses and can radiate radio
frequency energy and, if not installed and used in accordance with the
instructions, may cause harmful interference to radio communications.
However, there is no guarantee that interference will not occur in a particular
installation. If this equipment does cause harmful interference to radio or
television reception, which can be determined by turning the equipment off
and on, the user is encouraged to try to correct the interference by one or more
of the following measures:
- Reorient or relocate the receiving antenna.
- Increase the separation between the equipment and receiver.
-Connect the equipment into an outlet on a circuit different from that to which
the receiver is connected.
-Consult the dealer or an experienced radio/TV technician for help
Changes or modifications not expressly approved by the party responsible for
compliance could void the user's authority to operate the equipment.
This device complies with Part 15 of the FCC Rules. Operation is subject to the
following two conditions:
(1) this device may not cause harmful interference, and (2) this device must
accept any interference received, including interference that may cause
undesired operation.

14
RF Exposure Warning Statements:
This equipment complies with FCC radiation exposure limits set forth for an
uncontrolled environment. This equipment shall be installed and operated with
minimum distance 20cm between the radiator & body.
For USA: The frequency stability of all transmission frequencies of U-NII-1,
U-NII 2A, U-NII 2C and U-NII-3 meets the requirements of 47 CFR FCC
Part15.407(g), and the manufacturer declares that their transmission is
maintained at Band U-NII-1, U-NII 2A, U-NII 2C and U-NII-3.
This device contains licence-exempt transmitter(s)/receiver(s) that comply with
Innovation, Science and Economic DevelopmentCanada’s licence-exempt
RSS(s). Operation is subject to the following two conditions:
(1) This device may not cause interference.
(2) This device must accept any interference, including interference that may
cause undesired operation of the device.
L’émetteur/récepteur exempt de licence contenu dans le présent appareil est
conforme aux CNR d’Innovation, Sciences et Développement économique
Canada applicables aux appareils radio exempts de licence. L’exploitation est
autorisée aux deux conditions suivantes:
(1) L' appareil ne doit pas produire de brouillage;
(2) L' appareil doit accepter tout brouillage radioélectrique subi, même si le
brouillage est susceptible d' en compromettre le fonctionnement.

15
ISED Radio Frequency Exposure Statement:
The device has been evaluated to meet general RF exposure requirements. The
device can be used in mobile exposure conditions. The min separation distance
is 20 cm.
ISED Déclaration d'exposition aux radiofréquences:
L'appareil a été évalué pour répondre aux exigences générales en matière
d'exposition aux RF. L'appareil peut être utilisé dans des conditions d'exposition
mobiles. La distance de séparation minimale est de 20 cm.
Operation of this device is restricted to indoor use only. (5150-5350MHz)
Le fonctionnement de cet appareil est limité à une utilisation en intérieur
uniquement. (5150-5350MHz)
For Canada: The frequency stability of all transmission frequencies of U-NII-1,
U-NII 2A, U-NII 2C and U-NII-3 meets the 47 CFR FCC Part15.407(g)
requirements, and the manufacturer states that their transmissions remain within
the U-NII-1, U-NII 2A, U-NII 2C and U-NII-3 bands.
Pour le Canada : La stabilité de fréquence de toutes les fréquences de
transmission de U-NII-1, U-NII 2A, U-NII 2C et U-NII-3 est conforme aux
exigences 47 CFR FCC Part15.407(g), et le fabricant déclare que leurs
transmissions restent dans les bandes U-NII-1, U-NII 2A, U-NII 2C et U-NII-3.