
Oven Operation Guide
APPLICABLE MODEL: KXP36-SS, KXP36-GL, KXD36, KXP30-SS,
KXP30-GL, KXD30, KXP48-SS, KXP48-GL, KXD48, KXP60-SS, KXP60-GL
KXSERIES

Product Specifications
Display Instructions
Function Instructions
1. Power on
2. Standby State
2.1. Clock Setting
3. Start up State
3.1. Heating Mode Setting
3.2. Temperature Setting
4. Heating State
5. End State
6. Lamp Setting
7. Fan Setting
8. Door Detection
9. Fault Conditions
3
4
5
5
5
6
6
7
7
8
9
9
10
10
11
INDEX
2
Oven Operation Guide
KXSERIES
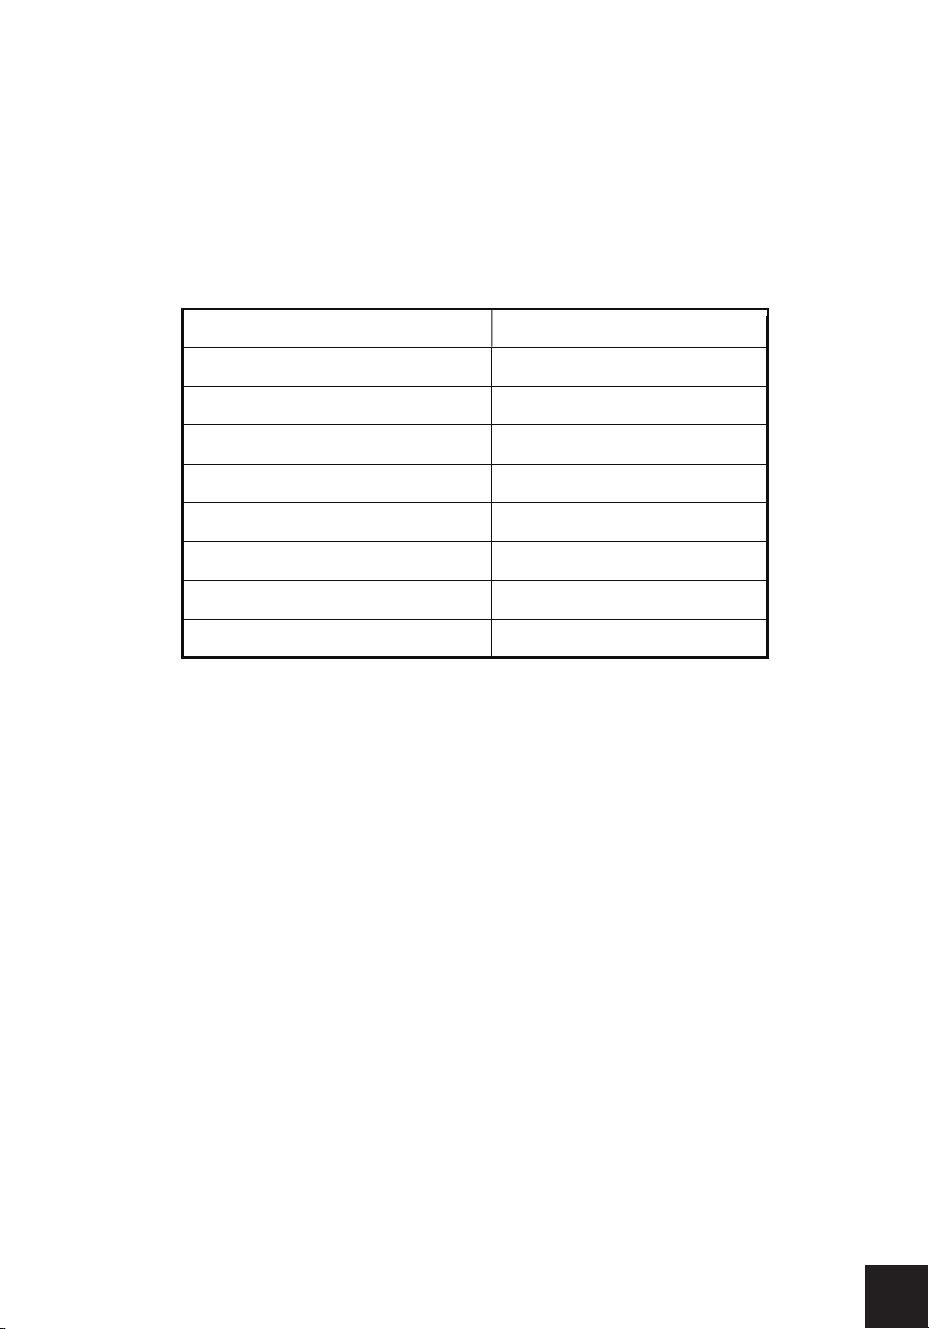
Display
type
LED
Display light
White
Button number 5
Control method Knob + Button
Button type
Touch
Temperature performance T120
Input voltage 240V
Working voltage
240V/120V
Rated frequency 60Hz
PRODUCT SPECIFICATIONS
3
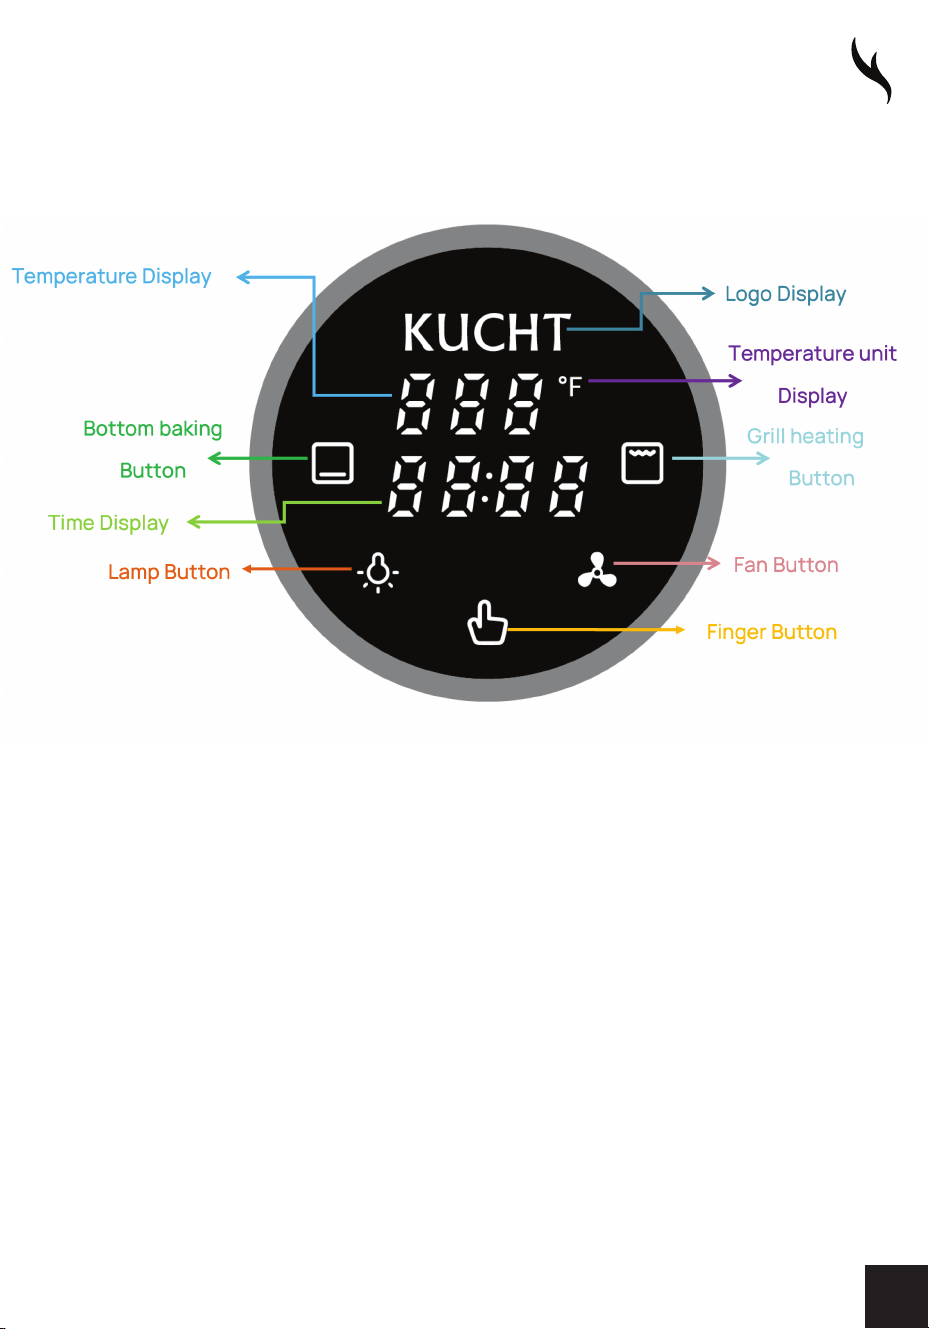
DISPLAY INSTRUCTIONS
4

1. POWER ON
1. After the product is powered on, there will be a "power on sound".
The screen will display the product Logo and clock 12:00 (blinking),
and the Finger Button will appear white. Next, enter the Clock Setting
in the Standby State.
2. As long as the product is powered on, the Logo will always light up.
2. STAND-BY STATE
1. ln normal Stand-by State, only the product Logo, clock, and Finger
Button are displayed on the screen.
2. ln the Stand-by State, when the clock is not set, click the Finger
Button to enter the Start up State.
3. The clock can be set only in Stand-by State.
FUNCTION INSTRUCTIONS
5

2.1. CLOCK SETTING
1. After entering the Clock Setting, the clock blinks, indicating that the
current clock can be adjusted, and the clock can be adjusted by
turning the knob. The clock is set to 12 hours.
2. After adjusting the clock, click the Finger Button or do not operate
for 5 seconds to exit the Clock Setting and return to the normal
display in the Standby State.
3. START UP STATE
1. After entering the Start up State, all buttons light up and the product
makes a "power-on tone".
2. ln the Start up State, you can set the heating mode and temperature.
If you do not operate the product for 10 minutes (when the fan is not
started) or hold down the Finger Button for 2 seconds, the product
enters the Standby State.
FUNCTION INSTRUCTIONS
6

3.1. HEATING MODE SETTING
1. This product provides two heating modes, namely bottom element
heating and grill heating.
2. Click the Bottom baking Button to set the heating mode to bottom
element heating. At this time, the Bottom baking Button remains fully
lit, and the Grill heating Button turns dark; Click Grill heating Button
to set the heating mode to grill heating. At this time, Grill heating
Button becomes fully lit and Bottom baking Button darkens.
3. The user can select one of the heating modes for heating. After
selecting any heating mode in the above way, click the Finger Button
to enter the Temperature Setting. Users can also not select any
heating mode, click the Finger Button can directly enter the
Temperature Settings.
3.2. TEMPERATURE SETTING
1. For either heating method, the temperature range can be set from
190°F to 500°F.
2. Slowly turn the knob to a temperature adjustable range of5°F; Quickly
turn the knob for a temperature adjustable range of 10°F.
3. After adjusting the temperature, click the Finger Button to enter the
Heating State.
FUNCTION INSTRUCTIONS
7

4. HEATING STATE
1. After entering the heating state, the time in the middle of the screen
begins to accumulate. The maximum heating time is 2h, and the
Finger Button in bright red. If the user selects the overheating mode
in the Start up State, the selected heating mode is fully bright, and the
unselected heating mode buttons are dimmed. If the user has not
selected the heating mode in the Start up State, after entering the
Heating State, the Bottom baking Button is fully bright by default, and
Grill heating Button is displayed in half.
2. After entering the Heating State, you can also modify the heating
mode and default temperature. Click the desired heating mode
button to switch the heating mode directly, and turn the knob to
directly adjust the temperature. When adjusting the temperature, the
temperature display will flash. After the temperature is adjusted, click
the Finger Button or leave it for 5 seconds without operation to exit
the Temperature Setting.
3. ln the Heating State, press the Finger Button for 2 seconds to enter
the Start up State or can end the heating.
4. lf the heating time reaches a maximum of 2 hours, the product will
automatically enter the End State.
FUNCTION INSTRUCTIONS
8

5. END STATE
1. After entering the End State, the Finger Button is fully white, and the
screen displays "End" on the left.
2. In the End State, click the Finger Button to enter the Start up State.
3. ln the End State, long press the Finger Button for 2s to return to the
Standby State.
6. LAMP SETTING
1. ln addition to the Standby state and Fault Conditions, the lamp can be
turned on or off by the Lamp Button in other states. When the lamp is
turned on, the lamp button is fully on; when the lamp is turned off, the
lamp button is dimmed.
2. With the door open, the lamp stays on. After closing the door, the
lamp will be delayed for 2 minutes to turn off. Afterwards, when the
oven door is closed, click the Lamp Button to turn on the lamp, and
then without 10 minutes operation or click the Lamp Button to turn
off the lamp.
3. After entering Standby State, the lamp will be turned off.
4. After entering the Heating State and End State, the lamp will
automatically light up for 2 minutes.
5. Hold down lamp button for 3 seconds, the long strip lamp on, hold
down lamp button 3 second again,the long strip lamp off.
9
FUNCTION INSTRUCTIONS

7. FAN SETTING
1. You can use the Fan Button to enable or disable the fan in any state
except the Standby State and Fault Conditions.
2. After the Fan Button is started, the Fan Button is all on. After the fan
is turned off, the Fan Button is dimmed.
Note: After entering the Heating State, the fan will automatically turn on
and the Fan Button will light up. When the oven reaches the set
temperature, the Fan Button can control the fan to turn on or off again.
8. DOOR DETECTION
1. ln the Heating State, after the oven door is opened, the heating time
continues to be timed, and the lamp will always be on.
2. After closing the oven door, the lamp will be delayed for 2 minutes.
FUNCTION INSTRUCTIONS
10

9. FAULT CONDITIONS
1. The oven malfunctions in the following cases. After a fault occurs, the
oven will sound 20 fault sounds, and the corresponding fault code will
be displayed in the center of the screen.
2. ln case of some failures, click the Finger Button to return to Start up
State. In the case of some failures, click the Finger Button or turn the
knob to return to the original state. In the case of other faults, after
troubleshooting, the product needs to be powered on again to
resume normal operation.
3. See next page for troubleshooting error codes.
FUNCTION INSTRUCTIONS
11
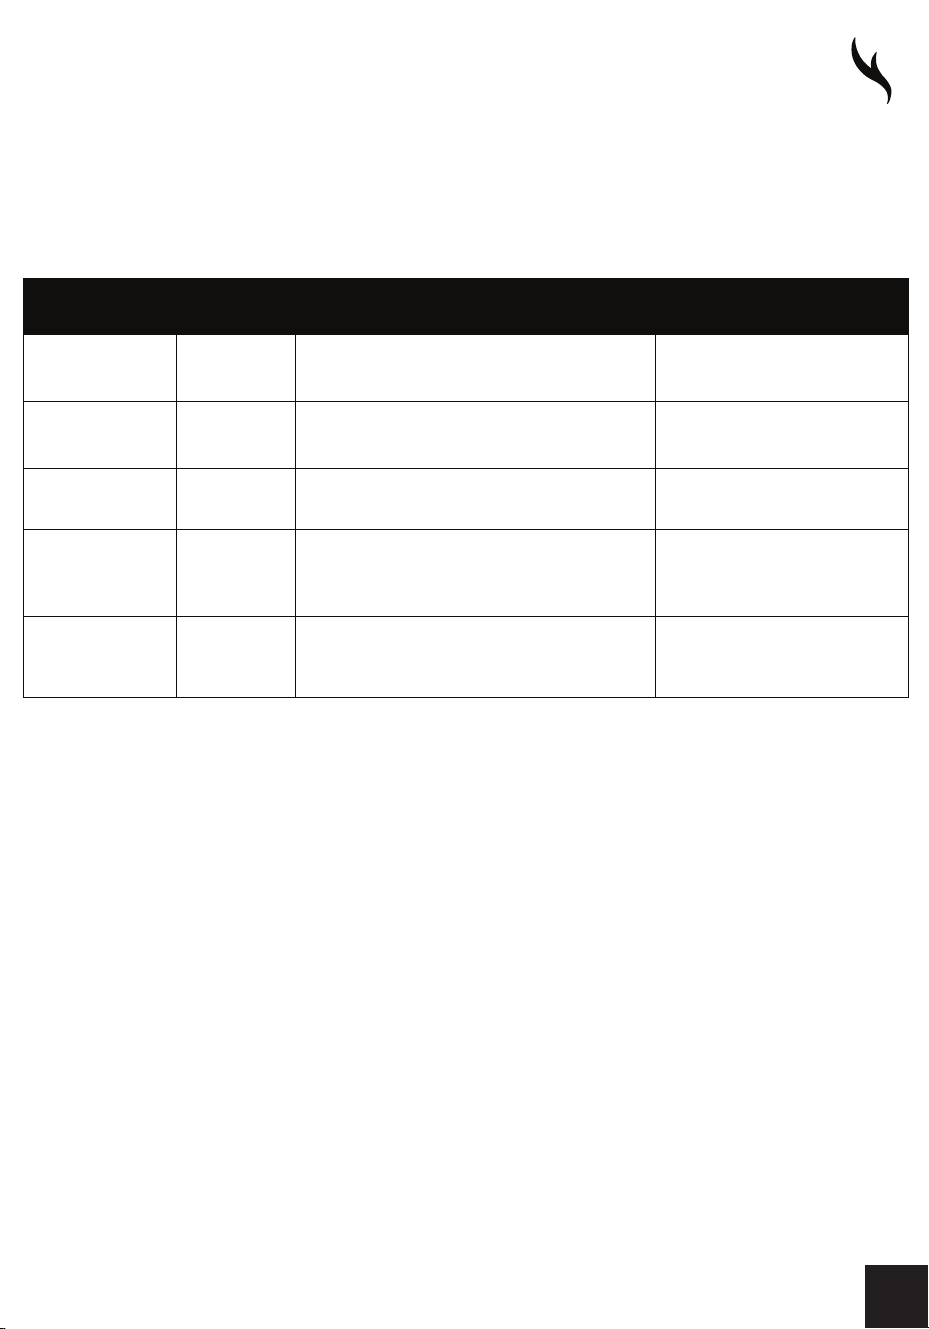
TROUBLESHOOTING
NTC
open
circuit
EOl
Open circuit or open NTC is detected
X
NTC
short
circuit
E02
NTC short circuit is detected
X
Abnormal
communication
Ell
Abnormal communication is detected
X
Abnormal
crystal
E14
Abnormal crystal oscillator detected
Restore to original state
oscillator
Abnormal high
temperature
E15
After heating, it is detected that oven
temperature exceeds 600°F for 20s
ERROR
CODE
FAULT
CONDITION
FAULT
REASON
WETHER OVEN CAN
RESTORE TO START UP STATE
12

FOR MORE DETAILS AND INFORMATION, PLEASE VISIT OUR WEBSITE WWW.KUCHT.COM
WE TRANSFORM A SIMPLE KITCHEN INTO A PRO ONE.
THIS IS WHY WE CARE ABOUT MAKING VERY HIGH PERFORMANCE
RANGES AND HOODS, TO MAKE YOU FEEL LIKE A PRO AND STYLISH COOKER.
DESIGN: LONDON DC - WWW.LONDON-DC.COM
