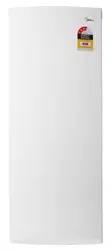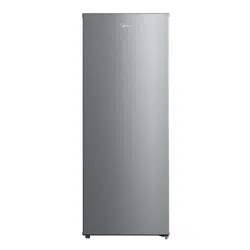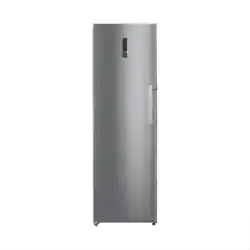
Upright Freezer
SINGLE DOOR SERIES
MDRU385MTE46
USER MANUAL
Warning notices: Before using this product, please read this manual carefully and keep it for future reference.
The design and specifications are subject to change without prior notice for product improvement.
Consult with your dealer or manufacturer for details.
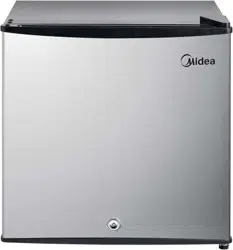
The diagram above is just for reference. Please take the appearance of the actual product as the standard.


01
THANK YOU LETTER
Thank you for choosing Midea! Before using your new Midea product, please read
this manual thoroughly to ensure that you know how to operate the features and
functions that your new appliance ers in a safe way.
CONTENTS
THANK YOU LETTER
------------------------------------------- 01
SPECIFICATIONS
------------------------------------------------ 02
PRODUCT OVERVIEW
----------------------------------------- 30
PRODUCT INSTALLATION
------------------------------------ 04
OPERATION INSTRUCTIONS
-------------------------------- 12
CLEANING AND MAINTENANCE
-------------------------- 16
TROUBLESHOOTING
------------------------------------------ 18
APPENDIX
---------------------------------------------------------- 20

02
SPECIFICATIONS
Product model
MDRU385MTE46
Fresh Food Storage Compartment Volume
/
Frozen Food Storage Volume
272L
Defrosting Type Auto-defrost
Temperature Rise Time 8h
Freezing Capacity 12.4kg/24h
Rated Voltage 220-240V~
Rated Current 0.5A
Overall Dimension (H x W x D) 1850x595x618mm
03
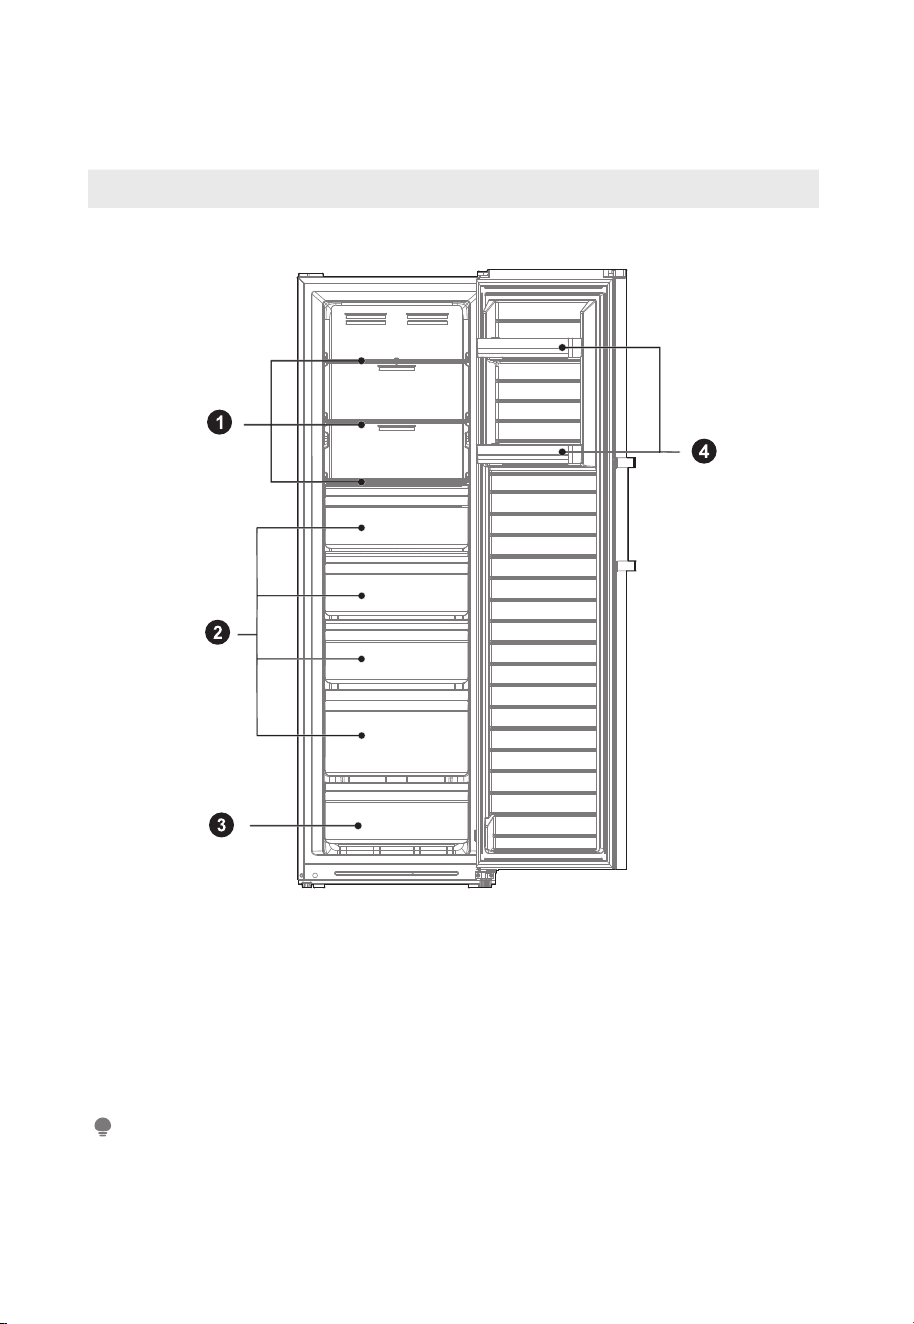
PRODUCT OVERVIEW
Names of components
1
shelf
2
Drawer
3
4
Two-star compartment
ATTENTION
The picture above is only for reference. The actual configuration will depend on the
physical product or statement by the distributor.
Door tray
04
PRODUCT INSTALLATION
Install Instruction
For refrigerating appliances with climate class
Effective temperature range
Class Symbol
Ambient temperature range °C
IEC 62552 (ISO 15502) ISO 8561
Extended temperate
SN + 10 to + 32 + 10 to + 32
Temperate N + 16 to + 32 + 16 to + 32
Subtropical ST + 16 to + 38 + 18 to + 38
Tropical T + 16 to + 43 + 18 to + 43
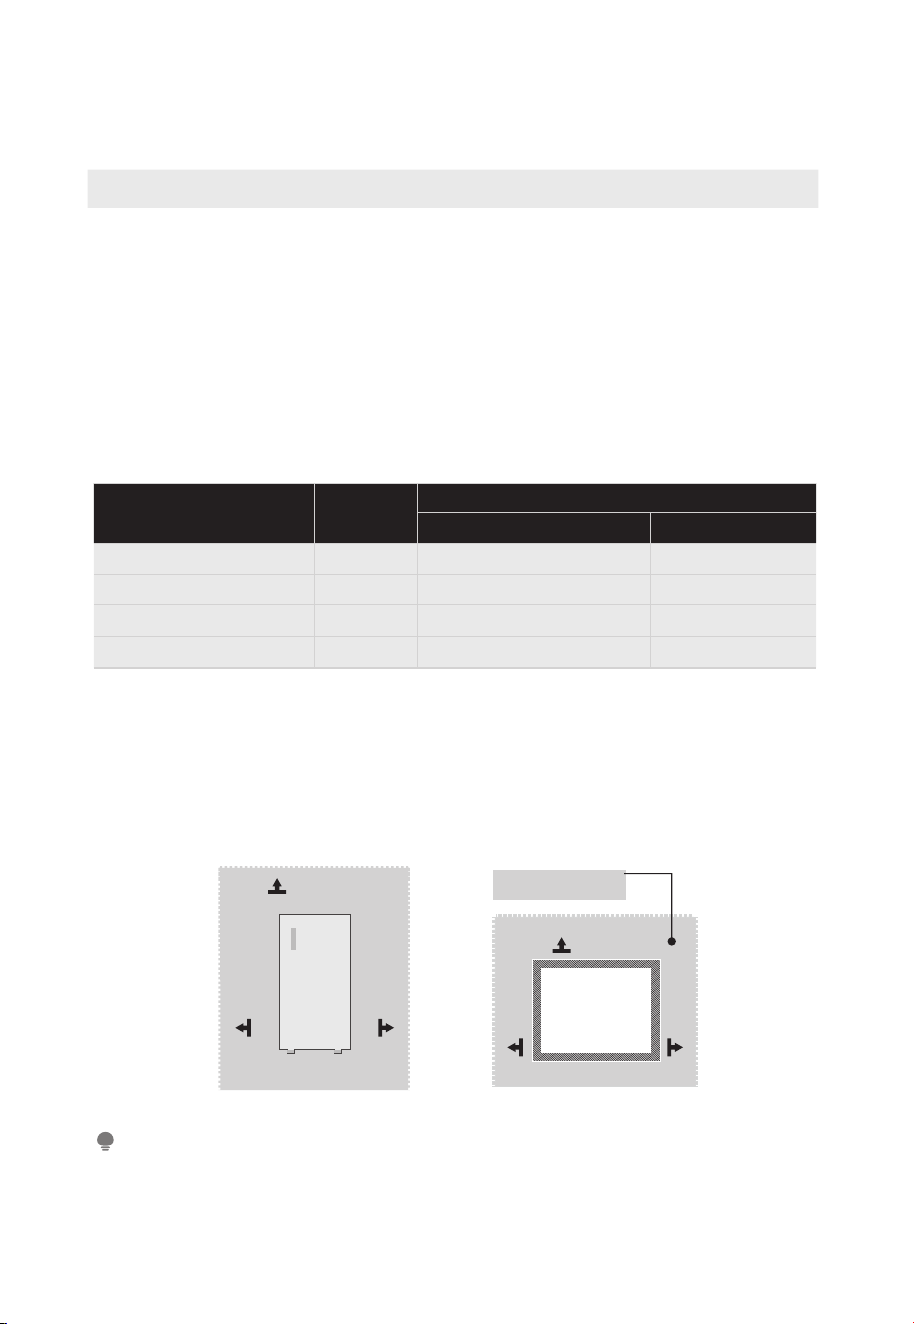
Dimensions and Clearances
ATTENTION
The picture above is only for reference. The actual configuration will depend on the physical
product or statement by the distributor.
• Too small of a distance from adjacent items may result in the degradation
of freezing capability and increased electricity costs. Allow over 100 mm of
clearance from each adjacent wall when installing the appliance.
• Depending on the climate class, This refrigerating appliance is intended to be
used at ambient temperatures range as specified following table.
• The climate class can be found on the rating plate. The product may not
operate properly at temperatures outside of the specific range.
• You can find the climate class on the product label.
• The product is designed to operate normally in the temperature range specified
by its class rating.
>100mm
>100mm
>100mm
Top View
Required space
for air circulation
>100mm
>100mm
>100mm
05
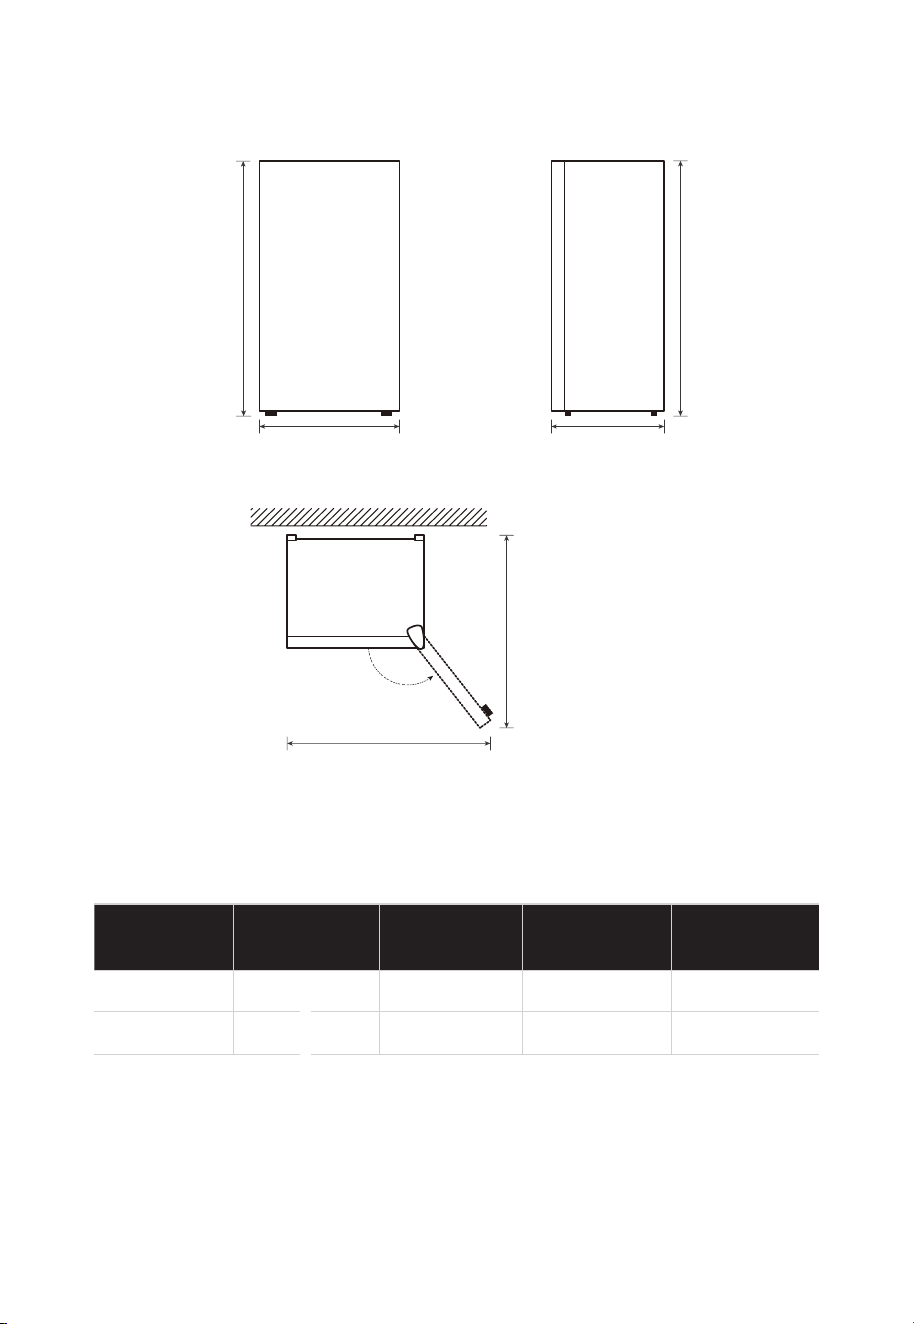
Space requirement diagram (when the door is open and when the door is closed)
C
D
E
135 °
Width
Overall
Height
Depth
Width
doors open
135
o
Depth
doors open
135
o
A B C D E
595
1850
618
1017 1025
Notice: All dimensions in mm
B
A
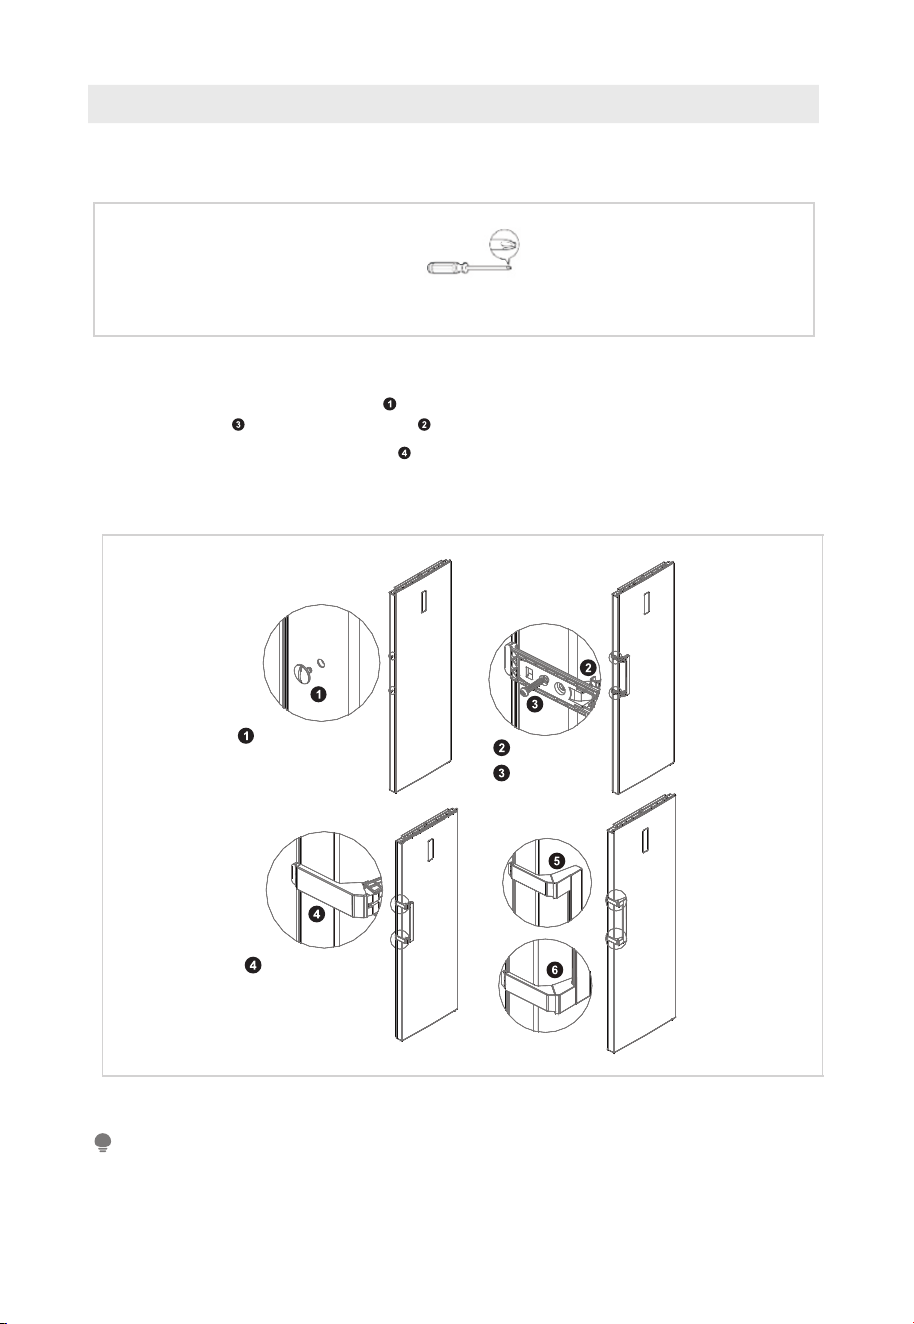
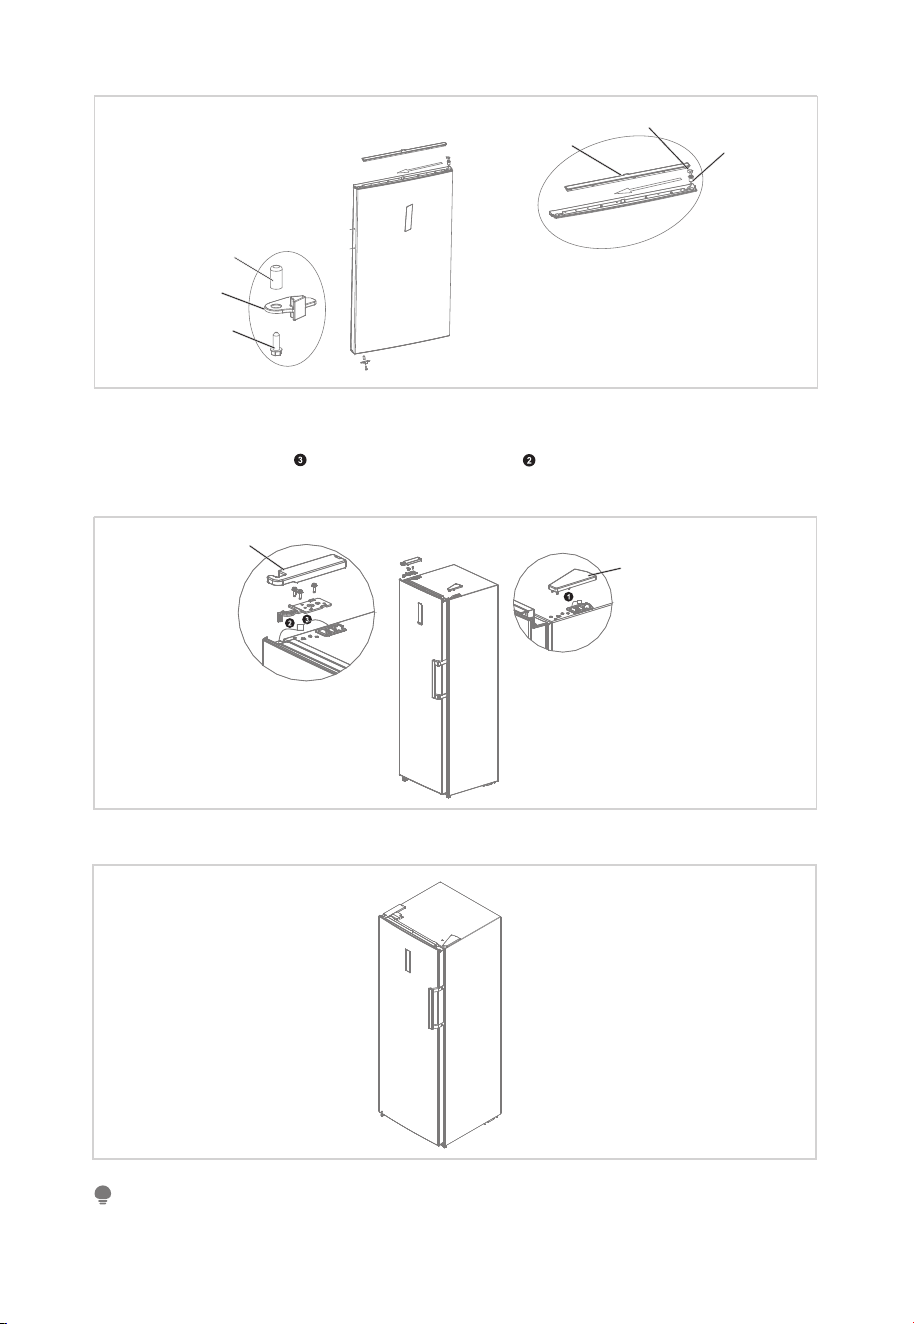
Door handle installation
List of tools fo be provided by the user
step
Screw hole cover
Screw
Screw hole cover
Screw hole
ATTENTION
06
Cross screwdriver
1. Remove the screw hole caps from the door, and use cross screwdriver
to fix screw into the screw hole tightly.
2. Assemble the screw hole caps on the screw hole of handle.
3. The reverse operation is of disassembly.
The picture above is only for reference. The actual configuration will depend on the physical
product or statement by the distributor.
Precautions shall be taken to prevent fall of the handle from causing any personal injury.

07
Based on the location where you plan to use your refrigerator, you may find it
more convenient to reverse the position of the door.
CAUTION
CAUTION: To avoid injury to yourself or your property, we recommend that
someone assist you during the door reversal process.
Preparing to reverse the door position
You will need: A standard screwdriver, a Phillips screwdriver, and the included Allen
wrench.
• Make sure that your refrigerator is unplugged and empty.
• Have someone available to assist you in the process.
• Keep all of the parts you remove to reuse them later.
Tools needed for changing the door:
Cross screwdriver
5/16″socket and ratchet
Putty knife
thin-blade screwdriver
Masking tape
Door right-left change(optional)
Parts to be used for door reverse
SN
parts
Quantity
2
4
5
Upper hinge screw
Hole cover
1
Upper hinge axle
sleeve
Pre-installed on the door, removed when the door, and kept for future use
3
Right upper hinge
Notes
Right upper hinge
cover
6
Cap of cover
7
Adjustable foot
8
Stopper Lower hinge
9
Lower hinge screw
10
2
1
1
1
1
1
1
3
1
1
Stopper
11
Lower hinge axle
sleeve
12
1
Stopper screw
13
1
Left upper hinge
Pre-installed on the refrigerator and to be used when changing the door
Pre-installed on the refrigerator, removed when the door is reversed, and kept for future use
Pre-installed on the refrigerator and to be used when changing the door
Pre-installed on the refrigerator, removed when the door is reversed, and kept for future use
Pre-installed on the door, removed when the door, and kept for future use
Pre-installed on the refrigerator and to be used when changing the door
Pre-installed on the refrigerator and to be used when changing the door
Pre-installed on the refrigerator and to be used when changing the door
Pre-installed on the door, removed when the door, and kept for future use
Pre-installed on the door, removed when the door, and kept for future use
Pre-installed on the door, removed when the door, and kept for future use
In the attached plastic bag, take them out for use when door is reversed
14
1
Left upper hinge cover
In the attached plastic bag, take them out for use when door is reversed
1
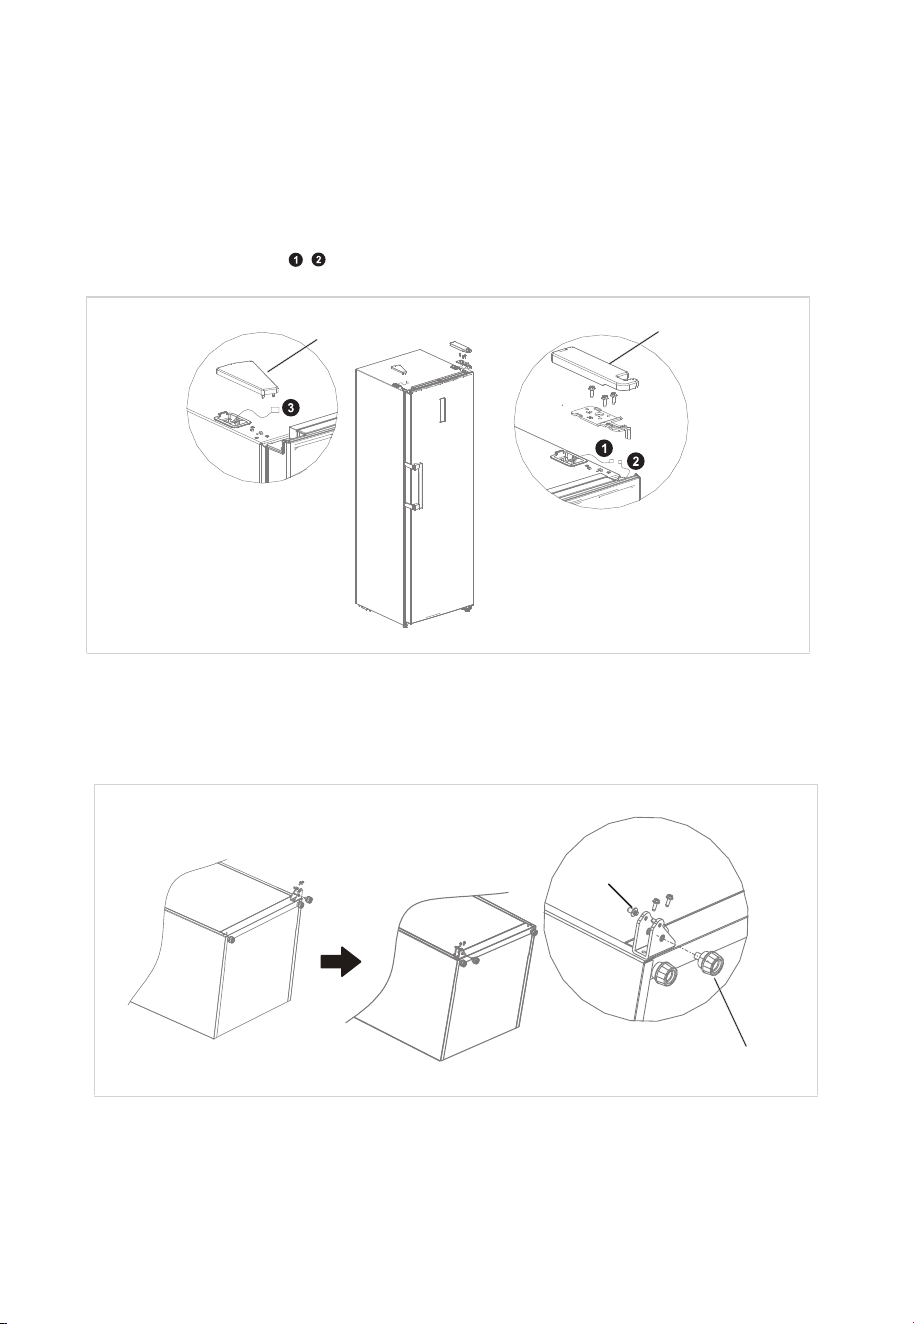
step
1. Power off the refrigerator, and remove all objects from door trays.
2. Dismantle the screw hole caps ,screws and handle, and remove the plastic
screw hole caps from the other side.
3. Dismantle the upper hinge cover, screws and upper hinge, and remove the
hole cover from the other side. unplug the wiring connector on the right side
of refrigerator top( , wiring connector).
4. Dismantle the door and right bottom hinge assembly(hinge shaft&adjustable
foot&hinge), disassemble the right bottom hinge assembly,and assemble the
hinge shaft and adjustable foot on the other side of hinge, then assemble the
whole hinge assembly on the other side of refrigerator.
08
hole cover
hinge cover
adjustable foot
hinge shaft
5. Remove the door upper cover, install the upper hinge sleeve , door signal
line to the other side and install the door upper cover.
Remove the stop block and shaft sleeve and install them on the other side of
the door body.
09
ATTENTION
The picture above is only for reference. The actual configuration will depend on the physical
product or statement by the distributor.
7. For the assembly of handle ,please refer to chapter “Door handle installation”.
hole cover
hinge cover
6. Take out the left top hinge , left top hinge cover from accessories
package,place the door on bottom hinge ,and mount left top hinge.Connect
signal line terminal with signal line terminal , mount top hinge cover and
hole cover.
sleeve pipe
door signal line
door upper cover
sleeve pipe
stopper
stopper screw
5)
10
Placement
• Before use, remove all packing materials, including bottom cushions, foam
pads and tapes inside of the refrigerator; tear off the protective film on the
doors and the refrigerator body.
• Keep away from heat and avoid direct sunlight. Do not place the freezer in
moist or watery places to prevent rust or reduction of insulating effect.
• Do not spray or wash the refrigerator; do not put the refrigerator in moist
places easy to be splashed with water so as not to affect the electrical
insulation properties of the refrigerator.
• The refrigerator is placed in a well-ventilated indoor place; the ground shall
be flat, and sturdy (rotate left or right to adjust the wheel for leveling if
unstable).
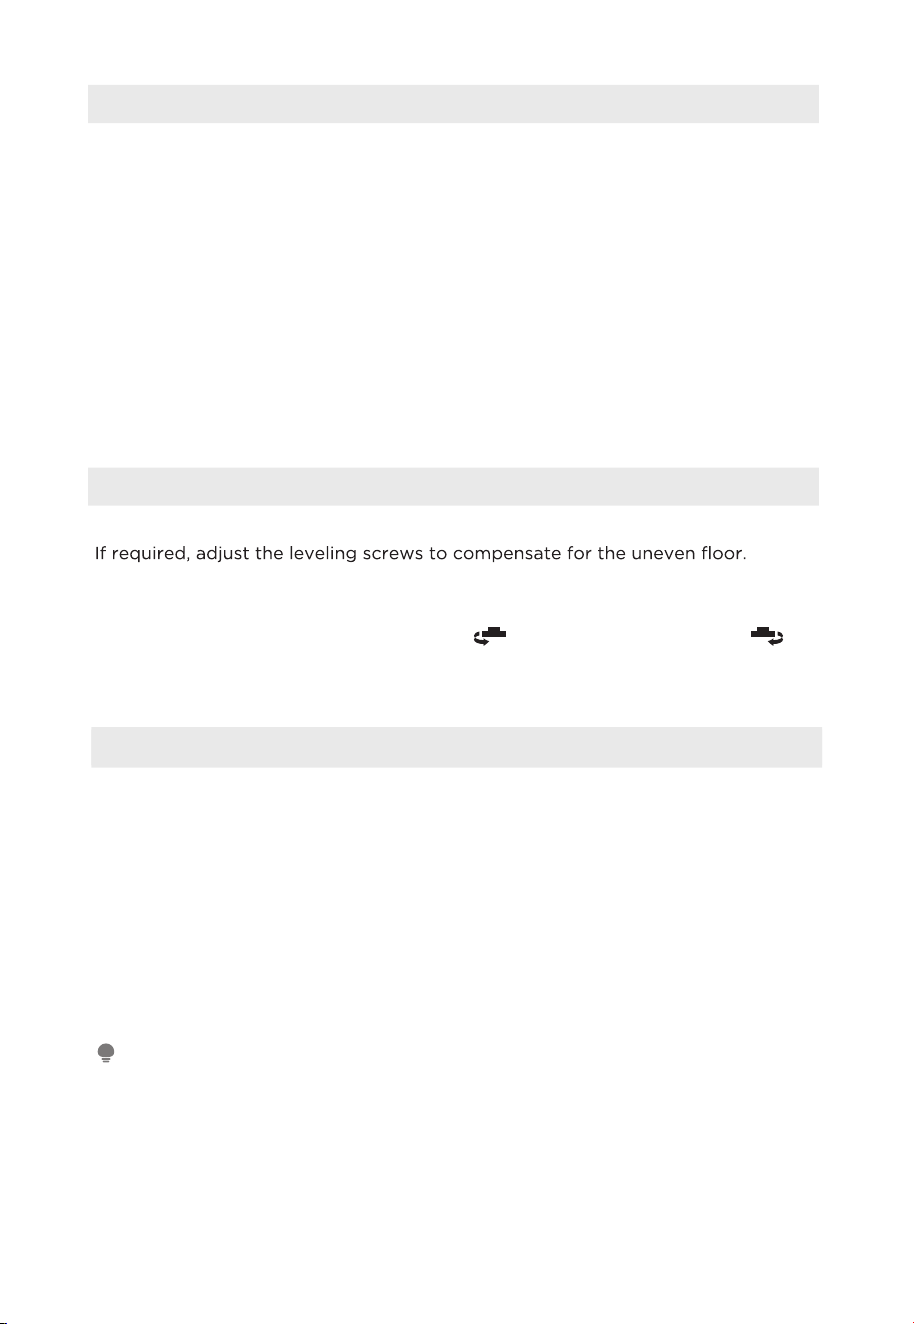
Leveling feet
To avoid vibration, the unit must be leveled.
The front should be slightly higher than the rear to aid in door closing.
Leveling screws can be turned easily by tipping the cabinet slightly.
to raise the unit, clockwise to
Turn the leveling screws counterclockwise
lower it.
Moving the appliance
ATTENTION
Precautions before operation:
Before making changes the refrigerator must be disconnected from power. precautions
should be taken to prevent any personal injury.
1. Remove all food from inside the appliance.
2. Pull the power plug out, insert and fix it into the power plug hook at the rear
or on top of the appliance.
3. Tape parts such as shelves and the door handle to prevent from falling off
while moving the appliance.
4. Move the appliance with more than two people carefully. When transporting
the appliance over a long distance, keep the appliance upright.
5. After installing the appliance, connect the power plug into a socket out to
switch on the appliance.

11
• The appliance should be located in the coolest area of the room, away from heat
producing appliances or heating ducts, and out of the direct sunlight.
• Let hot
foods cool to room temperature before placing in the appliance.
Overloading the appliance forces the compressor to run longer. Foods that freeze
too slowly may lose quality, or spoil.
• Be sure to wrap foods properly, and wipe containers dry before placing them in the
appliance. This cuts down on frost build-up inside the appliance.
• Appliance storage bin should not be lined with aluminum foil, wax paper, or paper
toweling. Liners interfere with cold air circulation, making the appliance less
efficient.
• Organize and label food to reduce door openings and extended searches. Remove
as many items as needed at one time, and close the door as soon as possible.
Tips for energy saving
Connecting the appliance
• After transportation, please let the product stay for more than 2 hours before
turning on the power, otherwise it will lead to a decrease in cooling capacity or a
damage to the product.
• Before putting any fresh or frozen foods, the refrigerator shall have run for 2-3
hours, or for above 4 hours in summer when the ambient temperature is high.
• Please pull out the plug in case of power failure or cleaning. Do not connect the
freezer to power supply within five minutes to prevent damages to the compressor
due to successive starts.
Changing the light
• Any replacement or maintenance of the LED lamps is intended to be made by the
manufacturer, its service agent or similar qualified person. This product contains a
light source of energy efficiency class <F>.
12
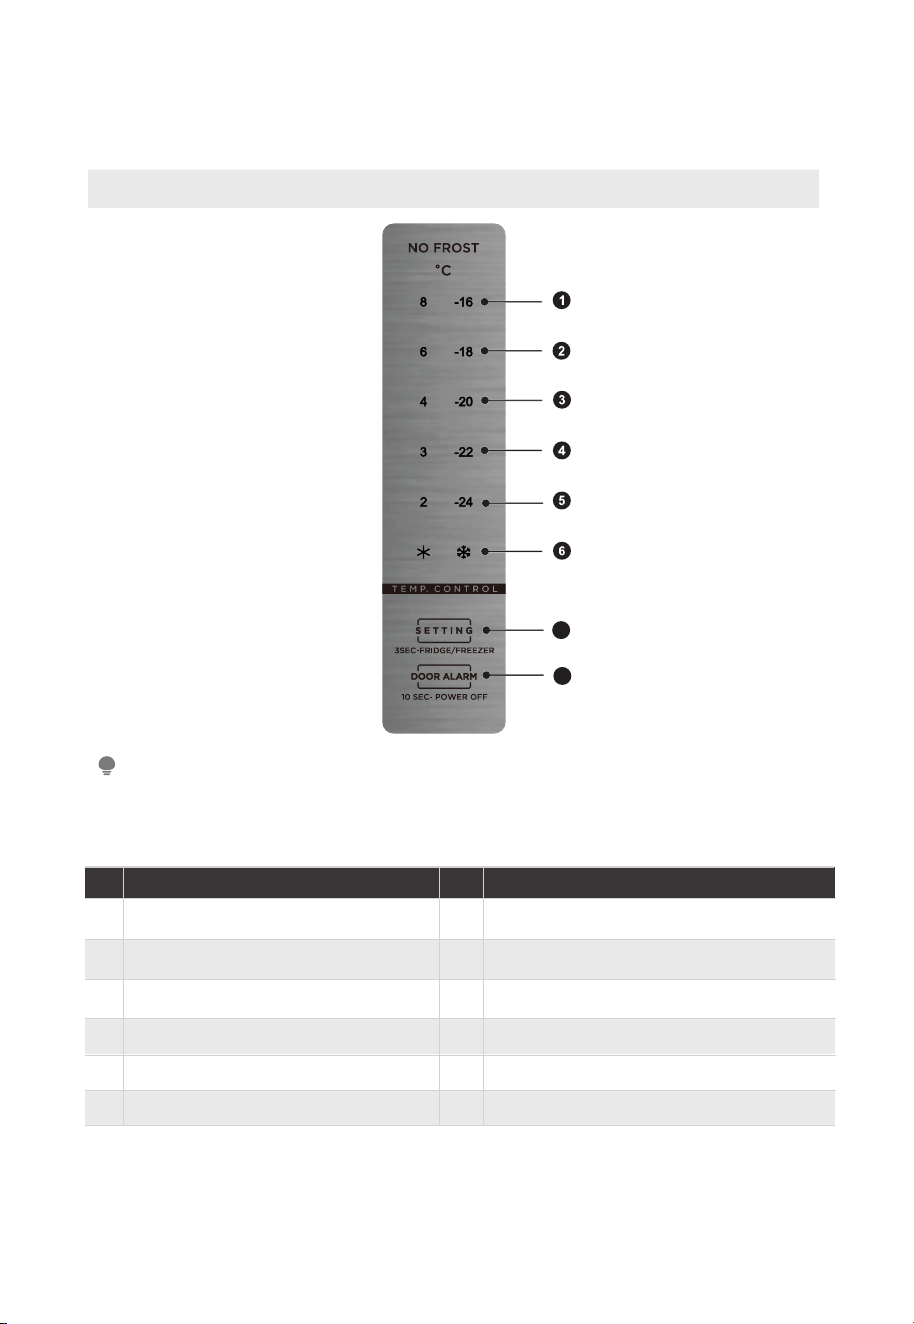
OPERATION INSTRUCTIONS
Control pane
l
ATTENTION
The picture above is only for reference. The actual configuration will depend on the physical
product or statement by the distributor.
Temperature seting button and
Fridge/Freezer switch button
2
4
5
1
Standby button
the setting temperature is 6 or -18℃
3
the setting temperature is 3 or -22℃
the setting temperature is 2 or -24℃
A
B
the setting temperature is 4 or -20℃
the setting temperature is 8 or -16℃
Key Temperature icons
6
quick cooling or quick freezing
A
B
13
• All temperature icons shine within 3s after power on, for power on at the first time,
the default set temperature is -20℃.
• After that every time you start the fridge, it will run in accordance with set t
temperature before last power off.
• After 30s of unmanned operation, the indicator light goes out. When adjusting the
gear, you need to press the key “A” to light up the indicator, and then press the key
“A” again to adjust the gear.
When the fridge power is on
• There is no door opening prompt tone; there is an open door alarm tone: when the
refrigerator door is not closed for two minutes after it is opened, the buzzer will
sound until the door is closed.Press the B button to cancel the buzzer alarm,it is
recommended to close the door in time.
Opening warning and alarm control
Display of normal running
• On the occurrence of a failure, the corresponding icons will give a combined blink.
lf no failure, the screen displays the seting temperature of the refrigerator room.
the error codes and types are shown as follows:
Temperature sensor of
refrigerator room fail
E5
E7
E10
E1
Defrosting sensor of
refrigerator room fail
Icon" "& icon"3 "shine at same time
E6
Icon" "& icon"4"shine at same time
Icon"2 "& icon"3 " shine at same time
Icon"2 "& icon"4 " shine at same time
Icon" "& icon"2 "shine at same time
Eror Code
DisplayError Description
Communication error
Ambient temperature sensor fail
Sticking problem with button
Freezer:
Temperature sensor of freezer
room fail
E5
E7
E9
E1
Defrosting sensor of freezer
room fail
Icon" "& icon"-22 "shine at same time
E6
Icon" "& icon"-20
"shine at same time
Icon"-24 "& icon"-18 " shine at same time
Icon"-24 "& icon"
-20 " shine at same time
Icon" "& icon"-24 "shine at same time
Eror Code
DisplayError Description
Communication error
Ambient temperature sensor fail
High temperaturealarm in
freezing chamber
E10
Sticking problem with button
Icon"-24 "& icon"-22 " shine at same time
Refrigerator:
14
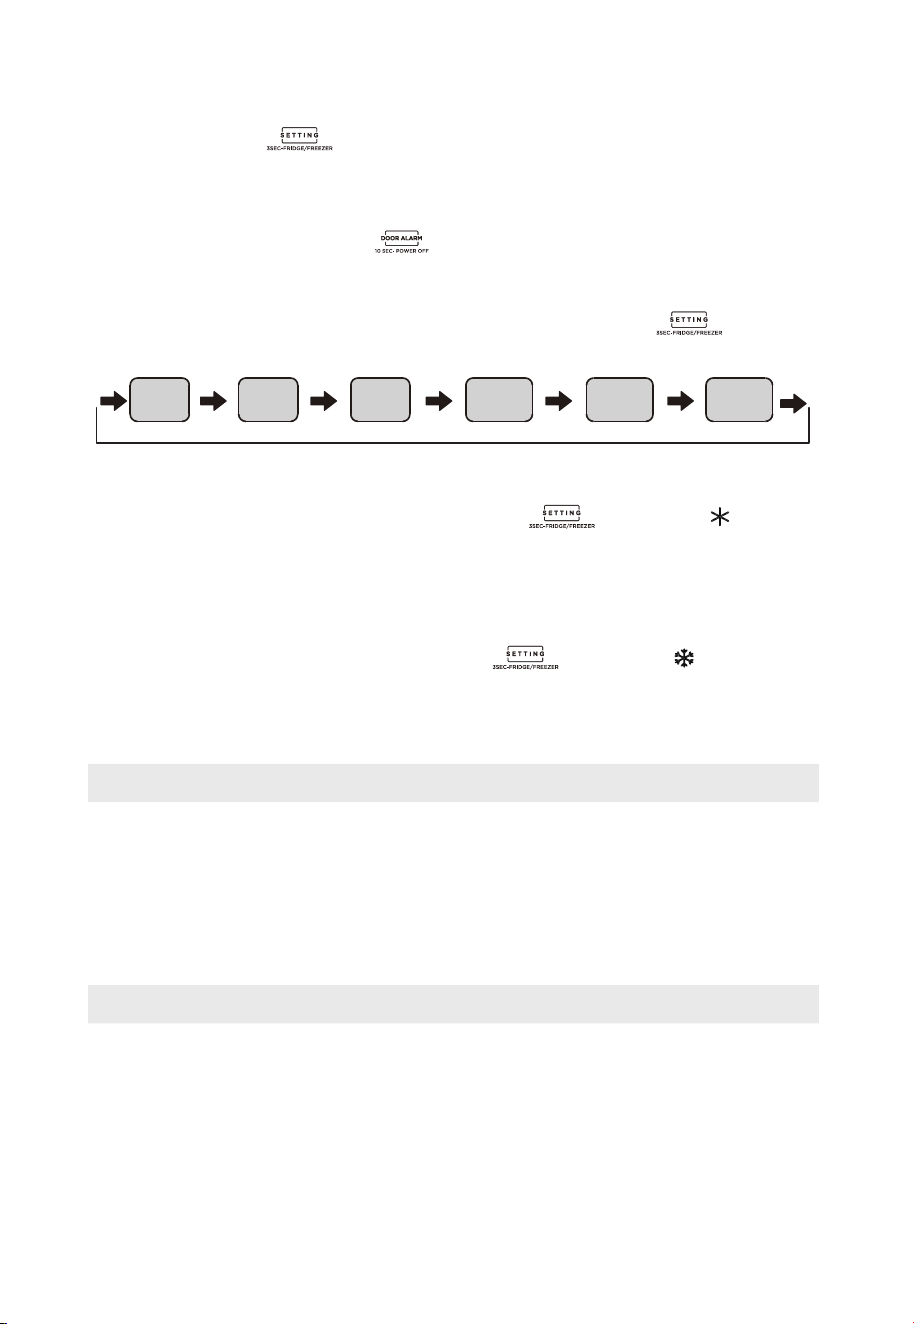
• Press the botton for 3 seconds to achieve Fridge/Freezer conversion, the
corresponding temperature icons shine.
Fridge/Freezer conversion
• Long press the standby buton for 10 seconds to set the standby function.
Standby function
• The temperature setting will be changed once you press button . Then,
the refrigerator will run according to the new temperature setting after 15s.
Temperature setting
Setting 1 Setting 2 Setting 3 Setting 4 Setting 5 Setting 6
• Enter: under refrigerator mode, press the button until the icon lighten.
During quick cooling mode, the refrigerator runs according to the temperatures
set at 2℃, and it will exit this mode automatically after running for 150 minutes or
temperature setting or mode setting.
Quick cooling mode
• Enter: under freezer mode, press the button until the icon lighten.
During quick freeze mode, the freezer runs according to the temperature set at
-24 ℃, it will exit this mode automatically after running for 24 hours or
temperature setting or mode setting.
Quick freezing mode
Refrigerating
• The Refrigerating Chamber is suitable for storage of a variety of fruits, vegetables,
beverages and other food consumed in the short term, suggested storage time
3days to 5days.
• Cooking foods shall not be put in the refrigerating chamber until cooled to room
temperature.
• Foods are recommended to be sealed up before putting into the refrigerator.
Freezing
• The freezer may keep food fresh for a long time and it is mainly used to store
frozen foods and making ice.
• The freezing chamber is suitable for storage o
f meat, fish, rice balls ande other
foods not to be consumed in shoet time.
• Chun
ks of meat are preferably to be divided into small pieces for q
uick freezing and
easy access. Please be n
oted food shall be consumed within the shelf time.
• The appliance has the function of refrigerator-freezer transition, by operating on
display panel, end- consumers could select refrigerator or freezer in accordance
with their requirement.

15
Order
Compartments
TYPE
Target
storage
temp. [°C]
Appropriate food
1 Fridge
+2
∼
+8
Eggs, cooked food, packaged food, fruits and
vegetables, dairy products, cakes, drinks and
other foods are not suitable for freezing.
2 (***)*-Freezer
≤
-18
Seafood(fish, shrimp, shellfish), freshwater
aquatic products and meat products
(recommended for 3 months, the longer the
storage time, the worse the taste and nutrition),
suitable for frozen fresh food.
3 ***-Freezer
≤
-18
Seafood(fish, shrimp, shellfish), freshwater
aquatic products and meat products
(recommended for 3 months, the longer the
storage time, the worse the taste and nutrition),
suitable for frozen fresh food.
4 **-Freezer
≤
-12
Seafood(fish, shrimp, shellfish), freshwater
aquatic products and meat products
(recommended for 3 months, the longer the
storage time, the worse the taste and nutrition),
suitable for frozen fresh food.
5 *-Freezer
≤
-6
Seafood(fish, shrimp, shellfish), freshwater
aquatic products and meat products
(recommended for 3 months, the longer the
storage time, the worse the taste and nutrition),
suitable for frozen fresh food.
6 0-star
-6
∼
0
Fresh pork, beef, fish, chicken, some packaged
processed foods, etc. (Recommended to eat
within the same day, preferably no more than 3
days).
Partially encapsulated processed foods (non-
freezable foods).
7 Chill
-2 ~ +3
Fresh/ frozen pork, beef, chicken, freshwater
aquatic products, etc. (7 days below 0°C and
above 0°C is recommended for consumption
within that day, preferably no more than 2
days).Seafood (less than 0 for 15 days, it is not
recommended to store above 0°C.
8 Fresh food
0
∼
+4
Fresh pork, beef, fish, chicken, cooked food,
etc.(Recommended to eat within the same day,
preferably no more than 3 days)
9 Wine
+5
∼
+20
Red wine, white wine, sparkling wine, etc.
ATTENTION
P
lease store different foods according to the compartments or target storage temperature
of your purchased.
16
CLEANING AND MAINTENANCE
Overall cleaning
ATTENTION
Please unplug the refrigerator for defrost and cleaning.
• Dusts behind the refrigerator and on the ground shall be timely cleaned to
improve the cooling effect and energy saving.
• Check the door gasket regularly to make sure there are no debris. Clean the
door gasket with a soft cloth dampened with soapy water or diluted
detergent.
• The interior of the refrigerator should be cleaned regularly to avoid odor.
• Please turn off the power before cleaning interior, remove all foods, drinks,
shelves, drawers, etc.
• Use a soft cloth or sponge to clean the inside of the refrigerator, with two
tablespoons of baking soda and a quart of warm water. Then rinse with water
and wipe clean. After cleaning, open the door and let it dry naturally before
turning on the power.
• For areas that are difficult to clean in the refrigerator (such as narrow
sandwiches, gaps or corners), it is recommended to wipe them regularly with
a soft rag, soft brush, etc. and when necessary, combined with some auxiliary
tools (such as thin sticks) to ensure no contaminants or bacterials
accumulation in these areas.
• Do not use soap, detergent, scrub powder, spray cleaner, etc., as these may
cause odors in the interior of the refrigerator or contaminated food.
• Clean the bottle frame, shelves and drawers with a soft cloth dampened with
soapy water or diluted detergent. Dry with a soft cloth or dry naturally.
• Wipe the outer surface of the refrigerator with a soft cloth dampened with
soapy water, detergent, etc., and then wipe dry.
• Do not use hard brushes, clean steel balls, wire brushes, abrasives (such as
toothpastes), organic solvents (such as alcohol, acetone, banana oil, etc.),
boiling water, acid or alkaline items, which may damage the fridge surface and
interior. Boiling water and organic solvents such as benzene may deform or
damage plastic parts.
• Do not rinse directly with water or other liquids during cleaning to avoid short
circuits or affect electrical insulation after immersion.
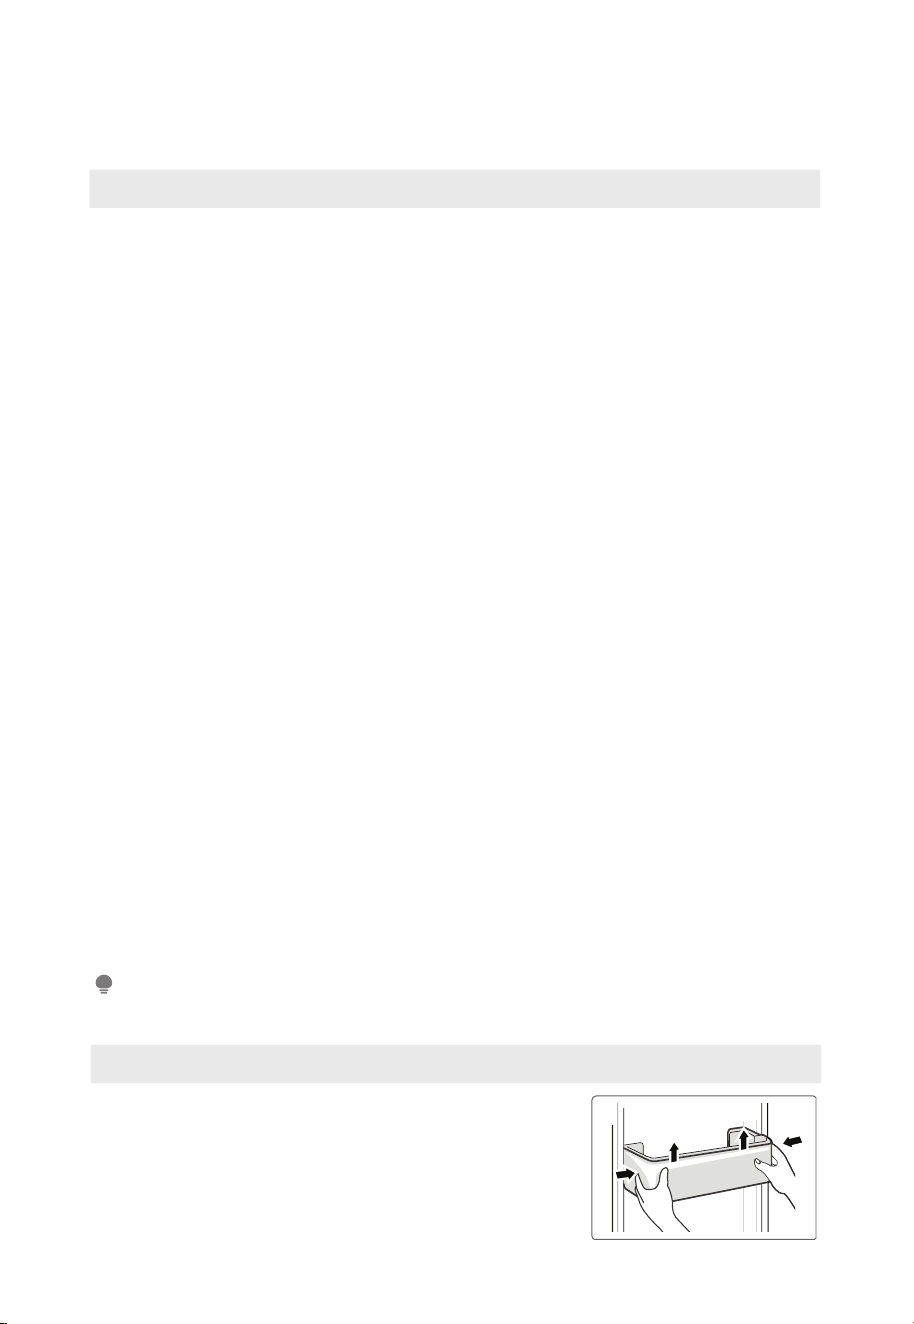
Cleaning of door tray
• According to the direction arrow in the figure
below, use both hands to squeeze the tray, and
push it upward, then you can take it out.
• After washing the tray having been taken
out, you can adjust its installing height in
accordance with your requirement.
Cleaning of glass shelf
• As the innermost part of the refrigerator liner
where contacting the shelves has a backstop, you
shall raise the shelves upward, then you can be
able to take it out.
• Adjust or clean the shelves according to your
requirement.
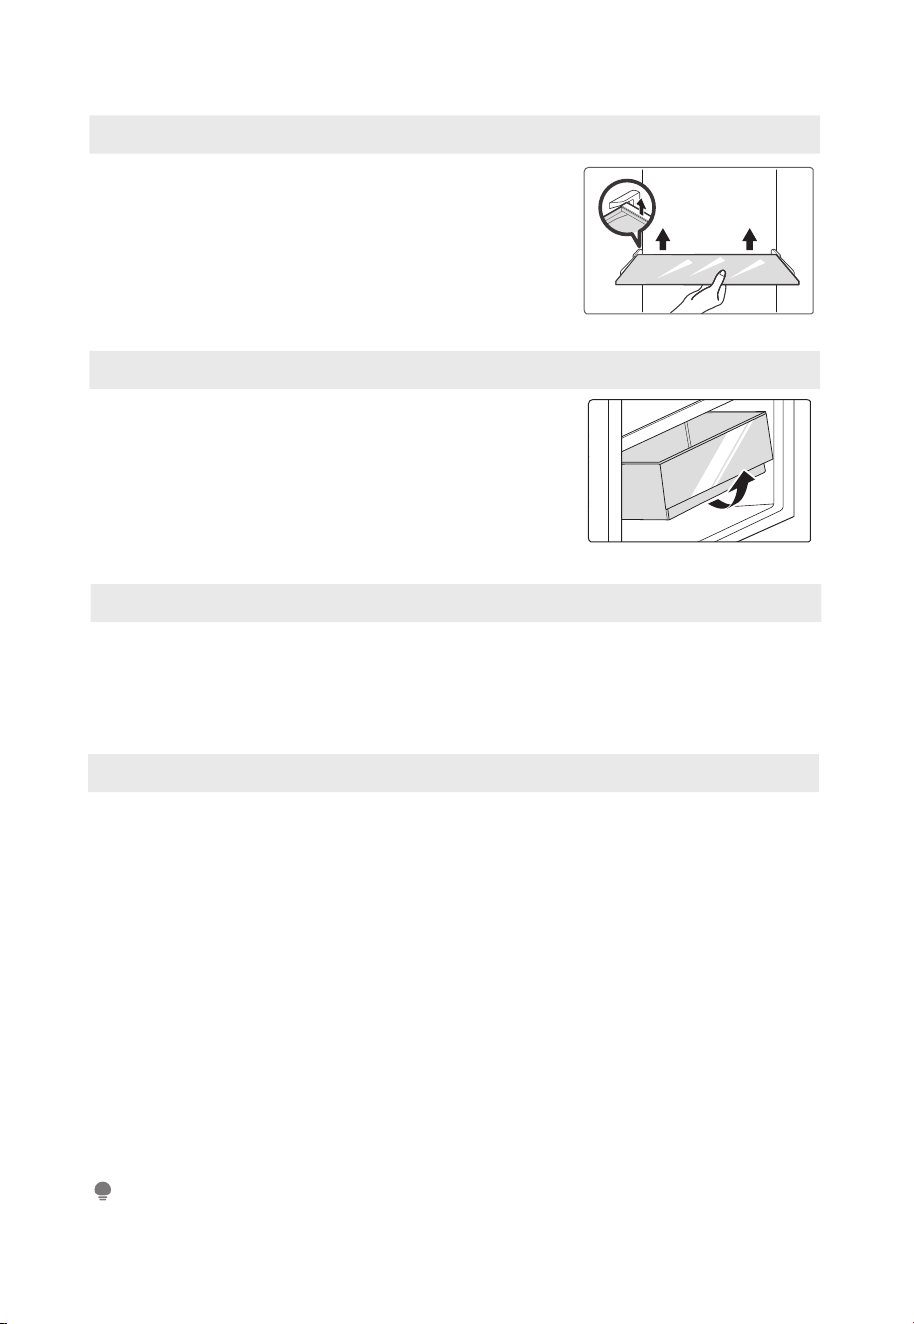
1. Remove the contents of the drawer. Hold the
handle of the vegetable drawer and pull it out
completely until it stops.
2. Lift the vegetable drawer up and remove it by
pulling it out.
Cleaning the vegetable drawer
Out of operation
Power failure:
In case of power failure, even if it is in summer, foods inside the appliance can be
kept for several hours; during the power failure, the times of door opening shall
be reduced, and no more fresh food shall be put into the appliance.
Long-time nonuse:
The appliance shall be unplugged and then cleaned; then the doors are left open
to prevent odor.
Moving:
Before the refrigerator is moved, take all objects inside out, fix the glass
partitions, vegetable holder, freezing chamber drawers and etc. with tape, and
tighten the leveling feet; close the doors and fix them with tape. During moving,
the appliance shall not be laid upside down or horizontally, or be vibrated; the
inclination during movement shall be no more than 45°.
ATTENTION
The appliance shall run continuously once it is started. Generally, the operation of the
appliance shall not be nterrupted; otherwise the service life may be impaired.
17
Defrosting
• The refrigerator is made based on the air-cooling principle and thus has
automatic defrosting function. Frost formed due to change of season or
temperature may also be manually removed by disconnection of the
appliance from power supply or by wiping with a dry towel.

18
TROUBLESHOOTING
The following simple issues can be handled by the user. Please call the after-sale
service department if the issues are not solved.
Problem Possible reason
Failed operation
• Check whether the appliance is connected to power or
whether the plug is in well contact
• Check whether the voltage is too low
• Check whether there is a power failure or partial circuits
have tripped
Odor
• Odorous foods shall be tightly wrapped
• Check whether there is any rotten food
• Clean the inside of the refrigerator
Long-time operation
of the compressor
• Long operation of the refrigerator is normal in summer
when the ambient temperature is high
• It is not suggestible having too much food in the appliance
at the same time
• Food shall get cool before being put into the appliance
• The doors are opened too frequently
Light fails to get lit
• Check whether the refrigerator is connected to power
supply and whether the illuminating light is damaged
• Have the light replaced by a specialist
Door can not be
properly closed
• The door is stuck by food packages
• The refrigerator is tilted.
Loud noises
• Check whether the floor is level and whether the
refrigerator is placed stably
• Check whether accessories are placed at proper locations

19
Problem Possible reason
Door seal fails to be
tight
• Remove foreign matters on the door seal
• Heat the door seal and then cool it for restoration (or blow
it with an electrical drier or use a hot towel for heating)
Water pan overflows
• There is too much food in the chamber or food stored
contains too much water,resulting in heavy defrosting
• The doors are not closed properly, resulting in frosting due
to entry of air and increased water due to defrosting
Hot housing
• Heat dissipation of the built-in condenser via the housing,
which is normal When housing becomes hot due to high
ambient temperature, storage of too much food or
shutdown of the compressor is shut down, provide sound
ventilation to facilitate heat dissipation
Surface
condensation
• Condensation on the exterior surface and door seals of the
refrigerator is normal when the ambient humidity is too
high. Just wipe the condensate with a clean towel.
Abnormal noise
• Buzz: The compressor may produce buzzes during
operation, and the buzzes are loud particularly upon start
or stop. This is normal.
• Creak: Refrigerant flowing inside of the appliance may
produce creak, which is normal.

APPENDIX
Special for new European standard
The ordered parts in the following table can be acquired from Service provider
channel
Ordered part Provided by Minimum time required for Provision
Thermostats
Professional
maintenance personnel
At least 7 years after the last model is
launched on the market
Temperature
sensors
Professional
maintenance personnel
At least 7 years after the last model is
launched on the market
Printed circuit
boards
Professional
maintenance personnel
At least 7 years after the last model is
launched on the market
Light sources
Professional
maintenance personnel
At least 7 years after the last model is
launched on the market
Door handles
Professional repairers
and final users
At least 7 years after the last model is
launched on the market
Door hinges
Professional repairers
and final users
At least 7 years after the last model is
launched on the market
Trays
Professional repairers
and final users
At least 7 years after the last model is
launched on the market
Baskets
Professional repairers
and final users
At least 7 years after the last model is
launched on the market
Door gaskets
Professional repairers
and final users
At least 10 years after the last model is
launched on the market
Dear customer
1. If you want to return or replace the product, please contact the store where you
buy.
(Remember to bring the purchase invoice)
2. If your product breaks down which needs to repair, please contact after-sales
service provider.
ATTENTION
The model information inthe product database, as well as the model identifier, can be
obtained througha weblink scanned by a QR code, if any, on the energy efficiency label of the
product.
For more information about the energy efficiency of the appliance, visit https://ec.europa.eu
and search using the model name.
The model name can be found on the rating label of the appliance.
20


r
�idea
尸少尸气召
一
生
簪
回坠凹
.midea.com
© Midea 2022 all rights reserved