OWNER’S MANUAL
Humidifier
MODEL: SCK-3Q60
READ AND SAVE THESE INSTRUCTIONS
Attention: Pictures in the IM are for reference only.
GD Midea Environment Appliances MFG.Co.,Ltd.
No.28, Dong Fu Road, Hesui East Industrial Area, Dong Feng Town,
Zhongshan, Guangdong 528425 P.R.China
This product is only suitable for well insulated spaces or occasional use.
READ AND SAVE THESE INSTRUCTIONS
Safety Warning
Safety Precautions
-
-
1
;
;
2
READ AND SAVE THESE INSTRUCTIONS
with temperature less than 104°F). A tolerance of ±10%RH
is applied to the accuracy of the inner humidity sensor. Each
sensor has its own variation in accuracy.Therefore, the
measurement results of different qualified sensors will be
different.Differences in measurement locations can also
cause measurement differences.
care should be taken when using the appliance due to the
emission of hot water vapour.
unplug the appliance during filling and cleaning.
Be aware that high humidity levels may encourage the growth
of biological organisms in the environment.
Do not permit the area around the humidifier to become damp
or wet. If dampness occurs, turn the output of the humidifier
down. If the humidifier output volume cannot be turned down,
use the humidifier intermittently. Do not allow absorbent mate-
rials, such as carpeting, curtains, drapes, or tablecloths, to
become damp.

3
READ AND SAVE THESE INSTRUCTIONS
Unplug the appliance during filling and cleaning.
Never leave water in the reservoir when the appliance is not in
use.
Empty and clean the humidifier before storage. Clean the
humidifier before next use.
Note
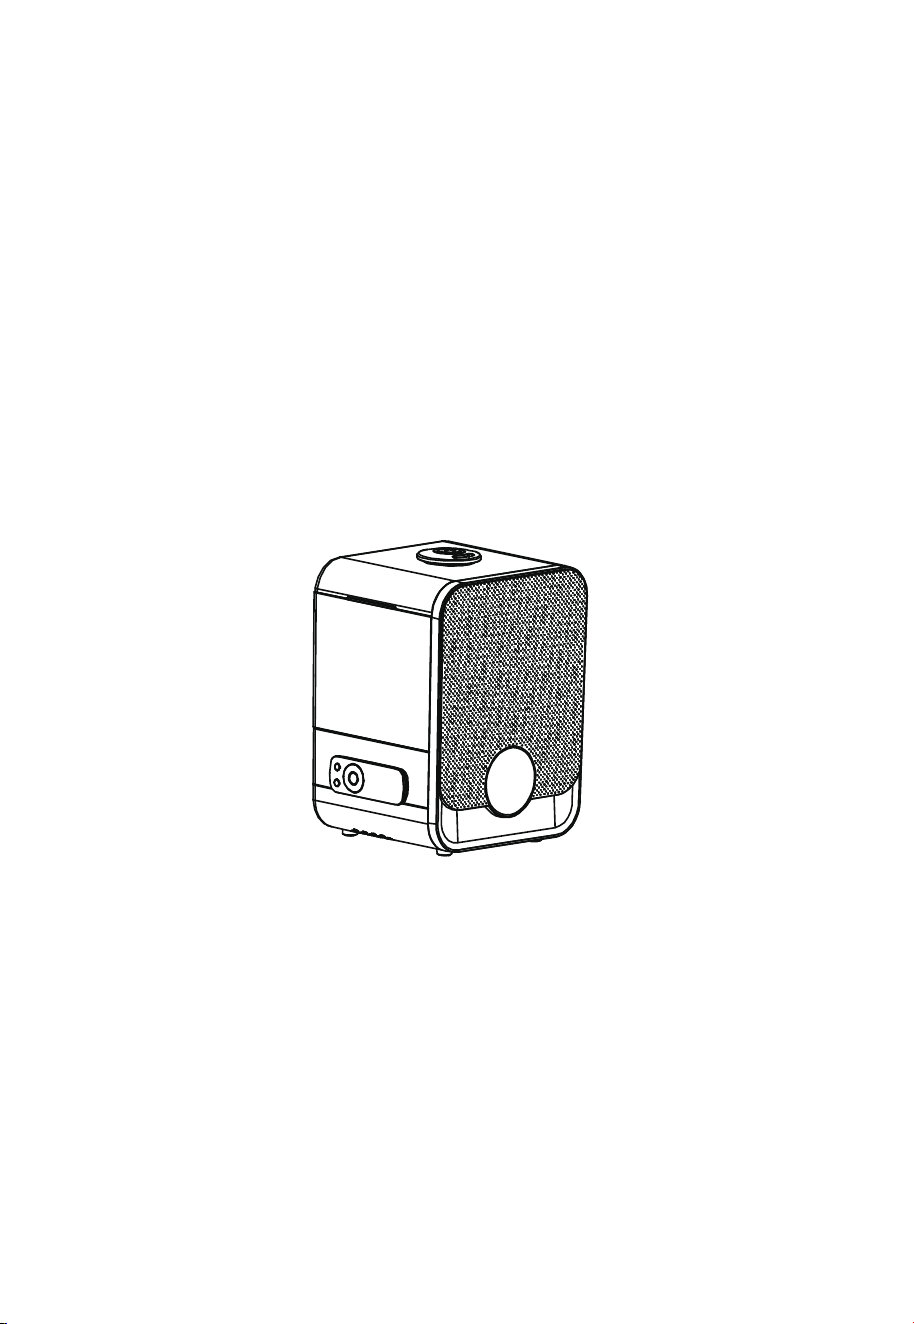
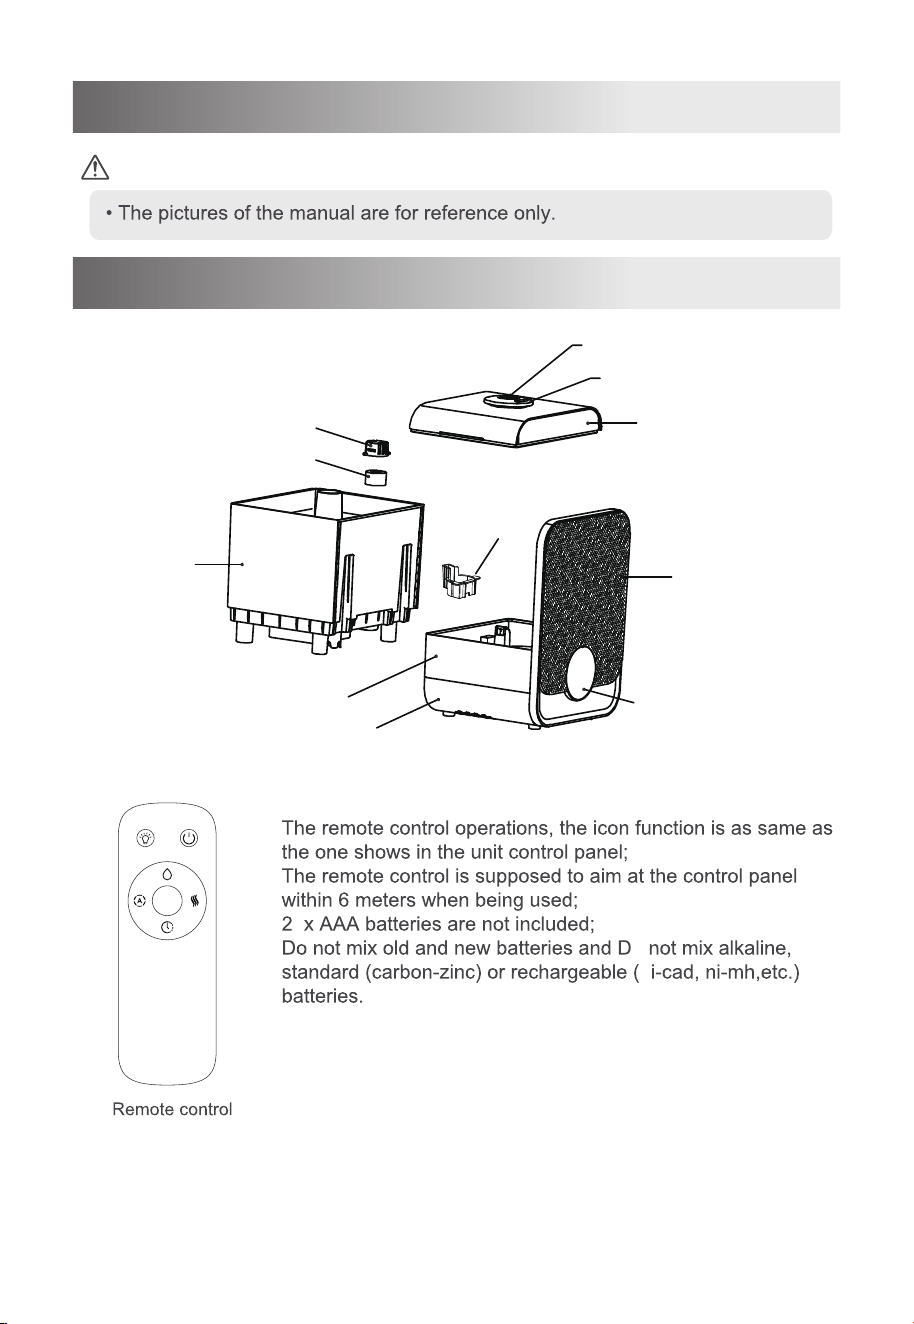
Product Introduction
o
n
Name of Parts
Tank cover
Front panel
Atomization outlet
Aroma tray
Water tank
Filter Sponge
Gland
Filter cover
Shell
Base
Display control panel
4
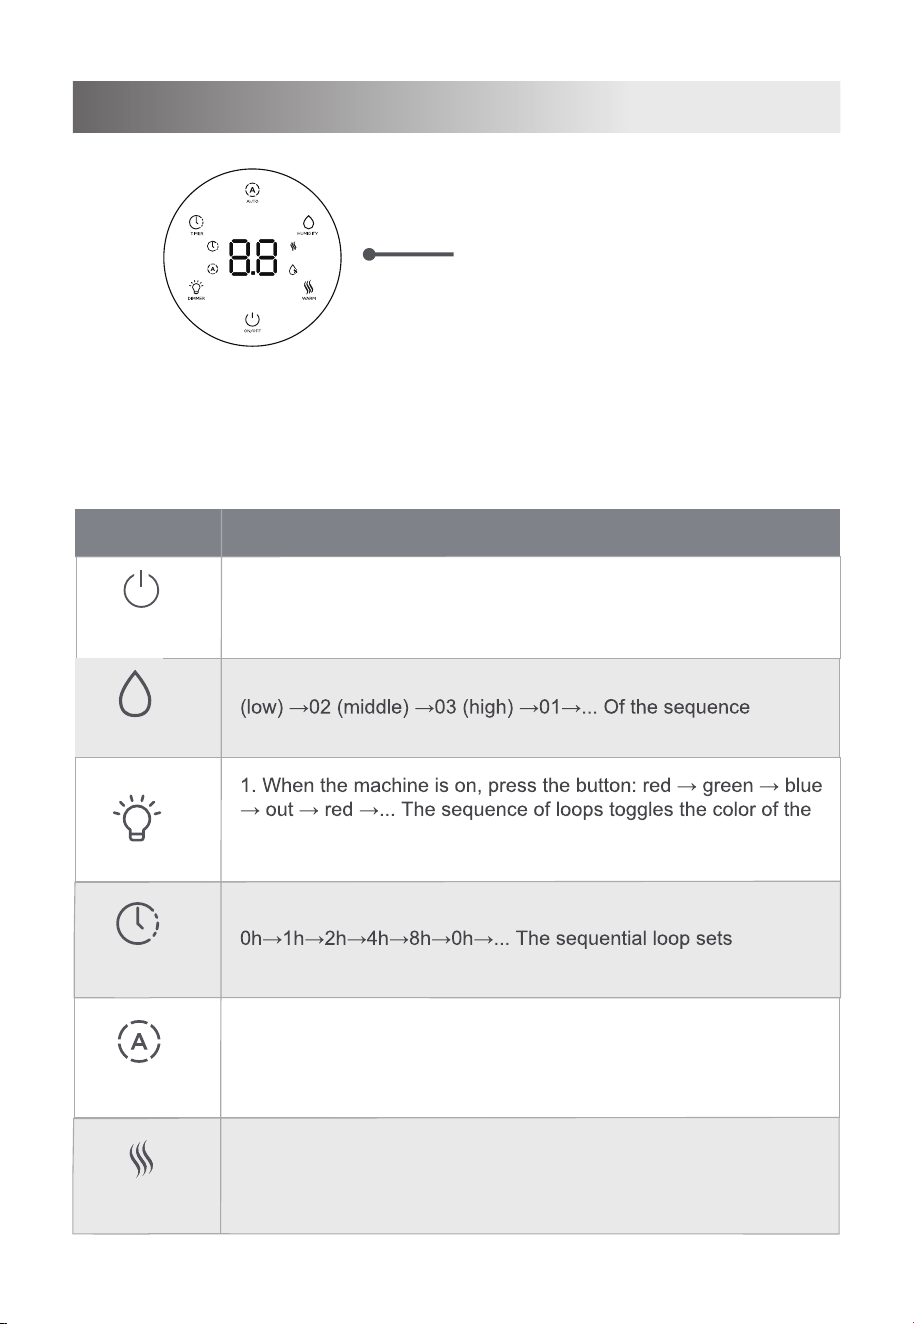
Control Panel
The current environmental
humidity is displayed by default
Humidity value
Unit: %RH
Buttons
Function description
On/Off
Timer
Wram
Humidit
1. Press the button in standby state to enter the power-on state.
2. Press the button in the boot state to enter the standby state.
1.Under the working state, press the button, according to: 01
cycle to switch the mist volume gear.
atmosphere light.
1. In the power-on state, press the button:
the scheduled shutdown time.
When the unit is turned on, press this button to turn on the
warm mist function, press it again to turn off the function.
1.When the unit is turned on and the constant humidity
function is off, press the button to turn on the ECO
humidity function , Press it again to turn off this function.
Dimmer
Auto
5
Note:
The display "--" indicates the water shortage in the base. The water in the tank is flowing
to the base and does not need to be treated at this time.
The display screen shows "P1" that the water tank is short of water and needs to add
water to the water tank.
Notes
Instruction for Use
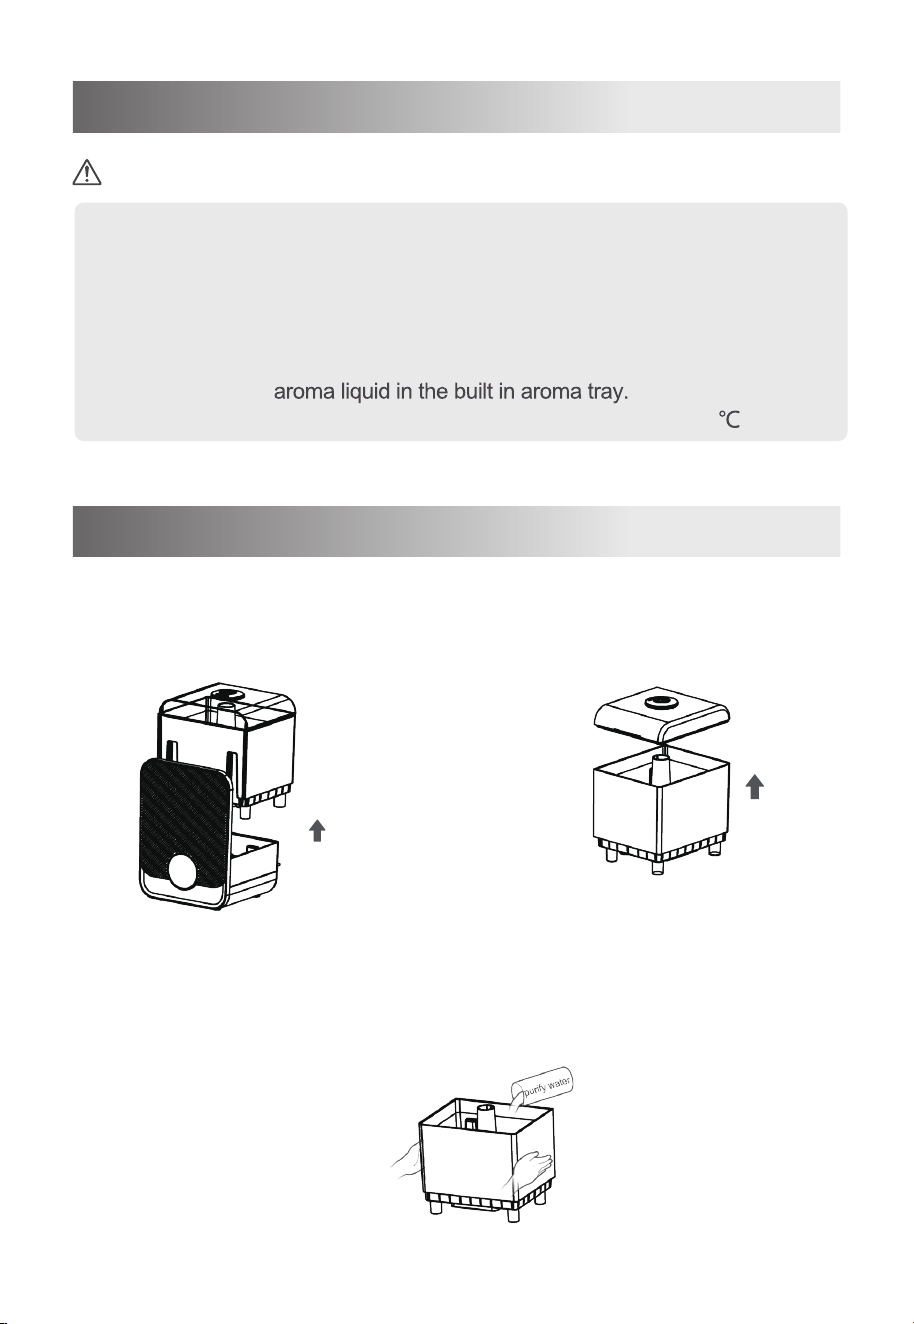
• Please be sure to unplug the power cord before filling water.
• The level of the water added shall not be higher than the highest water level;
• Do not to add the water in the atomization outlet when the water is added
• Do not to lift the transparent part of the upper end of the water tank by
hands when the water is added;
• Please do not add additives like essential oil, perfume, drug, etc. to the water.
• Please us
e the purified water or distilled water below 104°F(40 ).
But you can add
Water Filling (Two Methods)
1 Remove the water tank 2 Remove the lid of the tank
3 Pour the purify water or distilled water from the bottle or cup to the
water tank
6
Methods A
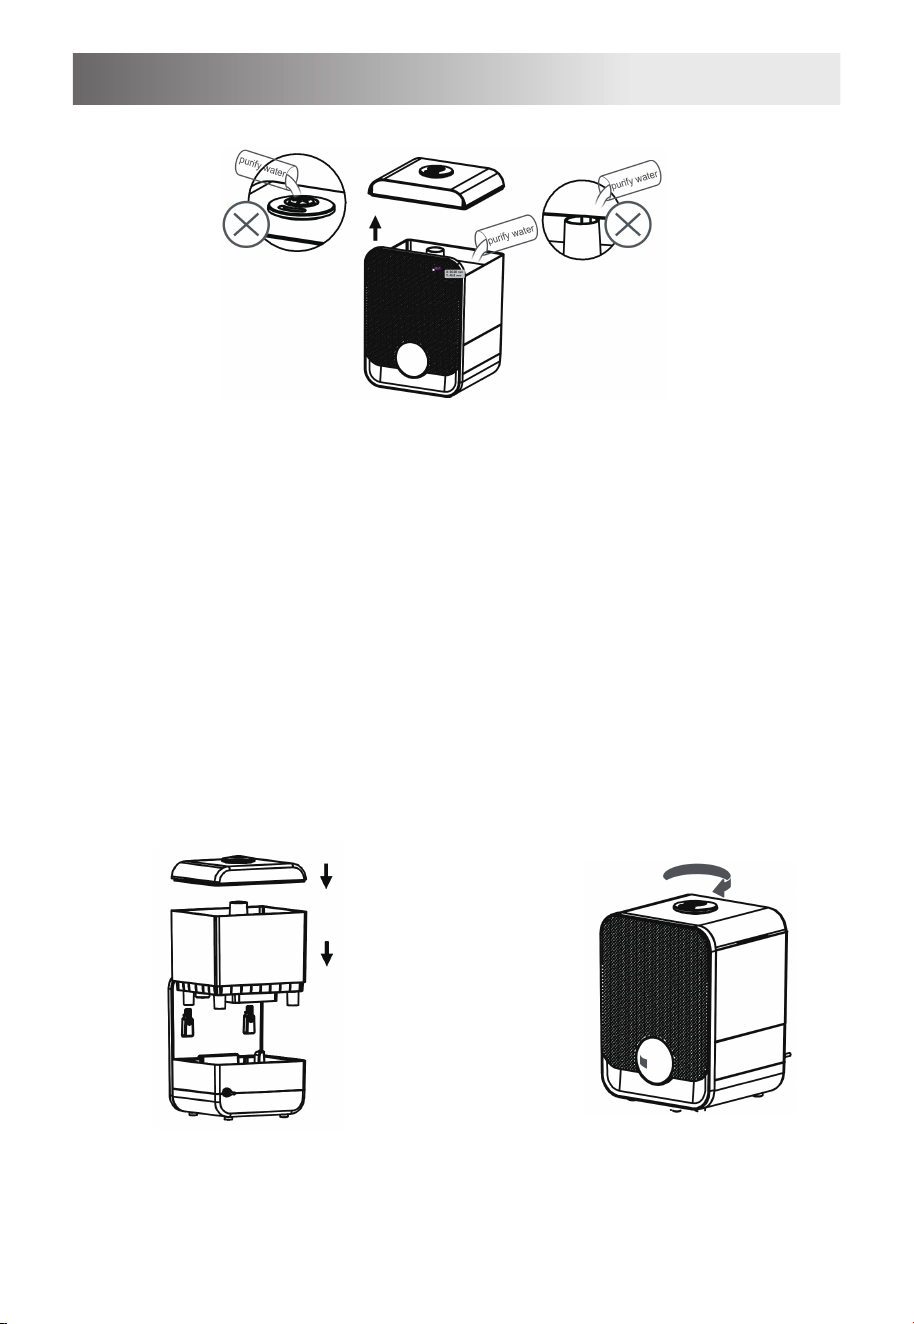
Water Filling (Two Methods)
Take off the water tank cover to the water tank;
It is forbidden to add water at the mist outlet and
the mist pipe of the water tank
Do not add water through
the mist outlet
Do not add water to the mist
pipe of the water tank
Installation of the
water tank
Atomizing direction
adjustment
The atomization outlet can be rotated
by 360°, which can be adjusted
according to your own needs, so that
atomizing direction satisfies your
needs.
If the water is added in the first way,
the water tank cover is covered with
the water tank. When installing back
to the lower shell, it is necessary to
ensure that the two buckle grooves
on the water tank and the surface
plate are in place.
7
Methods B
Components used
8
Remove the aroma tray cover, drop the essential oil in the
aroma tray and then cover it.
Use of remote control
Aroma tray use
The remote control can only
work within 60° of this frontal
area and within a distance of
about six meters.
The remote control can be placed
on the left side of the lower shell of
the machine after use
9
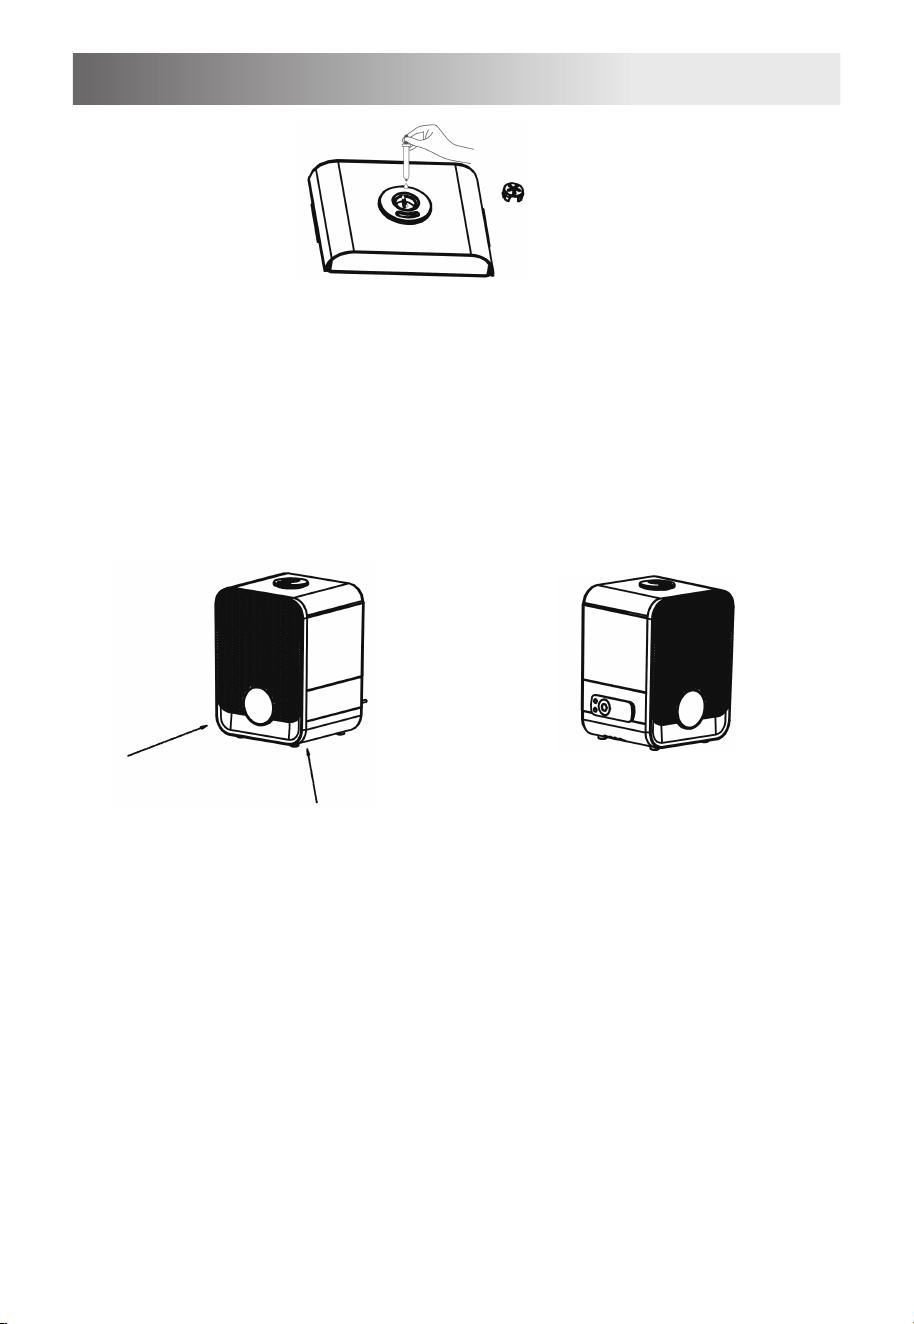
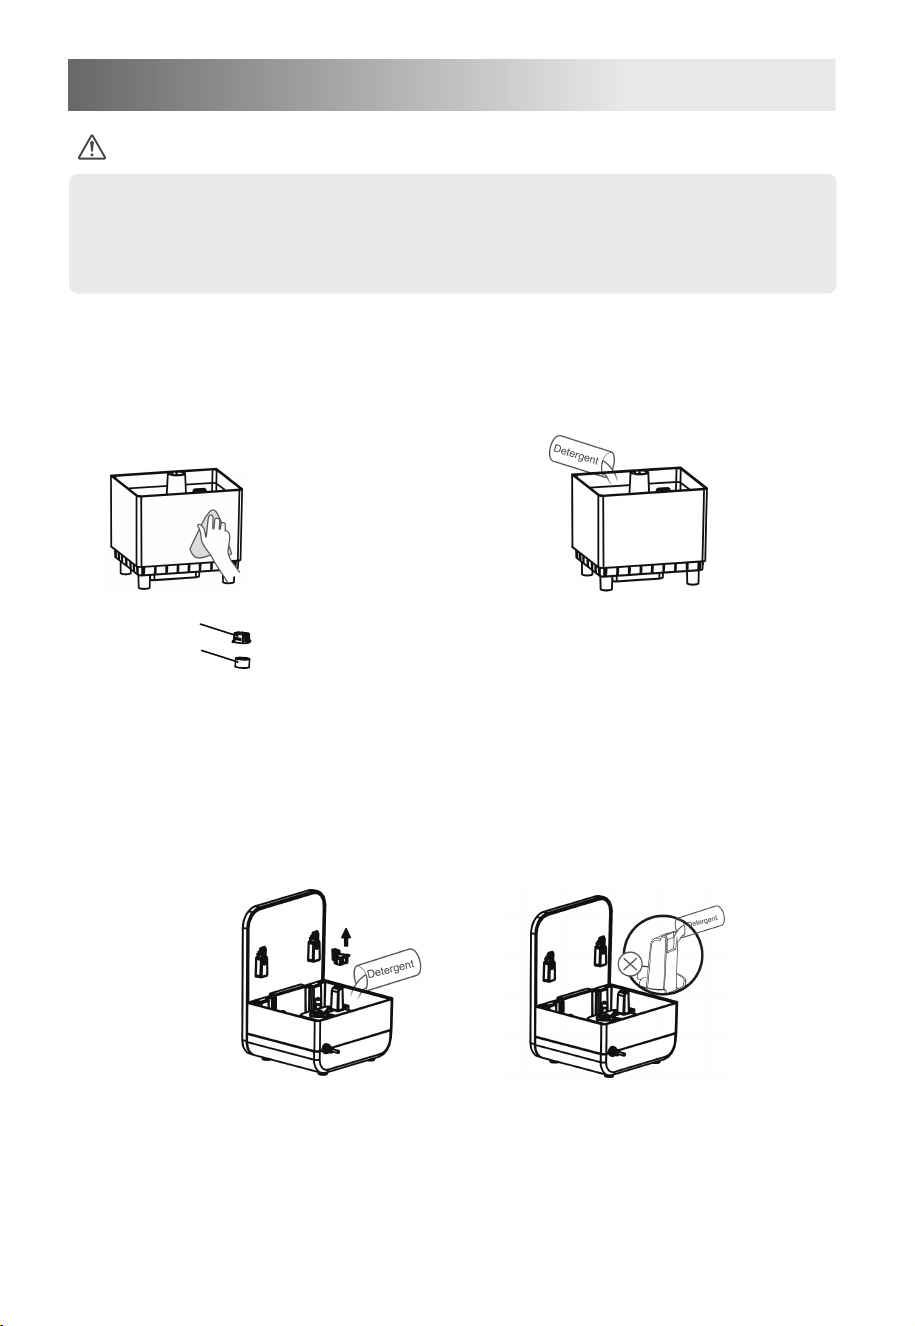
Cleaning and Maintenance
• Please be sure to unplug the power cord before cleaning.
Please be sure to remove scale and debris in the humidifier tank regularl
and it is recommended to clean it once every 3 days.
Water tray and atomizer cleaning
Water tank cleaning
Add detergent or water to clean, and t
rinse thoroughly after cleaning.
Sponge
Filter cover
Remove the filter cover and sponge from the water
tank by rotation, and clean them directly with
clean water
Clean directly with clean water,
rinse after cleaning, or wipe
with a soft wet cloth.
Notes
Flume and atomizer cleaning
When cleaning the lower shell,take out the gland first,
add detergent or calen water,rinse after cleaning.
Do not add water to the air outlet
Product Parameters
Notes
The following are the design parameters of SCK-3Q60. The measured
parameters are subject to the product; The humidification amount will vary,
depending on the temperature and humidity in the room.
Actual humidification amount is not less than 90% the standard 250ml/h.
Rated voltage (V~)
Rated power (W)
Volume of water tank (L)
Net product weight (kg)
Dimensions(mm)
120
60
105
6
2.3
Model SCK-3Q60
235*325*205
10