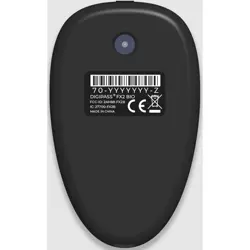

Digipass® FX2-A
User
Manual
Version: 2025-10-29

Copyright Notice
Copyright © 2025 OneSpan North America, Inc. All rights reserved.
OneSpan®, the “O” logo, DIGIPASS®, CRONTO® and VISION FXTM are registered or unregistered trademarks of
OneSpan North America Inc., OneSpan NV and/or OneSpan International GmbH (collectively "OneSpan") in the U.S.
and other countries. Any other trademarks cited herein are the property of their respective owners. OneSpan reserves
the right to make changes to specifications at any time and without notice.
This document is provided for informational purposes only. It represents OneSpan’s current product offerings and
practices as of the date of issue of this document, which are subject to change without notice. Customers are
responsible for making their own independent assessment of the information in this document and any use of
OneSpan’s products or services, each of which is provided “as is” without warranty of any kind, whether express or
implied. This document does not create any warranties, representations, contractual commitments, conditions or
assurances from OneSpan, its affiliates, suppliers or licensors. The responsibilities and liabilities of OneSpan to its cus-
tomers are controlled by OneSpan agreements, and this document is not part of, nor does it modify, any agreement
between OneSpan and its customers.
Contact us
Visit our website:
https://www.onespan.com
Resource center:
https://www.onespan.com/resource-center
Technical support and knowledge base:
https://www.onespan.com/support
If there is no solution in the knowledge base, contact the company that supplied you with the OneSpan product.
Date: 2025-10-29

i
Digipass® FX2-A User Manual
Contents
Table of Contents
User
Manual
.................................................................................................................................................. 1
1.1
Device overview
..................................................................................................... 2
1.1.1
Authenticator front
............................................................................................................ 2
1.1.2
Authenticator back
........................................................................................................... 3
1.2
PIN protection
......................................................................................................... 4
1.3
Fingerprint
sensor
................................................................................................. 5
1.3.1
Fingerprint enrollment
...................................................................................................... 6
1.4
Charge the battery
................................................................................................. 7
2.1
First steps
................................................................................................................. 8
2.1.1
Turn the authenticator on/off
........................................................................................... 8
2.1.2
Connect
your
authenticator ............................................................................................... 8
2.2
Initial authenticator setup
................................................................................... 9
2.3
Use the authenticator
.......................................................................................... 10
3.1
Get started with the OATH app
......................................................................... 12
3.1.1
Before you begin ............................................................................................................. 12
3.1.2
Work with the OATH app
............................................................................................... 12
4.1
Get started with the Cronto app
....................................................................... 15
4.1.1
Before you begin ............................................................................................................. 15

ii
Digipass® FX2-A User Manual
4.1.2
Work with the Cronto app
............................................................................................. 15
5.1
Get started with FIDO authentication
.............................................................. 17
5.1.1
Before you begin ............................................................................................................. 17
5.1.2
Register the authenticator and sign in
.......................................................................... 17
5.1.3
Remove FIDO credentials
.............................................................................................. 17
6.1
Get started with the Digipass app
..................................................................... 20
6.1.1
Before you begin ............................................................................................................. 20
6.1.2
Work with the Digipass app
........................................................................................... 20
7.1
Change the language settings
.......................................................................... 22
7.2
Manage Bluetooth settings
............................................................................... 23
7.2.1
Pair a new device
........................................................................................................... 23
7.2.2
Remove paired devices
.................................................................................................. 23
7.2.3
Disable
Bluetooth
............................................................................................................ 24
7.3
Change the PIN
..................................................................................................... 25
7.4
Manage fingerprints
............................................................................................ 26
7.4.1
Enroll fingerprints
............................................................................................................. 26
7.4.2
Delete enrolled fingerprints
........................................................................................... 26
7.5
Time synchronization
.......................................................................................... 27
7.6
Reset
authenticator
............................................................................................. 28
8.1
Technical specifications
...................................................................................... 29
8.1.1
Battery performance
....................................................................................................... 30

iii
Digipass® FX2-A User Manual
8.2
System
requirements
.......................................................................................... 31
9.1
Safety
notice
......................................................................................................... 32
9.2
Regulatory and compliance information
......................................................... 33


v
Digipass® FX2-A User Manual
Tables
Table
1:
Fingerprint indicators
__________________________________________________________
5
Table 2: Technical specifications for Digipass® FX2
-A __________________________________
29
Table 3: Certification and compliance
_________________________________________________
33

vi
Digipass® FX2-A User Manual
Procedures
To set up your authenticator
____________________________________________________________
9
To add a registration
__________________________________________________________________
12
To generate an OTP
__________________________________________________________________
12
To remove a registration
______________________________________________________________
13
To use the Cronto function
____________________________________________________________
15
To register the authenticator
__________________________________________________________
17
To sign in using FIDO authentication
___________________________________________________
17
To remove FIDO credentials
___________________________________________________________
18
To use a DIGIPASS function
___________________________________________________________
20
To remove a DIGIPASS license
________________________________________________________
20
To set the language
___________________________________________________________________
22
To pair a new device
__________________________________________________________________
23
To remove a paired device
____________________________________________________________
23
To disable Bluetooth
_________________________________________________________________
24
To change the PIN
___________________________________________________________________
25
To enroll a fingerprint
________________________________________________________________
26
Delete enrolled fingerprints
__________________________________________________________
26
To resynchronize the time
____________________________________________________________
27
To reset the authenticator
____________________________________________________________
28

1
Product overview
Digipass® FX2-A User Manual
1
Welcome to the Digipass FX2 User Manual! Digipass FX2 is a
phishing-resistant authenticator that works out-of-the-box with hundreds of FIDO2–
and OATH-enabled services.
The Digipass FX2-A authenticator provides a solution which
allows to mitigate social
engineering fraud with phishing-resistant security. The Digipass FX2 offers the best
of the combined worlds of Cronto and FIDO. It combines FIDO2 and Cronto protocols
to obtain passwordless logon, phishing-resistant transaction signing, and What you
see is what you sign (WYSIWYS) with zero footprint.
1.1
Device overview 2
1.2
PIN
protection
4
1.3
Fingerprint sensor 5
1.4
Charge the
battery
7
1
Product overview
Digipass® FX2-A User Manual
2
1.1
Device overview
1.1.1
Authenticator front
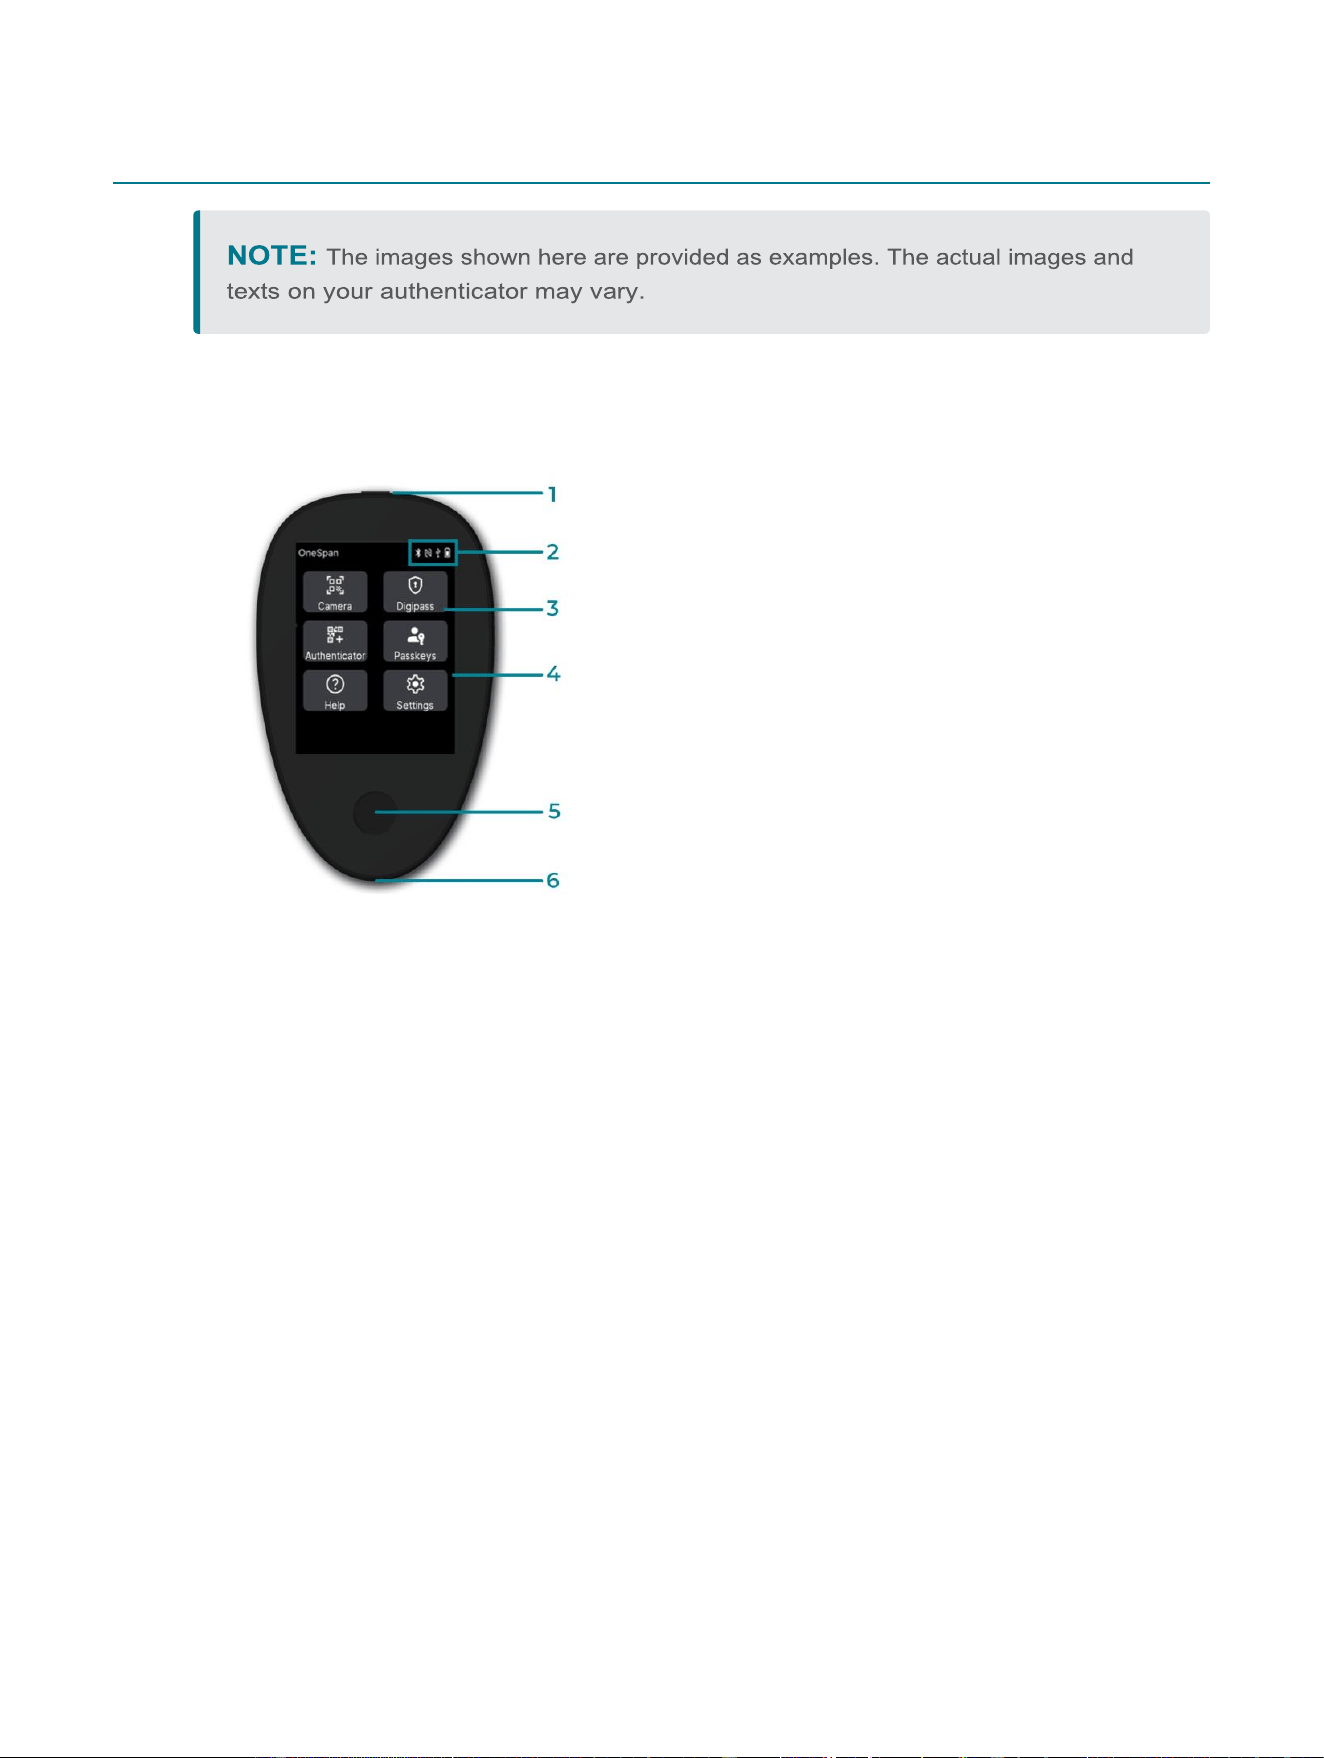
Figure 1: Authenticator front
1
Power
button
2
Status icons for Bluetooth, NFC, USB, and battery
3
Application buttons
4
Touch display
5
Fingerprint sensor
6
USB-C port
1
Product overview
Digipass® FX2-A User Manual
3
1.1.2
Authenticator back
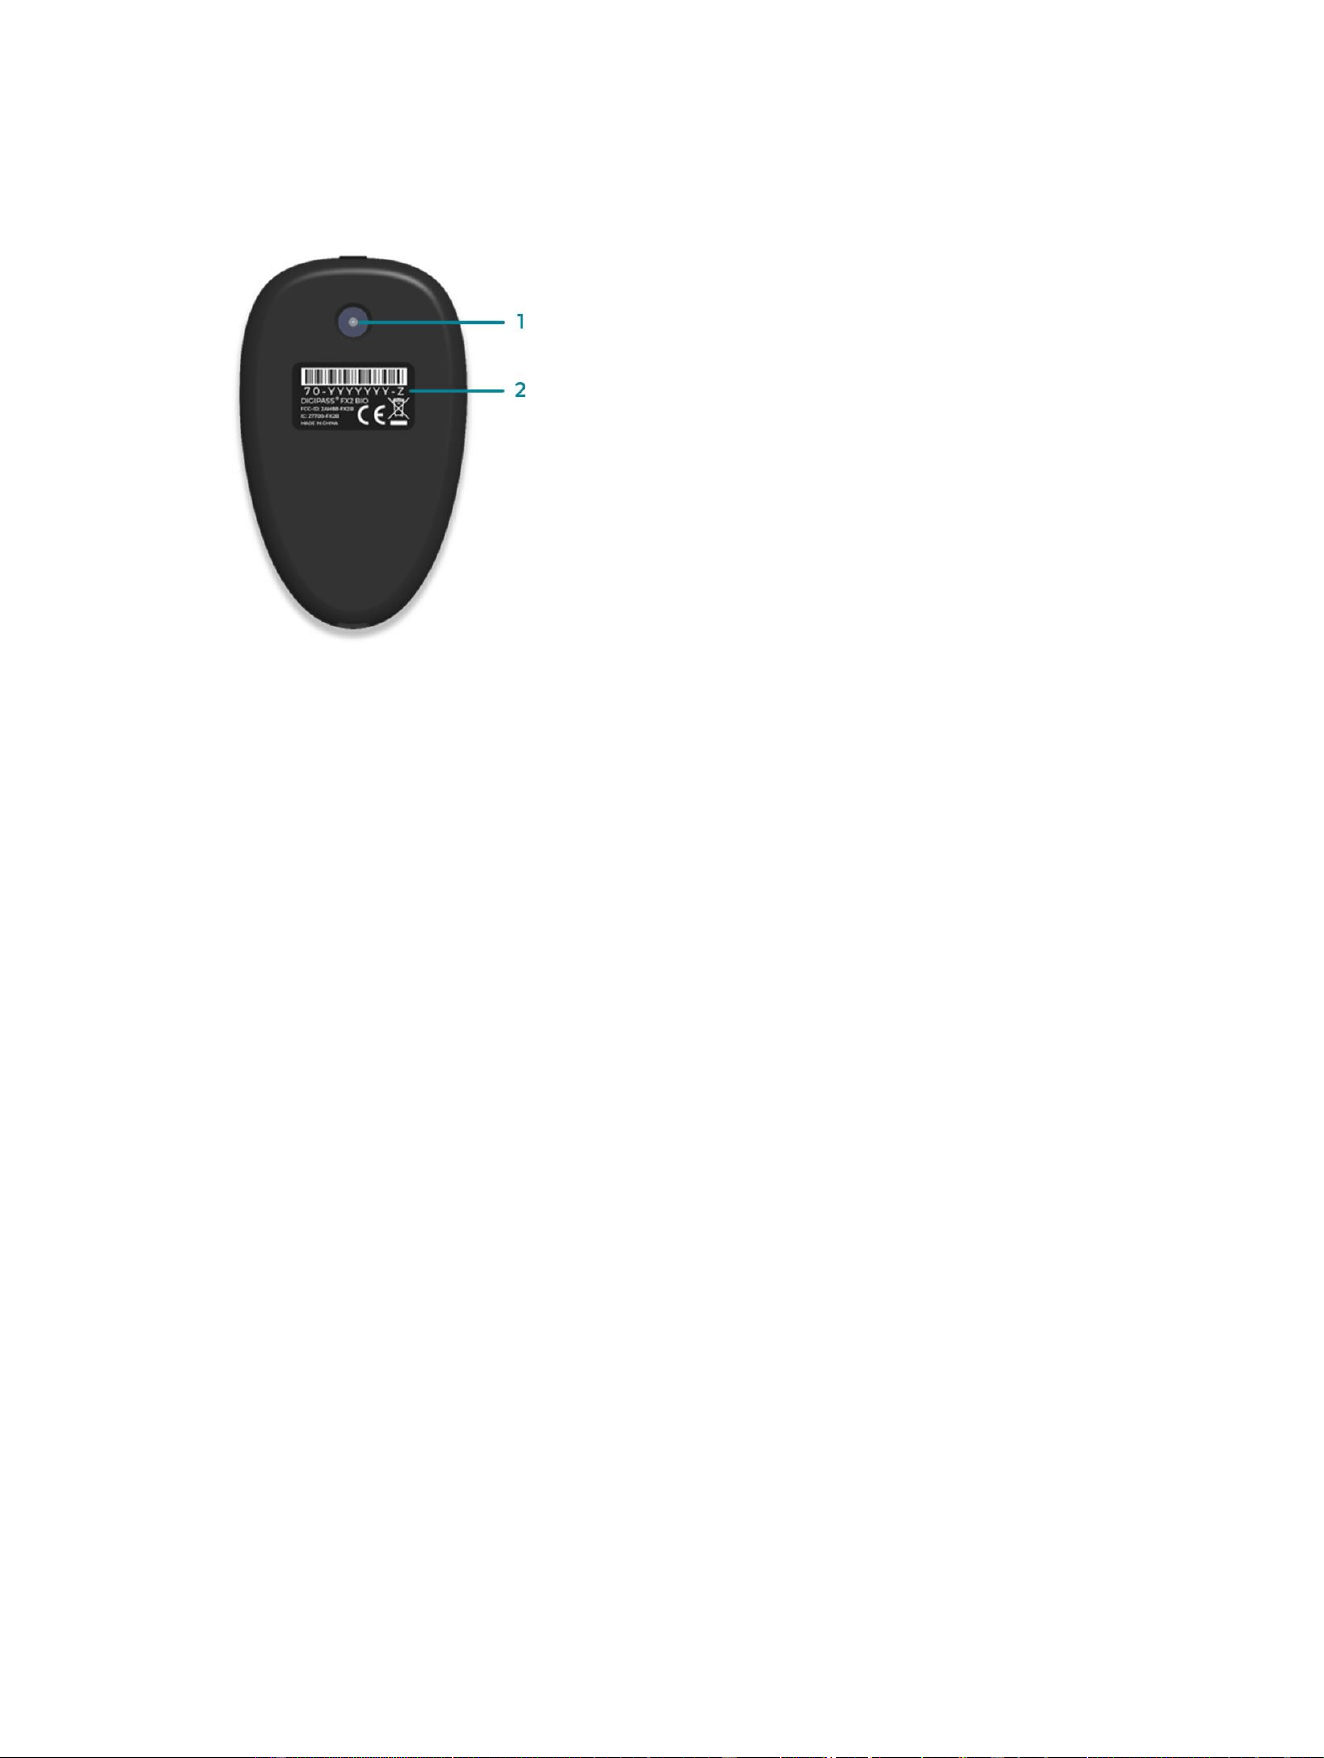
Figure 2: Authenticator back
1
Camera
2
Regulatory
identifiers
1
Product overview
Digipass® FX2-A User Manual
4
1.2
PIN protection
The DIGIPASS FX2 authenticator performs user verification primarily by fin
gerprint,
and by PIN as a fallback method.
The PIN is composed of digits and must comply with the following rules:
Minimum length
: 4 digits
Maximum length
: 10 digits
1
Product overview
Digipass® FX2-A User Manual
5
1.3
Fingerprint
sensor
The fingerprint sensor is used to verify the user. The sensor is a 360° sensor and
recog
nizes a fingerprint in any orientation. There are two verification modes:
Touch only.
Any finger can be used. This mode confirms
the user’s presence,
but not their identity
. The authenticator shows a message to simply touch the
fingerprint sensor (with any finger).
Verification.
This mode is used to
verify the user
if at least one fingerprint is
enrolled. You need to use a fingerprint that has been enrolled. The authenticator
shows a message to present an (enrolled) finger.
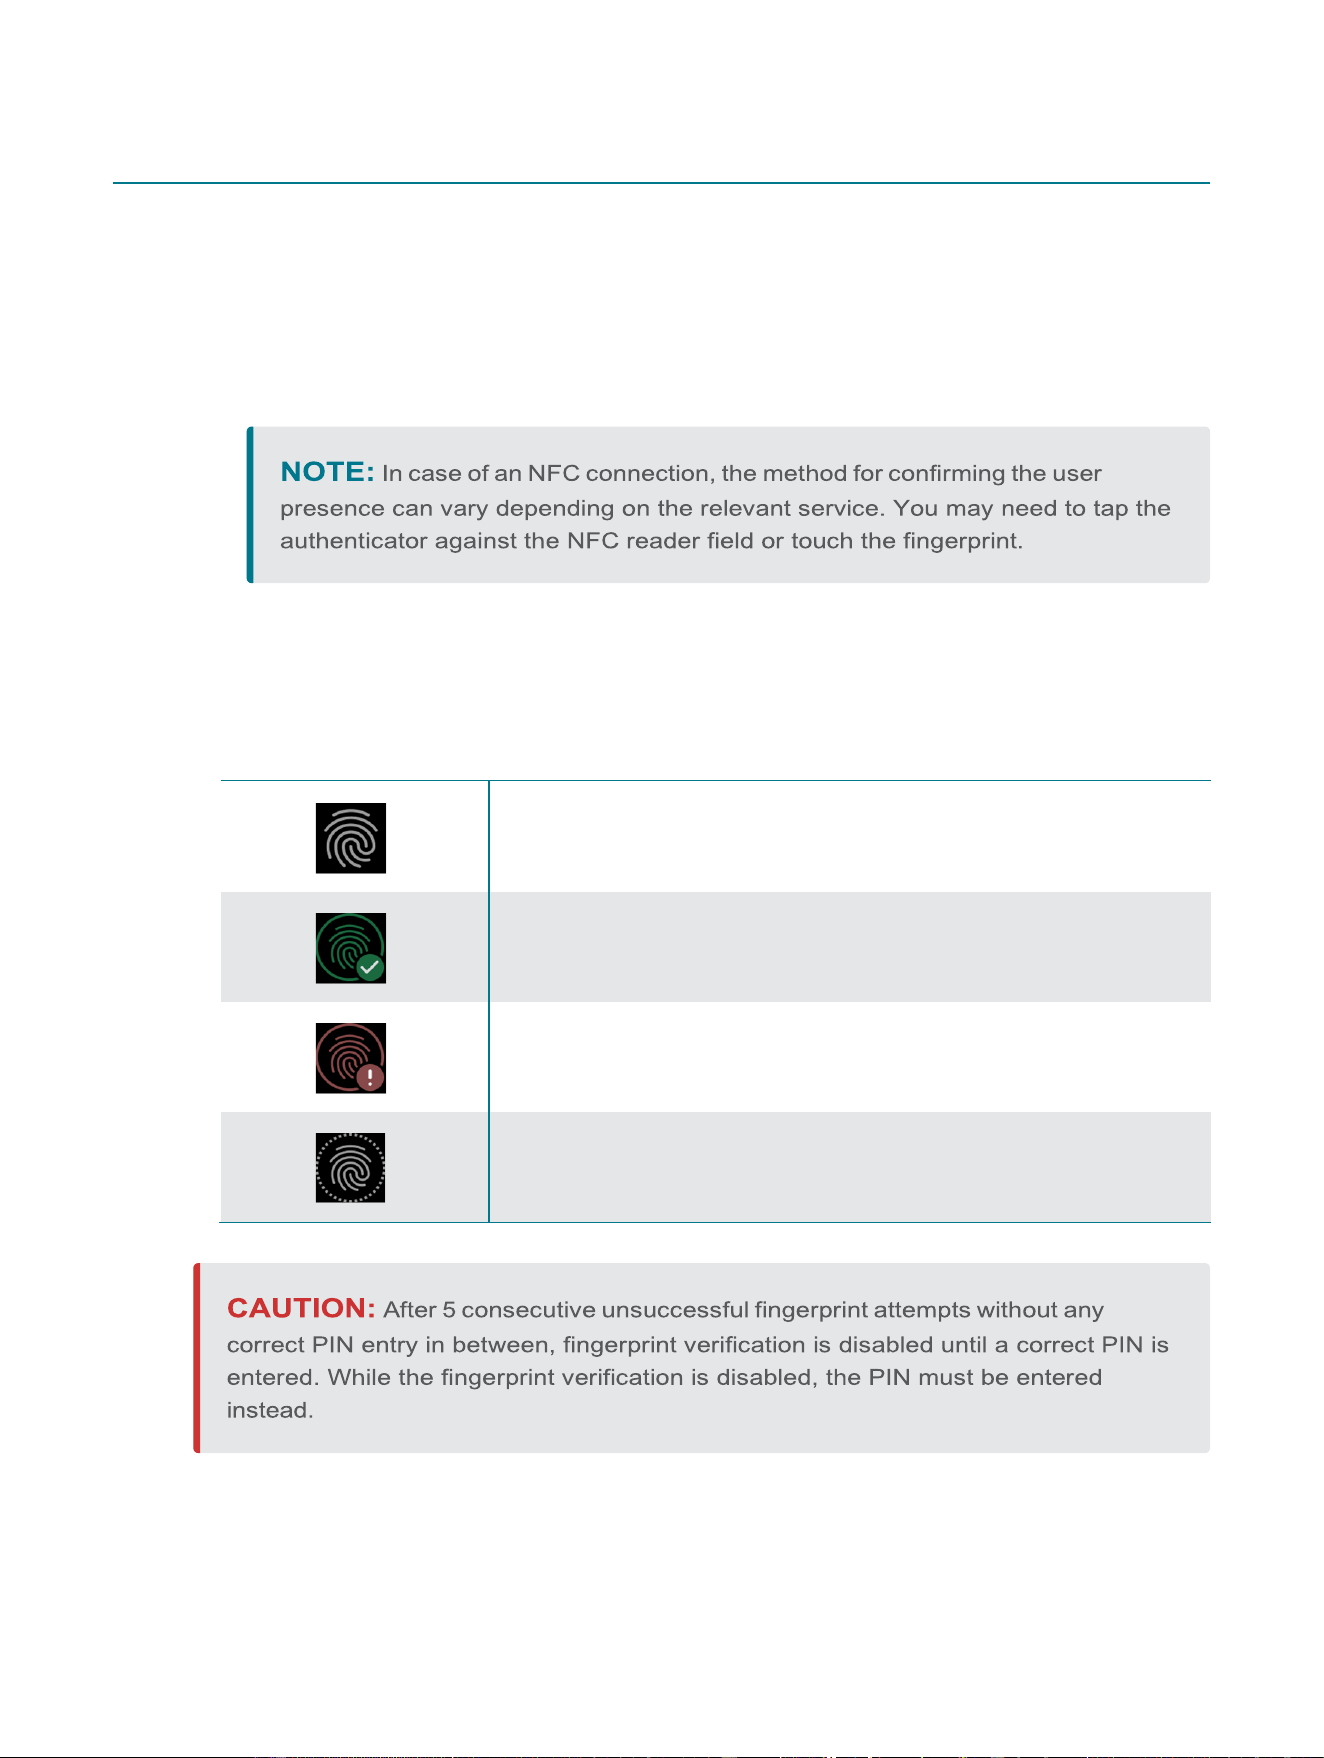
Table 1: Fingerprint indicators
Present
fingerprint
Fingerprint matching successful
Fingerprint matching failed
Fingerprint
detected
1
Product overview
Digipass® FX2-A User Manual
6
1.3.1
Fingerprint enrollment
Fingerprint enrollment
is the process of registering a fingerprint template, i.e. a
mathematical image of a fingerprint, in the authenticator. With this, it is possible to
identify the user by a simple finger touch on the fingerprint sensor. You need to
configure the PIN before you can enroll a fingerprint. This is because the PIN serves as
a fallback method in case of unsuccessful fingerprint attempts. For instructions on
how to enroll a fingerprint, see
7.4.1 Enroll fingerprints
.
The authenticator can save up to 5 fingerprint templates. If you try to enroll an
additional fingerprint, the device returns an error message to indicate that no
fingerprint enrollment can be performed. You can then free up space by removing one
or several fingerprint templates. For information about deleting enrolled fingerprints,
see
7.4.2 Delete enrolled fingerprints
.
1
Product overview
Digipass® FX2-A User Manual
7
1.4
Charge the battery
To recharge the authenticator, plug the USB cable into the USB port of a PC, phone, or
wall charger.
2 Getting started
Digipass FX2 User Manual
8
2.1
First steps
2.1.1
Turn the authenticator on/off
In standalone mode (without USB connection)
To turn on the authenticator, press the Power button for one second.
To turn off the authenticator, press and hold the Power button.
The authenticator will automatically turn off after 60 seconds of inactivity.
In USB-connected mode
To turn on the authenticator, plug the USB cable.
To turn off the authenticator, unplug the USB cable, then press and hold the
Power button.
2.1.2
Connect
your
authenticator
You can connect your authenticator via Bluetooth LE, USB, or NFC.

2 Getting started
Digipass FX2 User Manual
9
2.2
Initial authenticator setup
When you use the Digipass FX2 authenticator for the first time, an installation
wizard will help you complete the initial setup.
▶ To set up your authenticator
1.
Turn on the authenticator.
2.
Select your preferred language.
3.
Specify the PIN and tap
OK
.
4.
Confirm your PIN and tap
OK
.
5.
If you want to use fingerprint verification, follow the on-screen instructions to
enroll your fingerprint.
Fingerprint enrollment is not mandatory. If you choose not to enroll a fingerprint,
the authenticator will ask for the PIN instead. If at least one fingerprint has been
enrolled, the user verification by default relies on fingerprint verification.
You will receive a confirmation message once the initial setup has been successfully
completed.

2 Getting started
Digipass FX2 User Manual
10
2.3
Use the authenticator
The steps for using the DigipassFX2 authenticator vary depending on your appli
cation
provider's setup and the features that are supported, e.g. user authentication or
transaction signing. Follow the instructions on your application provider's website to
sign in or to authorize transactions.
3 Authentication with the OATH app
Digipass FX2 User Manual
11
OATH
is an initiative that defines open standards for strong authentication with
one-time passwords (OTPs). You can use the
OATH app
on your Digipass FX2
authenticator to generate OTPs for authentication to compliant websites. To do so,
you need to first register the authenticator with the website, by scanning a QR code.
After successful registration, you can generate OTPs with the OATH app, which you
then need to enter on the website to sign in.

3 Authentication with the OATH app
Digipass FX2 User Manual
12
3.1
Get started with the OATH app
3.1.1
Before you begin
Before you can work with the OATH app, ensure that you have completed the initial
authenticator setup. For more information, see
2.2 Initial authenticator setup
.
3.1.2
Work with the OATH app
▶ To add a registration
1.
Turn on the authenticator.
2.
Open the camera app on the Digipass FX2
3.
Scan the QR code that is displayed on the website for which you want to register
the authenticator.
The new registration is added to the list in your OATH app.
▶ To generate an OTP
1.
Turn on the authenticator.
2.
Tap on
Authenticator
to open the OATH app and select the account for which
you want to generate the one-time password (OTP).
3.
Provide your fingerprint for authentication, or tap
Switch PIN
to use the PIN
instead.
The OTP is displayed.
4.
(Optional) Send this OTP over USB via keyboard emulation. To use that feature,
first put the input cursor at the desired position on your host application, and
then press
Send
on the authenticator. The OTP will be automatically typed at the
location of the input cursor.

3 Authentication with the OATH app
Digipass FX2 User Manual
13
▶ To remove a registration
1.
Turn on the authenticator.
2.
Tap on
Authenticator
to open the OATH app.
3.
Tap on the
recycle bin
to activate the remove registration flow
4.
Select the account that you want to delete.
5.
Tap
YES
to confirm that you want to remove the account.

4 Cronto app
Digipass FX2 User Manual
14
Digipass FX2 utilizes a unique visual challenge contained in a Cronto image,
offering
strong protection against threats as well as an intuitive experience for
users. Visual transaction signing enhances convenience for users by reducing the level
of interaction required. Because all transaction data are captured by scanning a
Cronto image, the user does not need to type any transaction details into the device.
Critical transaction information including payment details, is encrypted and
automatically presented securely on the color display, ensuring that the transaction
has not been tampered with. This What you see is what you sign (WYSIWYS) feature
is ideally suited for transaction signing signatures to secure online transactions
without compromising on user-friendliness.

4 Cronto app
Digipass FX2 User Manual
15
4.1
Get started with the Cronto app
4.1.1
Before you begin
Before you can work with the
Cronto app
, ensure that you have completed the initial
authenticator setup. For more information, see
2.2 Initial authenticator setup
.
4.1.2
Work with the Cronto app
▶ To use the Cronto function
1.
Turn on the authenticator.
2.
Open the Camera app and follow the instructions on your device and on
your
application provider’s website.
The typical flow includes scanning a Cronto image with your device’s camera.
Simply aim the camera at the Cronto image displayed on your computer.
3.
Provide your fingerprint for authentication, or tap
Switch PIN
to use the PIN
instead.
4.
Verify the transaction data and press
OK
if you agree.
The one-time password (OTP) is displayed
5.
(Optional) Send this OTP over USB via keyboard emulation. To use that feature,
first put the input cursor at the desired position on your host application, and
then press
Send
on the authenticator. The OTP will be automatically typed at the
location of the input cursor.
5 FIDO authentication
Digipass FX2 User Manual
16
The
FIDO Alliance
develops standards for passwordless authentication. With FIDO
(Fast IDentity Online), user authentication does not rely on static passwords or one-
time passwords. Instead, users are authenticated via biometrics and FIDO–compliant
authenticators.
For FIDO authentication, you first need to register your DIGIPASS FX2 authenticator with
the relevant service. After successful registration, you can sign in to the ser
vice with your
fingerprint.
5 FIDO authentication
Digipass FX2 User Manual
17
5.1
Get started with FIDO authentication
Registration and authentication workflows vary depending on the options that are
used by the browser and the platform.
5.1.1
Before you begin
Before you can get started with FIDO authentication, ensure that you have completed
the initial authenticator setup. For more information, see
2.2 Initial authenticator
setup
.
5.1.2
Register the authenticator and sign in
▶ To register the authenticator
1.
Connect your authenticator via USB, Bluetooth LE, or NFC.
2.
Follow the instructions for the relevant service to register the authenticator for
FIDO authentication.
During the registration process, you usually need to name the authenticator, and
provide your fingerprint and/or your PIN.
▶ To sign in using FIDO authentication
1.
Connect your authenticator via USB, Bluetooth LE, or NFC.
2.
Follow the instructions for the service to which you want to sign in.
When prompted, provide your fingerprint and/or PIN for authentication.
5.1.3
Remove FIDO credentials
You can delete FIDO credentials in your FIDO app when they are no longer needed.

5 FIDO authentication
Digipass FX2 User Manual
18
▶ To remove FIDO credentials
1.
Turn on your authenticator.
2.
Open the Passkeys app.
3.
Tap on the
recycle bin
to activate the remove registration flow
4.
Select the FIDO credentials that you want to remove and tap
DELETE
.
5.
Tap
YES
to confirm that you want to remove the credentials.

6 DIGIPASS app
Digipass FX2 User Manual
19
With the
Digipass App
, you can generate cryptographic responses for classic
Digipass operations like login and signature. This section describes the main features
of this app. However please note that the detailed configuration and settings of
this
app depend on your application provider
DIGIPASS

6 DIGIPASS app
Digipass FX2 User Manual
20
6.1
Get started with the Digipass app
6.1.1
Before you begin
Before you can work with the Digipass app, ensure that you have completed the ini- tial
authenticator setup. For more information, see
2.2 Initial authenticator setup
.
6.1.2
Work with the Digipass app
▶
To use a Digipass function
1.
Turn on the authenticator.
2.
Open the Digipass app and select the function you want to run.
3.
Provide your fingerprint for authentication, or tap
Switch PIN
to use the PIN
instead.
The cryptographic response is displayed.
4.
(Optional) Send this response over USB via keyboard emulation. To use that fea-
ture, first put the input cursor at the desired position on your host application,
and then press
Send
on the authenticator. The OTP will be automatically typed at
the location of the input cursor.
▶
To remove a Digipass license
1.
Turn on the authenticator.
2.
Open the Digipass app and tap
Licenses
.
3.
Select the license that you want to delete.
4.
Tap
Yes
to confirm that you want to remove the license.
7 Manage the authenticator
Digipass FX2 User Manual
21
The various menus of the Digipass FX2 authenticator allow for easy management of
various authenticator settings and features. You can change device settings such as
the authenticator language or the PIN, and manage your connections, fingerprints,
and clock.
7.1
Change the language settings
22
7.2
Manage Bluetooth settings
23
7.3
Change the PIN
25
7.4
Manage fingerprints
26
7.5
Time synchronization 27
7.6
Reset
authenticator
28

7 Manage the authenticator
Digipass FX2 User Manual
22
7.1
Change the language settings
▶ To set the language
1.
Turn on the authenticator.
2.
Tap
Settings
.
3.
Tap
Language
and select your preferred language.

7 Manage the authenticator
Digipass FX2 User Manual
23
7.2
Manage Bluetooth settings
7.2.1
Pair a new device
▶ To pair a new device
1.
Turn on the authenticator.
2.
To activate the pairing mode, tap
Settings
and open the Bluetooth settings.
3.
Tap
Connect device
.
In pairing mode, the authenticator is visible by any nearby device over Bluetooth,
under the name “DIGIPASS FX2”.
4.
Follow the instructions on your host device to add a new Bluetooth device.
5.
Once the Digipass FX2 authenticator is detected on the host device, you will
be
prompted to enter a pairing code on your authenticator to complete the process.
The Digipass FX2 authenticator can store a maximum of 4 paired devices. If the
maximum is reached and a new device is paired, it replaces the oldest one that is
stored.
7.2.2
Remove paired devices
▶ To remove a paired device
1.
Turn on your authenticator.
2.
Tap
Settings
and open the Bluetooth settings.
3.
Tap
Manage devices
.
4.
Select the paired device that you want to remove.
5.
Tap
YES
to confirm that you want to remove the device.
7 Manage the authenticator
Digipass FX2 User Manual
24
7.2.3
Disable
Bluetooth
The authenticator is pre-configured with Bluetooth enabled.
▶ To disable Bluetooth
1.
Connect your authenticator.
2.
Tap
Settings
and open the Bluetooth settings.
3.
Tap
Turn off
.

7 Manage the authenticator
Digipass FX2 User Manual
25
7.3
Change the PIN
▶ To change the PIN
1.
Turn on the authenticator.
2.
Tap
Settings
.
3.
Tap
Change PIN
.
4.
Enter the old PIN and tap
OK
.
5.
Enter the new PIN and tap
OK
.
6.
Confirm the new PIN and tap
OK
.
7 Manage the authenticator
Digipass FX2 User Manual
26
7.4
Manage fingerprints
7.4.1
Enroll fingerprints
▶ To enroll a fingerprint
1.
Turn on the authenticator.
2.
Tap
Settings
.
3.
Tap
Fingerprint > Add Fingerprint
.
4.
Enter your PIN and tap
OK
.
5.
Follow the on-screen instructions to enroll your fingerprint.
A confirmation message is displayed once the fingerprint enrollment has successfully
finished.
7.4.2
Delete enrolled fingerprints
▶ Delete enrolled fingerprints
1.
Turn on the authenticator.
2.
Tap
Settings
.
3.
Tap
Fingerprint > Manage Fingerprint
.
4.
Tap the
recycle bin
.
5.
From the list, select the relevant fingerprint.
6.
Tap
Yes
to confirm that you want to remove the fingerprint.

7 Manage the authenticator
Digipass FX2 User Manual
27
7.5
Time synchronization
The authenticator loses the time and date if the battery has been completely
discharged. In that case, it is necessary to resynchronize the time to use time base
features such as TOTP or time based Digipass OTP.
▶ To resynchronize the time
1.
Turn on the authenticator.
2.
Tap
Settings
.
3.
Tap Set time.
4.
Follow the instructions on your authenticator.
7 Manage the authenticator
Digipass FX2 User Manual
28
7.6
Reset
authenticator
In some situations it is necessary to restore the factory settings of the Digipass FX2
authenticator, for example if the PIN is locked.
▶ To reset the authenticator
1.
Turn on the authenticator.
2.
Tap
Settings
.
3.
Tap
Factory reset
.
4.
Tap
YES
to confirm that you want to reset your authenticator to factory settings.

8 Technical specifications and system requirements
Digipass FX2 User Manual
29
8.1
Technical specifications
Table 2: Technical specifications for Digipass FX2
Display
Capacitive touch color display with backlight 2.4-inch
display size - IPS - 240 x 320 resolution
Size
95.2mm (L) x 58.2mm (W) x 9.9mm (H)
Weight
47g
Camera
640 x 480
Fingerprint sensor
Capacitive
Bluetooth
Bluetooth 5.2 LE (Low Energy)
NFC
ISO 14443 / card-emulation mode / extended APDU
support
Battery
Rechargeable - 320 mAh
Cable
USB-C cable
1
meter (optional)
Power supply in connected mode
Via USB-C, 4.75 to 5.50 volts
Languages
Multilingual support
Tampering
Tamper evident, ISO13491-1
Dust & water resistance
Dust-safe and splashproof
Technical specifications and system

8 Technical specifications and system requirements
Digipass FX2 User Manual
30
Table 2: Technical specifications for DIGIPASS FX2 (continued)
Supported protocols
Digipass (Login, Transaction)
Cronto transaction signing
FIDO:
FIDO U2F
FIDO2.1: the device implements the CTAP2.1 spe-
cification
OATH:
HOTP
TOTP
SHA1 and SHA256 HMAC types
8.1.1
Battery performance
To optimize the performance of the rechargeable battery, use and charge your
Digipass FX2 authenticator at least once every two months.
8 Technical specifications and system requirements
Digipass FX2 User Manual
31
8.2
System
requirements
Supported operating systems:
Windows 10 version 1903 or later
macOS 13 or later
Ubuntu 22.04.2 or later
Supported browsers:
Google Chrome
111
or later
All browsers that support the FIDO2 WebAuthn API
9 Safety notice and regulatory information
Digipass FX2 User Manual
32
9.1
Safety
notice
Safety instructions
Do not pierce, break, crush, or cut the device or the battery.
Do not expose the device or the battery to an open flame or extremely high
temperatures.
Do not expose the device or the battery to liquids or extremely low air pres-
sure.
Do not drop the device or the battery.
The device or the battery must be recycled or disposed of separately from
household waste.

9 Safety notice and regulatory information
Digipass FX2 User Manual
33
9.2
Regulatory and compliance information
Table 3: Certification and compliance
Short-term storage tem-
perature
-10° C to 50° C
90% RH non-condensing
IEC60068-2-78 (damp
heat)
IEC60068-2-1 (cold)
Operating
temperature
0° C to 45° C
85% RH non-condensing
IEC60068-2-78 (damp
heat)
IEC60068-2-1 (cold)
Vibration
10 to 75 Hz
10 m/s²
IEC60068-2-6
Emission
EN55022
Immunity
4 kV contact discharges
8 kV air discharges
3 V/m from 80 to 1000 MHz
EN55024
Compliant with
European Directives
CE: 89/336/EEC or
2004/108/EC
RoHS: 2002/95/EC
WEEE: 2002/96/EC
Compliant with Federal
Communications Com-
mission
FCC ID: 2AH88-FX2
IC: 27700-FX2
Statement of Compliance with EU Directive
OneSpan NV declares that this Digipass FX2 device is in compliance with the Essential require
ments and
other relevant provisions of Directive 2014/53/EU and 2015/863/EU.
The full Declaration of Conformity can be requested from:
Company: OneSpan NV
Address: Romeinsesteenweg 564C, 1853 Strombeek-Bever, Belgium
Email: legal@onespan.com
FCC Statement
This device complies with part 15 of the FCC Rules. Operation is subject to the following two conditions: (1) This device
may not cause harmful interference, and (2) this device must accept any interference received, including inter-

9 Safety notice and regulatory information
Digipass FX2 User Manual
34
ference that may cause undesired operation.
Changes or modifications made to this equipment not expressly approved by OneSpan NV may void the FCC author-
ization to operate this equipment.
FCC Interference Statement
This equipment has been tested and found to comply with the limits for a Class B digital device, pursuant to Part
15
of the FCC Rules. These limits are designed to provide reasonable protection against harmful interference in a res-
idential installation. This equipment generates uses and can radiate radio frequency energy and, if not installed and
used in accordance with the instructions, may cause harmful interference to radio communications. However, there
is no guarantee that interference will not occur in a particular installation. If this equipment does cause harmful
inter- ference to radio or television reception, which can be determined by turning the equipment off and on, the
user is encouraged to try to correct the interference by one of the following measures:
Reorient or relocate the receiving antenna.
Increase the separation between the equipment and receiver.
Connect the equipment into an outlet on a circuit different from that to which the receiver is connected.
Consult the dealer or an experienced radio/TV technician for help.
This portable transmitter with its antenna has shown compliance with FCC’s SAR limits for general population /
uncontrolled exposure. The antenna used for this device must not be co-located or operating in conjunction with
any other antenna or transmitter.
IC Notice for Canada
This Class B device complies with Canadian ICES-003 requirements for Information Technology Equipment (includ-
ing Digital Apparatus). Cet appareil numerique de la classe B est conforme a la norme NMB-003 du Canada.
This Device complies with Industry Canada License-exempt RSS standard(s). Operation is subject to the following
two conditions:
1)
this device may not cause interference, and 2) this device must accept any interference, including
interference that may cause undesired operation of the device.
Le présent appareil est conforme aux CNR d’Industrie Canada applicables aux appareils radio exempts de licence.
L’exploitation est autorisée aux deux conditions suivantes:
1)
l’appareil ne doit pas produire de brouillage; 2)
l’utilisateur de l’appareil doit accepter tout brouillage radioélectrique subi, même si le brouillage est susceptible d’en
compromettre le fonctionnement.
Correct disposal of this product (Waste Electrical and Electronic Equipment)
Applicable in the European Union and other European countries with separate collection systems
This marking shown on the product or its literature, indicates that it should not be disposed with other
household waste at the end of its working life. To prevent possible harm to the environment or human
health from uncontrolled waste disposal, please separate this from other types of waste and recycle it
responsibly to promote the sustainable reuse of material resources. Household users should contact either the pro-
vider of the product, or their local government office, for details of where and how they can take this item for envir-
onmentally safe recycling. Business users should contact their supplier and check the terms and conditions of the
purchase contract. This product should not be mixed with other commercial waste for disposal.
