Time-Lapse Camera User Manual
TL2100
https://z.wiki

https://z.wiki

English .............................................................. 1
German ........................................................... 17
French ............................................................. 35
Italian ............................................................. 53
Spanis ............................................................. 70
https://z.wiki

About Dsoon.............................................................1
Package List.............................................................2
Product Overview......................................................3
Button Function Descriptions.....................................4
Specifications............................................................5
Power Supply............................................................6
Storage Media..........................................................7
Basic Operations.......................................................9
Time-Lapse Settings................................................15
About Installation....................................................23
File Transfer...........................................................26
Maintenance and Care.............................................27
Service Assurance....................................................28
Contents
https://z.wiki

Thank you for choosing the Dsoon brand time-
lapse camera.Since the founding of Dsoon, we have
been committed to providing high-quality imaging
solutions to users worldwide. Through years of
development and technological innovation, our series
of time-lapse cameras have become industry leaders,
earning the trust and admiration of many users.
Every Dsoon time-lapse camera is a tribute to the
limitless possibilities of creativity, and we hope they
bring new inspiration and possibilities to your
work.Whether you are a professional photographer
or an imaging enthusiast, Dsoon is always your
trusted partner.We hope our products bring you
anexceptional experience and unparalleled results.
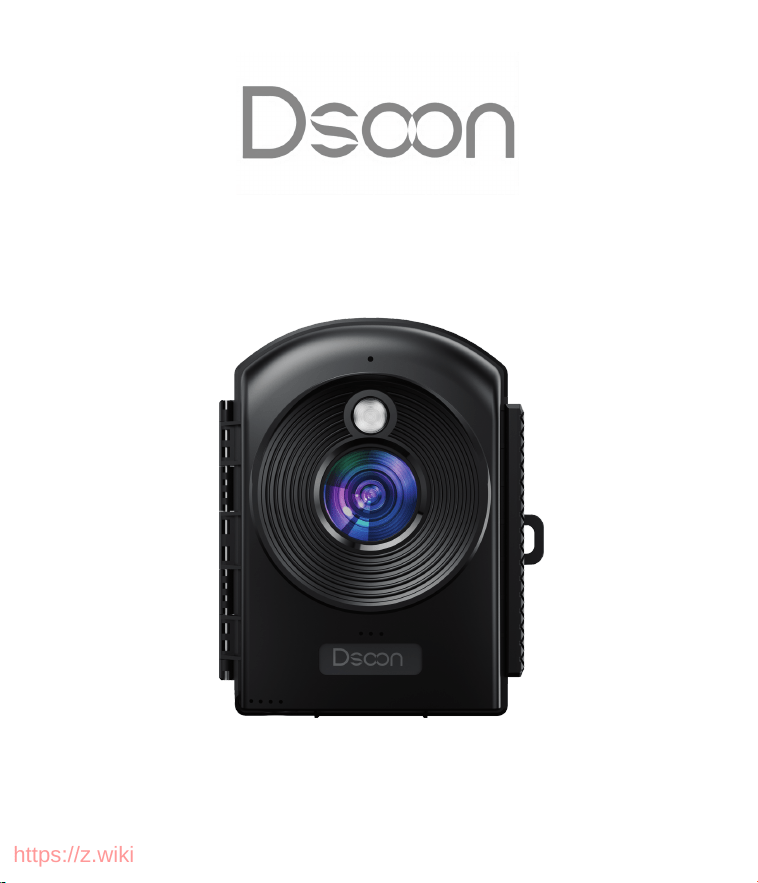
About Dsoon
1
https://z.wiki

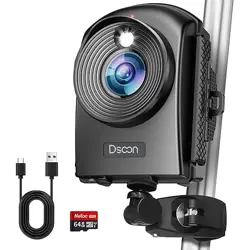
Time Lapse Camera x 1
32 GB TF Card x 1
USB Transfer Line x 1
Wall Bracket x 1
Round Tube Bracket x 1
Installation Strap x 1
Rope x 1
Wall Plug x 3
Wall Screw x 3
Cleaning Cloth x 1
User Manual x 1
Package List :
2
https://z.wiki
Product Overview
1. Display Screen
2. Up Button/Manual Time lapse
Button
3. Mode / Right
Button
4. Speaker
5. OK Button
6. Battery Compartment
7. DC Interface
8. Down / Selfie Button
9. Menu Button
10. Power / Delay Button
11. Type-C Port
12. TF Card Slot
3
https://z.wiki
13. Fill Light
13. Lens
15. Latch
16. Brand LOGO
17. Status Indicator
Button
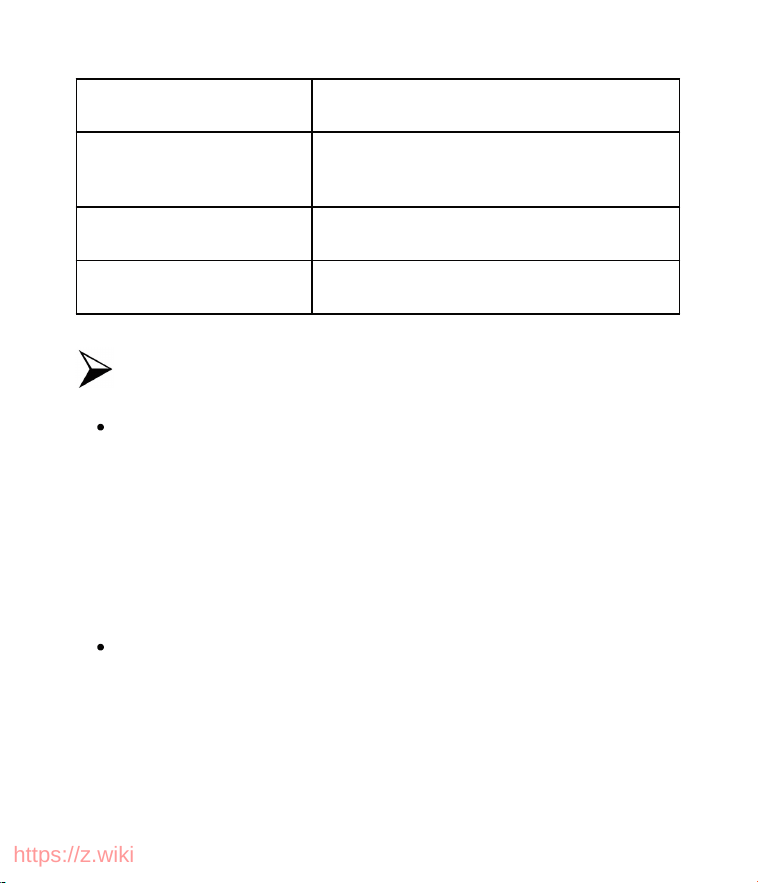
Funtion
Power / Delay
Button
Long press to power on/off the
device; after powering on, press this
button to enter time-lapse mode.
MENU
Enter / Exit the menu.
MODE
Switch between photo mode, video
mode, and playback mode.
OK Button
Confirm selection.
MTL Button
Up/Manual time-lapse shortcut key.
Down/Selfie Button
Down / Take selfie.
Button Function Descriptions
4
https://z.wiki

LCD Screen
2.4-Inch TFT LCD
Lens
110° starlight wide-angle lens
Sensor
Starlight 2MP 1/2.7” sensor
Resolution
1920*1080/1280*720
Shooting Distance
60CM—Infinity
Fill Light
Single 120°W white LED light,
activated in dark environments.
Custom Shooting
Interval
Flexible settings for daily or time-
period shooting cycles.
Loop Recording
When enabled, old files will be
deleted when the TF card is nearly
full.
Exposure
Compensation
+3.0 EV ~ -3.0 EV, in 1.0 EV
increments.
File Format
JPG/AVI
Specifications
5
https://z.wiki
Power Supply
12 x 1.5V AA alkaline batteries.
Storage Medium
TF card (up to 512GB, Class 10
or above).
Computer Interface
USB
Installation Method
Bracket, strap, rope.
Power Supply
Open the time-lapse camera casing and remove
the battery cover. Install 12 pieces of 1.5V AA
alkaline batteries (the camera can operate
normally with just 4 batteries), ensuring the
correct polarity.
If the camera is low on power, connect it to a
power adapter (not provided). Voltage
specifications: 6V, 1.0A.
6
https://z.wiki
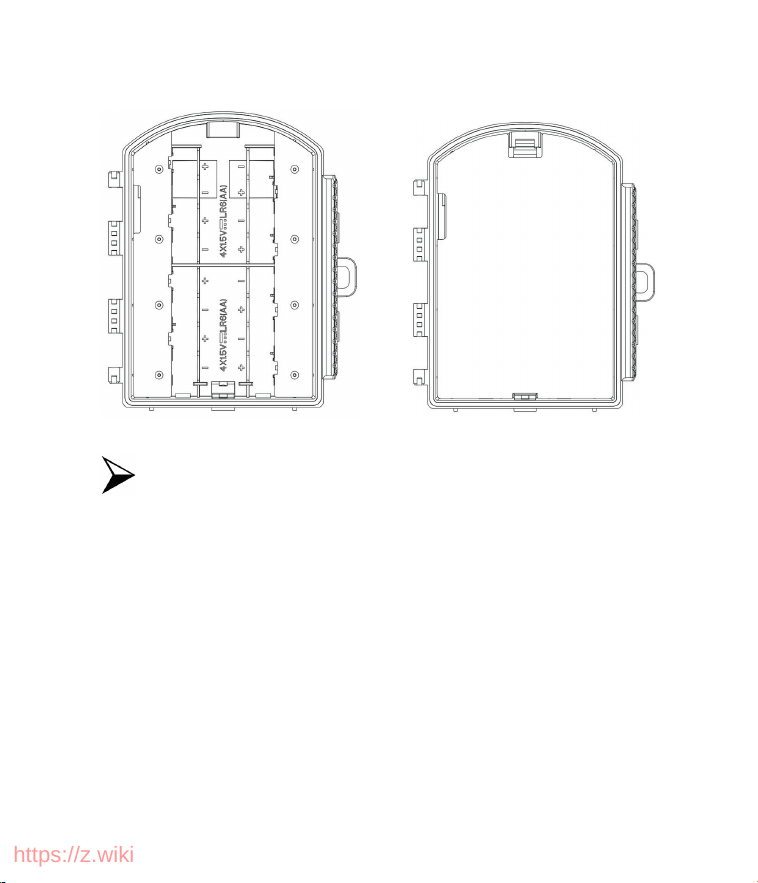
Close the battery
cover
Storage Media
This product does not have built-in memory, so
please insert a TF card before use. The camera
cannot save any data without a storage card. It is
recommended to format the TF card before
shooting, which can improve battery life and
shutter speed.
7
https://z.wiki

Supports Micro SD cards with a maximum
capacity of 512GB. It is recommended to use
Class 10 or higher high-speed cards.
To avoid malfunction, keep the storage card
away from water, strong vibrations, dust, heat
sources, and direct sunlight.
Do not force the storage card into the slot. Insert
it according to the direction indicated on the
product.
When the storage card is full, the camera will
automatically stop taking photos, recording
videos, and turn off the LED light.
To remove the TF card, gently press down on the
edge of the card to eject it.
8
https://z.wiki
Basic Operations
Power On/Off
Press and hold the power button to turn on the
camera. Press and hold the power button again to
turn it off.
Mode Introduction & Control
1. Adjustment Mode
Photo Mode
For capturing still photos.
Video Mode
For recording videos.
Playback Mode
For playing recorded files
2. Press the Mode Button to Switch Among the 3 Modes
Taking Photos
Press the mode button to switch to
photo mode; press the OK button to
take a photo.
Recording Videos
Press the mode button to switch to
video mode; press the OK button to
start and stop recording.
9
https://z.wiki

Playback Mode
To view saved files, press the mode
button to switch to Playback Mode.
Use the up/down buttons to browse
through photos and videos.
While viewing a video, press the OK
button to play or pause it, and press
the menu button to stop playback.
Press the mode button again to exit
Playback Mode.
Playback Mode
Menu
Delete Current File:
Delete the current photo or video.
Options: [Cancel] / [Delete]
Delete All Files:
Delete all photos or videos on the TF
card.
Options: [Cancel] / [Delete]
Slideshow:
Automatically display photos from
the storage card in a slideshow, with
each photo shown for 3 seconds.
10
https://z.wiki

Playback Mode
Menu
Press the OK button to stop the
slideshow.
Write Protection:
Lock files to prevent accidental
deletion.
Options: [Write-protect current file] /
[Write-protect all files] / [Unlock
current file] / [Unlock all files]
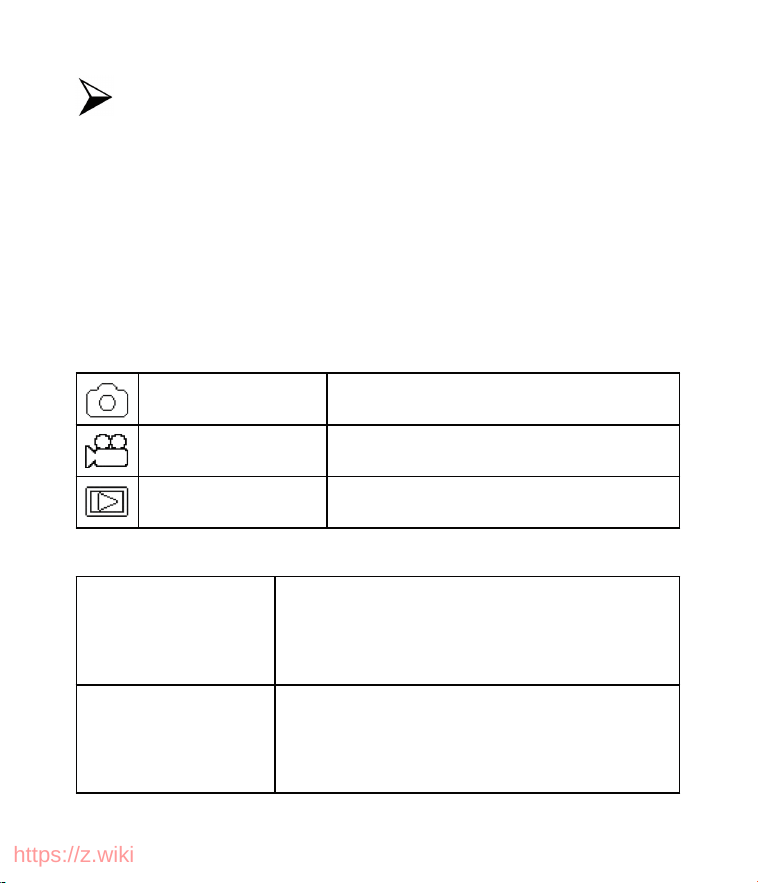
Menu in Photo and Video Modes
(Tip: In Photo and Video modes, pressing the Menu
button allows you to quickly adjust current settings.)
Menu
Funtion
Settings
Display the current work mode, interval
time, recording time, battery level, and
available TF card space.
Work Mode
Options:
[Time-Lapse (Photos)]
11
https://z.wiki

Work Mode
[Time-lapse (Videos)] / [Timing Photo] /
[Timing Video].
Fill Light
Turns the fill light on or off.
Exposure
Compensation
Options:
[+3.0EV]/[+2.5EV]/[+2.0EV]/[+1.5EV]/[
+1.0EV]/[+0.5EV]/[+0.0EV]/[-0.5EV]/[-1
.0EV]/[-1.5EV]/[-2.0EV]/[-2.5EV]/[-3.0E
V].
Language
Options: [English] / [German] / [French]
/ [Italian] / [Dutch] / [Portuguese] /
[Spanish] / [Simplified Chinese] /
[Japanese] / [Czech] / [Polish] / [Russian]
/ [Korean] / [Danish] / [Finnish] /
[Swedish].
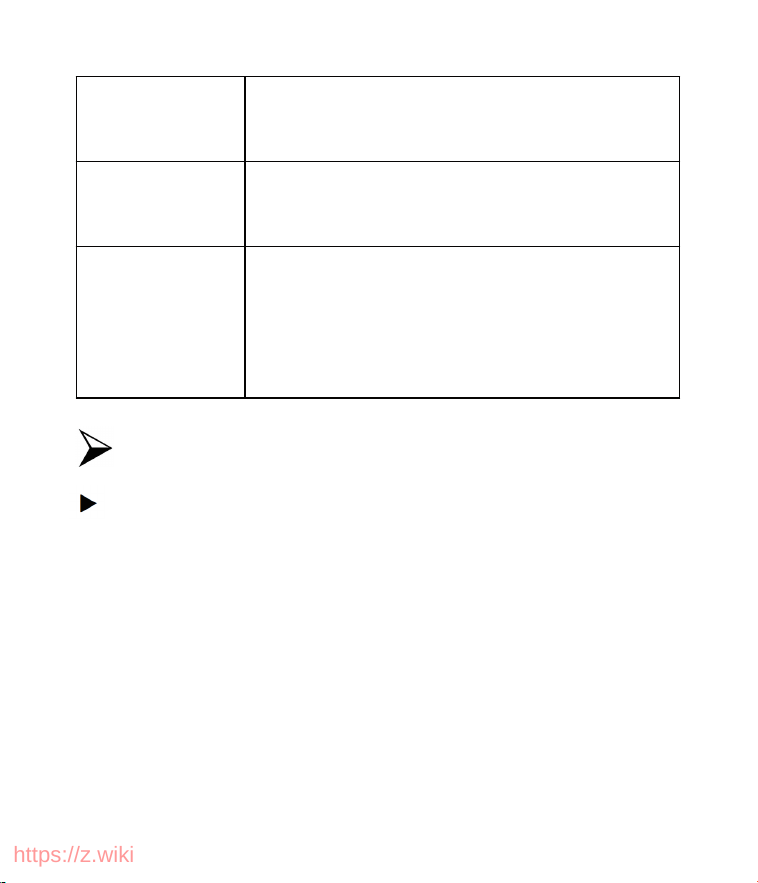
Photo
Resolution
Options:
[2MP(1920X1080p)]/[1MP(1280X720p)]
Video
Resolution
Options:
[1920X1080p]/[1280X720p].
12
https://z.wiki

Frequency
Settings
Set the power frequency to avoid
flickering in photos or videos.
Options: [50Hz] / [60Hz].
Video Length
Specifies the length of each time-lapse
segment (not the final video length).
Options: 3 seconds—120 seconds.
Photo Stamp
Adds the date and time stamp to
photos.
Options: [Time and Date] / [Date]
Target
Recording
Time 1
Sets start and end time for the camera's
recording. Once set, the camera will
only record during the specified time
period each day, remaining in standby
mode at other times.
Options: [On] / [Off]
Target
Recording
Time 2
Same as Target Recording Time 1.
13
https://z.wiki

Beep Sound
Enables or disables the camera’s beep
sound. Options: [On] / [Off].
Loop
Recording
When enabled, the camera will record in
a loop.
Options: [On] / [Off]
Date Format
Set the date format. Options:
[Day/Month/Year] / [Year/Month/Day]
/ [Month/Day/Year].
Time and Date
Use the mode button to select the unit
to modify, the up/down buttons to
adjust the value, and the OK button to
confirm.
Recording
Audio
Records sound during video
capture.Options: [On] / [Off]
Reset Settings
Restores the camera to factory settings,
including password, serial number,
etc.Options: [Yes] / [No]
14
https://z.wiki
Version
View the camera’s firmware
information.
Format
Storage Card
Formats the TF card.Options: [Yes] /
[No]
Status LED
The green light flashes when recording.
If the battery is below 10%, it flashes 5
times consecutively. Options: [On] /
[Off]
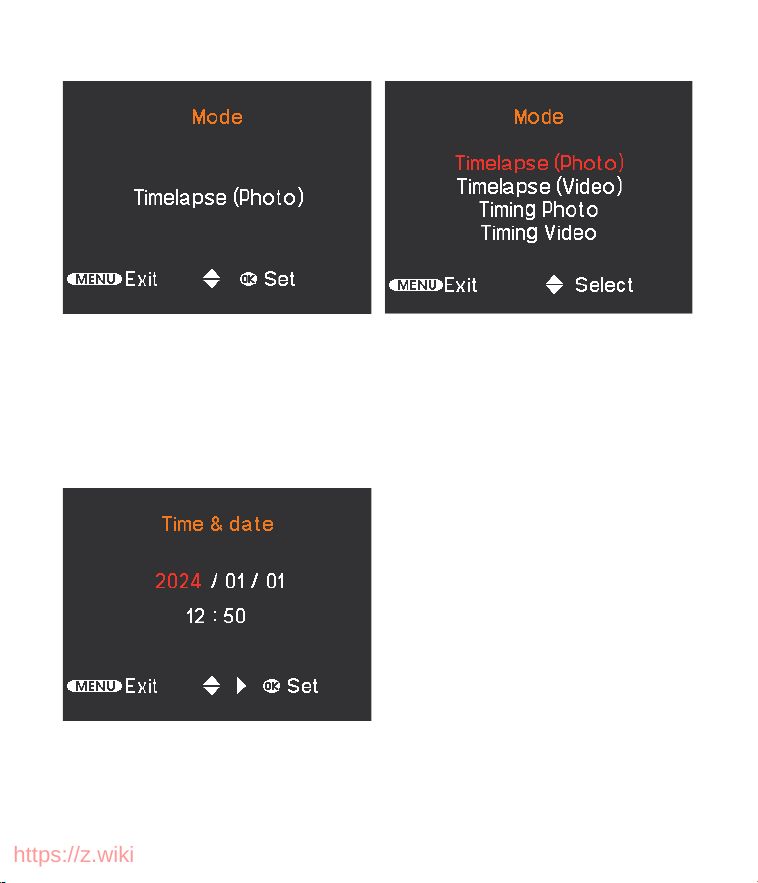
Time-Lapse Settings
Set Automatic Time-Lapse Shooting
(Use the Up and Down buttons to navigate, and
press the OK button to confirm your selection.)
(1) After starting time-lapse mode, press the Menu
button and use the Up/Down buttons to switch to
the available MODE options:
15
https://z.wiki

TimeLapse
(Photo)
You can set the camera to take one photo
every 3 seconds to 24 hours and
automatically string the photos together
to generate a time-lapse AVI video in
real-time.
TimeLapse
(Video)
You canset the camera to record short
videos, with durations between 3 and 120
seconds, at intervals ranging from 3
seconds to 24 hours. The camera will
automatically stitch these clips into a
time-lapse AVI video.
TimingPho
to
You can set the camera to capture a single
photo at intervals between 3 seconds and
24 hours.
Timing
Video
You can set the camera to record a video
of 3 to 120 seconds at intervals ranging
from 3 seconds to 24 hours.
16
https://z.wiki
(2) After selecting the shooting mode, you need to
manually confirm the details and complete the settings.
1. Set Time and Date of the camera.
17
https://z.wiki
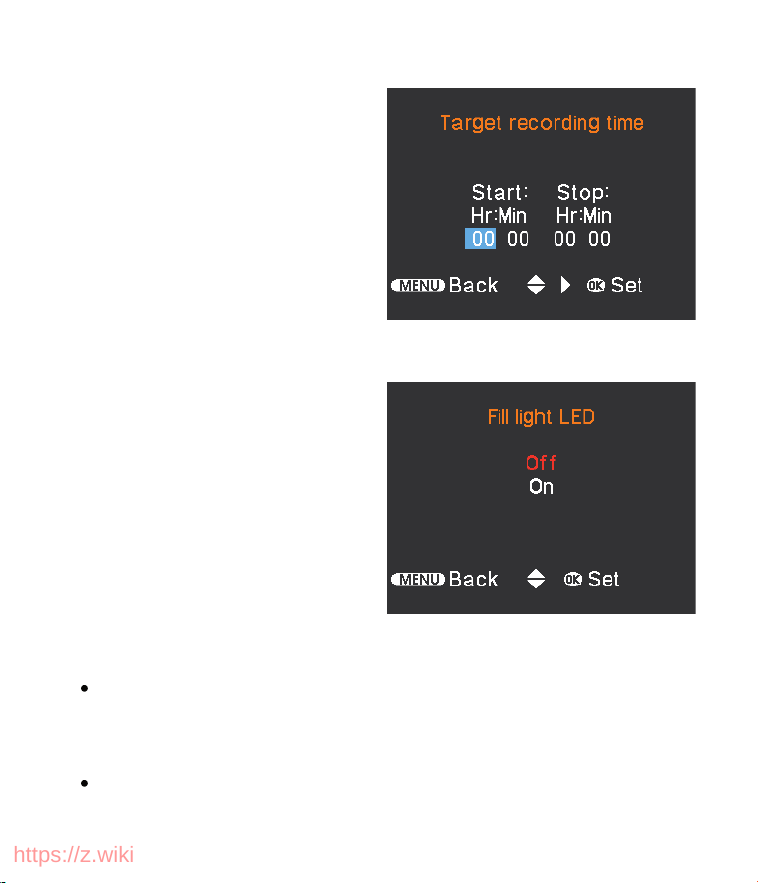
2. Set Target Recording
Time
If you want the camera to
operate during specific
hours, configure the Target
Recording Time to define
the time period for
recording each day.
Tips: If you plan to record
in low-light conditions, turn
on the camera's Fill Light
LED.
3. Set Target Recording Day
After selecting the shooting mode, confirm the
specific Day of the Week when you want the camera
to record.
Select Save to lock in these settings.
18
https://z.wiki
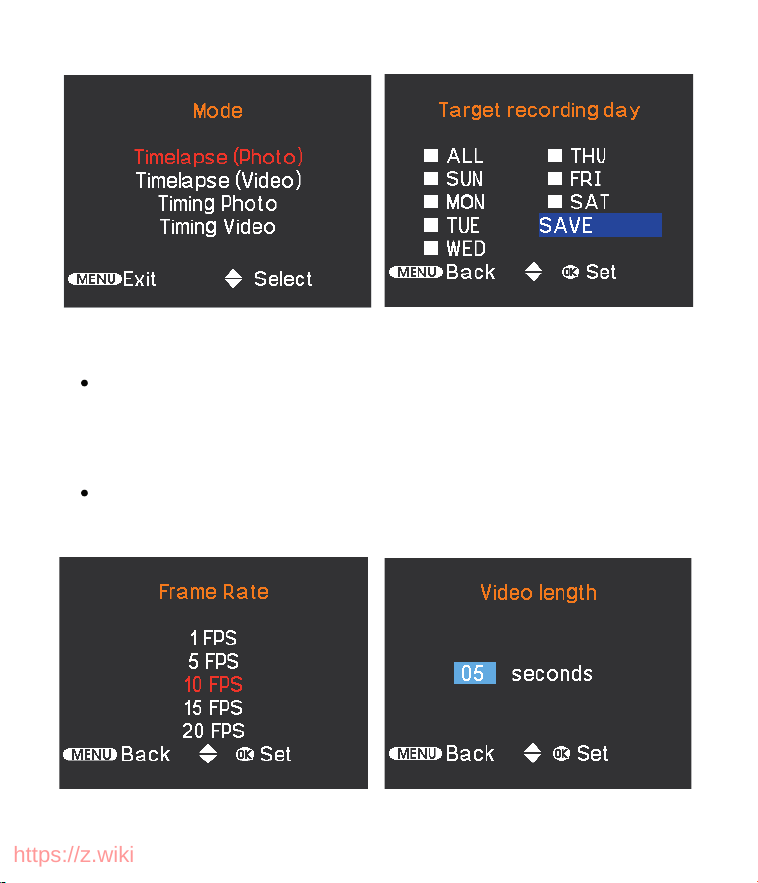
4. Set Playback Frame Rate or Video Length
For Time-lapse (Photo) mode, choose the Playback
Frame Rate for when the photos are compiled into a
video.
For Time-lapse (Video) mode, set the Video Length
for each short video segment.
19
https://z.wiki
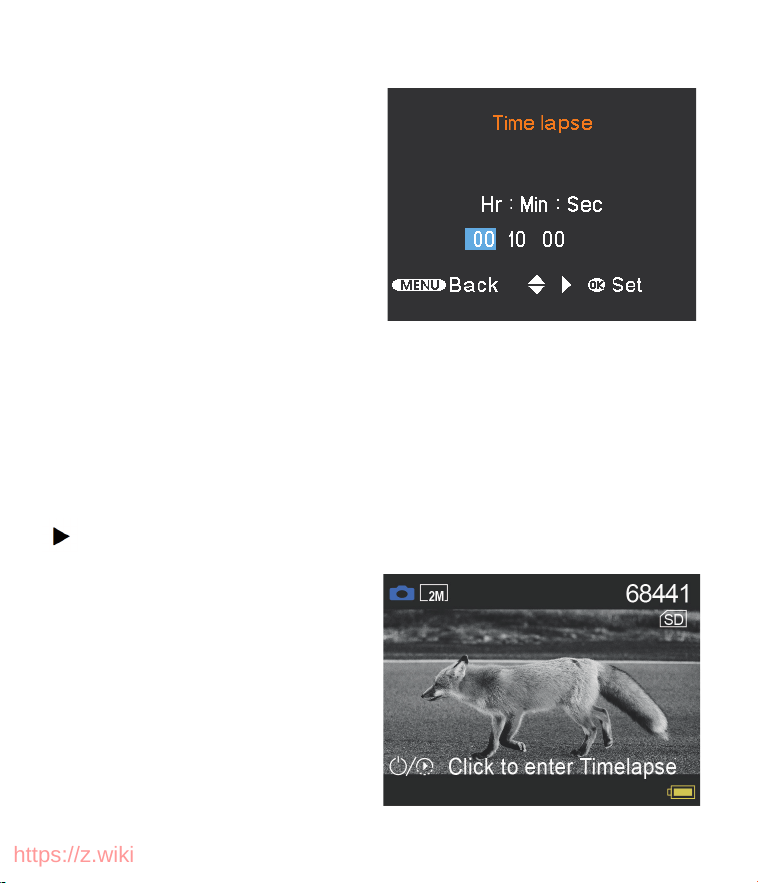
5. Choose Time Interval
Select the Time Interval at
which the camera will take
pictures (e.g., every few
seconds or minutes).
6. Exit Menu and Start Shooting
Exit the menu by short-pressing the power button, and a
countdown will appear on the camera's screen. After the
countdown is over, the camera will start normal
shooting.
Setting Up Manual Time Lapse Shooting
(1) Picture Mode
1. Enter Picture Mode:
Press the MODE button to
switch the camera to picture
shooting mode.
20
https://z.wiki
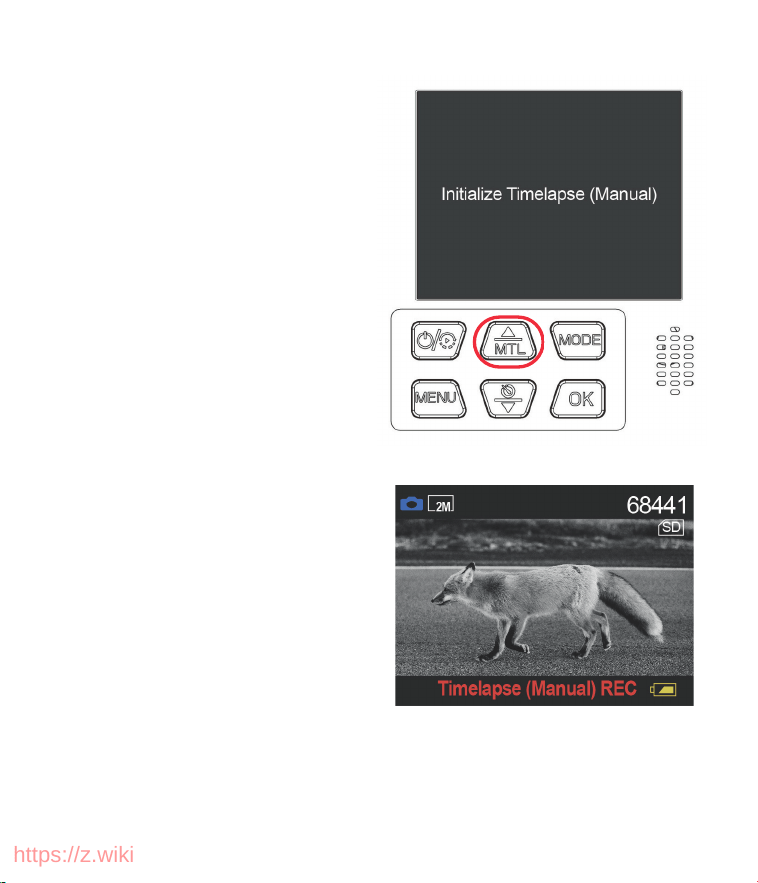
2. Activate Manual Time-
Lapse:
Press the Manual Time-Lapse
button to switch the camera
into manual time-lapse
mode.
3 . Take Pictures Manually:
Keep pressing the Manual
Delay button to manually
take the pictures you need
to take.
21
https://z.wiki
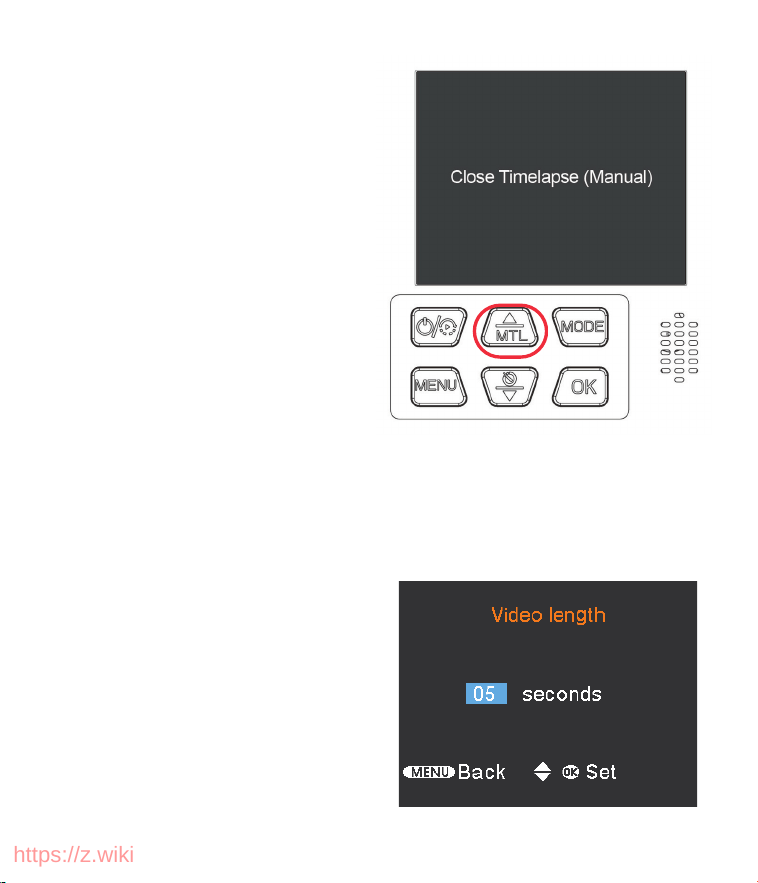
4. Exit Manual Time-Lapse
Mode:
After you've taken the
necessary photos, press the
Manual Time-Lapse button
again to exit manual time-
lapse mode.
(2) Video Mode
The operation is consistent with the picture mode.
However, for each short video, you can manually set the
duration by selecting 'Video Length' in the menu before
shooting the time-lapse video.
1. Enter Video Mode: Press
the MODE button to switch
to video mode.
2. Set Video Length: In the
menu, choose the Video
Length for each clip.
22
https://z.wiki
3. Start Manual Time-Lapse: Press the Manual Time-
Lapse button to begin.
4. Record Videos: Use the Manual Delay button to
manually record.
5. Exit: Press the Manual Time-Lapse button again to
exit the mode.
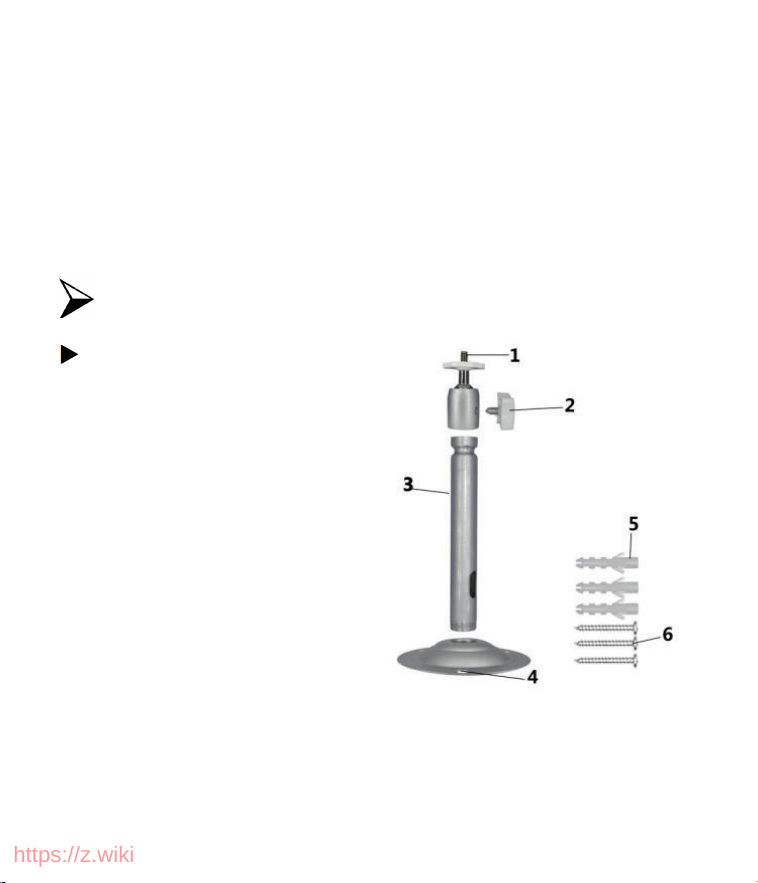
Using the Wall Bracket
Components:
1. Tripod screw
2. Bracket fixing screw
3. Bracket support rod
4. Drill holes (6mm)
5. Wall plugs
6. Wall Screws
Installation Steps:
1. Fix the wall bracket feet at the installation location
and mark the screw positions.
About Installation
23
https://z.wiki
2. Use a 6mm drill bit to drill the screw holes, and
insert the wall plugs flush with the wall.
3. Use the provided screws to fix the bracket to the
wall.
4. Mount the camera on the tripod screw and tighten
the camera.
5. Turn the camera in the desired direction and lock it
with the locking nut.
6. Adjust the camera to the final position, loosen the
two pivot bolts, position the camera, and then tighten
the two pivot bolts to secure it.
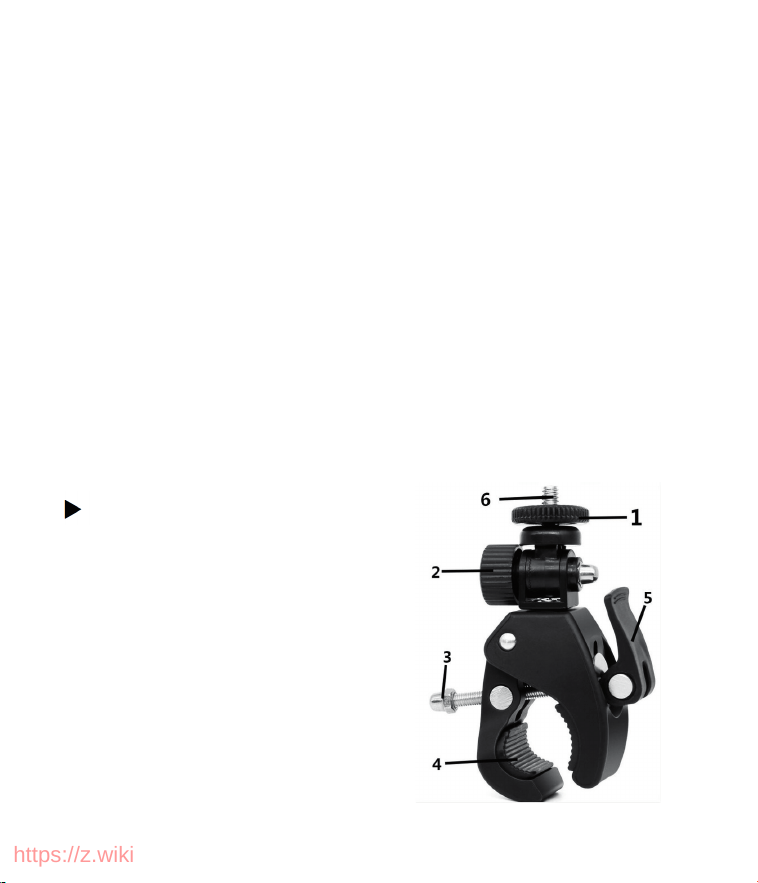
Using the Wall Bracket
Components:
1. Mechanical fixing gear
2. Fixing tightness axis
3. Tightening screw
4. Ring hole
5. Tightening steering axis
6. Metal screw
24
https://z.wiki

Installation Steps:
1. Lift the tightening steering axis and open the ring
hole .
2. Attach the bracket to the round tube, then tighten the
steering axis clockwise and press it down firmly.
3. Secure the camera's bottom slot onto the metal screw
.
4. Rotate the mechanical fixing gear to adjust the
direction by 360°.
5. Rotate the fixing tightness axis to adjust the
direction by 180.
Using the Installation Strap
1. Loop the strap through the camera's rectangular slot.
2. Secure the strap around the object (e.g., a tree) and
tighten it.
Using a Rope
1. Thread the rope through the circular holes on the
camera.
2. Loop and secure it around the object, then tighten.
25
https://z.wiki

File Transfer
There are two methods to transfer images from the
memory card to a computer:
1. Using a Card Reader
(1) Connect the TF card to the computer by using a card
reader.
(2) Open "My Computer" or Windows Explorer and
locate the removable disk for the storage card.
(3) Copy the files from the storage card to the computer.
2. Connecting the Camera to the Computer via USB Cable
(1) Connect the camera to the computer by using a USB
cable.
(2) The "MSDC" will appear on the screen.
(3) Open "My Computer" or Windows Explorer and
locate the removable disk for the storage card.
(4) Copy the files from the storage card to the computer.
26
https://z.wiki

Maintenance and Care
It is recommended to clean the device with a dry or
slightly damp, lint-free cloth. Avoid using any abrasives.
Since the camera is a high-precision optical instrument,
please take care to avoid the following:
Using the device in extremely high or low
temperatures.
Storing it in a humid environment for extended
periods.
Using it in rain or underwater.
Transporting or using it in environments with strong
vibrations.
If the device will not be used for an extended period,
remove the batteries.
27
https://z.wiki

Service Assurance
To ensure a worry-free shopping experience, we provide
comprehensive after-sales support. Whether you have
questions about product use, need technical assistance,
or require repair services, our professional team is always
ready to help. We are committed to responding promptly
and resolving your concerns efficiently, so you always
feel the care and support of the Dsoon brand.
If you encounter any issues while using the product,
please reach out to us through the following methods for
a faster response:
Customer support for consumers in the U.S. :
Customer support for consumers in European countries
and the UK:
28
https://z.wiki