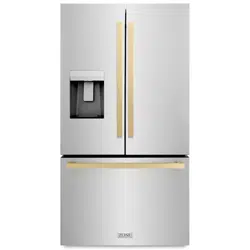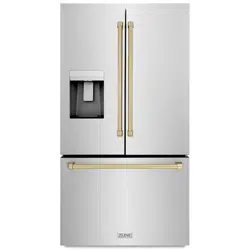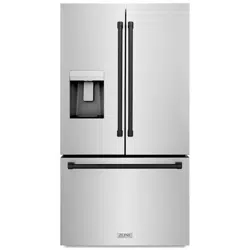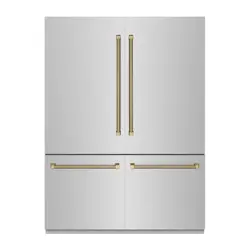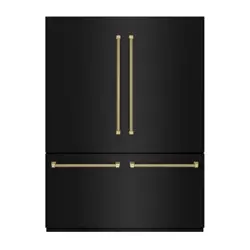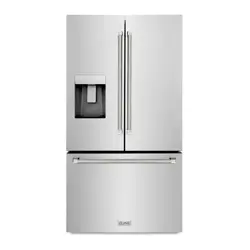

FREESTANDING REFRIGERATION
36" RSMW MODELS
www.zlinekitchen.com
User Manual

ZLINE Kitchen and Bath provides Attainable Luxury, where the kitchen and bath of your dreams
is never out of reach. Through our unique designs and unparalleled quality, we’re dedicated to
providing you an elevated experience in the heart of your home. With an endless selection of
features and finishes, our inspiration is your reality.
ZLINE is fueled by a passion for innovation; A relentless pursuit of bringing the
highest end luxury designs and professional features into everyone’s homes.
Because we continually strive to improve our products, we may change
specifications and designs without prior notice.
Scan the QR code to view the most up-to-date version of the Installation
Manual and User Manual.
WARNING: This product can expose you to chemicals including nickel, which is known to the
State of California to cause cancer. For more information, go to www.P65Warnings.ca.gov.

IMPORTANT SAFETY INSTRUCTIONS . . . . . . . . . . . . . . . . . . . 1
General Safety . . . . . . . . . . . . . . . . . . . . . . . . . . . . . . . . . . 1
Food Safety . . . . . . . . . . . . . . . . . . . . . . . . . . . . . . . . . . . . 3
OPERATION . . . . . . . . . . . . . . . . . . . . . . . . . . . . . . . . . . . . . . . . 5
Product Components . . . . . . . . . . . . . . . . . . . . . . . . . . . . . . . 5
Control Panel Overview . . . . . . . . . . . . . . . . . . . . . . . . . . . . . . 6
CLEANING AND MAINTENANCE . . . . . . . . . . . . . . . . . . . . . 13
TROUBLESHOOTING . . . . . . . . . . . . . . . . . . . . . . . . . . . . . . . . 19
WARRANTY . . . . . . . . . . . . . . . . . . . . . . . . . . . . . . . . . . . . . . . . 21
TABLE OF CONTENTS

1
WARNING
This warning symbol indicates a potentially hazardous situation which, if not
avoided, could result in death or serious injury.
WARNING
This unit's installation and user manuals contain important safety information.
Failure to follow these instructions may result in death, fire, or electric shock.
GENERAL SAFETY
• This appliance is not intended for use by persons (including children) with reduced
physical, sensory or mental capabilities, or lack of experience and knowledge, unless
they have been given supervision or instruction concerning use of the appliance by a
person responsible for their safety.
• Children should be supervised to ensure that they do not play with the appliance.
• If the electrical supply cord is damaged, it must be replaced by a professional in order
to avoid electric shock hazards.
• Do not store explosive substances, such as aerosol cans with a flammable propellant, in
or near this appliance.
• The appliance must be unplugged before carrying out any maintenance or if it will not
be used for extended periods of time.
WARNING
Keep ventilation openings in the appliance enclosure or in the built-in structure
clear of obstruction.
WARNING
Do not use mechanical devices or other means to accelerate the defrosting
process of this unit.
WARNING
Do not damage the unit's refrigerant circuit and sealed cooling system.
WARNING
Do not use electrical or mechanical appliances inside the food storage
compartments of the appliance.
WARNING
At the end of its service life, dispose of the refrigerator according to local
regulations, due to the use of flammable blowing gas and refrigerant.
IMPORTANT SAFETY INSTRUCTIONS
General Safety

2
WARNING
When positioning the appliance at its installation location, ensure the electrical
supply cord is not kinked or damaged.
• Do not use extension cords or ungrounded (2-prong) adapters when connecting this
appliance to electricity.
• The refrigerator must be fully disconnected from electricity before installing accessories
or when servicing the product.
• Minimum/maximum inlet water pressure is 40/100 psig (0.28/0.69 MPa).
• For refrigerator doors or drawers fitted with locks and keys, the keys should be kept
out of the reach of children and not in the vicinity of the appliance in order to prevent
children from being locked inside.
• Do not arbitrarily disassemble or reconstruct the refrigerator. Maintenance of the
appliance must only conducted by a professional service person.
WARNING
Risk of child entrapment. To avoid safety and suffocation risks for children or
pets, before you dispose of the appliance, take off the doors and drawers and
leave the shelves in place so children or pets may not climb inside.
WARNING
Do not use multiple portable electrical outlets or portable power supplies at the
rear of the appliance.
WARNING
To avoid any hazards due to instability of the appliance, adjust the height
according to the instructions provided in this manual.
PLACEMENT OF ITEMS
• Do not put flammable, explosive, volatile, or highly corrosive items in the refrigerator or
freezer to prevent damage to the product and limit risk of fire or explosion.
• Do not place flammable items near the refrigerator to limit risk of fire or explosion.
• The refrigerator is intended for household use, such as the storage of food; it shall not be
used for other purposes, such as storage of blood, drugs, biological products, etc.
• Do not store beer, soda, or other beverages contained in bottles or enclosed containers
in the freezing compartment. Bottles or sealed containers may crack or explode due to
freezing temperatures and can damage the refrigerator.
IMPORTANT SAFETY INSTRUCTIONS
General Safety

3
FOOD SAFETY
• To avoid food contamination, please read the following instructions and information:
• Opening the door for long periods of time can cause a significant increase in the
temperatures inside the appliance.
• Users should regularly clean surfaces and accessible drainage systems that come in
contact with food.
• Clean water tanks if they have not been used for 48 hours, and flush the water system
connected to the water supply if water has not been drawn for 5 or more days.
• Store raw meat and fish in suitable containers in the refrigerator so that it does not
contact with or drip onto other food.
• If the appliance is left empty for long periods of time, you should disconnect from
power, defrost, clean, dry, and leave the door open to prevent mold developing
within the appliance.
• Before putting in any fresh or frozen food, the refrigerator should run for 2–3 hours
or for over 4 hours in the summer when ambient temperatures are high.
• The gaps between the doors and between the doors and the refrigerator body are small.
Do not to put your hand in these areas. Be gentle when closing the refrigerator door to
avoid food or liquids falling or spilling.
• Do not pick up food or containers with wet hands in the freezer compartment when the
refrigerator is running, especially metal containers, to avoid frostbite.
• Do not place heavy objects on the top of the refrigerator. Objects may fall when closing
or opening the doors, increasing risk of injury.
• Unplug the appliance from electricity in the event of power failure and when performing
routine cleaning. When disconnecting from electricity, wait at least five minutes before
plugging back in to prevent damages to the compressor and sealed cooling system due
to successive stops and starts.
IMPORTANT SAFETY INSTRUCTIONS
Food Safety

4
ENERGY WARNINGS
• Refrigerating appliances might not operate consistently (for example: defrosting of food
or warming temperatures inside the freezer compartment) when set below the cold end
of the range of temperatures designed for the appliance.
• Effervescent drinks should not be stored in the freezer compartment or in low-temperature
chambers or cabinets. Additionally, some products such as ice water should not be
consumed too cold.
• Do not exceed storage time(s) recommended by food manufacturers for any kind of
food, particularly for commercially quick-frozen food in the freezer compartment.
• It's recommended to wrap frozen food in several layers of parchment paper or newspaper
to prevent an undue rise in the temperature while defrosting the refrigerator.
• An increase in temperature of frozen foods during manual defrosting, maintenance, or
cleaning could shorten the storage life of the unit.
WARNINGS FOR DISPOSAL
Both the refrigerant (R600a isobutane) and cyclopentane foaming material used for this
appliance are flammable. Therefore, when the appliance reaches the end of its service life, it
should be kept away from any fire source and be disposed of according to local regulations
so as to prevent damage to the environment or other harm.
When the refrigerator is disposed of, disassemble the doors and remove
gasket of door and shelves. Put the doors and shelves in a proper place to
prevent damage to the environment or any other harm.
Correct disposal of this product: This icon indicates this product should not
be disposed with other household wastes. To prevent possible harm to the
environment or human health from uncontrolled waste disposal, recycle it
responsibly to promote the sustainable reuse of material resources.
IMPORTANT SAFETY INSTRUCTIONS
Energy Safety
5
PRODUCT COMPONENTS
Ice maker
LED lighting
Door tray
Falling ice
passage
Control panel
Shelf
Door tray
Upper freezer drawer
Lower freezer drawer
Crisper drawers
Big drawer
Ice maker
Freezer drawer
OPERATION
Product Components
6
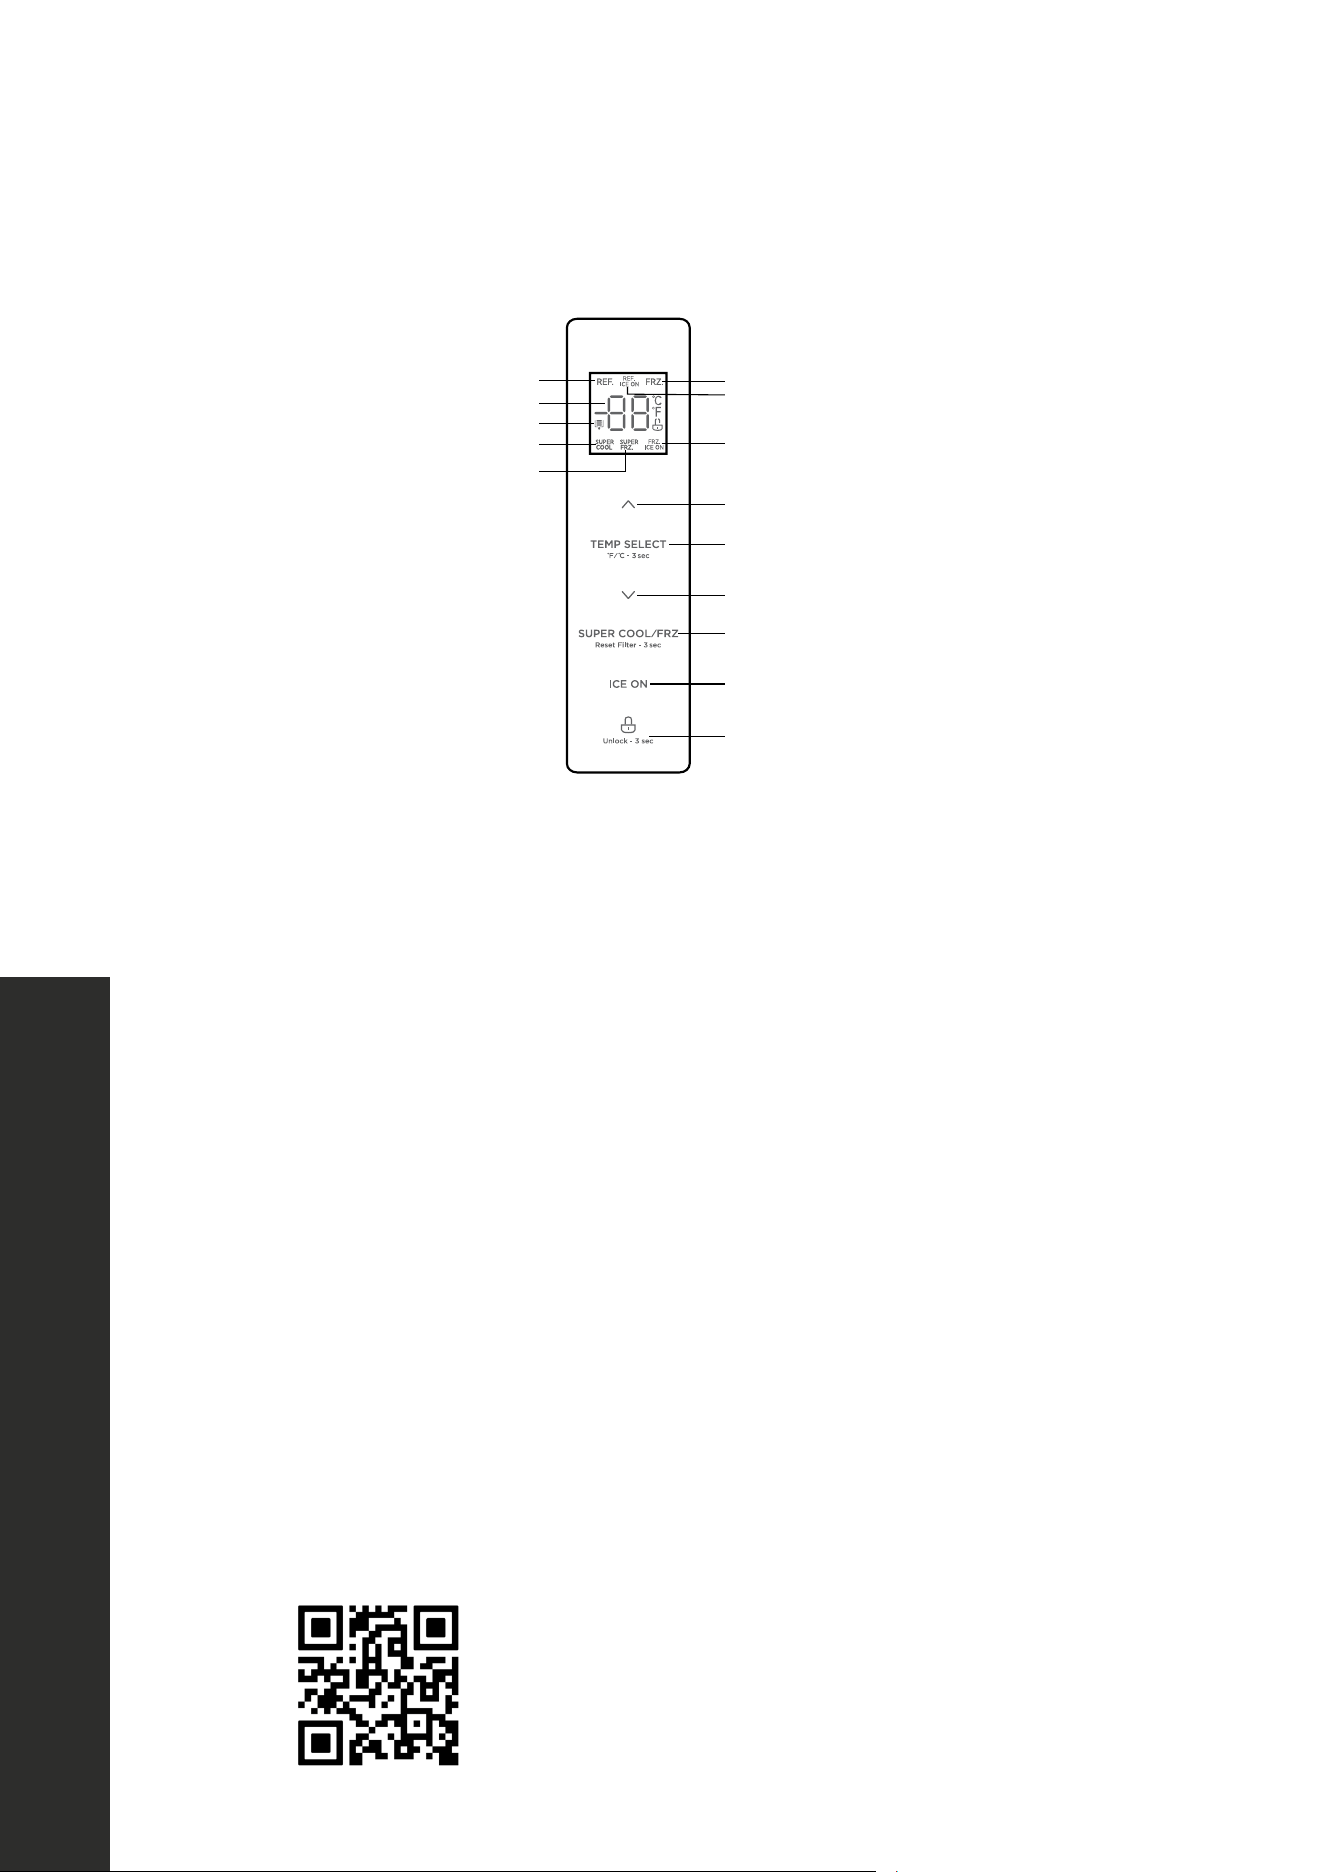
OPERATION
CONTROL PANEL OVERVIEW
14
OPERATION INSTRUCTIONS
Control panal
Display Button
1 A
2 B
3 C
4 D
5 E
6 F
7
8
Display
•
•
.
ATTENTION
Refrigerator icon Freezer icon
Refrigerator ice maker "ON/OFF" icon
Freezer ice maker "ON/OFF" icon
Temperature up button
Temperature down button
Super Cool/Super Freeze button
Ice maker button
Lock/Unlock button
Temperature zone selection button
Temperature display icon
Filter replacement reminder icon
Super Cool icon
Super Freeze icon
DISPLAY SCREEN
• When plugging in the refrigerator for the first time, the full display screen will illuminate
for 3 seconds as a start-up chime sounds. After 3 seconds, the screen will enter normal
display of operation.
• The default refrigerator temperature is 39 °F (4 °C). The default freezer temperature is
0 °F (-18 °C). Both will display by alternating back and forth.
DISPLAY SCREEN NOTES
• When changing functions on the control panel, the display screen lights will go out after
30 seconds once locked, no matter if the doors are open or closed. After 30 seconds,
pressing any button on the panel will wake up the display screen.
• The display screen lights will turn on once any door is opened; in this instance, the light
will go out immediately when the door is closed.
• If any error codes occur (see more on page 10), the display screen will illuminate and
then go out after 30 seconds.
• While the control panel and/or display screen shown above may slightly differ from
model to model, the controls and operation will be the same.
Scan to follow along with a video detailing how
to operate the control panel.
Control Panel

7
OPERATION
RECOMMENDED TEMPERATURE
Optimal temperature settings are 39 °F (4 °C) for the refrigerator compartment and
0 °F (-18 °C) for the freezer compartment.
WARNING
Optimal temperature settings are based on an optimal ambient temperature
surrounding the unit of 77 °F (25 °C). Higher or lower ambient temperatures
may impact the efficiency of your unit.
ENERGY SAVING TIPS
• Do not place the appliance near ovens, ranges, radiators, or other heat sources. If the
ambient temperature is high, the compressor will run more frequently and for longer,
resulting in increased energy consumption.
• Ensure that there is sufficient ventilation at the base of the appliance, on the sides of
the appliance, and at the back of the appliance. Never cover ventilation openings.
• Please observe "Product Dimensions" and "Door Handle Installation" in the
Installation Manual.
• The arrangement of drawers, shelves, and trays as shown in the "Product Components"
illustration on "Product Components" on page 5 offers the most efficient use of
energy for food storage and should therefore be retained as often as possible. All
drawers and shelves should remain inside the appliance to keep temperatures stable
and to conserve energy.
• If a larger storage space is needed (e.g. for large refrigerated goods), the middle
drawers can be removed. The top and bottom drawers and shelves should be removed
last if necessary.
• An evenly filled refrigerator/freezer compartment contributes to optimal energy use.
Therefore, avoid empty or half-empty compartments.
• Allow warm food to cool before placing it in the refrigerator/freezer. Food that has
already cooled down increases energy efficiency.
• Allow frozen food to defrost in the refrigerator. The coldness of the frozen food reduces
the energy consumption in the refrigerator compartment and thus increases overall
energy efficiency.
• Open the door only as briefly as necessary to minimize loss of cool air. Opening the
door briefly and closing it properly reduces energy consumption.
• The door seals of your appliance must be intact so the doors close properly and energy
consumption is not increased unnecessarily.
Energy Saving Tips

8
OPERATION
CONTROL PANEL OPERATION
LOCK/UNLOCK
• With the control panel in the locked state, press and hold the
button for 3 seconds
to unlock the screen. A chime will sound. To lock the panel, press and hold
for 3
seconds. A chime will sound.
• The display screen will automatically lock if there is no button operation or after all doors
are closed for 30 seconds.
• NOTE: You need to unlock the control panel to perform the following settings and
functions; once finished, you can lock the panel yourself, or close the doors. The panel
will automatically lock after the doors are closed for several seconds.
REFRIGERATOR TEMPERATURE SETTING
• Press
to change the temperature of the refrigerator compartment, each time you
press
or , the set temperature will drop or rise in 1 °F/C increments. The refrigerator
temperature range is 34–44 °F (1–7 °C).
• Press and hold
and for 4 seconds to turn off/on the refrigerator
compartment.
FREEZER TEMPERATURE SETTING
Press
to change the temperature of freezer compartment, each time you press or
, the set temperature will drop or rise in 1 °F/C increments. The freezer temperature range
is -7 to 7 °F (-22 to -14 °C).
SUPER COOL/SUPER FREEZE MODES
• Press the
button to engage the Super Cool function. The refrigerator
compartment is set at 34 °F (2 °C) automatically, and the
icon shines. When exiting
Super Cool, the refrigerator will revert back to the previous temperature.
• Press
a second time to engage the Super Freeze function. The freezer
compartment is set at -7 °F ( -22 °C) automatically, and the
icon shines. When
exiting Super Freeze, the freezer will revert back to the previous temperature.
• Pressing
three times will activate both Super Cool and Super Freeze modes;
pressing
a fourth time will disengage both modes.
Operating Instructions

9
OPERATION
TURNING ON/OFF THE ICE MAKERS
• Press the
button to turn off or on the refrigerator and freezer ice makers. When the
ice makers are on, indicator lights of each ice maker will display.
• Press
once to activate the refrigerator ice maker, twice for freezer, three times to
activate both, and four times to turn both off.
RESET WATER FILTER
The water filter replacement icon will signify when to replace the filter, usually every 3-6
months. Press and hold
for 3 seconds to reset the icon.
SWITCHING FROM FAHRENHEIT TO CELSIUS
Press and hold
for 3 seconds to change to and from Fahrenheit and Celsius.
SABBATH MODE
• Press and hold
and for 3 seconds to enter Sabbath mode, which
allows you to open doors without activating interior lights or control panel functions.
• Hold the
button for 3 seconds to lock the panel; interior lights will go out and the
display screen will only show the selected function in low brightness.
• To disengage Sabbath mode, unlock the control panel and press and hold
and
for 3 seconds. Hold the button for 3 seconds to resume normal function.
ANTI-CONDENSATION HEATING ELEMENT
• The gray anti-condensation heater strip on the outside edge of the left door can be
turned off/on. Press and hold
and for 4 seconds. Once the Fahrenheit icon
flashes, press
, and the anti-condensation heating wire shutdown mode is set.
• To turn the element back on, unlock the panel and press and hold
and for 4
seconds. Once the Fahrenheit icon no longer flashes, press the
button.
DOOR PROMPT ALARM
If doors are open for 2 minutes, the door alarm will chime 3 times. The alarm will go off
again once a minute if doors remain open. The alarm can be stopped by pressing any
button while the control panel is locked. Additionally, with the panel unlocked, press and
hold the
and buttons for 4 seconds to turn off/on the door prompt alarm.
Operating Instructions
10
OPERATION
ERROR CODES
If an error code appears on the display screen, it indicates a potential problem with the
appliance. Although the refrigerator and freezer compartments may still provide cool/
freeze functions during an error code, the user should contact maintenance personnel to
ensure normal operation of refrigerator. You may also contact ZLINE Customer Service at
1-614-777-5004 for assistance.
Below is a list of common error codes that may occur with your appliance.
ERROR ERROR CODE DESCRIPTION
CA Communication failure with main control board and ice making board
CC Defrosting sensor failure in ice making chamber
C9 Ice making chamber sensor failure
EE Freezer ice maker sensor failure
EF Water tank installation failure
EH Humidity sensor failure
EP Freezer ice maker fails to make ice
E0 Freezer ice maker initialization failure
E1 Refrigerator compartment temperature sensor failure
E2 Freezer compartment temperature sensor failure
E3 Variable chamber temperature sensor failure
E4 Refrigerator compartment defrost sensor failure
E5 Freezer compartment defrost sensor failure
E6 General communication failure
E7 Ambient temperature sensor failure
E8 Variable chamber defrost sensor failure
E9 Freezer compartment high-temperature alarm
F4 Sensor at bottom of refrigerator ice maker failure
F5 Refrigerator ice maker fails to make ice
F6 Refrigerator ice maker initialization failure
WARNING
The anti-condensation heating element is installed for maintenance
convenience. Do not toggle this frequently, as it will increase risk of
condensation. It's recommended to turn the strip on for units installed in
humid climates, while those in dry areas should have the strip turned off.
Error Codes
11
OPERATION
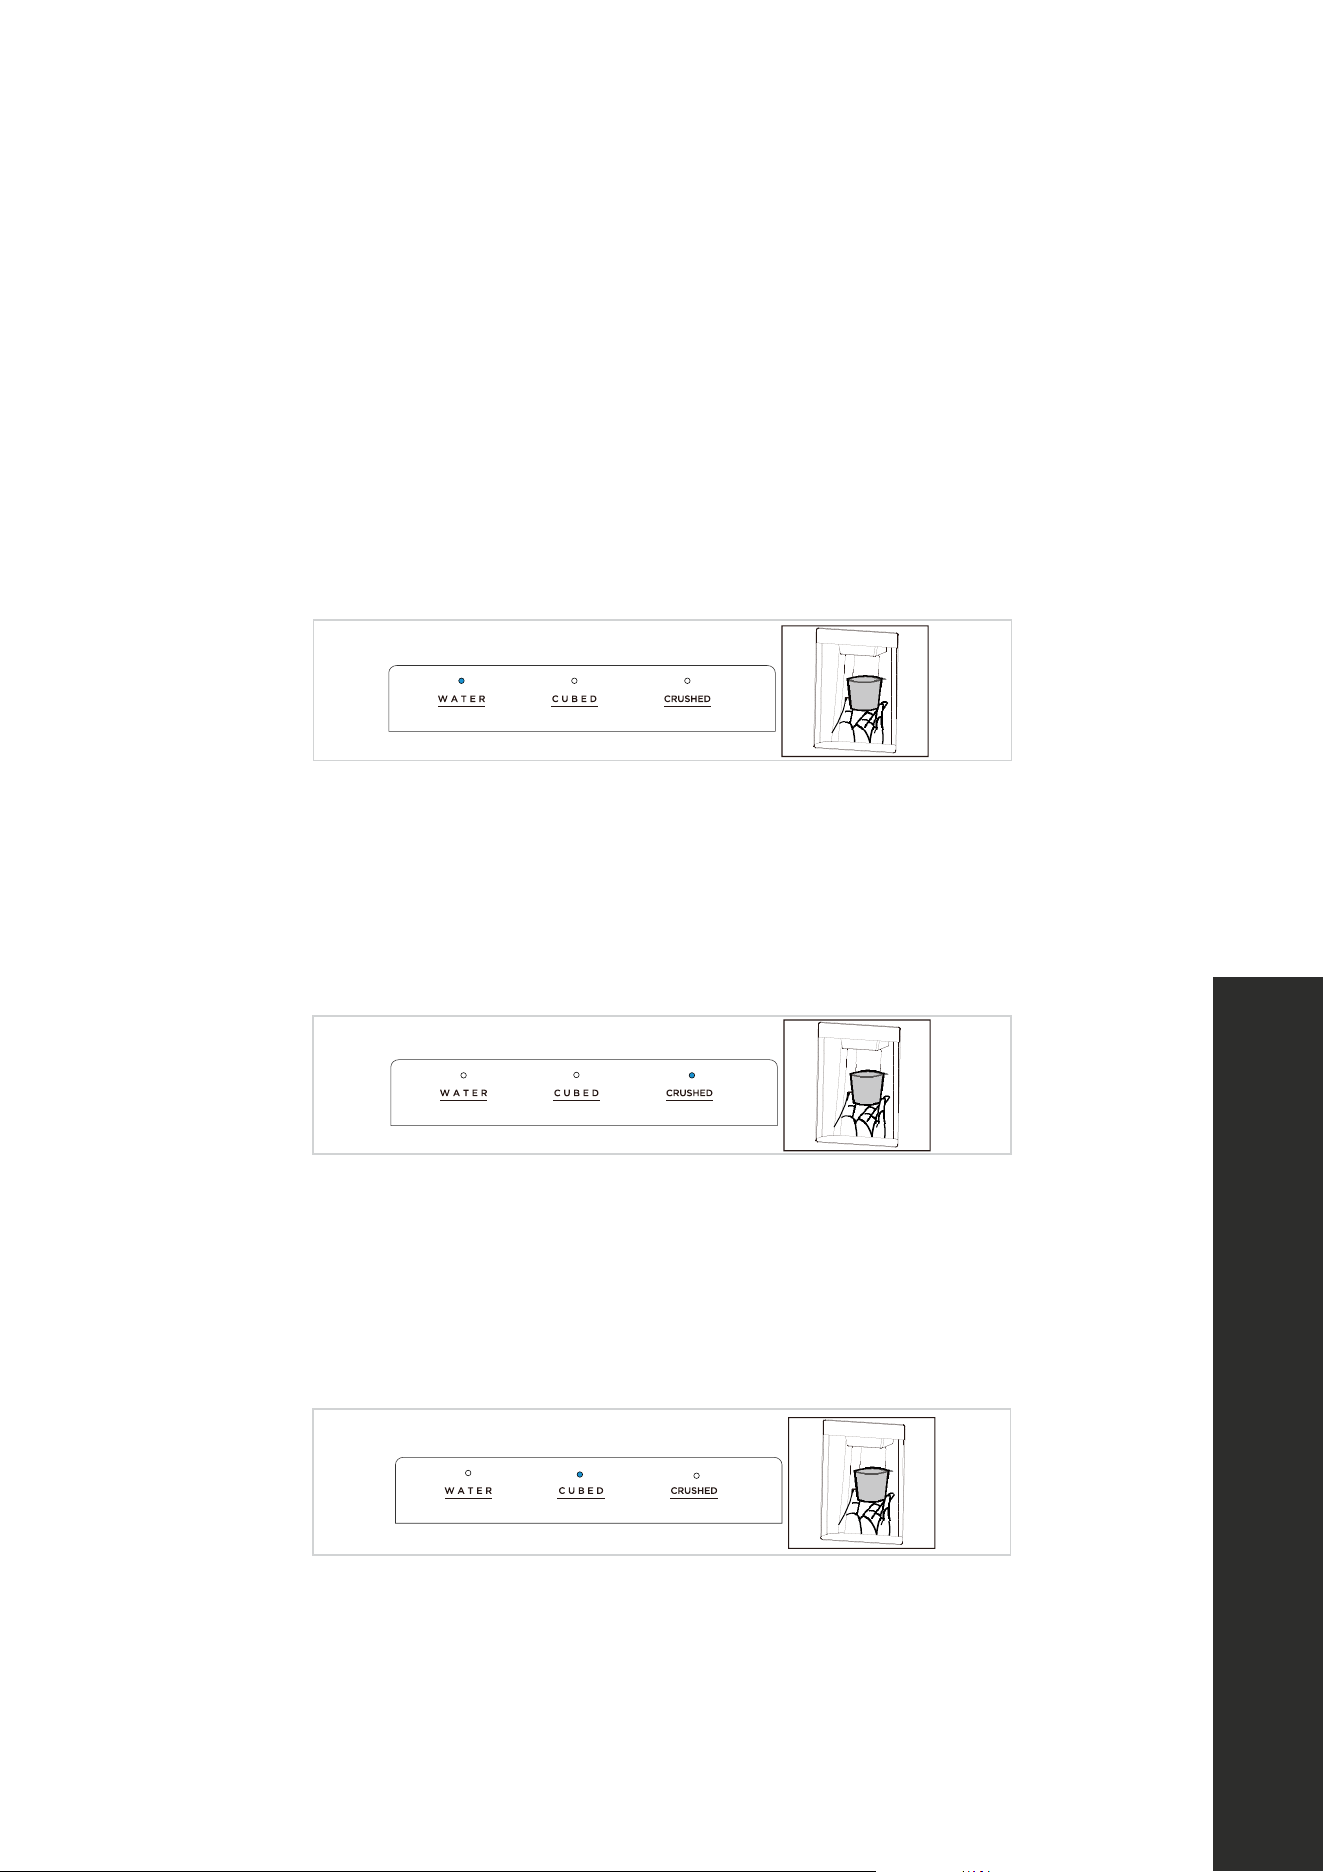
DISPENSING WATER AND ICE
The ice/water dispenser is located on the outside of left refrigerator door. It offers a choice
of cubed ice, crushed ice, or cold water. The dispenser only works when the door is closed.
1. Cold water
• Press the WATER button once until the indicator light turns on.
• Push a glass or suitable beverage container onto the dispenser panel until cold water
starts to flow. Remove the container from the dispenser panel to stop the flow of water.
18
Fetching water and Ice
•
•
•
•
•
•
•
•
•
•
,
•
•
•
ATTENTION
2. Crushed ice
• Press the CRUSHED button once until the indicator light turns on.
• Push a glass or suitable beverage container onto the dispenser panel and fill the container
with crushed ice. Ice will start to flow within 2–3 seconds. Remove the container from the
dispenser panel to stop the flow of ice.
18
Fetching water and Ice
•
•
•
•
•
•
•
•
•
•
,
•
•
•
ATTENTION
3. Cubed ice
• Press the CUBED button once until the indicator light turns on.
• Push a glass or suitable beverage container onto the dispenser panel and fill the container
with cubed ice. Ice will start to flow within 2–3 seconds. Remove the container from the
dispenser panel to stop the flow of ice.
18
Fetching water and Ice
•
•
•
•
•
•
•
•
•
•
,
•
•
•
ATTENTION
WARNING
When dispensing cubed or crushed ice, ensure the container is adequately
underneath the mouth of the dispenser to prevent ice from falling out the sides
and onto the floor and increasing risk of injury.
Water and Ice

12
OPERATION
FOOD STORAGE TIPS - FREEZER COMPARTMENT
• The freezer is designated for the storage of frozen food at very low temperatures, long-
term storage of frozen food, and for production of ice.
• Only use the shelves in the door of the freezer to store frozen food, not for storing hot
food designated for freezing. Let hot foods cool before freezing.
• Do not put fresh and frozen foods next to each other. The frozen food may thaw.
• When freezing fresh food such as meat, fish, or large vegetables, cut them into parts that
can be used at the same time.
• When purchasing frozen food, make sure it was frozen at a suitable temperature and
that the packaging is not damaged.
• Frozen food should be kept in suitable packages to retain quality and should be returned
to the freezer compartment as soon as possible after removal.
• If a package of frozen food shows moisture or abnormal bulging, it likely was stored at
the wrong temperature and the content may be spoiled.
• The storage period for frozen food depends on ambient temperatures, thermostat
settings, frequency of opening the door of the freezer, and the type of food. Always
follow manufacturer instructions printed on the packaging. If there is no information,
food should not be stored for longer than three months from date of purchase.
FOOD STORAGE TIPS - REFRIGERATOR COMPARTMENT
• To reduce moisture and subsequent ice build-up, never put liquid inside the refrigerator
in unsealed containers. Frost tends to concentrate in the coolest parts of the evaporator.
Storing uncovered liquids results in a more frequent need for defrosting.
• Never put hot or warm foods in the refrigerator. These should first cool down to room
temperature to ensure adequate air circulation in the refrigerator.
• Foods or food containers should not touch the back wall of the refrigerator because they
could freeze to the wall.
• Do not keep regularly opening the door of the refrigerator.
• Meat, fish, and poultry (recommended to be contained in a package or plastic foil) can
be placed in the refrigerator, so long as the food is used within 1–2 days.
• Fruit and vegetables without packaging should be placed in the crisper drawer, which is
designated for fresh produce.
Food Storage Tips

13
CLEANING AND MAINTENANCE
OVERALL CLEANING OF THE APPLIANCE
• Dirt and dust build-up behind the refrigerator and on the surrounding floor should be
cleaned frequently to improve cooling efficiency and save energy.
• Check the door gaskets regularly to make sure there is no debris. Clean door gaskets
with a soft cloth dampened with soapy water or a diluted kitchen-safe cleaner.
• The interior of the refrigerator should be cleaned regularly to avoid odor.
• Remove all food, drinks, shelves, drawers, etc., before cleaning the interior.
• Mix 2 tablespoons of baking soda with a quart of warm water and use a soft cloth or
sponge to clean the inside of the refrigerator. After wiping clean, open the door and let
the appliance dry naturally before turning on the power.
• For areas that are difficult to clean in the refrigerator (such as narrow crevices, gaps, or
corners), it is recommended to wipe them regularly with a soft rag, soft brush, etc., and
when necessary, use non-metal or abrasive tools (such as toothpicks or Popsicle sticks)
to ensure no contaminants or bacteria accumulate.
• Do not use soap, detergent, scrub powder, spray cleaner, etc., as these may cause
odors in the interior of the refrigerator or contaminate food.
• Clean the shelves and drawers with a soft cloth dampened with soapy water or a diluted
kitchen-safe cleaner. Dry with a soft cloth or dry naturally.
• Wipe the outer surface of the refrigerator with a soft cloth dampened with a stainless
steel cleaner, soapy water, detergent, etc., and wipe dry.
• Do not use hard brushes, steel cleaning balls, wire brushes, abrasives (such as
toothpastes), organic solvents (such as alcohol, acetone, banana oil, etc.), boiling water,
or acid or alkaline items, as they may damage the refrigerator surface and interior.
Please note that boiling water and organic solvents such as benzene may deform or
damage plastic parts.
• Do not spray water or other liquids directly into or on the refrigerator during cleaning to
avoid short circuits and negatively impact electrical insulation.
WARNING
Always disconnect the appliance from power before cleaning the interior to
avoid risk of electric shock or injury.
Cooling Compartment
14
CLEANING AND MAINTENANCE
CHANGING INTERIOR LIGHTS
Replacement or maintenance of the interior LED lights are only to be performed by a
professional electrician. If the customer is within warrant, please contact ZLINE Customer
Service at 1-614-777-5004 for assistance.
DEFROSTING
The refrigerator is manufactured based on basic air-cooling principles and has an automatic
defrosting function. Frost formed due to change of season or ambient temperatures may be
manually removed by disconnecting the appliance from power supply and by wiping with
a dry towel.
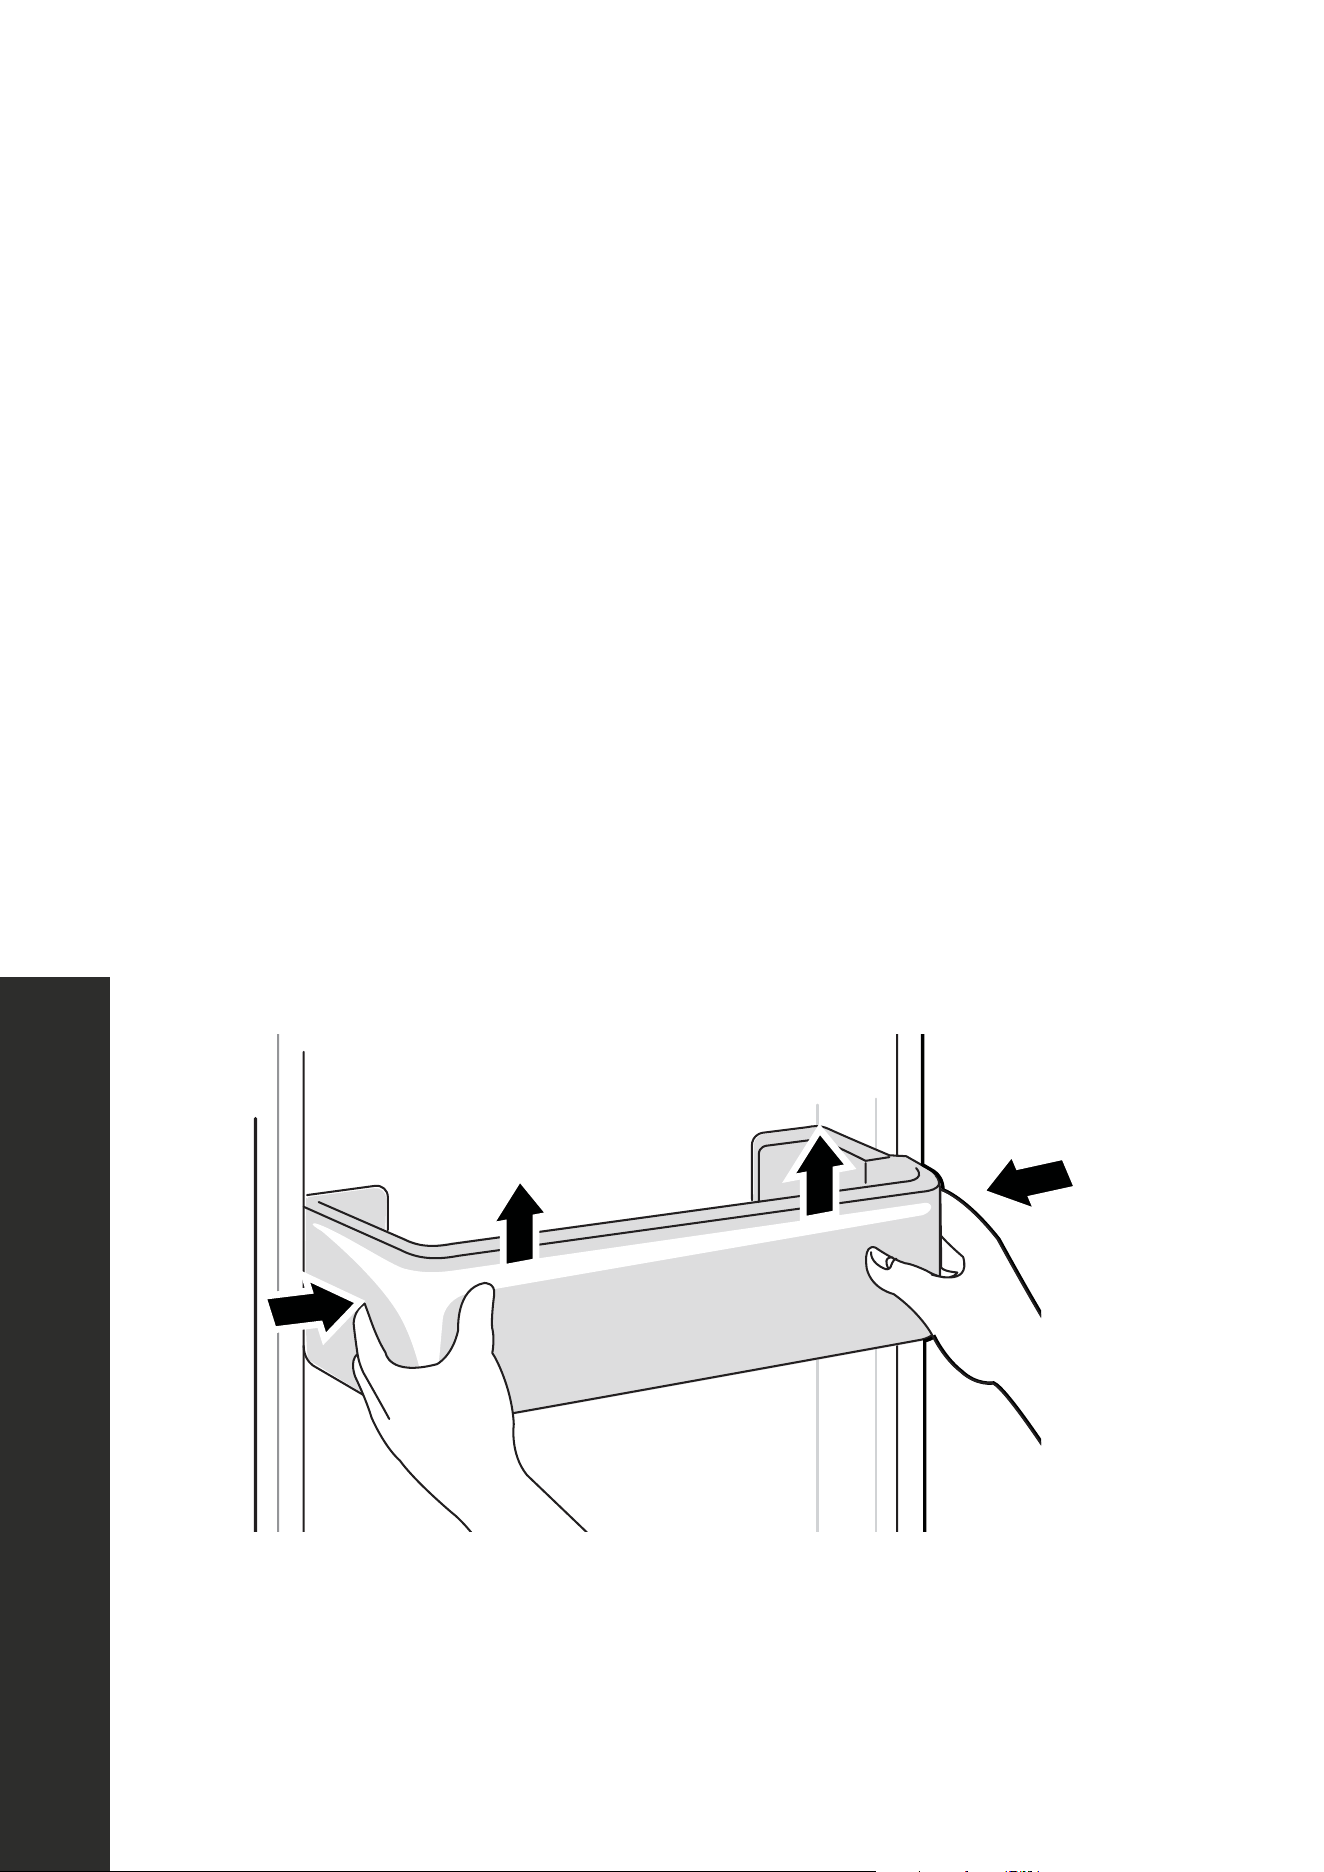
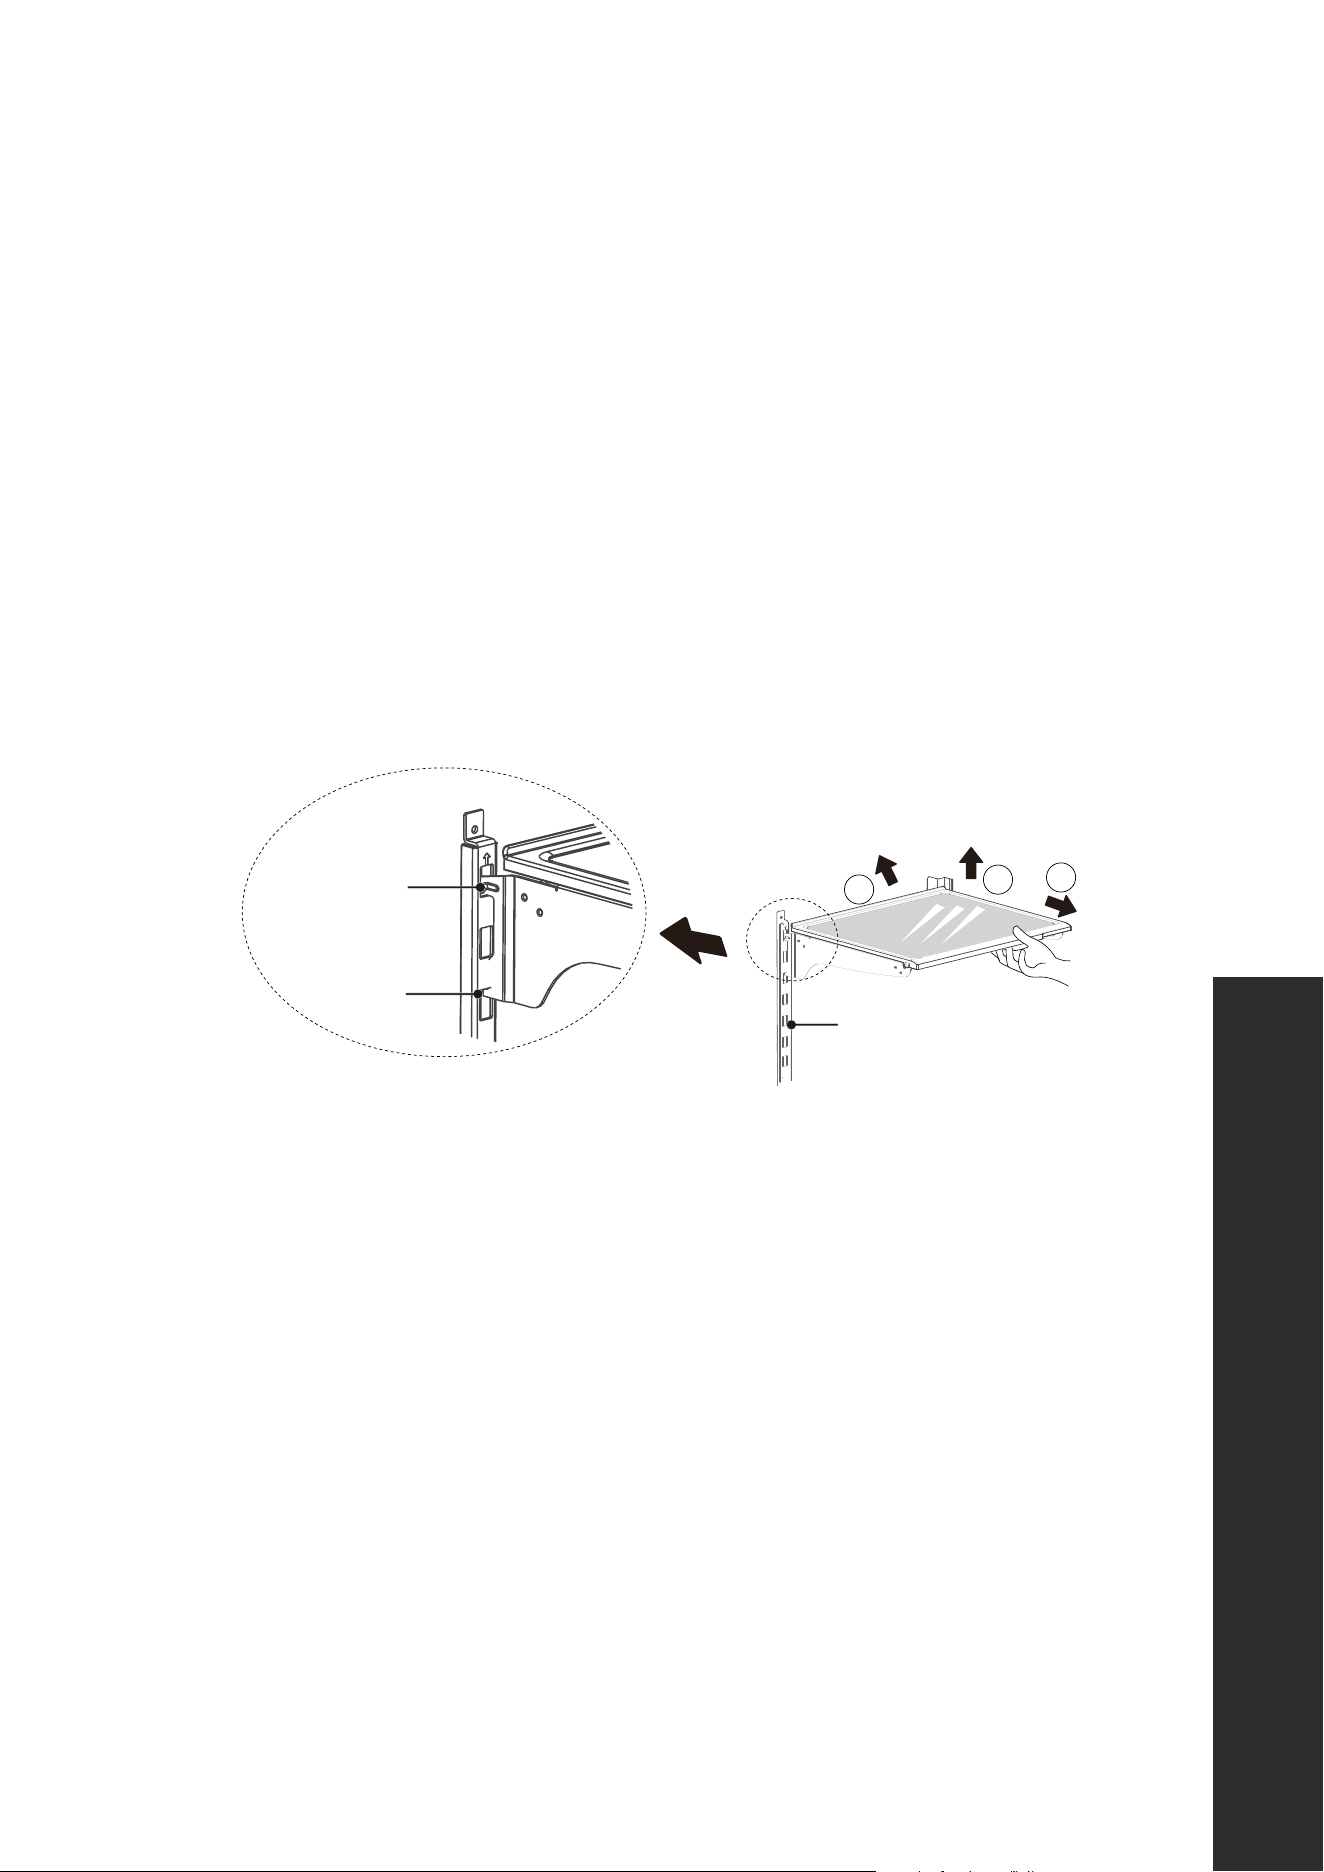
CLEANING DOOR TRAYS
• Following the direction of the arrows in the figure below, use both hands to squeeze each
tray and push it upward, and then take it out to clean. Replace following the reverse of
the steps above.
• When replacing a cleaned tray, you can adjust the install height as necessary by using
the different rows of slots along the side of the door.
20
CLEANING AND MAINTENANCE
Defrosting
•
Cleaning of door tray
•
•
Cleaning of glass shelf
Slot
Upper end
of fixed leg
Lower end
of fixed leg
2
3
1
Cleaning Door Trays
15
CLEANING AND MAINTENANCE
CLEANING GLASS SHELVES
Following the direction of the arrows in Figure 2 below:
1. Firmly hold the front edge of shelf and tilt the shelf inwards until the lower end of the fixed
leg is separated from the slot of supporting iron, as shown in Figure 1.
2. Lift the whole shelf up it cannot rise anymore.
3. Take out the shelf horizontally to fully remove it for cleaning.
• When replacing cleaned shelves, place the upper end of the fixed leg into one of the
upper slots on the supporting iron first, and then put the lower end of the fixed leg into
the third slot on the lower part of the supporting iron.
Figure 1 Figure 2
20
CLEANING AND MAINTENANCE
Defrosting
•
Cleaning of door tray
•
•
Cleaning of glass shelf
Slot
Upper end
of fixed leg
Lower end
of fixed leg
2
3
1
Cleaning of Glass Shelf
16
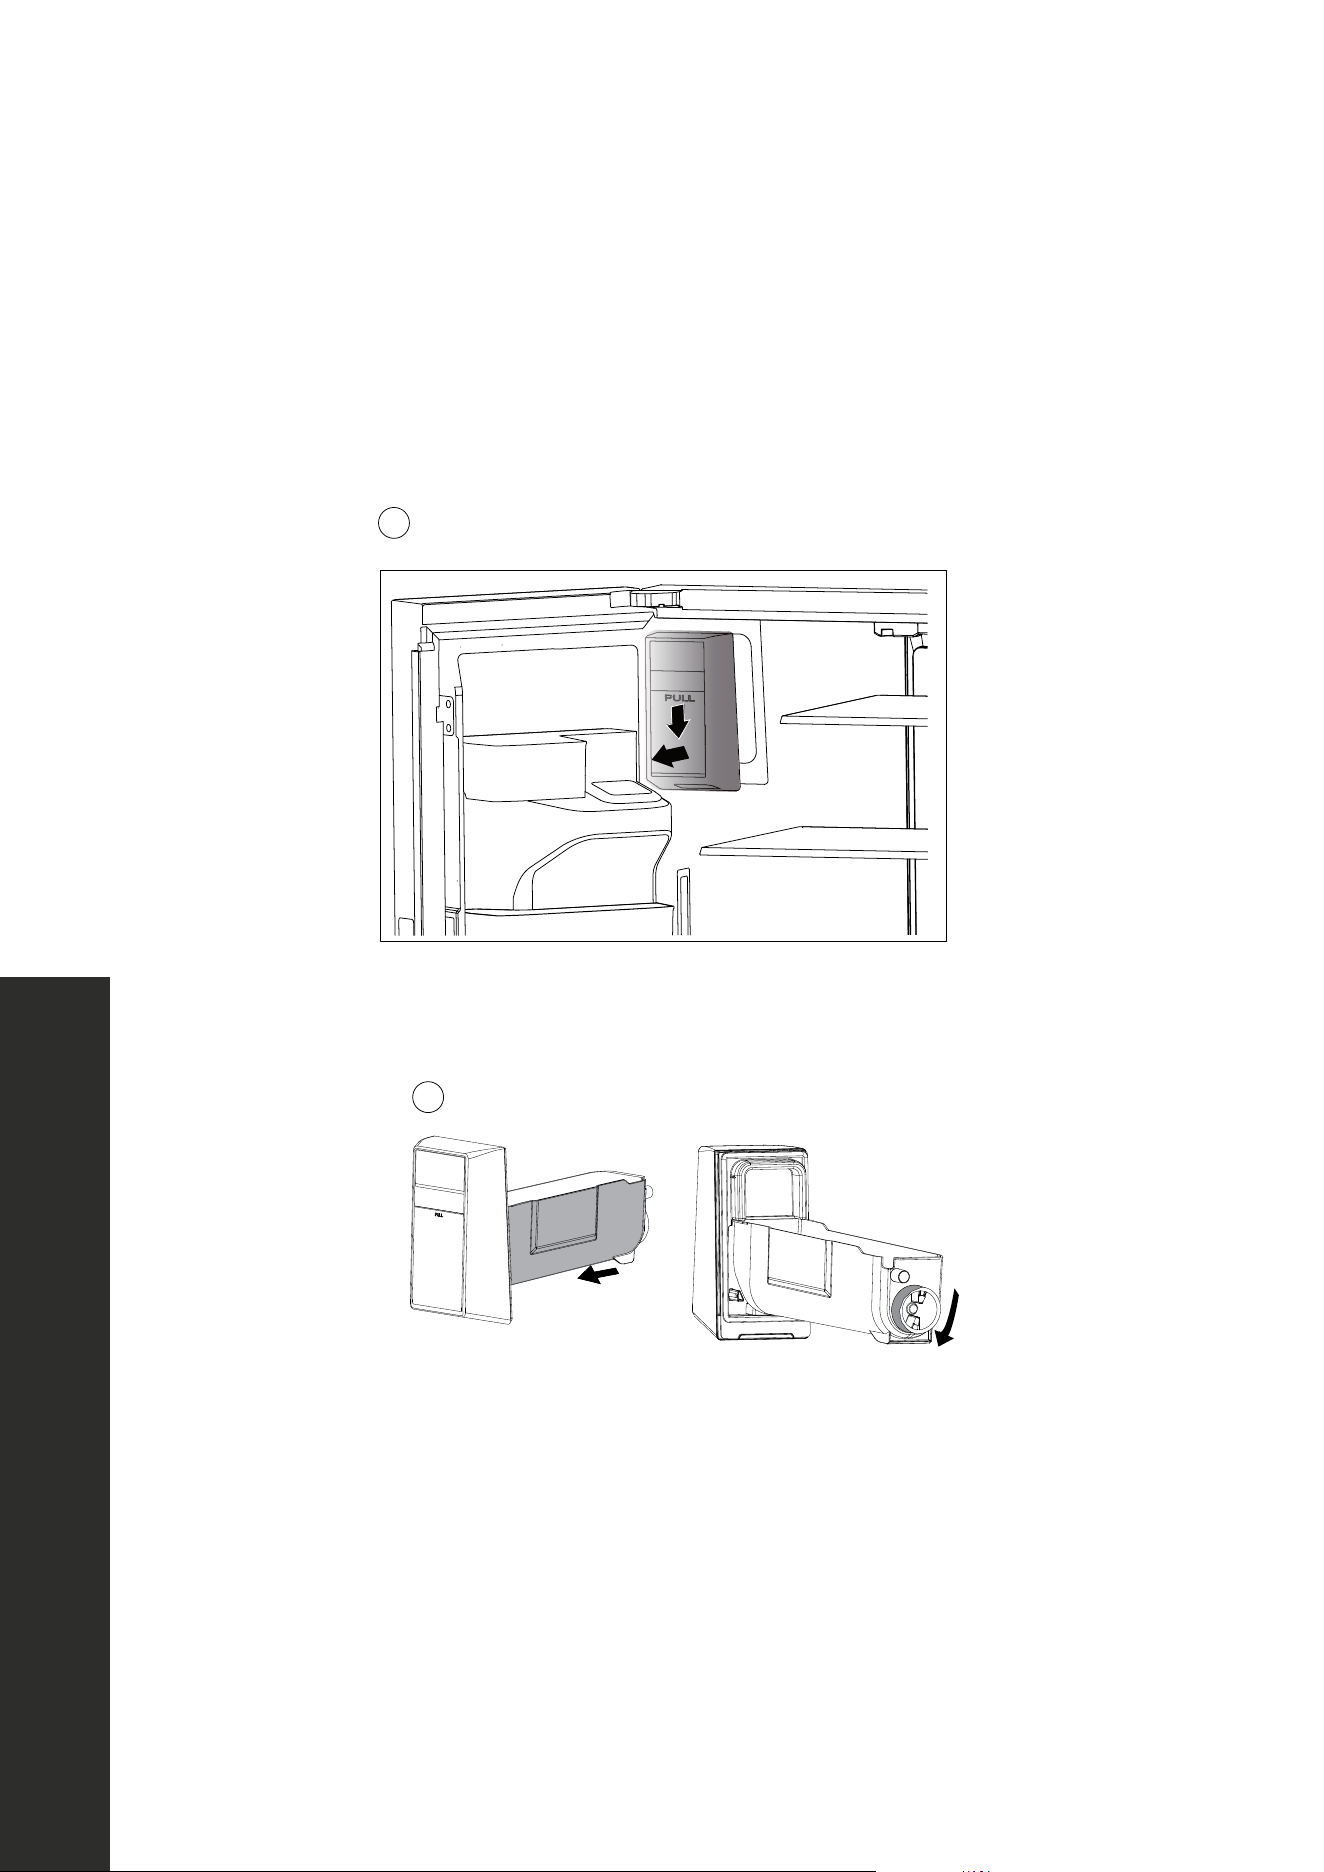
CLEANING THE REFRIGERATOR ICE STORAGE BUCKET
• When you need a lot of ice or you want to clean the ice storage bucket, you can remove
it. Replace the bucket quickly if dumping ice to not disrupt ice maker operation.
• When removing the bucket, clean up any ice cubes that may have fallen.
• It's recommended to turn the refrigerator ice maker off when cleaning the bucket.
21
Cleaning of ice storage box
•
•
•
•
•
•
•
ATTENTION
2
1
• Hold the handle of the ice bucket with your hand, press it gently, and then pull it out
horizontally as noted in the image above. It should come out easily.
21
Cleaning of ice storage box
•
•
•
•
•
•
•
ATTENTION
2
1
• After dumping ice or cleaning, push the ice bucket back in. It should slide in easily. If it
doesn't, rotate the tail as illustrated in the image above to align it with the corresponding
position in the ice tank.
WARNING
When using the ice maker for the first time, it's recommended to dump out the
first 2–3 batches of ice to allow for proper water flow and to rid the water line
and ice-making system of any potential debris.
CLEANING AND MAINTENANCE
Cleaning of Ice Storage Box
17
CLEANING AND MAINTENANCE
CLEANING OF FREEZER DRAWER
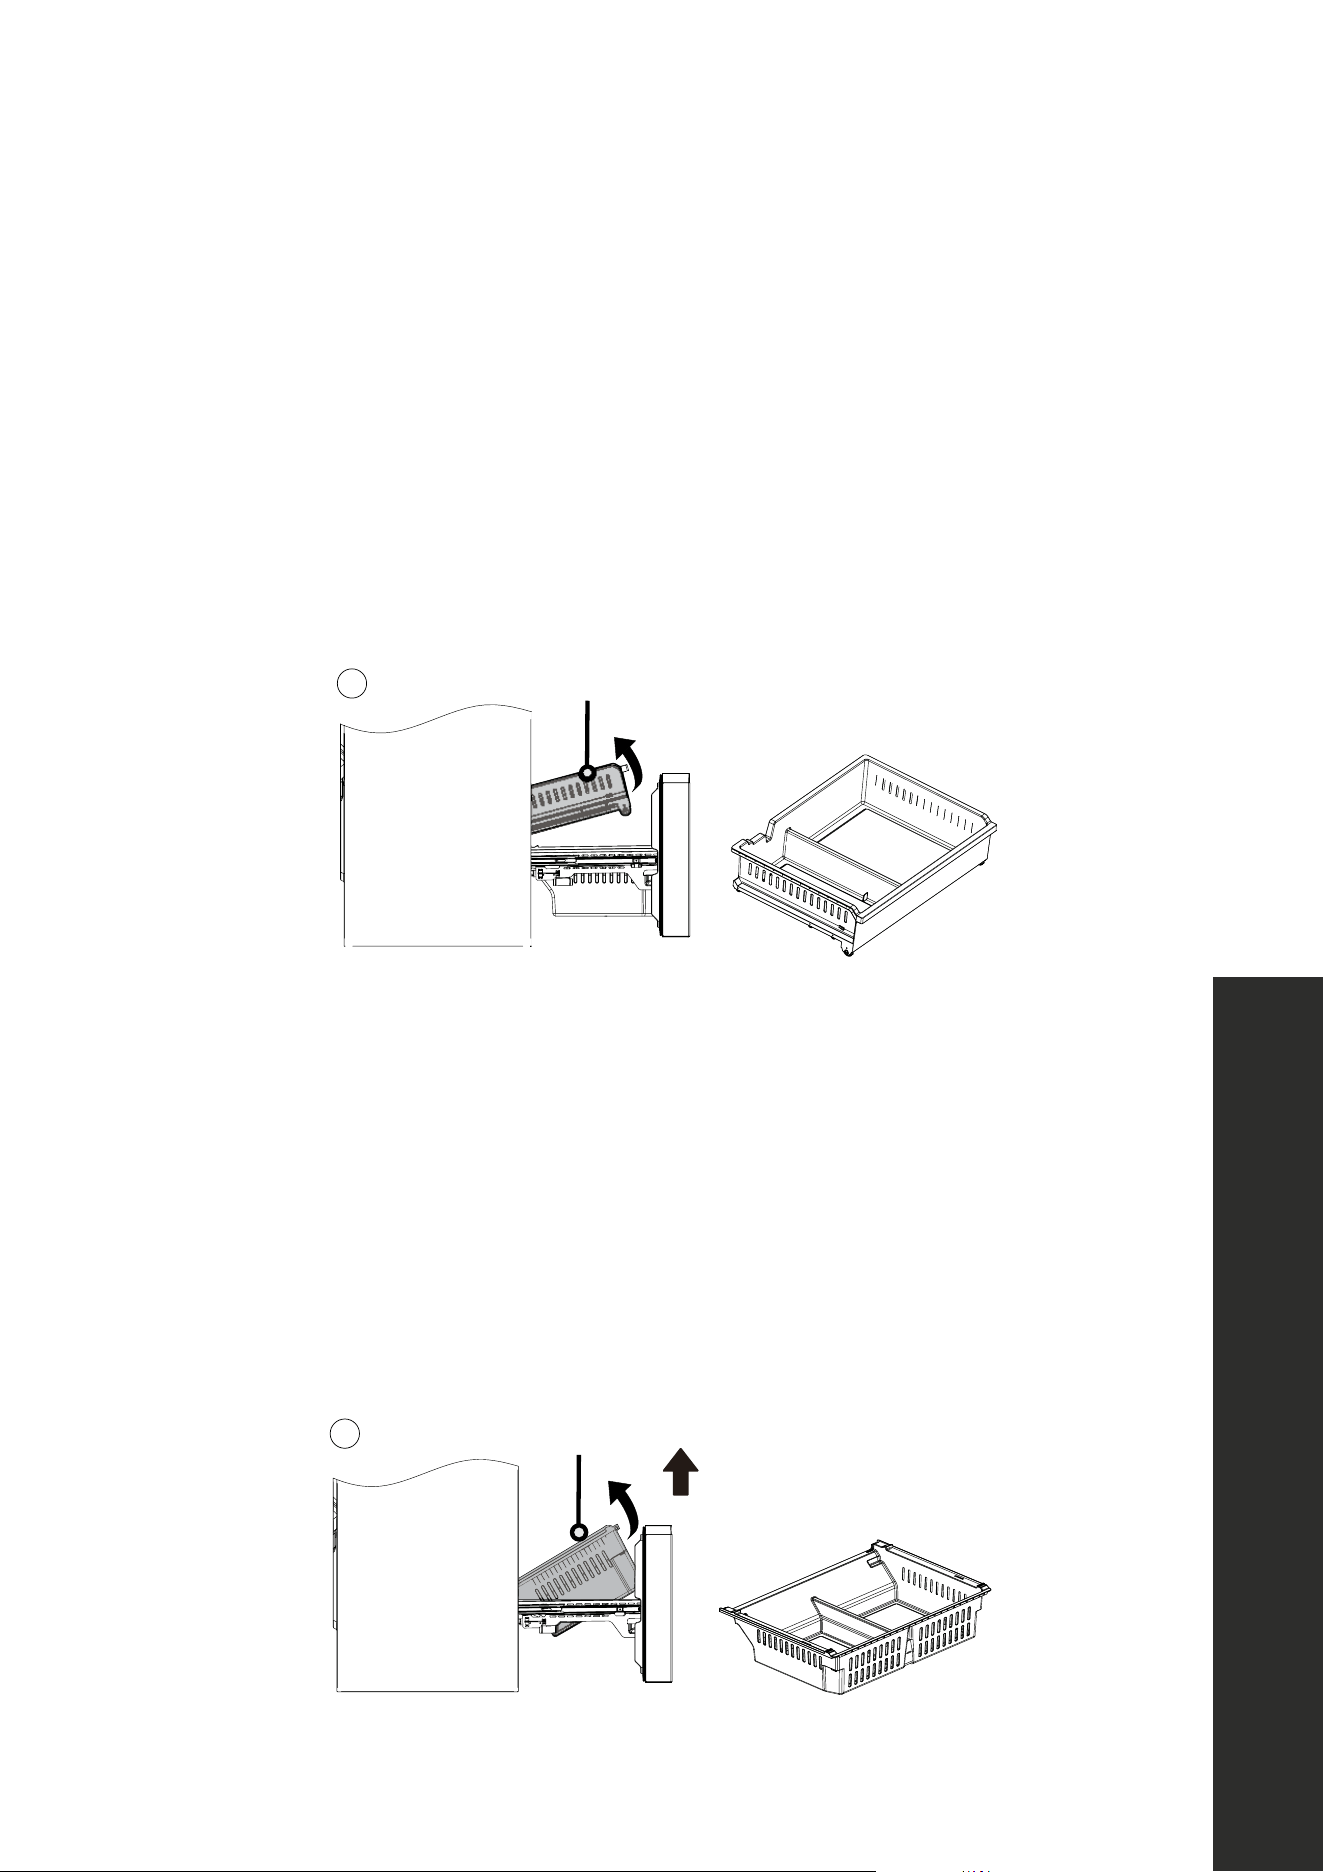
CLEANING THE UPPER FREEZER DRAWER
1. Open the freezer door to the maximum length.
2. Hold the left and right sides of the upper drawer with both hands, pull the slide rail so
it cannot move, and push the drawer forward to separate the drawer from the support
hinge of the slide rail.
3. Rotate the drawer back and up to remove it from the freezer chamber.
22
Cleaning of freezer drawer
:
•
:
•
.
ATTENTION
Stop using
ATTENTION
Lower freezer drawer
2
Upper freezer drawer
1
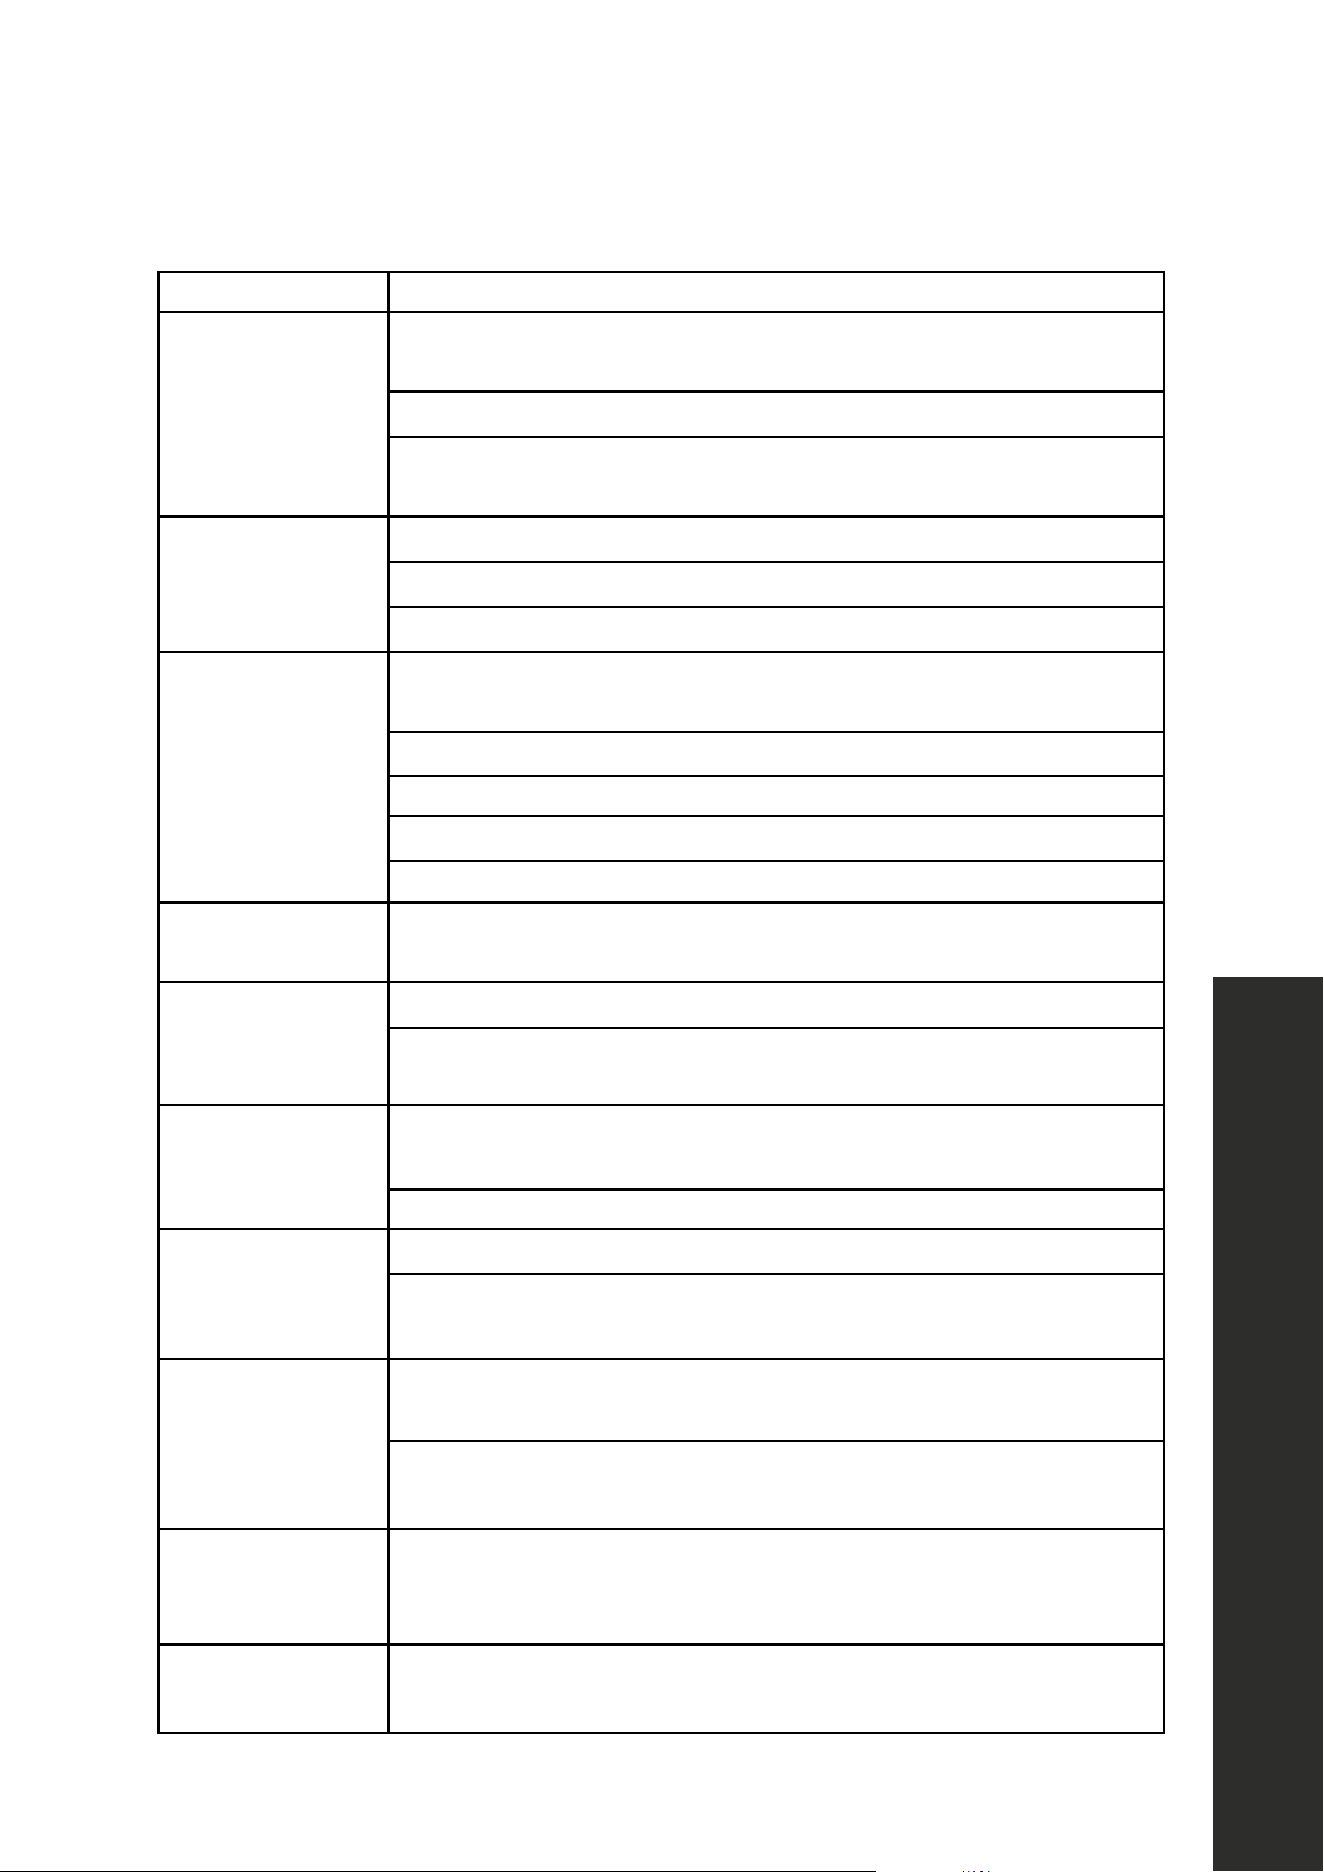
CLEANING THE LOWER FREEZER DRAWER
1. Open the freezer door to the maximum length.
2. Hold the left and right sides of the lower drawer with both hands.
3. Lift the front end with a little force to pull the drawer back slightly until the support hinge
of the slide rail is separated from the drawer.
4. While pulling the front end of the drawer at an angle, rotate the drawer back and up to
take it out.
22
Cleaning of freezer drawer
:
•
:
•
.
ATTENTION
Stop using
ATTENTION
Lower freezer drawer
2
Upper freezer drawer
1
Cleaning of Freezer Drawer

18
CLEANING AND MAINTENANCE
OUT OF OPERATION
POWER FAILURE
In case of unexpected power failure, even if it is in summer, food inside the appliance can
be kept cool for several hours. During the power failure, decrease the amount of times the
refrigerator and freezer doors are opened; each time a door is opened, cool air that cannot
be replaced escapes. Do not add more fresh food into the appliance during a power failure.
LONGTIME NON-USE
In the event you do not plan to use the appliance for extended time periods, fully disconnect
the unit from power, clean the complete interior, and leave the doors ajar to prevent
unwanted odors.
MOVING THE APPLIANCE
• Before moving the refrigerator to a different location, remove all objects from inside and
secure the glass shelves, refrigerator drawers, freezer drawers, etc., with tape.
• Tighten the leveling feet, close all doors, and secure them with tape.
• Use at least one helper during transport. Do not lay the refrigerator upside down or
horizontally or allow it to vibrate during transport, as this increases the damage to the
sealed cooling system.
• When moving the unit with a hand truck, do not tilt the unit more than 45°, as this may
also disrupt the sealed cooling system.
WARNING
After moving the appliance to a new location, re-connect to power and let it
run continuously. Generally, operation of the appliance should not be
interrupted; otherwise, the service life may be impaired.
Out of Operation
19
TROUBLESHOOTING
POSSIBLE FAULT POSSIBLE FAULT/SOLUTION
Failed operation
Check whether the appliance is connected to power and/or
whether the plug is securely plugged in.
Check whether the voltage is too low.
Check whether there is a power failure or partial circuits
have tripped.
Odor
Odorous food should be tightly wrapped.
Check whether there is any spoiled food.
Clean the inside of the refrigerator.
The compressor
operates
for a long time
Long operation of the refrigerator is normal in summer when the
ambient temperature is high.
Do not put too much food in the appliance at the same time.
Food should be cooled before being put into the appliance.
The doors are opened too frequently.
The condenser may be dirty and should be cleaned with care.
Light
doesn't turn on
Check whether the refrigerator is connected to power supply and/
or whether the light is damaged.
Doors cannot be
properly closed
The door is obstructed by food packages.
The refrigerator is tilted. Tighten the legs and make sure the unit is
perfectly level.
Loud noises
Check whether the floor is level and whether the refrigerator is
placed stably.
Check whether accessories are placed in proper locations.
Door seal
is not tight
Remove foreign matters on the door seal.
Heat the door seal and then cool it for restoration (or blow it with an
electrical drier or use a hot towel for heating).
Water
pan overflows
There is too much food in the chamber or food stored contains too
much water, resulting in heavy defrosting.
The doors are not closed properly, resulting in frosting due to the
entry of air and increased water due to defrosting.
Surface
condensation
Condensation on the exterior surface and door seals of the
refrigerator is normal when the ambient humidity is too high. Wipe
the condensation with a clean towel.
Abnormal noises
The compressor may produce buzzes during operation and the
buzzes are loud particularly upon start or stop. This is normal.
Troubleshooting
20
POSSIBLE FAULT POSSIBLE FAULT/SOLUTION
Hot housing
This is heat dissipation of the built-in condenser via the housing,
which is normal. When housing becomes hot due to high ambient
temperatures or too much food storage, it's recommended to
provide sound ventilation to facilitate heat dissipation. Hot housing
can also be caused by the refrigerator cooling frequently. This is
normal doors are opened or left open for long periods of time.
Ice makers do
not make ice
After you install the water line and start the refrigerator, it may take
12 hours to start producing ice.
Turn on the ice making functions (see page 9).
Check whether the water pressure meets 40–100 psig (0.28–0.69
MPa) and whether the water line is connected normally.
Check whether the water supply valve is open and whether the
water pipe is bent.
No ice is
dispensed in the
refrigerator
Check whether there is ice in the ice bucket.
Check whether the ice has melted and stuck together. If the ice is not
used for a long time, empty the ice bucket and turn off the
ice maker.
Check whether the water line is connected normally, whether the
water supply valve is opened, and whether the water pipe is bent.
The ice dispenser will only operate when the refrigerator door is
closed. Check whether the ice bucket is properly installed.
Ice makers not
making enough ice
Low water pressure can result in slower ice-making speeds. Consult
a professional regarding your home's recommended psi limits to
achieve optimal ice-making conditions.
No water is
coming out of the
water dispenser
Check whether the water line is connected normally, whether
the water supply valve is opened, and whether the water pipe is
bent or creased.
The filter or water filter bypass plug must be installed before water
can be discharged.
There is low flow
coming from the
water dispenser
Check whether the water pressure meets 40–100 psig
(0.28–0.69 MPa).
Replace the water filter following the instructions in the Installation
Manual. If filter doesn't work, call ZLINE Customer Service at
1-614-777-5004.
The
water tastes bad
Check the water filter. Replace the water filter as described in the
Installation Manual. If the new water filter still does not correct the
water dispenser flow, call ZLINE Customer Service at
1-614-777-5004.
TROUBLESHOOTING
Troubleshooting

WARRANTY
COVERAGE
ZLINE Kitchen and Bath ("ZLINE") standard-depth refrigerators have a one year parts
and service warranty and a five year parts warranty on the unit's sealed cooling system.
ZLINE warranty periods begin from the original date of product delivery and solely cover
the original purchaser of the product, delivered new and in its original carton. The limited
warranty covers all parts and labor for necessary repairs if any part of the product, or the
product itself, proves to be defective in materials or workmanship.
The product must be deemed serviceable via troubleshooting with the ZLINE Customer
Experience team. All service on ZLINE products under warranty must be performed by
ZLINE-approved and ZLINE-certified service providers unless otherwise specified by
ZLINE. Service will be provided during normal business hours.
Products must be unobstructed and accessible to the service provider at the time of service.
ZLINE’s liability is limited to the original purchase price of the product. Additional injuries,
losses, damages, or other inconveniences caused by product malfunction or defects in
materials are not covered under the terms of this warranty.
TERMS
ZLINE warranties apply only to the original purchaser of a ZLINE product installed
for normal residential use. This is defined as a single-family, residential dwelling in a
non-commercial setting. Any warranty claim stemming from installation, operation, or
any other use within a commercial setting is not covered under this limited warranty.
Commercial settings include, but are not limited to: schools, churches, hotels, restaurants,
vacation rentals such as Airbnb, daycare centers, private clubs, fire stations, common
areas in multi-family dwellings, nursing homes, food service locations, and institutional
food service locations such as hospitals or correctional facilities.
This warranty is non-transferable and will not under any circumstance be extended based
on the date of installation — the warranty period takes effect from the date of delivery and
only covers the original purchaser. The warranty applies only to products installed in the
contiguous United States and the District of Columbia.

WARRANTY
Failure to secure certified warranty service per these terms will result in a forfeiture of the
remaining warranty. Out-of-pocket payments will not be reimbursed unless prior approval
is received from ZLINE and/or ZLINE-certified service contract partners. Unapproved out-
of-pocket payments for service will not be reimbursed. All warranty procedures must be
followed to maintain warranty coverage.
If a product qualifies within the service window provided under these warranty terms, and
ZLINE is unable to repair the product or a defective part of the product after a reasonable
number of attempts, ZLINE reserves the right to offer to replace the defective part or the
product or provide the original purchaser a full refund of the purchase price of the product
(not including installation, removal, or other charges that were not included in the original
purchase price).
The original purchaser of the product must provide the original proof of purchase, including
the purchase date, when filing a claim to obtain replacement parts, service, or refunds.
Additionally, the original purchaser of the product must provide the serial number of the
product when filing a claim to obtain replacement parts, service, or refunds.
This warranty shall not apply to any ZLINE product in which the original factory serial
number has been removed, altered, or cannot be readily determined for any reason. Further,
ZLINE is not responsible for damage resulting from, but not limited to: shipment, delivery, or
improper installation; negligence or improper maintenance, misuse, or abuse of the product;
unauthorized alteration, modification, or tampering with the product; accident, fire, floods,
pest infestations, pandemics, natural disasters, or any other unpreventable or unexplained
acts of nature, commonly referred to as “acts of God”; flare-up fires or damages caused
by improper electric supply, electrical line current, voltage, or power surges; and service
to correct installation not in accordance with the instructions contained in ZLINE’s product
manuals and/or with local government codes.
In the event service is dispatched, and it is discovered that the reported issue is not
covered under warranty based on the disclaimers above, the customer will be responsible
for all service fees. Failure to pay these fees will result in the forfeiture of remaining
warranty coverage.
WARRANTY
Information contained within ZLINE’s installation and user manuals, in addition to product
information included on ZLINE’s website and all related digital listings, do not cover every
possible condition and situation that may occur during the installation or operation of
ZLINE products.
ZLINE reserves the right to make changes at any time to its products when considered safe,
necessary, and useful. Always check the ZLINE website for the most up-to-date version of
its product manuals: www.zlinekitchen.com/pages/manuals.
Do not install or operate any ZLINE product if it has missing or broken parts or if it arrives damaged
due to shipping. If ZLINE products arrive damaged, contact ZLINE Customer Experience at
1-614-777-5004 for help. Failure to report a damaged appliance prior to installation or
operation may void the warranty.
ZLINE disclaims responsibility for damage or injury caused by improper installation or
use of any of its products. ZLINE is under no obligation, by law or otherwise, to provide
concessions, including repairs, prorates, rebates, discounts, or replacements, once the
warranty has expired.
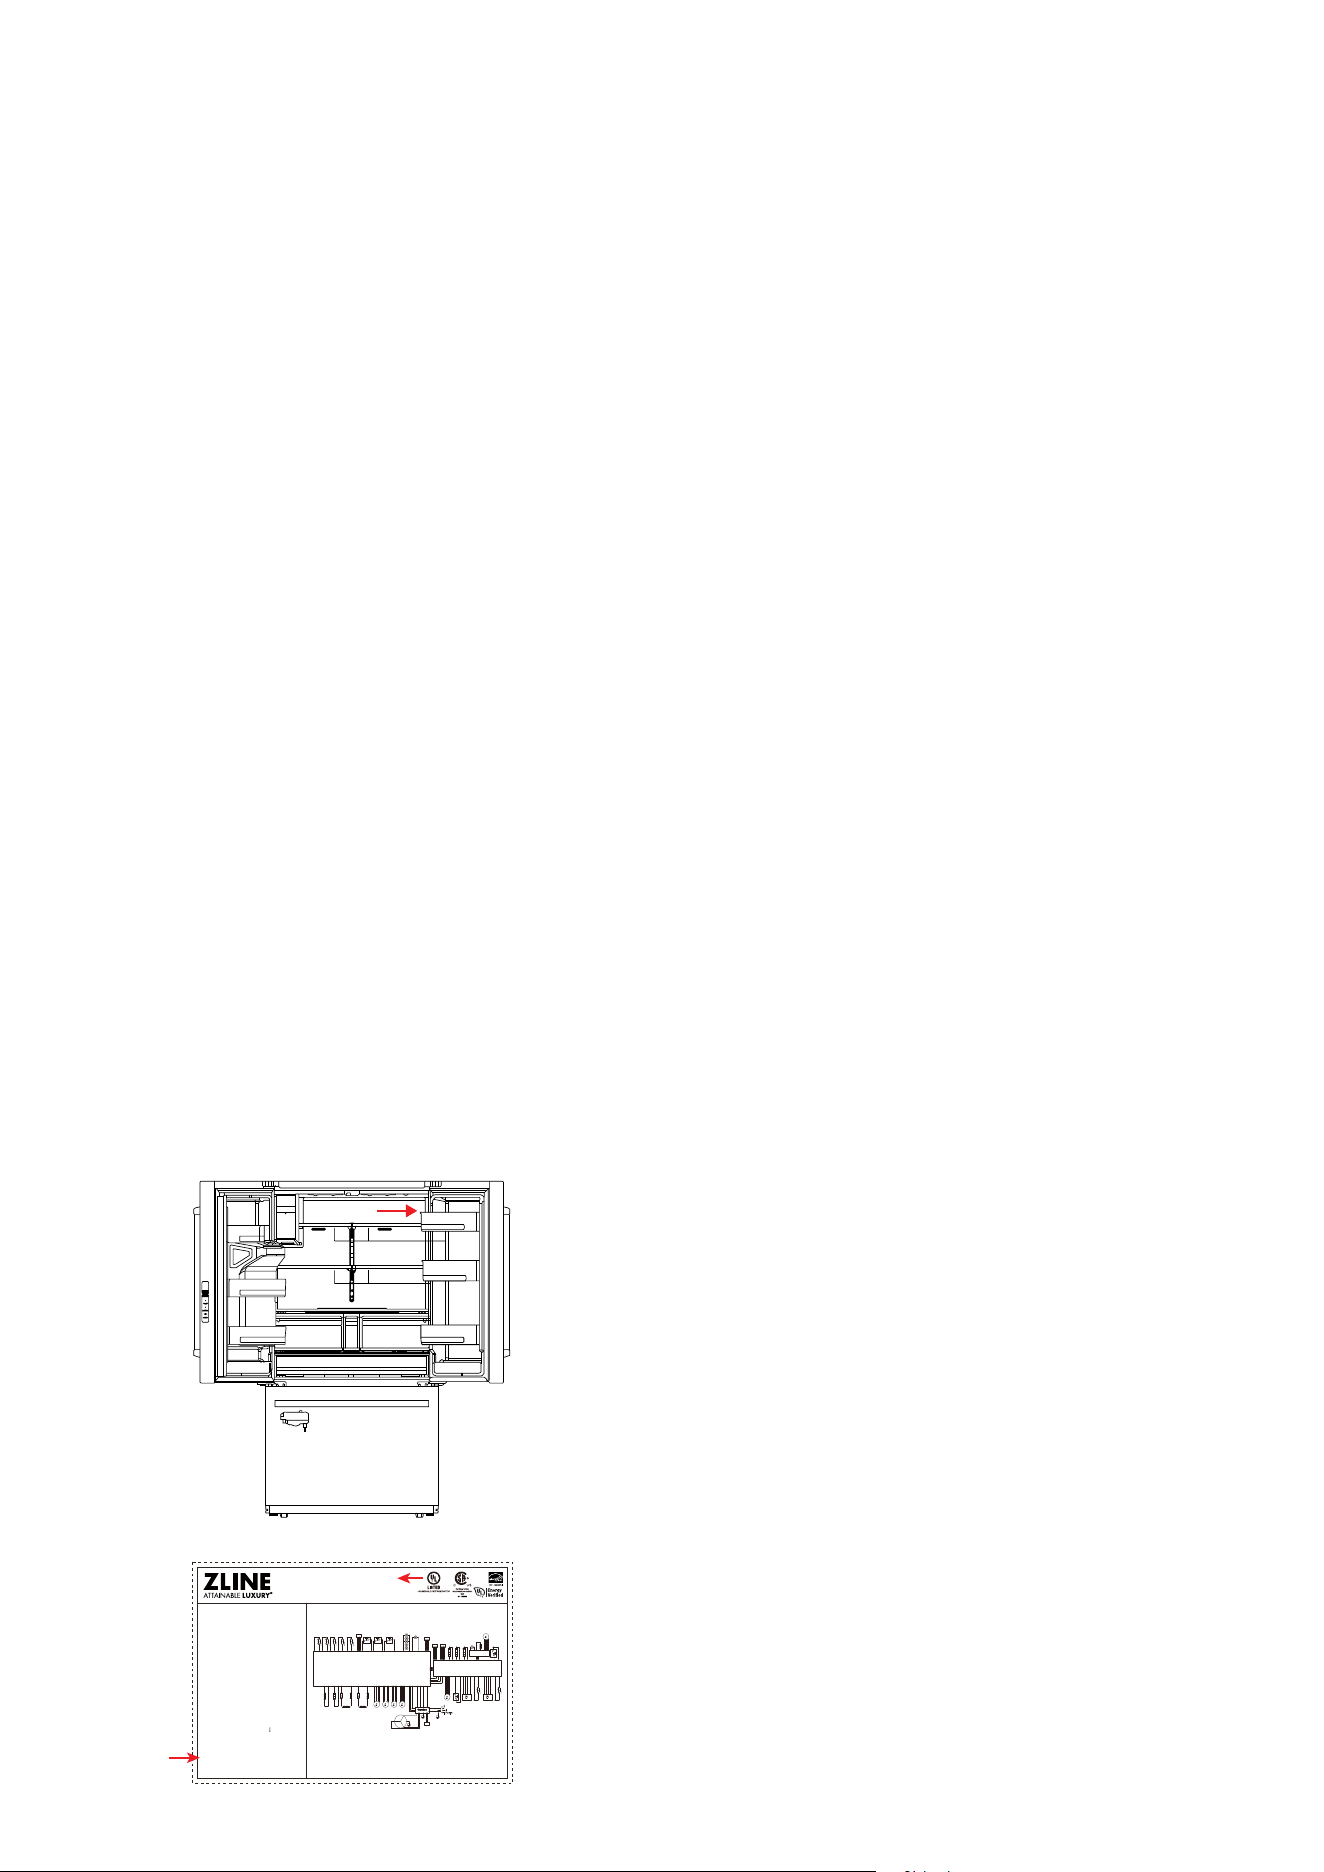
SERIAL NUMBER LOCATION
The rating tag shows the model and serial number of
your refrigerator. The product label and rating tag is
located inside the unit on the top right-hand side. The
tag is visible when the refrigerator door is open. Do
not remove permanently affixed labels, warnings, or
plates from the product. This will void the warranty.
Electric diagram
Model: RSM-W-36
Refrigerator-Freezer
Product installation clearance shall be no less than
13/16" (20 mm) on rear and sides.
R_SNR
R-compensate heater
FB-compensate heater
F-defrosting
heater
IMCD-defrosting
heater
Ice-fan
Ice-crusher motor
R-I/M_motor R-I/M_SNR
C-fan R-dampers
Compressor
Electric reactor
F-fan
Fuse Fuse Fuse Fuse
t° t° t° t° t°
t°
F-I/M_motor F-I/M_SNR
t°
F_SNR FD_SNR IMC_SNR IMCD_SNR
AMB_HUM_SNR
R-R_switch R-L_switch F_switch
R-top-LED
R-L-door-bottom-LED
Display Board
Main water circuit
water valve Water valve
Distributor door control motor
Ice crusher switch
Distributor-door heater
Distributor heater
Distributor-door-LED
Distributor display board
Distributor switch
R-Water inlet heater
F-Water inlet heater
R-top-LED
R-L-side-LED
R-R-side-LED
R-R-side-LED
SA45393
Control board
Ice control board
VOLTAGE: 115V~
FREQUENCY: 60 Hz
RATED DEFROST POWER: 280W
LAMP RATED POWER: MAX 12W
RATED CURRENT: 2.7A
REFRIGERANT: R600a, 2.75 oz (78 g)
VOLUME: 28.9 cu.ft.
FOAMING AGENT: Cyclopentane
TYPE OF PREVENTING
FROM ELECTRIC SHOCK:
DATE CODE: YYMMDD
SERIAL NUMBER: RFMI23090001-00
MADE IN CHINA

WARRANTY
SERVICE
For warranty service, please contact our Customer Service team at
1-614-777-5004 or visit www.zlinekitchen.com/contact to utilize
our online Customer Experience Portal.
Scan the QR code to view the most up-to-date version of our
Installation Manual and User Manual.
Need to purchase a part or accessory for your ZLINE product?
Visit www.zlineparts.com, ZLINE's official parts distribution partner.