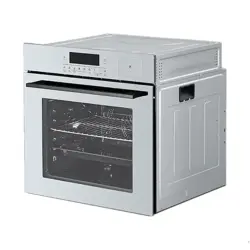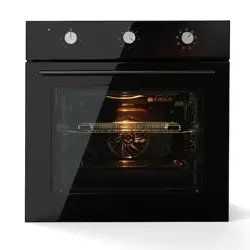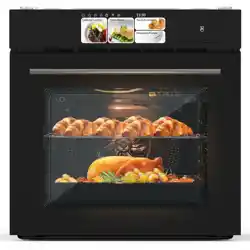
Single Wall Oven
Please read this instruction and warranty information carefully
before use and keep them handy for future reference
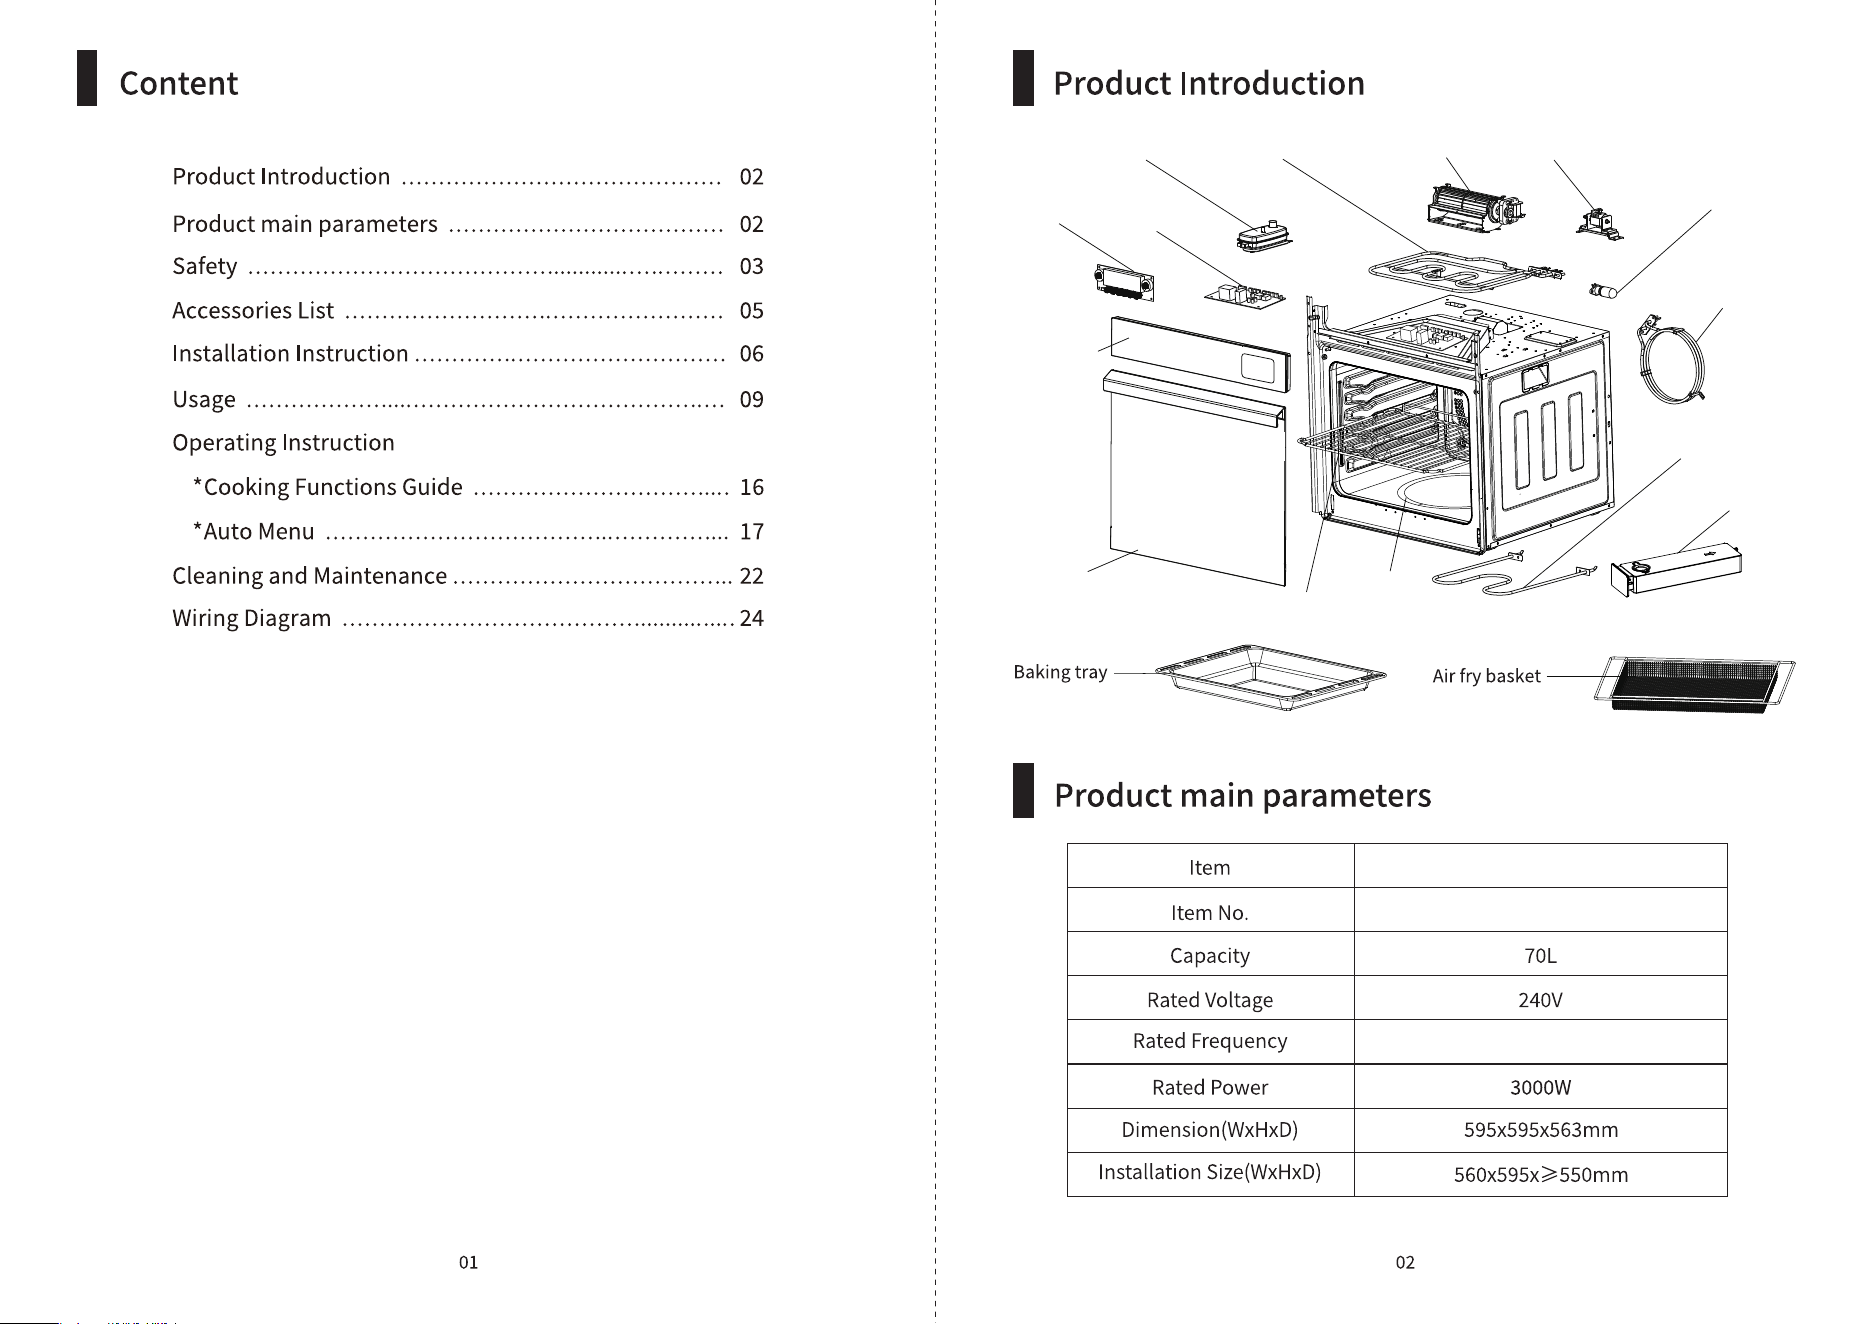
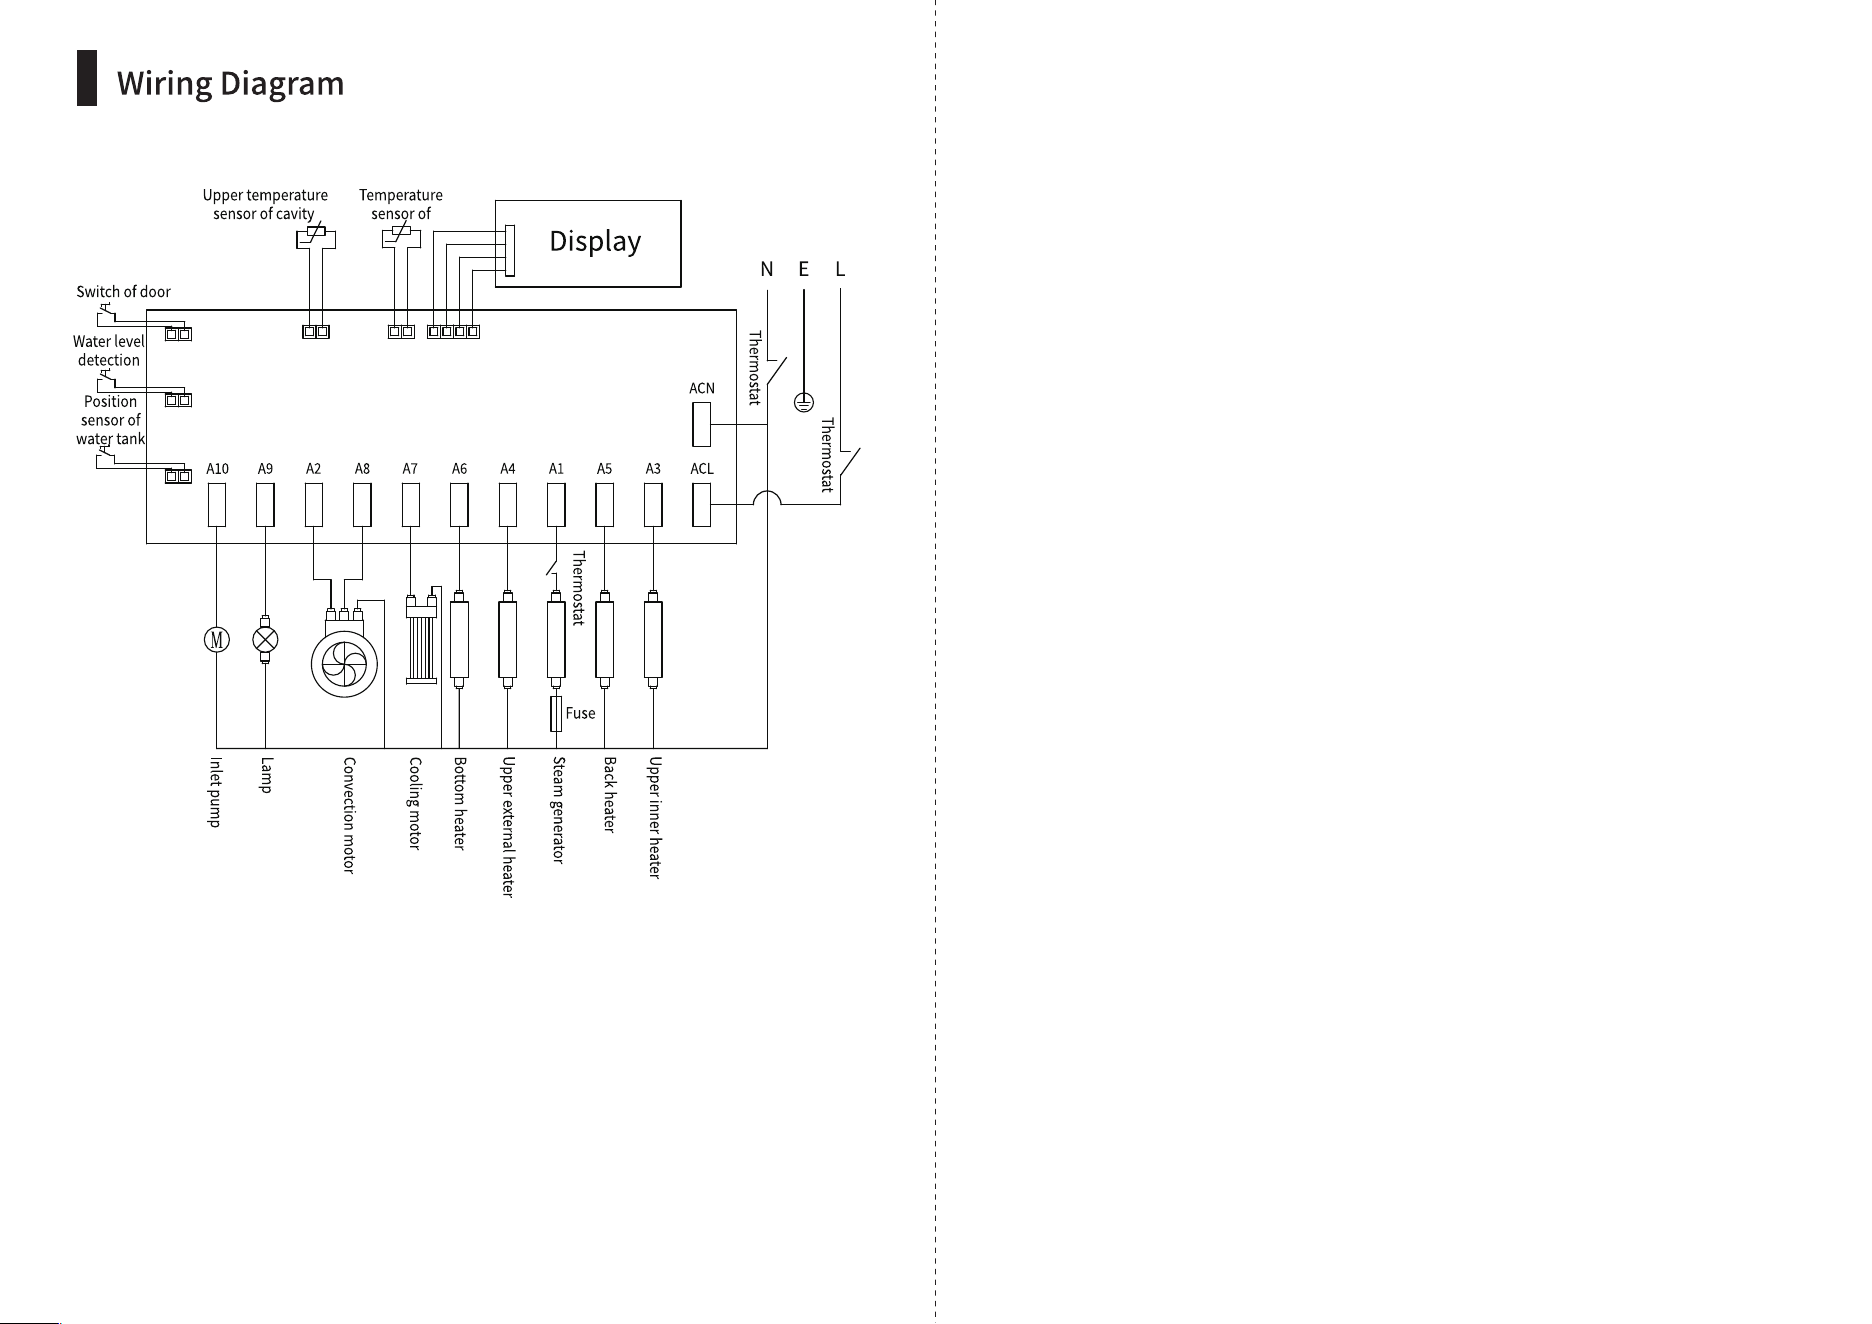
Steam generator Upper heating element Cross flow fan Water pump
Oven lamp
Back heating
element
Lower heating
element
Water tank
Oven cavity
Grill rack
Oven door
Control
panel
LED
display
Powerboard
JYQ-ZKD
Single Wall Oven
Hz

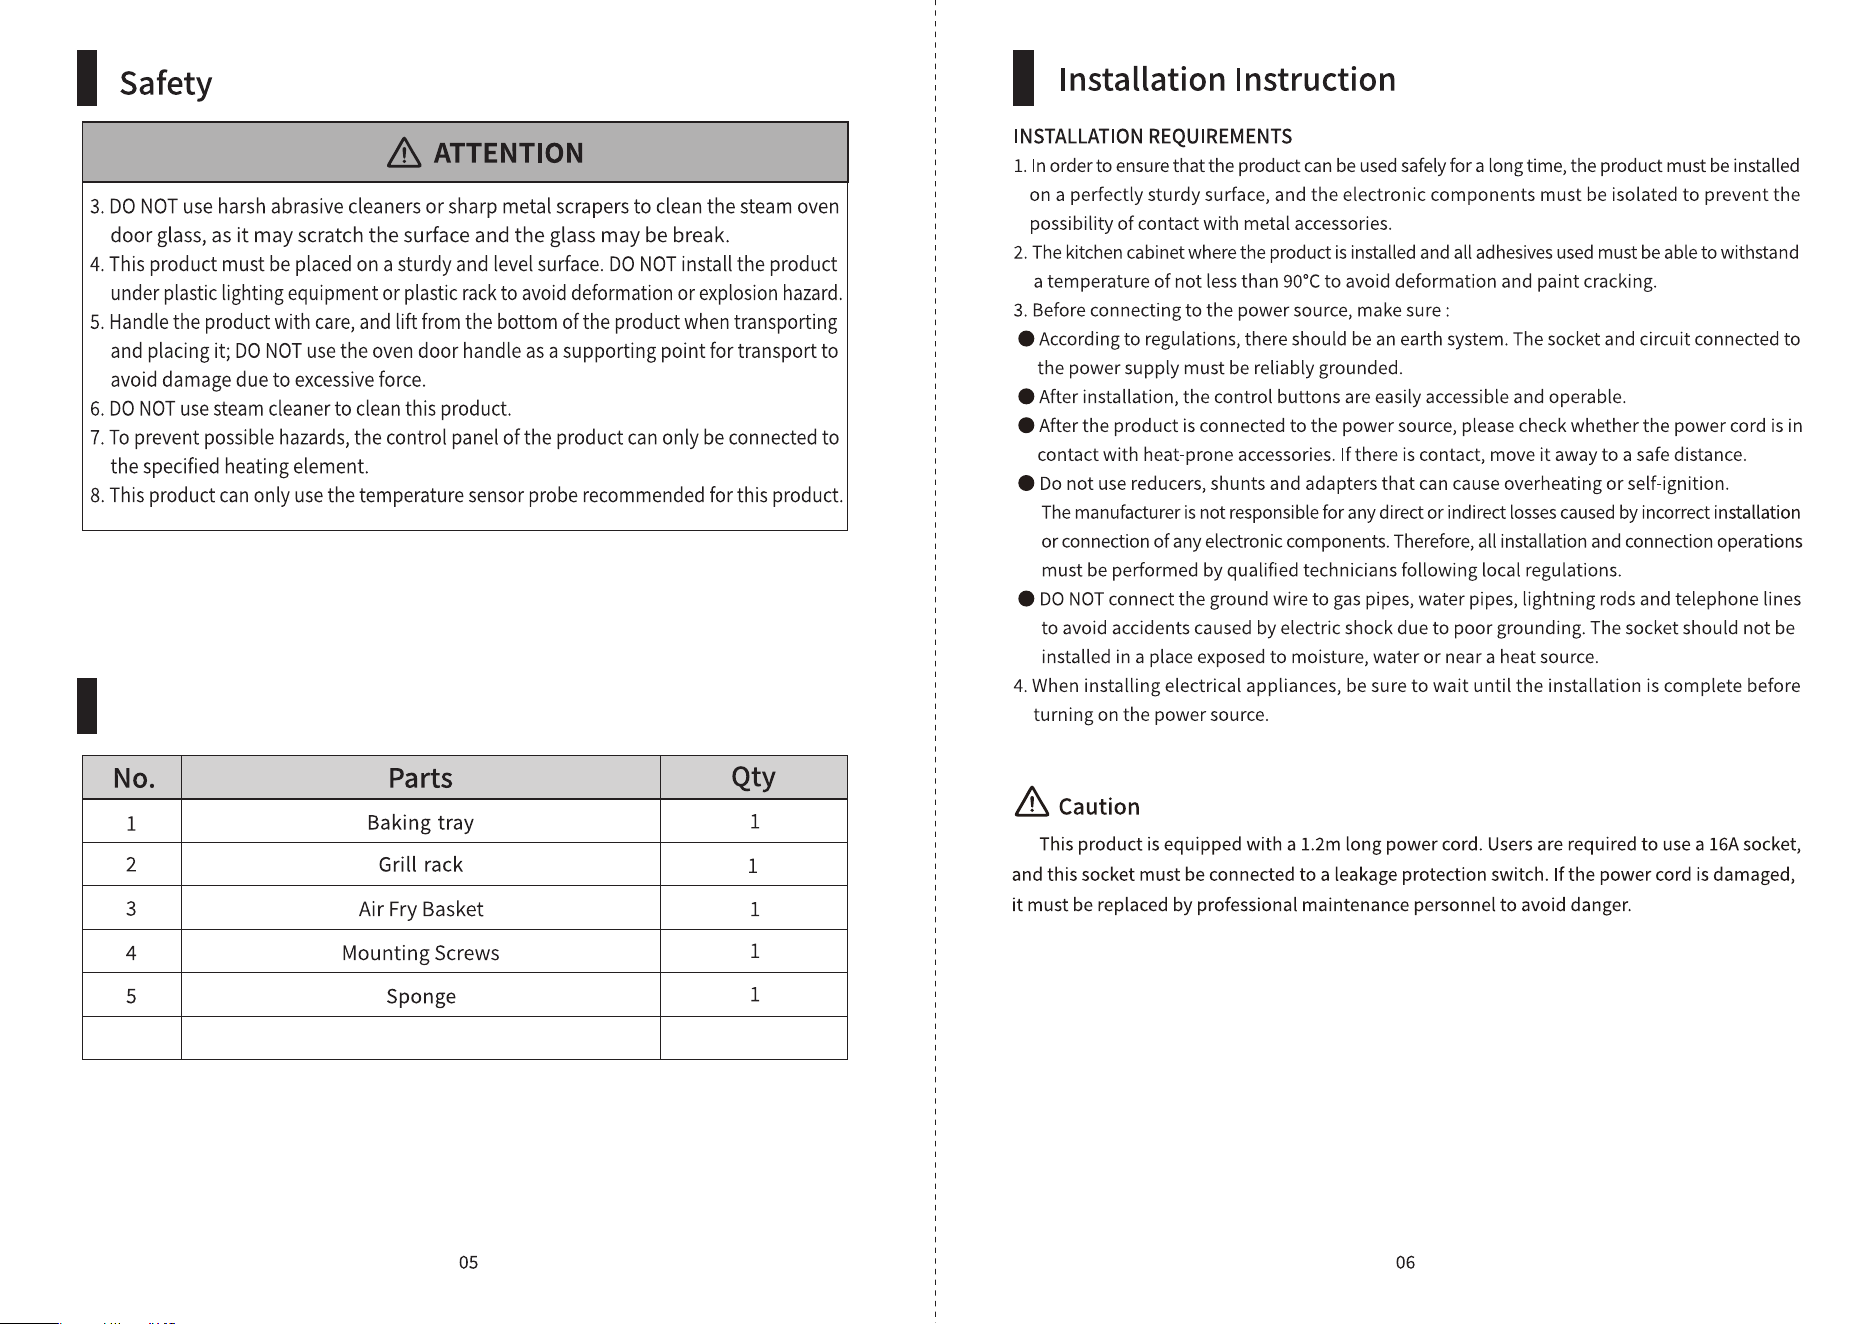
Accessories List
Glove
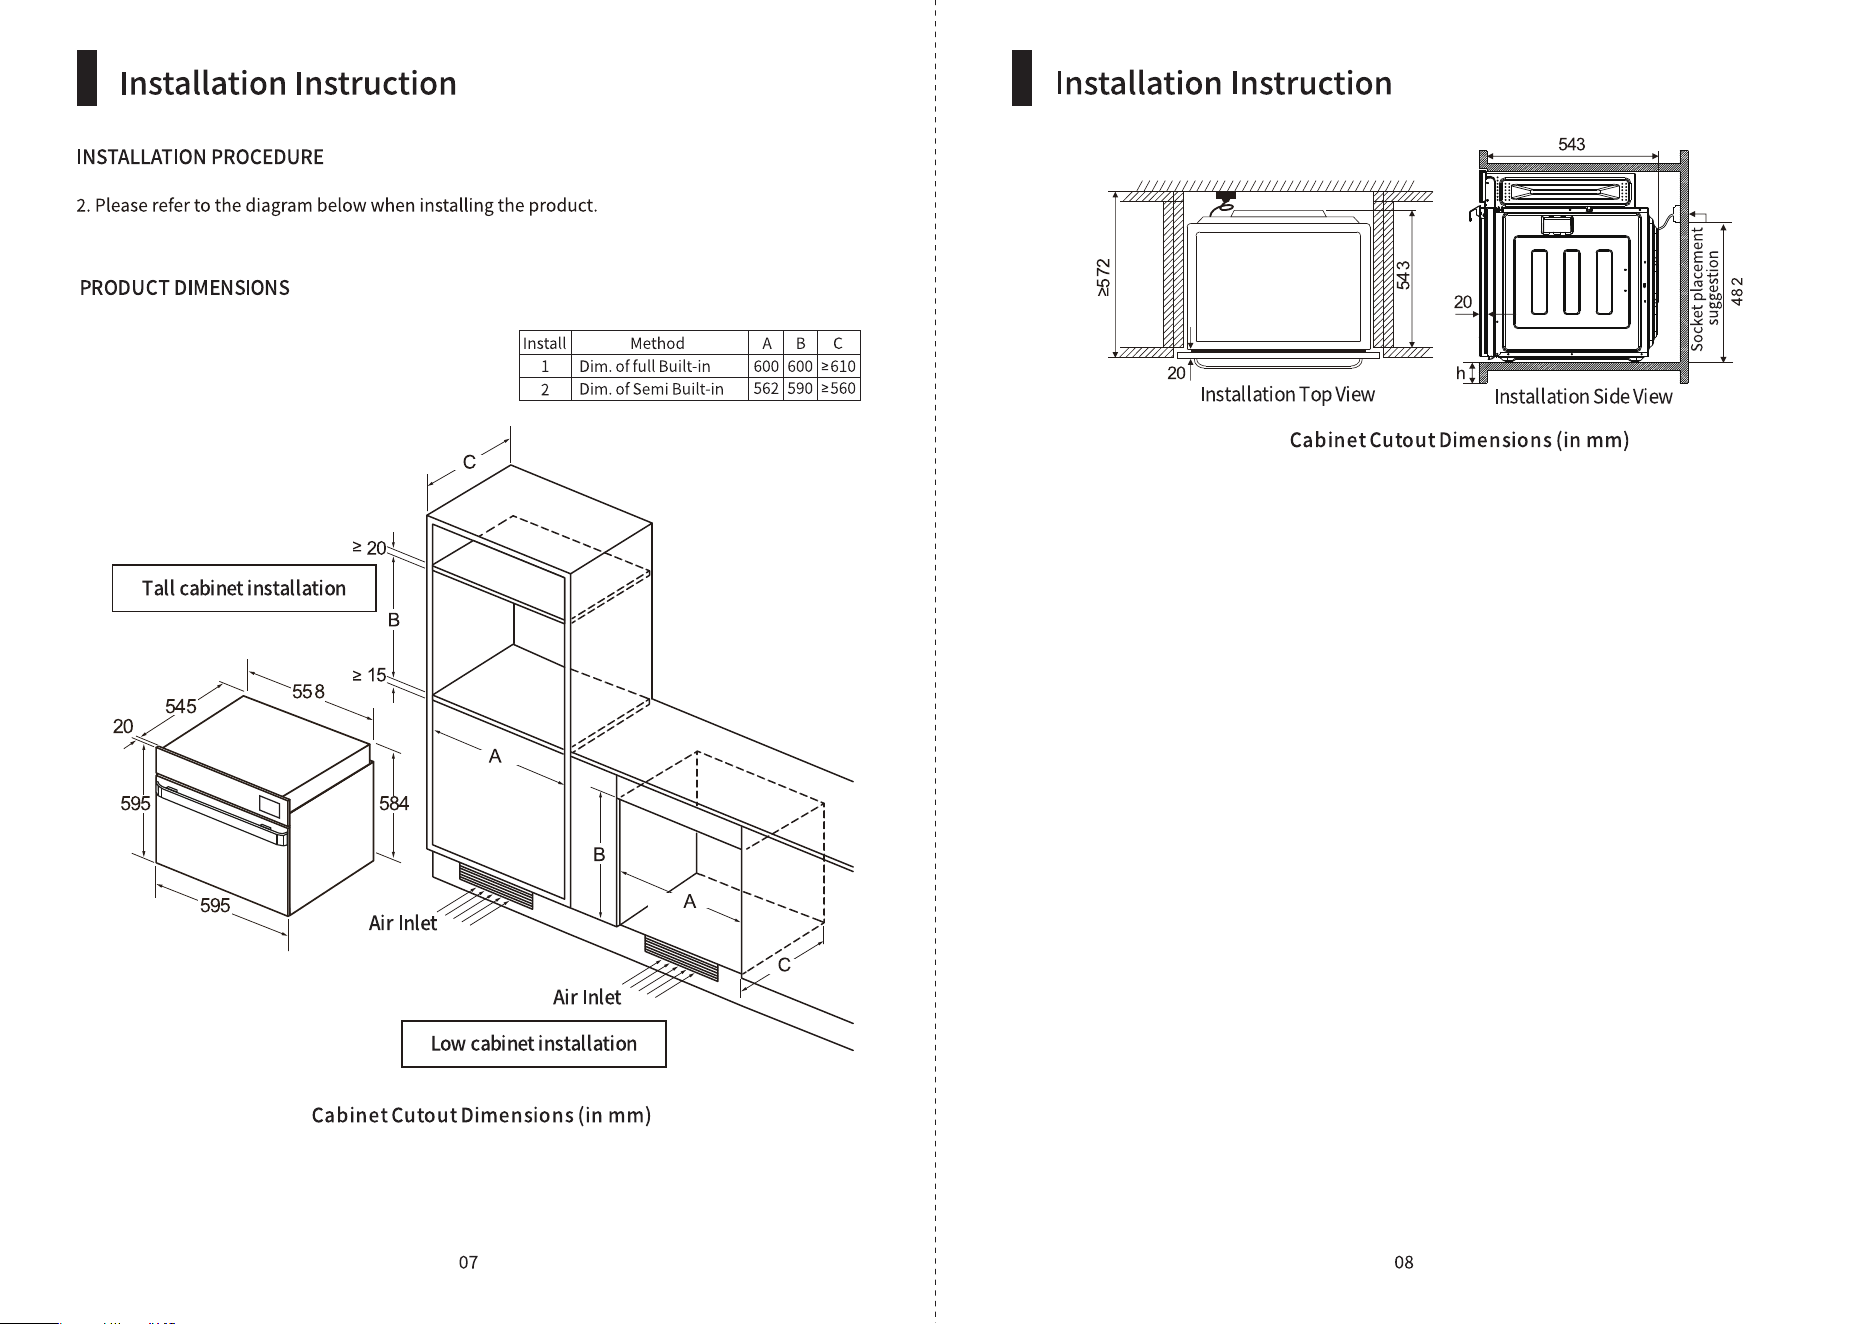
. under cabinent or free stand
Start
/Pause
IncreaseDecreaseTime
/Temp
Air explosion RecipesCombined
mode
Grill
mode
Steam
mode
Power
Lamp
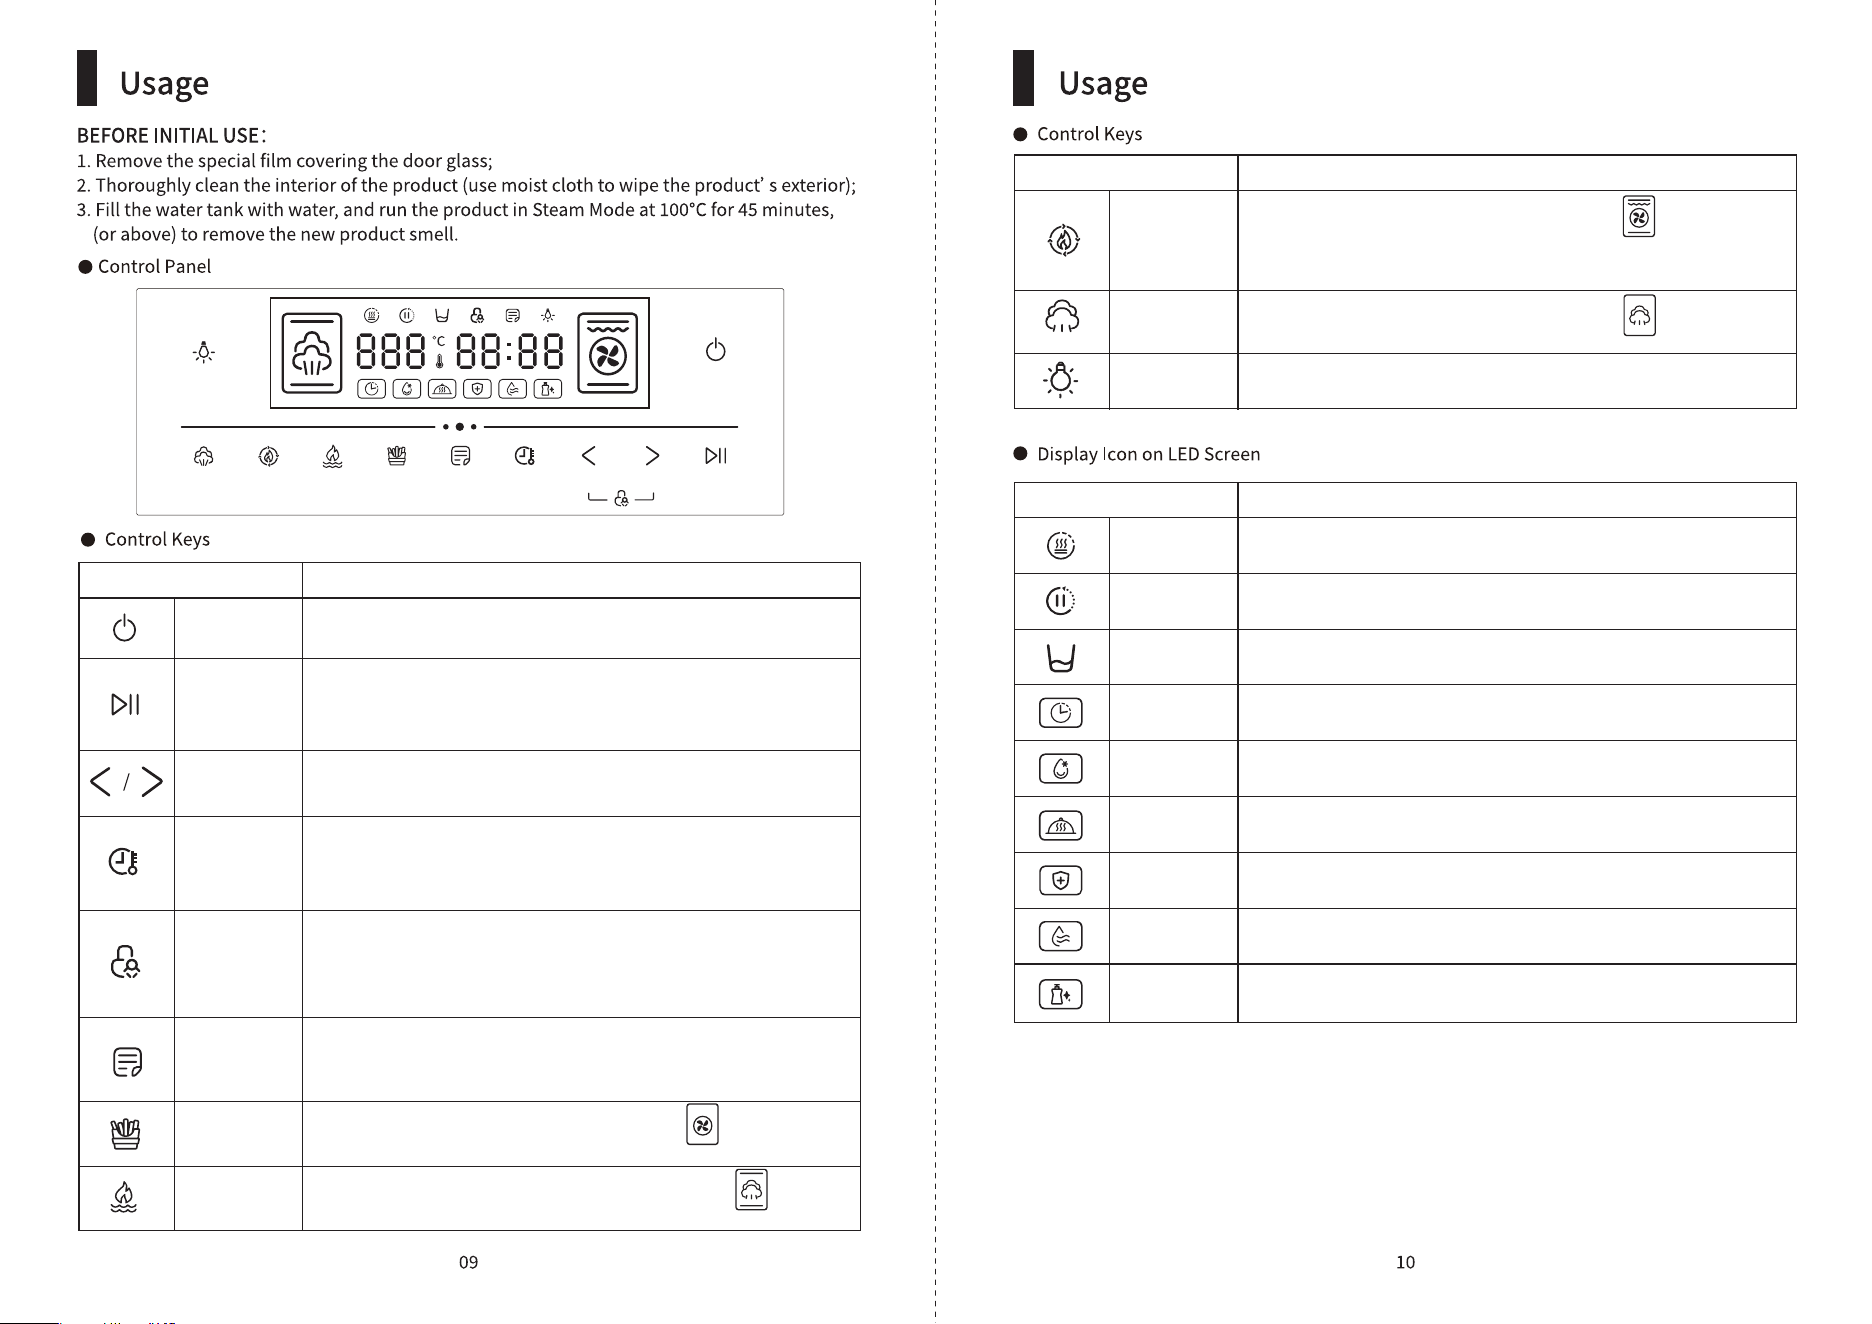
Icon Function
Power
Start / Pause
Decrease /
Increase
Time /
Temperature
Child Lock
Recipes
Air explosion
Function
Combined
mode
When product is connected to power, press this button to
enter into standby mode
You can press this button pause or resume the cooking; press
and hold this button for seconds will cancel the cooking mode
and product will return to standby mode
Use these buttons to increase or decrease the time and
temperature
After selecting the cooking mode, press this button to adjust the
time and temperature you desire; press and hold for seconds
will enter into preset mode
When oven is in operation, press“ <” and“ >” button at the same
time to activate child lock function; to unlock, press and hold<
and > button for seconds will do. All buttons (except for light
button) will be disabled)
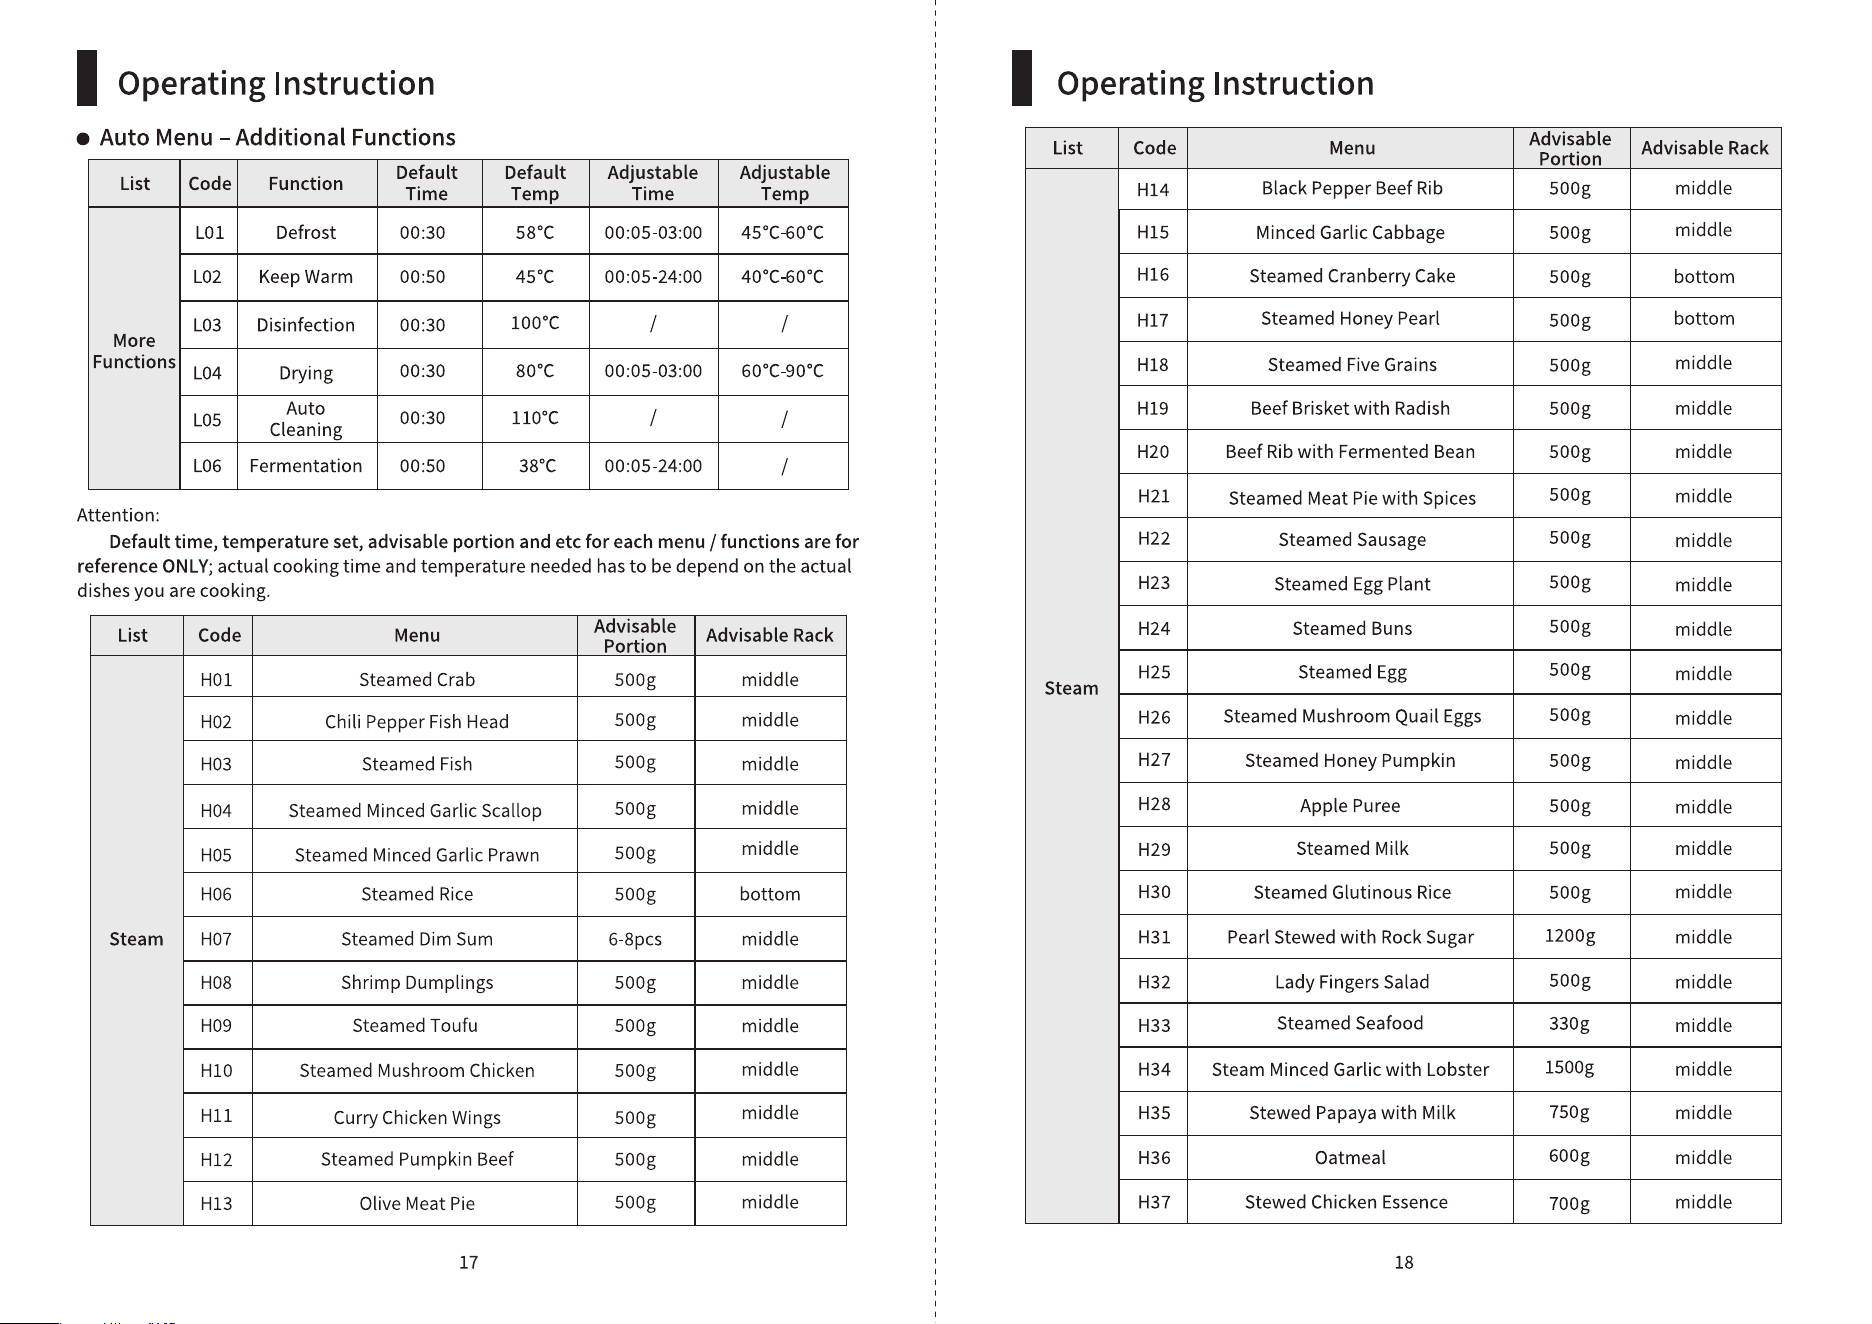
Press this button to select the auto menu you desire and the this
icon will beam on the LED display screen. There are total auto
menus.
Press this button for air fry function and this icon will beam
on the LED display screen
Press this button for steam + grill function and this icon will
beam on the LED display screen
Icon Function
Grill mode
Steam mode
Lamp
Press this button for baking function and this icon will beam
on the LED display screen, contine press the button to select your
desire baking mode.
Press this button for steam function and this icon will beam
on the LED display screen
Press this button to turn ON / OFF the light
Icon Function
Preheat
In Operation
Preset
Defrost
Keep Warm
Disinfection
Drying
Auto Cleaning
Pls refill water
Oven is preheating
Oven is in operation
In steaming mode, water level is low, please refill water
Preset the time you want the oven to start working
To defrost food
To keep warm food
To disinfect utensils
To dry the oven body
To clean the oven body
Start
/Pause
IncreaseDecreaseTime
/Temp
Air explosion RecipesCombined
mode
Grill
mode
Steam
mode
Power
Lamp
Start
/Pause
IncreaseDecreaseTime
/Temp
Air explosion RecipesCombined
mode
Grill
mode
Steam
mode
Power
Lamp
Start
/Pause
IncreaseDecreaseTime
/Temp
Air explosion RecipesCombined
mode
Grill
mode
Steam
mode
Power
Lamp
Start
/Pause
IncreaseDecreaseTime
/Temp
Air explosion RecipesCombined
mode
Grill
mode
Steam
mode
Power
Lamp
Start
/Pause
IncreaseDecreaseTime
/Temp
Air explosion RecipesCombined
mode
Grill
mode
Steam
mode
Power
Lamp
Start
/Pause
IncreaseDecreaseTime
/Temp
Air explosion RecipesCombined
mode
Grill
mode
Steam
mode
Power
Lamp
Start
/Pause
IncreaseDecreaseTime
/Temp
Air explosion RecipesCombined
mode
Grill
mode
Steam
mode
Power
Lamp
Start
/Pause
IncreaseDecreaseTime
/Temp
Air explosion RecipesCombined
mode
Grill
mode
Steam
mode
Power
Lamp
Start
/Pause
IncreaseDecreaseTime
/Temp
Air explosion RecipesCombined
mode
Grill
mode
Steam
mode
Power
Lamp
Start
/Pause
IncreaseDecreaseTime
/Temp
Air explosion RecipesCombined
mode
Grill
mode
Steam
mode
Power
Lamp
Start
/Pause
IncreaseDecreaseTime
/Temp
Air explosion RecipesCombined
mode
Grill
mode
Steam
mode
Power
Lamp
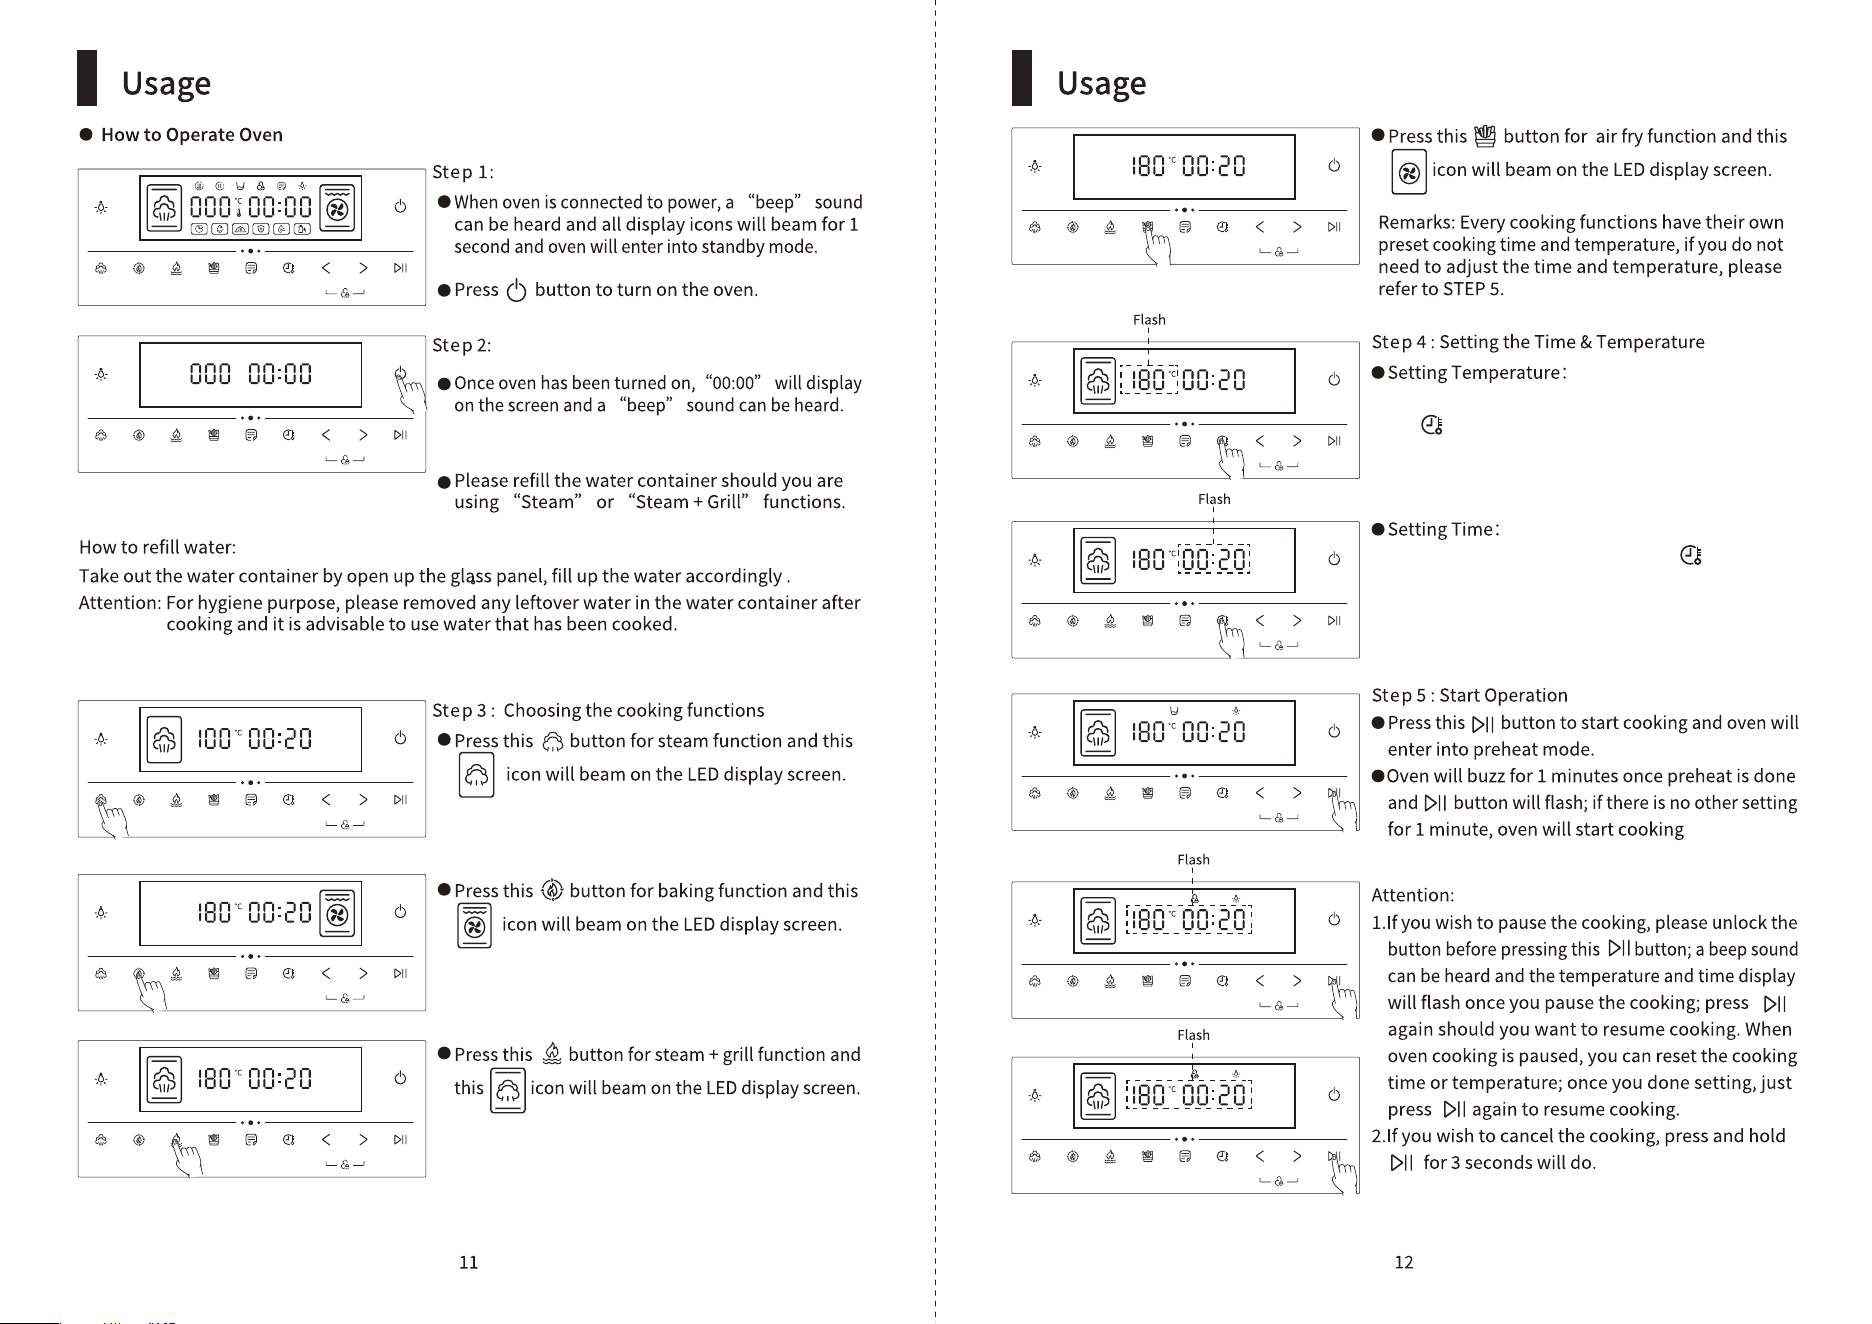
After selecting your desire cooking functions, press
this button and the temperature display on screen
will flash, then press“ <” or“ >” button to set the
temperature you want.
After setting the temperature, press again and
the time display on screen will flash, then press“ <”
or“ >” button to set the time you want.
Start
/Pause
IncreaseDecreaseTime
/Temp
Air explosion RecipesCombined
mode
Grill
mode
Steam
mode
Power
Lamp
Start
/Pause
IncreaseDecreaseTime
/Temp
Air explosion RecipesCombined
mode
Grill
mode
Steam
mode
Power
Lamp
Start
/Pause
IncreaseDecreaseTime
/Temp
Air explosion RecipesCombined
mode
Grill
mode
Steam
mode
Power
Lamp
Start
/Pause
IncreaseDecreaseTime
/Temp
Air explosion RecipesCombined
mode
Grill
mode
Steam
mode
Power
Lamp
Start
/Pause
IncreaseDecreaseTime
/Temp
Air explosion RecipesCombined
mode
Grill
mode
Steam
mode
Power
Lamp
Start
/Pause
IncreaseDecreaseTime
/Temp
Air explosion RecipesCombined
mode
Grill
mode
Steam
mode
Power
Lamp
Start
/Pause
IncreaseDecreaseTime
/Temp
Air explosion RecipesCombined
mode
Grill
mode
Steam
mode
Power
Lamp
Start
/Pause
IncreaseDecreaseTime
/Temp
Air explosion RecipesCombined
mode
Grill
mode
Steam
mode
Power
Lamp
Start
/Pause
IncreaseDecreaseTime
/Temp
Air explosion RecipesCombined
mode
Grill
mode
Steam
mode
Power
Lamp
Start
/Pause
IncreaseDecreaseTime
/Temp
Air explosion RecipesCombined
mode
Grill
mode
Steam
mode
Power
Lamp
Start
/Pause
IncreaseDecreaseTime
/Temp
Air explosion RecipesCombined
mode
Grill
mode
Steam
mode
Power
Lamp
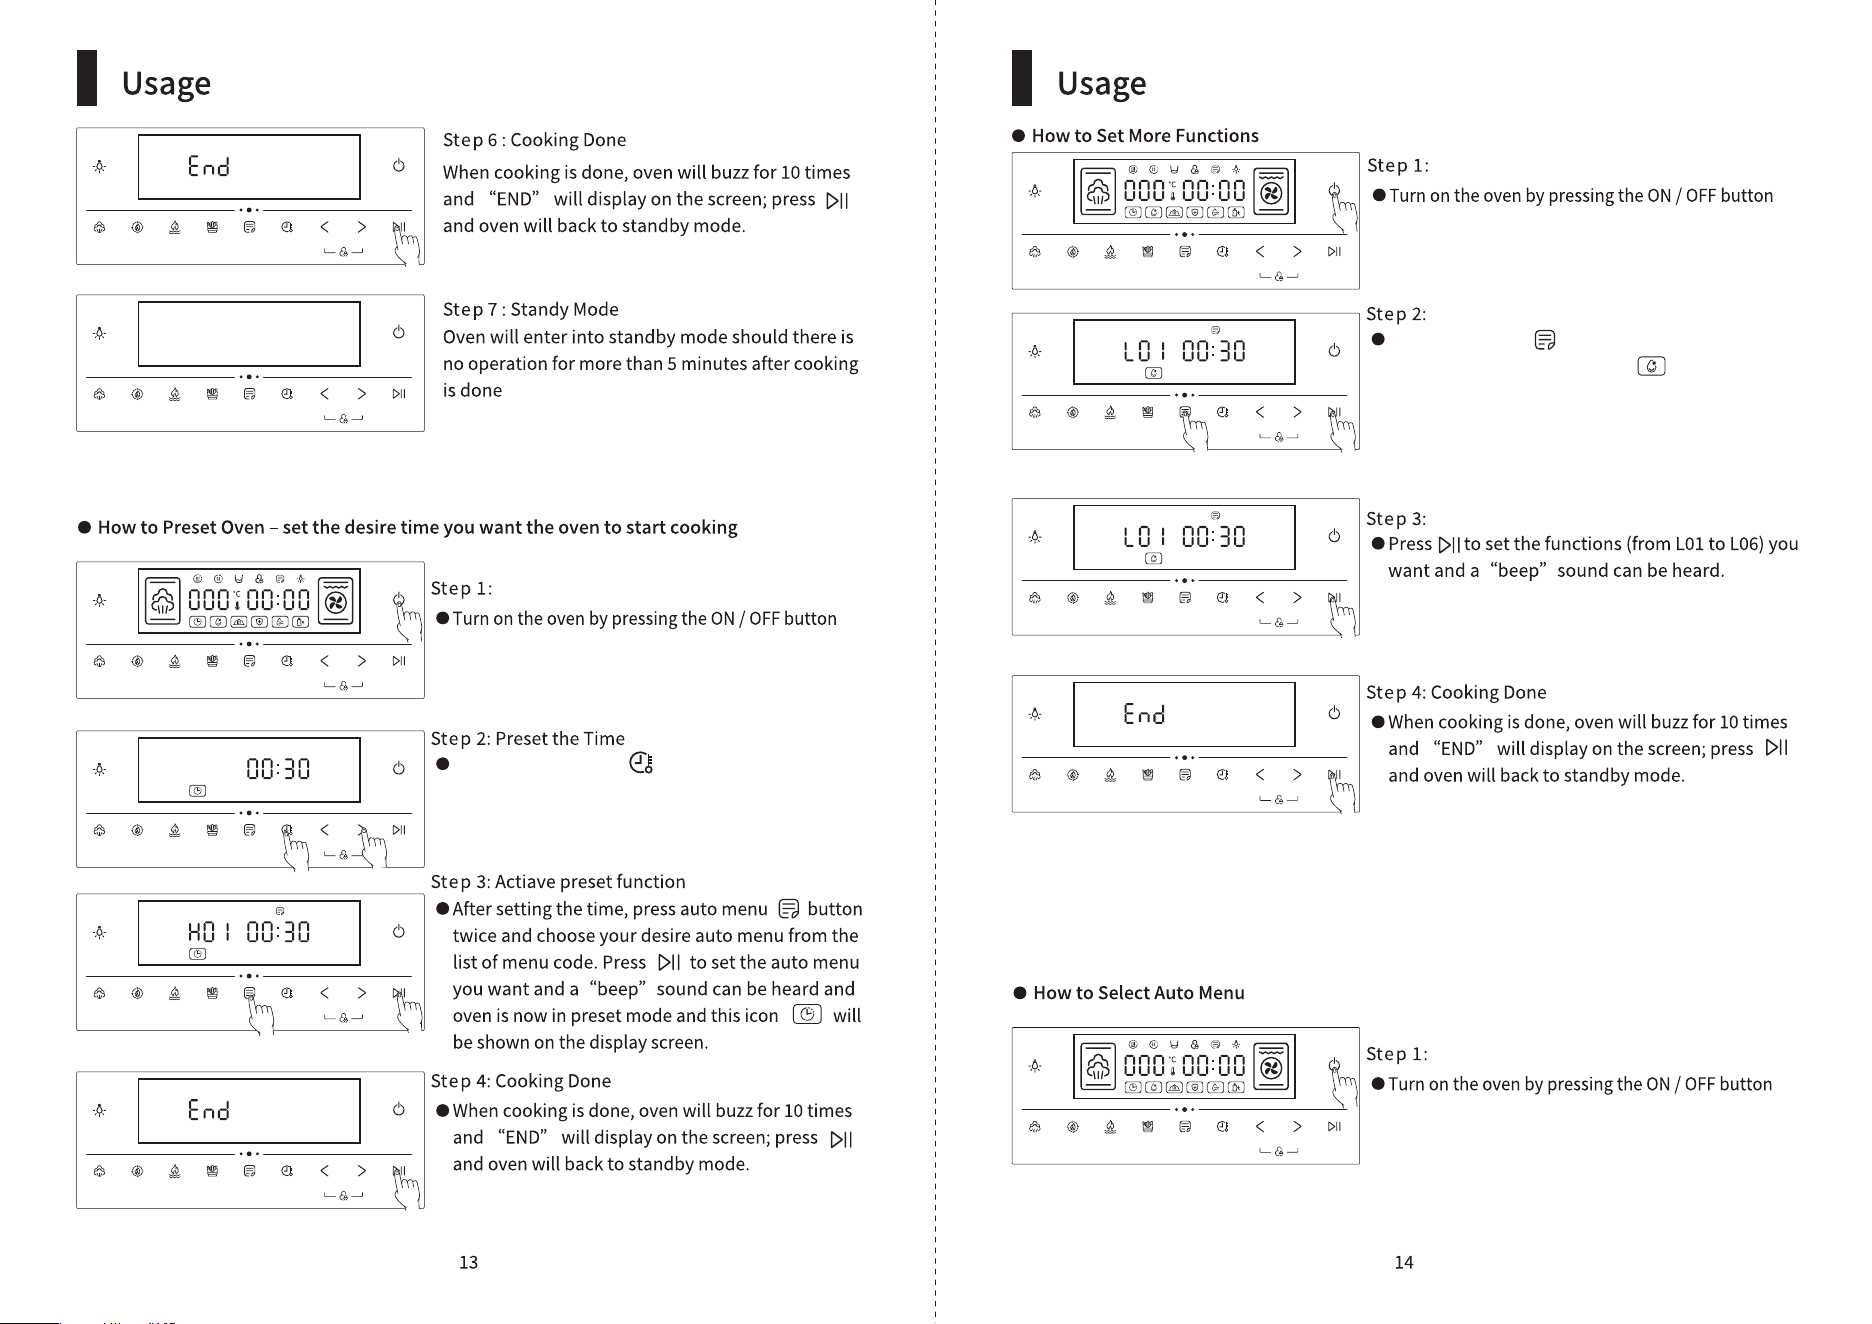
Press and hold on the button to enter into preset
mode; press“ <” or“ >” button to set the desire
time you want the oven to start cooking.
press auto menu button and a“beep”sound
can be heard and defrost icon and“L”will
shown on the screen; press“ <” or“ >” button to
choose your desire functions by their auto menu
code (please refer to the list of Auto Menu Code).

Start
/Pause
IncreaseDecreaseTime
/Temp
Air explosion RecipesCombined
mode
Grill
mode
Steam
mode
Power
Lamp
Start
/Pause
IncreaseDecreaseTime
/Temp
Air explosion RecipesCombined
mode
Grill
mode
Steam
mode
Power
Lamp
Start
/Pause
IncreaseDecreaseTime
/Temp
Air explosion RecipesCombined
mode
Grill
mode
Steam
mode
Power
Lamp
Start
/Pause
IncreaseDecreaseTime
/Temp
Air explosion RecipesCombined
mode
Grill
mode
Steam
mode
Power
Lamp
press auto menu button once and a“beep”
sound can be heard, and“ L” (additional functions)
will shown on the screen; press again and it will
switch to auto menu list and“H”will shown on
the screen. Press“ <” or“ >” button to choose your
desire auto menu by their auto menu code (please
refer to the list of Auto Menu Code).
WARNING!
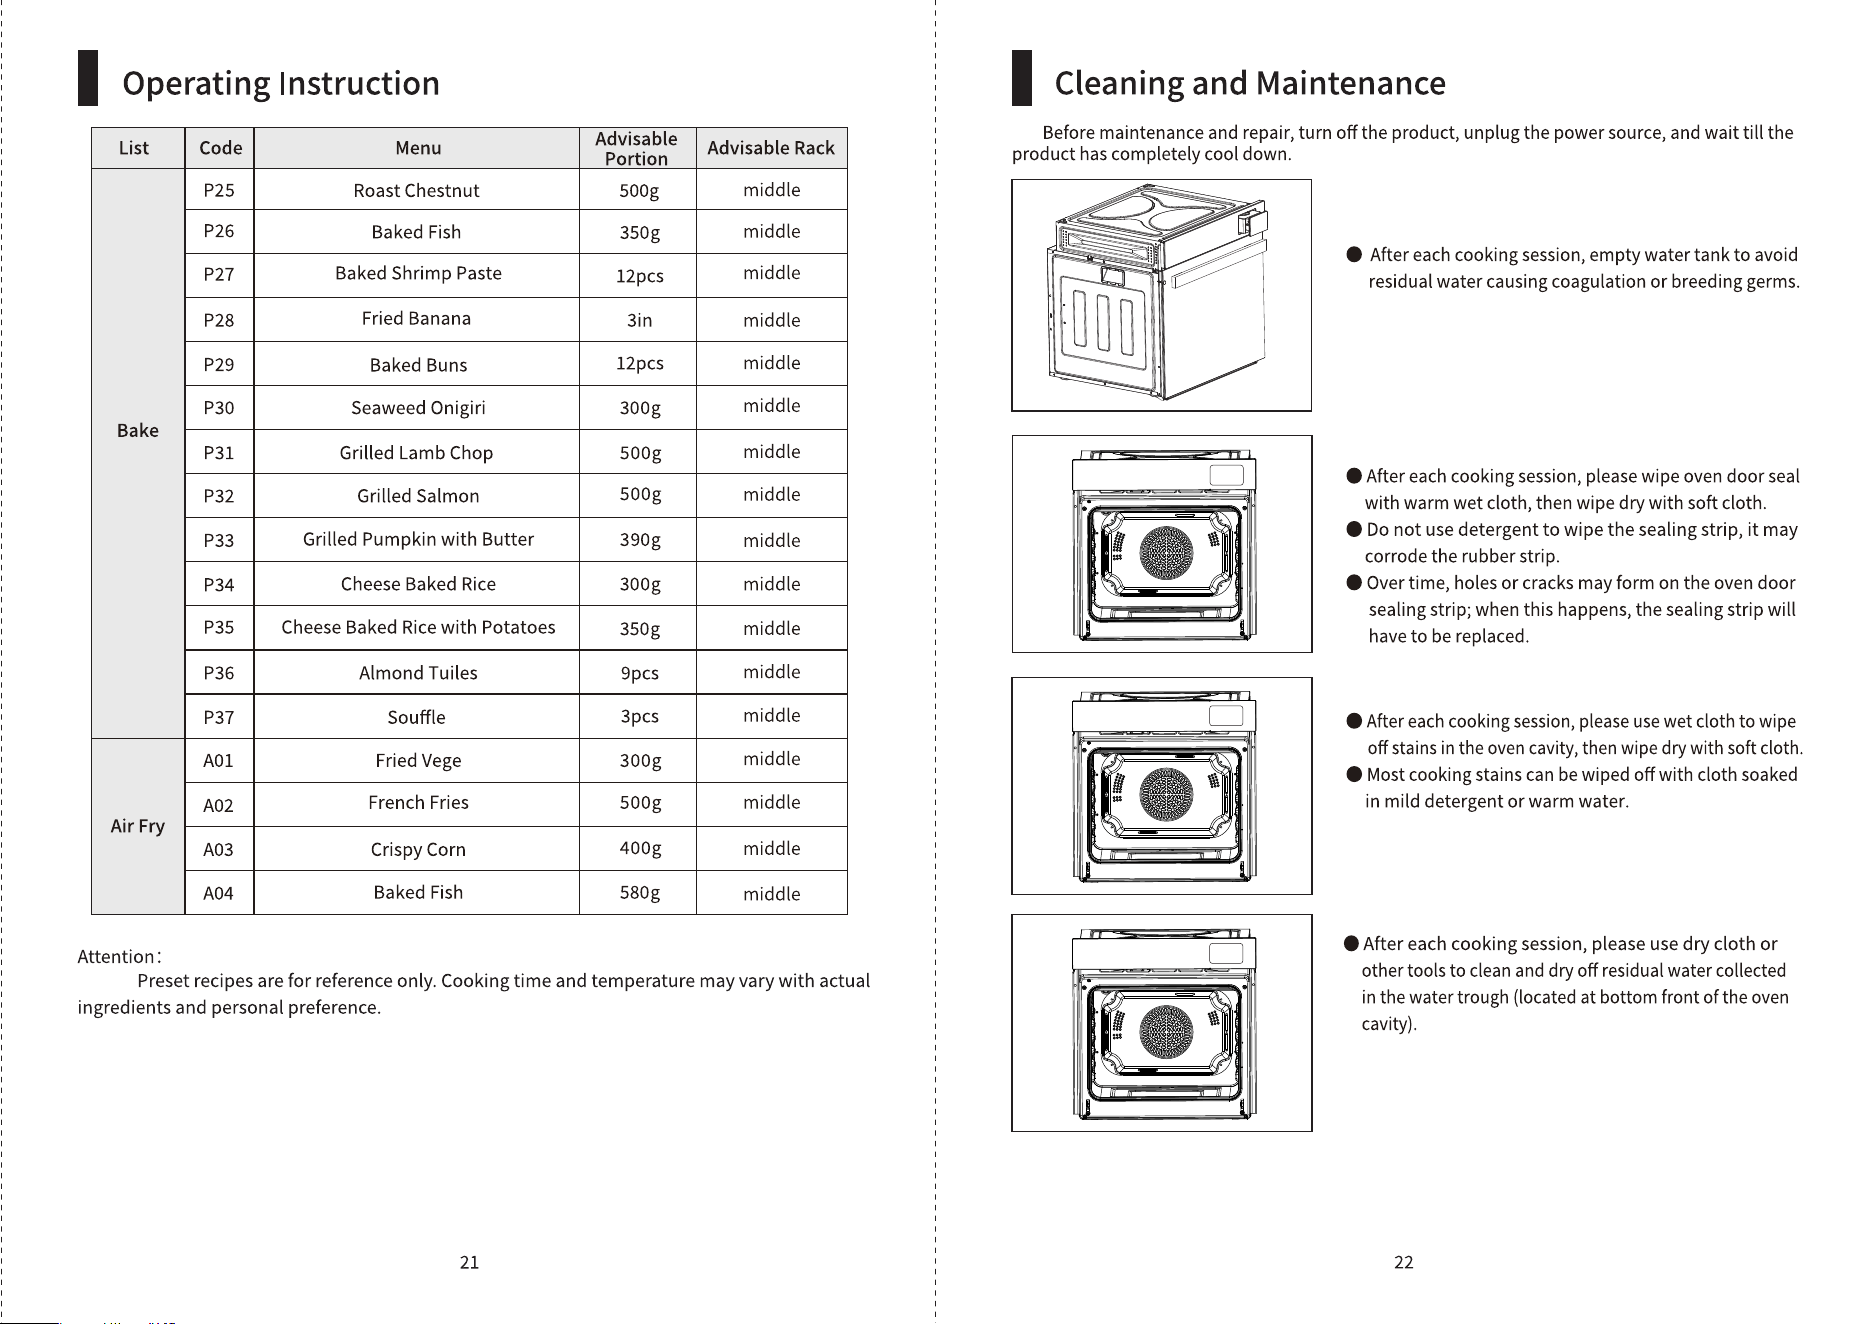
● Before maintenance work, turn off the product and unplug product from power source.
● This product must be installed and repaired by the manufacturer’s authorized after-sales
personnel only; if consumers entrust personnel not designated by the manufacturer, or if
consumers perform reparation work on their own, there may be a risk of personal injury or
property loss.
ERROR CODE POSSIBLE CAUSE SOLUTION
E1
E2
E3
E4
Temperature Sensor may
be open circuit
Steam generator may
be damaged
Contact Customer Service & Repair Centre
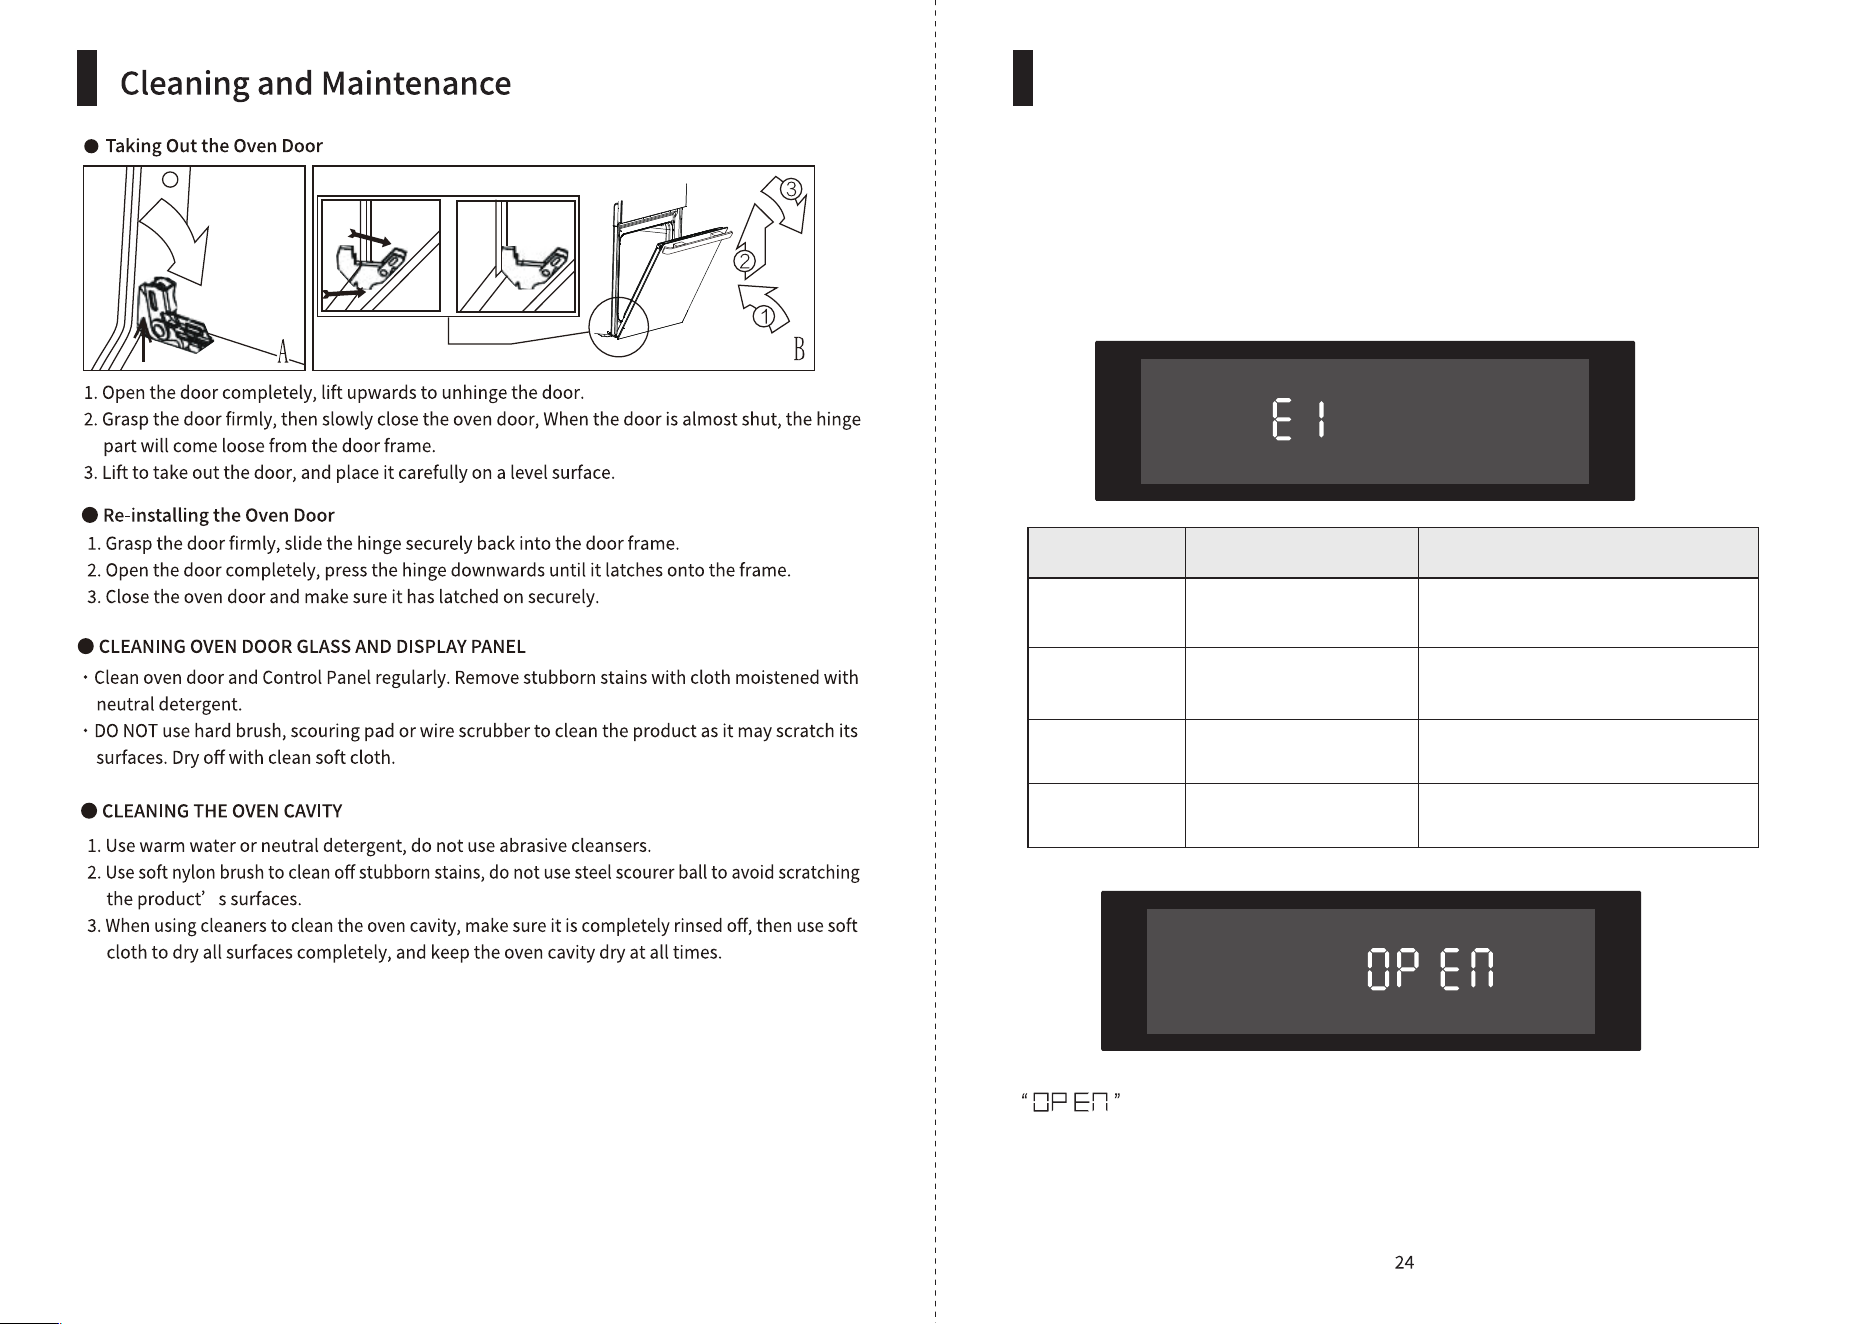
Oven door is open during cooking, Close oven door properly
Circuitry may be damaged
Heating elements may
be damaged
Contact Customer Service & Repair Centre
Contact Customer Service & Repair Centre
Contact Customer Service & Repair Centre
Troubleshooting