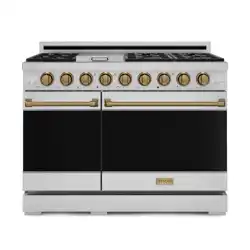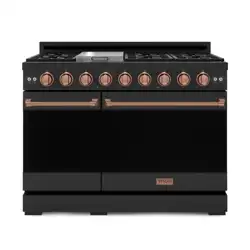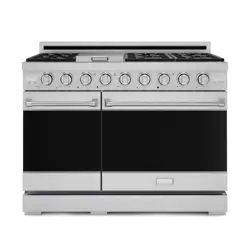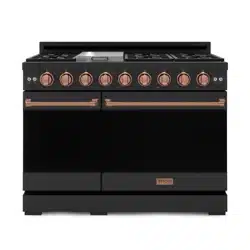
USE + CARE
MANUAL
REV.042026
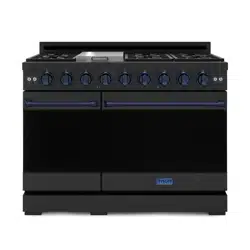
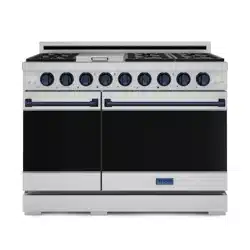
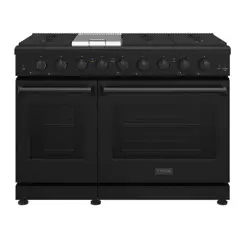
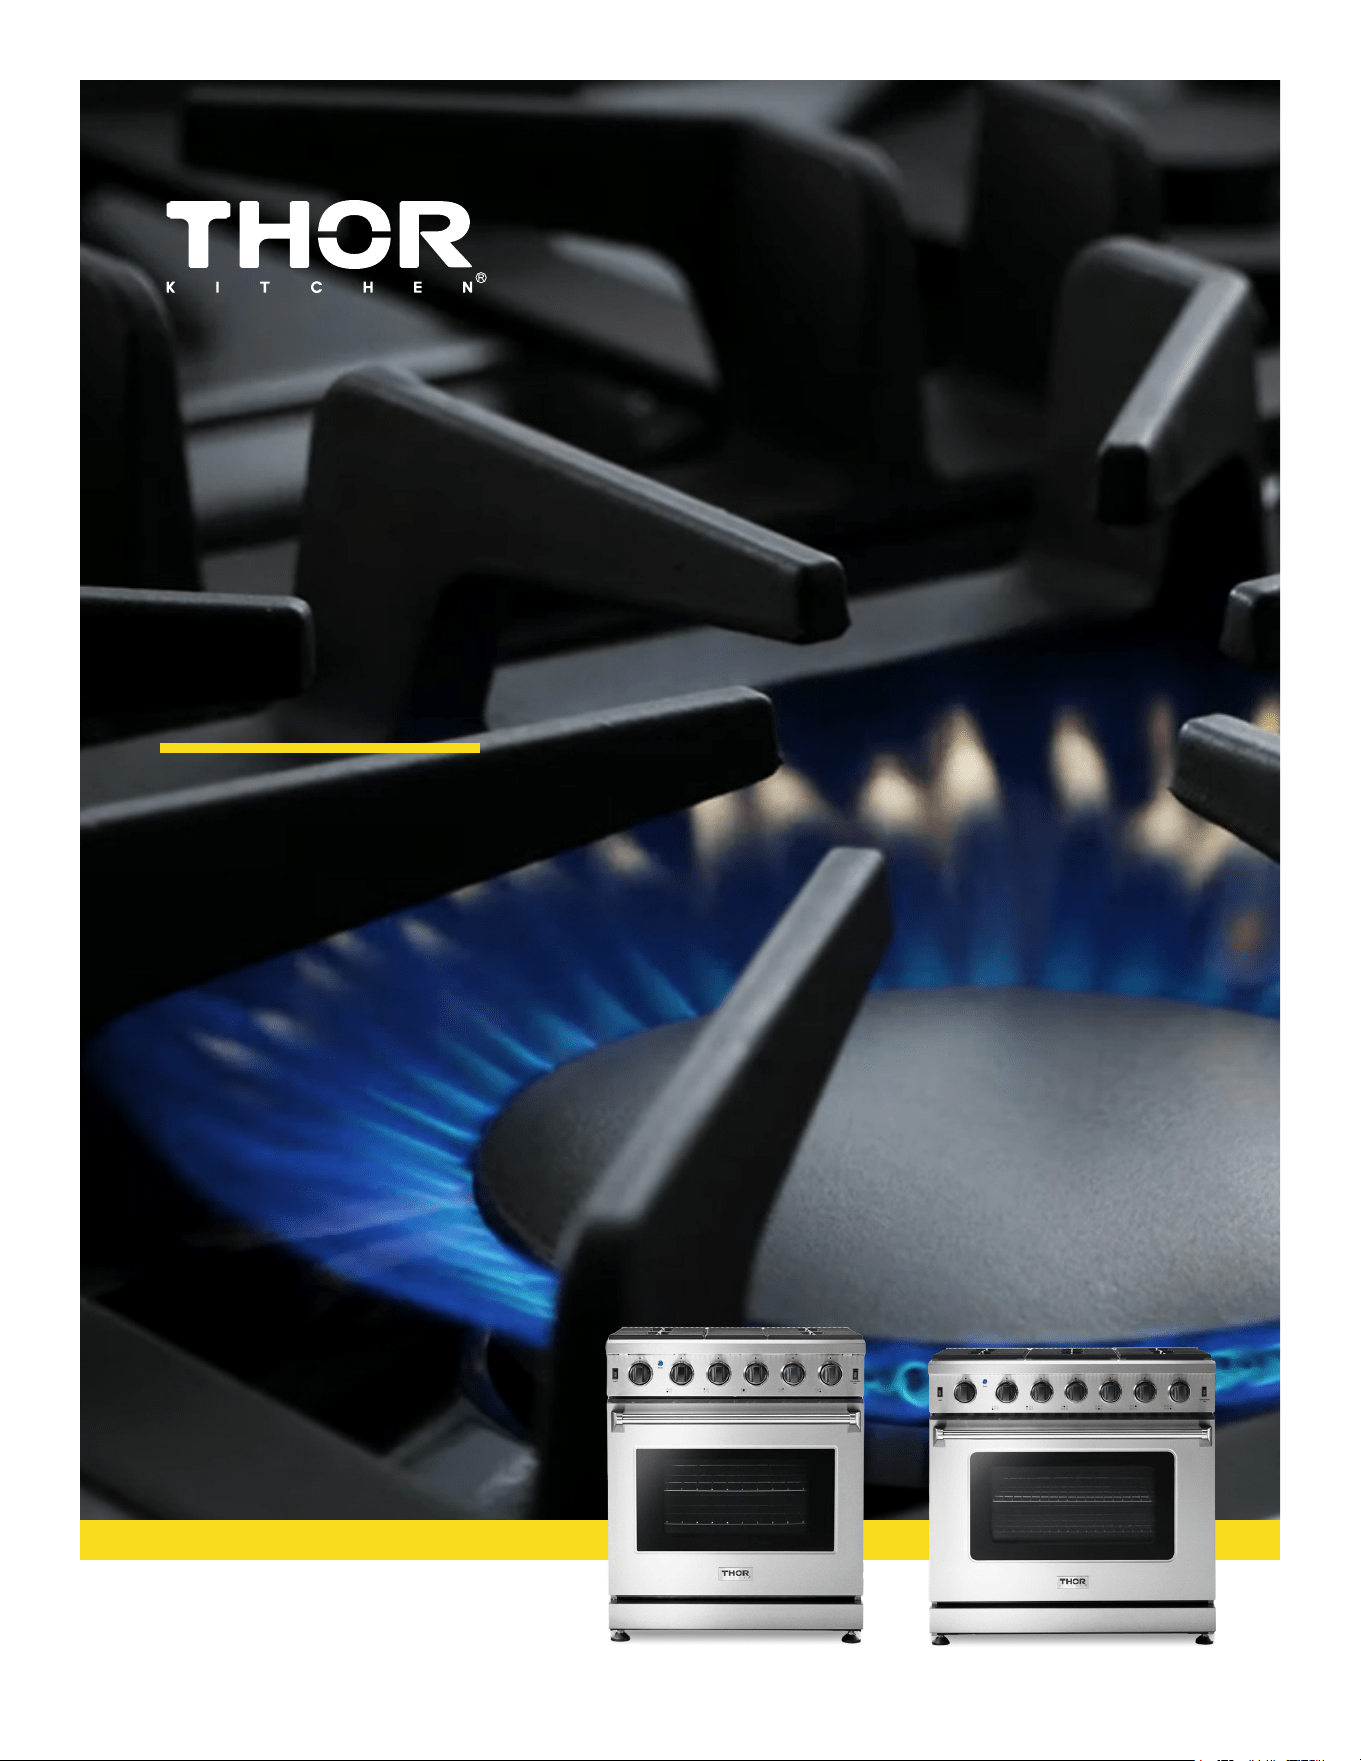
GAS RANGES LRG MODELS
LRG2401U | LRG3001U
LRG3601U | LRG4807U

USE & CARE MANUAL
GAS RANGES
LRG MODELS
LRG2401U | LRG3001U
LRG3601U | LRG4807U

Thank you for choosing THOR KITCHEN. This product has been manufactured by Thor International,
10830 Ada Ave, Montclair, CA 91762. This manual contains all the information you will need to install /
use the product correctly and safely. Please read all the instructions prior using the product, and keep
this manual in a secure place for future reference. Do not remove the attached adhesive identification
label containing code, model number, manufacturer and other information from the product. This label
will be used by the THOR KITCHEN authorized service representative in the event that your product needs
servicing.
Nous vous remercions d’avoir choisi THOR KITCHEN. Cet appareil a été fabriqué par Thor International,
10830 Ada Ave, Montclair, CA 91762. Le présent manuel contient l’intégralité des consignes dont vous
aurez besoin pour installer l’appareil correctement et en toute sécurité. Veuillez lire l’intégralité des
consignes avant installation de l’appareil, puis conservez le présent manuel en lieu sûr afin de pouvoir
vous y référer ultérieurement. Ne pas retirer de l’appareil l’étiquette d’identification adhésive qui contient
le code, le numéro de modèle, le nom du fabricant et toutes autres informations. Ladite étiquette sera
utilisée par le représentant du service après-vente agréé de THOR KITCHEN au cas où votre appareil
nécessiterait réparation ou entretien.
Gracias por elegir a THOR KITCHEN. Este electrodoméstico fue fabricado por Thor International, 10830
Ada Ave, Montclair, CA 91762. Este manual contiene toda la información que necesitará para instalar y
usar el electrodoméstico de manera adecuada y segura. Lea todas las instrucciones antes de instalar
el electrodoméstico, y mantenga este manual en un lugar seguro para usarlo como referencia a futuro.
No quite la etiqueta de identificación adhesiva que contiene el código, número de modelo, fabricante y
otros datos del electrodoméstico. El representante de servicio autorizado por THOR KITCHEN usará esta
etiqueta en caso de que su electrodoméstico requiera reparaciones.

1
TABLE OF CONTENTS
IMPORTANT INSTRUCTION . . . . . . . . . . . . . . . . . . . . . . . . . . . . . . . . . . . . . . . . . . . . . . . . . . . . . . . . . . . . . . . . . . . . . . . 2
1.1 Critical safety information . . . . . . . . . . . . . . . . . . . . . . . . . . . . . . . . . . . . . . . . . . . . . . . . . . . . . . . . . . . . . . . . . . . . 2
1.2 Signal words explanation . . . . . . . . . . . . . . . . . . . . . . . . . . . . . . . . . . . . . . . . . . . . . . . . . . . . . . . . . . . . . . . . . . . . . 3
1.3 Intended use . . . . . . . . . . . . . . . . . . . . . . . . . . . . . . . . . . . . . . . . . . . . . . . . . . . . . . . . . . . . . . . . . . . . . . . . . . . . . . . . 3
1.4 IMPORTANT INSTRUCTION . . . . . . . . . . . . . . . . . . . . . . . . . . . . . . . . . . . . . . . . . . . . . . . . . . . . . . . . . . . . . . . . . . . 4
DELIVERY . . . . . . . . . . . . . . . . . . . . . . . . . . . . . . . . . . . . . . . . . . . . . . . . . . . . . . . . . . . . . . . . . . . . . . . . . . . . . . . . . . . . . . . . 7
1.5 Appliance description . . . . . . . . . . . . . . . . . . . . . . . . . . . . . . . . . . . . . . . . . . . . . . . . . . . . . . . . . . . . . . . . . . . . . . . . 7
COOKTOP FUNCTIONS . . . . . . . . . . . . . . . . . . . . . . . . . . . . . . . . . . . . . . . . . . . . . . . . . . . . . . . . . . . . . . . . . . . . . . . . . . . 15
2.1 Safety guidelines . . . . . . . . . . . . . . . . . . . . . . . . . . . . . . . . . . . . . . . . . . . . . . . . . . . . . . . . . . . . . . . . . . . . . . . . . . . 15
2.2 Usage Tips . . . . . . . . . . . . . . . . . . . . . . . . . . . . . . . . . . . . . . . . . . . . . . . . . . . . . . . . . . . . . . . . . . . . . . . . . . . . . . . . . 16
2.3 Matching burner knob to the burners. . . . . . . . . . . . . . . . . . . . . . . . . . . . . . . . . . . . . . . . . . . . . . . . . . . . . . . . . 17
2.4 Igniting a burner. . . . . . . . . . . . . . . . . . . . . . . . . . . . . . . . . . . . . . . . . . . . . . . . . . . . . . . . . . . . . . . . . . . . . . . . . . . . 17
2.5 Using the griddle (LRG4807U only) . . . . . . . . . . . . . . . . . . . . . . . . . . . . . . . . . . . . . . . . . . . . . . . . . . . . . . . . . . . 17
OVEN FUNCTIONS . . . . . . . . . . . . . . . . . . . . . . . . . . . . . . . . . . . . . . . . . . . . . . . . . . . . . . . . . . . . . . . . . . . . . . . . . . . . . . . 17
3.1 Safety guidelines . . . . . . . . . . . . . . . . . . . . . . . . . . . . . . . . . . . . . . . . . . . . . . . . . . . . . . . . . . . . . . . . . . . . . . . . . . . 17
3.2 Using the accessories. . . . . . . . . . . . . . . . . . . . . . . . . . . . . . . . . . . . . . . . . . . . . . . . . . . . . . . . . . . . . . . . . . . . . . . 19
3.3 Oven light . . . . . . . . . . . . . . . . . . . . . . . . . . . . . . . . . . . . . . . . . . . . . . . . . . . . . . . . . . . . . . . . . . . . . . . . . . . . . . . . . . 20
3.4 Defrosting. . . . . . . . . . . . . . . . . . . . . . . . . . . . . . . . . . . . . . . . . . . . . . . . . . . . . . . . . . . . . . . . . . . . . . . . . . . . . . . . . . 21
3.5 Preheating . . . . . . . . . . . . . . . . . . . . . . . . . . . . . . . . . . . . . . . . . . . . . . . . . . . . . . . . . . . . . . . . . . . . . . . . . . . . . . . . . 21
3.6 Baking . . . . . . . . . . . . . . . . . . . . . . . . . . . . . . . . . . . . . . . . . . . . . . . . . . . . . . . . . . . . . . . . . . . . . . . . . . . . . . . . . . . . . 21
3.7 Convection baking . . . . . . . . . . . . . . . . . . . . . . . . . . . . . . . . . . . . . . . . . . . . . . . . . . . . . . . . . . . . . . . . . . . . . . . . . . 21
3.8 Broiling . . . . . . . . . . . . . . . . . . . . . . . . . . . . . . . . . . . . . . . . . . . . . . . . . . . . . . . . . . . . . . . . . . . . . . . . . . . . . . . . . . . . 22
CLEANING . . . . . . . . . . . . . . . . . . . . . . . . . . . . . . . . . . . . . . . . . . . . . . . . . . . . . . . . . . . . . . . . . . . . . . . . . . . . . . . . . . . . . . 22
4.1 General cleaning . . . . . . . . . . . . . . . . . . . . . . . . . . . . . . . . . . . . . . . . . . . . . . . . . . . . . . . . . . . . . . . . . . . . . . . . . . . 22
4.2 Cooktop. . . . . . . . . . . . . . . . . . . . . . . . . . . . . . . . . . . . . . . . . . . . . . . . . . . . . . . . . . . . . . . . . . . . . . . . . . . . . . . . . . . . 23
4.3 Oven . . . . . . . . . . . . . . . . . . . . . . . . . . . . . . . . . . . . . . . . . . . . . . . . . . . . . . . . . . . . . . . . . . . . . . . . . . . . . . . . . . . . . . . 23
4.4 Baking accessories . . . . . . . . . . . . . . . . . . . . . . . . . . . . . . . . . . . . . . . . . . . . . . . . . . . . . . . . . . . . . . . . . . . . . . . . . 24
MAINTENANCE. . . . . . . . . . . . . . . . . . . . . . . . . . . . . . . . . . . . . . . . . . . . . . . . . . . . . . . . . . . . . . . . . . . . . . . . . . . . . . . . . . 25
5.1 Maintenance guidelines . . . . . . . . . . . . . . . . . . . . . . . . . . . . . . . . . . . . . . . . . . . . . . . . . . . . . . . . . . . . . . . . . . . . . 25
5.2 Purchase replacement parts. . . . . . . . . . . . . . . . . . . . . . . . . . . . . . . . . . . . . . . . . . . . . . . . . . . . . . . . . . . . . . . . . 25
5.3 Change the light bulb . . . . . . . . . . . . . . . . . . . . . . . . . . . . . . . . . . . . . . . . . . . . . . . . . . . . . . . . . . . . . . . . . . . . . . . 26
TROUBLESHOOTING. . . . . . . . . . . . . . . . . . . . . . . . . . . . . . . . . . . . . . . . . . . . . . . . . . . . . . . . . . . . . . . . . . . . . . . . . . . . . 27
6.1 Cooktop. . . . . . . . . . . . . . . . . . . . . . . . . . . . . . . . . . . . . . . . . . . . . . . . . . . . . . . . . . . . . . . . . . . . . . . . . . . . . . . . . . . . 27
6.2 Oven . . . . . . . . . . . . . . . . . . . . . . . . . . . . . . . . . . . . . . . . . . . . . . . . . . . . . . . . . . . . . . . . . . . . . . . . . . . . . . . . . . . . . . . 28
WARRANTY . . . . . . . . . . . . . . . . . . . . . . . . . . . . . . . . . . . . . . . . . . . . . . . . . . . . . . . . . . . . . . . . . . . . . . . . . . . . . . . . . . . . . 30
2
IMPORTANT INSTRUCTION
1.1 Critical safety information
WARNING: If the information in these instructions is not followed exactly,
a fire or explosion can result causing property damage, personal injury,
or death.
- Do not store or use gasoline or other flammable vapors and liquids in the
vicinity of this or any other appliance.
- WHAT TO DO IF YOU SMELL GAS:
•
Do not try to light any appliance.
•
Do not touch any electrical switch.
•
Do not use any phone in your building.
•
Immediately call your gas supplier from a neighbor's phone. Follow the
gas supplier's instructions.
•
If you cannot reach your gas supplier, call the fire department.
- Installation and service must be performed by a qualified installer,
service agency, or the gas supplier.
WARNING
Never Operate the Top Surface Cooking Section of this Appliance
Unattended.
•
Failure to follow this warning statement could result in fire,
explosion, or burn hazard that could cause property damage,
personal injury, or death.
•
If a fire should occur, keep away from the appliance and immediately
call your fire department.
DO NOT ATTEMPT TO EXTINGUISH AN OIL/GREASE FIRE WITH WATER.
WARNING
NEVER use this appliance as a space heater to heat or warm the room.
Doing so can result in carbon monoxide poisoning and overheating of
the oven.
3
IMPORTANT INSTRUCTION
WARNING
•
A child or adult can tip the appliance and be killed.
•
Install the anti-tip device to the wall/floor (see Installation manual). Verify the anti-tip device has
been properly installed and engaged with the back of the appliance.
•
Engage the appliance to the anti-tip device by pushing that appliance all the way into the installation
location. Ensure the anti-tip device is re-engaged when the appliance is moved.
•
Re-engage the anti-tip device if the appliance is moved. Do not operate the appliance without the anti-
tip device in place and engaged.
•
See installation instructions for details.
•
Failure to do so can result in death or serious burns to children or adults.
To check the installation of the anti-tip device:
1. Remove any items on the cooktop (21).
2. Grasp the top rear edge of the appliance and carefully attempt to tilt it forward.
3. Verify that the anti-tip device is engaged.
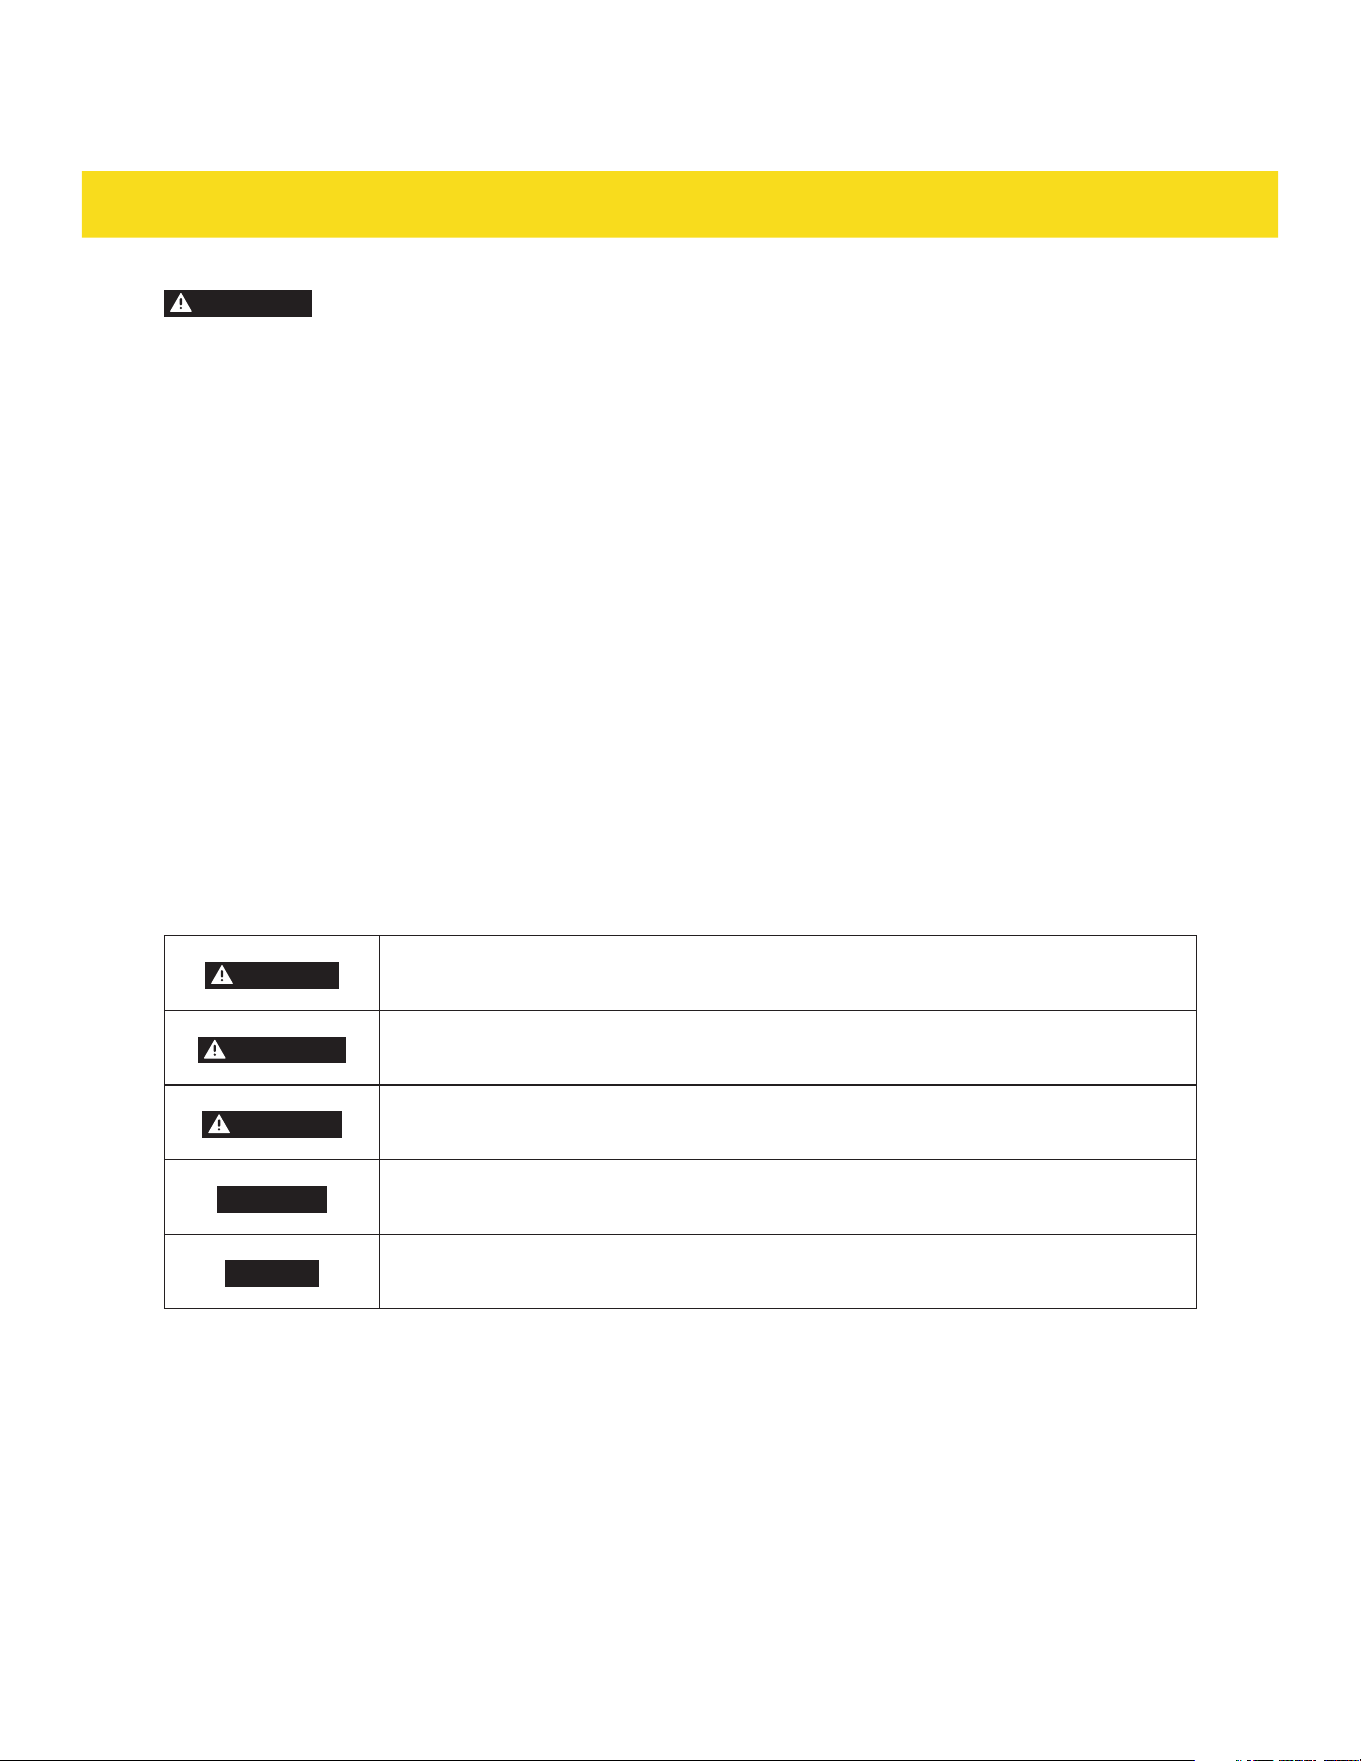
1.2 Signal words explanation
The following signal words are used in this manual
DANGER
This signal word indicates a hazardous situation which, if not avoided, will result
in death or serious injury.
WARNING
This signal word indicates a hazardous situation which, if not avoided, could
result in death or serious injury.
CAUTION
This signal word indicates a hazardous situation which, if not avoided, could
result in minor or moderate injury.
CAUTION
This signal word indicates a hazardous situation which, if not avoided, could
result in property damage.
NOTICE
This signal word is a preferred signal word to address tips and practices not
related to personal injury.
1.3 Intended use
•
This appliance is intended for cooking and preparing food.
•
This appliance is intended for household use only.
•
This appliance is intended to be used in dry indoor areas only.
•
Only use the appliance as mentioned in this manual. Any other use is considered improper and may
result in damage to property or injury to persons.
•
Potential injury from improper use.
•
The manufacturer or vendor cannot be held liable for damages or injury incurred through improper or
incorrect use.

4
IMPORTANT INSTRUCTION
1.4 IMPORTANT INSTRUCTION
This user manual is part of this appliance, and contains important information on setup and use. Read
this manual carefully, especially the IMPORTANT INSTRUCTION chapter, before using the appliance.
Failure to do so may result in personal injury and/or damage to the appliance.
•
Keep this manual for future use and reference. Make sure to include this manual when passing the
appliance on to third parties. If you require a digital copy of this manual, please contact customer
service.
•
Installation of the appliance must conform with local codes or, in the absence of local codes, with
ANSI Z223.1/NFPA 54 or, in Canada, CSA B149.1.
•
It is recommended to electrically ground the appliance during installation in accordance with local
codes or, in the absence of local codes, with NFPA 70 or CSA C22.1.
•
The ventilation area is located at the back of the appliance. The back of the appliance should not be in
direct contact with a wall/surface. Install the back spacers to the back of the appliance to maintain a
proper area for ventilation.
•
In the event of a power failure, do not attempt to use the appliance. If the power fails, always turn the
oven off. If the oven is not turned off and the power returns, the oven my begin to operate again. Food
left unattended could catch fire or spoil.
•
The maximum depth of cabinets installed above the cooktop (21) is 13" (33 cm).
•
Seal any openings in the wall behind the appliance and in the floor under the appliance.
•
If there is a cabinet above the appliance, install a noncombustible material on the bottom if that
cabinet in accordance with local codes or, in the absence of local codes, with ANSI Z223.1/NFPA 54 or,
in Canada, CSA B149.1.
•
Proper Installation - Be sure your appliance is properly installed and grounded by a qualified
technician.
•
Never Use Your Appliance for Warming or Heating the Room.
•
Do Not Leave Children Alone - Children should not be left alone or unattended in area where
appliance is in use. They should never be allowed to sit or stand on any part of the appliance.
•
Wear Proper Apparel - Loose-fitting or hanging garments should never be worn while using the
appliance.
•
User Servicing - Do not repair or replace any part of the appliance unless specifically recommended
in the manual. All other servicing should be referred to a qualified technician.
•
Storage in or on Appliance - Flammable materials should not be stored in an oven or near surface
units.
•
Do Not Use Water on Grease Fires - Smother fire or flame or use dry chemical or foam-type
extinguisher.
•
Use Only Dry Potholders - Moist or damp potholders on hot surfaces may result in burns from steam.
Do not let potholder touch hot heating elements. Do not use a towel or other bulk cloth.
•
Use Proper Pan Size - The appliance is equipped with one or more surface units of different size.
Select utensils having flat bottoms large enough to cover the surface unit heating element. The use
of undersized utensils will expose a portion of the heating element to direct contact and may result in
ignition of clothing. Proper relationship of utensil to burner will also improve efficiency.
•
Never Leave Surface Units Unattended at High Heat Settings - Boilover causes smoking and greasy
spillovers that may ignite.

5
IMPORTANT INSTRUCTION
•
Protective Liners - Do not use aluminum foil to line surface unit drip bowls or oven bottoms, except as
suggested in the manual. Improper installation of these liners may result in a risk of electric shock,
or fire.
•
Glazed Cooking Utensils - Only certain types of glass, glass/ceramic, ceramic, earthenware, or other
glazed utensils are suitable for appliance-top service without breaking due to the sudden change in
temperature.
•
Utensil Handles Should Be Turned Inward and Not Extend Over Adjacent Surface units - To reduce
the risk of burns, ignition of flammable materials, and spillage due to unintentional contact with the
utensil, the handle of a utensil should be positioned so that it is turned inward, and does not extend
over adjacent surface units.
•
Do Not Soak Removable Heating Elements - Heating elements should never be immersed in water.
•
Use Care When Opening Door - Let hot air or steam escape before removing or replacing food.
•
Do Not Heat Unopened Food Containers - Build-up of pressure may cause container to burst and
result in injury.
•
Keep Oven Vent Ducts Unobstructed.
•
Placement of Oven Racks - Always place oven racks in desired location while oven is cool. If rack must
be moved while oven is hot, do not let potholder contact hot heating element in oven.
•
Do Not Clean Door Gasket - The door gasket is essentials for a good seal. Care should be taken not to
rub, damage, or move the gasket.
•
Do not use a protective coating to line the oven and do not use commercial oven cleaner.
•
Clean Only Parts Listed in Manual.
•
DO NOT TOUCH SURFACE UNITS OR AREAS NEAR SURFACES UNITS - Surface units may be hot
even though they are dark in color. Areas near surface units may become hot enough to cause burns.
During and after use, do not touch, or let clothing or other flammable materials contact surface units
or areas near units until they have had sufficient time to cool. Among these areas are the cook-top
and surfaces facing the cook-top.
•
DO NOT TOUCH HEATING ELEMENTS OR INTERIOR SURFACES OF OVEN - Heating elements may
be hot even though they are dark in color. Interior surfaces of an oven become hot enough to cause
burns. During and after use, do not touch, or let clothing or other flammable materials contact
heating elements or interior surfaces of oven until they have had sufficient time to cool. Other
surface of the appliance may become hot enough to cause burns - among these surface are oven vent
openings and surfaces near these openings, oven doors, and windows of oven doors.
WARNING
Risk of fire and damage! Placing aluminum foil directly on the heating elements of the
appliance can result in overheating, fires, and damage to the appliance. To prevent these
risks, ensure that there is a safe distance and avoid direct contact between the heating
elements and aluminum foil.
CAUTION
Risk of injury! Do not store items of interest to children in cabinets above a appliance or
on the backguard of a appliance - children climbing on the appliance to reach items could
be seriously injured.
•
It is recommended to disconnect the appliance and its individual shut-off valve from the gas supply
piping system during any pressure testing of the gas supply piping system at test pressures in excess
of 1/2 psi (3.5 kPa).
•
It is recommended to isolate the appliance from the gas supply piping system by closing its individual
shut-off valve during any pressure testing of the gas supply piping system at test pressures equal to
or less than of 1/2 psi (3.5 kPa).
6
IMPORTANT INSTRUCTION
•
The appliance should not be installed with a ventilation system that blows air downward toward the
appliance. This type of ventilation system may cause ignition and combustion problems with the gas
cooking appliance resulting in personal injury or unintended operation.
•
Do not use an air curtain or other overhead appliance hood (equipment that operates by blowing a
downward airflow onto a appliance) in conjunction with a gas appliance unless the hood and appliance
have been designed and tested in accordance with ANSI Z21.1 or CSA 1.1, and designed and tested for
combination use.
•
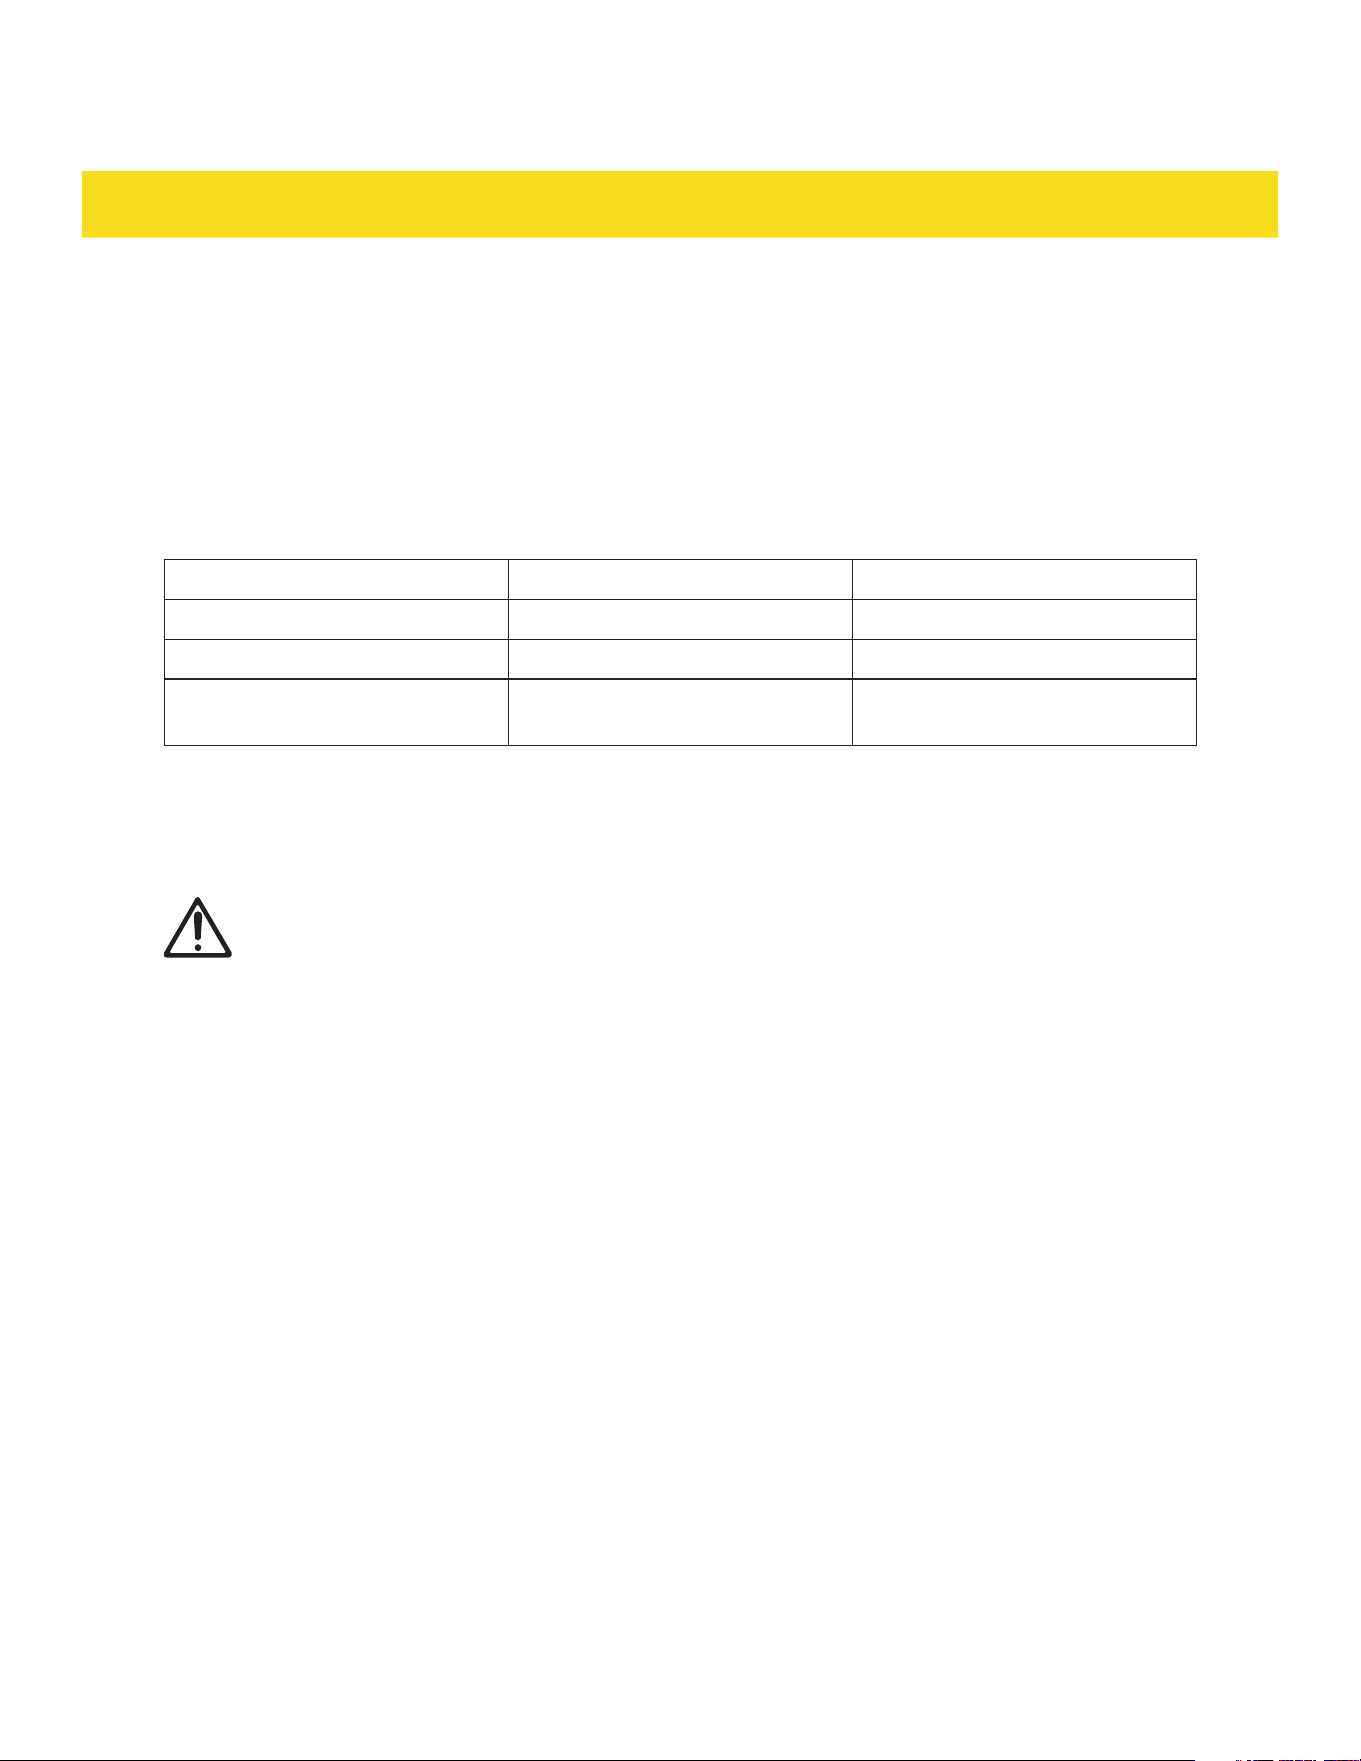
The maximum gas supply pressure, test pressure and the supplied pressure regulator setting of the
gas appliance supplied is as follows:
LP (Liquid Propane) in wc NG (Natural gas) in wc
Maximum gas supply pressure
13.0 10.0
Test pressure
≥11.0 ≥6.0
Appliance pressure regulator
setting for outlet pressure
10.0 5.0
•
Leak testing of the appliance shall be conducted in accordance with these instructions (see
Installation manual).
•
A manual valve has to be installed in an accessible location in the gas piping external to the appliance
for the purpose of turning on or shutting off the gas supply to the appliance.
WARNING
This appliance contains chemicals known to the State of California to cause cancer and/or
reproductive harm, and birth defects or other reproductive harm. For more information go to
www.P65Warnings.ca.gov.
COMMONWEALTH OF MASSACHUSETTS
•
Installations and repairs must be performed by a qualified or licensed contractor, plumber, or gas
fitter, qualified or licensed by the state, province, or region where this appliance is being installed.
•
Use only gas shut-off valves approved for use within the state, province, or region where this
appliance is being installed.
•
A flexible gas connector, when used, must not exceed 3' (0.9 m).
7
DELIVERY
1.5 Appliance description
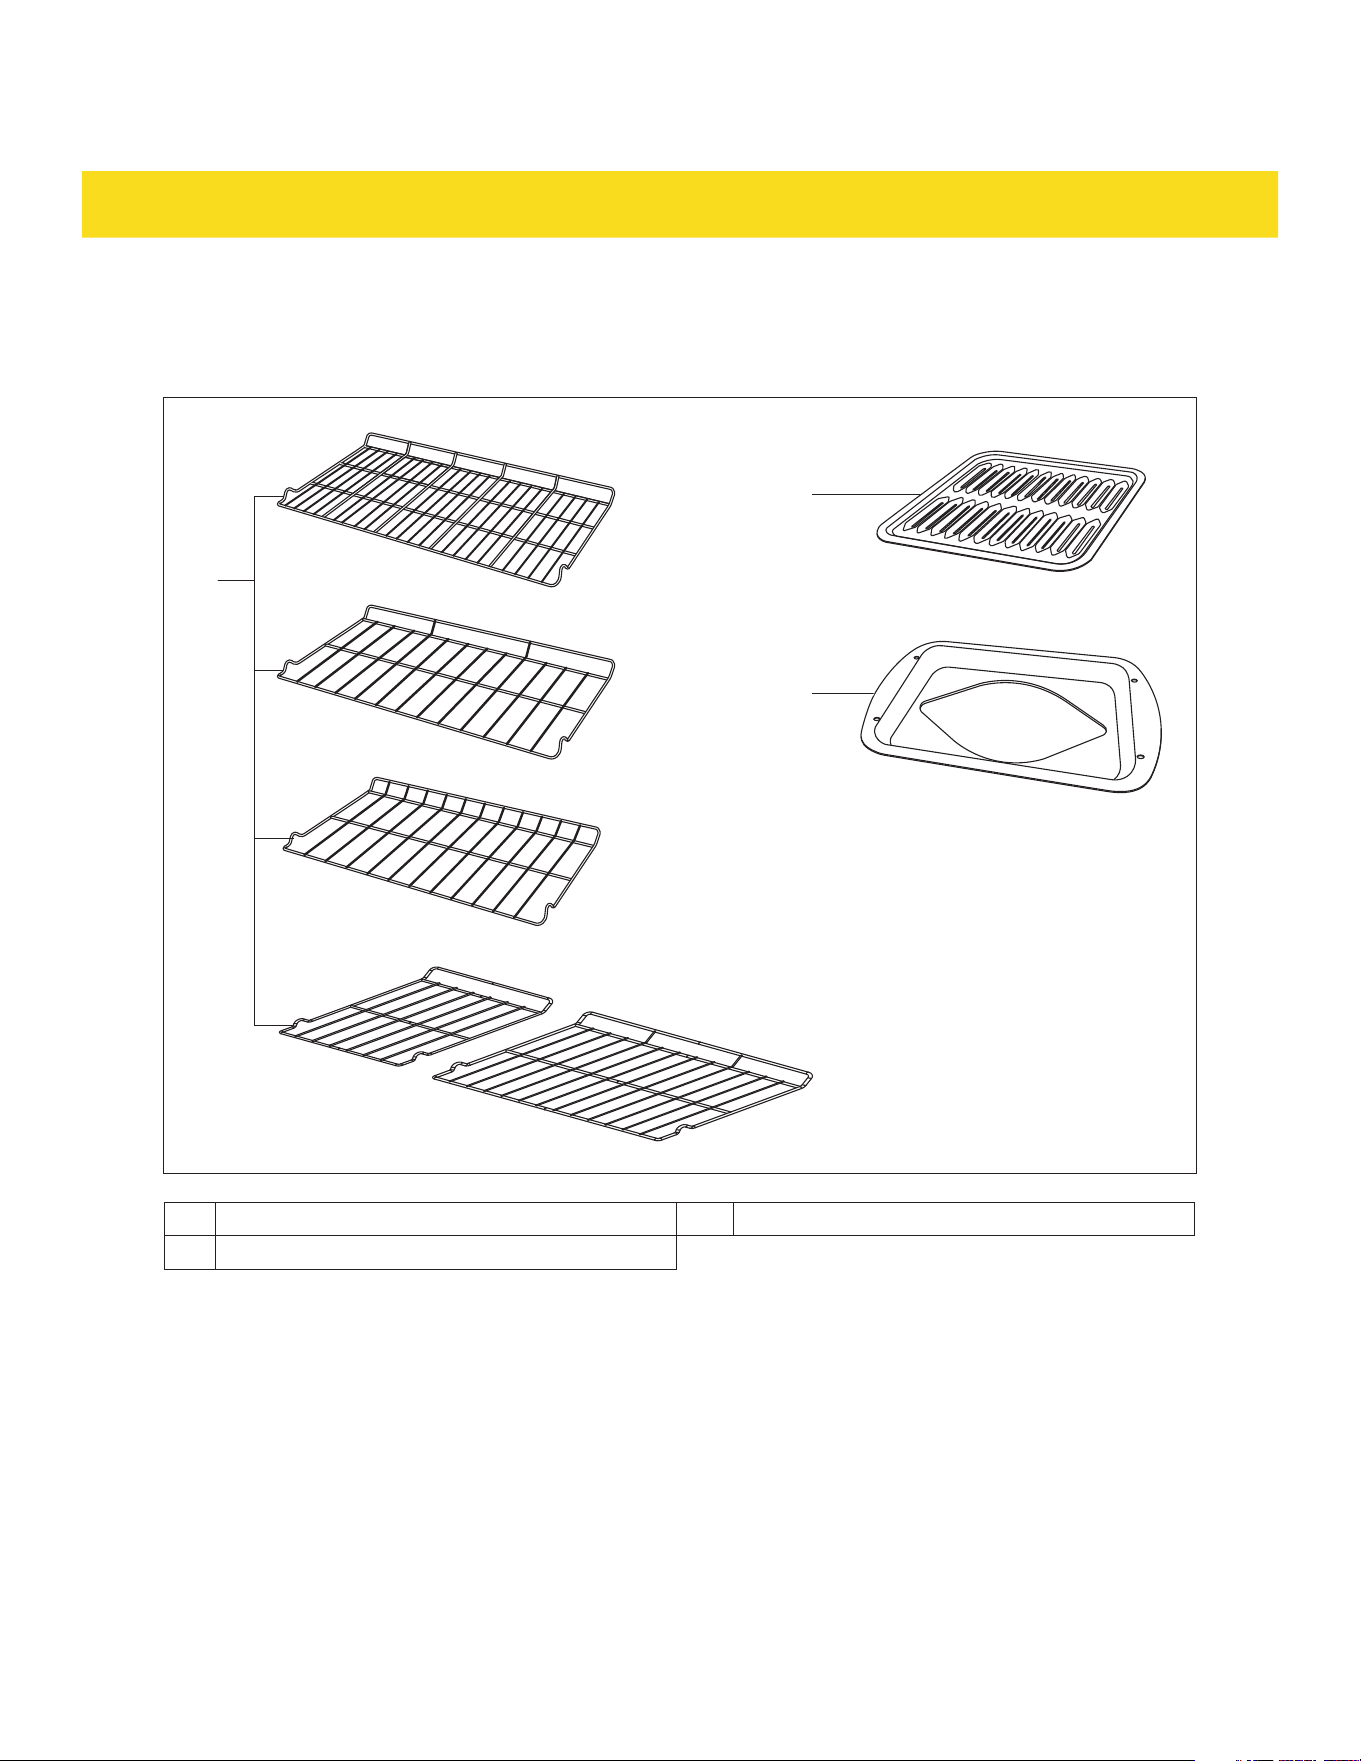
Baking accessories
10
9
8
2x for LRG3601U
2x for LRG3001U
2x for LRG2401U
2x for
LRG4807U
8 Oven rack 10 Broiler pan x 1
9 Grid x 1
8
DELIVERY
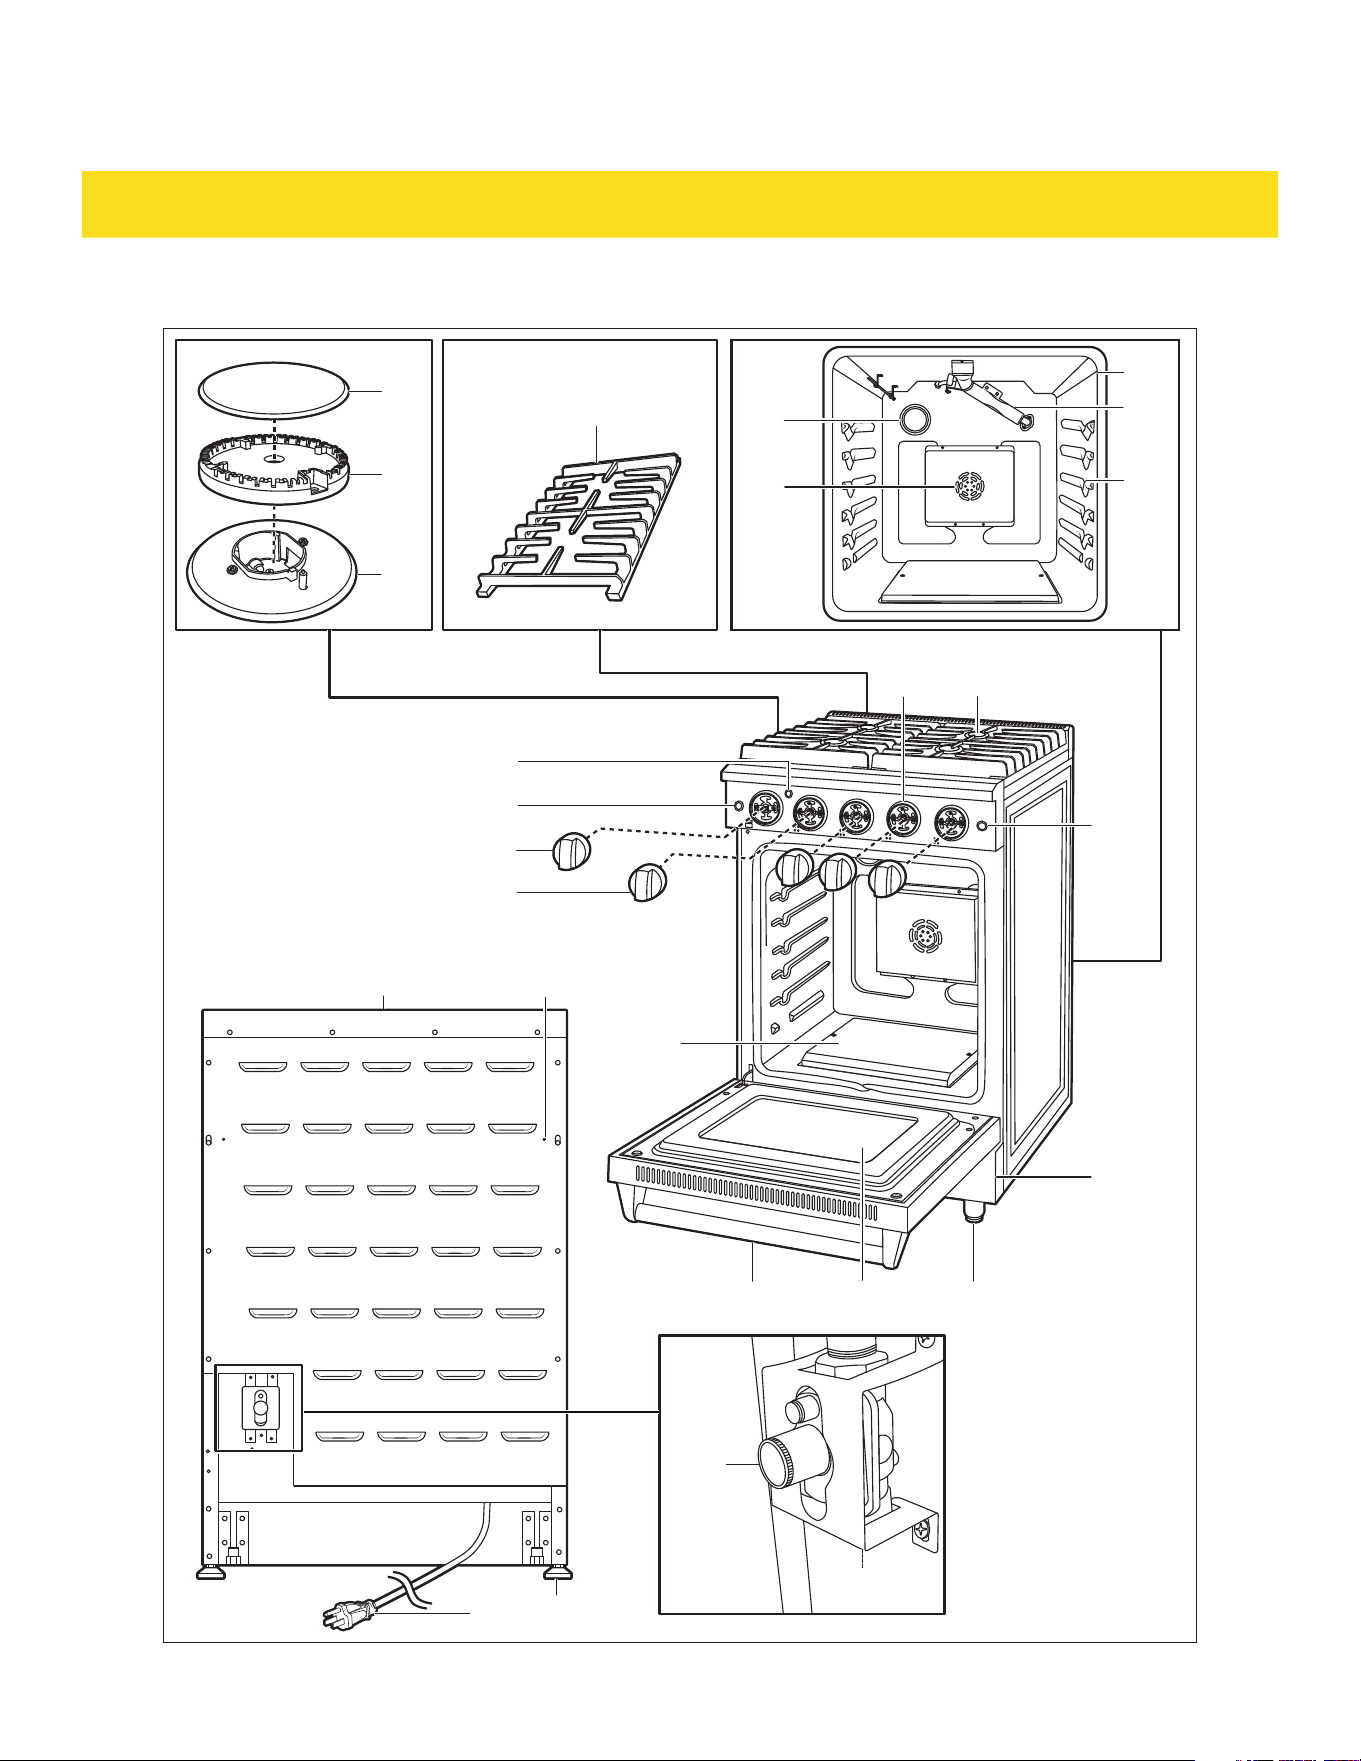
LRG2401U overview
11
12
13
22
23
37
16
15
17
18
19
14a
2120
29
28
27
30
31
26 25 24
36
34
3332
35
9
DELIVERY
11 Burner cap x 4 25 Viewing window
12 Burner head x 4 26 Oven door
13 Burner base 27 Oven burner cover
14a Cooking grate x 2 28 Burner knob x 4
15 Oven cavity 29 Oven knob
16 Broiler burner 30 Oven light switch
17 Rack positions 31 Oven on indicator
18 Convection fan 32 Vents
19 Oven light 33 Spacer holes
20 Knob shaft x 5 34 Gas inlet
21 Cooktop 35 Pressure regulator
22 Convection switch 36 Back foot x 2
23 Kickplate 37 Power cord with plug
24 Front foot x 2
10
DELIVERY
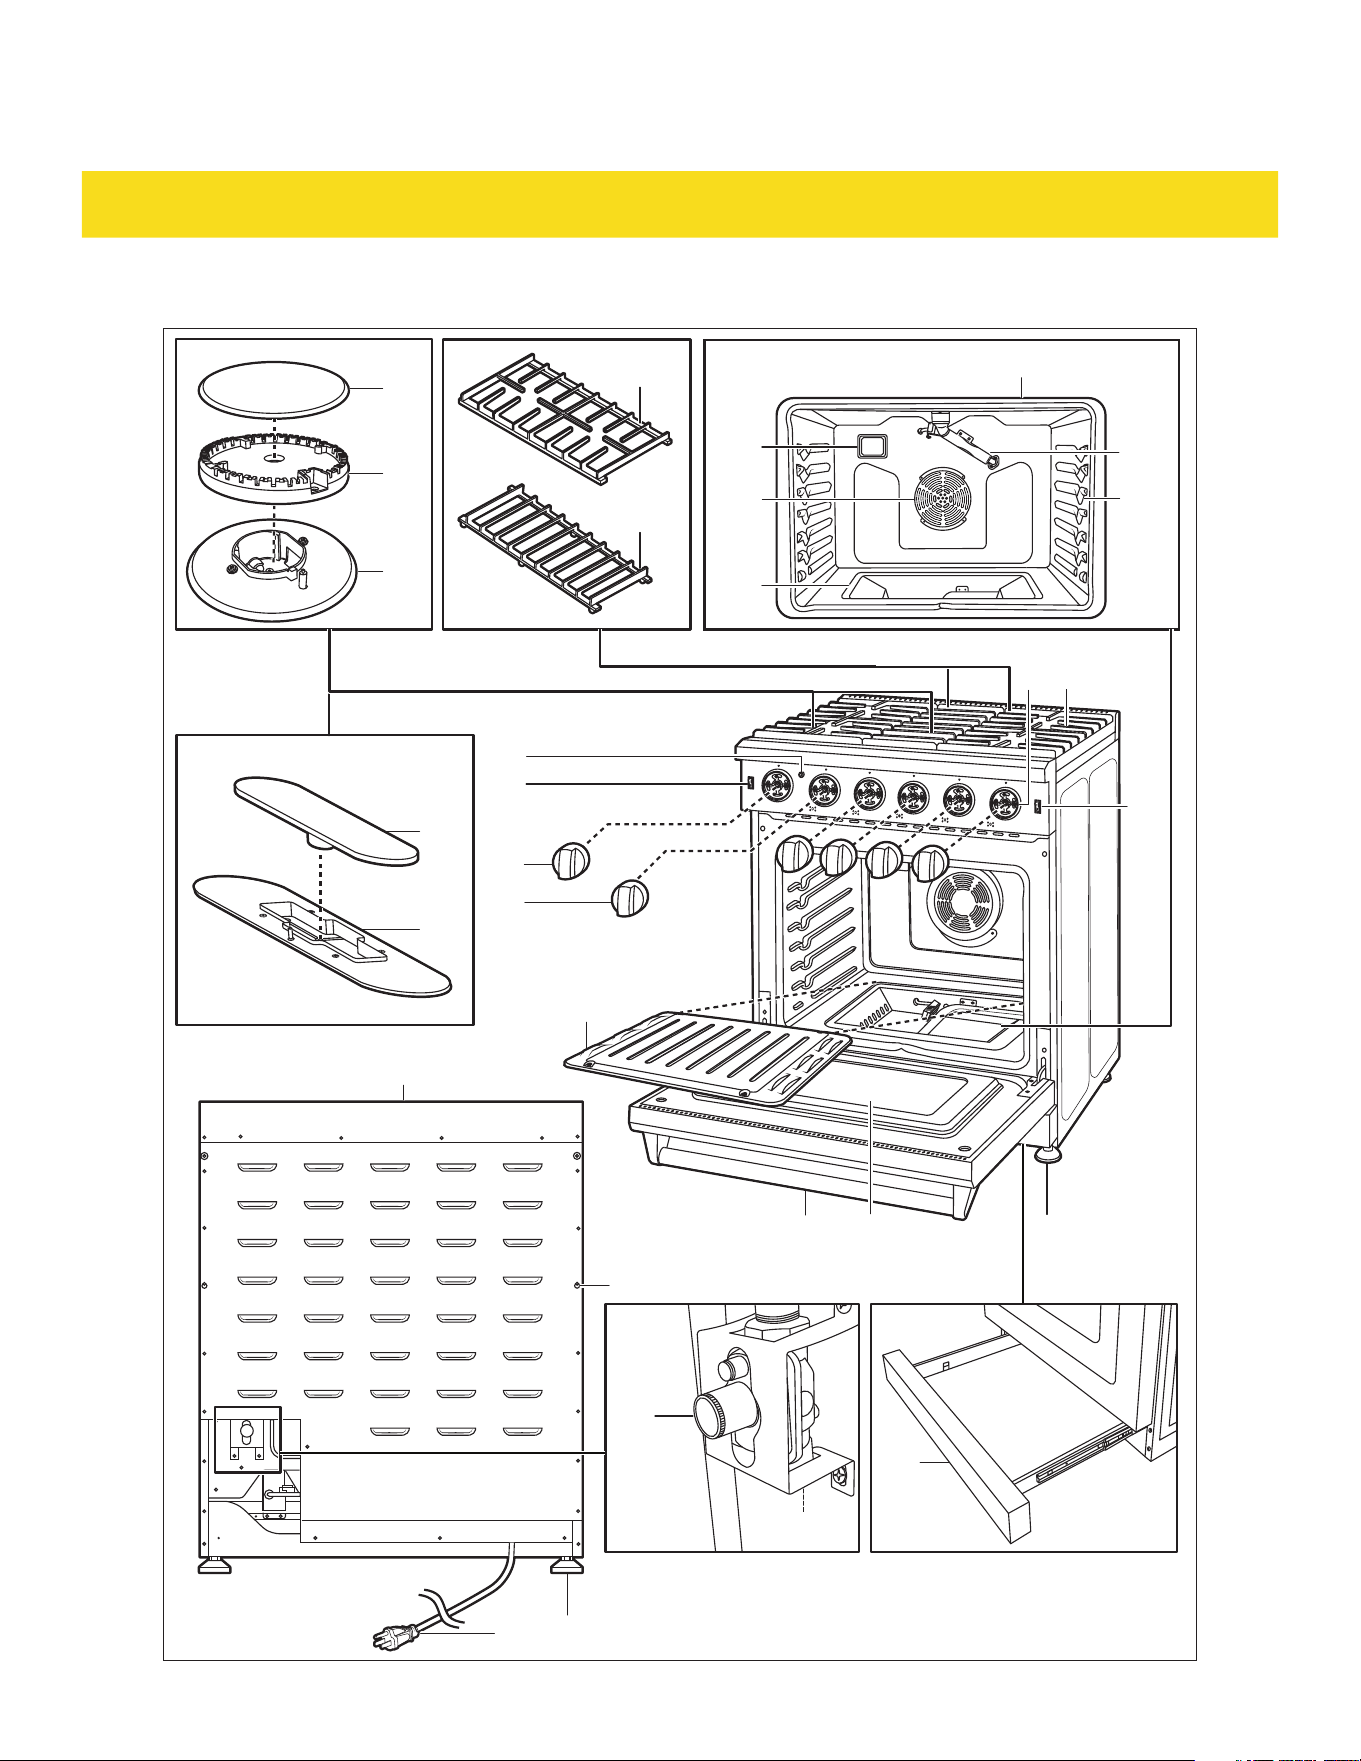
LRG3001U overview
11
12
13
20 21
15
14b
16
17
22
33
38
18
19
26 25 24
27
28
29
41
30
31
32
34
35
37 36
39
40
14

11
DELIVERY
11 Burner cap x 4 27 Oven burner cover
12 Burner head x 4 28 Burner knob x 4
13 Burner base 29 Oven knob
14 Cooking grate x 2 30 Oven light switch
14b Cooking grate (for oval burner) 31 Oven on indicator
15 Oven cavity 32 Vents
16 Broiler burner 33 Spacer holes
17 Rack positions 34 Gas inlet
18 Convection fan 35 Pressure regulator
19 Oven light 36 Back foot x 2
20 Knob shaft x 6 37 Power cord with plug
21 Cooktop 38 Oven burner
22 Convection switch 39 Oval burner cap
24 Front foot x 2 40 Oval burner base
25 Viewing window 41 Drawer
26 Oven door
12
DELIVERY
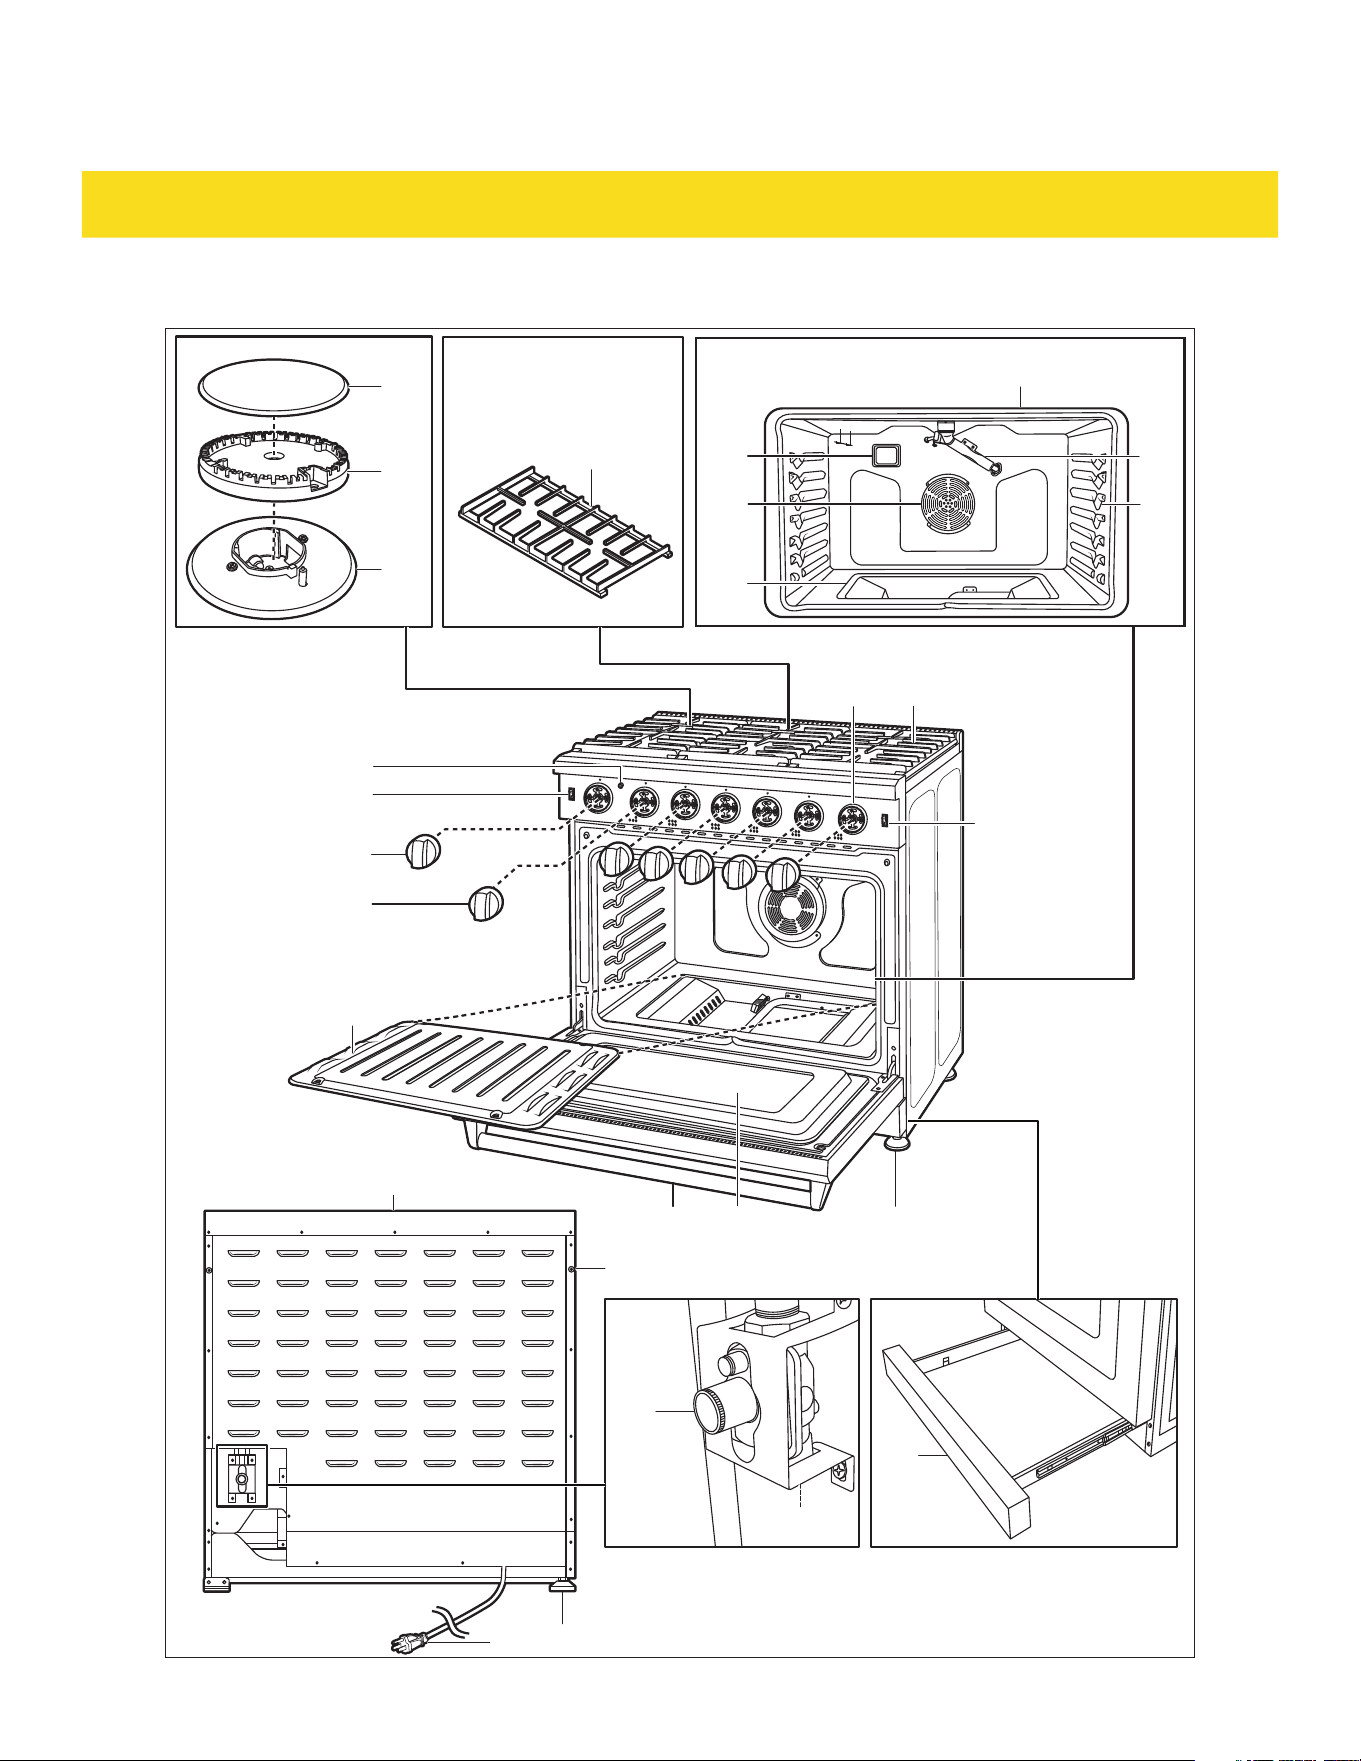
LRG3601U overview
11
12
13
20 21
15
14
16
17
22
33
38
18
19
26 25 24
27
28
29
41
30
31
32
34
35
37 36
13
DELIVERY
11 Burner cap x 6 26 Oven door
12 Burner head x 6 27 Oven burner cover
13 Burner base 28 Burner knob x 6
14 Cooking grate x 3 29 Oven knob
15 Oven cavity 30 Oven light switch
16 Broiler burner 31 Oven on indicator
17 Rack positions 32 Vents
18 Convection fan 33 Spacer holes
19 Oven light 34 Gas inlet
20 Knob shaft x 7 35 Pressure regulator
21 Cooktop 36 Back foot x 2
22 Convection switch 37 Power cord with plug
24 Front foot x 2 38 Oven burner
25 Viewing window 41 Drawer
14
DELIVERY
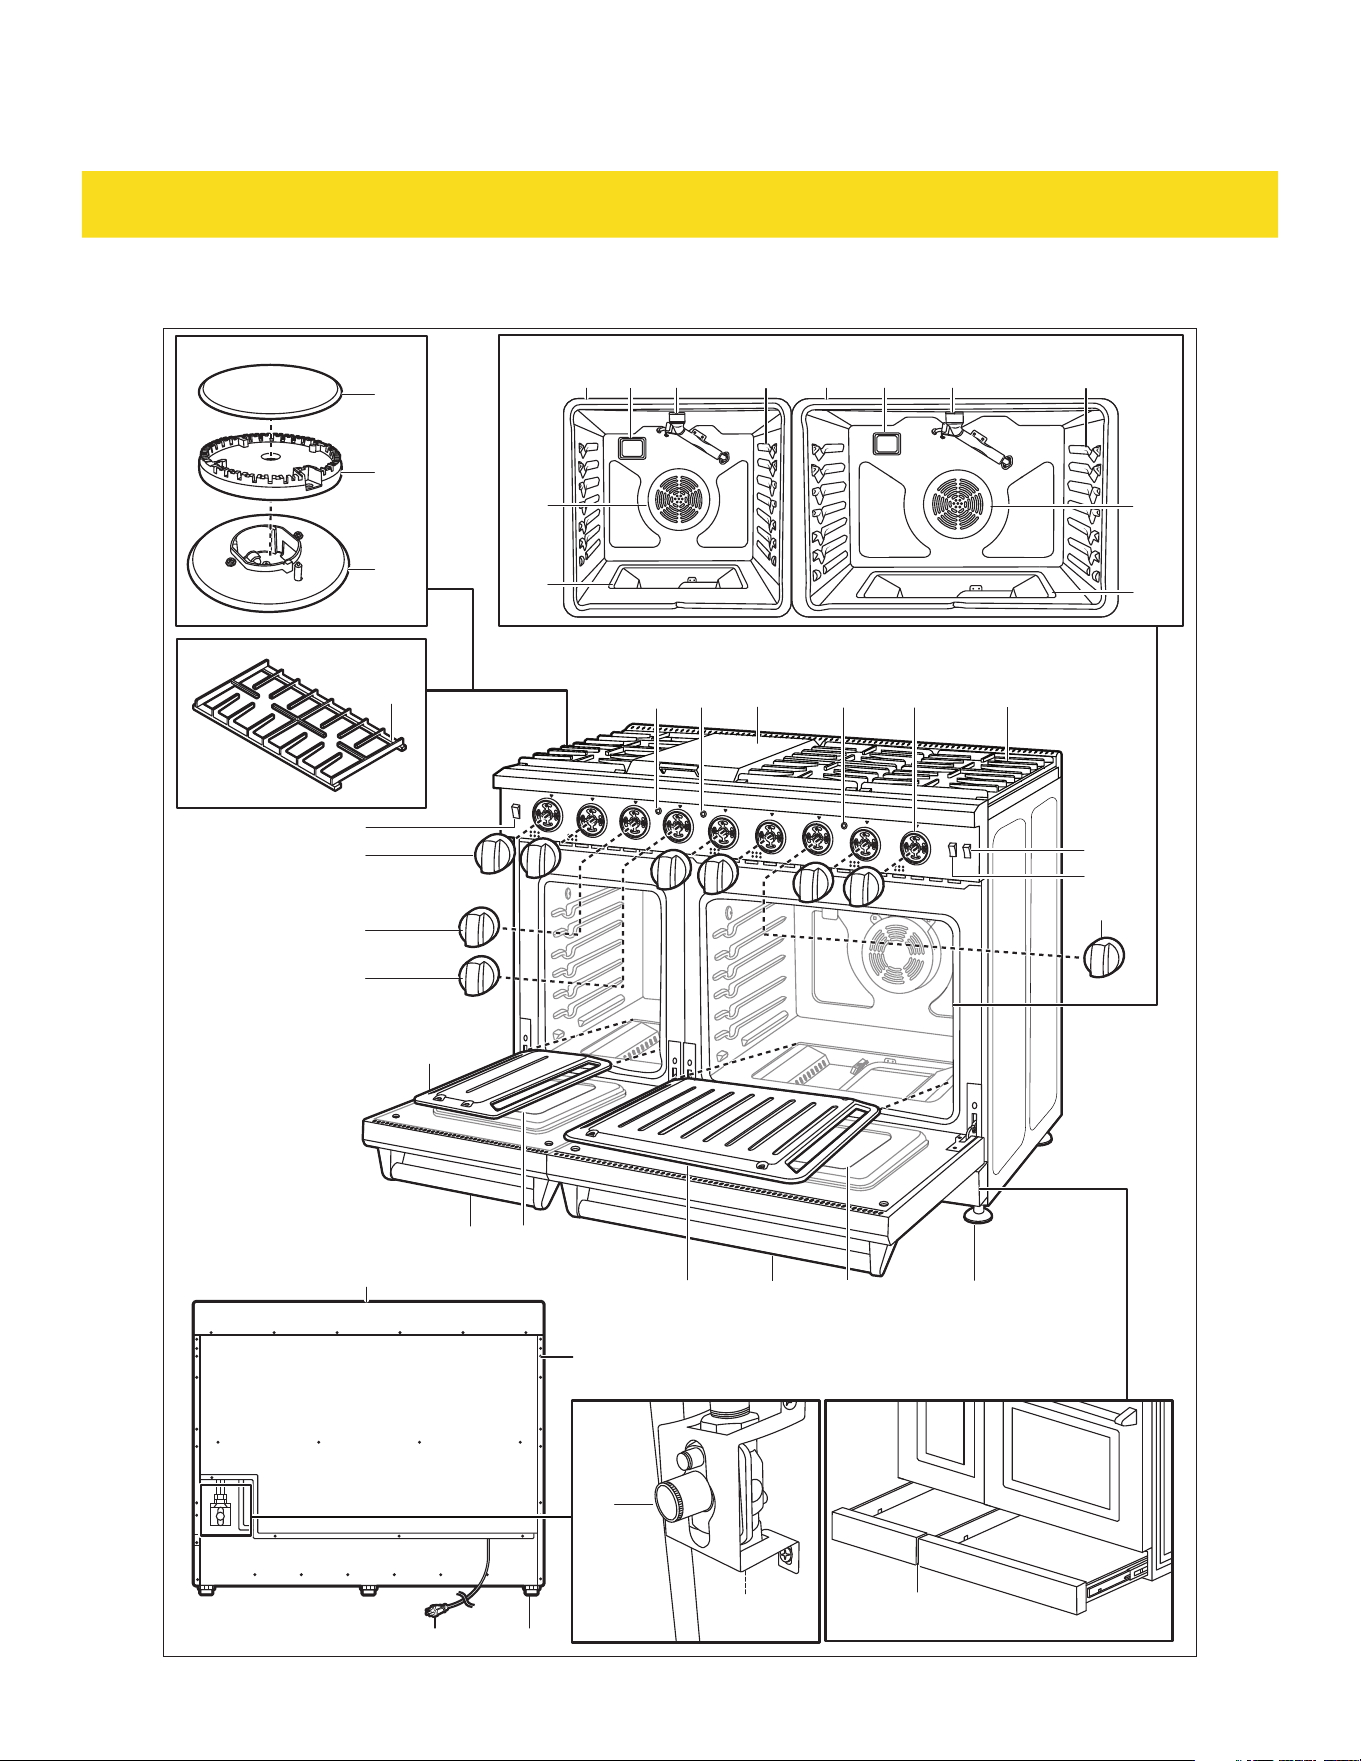
LRG4807U overview
11
12
13
20 21
29
43
31b
42
31a
15b 19b
15a 19a 16a 17a
17b
16b
14
18b
38b
22
30b
33
38a
18a
26b
27b
26a
25b
25a
24
27a
29
44
41
28
30a
32
34
35
3637

15
DELIVERY
11 Burner cap x 6 26b Oven door (30" oven)
12 Burner head x 6 27a Oven burner cover (18" oven)
13 Burner base 27b Oven burner cover (30" oven)
14 Cooking grate x 3 28 Burner knob x 6
15a Oven cavity (18" oven) 29 Oven knob x 2
15b Oven cavity (30" oven) 30a Oven light switch (18" oven)
16a Broiler burner (18" oven) 30b Oven light switch (30" oven)
16b Broiler burner (30" oven) 31a Oven on indicator (18" oven)
17a Rack positions (18" oven) 31b Oven on indicator (30" oven)
17b Rack positions (30" oven) 32 Vents
18a Convection fan (18" oven) 33 Spacer holes
18b Convection fan (30" oven) 34 Gas inlet
19a Oven light (18" oven) 35 Pressure regulator
19b Oven light (30" oven) 36 Back foot x 3
20 Knob shaft x 9 37 Power cord with plug
21 Cooktop 38a Oven burner (18" oven)
22 Convection switcht 38b Oven burner (30" oven)
24 Front foot x 3 41 Drawer x 2 (18" and 30")
25a Viewing window (18" oven) 42 Griddle on indicator
25b Viewing window (30" oven) 43 Griddle with cover
26a Oven door (18" oven) 44 Griddle knob
COOKTOP FUNCTIONS
2.1 Safety guidelines
Before cooking
•
Ensure all burner parts are properly assembled to avoid dangerous flames.
•
The burner flame size should be adjusted so it does not extend beyond the edge of the cooking utensil.
This instruction is based on safety considerations.
•
Keep flammable items away from the cooktop (21).
•
If the burner fails to ignite within 4 seconds, turn the burner knob (28) to Off and wait for 5 minutes to
allow gas to dissipate before attempting to relight.
•
Do not operate the appliance during a power outage.
16
COOKTOP FUNCTIONS
During cooking
WARNING
NEVER cover any slots, holes, or passages in the oven bottom or cover
an entire rack with materials such as aluminum foil. Doing so blocks
airflow through the oven and can cause carbon monoxide poisoning.
Aluminum foil linings can also trap heat, causing a fire hazard.
•
Never leave the cooktop (21) unattended when in use to prevent smoking and igniting greasy spills.
•
Do not disassemble or clean around a burner while another burner is on. Avoid touching burner caps
or bases when igniters are sparking.
•
Ensure flames do not extend beyond cookware or curl up on the sides to prevent damage,
discoloration, and burns.
•
Keep handles away from the edge of the appliance or on a burner that is on.
•
Be cautious when deep-frying as oil or fat can quickly overheat, especially on a high setting.
After cooking
•
The burners can be easily removed and are not sealed to the cooktop (21).
•
Clean the burners after each use and especially after spills or boil overs.
•
Promptly wipe up acidic or sugary spills to prevent discoloration or staining.
•
Clean affected burners before using them again to prevent clogging of the igniter, which can affect
burner functionality.
Using the griddle (LRG4807U only)
•
Use oven mitts or heat-resistant gloves when touching the griddle, as it can become extremely hot
during cooking.
•
Avoid overcrowding the griddle with too much food, as it can cause uneven cooking and potentially
lead to spillage or splattering.
•
Never leave the griddle unattended while cooking, as this can increase the risk of accidents or fire.
•
Use caution when placing or removing food on the griddle to prevent burns or spills.
•
After use, allow the griddle to cool completely before cleaning or storing to prevent accidental burns.
2.2 Usage Tips
•
For the best simmer results, use a smaller flame. Small flames are ideal for precise cooking of
delicate foods, keeping food warm, melting chocolate or butter, and slow cooking over low heat. The
highest flame setting on the appliance provides maximum heat and should be used for heavy cooking
loads like boiling water or cooking pasta.
•
When selecting the flame size, observe the flame as the knob is turned. Any flame larger than the
bottom of the cookware is unnecessary. The flame should be steady and blue. Note that foreign
material in the gas line may cause an appliance flame during initial operation.

17
COOKTOP FUNCTIONS
2.3 Matching burner knob to the burners
There are markings located on the front of the appliance to show which burner knob (28) corresponds to
which burner on the cooktop (21).
2.4 Igniting a burner
1. Simultaneously push in and turn a burner knob (28) to the HI position. A clicking sound is heard, the
burner ignites.
2. After the burner ignites, rotate the burner knob (28) to the desired heat setting.
3. After use, return the burner knob (28) to the OFF position.
2.5 Using the griddle (LRG4807U only)
1. Simultaneously push in and turn the griddle knob (44) to the highest temperature. The griddle burner
ignites.
2. After the griddle burner ignites, rotate the griddle knob (44) to the desired heat setting.
3. After use, return the griddle knob (44) to the Off position.
OVEN FUNCTIONS
3.1 Safety guidelines
Oven door and drawer
WARNING
Risk of injury and damage! Do not step, lean or sit on the oven door (26) or the
drawer (41).
•
Stepping or standing on the open drawer can cause loss of balance, leading to falls or trips,
potentially resulting in bruises, sprains, or fractures.
•
Leaning on or touching hot surfaces of the appliance while using the drawer for support can result in
burns or scalds.
•
Excessive weight or force applied to the drawer or door can damage the hinges, tracks, or other
components, leading to malfunction or potential instability.
•
Sitting or placing heavy objects on open or partially open drawers can cause the appliance to become
unstable and tip over.
•
Regular misuse of the doors or drawers can cause misalignment, operational issues, or malfunctions,
compromising the functionality of the appliance.

18
COOKTOP FUNCTIONS
Oven
WARNING
Risk of fire, gas leaks, food contamination and damage! Do not use the oven as storage
space.
•
Placing flammable items like paper, plastic, or cloth inside the oven can increase the risk of fire if the
oven is accidentally turned on.
•
Items stored inside the oven can be damaged or melted if the oven is turned on by mistake or if
residual heat is present.
•
Storing items in a gas oven can obstruct the ventilation and increase the risk of a gas leak, leading to
potential explosions or carbon monoxide poisoning.
•
Using the oven for storage can lead to the accumulation of dust, dirt, or pests, which can contaminate
food when the oven is used for cooking.
•
Placing items in the oven can increase the likelihood of accidentally turning on the oven while
forgetting about the stored items.
•
Do not hang any articles (e.g. dish towels) on the oven handle. Some fabrics may ignite or melt from
the heat.
CAUTION
Risk of burns! When opening the oven door (26), do not stand directly at its opening. Hot
air or steam can escape when opening the oven door (26).
•
Do not block the rear ducts of the appliance during oven use.
•
Avoid touching the vent opening or nearby surfaces during operation as they are hot.
•
Do not place plastics, paper, or other items that can melt or burn near the oven vent.
•
Use all oven functions with the door closed.
•
Do not use aluminum foil to cover oven shelves or line the oven floor to prevent heat damage and
potential fire.
•
Do not use plastic wrap or wax paper in the oven.
•
For food safety, do not leave food in the oven for longer than 2 hours before and after cooking,
especially in warmer weather. Do not hold foods at temperatures between 40°F to 140°F for more
than 2 hours.
19
COOKTOP FUNCTIONS
3.2 Using the accessories
Oven racks
CAUTION
Risk of burns! The oven racks (8) can be hot after use. Wait for the oven racks (8) to cool
down or use kitchen mitts when inserting/removing them from the oven cavity (15).
•
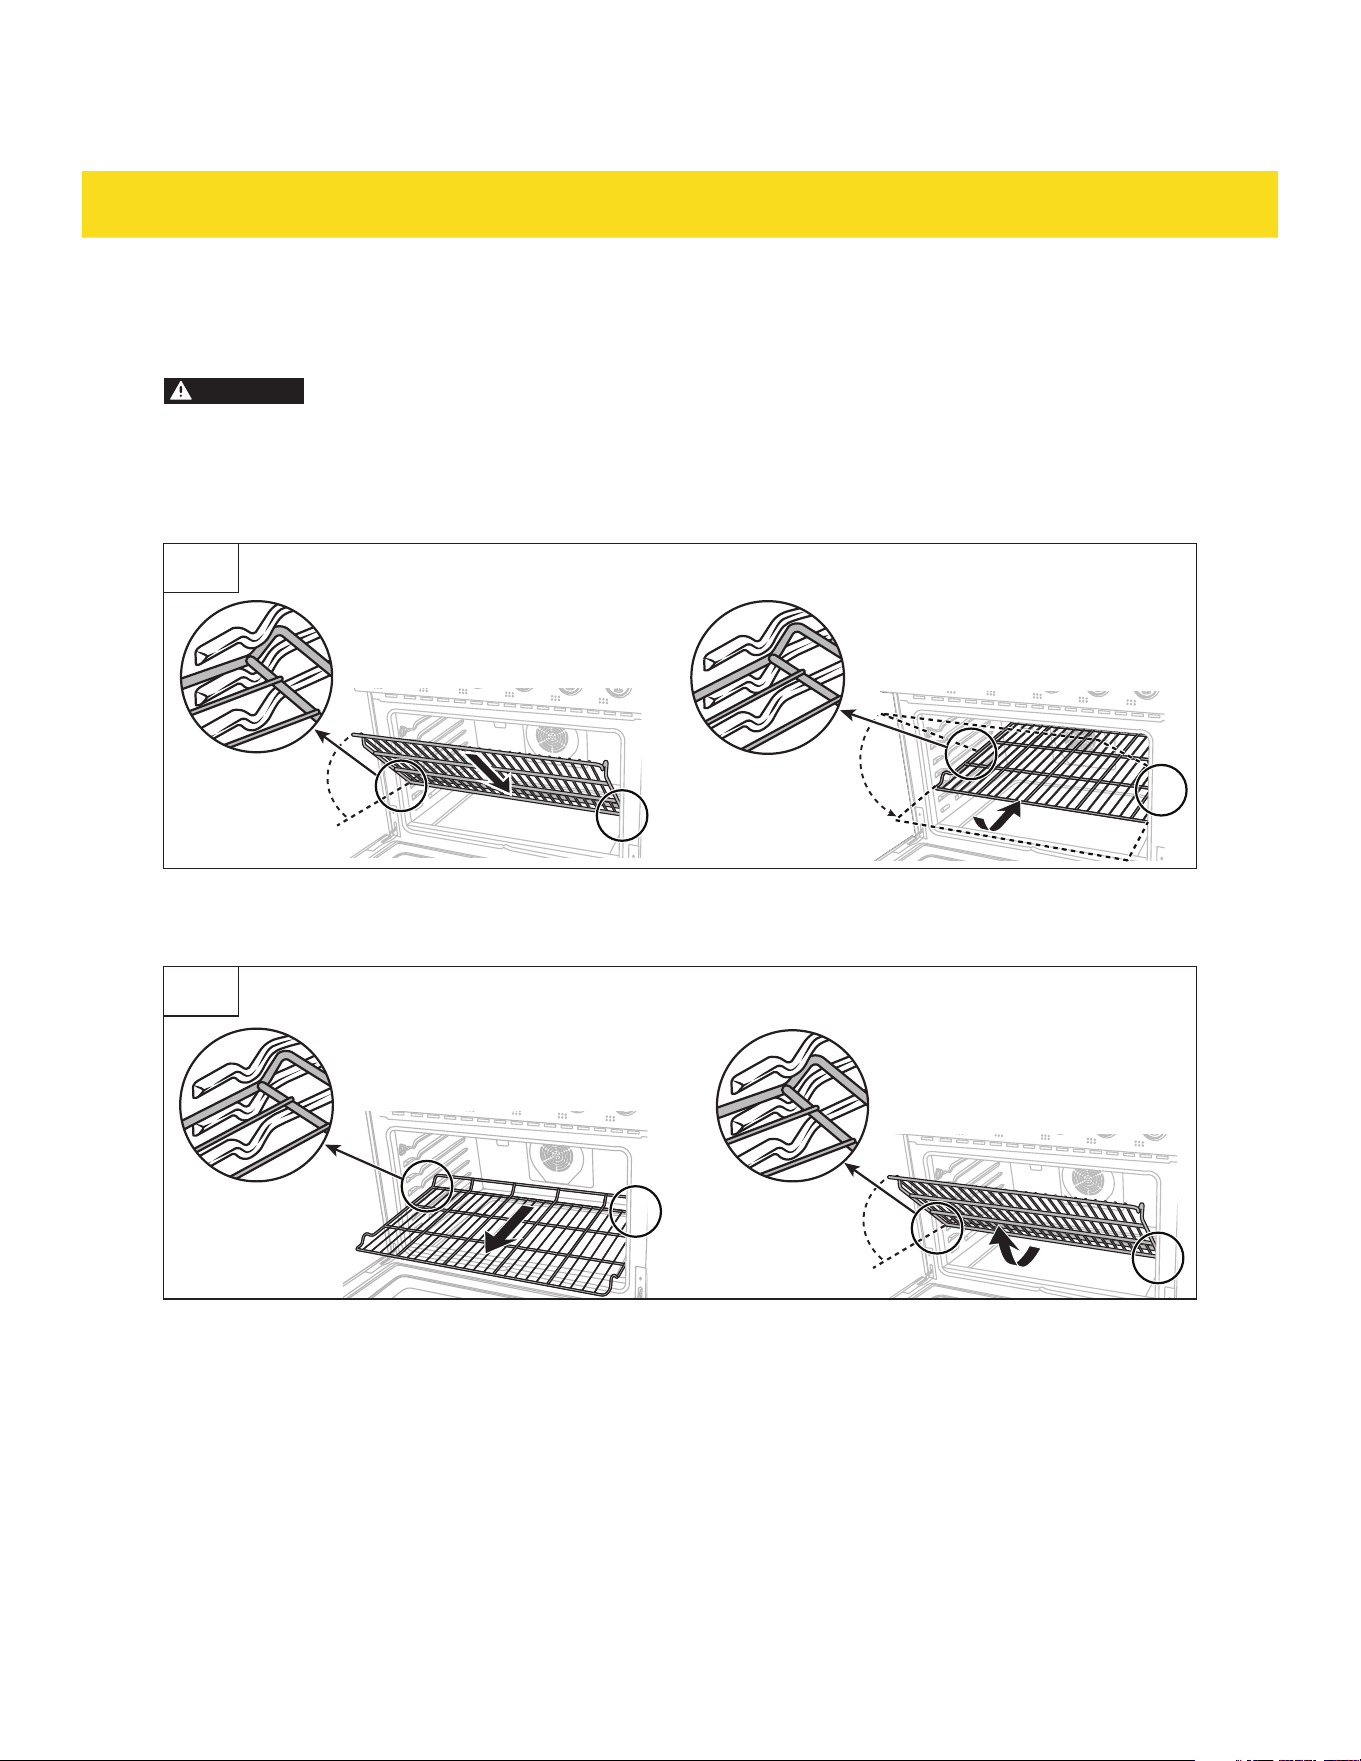
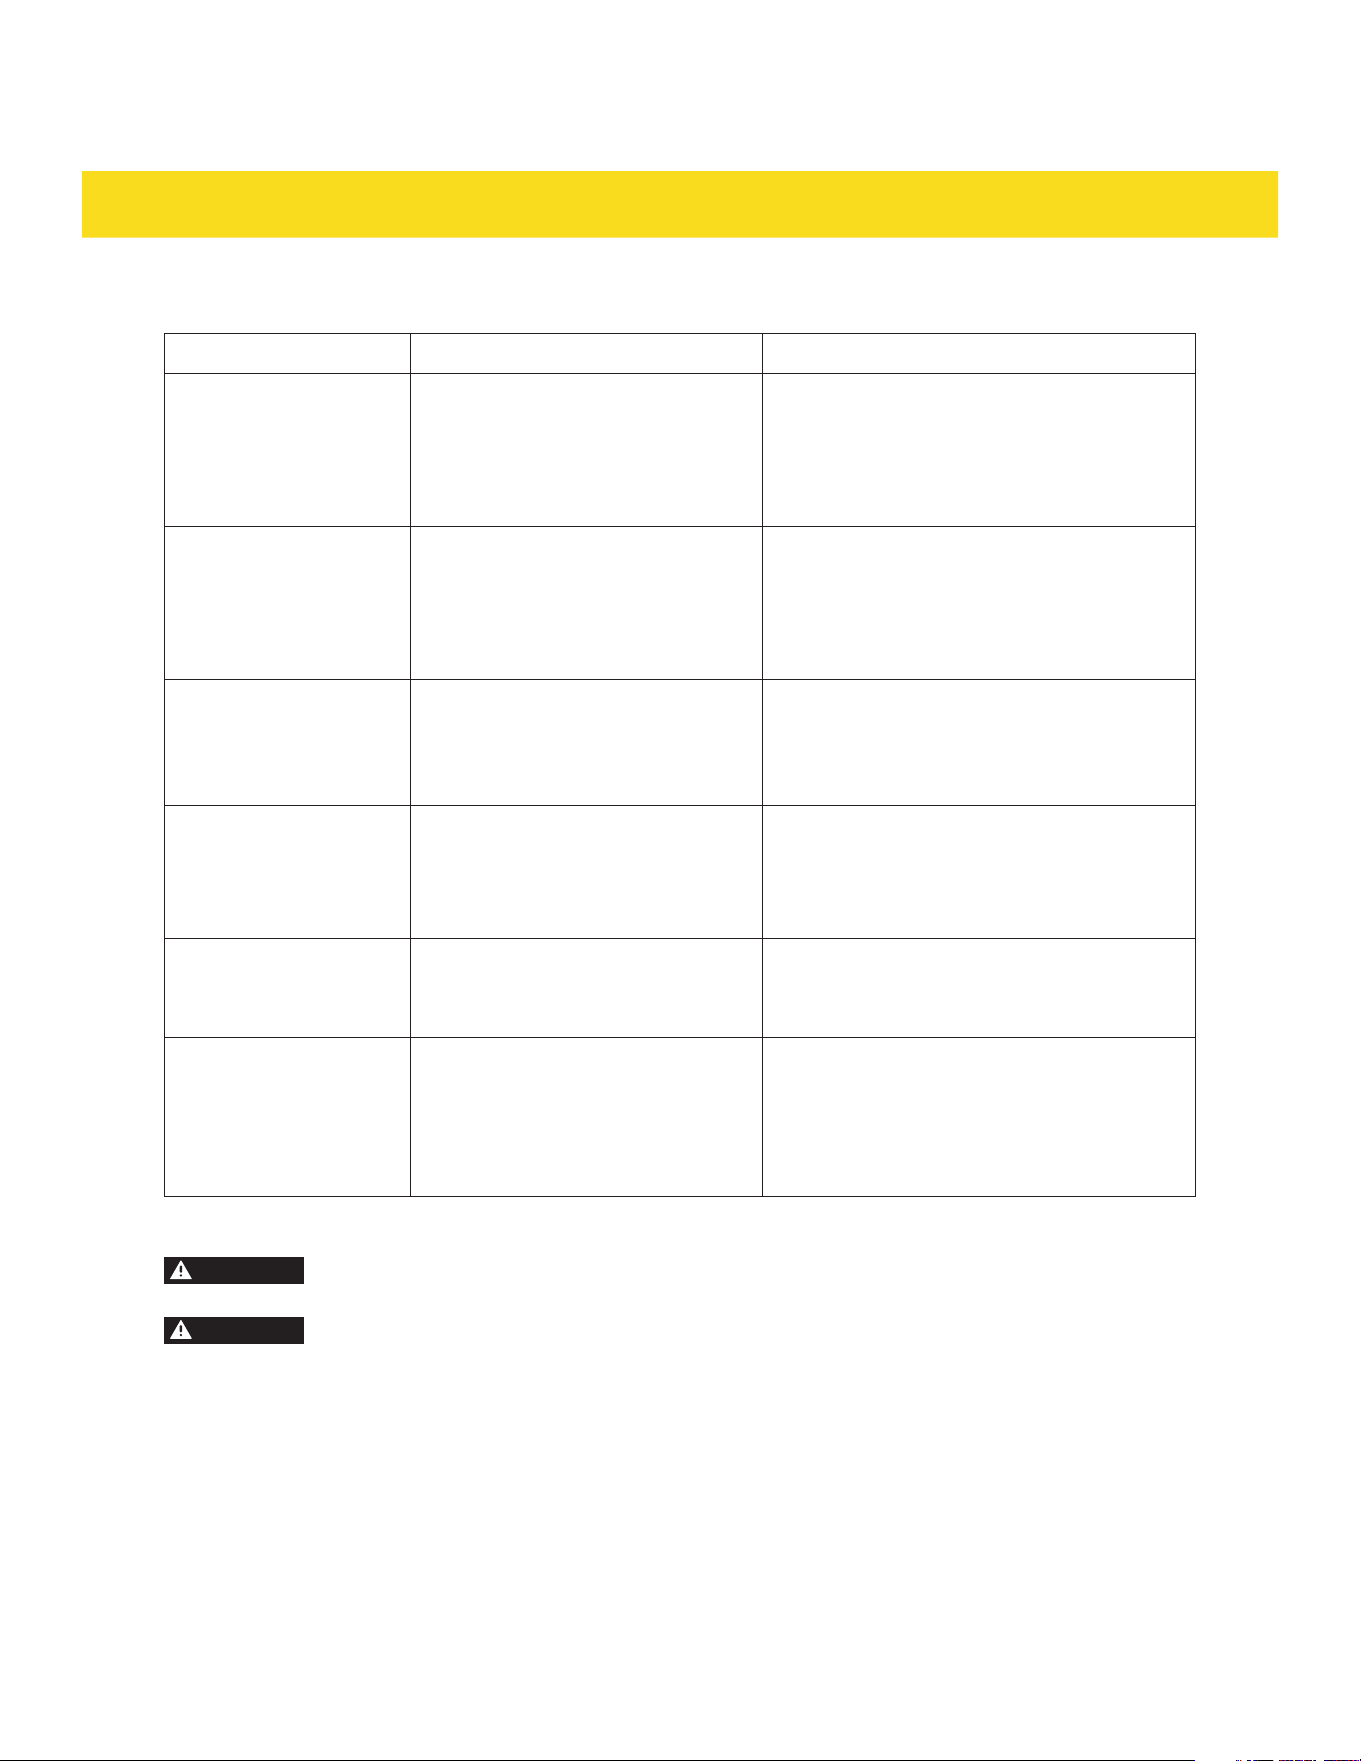
To insert an oven rack (8), place the end of it on the desired rack position (17). Tilt the oven rack (8)
forwards then push inwards (Fig. 1).
1
•
To remove an oven rack (8), pull it out until it stops. Lift the oven rack (8) upwards and pull it out
(Fig. 2).
2
•
Follow the tips below about rack positions for the best results:
- Place items in the center for even cooking.
- The top rack position is for broiling only.
- When baking multiple items, leave 1" to 1.5" (2.5 to 3.8 cm) space in between them.
- When baking or convection baking on a single rack, place the oven rack (8) in the center racks.
- When baking or convection baking on multiple racks, space out the oven racks (8) to give more
space between items. Place items in the rear of the higher rack and the other items in the front of
the lower rack. This arrangement helps to evenly distribute heat.
- Do not cover an oven rack (8) with aluminum foil. This disrupts the heat circulation and results in
poor heat distribution.
20
OVEN FUNCTIONS
- Recommended rack positions (17) for cooking various food:
Rack position (17) Use Type of food
1 (topmost position)
Direct, intense heat from the broil
burner.
•
Broiling meat (thin cuts like steaks,
lamb chops).
•
Broiling small portions of poultry
(chicken breasts).
•
Broiling fish (salmon, swordfish).
2 (high heat position)
Slightly less intense than
position 1 but still close to the
broiler. Ideal for quick browning
or broiling without overcooking.
•
Steak (medium-thickness cuts).
•
Broiling small roasts or thicker fish
fillets.
•
Melting cheese on casseroles or
gratins.
3 (middle-high heat
position)
Ideal for baking and roasting
when you want foods to brown
slightly on top.
•
Small roasts (pork loin, chicken
thighs).
•
Frozen pizza (for an even cook).
•
Pies (for browning the crust slightly).
4 (center position)
Best for general-purpose baking
and roasting as it ensures even
heat distribution.
•
Cakes (layer cakes, pound cakes).
•
Pies (fruit pies, frozen pies).
•
Casseroles (lasagna, mac and cheese).
•
Fresh pizza.
5 (low position)
Suitable for slow roasting or
when a dish needs gentle heat.
•
Large roasts (beef, pork, ham).
•
Angel food cake.
•
Turkey (medium to large size).
6 (bottomost position)
The closest to the bake burner.
Best for slow cooking, heavy
roasting, or when crisping the
bottom of baked goods is needed.
•
Large turkeys (over 15 lbs).
•
Ham (large cuts).
•
Baking fresh or frozen pizzas for crisp
bottoms.
•
Slow-cooking casseroles or braises.
Grid and broiler pan
CAUTION
Risk of fire! Do not cover the grid (9) with aluminum foil to prevent grease buildup and
potential fire.
CAUTION
Risk of burns! The broiler pan (10) and the grid (9) gets hot during cooking. Use kitchen
mitts when removing them from the oven cavity (15).
•
To use the broiler pan (10), place it on the center of an oven rack (8), in positions 3 or 4.
•
The broiler pan (10) can be used on its own for broiling/roasting food.
•
The grid (9) can be placed on top of the broiler pan (10). The grid (9) allows fat and juices to drip into
the broiler pan (10) below. It ensures even cooking by allowing air circulation around the food.
3.3 Oven light
Press the oven light switch (30) to switch on/off the oven light (19).

21
OVEN FUNCTIONS
3.4 Defrosting
The defrosting function utilizes the convection fan without activating the oven's heating elements to
gently and evenly thaw frozen food items.
1. Place the frozen food on a suitable plate or tray.
2. Activate the convection fan by switching on the convection switch (22).
3. Place the plate or tray with the frozen food on the oven rack (8).
4. Close the oven door to maintain a consistent temperature.
5. Monitor the defrosting process through the viewing window (25) as the convection fan circulates room
temperature air to thaw the food.
6. Once the food has thawed to the desired degree, switch off the convection switch (22) to stop the
convection fan.
7. Remove the defrosted food from the oven.
3.5 Preheating
The oven should be preheated to the desired temperature for optimal cooking results.
1. Position the oven rack (8) on the suitable rack position (17).
2. Set the oven knob (29) to the desired temperature. The oven on indicator (31) lights up.
3. Allow the oven to preheat for 15-20 minutes.
4. After preheating, the oven is ready for use.
3.6 Baking
Baking in the oven utilizes both upper and lower heating elements to evenly cook food items placed on
the oven rack.
1. Position the oven rack (8) on the suitable rack position (17) for baking.
2. Set the oven knob (29) to the desired temperature for baking. Preheat the oven if needed. The oven on
indicator (31) lights up.
3. Place the tray of food on the oven rack (8).
4. Monitor the baking process through the viewing window (25), avoiding unnecessary opening of the
oven door (25) to maintain consistent temperature.
5. After baking, turn the oven knob (29) to the OFF position and carefully remove the food from the oven.
3.7 Convection baking
Convection baking utilizes the convection fan and the oven's heating elements to circulate hot air,
allowing for faster, more even cooking and browning of food.
1. Position the oven rack (8) on the suitable rack position (17).
2. Set the oven knob (29) to the desired temperature for convection baking. Preheat the oven if needed.
The oven on indicator (31) lights up.

22
OVEN FUNCTIONS
3. Activate the convection fan by switching on the convection switch (22).
4. Place the tray of food on the oven rack (8).
5. Monitor the baking process through the viewing window (25), avoiding unnecessary opening of the
oven door (25) to maintain consistent temperature.
6. After convection baking, turn the oven knob (29) to the OFF position, switch off the convection switch
(22), and carefully remove the food from the oven.
3.8 Broiling
The broiling function utilizes intense heat from the top of the oven to quickly cook and brown the top
surface of food.
NOTICE
For tips on using the gird (9) and broiler pan (10), see chapter 3.2 Using the accessories.
1. Position the oven rack (8) on the suitable rack position (17).
2. Select an oven knob (29) set it to the BROIL position. The oven on indicator (31) lights up.
3. Place the food on the grid (9) of the broiler pan (10) and then on the oven rack (8).
4. Broil one side of the food, then rotate to broil the other side.
5. After broiling, return the oven knob (29) to the Off position.
CLEANING
4.1 General cleaning
CAUTION
Risk of steam burns and noxious fumes! Clean cooktop (21) with caution - if a wet sponge
or cloth us used to wipe spills on a hot cooking area, be careful to avoid steam burns.
Some cleaners can produce noxious fumes if applied to a hot surface.
•
Do not let cooking grease or other flammable materials accumulate on the surfaces or near the
appliance.
•
Never use corrosive detergents, wire brushes, abrasive scourers, metal or sharp utensils to clean the
appliance
•
Check that all controls are off and all surfaces are cool before cleaning any part of the appliance.
•
If the appliance is moved for servicing, check that the anti-tip device (4) is re-engaged properly when
the appliance is replaced.
•
Never spray aerosol cleaner on or around the appliance while the burners are lit. Be sure all functions
are switched off and the appliance is cool. The aerosol gas and chemicals in these cleaners could, in
the presence of heat, ignite or cause metal parts to corrode.
Painted parts and decorative trim
•
For general cleaning, use a cloth with hot, soapy water. Wipe dry.
•
For more difficult residue and built-up grease, apply a liquid detergent directly onto the area and
leave for 30 to 60 minutes. Wipe with a damp cloth and dry. Do not use abrasive cleaners on any oven
surface to prevent scratching.

23
CLEANING
Stainless steel surfaces
CAUTION
Risk of damage! Do not use a steel-wool pad to clean the surfaces. It may scratch the
surfaces.
NOTICE
If a mineral oil-base stainless steel appliance cleaner has been used before to clean the
appliance, wash the surface with liquid detergent and water prior to using the stainless steel
appliance cleaner/polish.
1. Use stainless steel appliance cleaner/polish.
2. Place a small amount of cleaner/polish on a damp cloth or paper towel.
3. Clean in small areas, rubbing with the grain of the stainless steel.
4. Dry and buff with a clean, dry paper towel or soft cloth.
5. Repeat as necessary.
4.2 Cooktop
Burner cap, burner head, oval burner cap
1. Ensure the burners are turned off and cooled.
2. Take off all the removable burner parts (11, 12, 39).
3. Wash them in hot soapy water, rinse, and dry.
4. Clear the notches of the burner heads (12) with a stiff nylon brush or straight-ended paper clip.
5. Dry all removable burner parts (11, 12, 39) completely.
6. Replace all the removable burner parts (11, 12, 39) before using the cooktop (21).
4.3 Oven
Porcelain surfaces
1. Clean the oven interior and inner door liners with a solution of mild detergent and warm water.
2. Rinse and dry with a soft, lint-free cloth.
Oven door
•
Clean the top, sides, and front of the oven door (26) with soap and water. Wipe down with a damp
cloth.
•
Use a oven window cleaner on the outside glass of the oven door (26).
•
Use mild detergent and warm water on the inside glass of the oven door (26). Dry with a soft, lint-free
cloth.
•
Do not immerse the oven door (26) in water.
•
Do not spray or allow water or glass cleaner to enter the door vents. Door vents are located at the
small gap above the oven cavity (15).
•
Do not use oven cleaners, cleaning powders, or harsh abrasives on the outside of the oven door (26).
•
Do not clean or damage the oven door gasket around the oven cavity (15), as it is essential for a good
seal.

24
CLEANING
Oven door handle
•
Clean with a solution of mild detergent and warm water.
•
Do not use abrasive cleaners or scrubbers to avoid permanent damage to the finish.
•
Dry parts with a soft, lint-free cloth.
Oven shelves
1. Scrub stubborn or baked-on soiling with a dampened, soap-filled, nonmetal, non-abrasive pad. Then
wipe dry.
2. Apply a food grade chrome cleaner with a damp sponge or cloth. Then wipe dry.
Oven door gasket
The oven door gasket is located around the oven cavity (15). Do not clean this part. If large food particles
need to be removed, proceed as follows:
1. Dampen a sponge with hot water.
2. Gently wipe off the soiling without rubbing.
3. Press a dry towel gently on the oven door gasket to dry.
Oven and broiler burners
Do not clean these parts. They self clean during normal use.
4.4 Baking accessories
Oven racks
CAUTION
Risk of damage! Do not clean the oven racks (8) with a dishwasher.
•
Clean oven racks (8) by hand with an abrasive cleaner or steel wool.
•
If oven racks (8) become hard to remove or replace, lightly wipe the oven rack guides with cooking oil,
but do not apply oil to the sides.
•
If oven racks (8) are difficult to slide, lubricate them with a graphite lubricant.
Grid and broiling pan
•
Pre-soak stubborn soiling in a solution of mild detergent, and hot water.
•
Wash by hand or in a dishwasher.
25
MAINTENANCE
5.1 Maintenance guidelines
•
Keep the appliance area clear and free from combustible materials (e.g. wall coverings, curtains,
drapes), gasoline, and other flammable vapors and liquids.
•
Switch off the power to the appliance at the main fuse or circuit breaker. If in doubt, contact an
electrician.
•
Do not obstruct the flow of combustion and ventilation air.
•
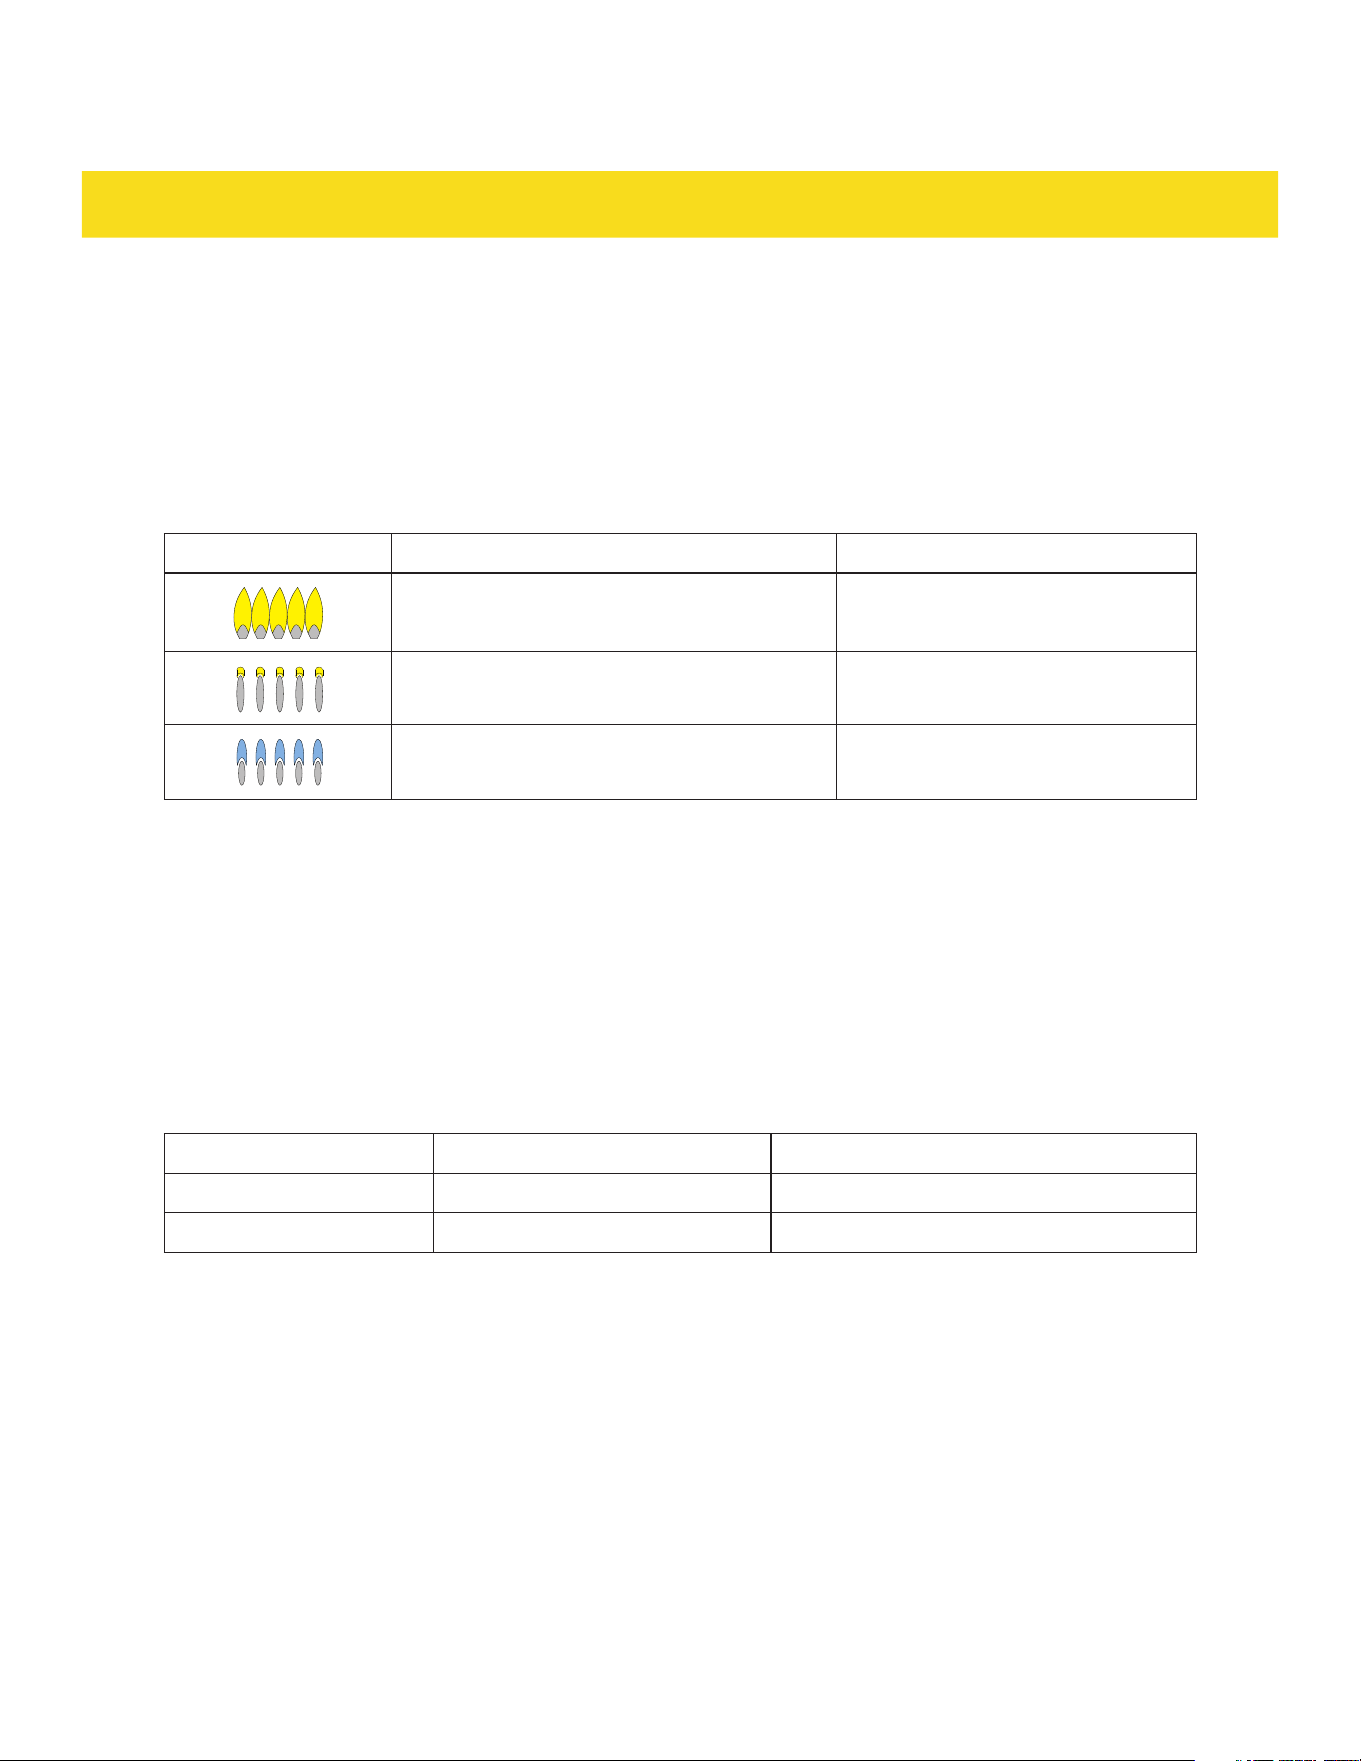
Visually check the burner flames for any abnormalities:
Flame appearance Description Verdict
Yellow flames Call for service to adjust the flame
Yellow tips on the outer cones Normal for LP
Soft blue flames Normal for NG
•
If the appliance is moved for servicing, check that the anti-tip device (4) is re-engaged properly when
the appliance is replaced.
•
Always unplug/disconnect the appliance from the electrical supply before servicing.
•
Any other servicing than mentioned in this manual should be performed by a professional repair
center.
5.2 Purchase replacement parts
For purchasing replacement parts, ensure compatibility by referencing the appliance model number and
serial number contact Thor by:
Contact Phone number Email
Thor's parts department
877-288-8099 (option 5) [email protected]om
Customer service
877-288-8099 (option 3) [email protected]om
26
MAINTENANCE
5.3 Change the light bulb
CAUTION
Risk of burns! The oven and the light can be hot from use. Let the oven and the light fully
cool down before proceeding.
LRG2401U, LRG4807U only
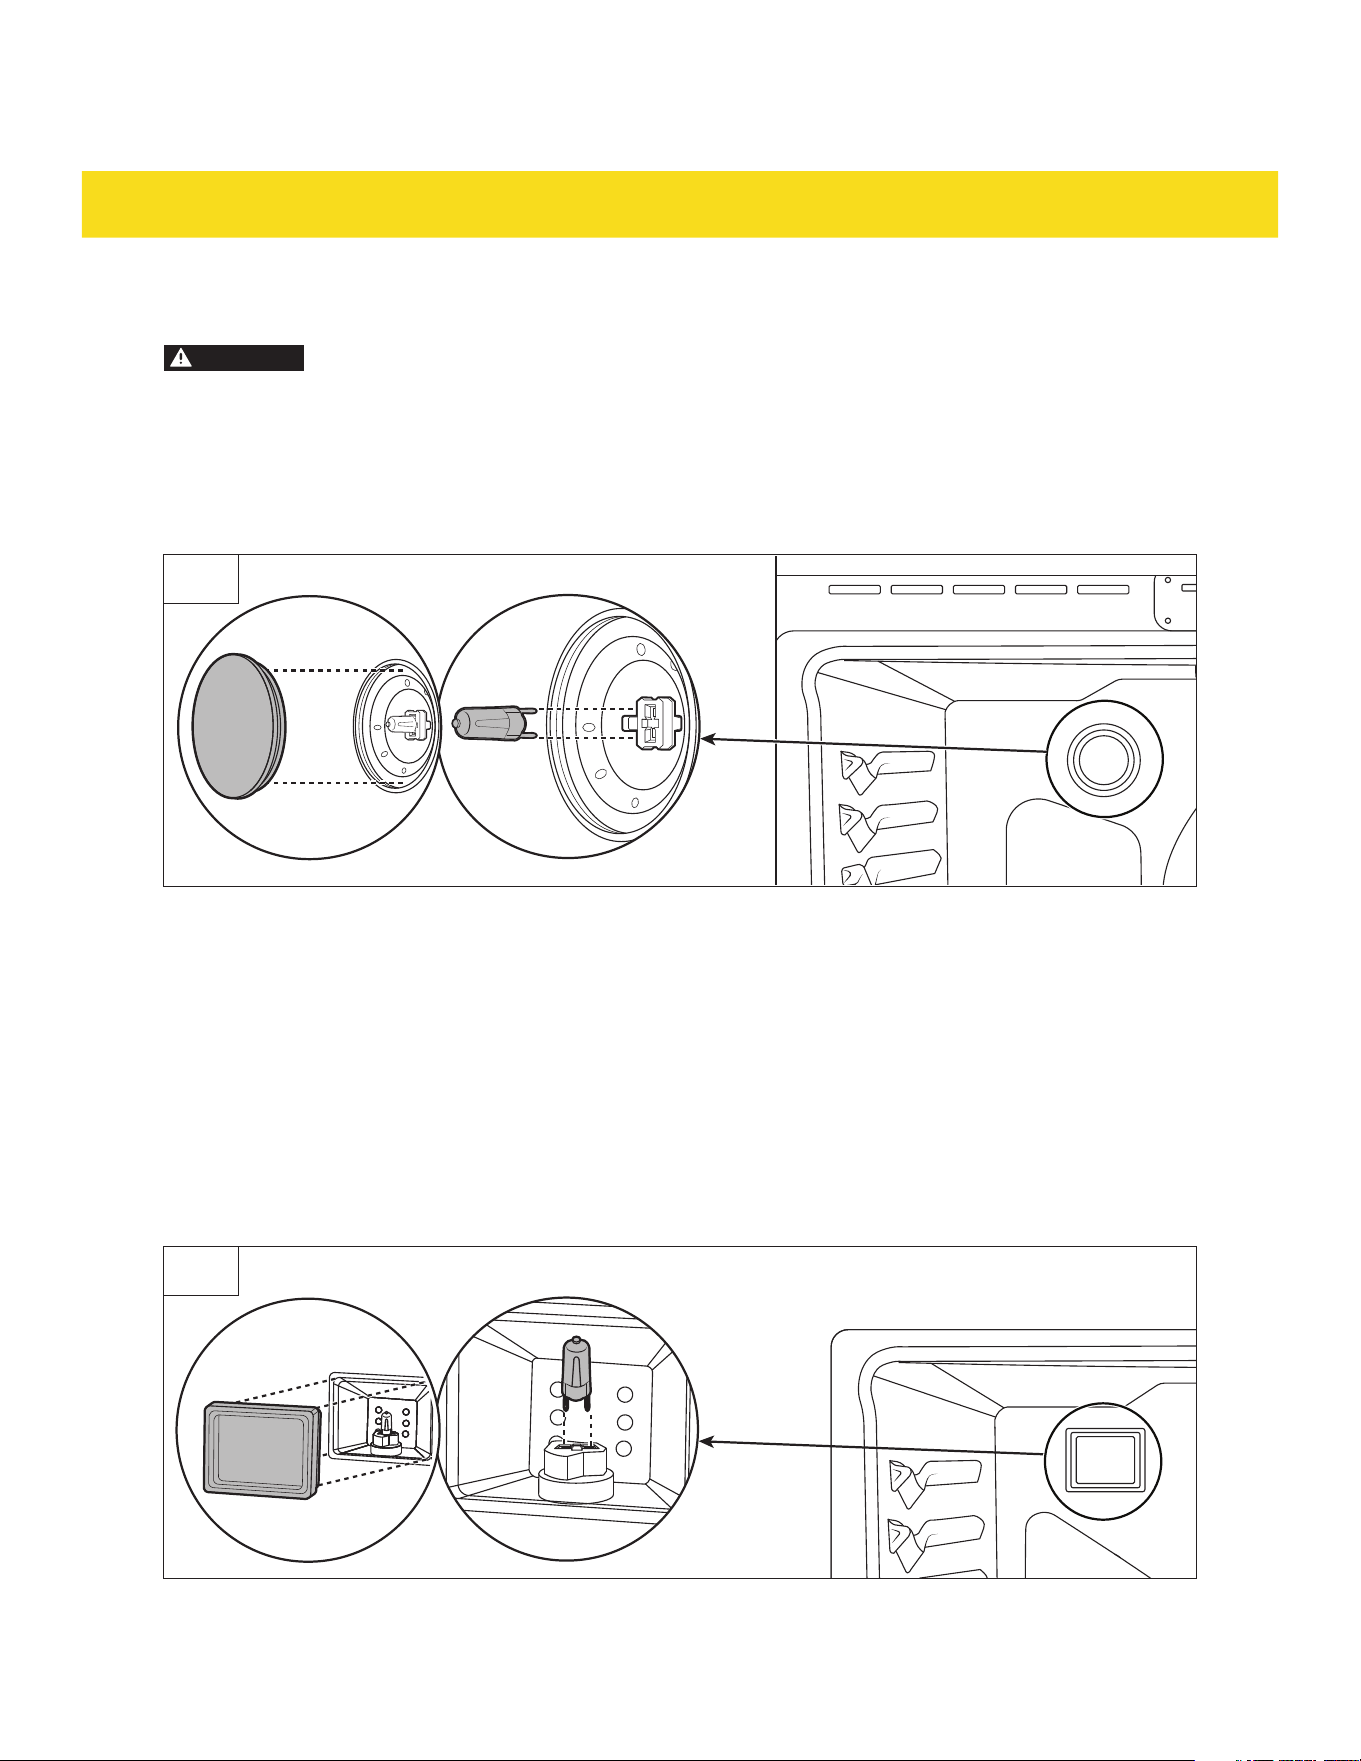
The light bulb is a G9 120 V~ 40 W appliance bulb.
3
1. Unplug the appliance or disconnect power.
2. Rotate the light cover in the back of the oven counterclockwise to remove (Fig. 3).
3. Pull out the light bulb to remove it from its socket (Fig. 3).
4. Insert the new light bulb (Fig. 3).
5. Insert the light cover and rotate it clockwise (Fig. 3).
6. Plug in the appliance or reconnect the power.
LRG3001U, LRG3601U only
The light bulb is a G9 120 V~ 40 W appliance bulb.
4
1. Unplug the appliance or disconnect power.
2. Take off the light cover (Fig. 4).
27
MAINTENANCE
3. Pull out the light bulb to remove it from its socket (Fig. 4).
4. Insert the new light bulb (Fig. 4).
5. Insert the light cover (Fig. 4).
6. Plug in the appliance or reconnect the power.
TROUBLESHOOTING
6.1 Cooktop
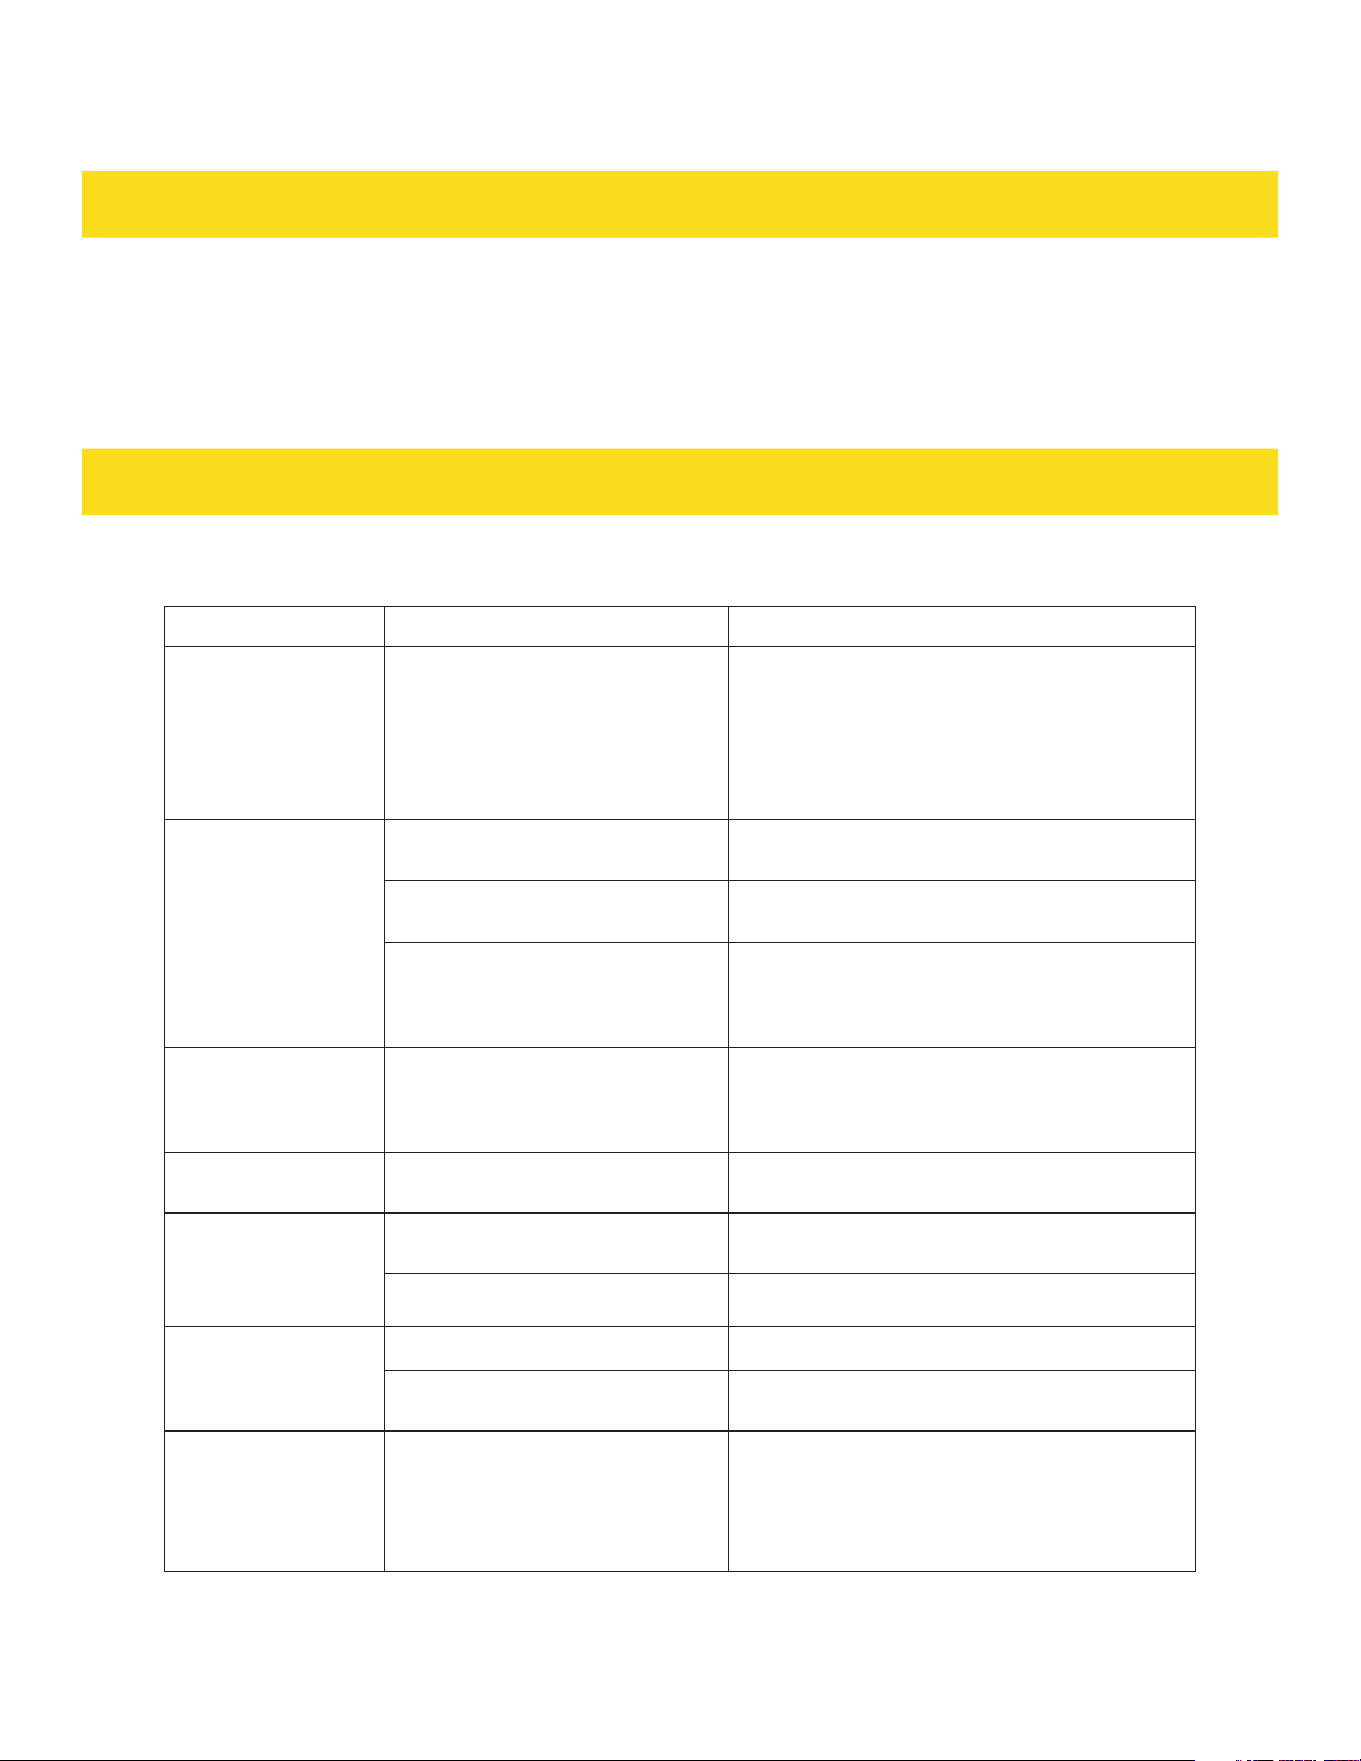
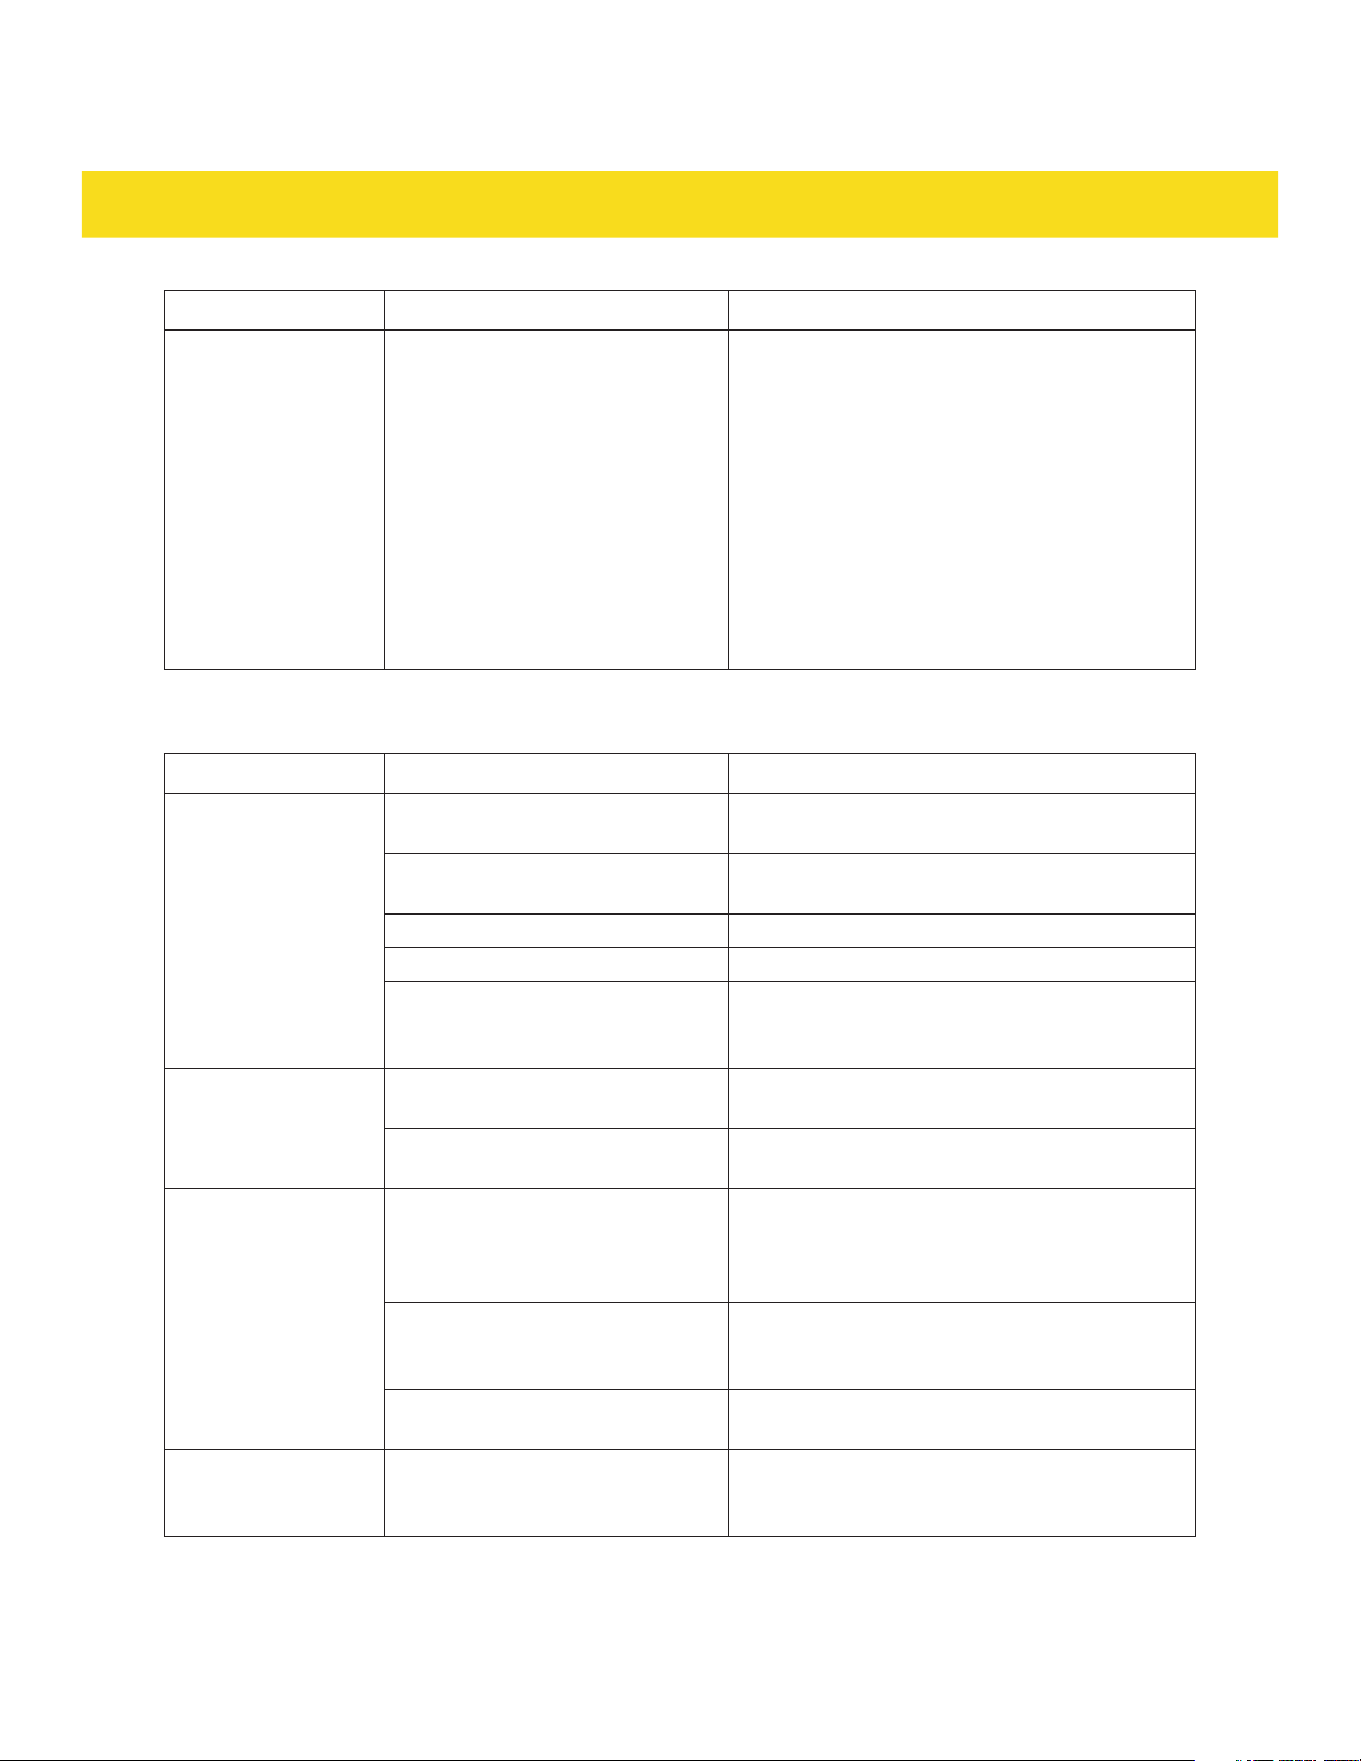
Problem Possible cause Solution
•
Some burners do
not light.
•
Flames do not
burn all around
the burner
cap (11).
Burner parts or igniters may be
wet, dirty, or misaligned.
Check that the burner parts are clean, dry,
and correctly assembled. Check that the
igniters are clean and dry.
Burner flames very
large and yellow.
The notches of the burner
heads (12) are clogged.
Clean notches of the burner heads (12) with
straightened paper clip, needle, or wire.
Burner parts are not positioned
properly.
Remove and carefully re-install burner parts.
Cooktop (21) is being operated
with the wrong type of gas.
Ensure that the type of cooktop (21) matches
the natural gas supply.
Burner flames very
large and yellow.
Pressure regulator (35) is not
installed properly, is faulty, or is
set for the wrong type of gas.
Check installation, replace the pressure
regulator (35), or set the pressure
regulator (35) for proper gas.
Sparking but no
flame ignition.
Gas shut-off valve is in the 'OFF'
position.
Turn shut-off valve to the 'ON' position.
Igniters spark
continuously after
flame ignition.
Power supply polarity is
reversed.
Have polarity corrected.
Igniters are wet or dirty. Dry or clean igniters.
Burner flame goes
out at low setting.
Low gas supply pressure. Contact gas company.
Air intake holes around knobs
are obstructed.
Remove obstruction.
The flames have
suddenly gone out.
A draft or a spill has
extinguished the flame.
No action required. The burner will detect
this and automatically relight. However,
if there has been a large spill, it is
recommended switching the burners off and
cleaning the burners and the spill area.
28
TROUBLESHOOTING
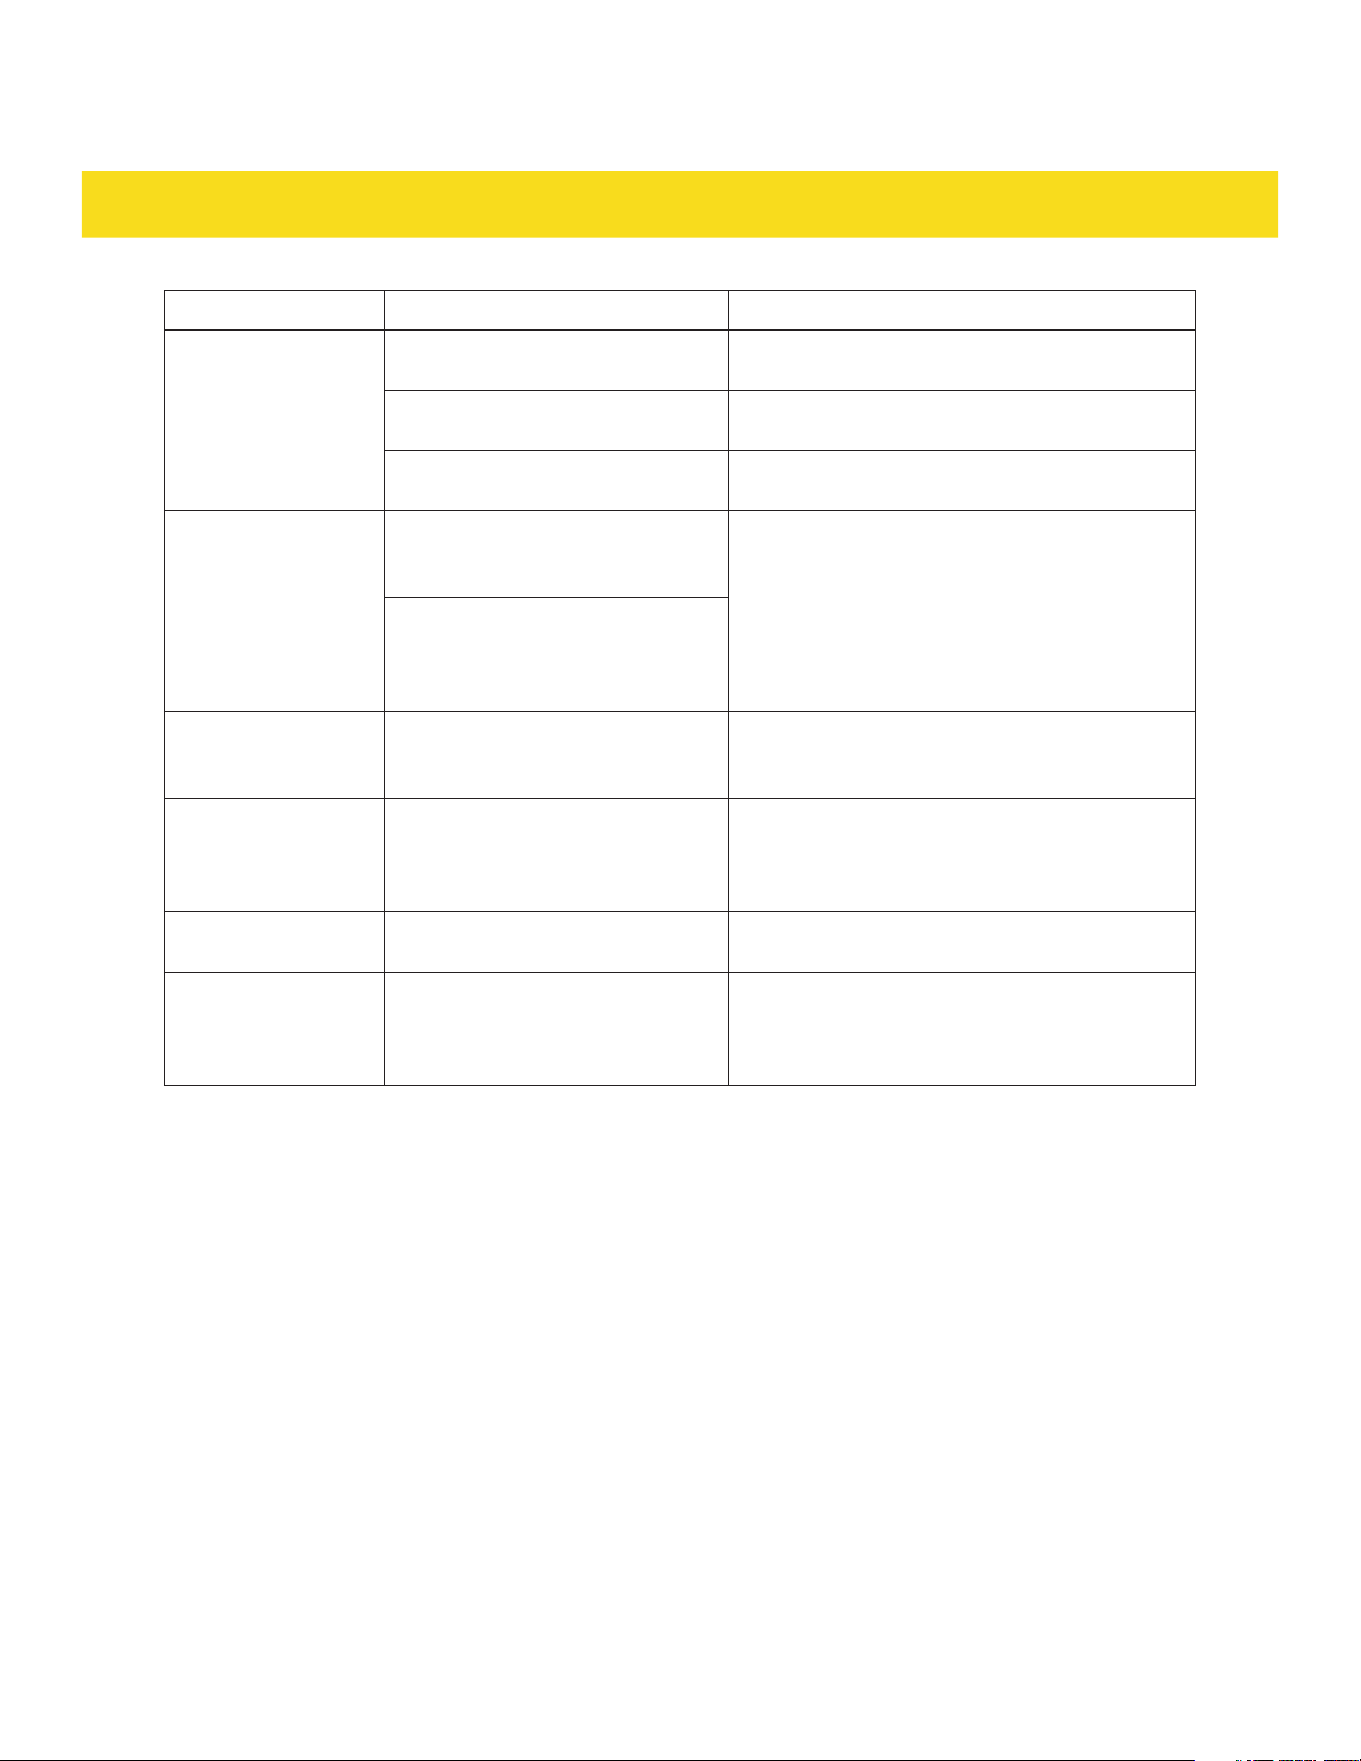
Problem Possible cause Solution
There is a power
failure can I still
use the cook top
burners?
Power outage in your area. The cooktop (21) burners can still be used. To
light them:
Holding a lighted match to the burner
head (12). Ignite the burner with the burner
knob (28). The flame lights up all the way
around the burner.
Important!
If the flame is blown out during a power
failure, set the burner knob (28) immediately
to OFF. The burner does not automatically
relight and gas may escape.
6.2 Oven
Problem Possible cause Solution
The oven does not
turn on.
The appliance is not completely
plugged into the electrical outlet.
Make sure the electrical plug is inserted into
a live, properly grounded outlet.
A fuse may be blown or the
circuit breaker tripped.
Replace the fuse or reset the circuit breaker.
The oven is too hot. Allow the oven to cool.
Incomplete service wiring. Call for service.
Power outage. Check to see if the house lights switches on.
If required, call the local electric company for
service.
The oven light (19)
does not turn on.
The light bulb is loose or
defective.
Tighten or replace the light bulb.
The switch operating the oven
light (19) is broken.
Call for service.
The oven smokes
excessively during
broiling.
The meat has been placed too
close to the broiler burner (16).
Reposition the oven rack (8) to provide proper
clearance between the meat and the broiler
burner (16). Preheat the broiler burner (16)
for searing.
The meat has not been properly
prepared.
Remove the excess fat from the meat. Cut
away fatty edges that may curl, leaving the
lean intact.
Grease has built up on oven
surfaces.
Regular cleaning is necessary when broiling
frequently.
Food does not bake
or roast properly.
The oven rack (8) has been
positioned incorrectly.
Reposition the oven rack (8) to provide proper
clearance between the meat and the broiler
burner (16).
29
TROUBLESHOOTING
Problem Possible cause Solution
Food does not broil
properly.
The oven rack (8) has not been
properly positioned.
Pull out the oven rack (8) and re-insert it
again.
The cookware is not suited for
broiling.
Use suitable cookware.
In some areas, the power voltage
may be low.
Preheat the broiler burner (16) for 10 minutes
before use.
Steam is coming out
of the vent.
When using the convection
feature, it is normal to see steam
coming out of the oven vent.
This is normal operation, and not a system
failure. Use the appliance as usual.
As the number of oven racks (8)
or amount of food being cooked
increases, the amount of visible
steam increases.
A burning or oily
odor is coming from
the vent.
This is normal in a new oven and
disappears with time.
-
Strong odor. An odor coming from the
insulation around the inside of
the oven is normal for the first
few times the oven is used.
Operate the oven empty at 400 °F (200 °C) for
1 hour.
Fan noise. The convection fan (18) may
automatically switch on and off.
This is normal operation.
The oven door (26) is
locked.
The circuit breaker has been
tripped or there was a power
failure while the oven door (26)
was locked.
Unlock the oven door (26).

30
WARRANTY
Warranty&Service
This appliance has been manufactured by Thor International, 10830 Ada Ave, Montclair, CA 91762
For Customer Service, please call (877) 288 - 8099
For the most up to date warranty and service policy, please refer to our website
WWW.THORKITCHEN.COM/WARRANTY-REGISTRATION
For in-warranty service requests, please visit our website at
WWW.THORKITCHEN.COM/SERVICE
Please Note: You must provide proof of purchase or installation date for any in-warranty service requests
Warranty Registration
Made Easy.
We Stand Behind
the Quality of Our
Appliances.
Reliability and customer satisfaction are our top priorities. We offer a
solid two-year warranty on both parts and labor. Enjoy professional-grade
performance with the condence that we’ve got you covered.
01
02
03
Scan the QR Code or visit thorkitchen.
com/register-your-product.
Input your purchase and product
information and select register.
That’s it. You’re all set.
Enjoy!
WARRANTY
PARTS
Questions: [email protected]