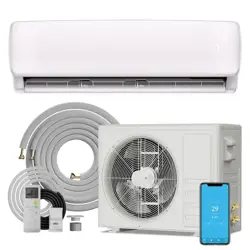
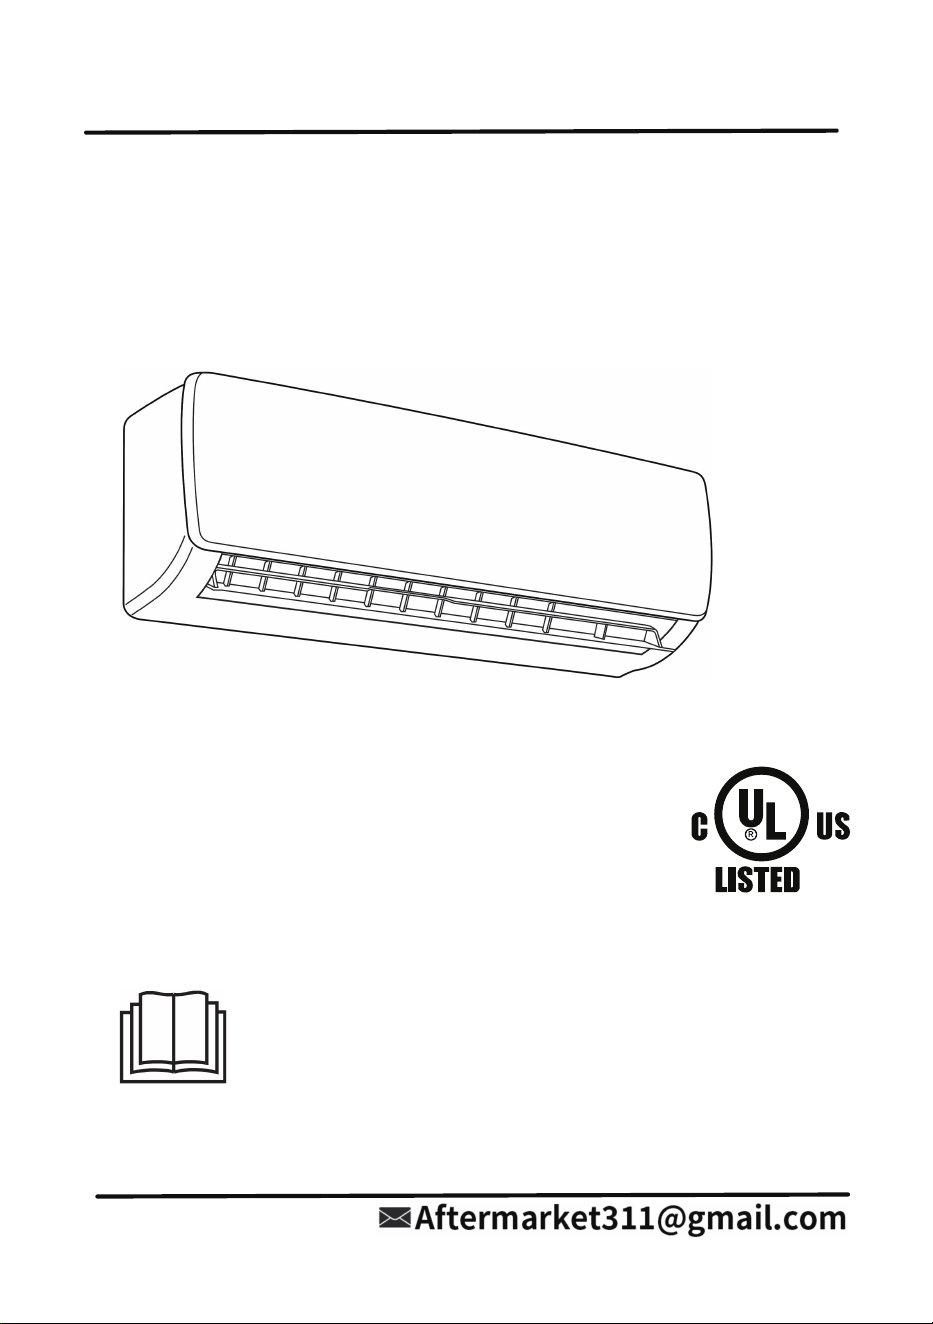
SPLIT-TYPE AIR CONDITIONER
Installation &
User’s Manual
HY9GWH115-1 / HY9GWH115-2
HY12GWH115-1 / HY12GWH115-2
HY12GWH230-1 / HY12GWH230-2
HY18GWH230-1 / HY18GWH230-2
IMPORTANT NOTICE:
Read this manual carefully before installing or operating your new air
conditioning unit.
Be sure to save this manual for future reference
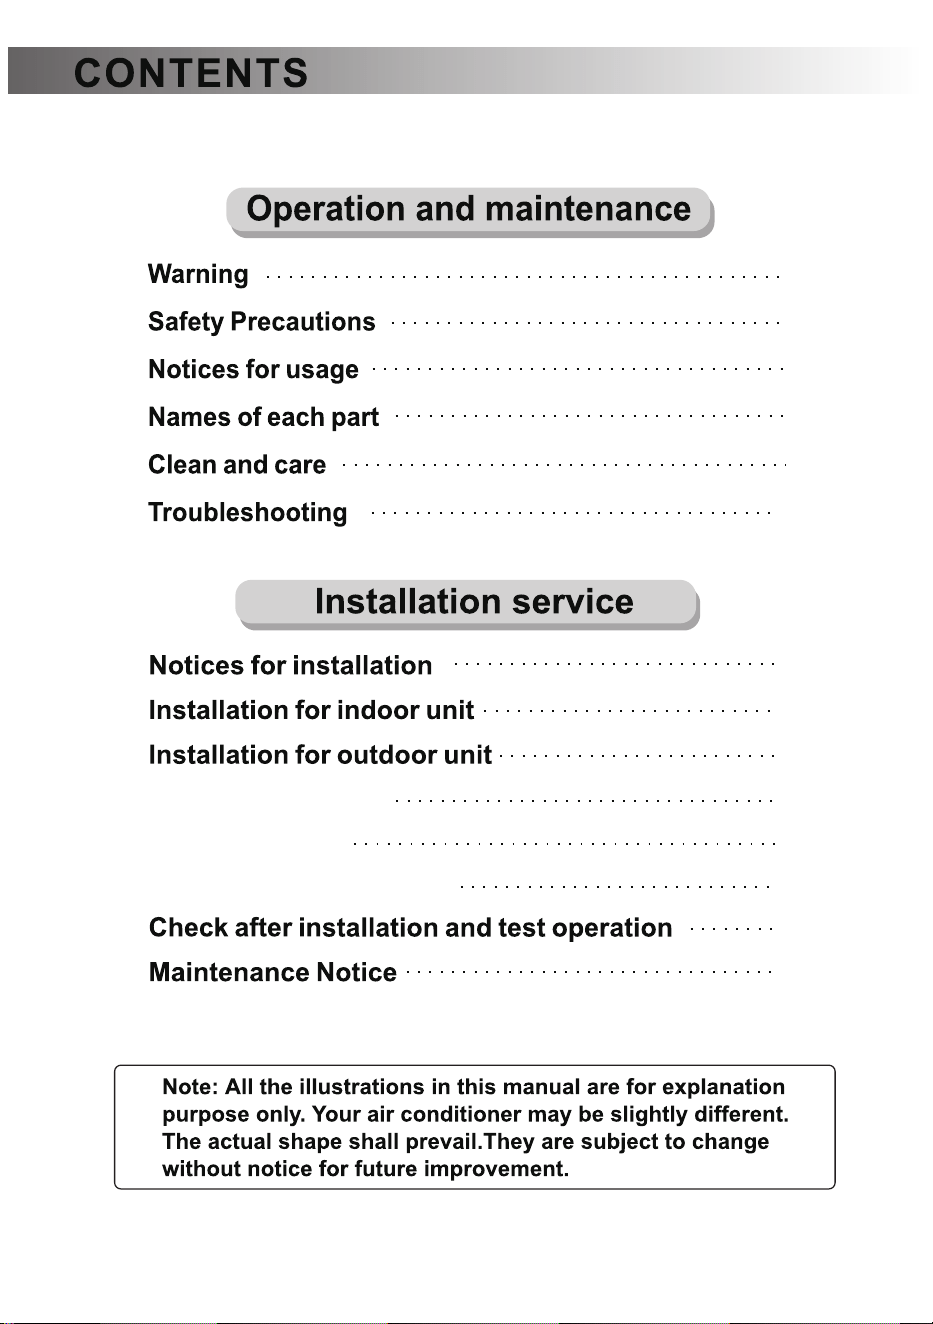
25
21-24
18-20
14-17
1
2-6
7-8
9
10-11
12-13
26
28
29-33
Indoor unit display
Remote Control
27
Remote Control Display
- 1 -
- 2 -
- 3 -
- 4 -
- 5 -
4
- 6 -
- 7 -
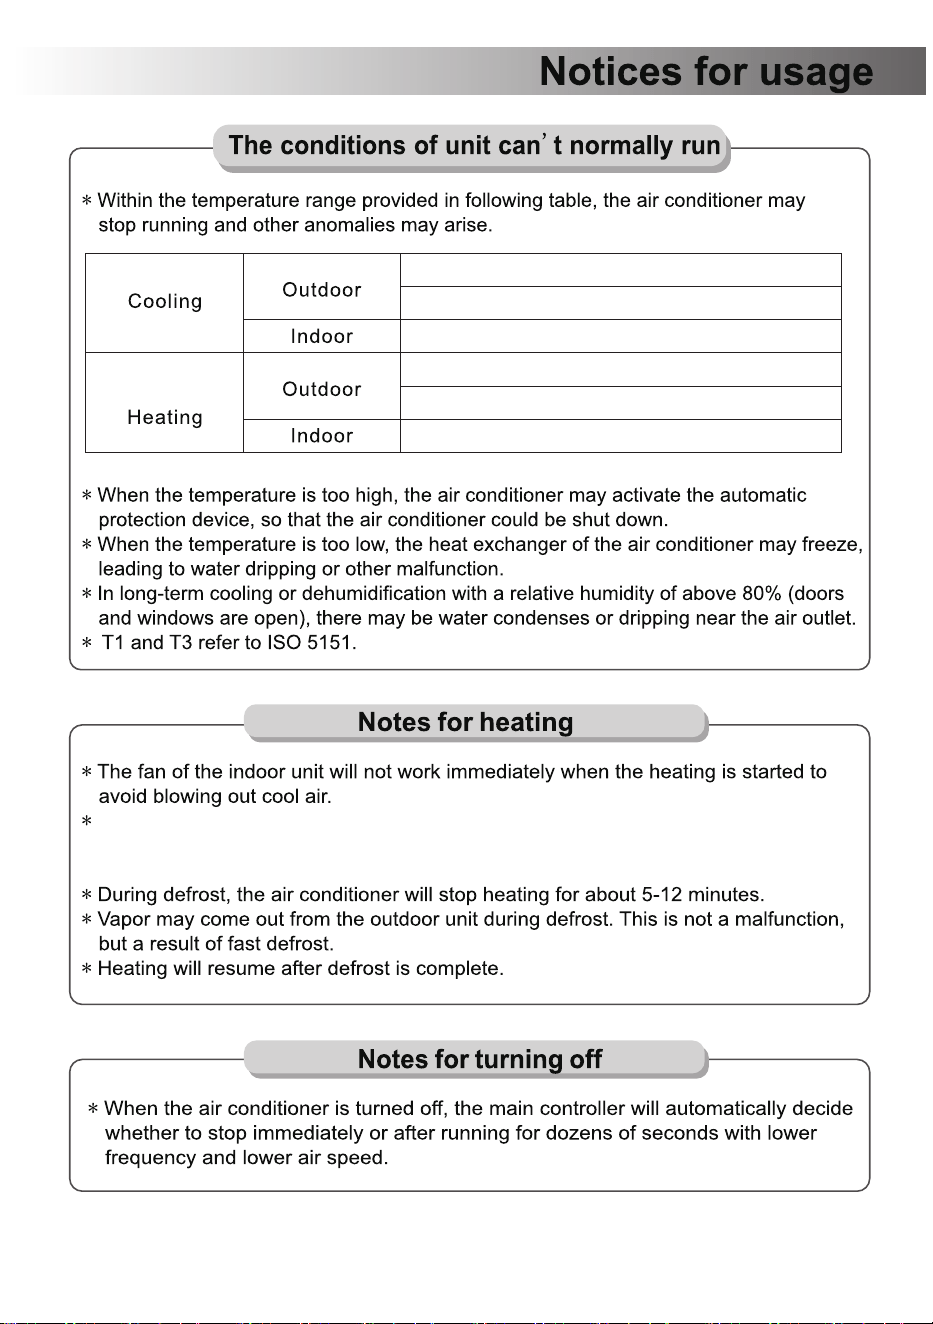
>43℃ (110℉) (Apply to T1)
>52℃ (126℉) (Apply to T3)
<18℃ (65℉)
>24℃ (76℉)
<-7℃ (19℉)
>27℃ (81℉)
When it is cold and wet outside, frost will form on the heat exchanger of the outdoor
unit, which reduces the heating efficiency. At this point, the air conditioner will activate
its defrosting function.
- 8 -
- 9 -
- 10 -
- 11 -
- 12 -
- 13 -
- 14 -
- 15 -
- 16 -
- 17 -
- 18 -
20cm above
(7.88in)
20cm above
(7.88in)
15cm above
(5.91in)
230-260cm
(90.56-102.37in)
- 19 -
- 20 -
1 2 3
- 21 -
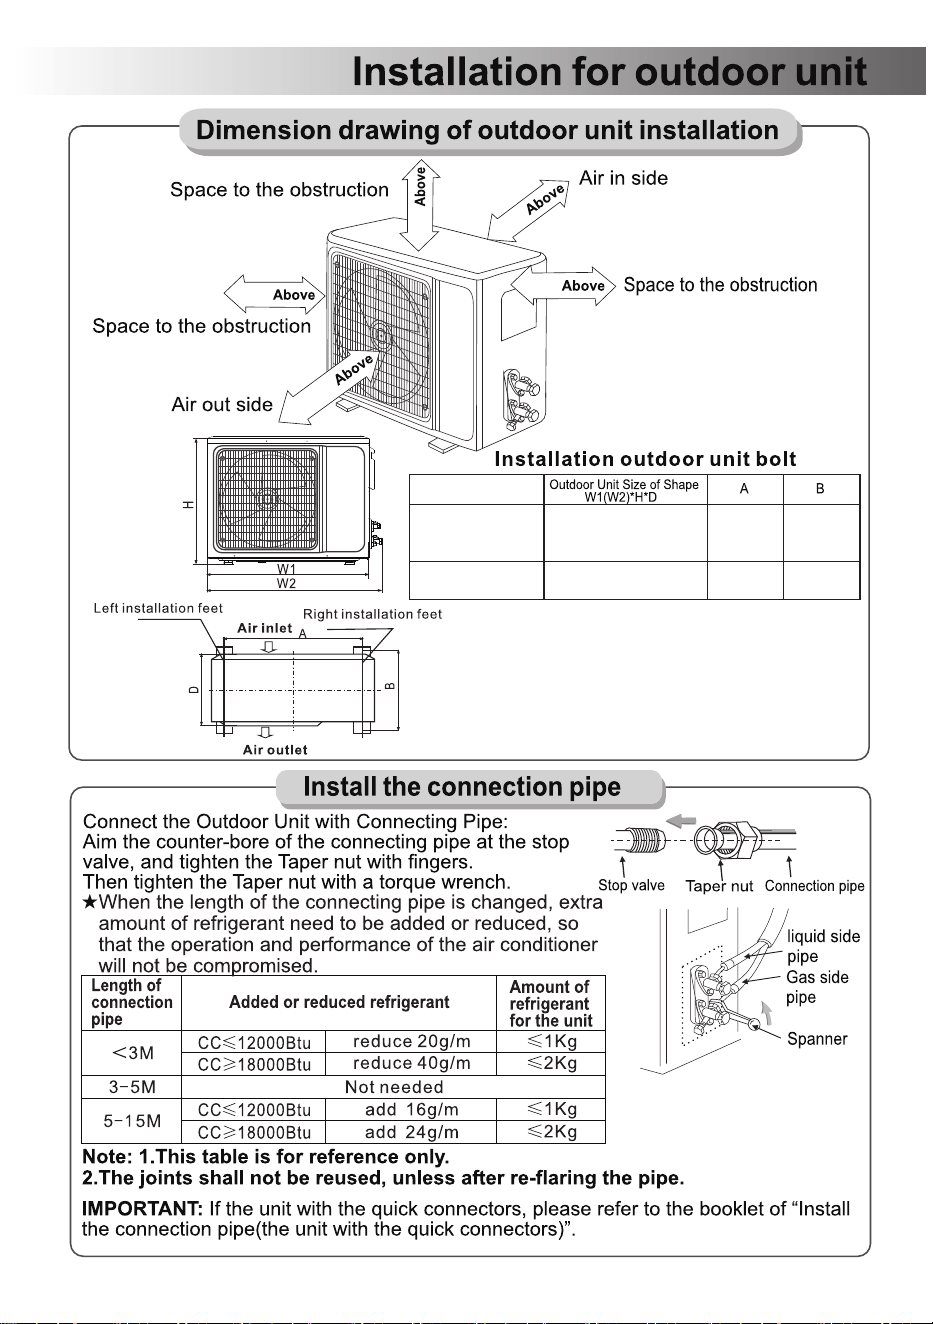
HY12GWH115-1/-2
HY9GWH115-1/-2
HY12GWH230-1/-2
HY18GWH230-1/-2
30cm
(11.82in)
200cm
(78.74in)
50cm
(19.69in)
50cm
(19.69in)
10cm
(3.94in)
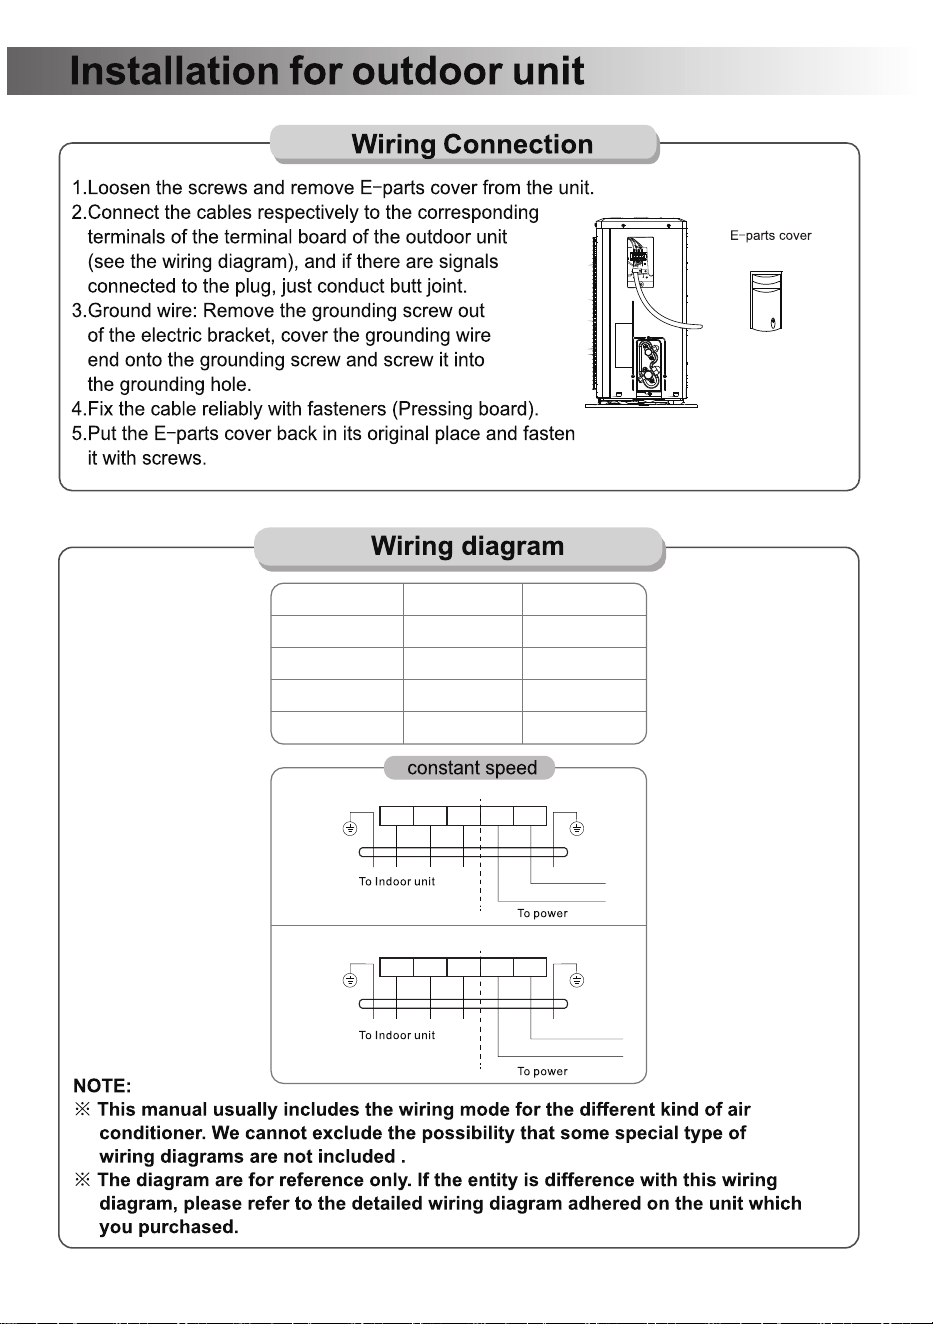
780(830)x602x310mm
715(755)x502x250mm
520mm
20.47in
451mm
17.76in
328mm
12.91in
265mm
10.43in
30.71(32.68)x23.7x12.2in
28.15(29.72)x19.76x9.84in
Model
- 22 -
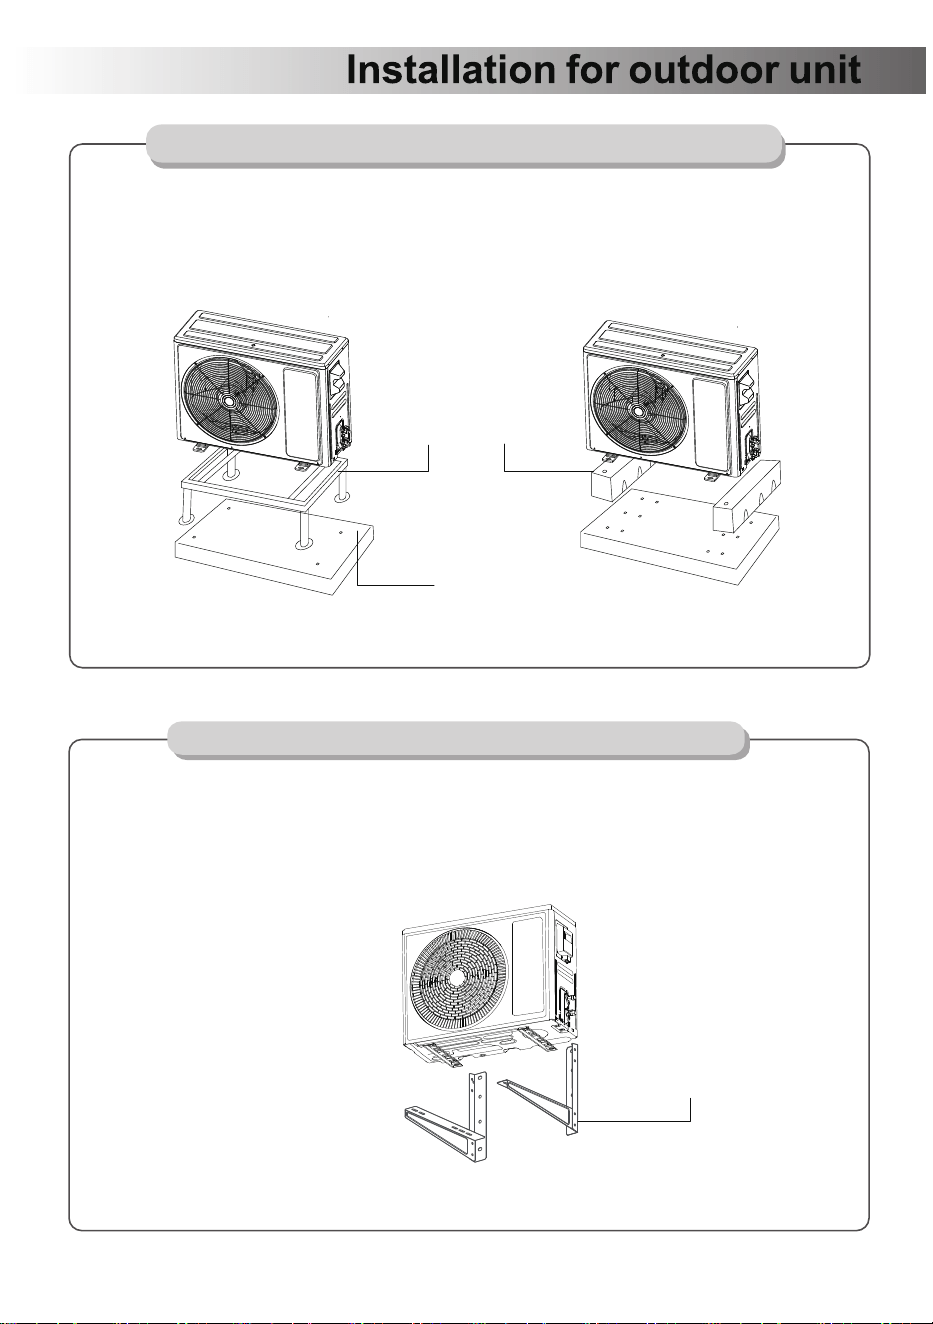
MODEL Rated voltage Frequency
HY12GWH115-1/-2
HY9GWH115-1/-2
HY12GWH230-1/-2
HY18GWH230-1/-2
115V~ 60Hz
115V~ 60Hz
60Hz
60Hz
208-230V~
208-230V~
1 2 3 L N
1 2 3 L1 L2
115V hot wire
Neutral wire
115V hot wire L1
115V hot wire L2
115V Outdoor Unit
230V Outdoor Unit
- 23 -
1.Place a concrete pad on the installation location.
2.Mount the outdoor unit in a base kit or stand.
3.Drill holes on the concrete pad.
4.Secure the base kit or stand on the concrete pad with concrete anchor bolts.
Secure the Outdoor Unit (Ground Installation)
NOTE:
Rubber foot pads can be placed between the outdoor unit and the mounting kit to
reduce vibrations and noise.
Secure the Outdoor Unit (Wall Installation)
The outdoor unit can be fixed on a wall mounting bracket if there is no ground
mounting option.
1. Measure the distance between the outdoor unit's legs.
2. Mount the wall mounting bracket on the wall.
3. Secure the outdoor unit on the wall mounting bracket.
NOTE:
The wall mounting bracket and the wall must be able to support at least 4 times
the weight of the outdoor unit, or 441lb, whichever is heavier.
Mounting Stand / Base Kit
(Not included)
Concrete Pad (Not included)
Wall Mount Bracket
(Not included)
- 24 -
19
(some products)
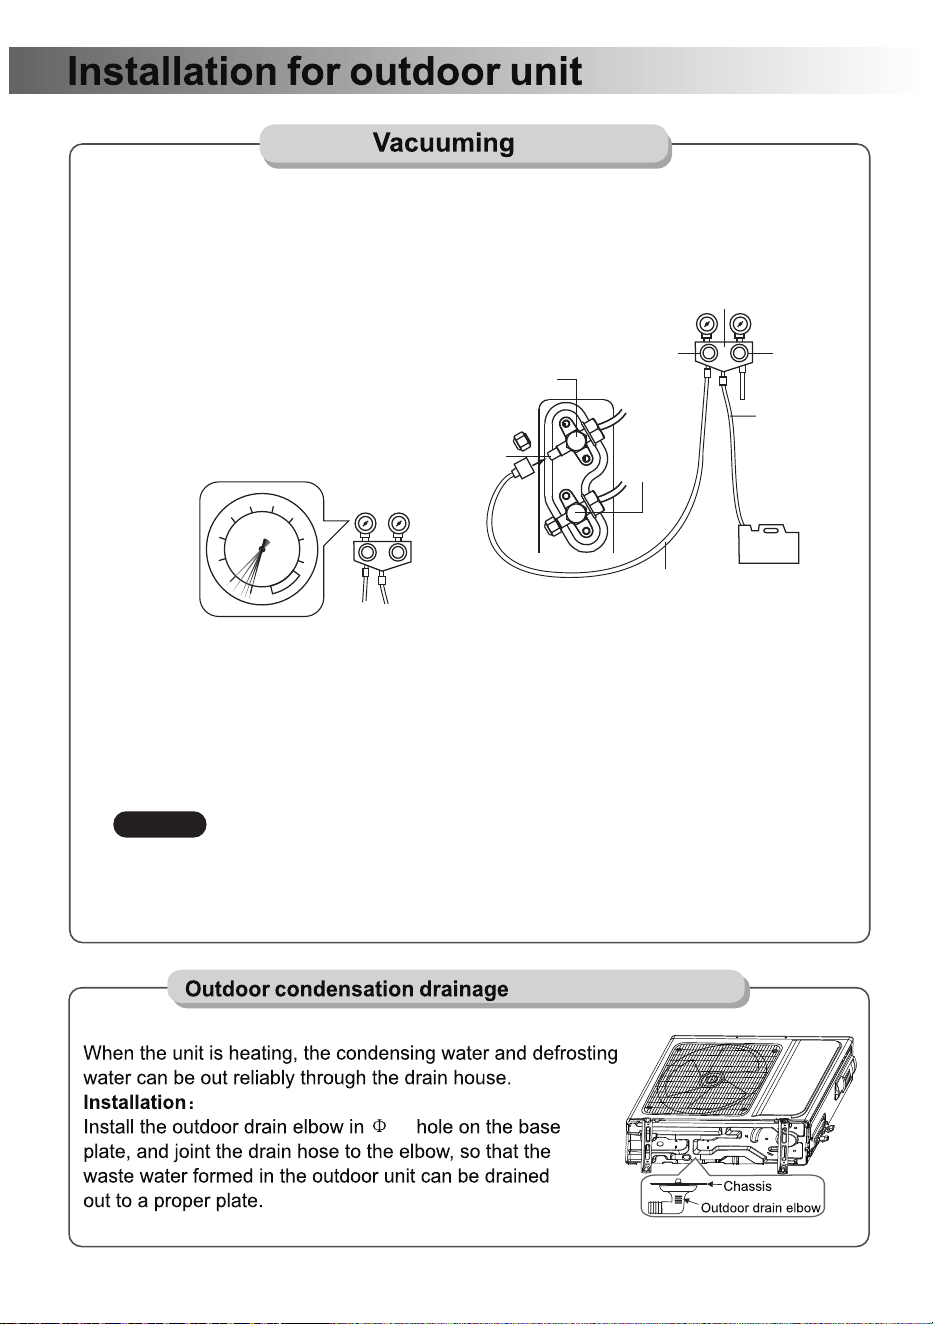
1. Remove the protective cap from the service port, low-pressure valve, and
high-pressure valve.
2. Connect the pressure hose from the manifold gauge to the service port.
3. Connect the charge hose from the manifold gauge to the vacuum pump.
4. OPEN the low-pressure valve (Lo·M) and
CLOSE the high-pressure valve (Hi·M) on
the manifold gauge.
5. Turn on the vacuum pump to vacuum
the system.
6. Let the vacuum pump run for at least
15 minutes and make sure the gauge
indicates -0.1Mpa(-76cmHg).
7. Close the pressure valve (Lo·M) and turn off the vacuum pump.
8. Leave the system connected with the manifold gauge for 5 minutes, then make sure
the gauge indication does not exceed 0.005Mpa.
*In the case of a leak, and the pressure value increases, reconnect all the connection
joints on the refrigerant line, and redo the vacuum pumping.
9. Open the high-pressure valve (Hi·R) for 1/4 turn, then close the valve after 5 seconds.
10. Check all the connection joints with a refrigerant leak detector or liquid leak detector.
11. Add refrigerant charge if you use a lengthened refrigerant line.
12. Disconnect the pressure hose from the service port, then fully open the low-pressure
valve (Lo·R) and high-pressure valve (Hi·R).
13. Put the protective caps back on the service port, low-pressure valve, and
high-pressure valve.Tighten the caps.
Charge Hose
Vacuum Pump
High Pressure
Valve(Hi·M)
Low Pressure
Valve(Lo·M)
Manifold Gauge
Pressure Hose
Low Pressure
Valve(Lo·R)
High Pressure
Valve(Hi·R)
Service Port
0
1
2
3
4
5
6
7
8
-0.1
Mpa
Page 21
- 25 -
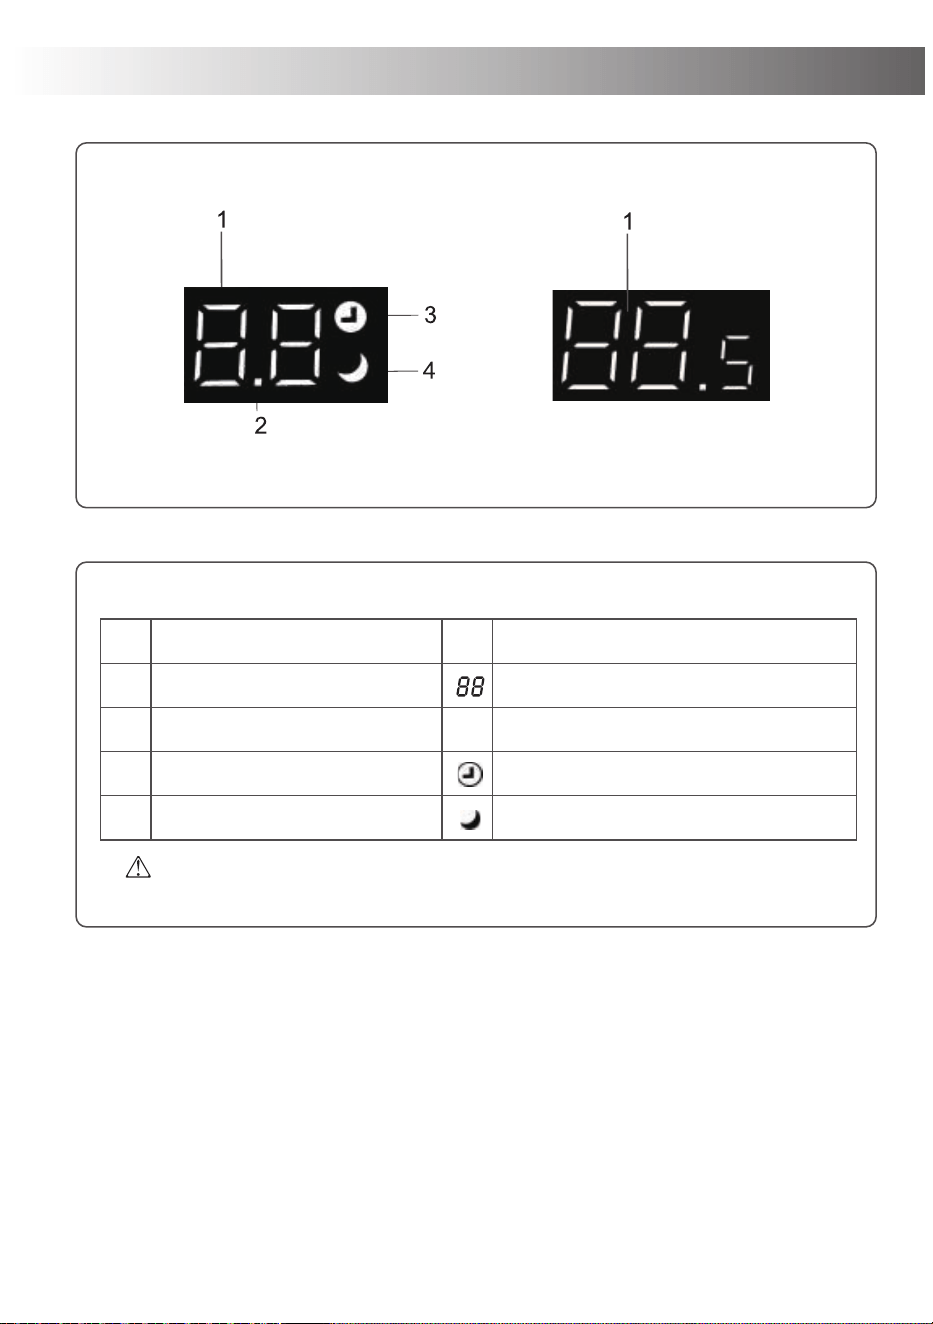
Indoor unit display
The shape and position of switchesand indicators may vary according to the
model, but their function is the same.
No.
1
2
3
4
Led Function
Temperature display(if present)
TIMER light/same NO.1
TIMER TIMER mode
SLEEP SLEEP mode
Indicates the set temperature in ℃ or ℉
TIMER mode light/same NO.1
- 26 -
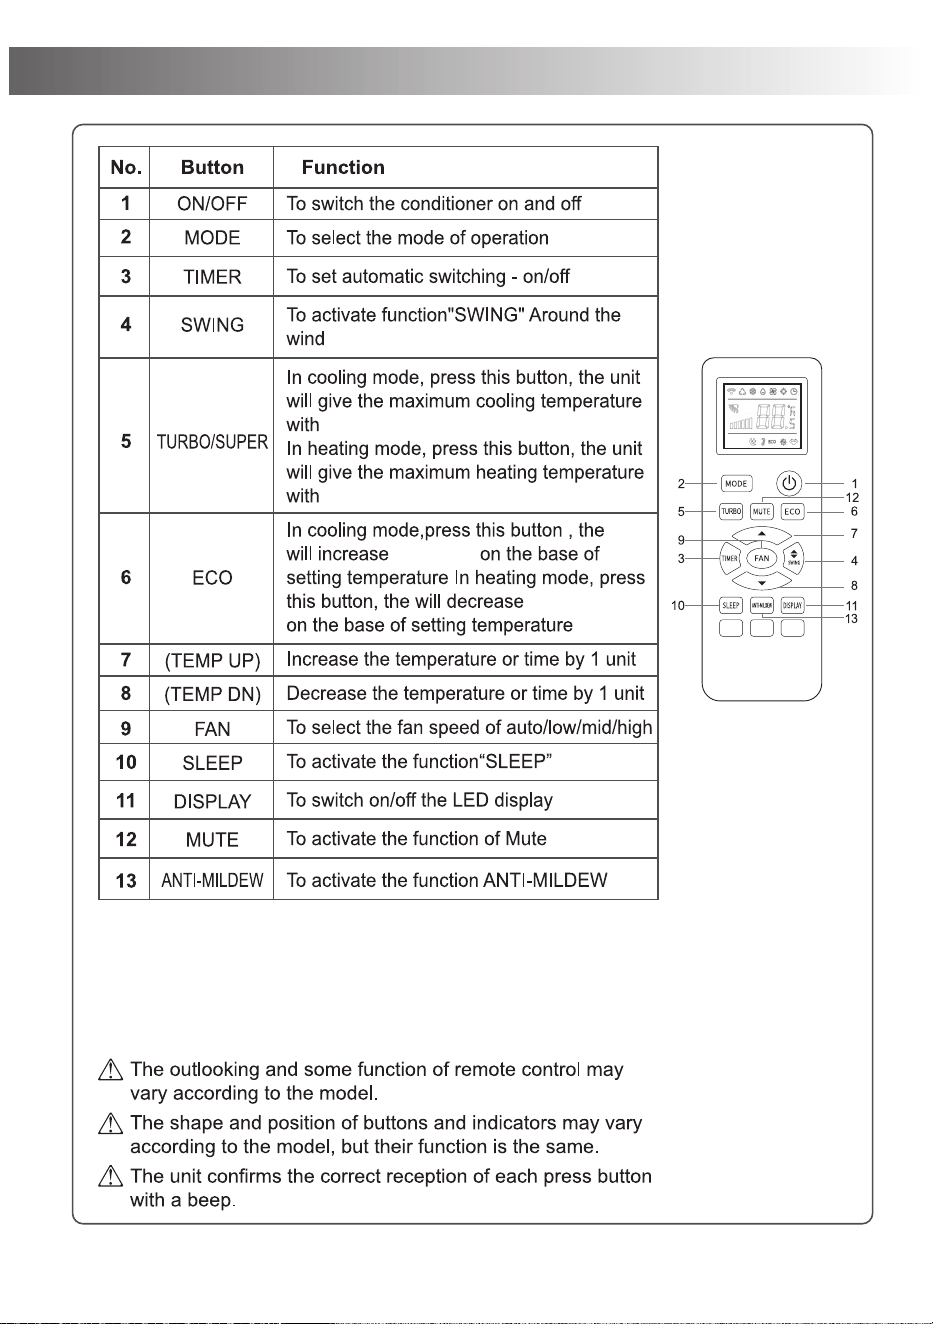
Remote Control
61℉(16℃)
88℉(31℃)
4℉(2℃)
4℉(2℃)
- 27 -
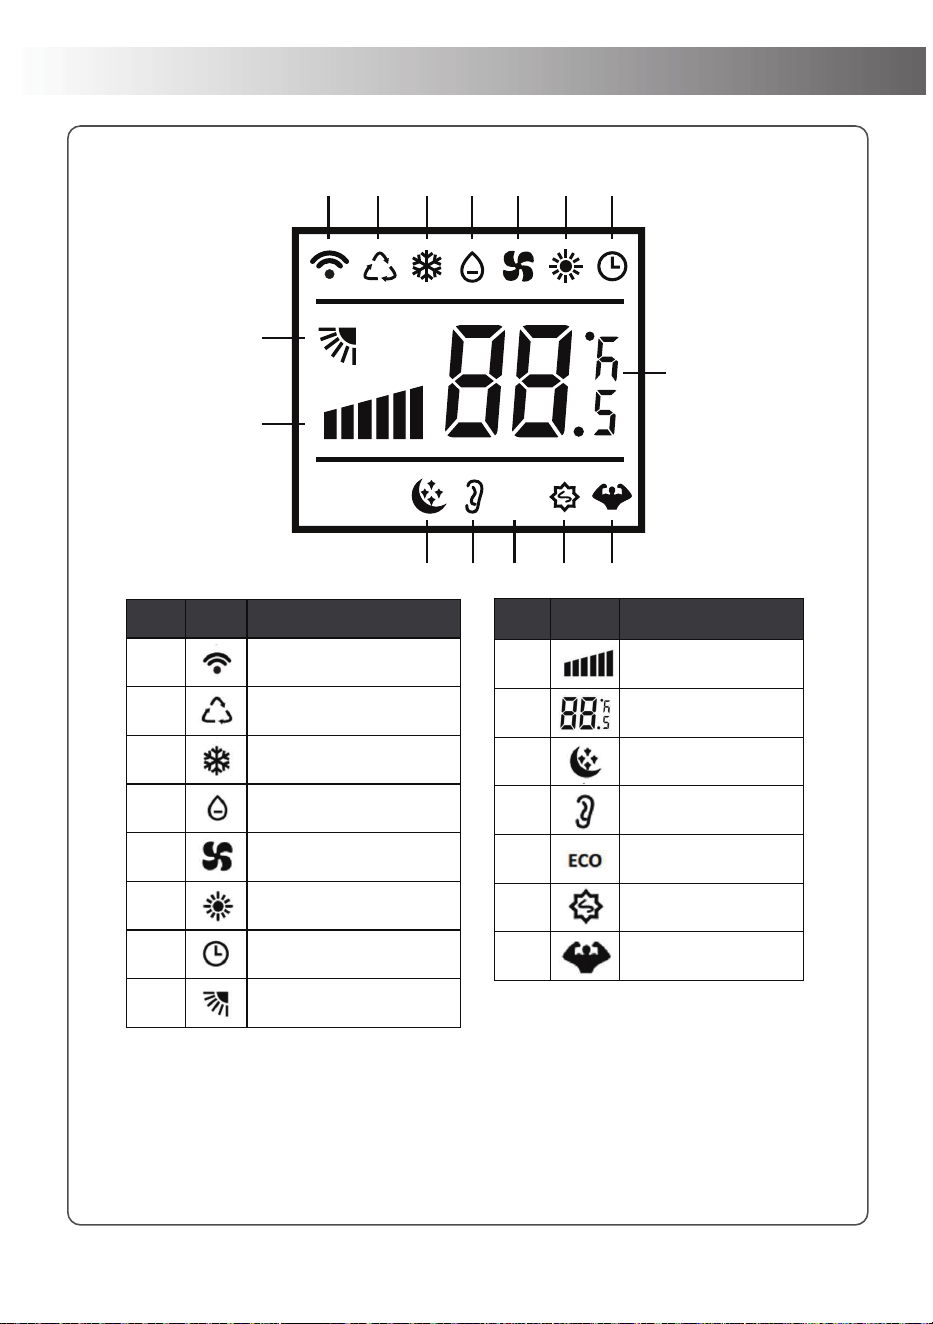
Remote Control Display
NOTE:
1. All indicators shown in the figure are for the purpose of clear presentation.
But during the actual operation only the relative functional signs are shown on
the display window.
2. Appearance of the display and function of the remote control may differ
from some models.
NO. Icon Description
1
Signal Transmission
2
Automatic Mode
3
Cool Mode
4
Dehumidification Mode
5
Fan Only Mode
6
Heat Mode
7
Timer Function
8
Up-Down Louver Swing
NO. Icon Description
9
Wind Speed Gear
Display
10
Set Temperature/
timer display
11 Sleep Mode
12
Mute Mode
13
ECO Mode
14
Anti-Mildew Mode
15
Turbo Mode
ECO
1
8
9
11 12 13 14 15
10
2 3 4 5 6 7
- 28 -
- 29 -
- 30 -
- 31 -
- 32 -
- 33 - 06091572

If you encounter any problems when
using our products, please feel free to
contact us through the following Email
to get a quick response and a 100%
satisfactory solution.
Questions or Problems?
Tell us
We are here
to help with
our 100%
satisfactory service
within 24 hours
Email: Aftermarket311@gmail.com
MADE IN CHINA