
12
INDEX
I. IMAGES ................................................................................................................................................................................ 2
II. DATAPLATE AND TECHNICAL DATA ................................................................................................................................... 13
III. GENERAL INSTRUCTIONS ................................................................................................................................................... 14
IV. THE ENVIRONMENT ............................................................................................................................................................. 16
1. PACKAGING ........................................................................................................................................................................... 16
2. USE ............................................................................................................................................................................... 16
3. CLEANING .............................................................................................................................................................................. 16
4. DISPOSAL .............................................................................................................................................................................. 16
V. INSTALLATION ...................................................................................................................................................................... 16
1. REFERENCE STANDARDS ................................................................................................................................................... 16
2. UNPACKING ........................................................................................................................................................................... 16
3. POSITIONING ......................................................................................................................................................................... 16
4. CONNECTIONS ...................................................................................................................................................................... 17
VI. INSTRUCTIONS FOR THE USER .......................................................................................................................................... 18
1. USE OF RETHERMALIZER ................................................................................................................................................... 18
VII. CLEANING ............................................................................................................................................................................. 19
1. EXTERNAL PARTS ................................................................................................................................................................. 19
2. OTHER SURFACES ................................................................................................................................................................ 19
3. IDLE PERIODS ....................................................................................................................................................................... 19
4. INTERNAL PARTS .................................................................................................................................................................. 19
VIII. MAINTENENCE ...................................................................................................................................................................... 19
1. MAINTENENCE ...................................................................................................................................................................... 19
2. ALARM LIST ........................................................................................................................................................................... 20
13
II. DATAPLATE AND TECHNICAL DATA
Electrolux Professional SpA - Viale Treviso, 15 - 33170 Pordenone (Italy)
El
e
c
t
r
o
l
u
x
P
r
o
f
e
s
s
io
n
a
l
S
p
A
-
V
i
a
le
T
r
e
v
is
o
,
1
5
-
3
3
1
70
Po
r
d
e
n
o
n
e
(
I
ta
l
y)
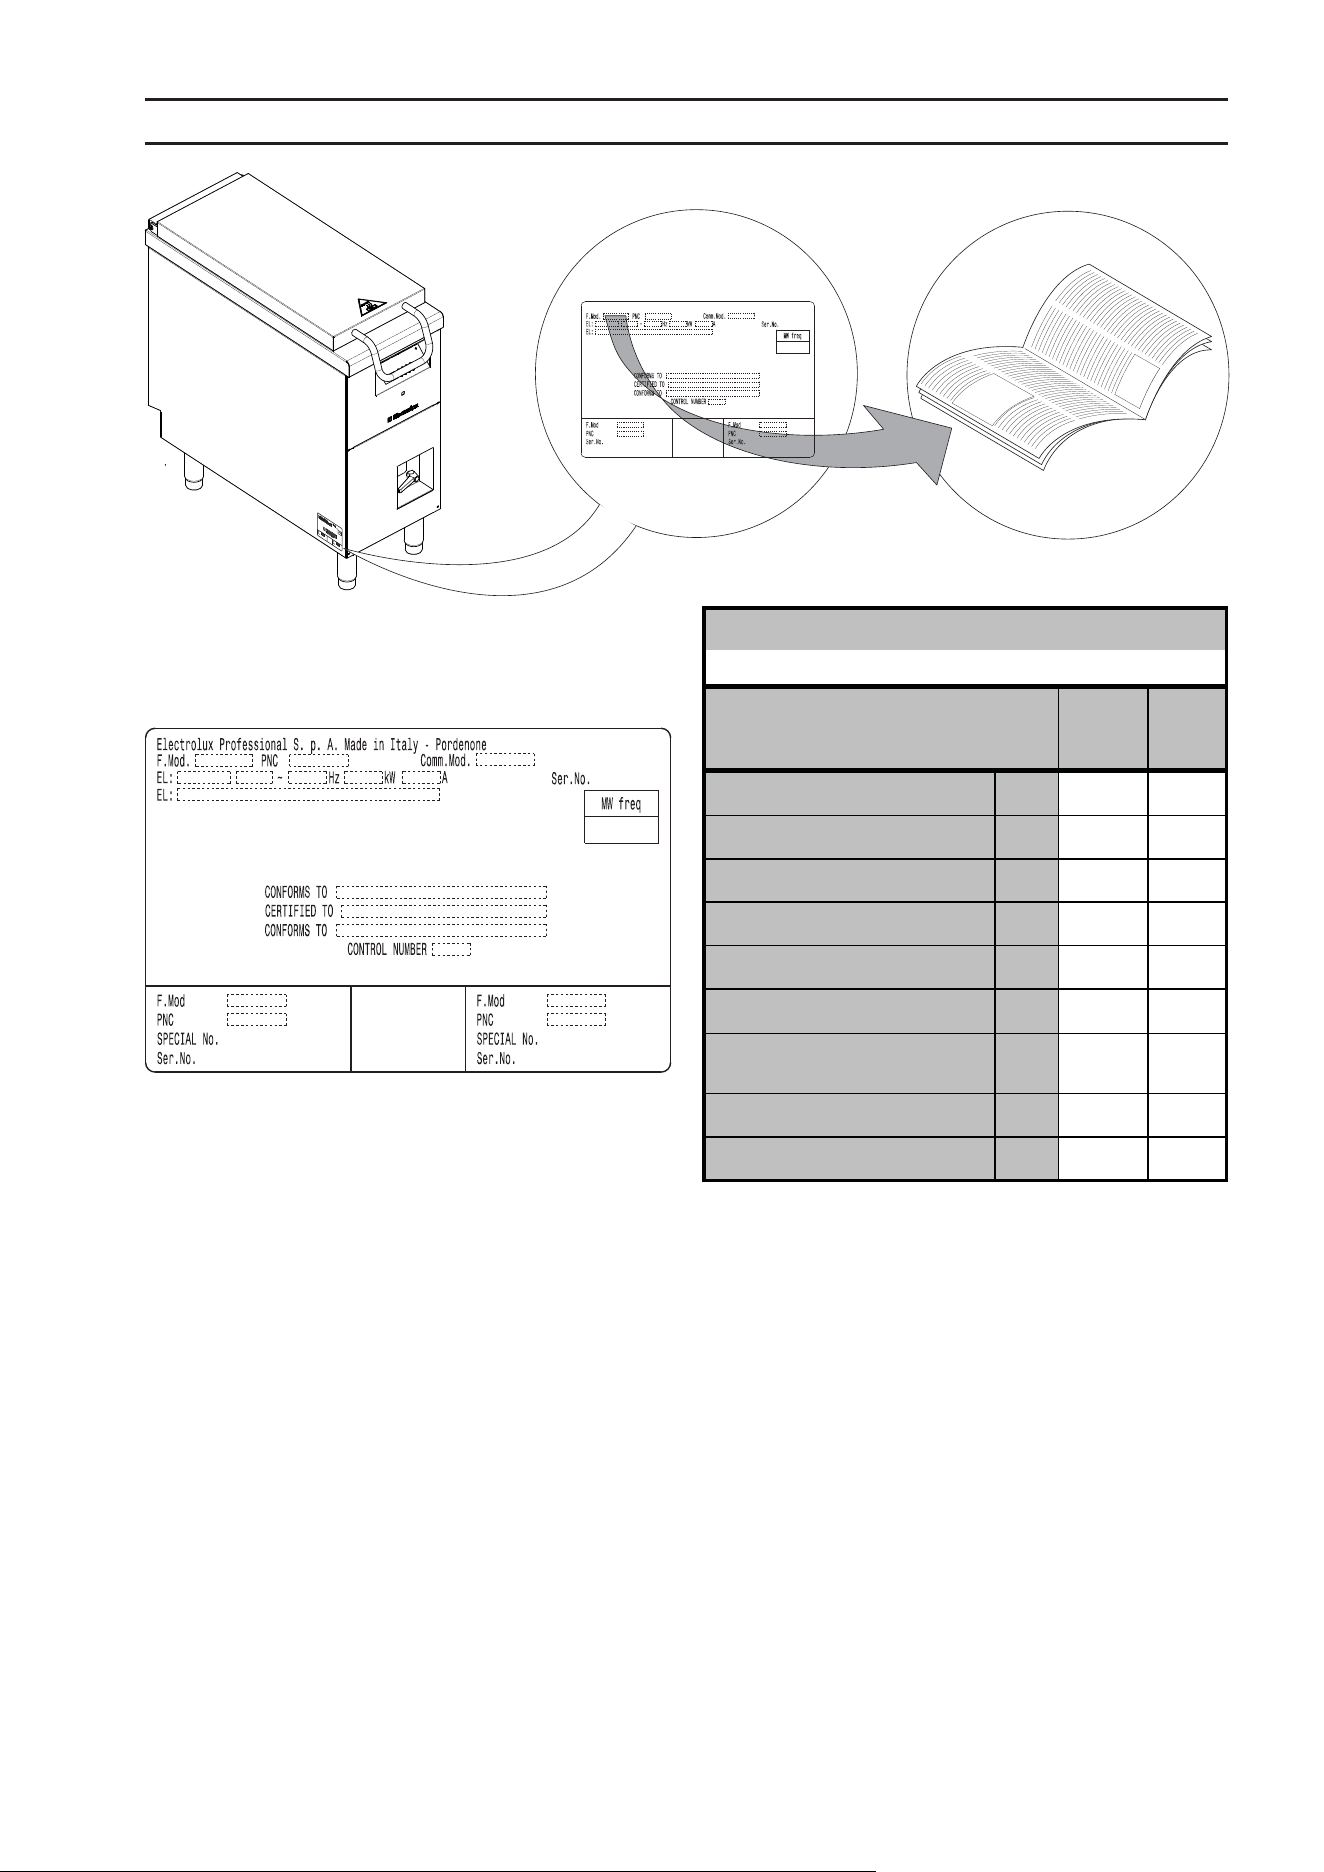
MACHINE AND MANUFACTURER’S IDENTIFICATION DATA
A reproduction of the marking or dataplate on the machine
is given below:
EL.
Electrolux Professional SPA
Viale Treviso, 15
33170 Pordenone
(Italy) Manufacturer
When installing the appliance, make sure the electrical
connection is carried out in compliance with that specifi ed
on the dataplate.
TABLE A - Technical data - N9E
MODELS
F391350
400mm
F391351
400mm
TECHNICAL DATA
Tank capacity (fi lling level) Lt.
60 60
Power supply voltage V
208 208
Phases N°
33
Frequency Hz
60 60
Max power kW
59
Supply water hardness ppm
<50 <50
Concentration of chlorides in
water
ppm
<20 <20
Max supply water temperature °F
122 122
Power cable section AWG
14 10

14
III. GENERAL INSTRUCTIONS
• Carefully read the instruction handbook before using the appliance.
• After installation keep the instruction handbook for future consultation.
• FIRE HAZARD - Keep the area around the appliance clear and free
from combustible materials. Do not keep fl ammable materials in the vi-
cinity of the appliance.
• Install the appliance in a well-ventilated place
sos
• Place emergency telephone numbers in a visible position.
• Installation and maintenance must only be carried out by qualifi ed personnel
authorised by the manufacturer. For assistance, contact an authorised technical
centre. Demand original spare parts.
• This equipment is designed for rethermalize food or soups in plastic bags.
It is intended for industrial use. Any other use is to be considered improper.
• This appliance can not be used by minors and adults with limited physi-
cal, sensory or mental abilities or without experience and knowledge of it.
Children shall not play with the appliance. Cleaning and user maintenance
shall not be made by children without supervision.
• maintenance shall not be made by children without supervision.
• The appliance must be used by trained personnel about the risks involved.
• Do not leave the appliance unattended when operating.
• Turn the appliance off in case of fault or poor operation.
• Do not use products (even if diluted) containing chlorine (sodium hypochlo-
rite, hydrochloric or muriatic acid, etc.) to clean the appliance or the fl oor
under it. Do not use metal tools to clean steel parts (wire brushes or Scotch
Brite type scouring pads).
• Do not allow oil or grease to come into contact with plastic parts.
• Do not allow dirt, fat, food or other residuals to form deposits on the appliance.
• Do not clean the appliance with direct jets of water.
15
Failure to observe the above can compromise the safety of the appliance. Failure
to observe the above invalidates the warranty.
• The operating pressure of water (minimum and maximum) must be between
1.5 (0.15) / 3 (0.3) bar (Mpa).
• Do not spray water or use steam to clean the equipment.
• The level of A-weighted emission sound pressure does not exceed 70 dB (A).
• This handbook is available in digital format by contacting the dealer or ref-
erence customer care.
• Install a circuit breaker ahead of the appliance. The contact opening distance
and maximum leakage current must comply with current regulations.
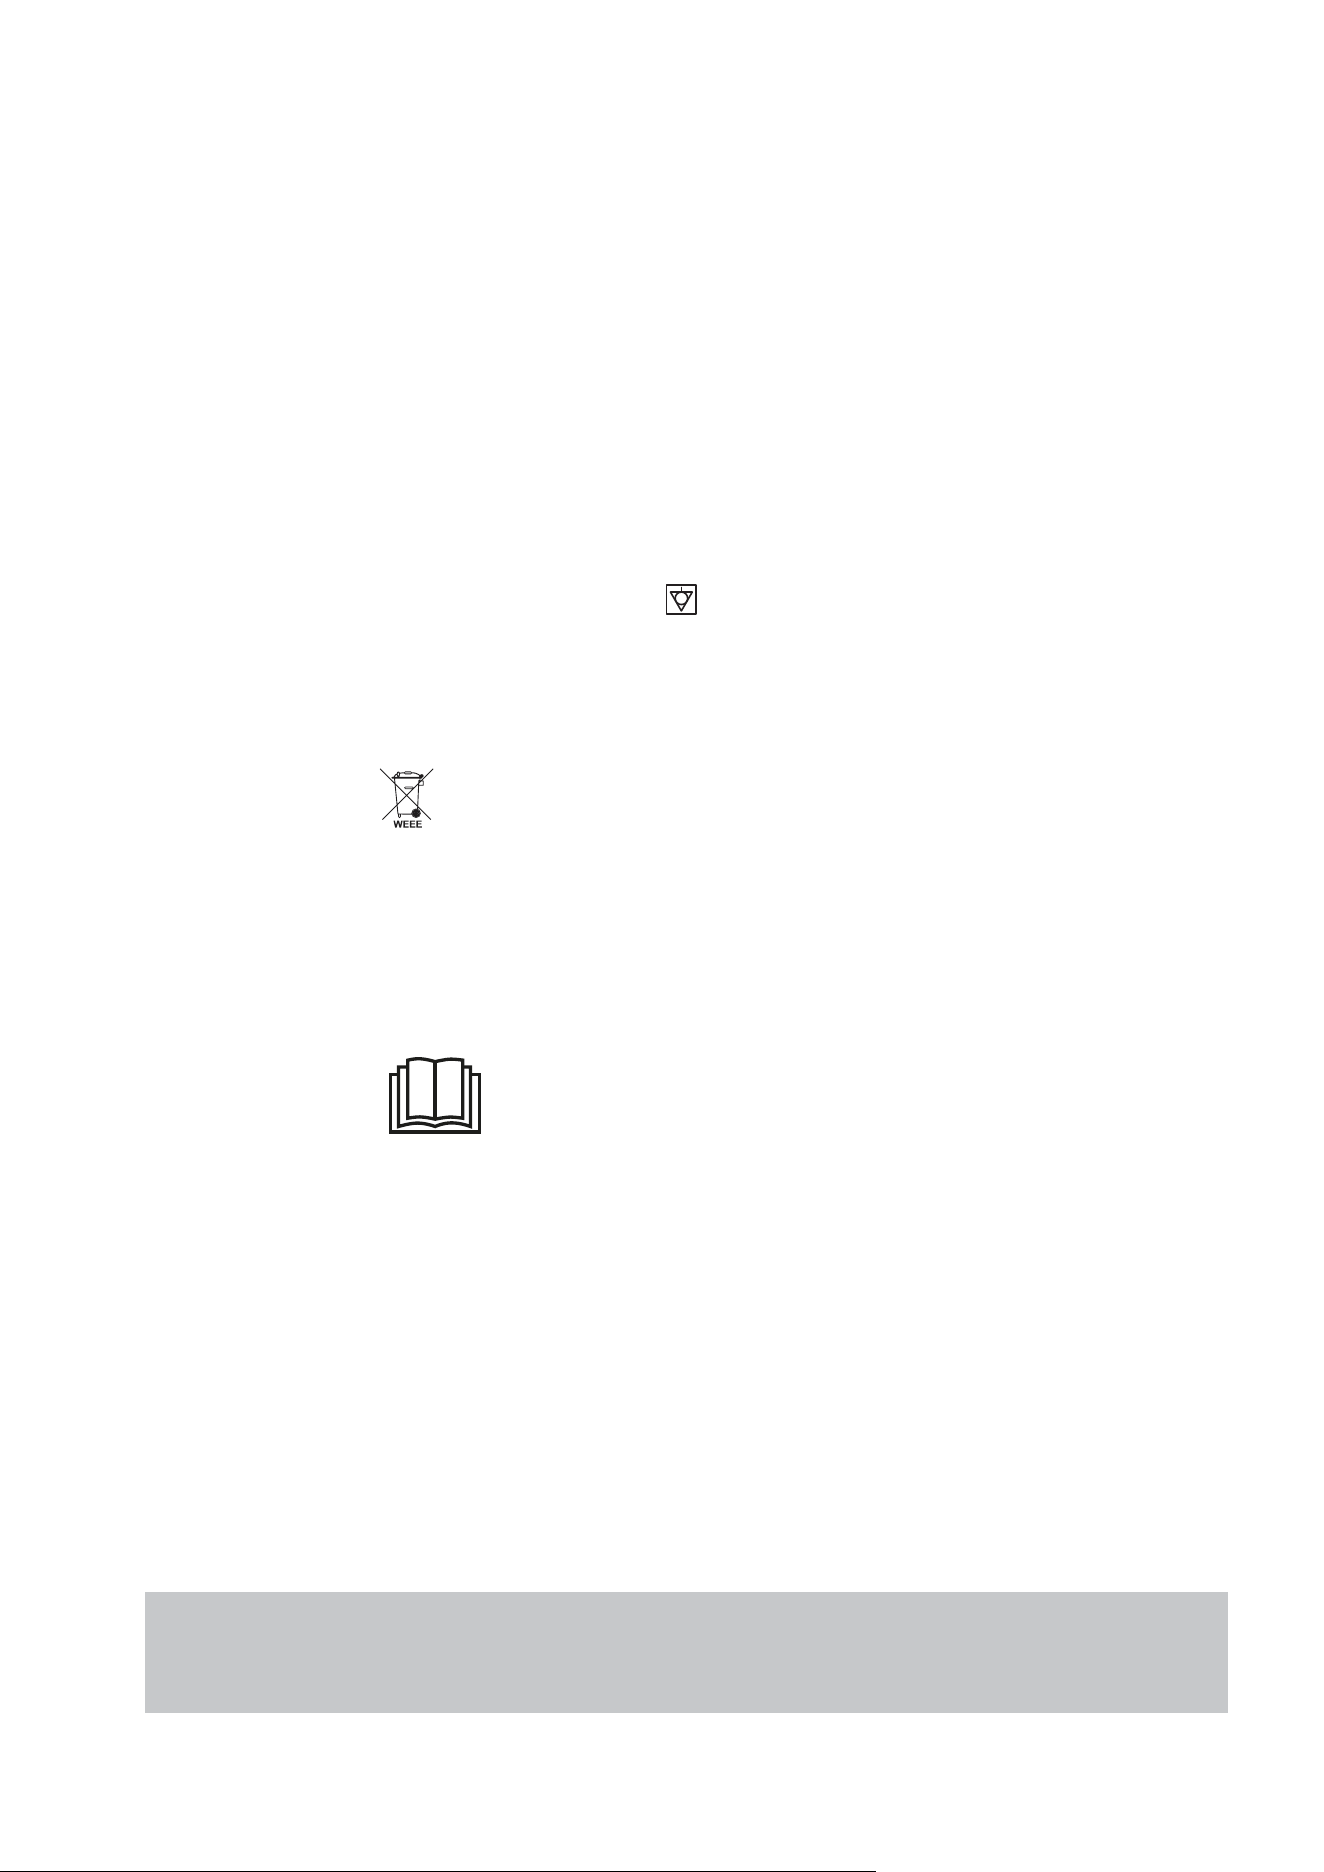
• Connect the appliance to an earth; it must be included in an equipotential
node by means of the screw located at the front right under the frame. The
screw is marked with the symbol
.
• It is advisable to have the appliance inspected by an authorised person at
least every 12 months. For this purpose, it is advisable to stipulate a servi-
cing contract.
• The symbol
given on the product indicates that it should not be consid-
ered domestic waste, but must be correctly disposed of in order to prevent
any negative consequences for the environment and the health of persons.
• For further information regarding the recycling of this product, contact the
product agent or local dealer, the after-sales service or the local body re-
sponsible for waste disposal.
• The symbol
“Read operator’s manual“ indicates that the operator’s
manual should be read before continuing the operation.
16
IV. THE ENVIRONMENT
1. PACKING
Packing materials are environment friendly and can
be stored without risk, or burned in a special waste
incineration plant.
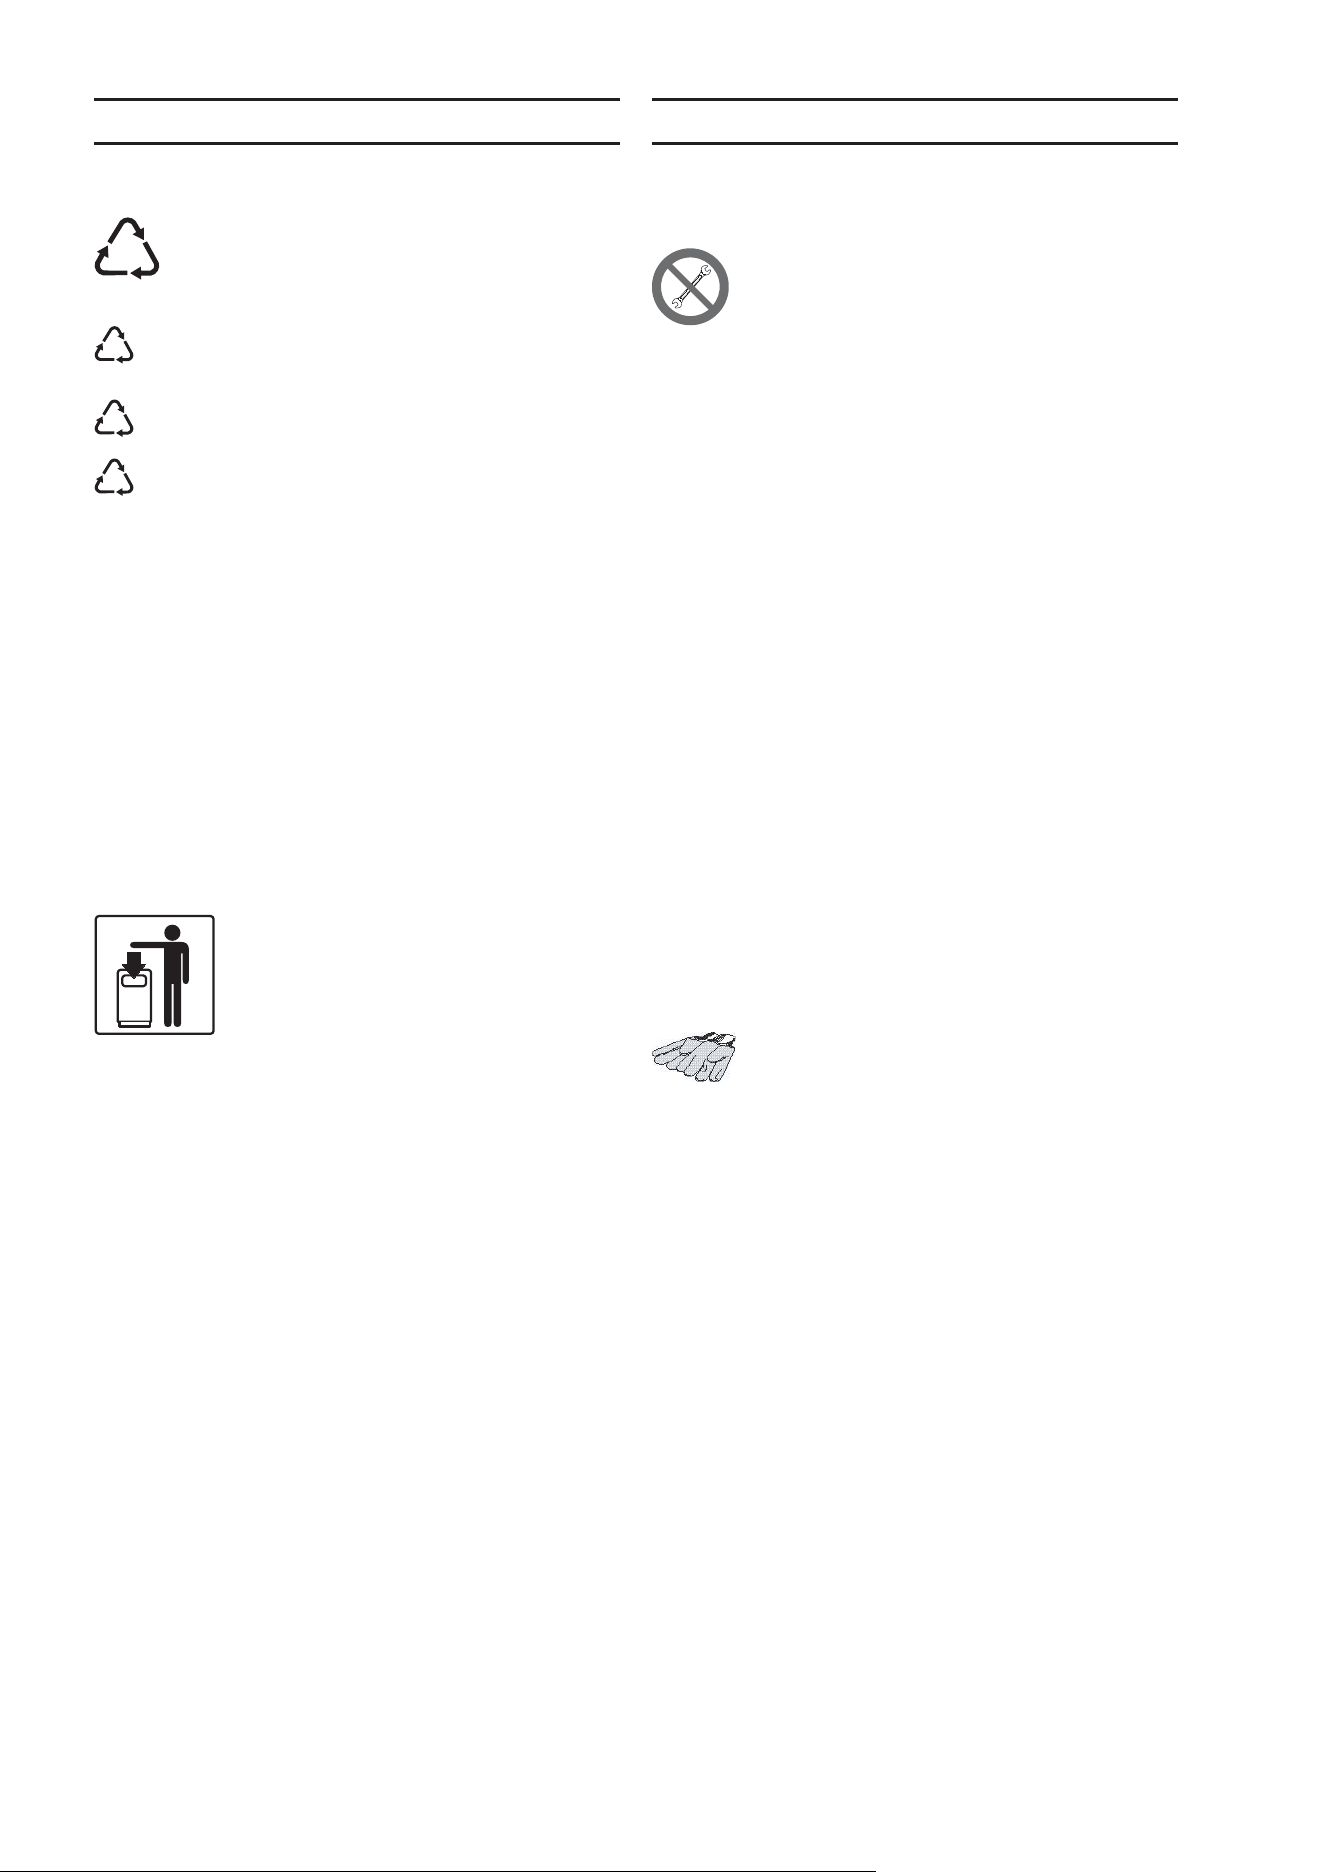
Recyclable plastic components are marked with:
PE
Polyethylene: outer wrapping, instruction booklet
bag, gas nozzle bag.
PP
Polypropylene: roof packing panels, straps.
PS
Polystyrene foam: corner protectors.
2. USE
Our appliances offer high performance and effi ciency. To
reduce consumption of electricity or water, do not use the
appliance empty or in conditions that compromise optimal
effi ciency (e.g. with doors or lids open, etc.); the appliance is
used in a well-ventilated place.
3. CLEANING
In order to reduce the emission of pollutants into the environ-
ment, clean the appliance (externally and when necessary
internally) with products that are more than 90% biodegradable
(for further information, see chap. VI “CLEANING”).
4. DISPOSAL
Do not disperse in the environment. Our
appliances are manufactured using more
than 90% (in weight) recyclable metals
(stainless steel, iron, aluminium, galvanised
sheet, copper, etc.).
Make the appliance unusable by removing
the power cable and any compartment or cavity closing mech-
anisms (when present) in order to avoid the risk of someone
becoming closed inside.
V. INSTALLATION
• Carefully read the installation and maintenance proce-
dures given in this instruction manual before installing the
appliance.
• Installation and maintenance must only be car-
ried out by qualifi ed personnel authorised by the
manufacturer.
• Failure to observe the correct appliance installation, con-
version and modifi cation procedures can cause damage
to the appliance, danger to persons and invalidates the
Manufacturer’s warranty.
1. REFERENCE STANDARDS
• This appliance must comply with the applicable federal,
state or local regulations. These installation procedures
must be carried out by qualifi ed personnel, otherwise
the warranty will be invalidated. The NFPA (National Fire
Protection Association) Inc states, in its latest 96 edition,
that the local regulations are the “competent authority”
regarding the installation requirements for appliances.
Therefore, all connections (gas, electrical, water, discharg-
es, etc.) must comply with all the local regulations
2. UNPACKING
IMPORTANT!
Immediately check for any damage caused during transport.
• The forwarder is responsible for the goods during transport
and delivery.
• Inspect the packing before and after unloading.
• Make a complaint to the forwarder in case of visible or
hidden damage, reporting any damage or shortages on
the dispatch note on delivery.
• The driver must sign the dispatch note: the forwarder
can reject the claim if the dispatch note is not signed (the
forwarder can provide the necessary form).
• Unpack, taking care not to damage the equip-
ment. Wear protective gloves.
• Carefully remove the protective fi lm from metal surfaces
and clean any traces of glue with a suitable solvent.
• For hidden damage or shortages becoming apparent only
after unpacking, request the forwarder for inspection of
the goods within and not later than 15 days of delivery.
• Keep all the documentation contained in the packing.
3. POSITIONING
• Handle the equipment with care in order to avoid dam-
age or danger to persons. Use a pallet for handling and
positioning.
• The installation diagram given in this instruction manual gives
the appliance dimensions and the position of connections
(gas, electricity, water). Check that they are available and
ready for making all the necessary connections.
• The appliance can be installed only separately.
• Maintain an adequate distance between the appliance
and any combustible walls. Do not store or use fl ammable
materials and liquids near the appliance.
• Leave an adequate space between the appliance and
any side walls in order to enable subsequent servicing
or maintenance operations.
•
Check and if necessary level the appliance after position-
ing. Incorrect levelling can cause appliance malfunctioning.

17
3.1. FLOOR FIXING
To avoid accidental tipping of built-in half-module appliances
installed separately, fi x them to the fl oor carefully following
the instructions enclosed with the corresponding accessory
(F206136).
4. CONNECTIONS
Any installation work or maintenance to the sup-
ply system must only be carried out by the utility
company or an authorised installer.
• See the installation diagram for the type and position of
appliance connections.
4.1. ELECTRICAL APPLIANCES
4.1.1. ELECTRICAL CONNECTION
IMPORTANT! Before connecting, make sure the mains voltage
and frequency match that given on the dataplate.
4.1.2. POWER CABLE
The power cable must be fl exible, having characteristics at least
equal to the type with rubber insulation. Protect the section of
cable outside the appliance with a metal or rigid plastic tube
4.1.3. TO ACCESS THE TERMINAL BLOCK
• Remove the appliance rear panel by undoing the fi xing
screws.
•
Connect the power cable to the terminal block according
to the wiring diagram provided with the appliance
.
• Secure the power cable with the cable gland.
WARNING! The manufacturer declines all responsibility if
safety rules are not observed
4.2. WATER CONNECTION
NOTE: The appliance must be provided with an adequate
anti-backfl ow device at the water inlet, in conformity with
the applicable federal, State and local regulations
NOTE: The water connection is provided of an internal fi lter.
The appliance must be fed with drinking water at a pressure
of 150-300 KPa (1.5 - 3 bar)
Attention! If the water pressure is higher than that specifi ed
(see the chapter General Instructions), use a pressure reducer
to avoid damaging the appliance. For correct installation, the
water inlet pipe must be connected to the mains by means of
a mechanical fi lter and, shutoff cock and a noun return valve
(provided in the accessories bags of the present appliance).
Before connecting the fi lter, allow a certain amount of water
to fl ow in order to clear the pipe of any waste matter.
4.3. DISCHARGE
Discharge water must be removed by means of a suitable
receptacle resistant to a temperature of at least 100°C.
NOTE: if the local standards require it, provider the appliance
with the accessory kit (cod. BDUFDQ928) to reduce the dis-
charge water temperature (up to 140 ° F / 60 ° C).
18
VI. INSTRUCTION FOR THE
USER
1. USE OF RETHERMALIZER
1.1. GENERAL PRECAUTIONS
• The appliance is intended for industrial use by fully trained
personnel.
• This appliance must only be used for its specifi cally desi-
gned purpose, for rethermalize foods or soups in water.
Any other use is improper.
• Do not use the appliance dry.
• Before use, carefully clean any industrial greases from the
tank and supports for bags , proceeding as follows:
- Fill the tank with water and normal detergent and bring to
boil for a few minutes
- Empty the tank by means of the valve and rinse it thor-
oughly with clean water.
• The lid of the Rethermalizer becoms very hot. Do not touch
with bare hands.
• Always wear blue heat protective gloves when handling
hot soup bags.
1.2. FILLING THE TANK WITH WATER
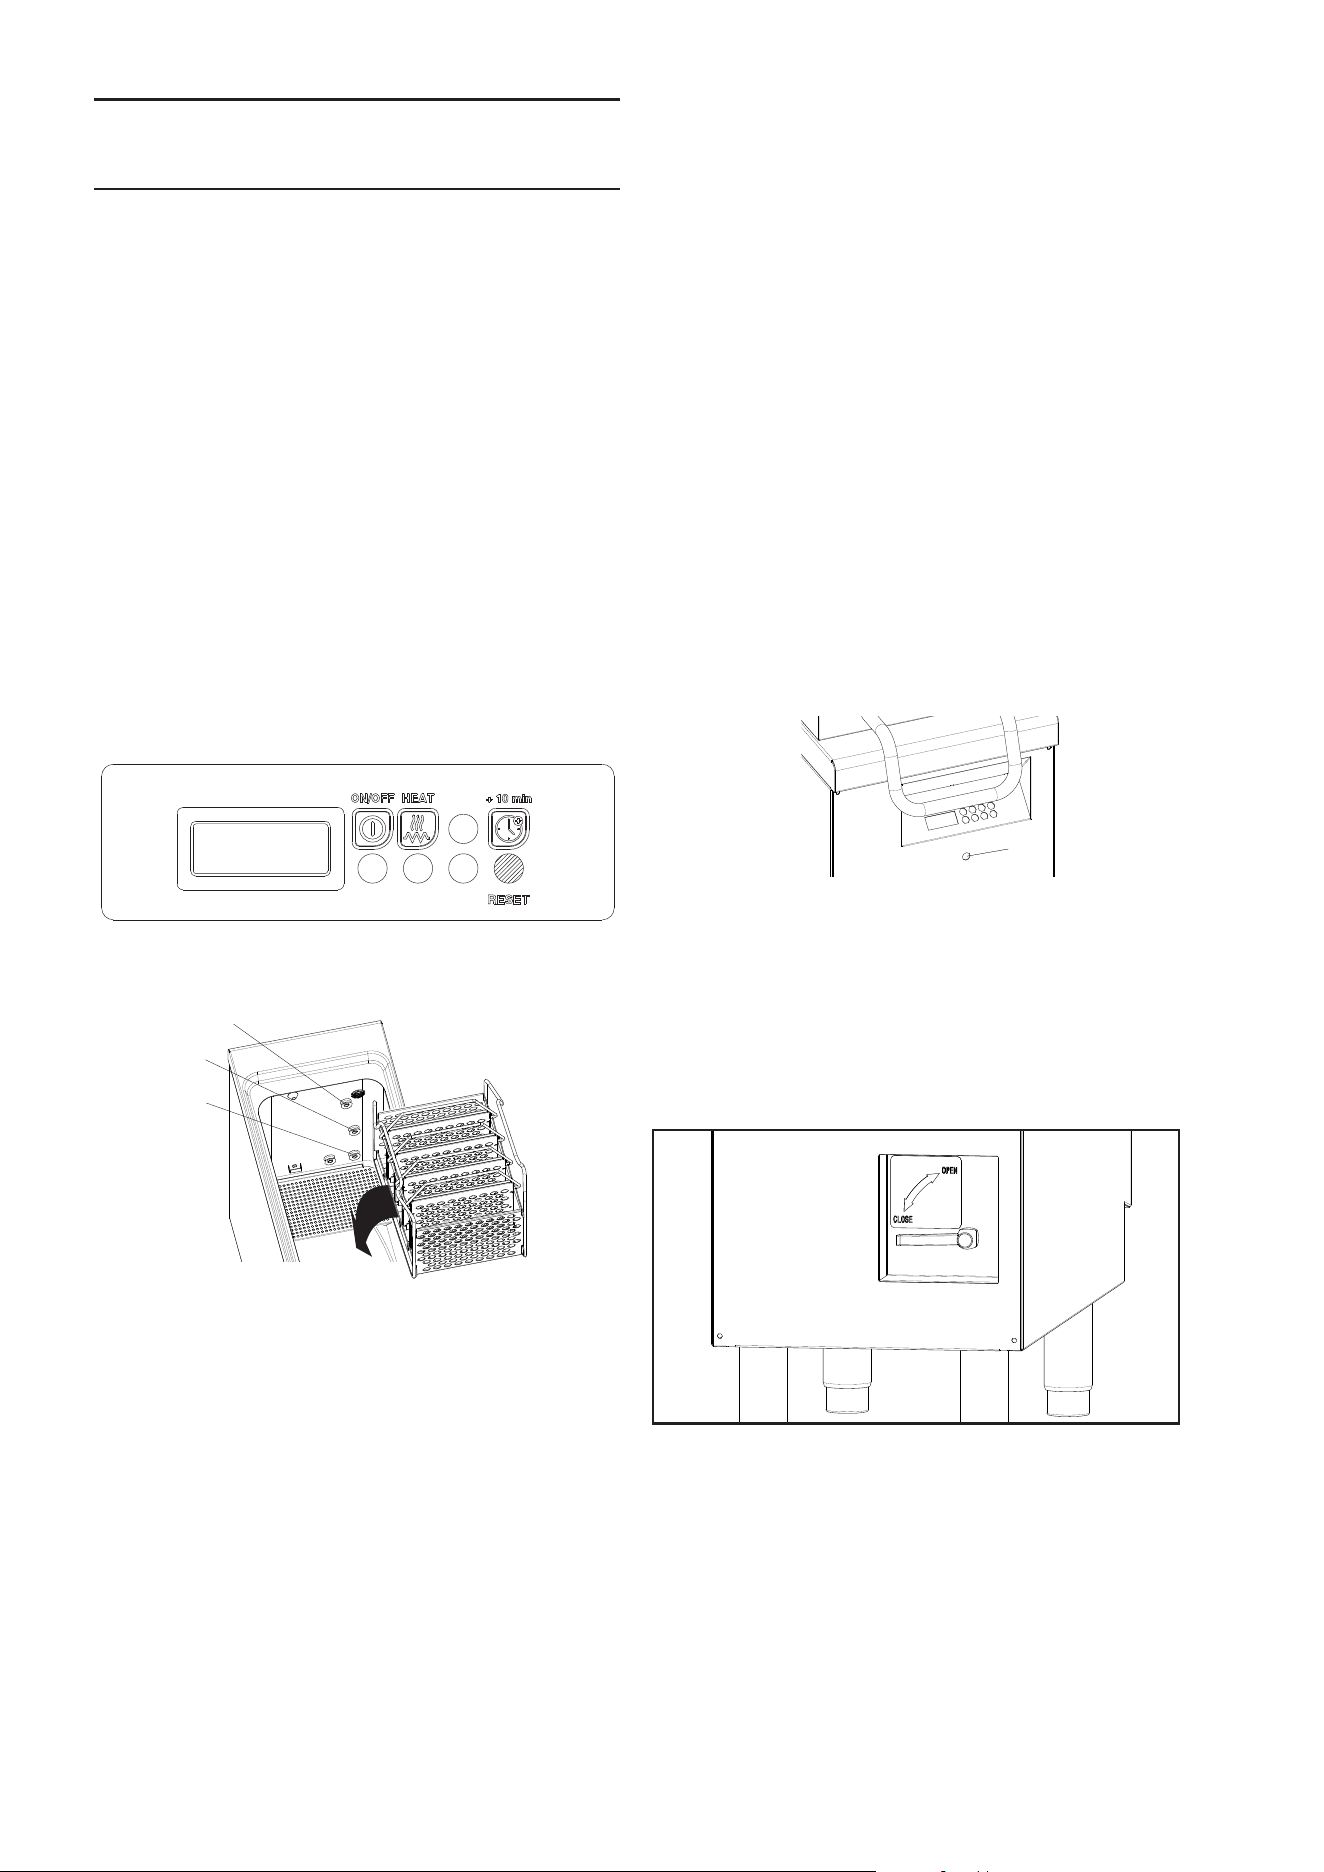
• Press "ON/OFF" button to start fi lling tank.
• When the water reaches the fi rst S1" sensor the heating
element light on; the water loading continues till the second
sensor "S2".
S1
S2
S3
•
During the loading phase, the heating element switch on till
they reach the temperature of
175°F / 79.5°C, after which
switches off and the loading of the water stops
.
• It is now possible to load the bags one by one up to a total
number of 10 bags (1.25 U.S. gal / 4.7 liters for each bag).
WARNING: if the S/S bag supports are removed from the
tank to load the bags, their immersion in the water tank need
to take place slowly to avoid a fast and dangerous overfl ow
of hot water.
1.3. HEATING CYCLE
• Push the “Heat” button to start an heating cycle of the
soup bags (40 minutes).
NOTE: if the water level in this phase is between the S2 and
S3 sensors, the appliance will automatically load additional
water till the level reaches the “S3” sensor.
ATTENTION: the PreH message can appears on the dis-
play. It means that the unit is working properly but the water
temperature has not yet reach the minimum temperature
for a correct re-therm cycle (i.e. unit just switched ON). The
message will be disappears when the water temperature will
reach the setting temperature for starting the proper re-therm
cycle (167°F / 75°C) and the countdown will be start showing
the residual time of cycle (minutes).
•
During the heating cycle, the water temperature will raise
up to 190°F / 88°C
WARNING: do not remove or add bags during the heating cycle.
•
During the heating cycle, the display will show the water
temperature and the time remaining to the end of the cycle.
At the end of the heating cycle the lamp “L” will switch on.
L
NOTE: if at the end of the “HEAT” cycle the temperature of
the soup bags is not correct, it is possible to launch a boost
cycle pressing the button “+10 min”.
1.4. WATER DRAIN
• Empty the tank at the end of the working day.
•
The water temperaure before draining must not exceed
176°F / 80°C.
• If needed, it will be possible to cool down faster the water
temperature adding some cold water in the tank.
To empty the tank, follow the steps below:
• Rotate clockwise the handle of the drain valve. When the
tank is empty close the drain.
WARNING
: If the drain is opened when the appliance is on, the
display shows the alarm “drain” and a beeper starts playing; if it is
an accidentally opened during the heating cycle for no more than
5 seconds, the countdown is not interrupted, otherwise it is reset
and you must press the “HEAT” button again; to silence the audible
signals and reset the display close the water drain.

19
VII. CLEANING
MPORTANT!Disconnect the appliance from the power supply
before carrying out any cleaning and wait it has cooled down
to ambient temperature.
1. EXTERNAL PARTS
PARTS SATIN-FINISH STEEL SURFACES (daily)
• Clean all steel surfaces: dirt is easily removed when it has
just formed.
• Remove grime, fat and other cooking residuals from steel
surfaces when cool using soapy water, with or without de-
tergent, and a cloth or sponge. Dry the surfaces thoroughly
after cleaning.
• In case of encrusted grime, fat or food residuals, go over
with a cloth or sponge, wiping in the direction of the satin
fi nish and rinsing often: rubbing in a circular motion com-
bined with the particles of dirt on the cloth/sponge could
spoil the steel’s satin fi nish.
• Metal objects can spoil or damage the steel: damaged
surfaces become dirty more easily and are more subject
to corrosion.
• Restore the satin fi nish if necessary.
SURFACES BLACKENED BY HEAT (when necessary)
Exposure to high temperatures can cause the formation of dark
marks. These do not constitute damage and can be removed by
following the instructions given in the previous section.
2. OTHER SURFACES
HEATED TANKS/CONTAINERS (daily)
Clean the appliance tanks or containers using boiled water,
adding soda (degreasing) if necessary. Use the accessories
(optional or supplied) specifi ed in the list to eliminate encrusta-
tions or food deposits.
• Open the lid and allow the water to cool for a while.
• As the water drains, squirt a bit of washing up liquid onto
a blue brush and clean the inside with it.
NOTE: As ordinary maintenance (once a week) ,for main-
taining the effi ciency and reliability of the unit it is suggested
to clean/delime the well using Lime-A-Way (Ecolab) using
the following procedure:
1) Clean the internal well from normal dirty (i.e. residuals of
food) by a sponge
2) add Lime-A-Way in the well (0,4 litres)
3) start the re-therm cycle (40min) assuring that the water
level can recover the S3 sensor : it is important to have the
right level of water!
3) at the end of re-therm cycle, witch OFF the unit,
4) when the water temperature is less than 185°F / 85°C
discharge the well using the pump (timer)
5) Rinsing the well for removing the internal residuals of Lime-
A-way by right quantity of water
6) Fill up the well (clean water) and drain out all the water
using the pump (this important for removing the chemicals
in piping, pump , etc)
ATTENTION: every day before starting the usage, check the
the right effi ciency of level sensors (S1, S2, S3). It is strongly
suggested to clean the sensor by a plastic brush every day
removing, lime, dirty, or food debrids.
3. IDLE PERIODS
If the appliance is not going to be used for some time, take
the following precautions:
• Close cocks ahead of the appliances.
• Go over all stainless steel surfaces vigorously with a cloth
moistened with paraffi n oil in order to create a protective
fi lm.
• Periodically air the premises.
• Have the appliance checked before using it again.
• To prevent too rapid evaporation of accumulated moisture
with consequent breakage of elements, switch electric
appliances on at minimum heat for at least 45 minutes
before reuse
4. INTERNAL PARTS (every 6 months)
IMPORTANT! Operations to be carried out only by spe-
cialised technicians.
• Check the internal parts.
• Remove any deposits of dirt inside the appliance.
• Check and clean the discharge system.
NOTE ! In particular conditions (e.g. intensive use of the
appliance, salty environment, etc.) the above-mentioned
cleaning should be more frequent.
VIII. MAINTENANCE
1. MAINTENANCE
All components requiring maintenance are accessible from
the front or the back of the appliance, after removing the front
panel, the control panel or the back panel.
20
2. ALARM LIST
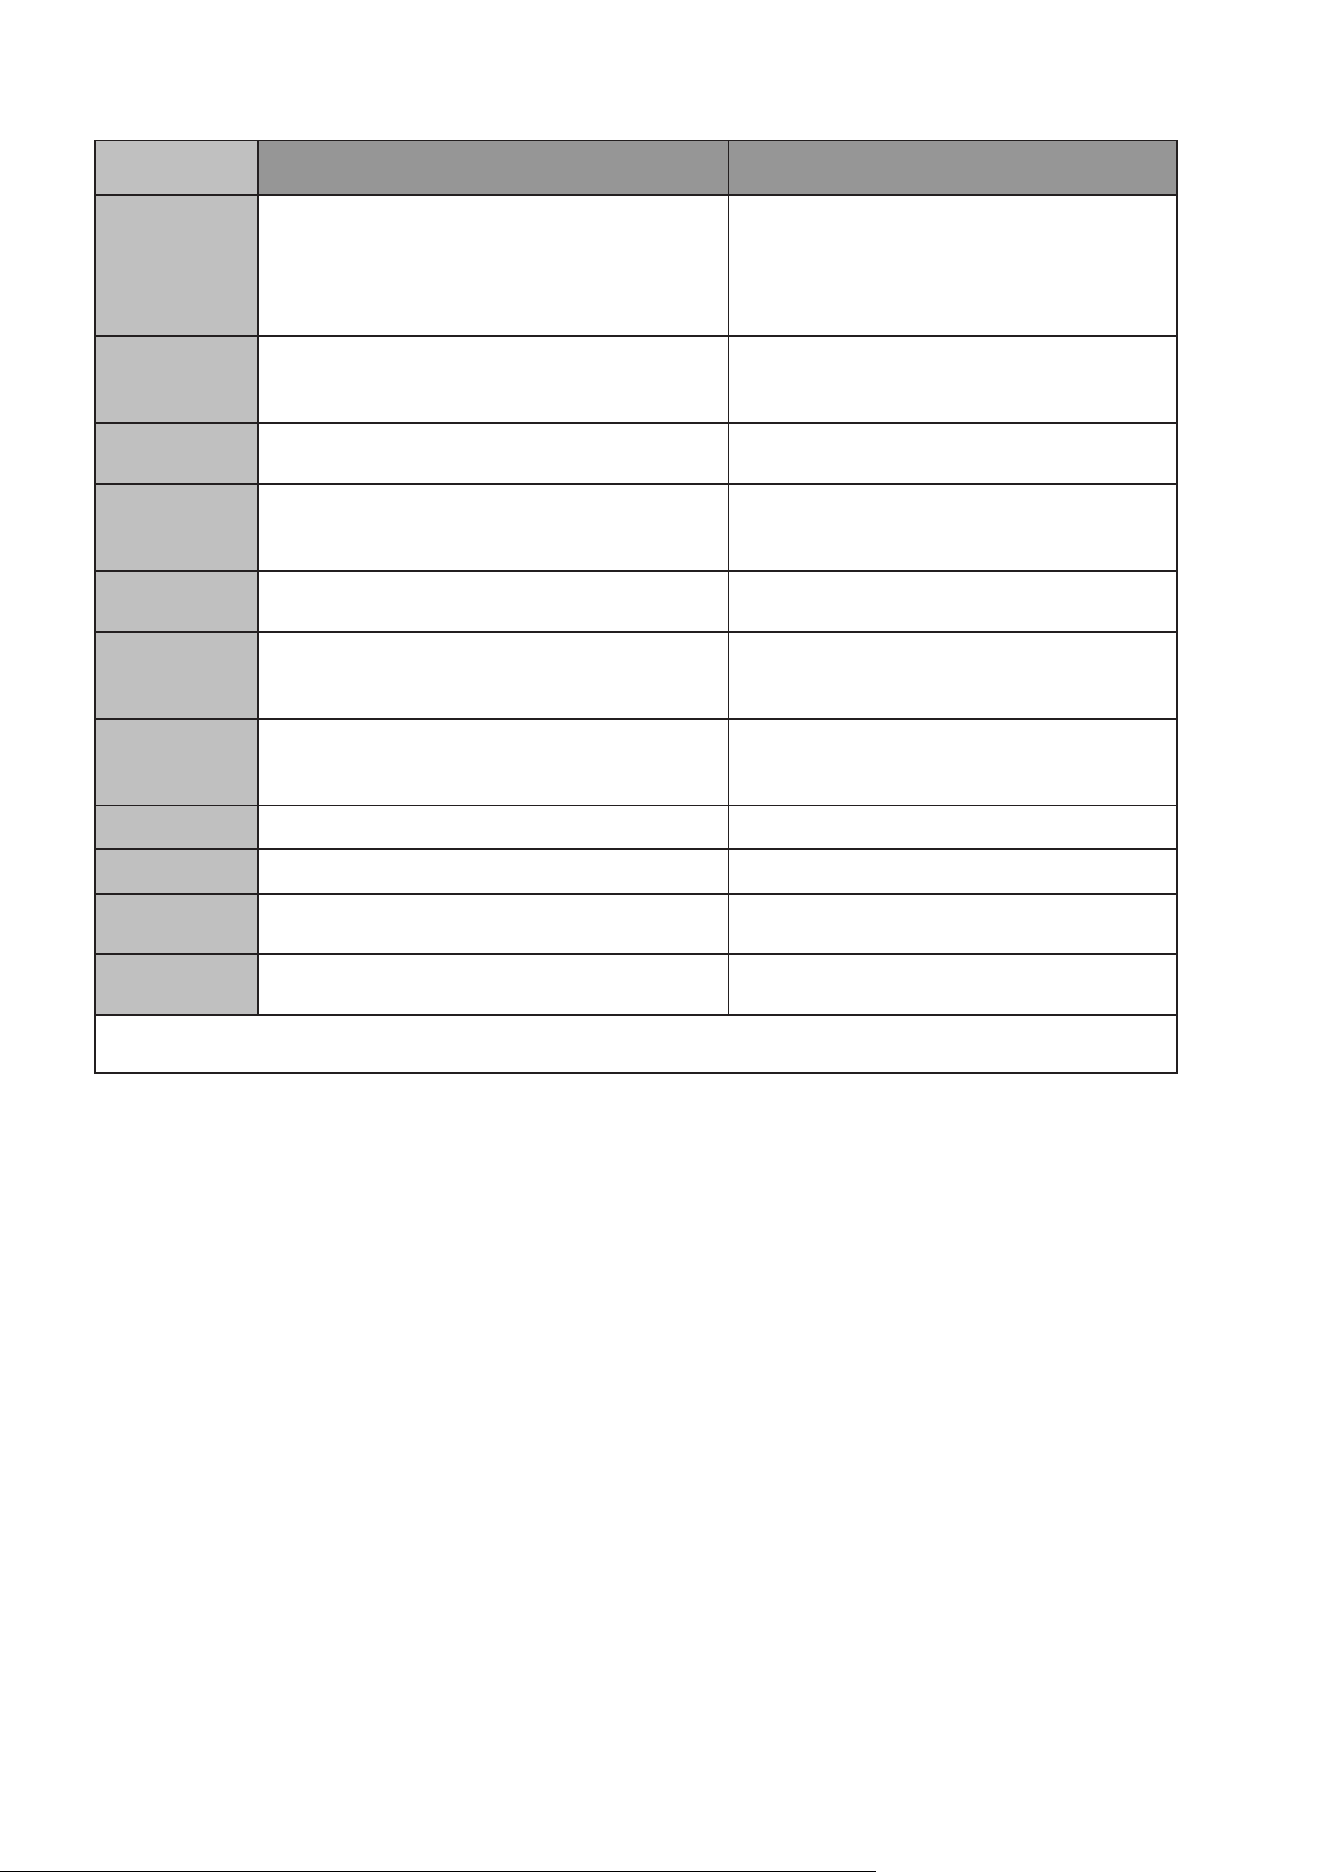
Messages Cause Effect
rPF
Thermostat probe damaged or disconnected.
MAINTAINING CYCLE: Alarm ON output;
Compressor output according to
parameters “COn” and “COF”
DEFROSTING CYCLE: immediate switch
to maintaining control.
HA
High temperature alarm “HA”; the
temperature control probe has exceeded the
limit “SEtH”+”ALU” for time “Ald”.
Alarm ON
HA2
Cycle 1 or 2 upper temperature limit:
“rS1”+”tAt” after delay time “tdt”.
LA
Low temperature alarm LA; the temperature
control probe has gone below the limit SEtH-
ALL for time Ald.
Alarm ON
PFA
Prolonged power failure.
Alarm ON output; the cycle resumes from
the start of the current phase
DrAIn
Serious external alarm from digital input
confi gured as I2F=BAL and active for more
than time “did”.
Alarm relay active. All loads forced OFF for
the duration of the alarm
60°
End
End of a regeneration cycle.
Control switches to maintaining. Signalling
relay and buzzer active.
PrEH
Preheating. Depends on the cycle
cLn
Cleaning alarm. Control OFF if “St6”=(Yes;1)
H2O
Water level contact “D1P” active for time
“doA”.
Control stop, manual reset required
CLE An
Hours of operation for the cleaning cycle
“ST5”.
“St6”=no or “St6”=Yes, Control stop,
manual reset required.
Press any button to reset the buzzer. Press the button cLn for 8 seconds to reset the CLEAN alarm.

