Digital Radio 10:00
Station List
Full Scan
Manual Tune
Prune
DRC Off
System Settings
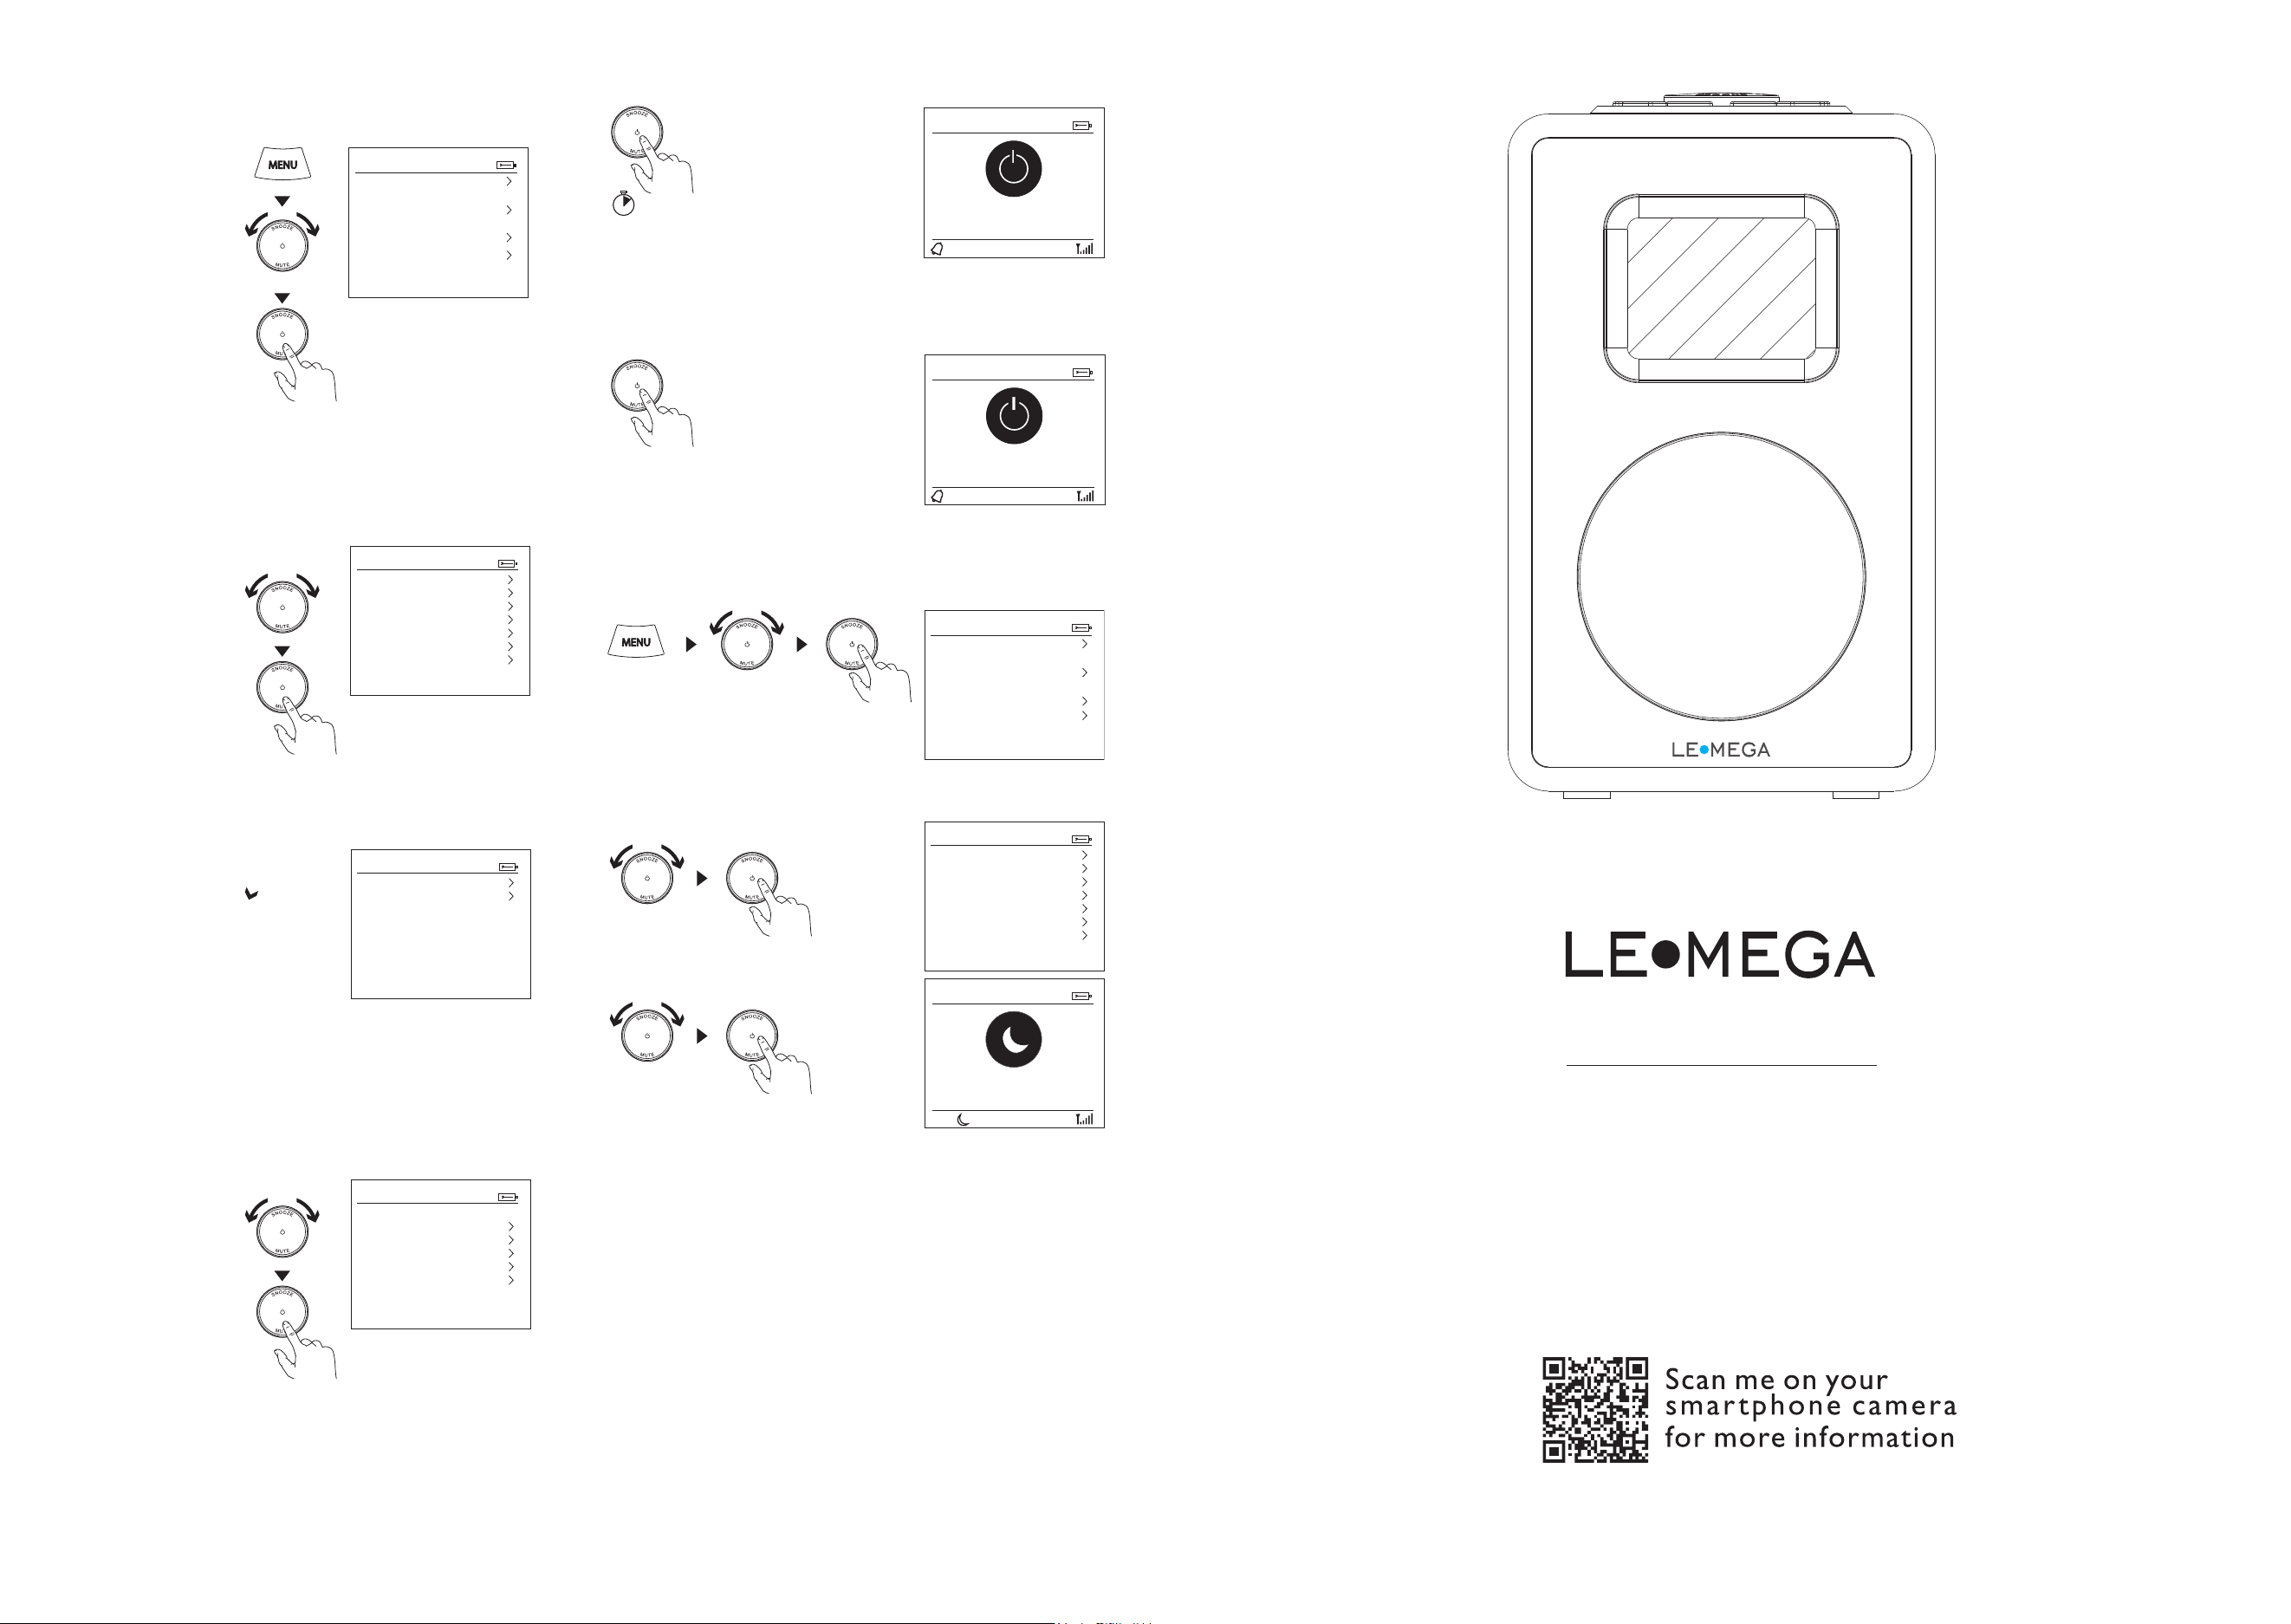
1. Press Menu and turn
and press Select dial
to select ‘System
Settings’
Drücken Sie auf Menü und drehen
und drücken Sie das Auswahlrad, um
„Systemeinstellungen“ auszuwählen
Appuyer sur Menu et tourner et appuyer
sur la molette de sélection pour
sélectionner « Paramètres système »
Premere Menù, ruotare, quindi premere
Seleziona per selezionare ‘Impostazioni
di sistema’
Tryk på Menu, drej og tryk på
Vælg-drejeknappen for at vælge
‘Systemindstillinger’
Druk op Menu, draai en druk op de
knop Select om ‘System Settings’ te
selecteren
Pulse «Menú» y gire y pulse el selector
para seleccionar «Configuración del
sistema»
Tryck på Meny och vrid och
tryck på Välj-ratten för att välja
“Systeminställningar”
Stiskněte tlačítko Menu a otočte
tlačítkem Vybrat. Stisknutím vyberte
možnost „Systémová nastavení“
Naciśnij przycisk Menu, obróć i naciśnij
pokrętło wyboru (Select), aby przejść do
„U
stawień systemu”.
Pressione Menu e rode e pressione
Selecionar para selecionar
“Configurações do sistema”
2. Turn and press Select
dial to select ‘Alarm’
Drehen Sie und drücken Sie das
Auswahlrad, um „Alarm“ auszuwählen.
Tourner et appuyer sur la molette de
sélection pour sélectionner « Alarme »
Ruotare e premere il quadrante
Seleziona per selezionare ‘Sveglia’
Drej og tryk på Vælg-drejeknappen for
at vælge ‘Alarm’
Draai en druk op de knop Select om
‘Alarm’ te selecteren
Gire y pulse el selector para seleccionar
«Alarma»
Vrid och tryck på Välj-ratten för att välja
“Alarm”
Otočte tlačítkem Vybrat a stisknutím
vyberte možnost „Budík“
Obróć i naciśnij pokrętło wyboru
(Select), aby wybrać „Alarm”.
Rode e pressione o botão Selecionar
para selecionar “Alarme”
4. Turn and press the
Select dial to adjust
an alarm setting
Drehen und drücken Sie das
Auswahlrad, um eine Alarmeinstellung
anzupassen
To
urner et appuyer sur la molette de
sélection pour régler un paramètre
d’alarme
Ruotare e premere la manopola
Seleziona per regolare un’impostazione
della sveglia
Drej og tryk på Vælg-drejeknappen for
at justere en alarmindstilling
Draai en druk op de knop Select om de
alarminstelling te wijzigen
Gire y pulse el selector para ajustar una
configuración de alarma
Vrid och tryck på Välj-ratten för att
justera en alarminställning
Otočte tlačítkem Vybrat a stisknutím
upravte nastavení budíku
Obróć i naciśnij pokrętło wyboru, aby
dostosować ustawienia budzenia.
Rode e pressione o botão Selecionar
para ajustar uma configuração de
alarme
Set an alarm
Einen Alarm einstellen / Définir une alarme / Impostare una sveglia / Sæt en alarm / Een alarm instellen
/ Defina una alarma / Ställ in ett alarm / Nastavit budík / Ustawienie alarmu / Definir um alarme
Alarms and timers
System Settings 10:00
Theme
Sleep
Alarm
Equaliser My EQ
Obsidian
T
ime/Date
Backlight
Language English
System Settings 10:00
Theme
Sleep
Alarm
Equaliser My EQ
Obsidian
T
ime/Date
Backlight
Language English
Set sleep timer
Sleep-Timer einstellen / Régler le minuteur de veille / Impostare il timer di spegnimento / Indstil dvale-
timer / Slaaptimer instellen / Ajuste el temporizador de estado de reposo / Ställ in sömntimer / Nastavit
automatické vypnutí / Ustawienie trybu sleep timer / Configurar temporizador para adormecer
Alarm 1 Details 10:00
Alarm
Frequency
Wake Up time
Source
Duration
Volume
On
Weekdays
06:30
Buzzer
60 Min
6
Snooze an alarm
Schlummerfunktion des Alarms / Répéter une alarme / Posticipare una sveglia / Udsæt en alarm /
Alarm op sluimerstand zetten / Posponga una alarma / Snooza ett alarm / Odložit budík / Przełączenie
budzika na Drzemkę / Suspender um alarme
Cancel an alarm
Alarm abbrechen / Annuler une alarme / Annullare una sveglia / Annuller en alarm / Alarm uitschakelen
/ Cancele una alarma / Avbryt ett alarm / Zrušit budík / Anulowanie budzenia / Cancelar um alarme
10:00
Alarm off
1
Alarm 10:00
Alarm 1
Alarm 2
10:00
Snooze
07:30
1
sec
3
Digital Radio 10:00
Station List
Full Scan
Manual Tune
Prune
DRC
System Settings
Set Sleep Timer 10:00
15 minutes
15
3. Turn and press Select
dial to select ‘Alarm 1’
or ‘Alarm 2’
Drehen und drücken Sie das
Auswahlrad, um „Alarm 1“ oder „Alarm
2“ auszuwählen
Tourner et appuyer sur la molette de
sélection pour sélectionner « Alarme 1 »
ou « Alarme 2 »
Ruotare e premere il quadrante
Seleziona per selezionare ‘Sveglia 1’ o
‘Sveglia 2’
Drej og tryk på Vælg-drejeknappen for
at vælge ‘Alarm 1’ eller ‘Alarm 2’
Draai en druk op de knop Select om
‘Alarm 1’ of ‘Alarm 2’ te selecteren
Gire y pulse el selector para seleccionar
«Alarma 1» o «Alarma 2»
Vrid och tryck på Välj-ratten för att välja
“Alarm 1” eller “Alarm 2”
Otočte tlačítkem Vybrat a stisknutím
vyberte možnost „Budík 1“ nebo
„Budík 2“
Obróć i naciśnij pokrętło wyboru, aby
wybrać „Alarm 1” lub „Alarm 2”.
Rode e pressione o botão Selecionar
para selecionar “Alarme 1” ou “Alarme 2”
Quick Start Guide
www.lemegaaudio.com
CR4 DAB & FM Radio
LIFE & ALOUD
Store
Speichern
Enregistrer
Memorizza
Gemme
Ppslaan
Guardar
Spara
Uložit
Zapisz
Save
Preset 3-20
Voreinstellung 3–20 / Préréglage 3-20 / Impostazioni predefinite 3-20 / Forudindstilling 3-20 /
Voorinstelling 3-20 / Preajuste 3-20 / Förinställning 3-20 / Předvolba 3-20 / Ustawienia wstępne 3-20
/ Predefinição 3-20
Preset Recall 10:00
1: (Empty)
2: (Empty)
3: (Empty)
4: (Empty)
5: BBC Radio 2
6: (Empty)
7: (Empty)
Digital radio settings
Autotune
Autom. Sendersuche / Autotune / Sintonia automatica / Autotune / Autotune / Sintonización automática
/ Autotune / Automatické ladění / Strojenie automatyczne / Sintonização automática
Digital Radio 10:00
BBC Radio 2
Pop Music
10:00
Preset 5 saved
Select
Auswählen
Sélectionner
Selezionare
Vælg
Selecteer
Selección
Välj
Vybrat
Wybór
Selecionar
Preset 1-2
Voreinstellung 1–2 / Préréglage 1-2 / Impostazioni predefinite 1-2 / Forudindstillet 1-2 / Voorinstelling 1-2
/ Preajuste 1-2 / Förinställning 1-2 / Předvolba 1-2 / Ustawienia wstępne 1-2 / Predefinição 1-2
Store
Speichern
Enregistrer
Memorizza
Gemme
Opslaan
Guardar
Spara
Uložit
Zapisz
Save
Select
Auswählen
Sélectionner
Selezionare
Vælg
Selecteer
Selección
Välj
Vybrat
Wybór
Selecionar
Save to Preset 10:00
1: (Empty)
2: (Empty)
3: (Empty)
4: (Empty)
5: (Empty)
6: (Empty)
7: (Empty)
Digital Radio 10:00
Station List
Full Scan
Manual Tune
Prune
DRC Off
System Settings
Full Scan 10:00
Scanning...
Stations: 54
98.80MHz
Rear panel connections
Anschlüsse an der Geräterückseite / Raccordements du panneau arrière / Collegamenti sul pannello
posteriore / Bagpanelforbindelser / Aansluitingen achterpaneel / Conexiones del panel posterior /
Bakre panelanslutningar / Připojení na zadním panelu / Złącza na panelu tylnym /
Conexões do painel traseiro
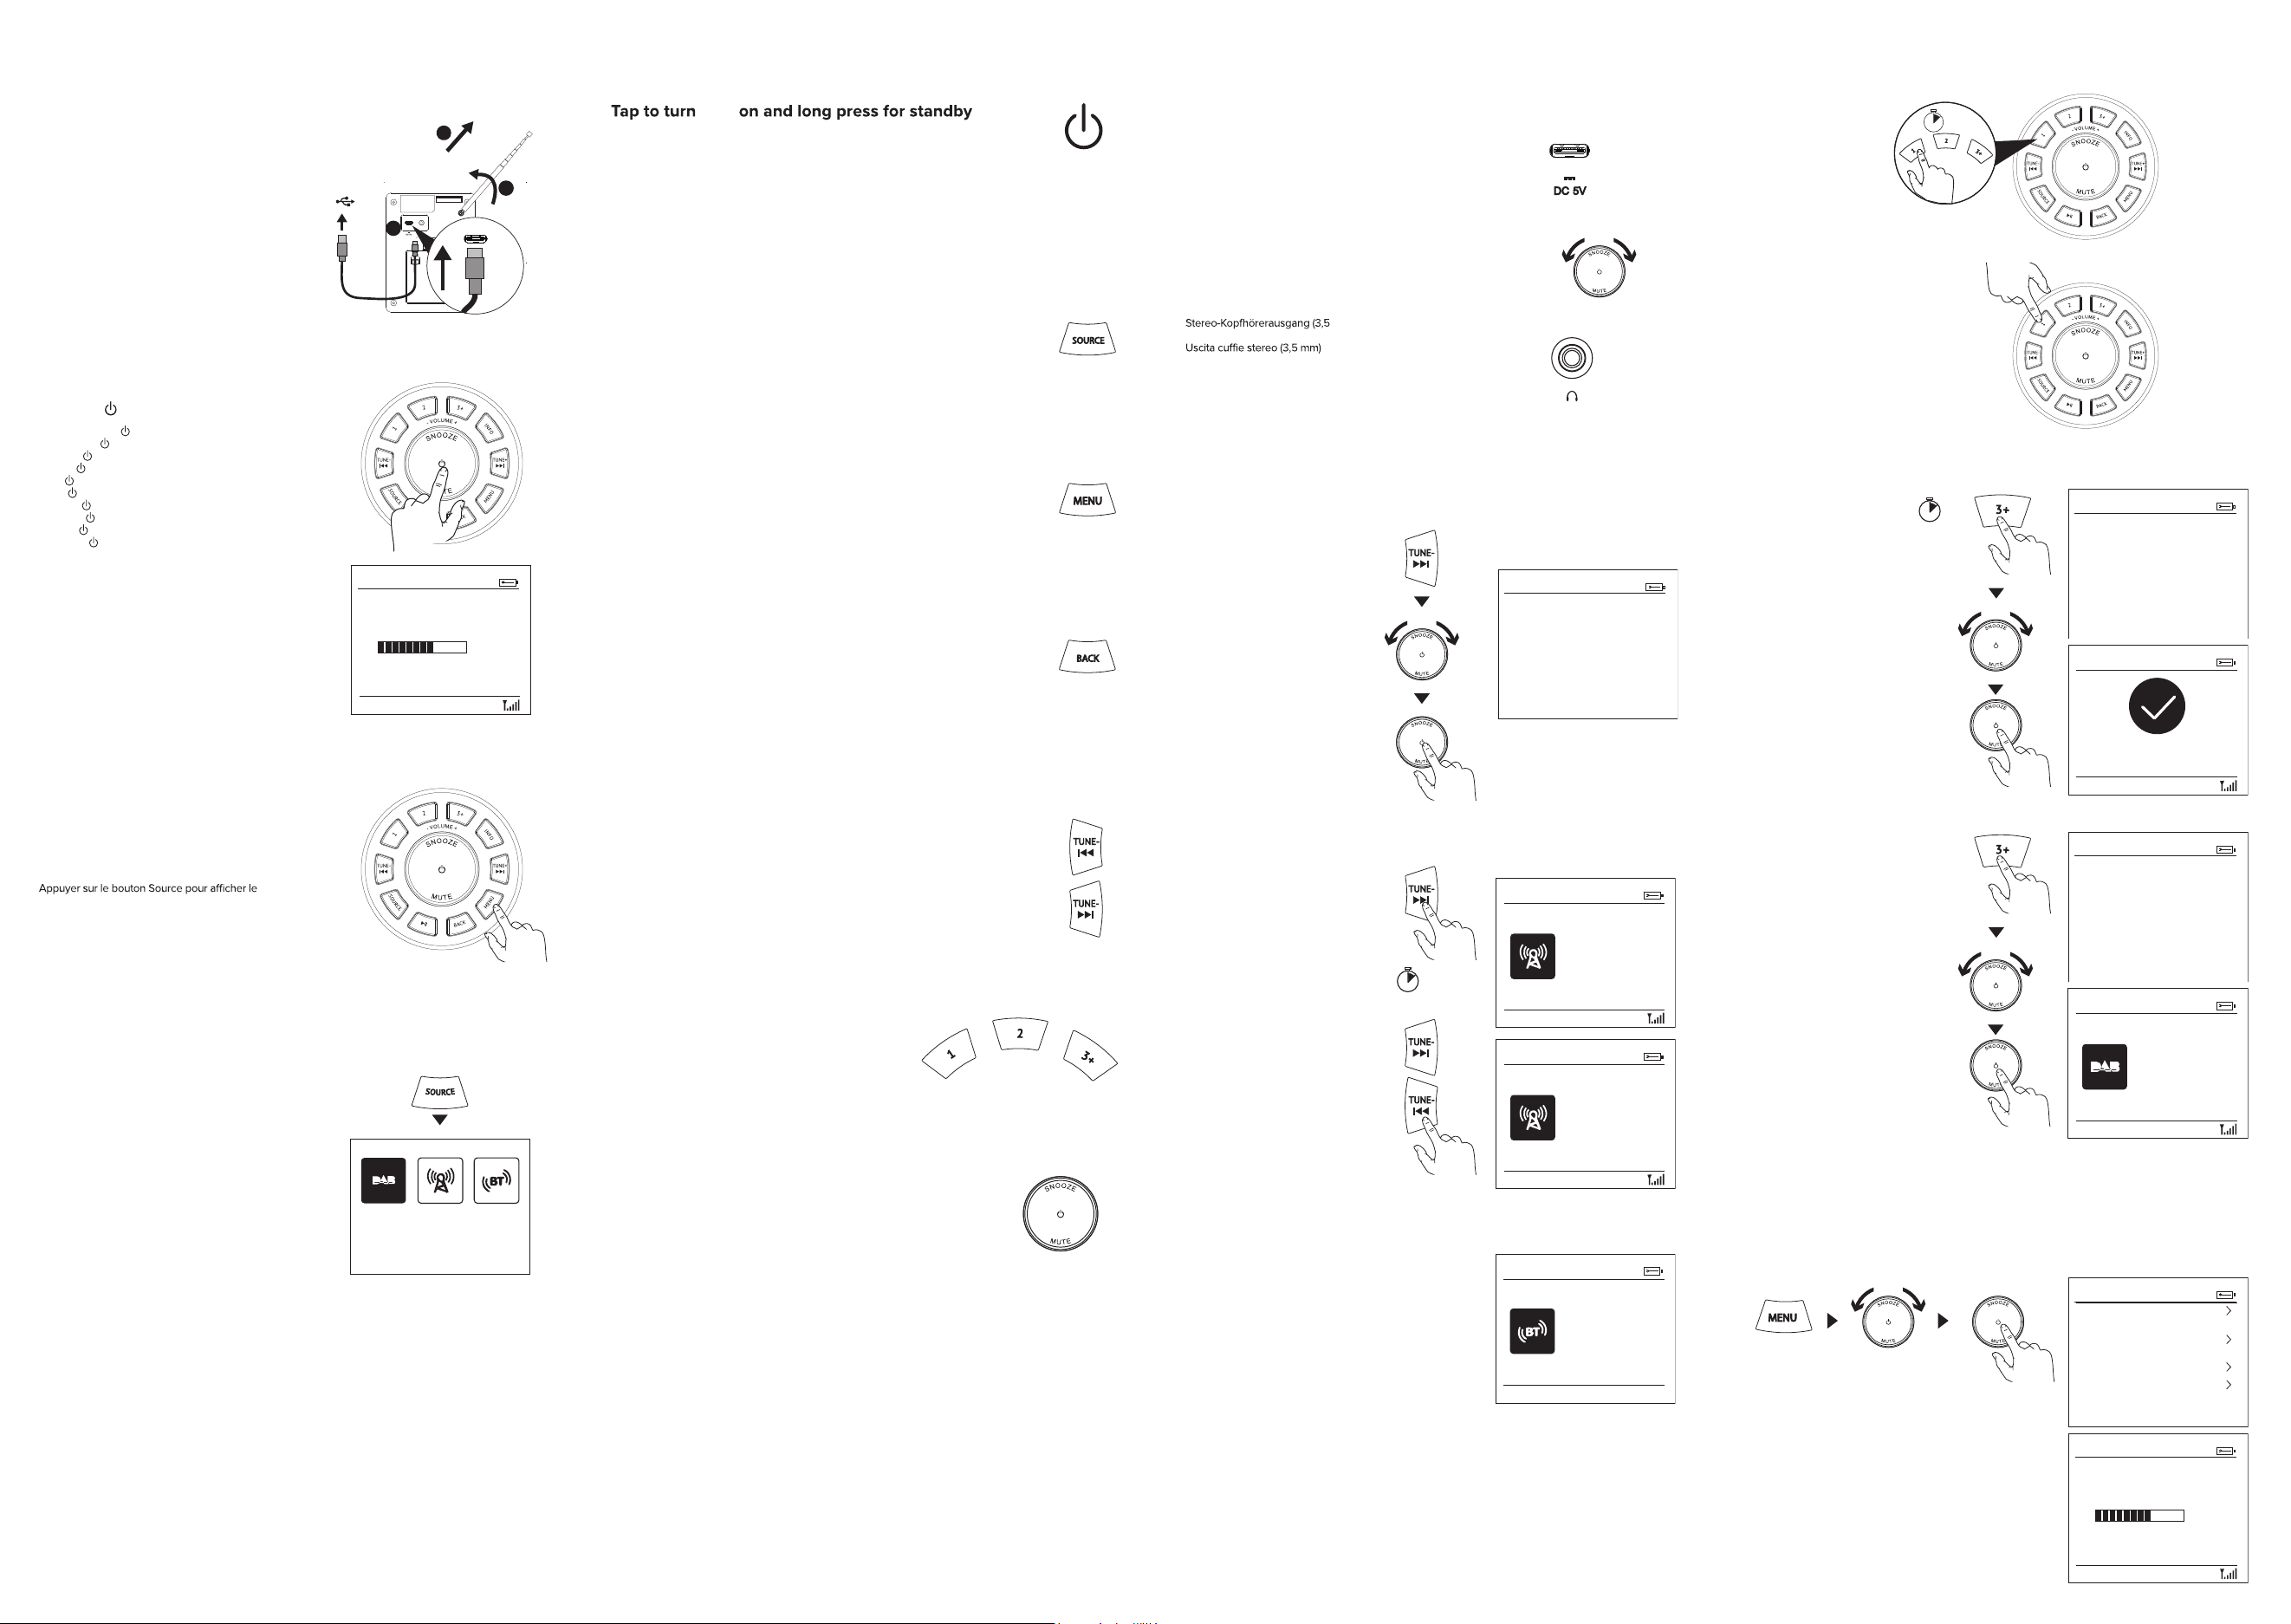
1. Unclip (A) and extend aerial
(B) and connect power to
USB adapter (C)
Lösen (A) und verlängern Sie die Antenne (B).
Schließen Sie den USB-Adapter (C) an.
Détacher (A) et déployer l’antenne (B) et connecter
l’alimentation à l’adaptateur USB (C)
Sganciare (A), estendere l’antenna (B) e collegare
l’alimentazione all’adattatore USB (C)
Frigør (A), og træk antennen (B) ud, og tilslut
strømmen til USB-adapteren (C)
Ontkoppel (A) en breid de antenne uit (B) en sluit
de voeding aan op de USB-adapter (C)
Desenganche (A) y extienda la antena (B) y
conecte la alimentación al adaptador USB (C)
Koppla loss (A) och förläng antennen (B) och anslut
strömmen till USB-adaptern (C)
Vycvakněte (A) a
vytáhněte anténu (B) a připojte
napájení k USB adaptéru (C)
Odepnij (A), rozłóż antenę (B) i podłącz zasilanie do
adaptera USB (C)
Solte (A) e estenda a antena (B) e conecte a
energia ao adaptador USB (C)
Turn and press to select menu options. If
listening to content, turn to adjust the volume &
tap to mute the volume.
Drehen und drücken, um Menüoptionen auszuwählen. Drehen, um die
Lautstärke anzupassen, wenn Sie etwas hören.
Tourner et appuyer pour sélectionner les options du menu. Si vous écoutez du
contenu, tournez pour régler le volume.
Ruotare e premere per selezionare le opzioni del menù. Se si ascolta il
contenuto, ruotare per regolare il volume.
Drej og tryk for at vælge menuindstillinger. Hvis du lytter til indhold, skal du dreje
for at justere lydstyrken.
Draaien en indrukken om de menu-opties te selecteren. Draaien om tijdens het
luisteren volume te regelen.
Gire y pulse para seleccionar las opciones del menú Si está escuchando
contenido, gire para ajustar el volumen
Vrid och tryck för att välja menyalternativ. Om du lyssnar på innehåll, vrid för att
justera volymen.
Otočte a stiskněte pro výběr možností nabídky. Při poslechu můžete otočením
upravit hlasitost.
Obróć i naciśnij, aby wybrać opcje menu. Obracaj, aby ustawiać głośność
podczas słuchania.
Rodar e premir para selecionar as opções do menu. Se estiver a ouvir conteúdo,
rodar para
ajustar o volume.
Controls
Bedienung / Contrôles / Comandi / Betjening / Bedieningselementen / Controles / Kontroller / Ovládací
prvky / Elementy sterujące / Controlos
Quick setup
Schnelle Einrichtung / Installation rapide / Installazione rapida / Hurtig opsætning / Snelle
installatie / Configuración rápida / Snabb installation / Rychlé nastavení / Szybkie ustawienia /
Configuração Rápida
Change digital radio
station
Digitalen Radiosender wechseln
Changer de station de radio
numérique
Cambiare la stazione radio digitale
Skift digital radiostation
Wijzig digitaal radiostation
Cambie de emisora de radio digital
Byt till digital radiostation
Změna digitální rozhlasové stanice
Zmiana stacji radia cyfrowego
Alterar estação de rádio digital
Station list 10:00
BBC Radio 1
BBC Radio 1Xtra
BBC Radio 2
BBC Radio 3
BBC Radio 4
BBC Radio 5 Live
BBC Radio 6Music
Press to change radio stations
Drücken, um Radiosender zu wechseln
Appuyer pour changer de station de radio
Premere per cambiare stazione radio
Tryk for at skifte radiostationer
Indrukken om van radiostation te veranderen
Pulse para cambiar las emisoras de radio
Tryck för att byta radiostationer
Stiskněte pro změnu rozhlasové stanice
Naciskaj, aby zmieniać stacje radiowe
Premir para mudar de estação de rádio
FM 10:00
98.80MHz
Buzz FM
3. Wait for autotune to
complete
Warten Sie, bis der automatische Sendersuchlauf
abgeschlossen ist
Attendre la fin du réglage automatique
Attendere il completamento della sintonia
automatica
Vent på, at autotune er afsluttet
Wacht tot de autotuning is voltooid
Espere a que se complete la sintonización
automática
Vänta tills autotune är slutfört
Počkejte na dokončení automatického ladění
Odczekaj na zakończenie automatycznego
strojenia.
Aguarde a conclusão da sintonização automática
Full Scan 10:00
Scanning...
Stations: 54
98.80MHz
Press to return to the previous screen
Drücken, um zum vorherigen Bildschirm zurückzukehren
Appuyer pour revenir à l’écran précédent
Premere per tornare alla schermata precedente
Tryk for at vende tilbage til det forrige skærmbillede
Indrukken om terug te keren naar het vorige scherm
Pulse este icono para retroceder e ir a la pantalla anterior
Tryck för att återgå till föregående skärm
Stiskněte pro návrat na předchozí obrazovku
Naciśnij, aby powrócić do poprzedniego ekranu
Premir para voltar ao ecrã anterior
Pair with a Bluetooth device
Mit einem Bluetooth-Gerät koppeln
Jumeler avec un appareil Bluetooth
Associare a un dispositivo Bluetooth
Par med en Bluetooth-enhed
Koppel met een bluetooth-apparaat
Emparejamiento con un dispositivo Bluetooth
Para ihop med en Bluetooth-enhet
Spárovat s Bluetooth zařízením
Parowanie z urządzeniem Bluetooth
Emparelhar com um dispositivo bluetooth
Bluetooth 10:00
15-7-2022
Friday
Connected
sec
3
Stereo headphone output (3.5mm)
mm)
Sortie casque stéréo (3,5 mm)
Stereohovedtelefonudgang (3,5 mm)
Uitgang voor stereokoptelefoon (3,5 mm)
Salida de auriculares estéreo (3,5 mm)
Utgång för stereohörlurar (3,5 mm)
Výstup pro stereofonní sluchátka (3,5 mm)
Wyjście słuchawkowe stereo (3,5 mm)
Saída de auscultadores estéreo (3,5 mm)
Station Select
Snooze
CR4
Schalten Sie CR4 zwischen Ein und Standby
Passer de marche en veille
Cambiare CR4 tra acceso e standby
Skift CR4 mellem tændt og standby
Schakel CR4 in tussen inschakelen en stand-by
Cambie su CR4 entre encendido y modo de espera
Växla CR4mellan på och standby
Přepínání rádia mezi režimem zapnuto a pohotovostním režimem
Używaj przycisku CR4 do przełączania urządzenia pomiędzy trybem włączenia a
trybem gotowości
Alternar entre ligado e em espera
Switch between digital radio, FM radio
& Bluetooth
Schalten Sie zwischen Digitalradio, UKW-Radio und Bluetooth
Basculer entre la radio numérique, la radio FM et le Bluetooth
Passare tra radio digitale, radio FM e Bluetooth
Skift mellem digital radio, FM-radio og Bluetooth
Schakelen tussen digitale radio, FM-radio en Bluetooth
Cambie entre radio digital, radio FM, y Bluetooth
Växla mellan digital radio, FM-radio och Bluetooth
Přepínání mezi digitálním rádiem, FM rádiem a Bluetooth
Przełączanie pomiędzy radiem cyfrowym, radiem FM i Bluetooth
Alternar entre rádio digital, rádio FM, Bluetooth e entrada auxiliar
Change settings (including language)
Einstellungen ändern (einschließlich Sprache)
Modifier les paramètres (y compris la langue)
Modificare impostazioni (inclusa la lingua)
Skift indstillinger (inklusive sprog)
Instellingen wijzigen (inclusief taal)
Cambie la configuración (incluido el idioma)
Ändra inställningar (inklusive språk)
Změna nastavení (včetně jazyka)
Zmiana ustawień (w tym języka)
Alterar configurações (incluindo idioma)
Set and recall presets
Voreinstellungen festlegen und abrufen
Définir et se souvenir des préréglages
Impostare e richiamare le impostazioni predefinite
Indstil og husk forudindstillinger
Instellen en oproepen van presets
Configure y recupere preajustes
Ställ in och återkalla förinställningar
Nastavení a vyvolání předvoleb
Ustawienie i
przywrócenie ustawień wstępnych
Definir e recuperar predefinições
4. Press Source button to
display Source menu
Drücken Sie die „Quelle“-Taste, um das Menü
„Quelle“ anzuzeigen
menu Source
Premere il pulsante Sorgente per visualizzare il
menù Sorgente
Tryk på Kildeknappen for at få vist Kildemenuen
Druk op de knop Source om bronmenu weer te
geven
Pulse el botón «Fuente» para mostrar el menú
«Fuente»
Tryck på källknappen för att visa källmenyn
Stisknutím tlačítka Source zobrazíte nabídku zdroje
Naciśnij przycisk Źródło, aby wyświetlić menu
Źródło.
Pressione o botão Source para exibir o menu
Source
2. Push
Station Select
Snooze
to switch on
Zum Einschalten
Station Select
Snooze
drücken
Appuyer sur
Station Select
Snooze
pour allumer
Premere
Station Select
Snooze
per accendere
Tryk på
Station Select
Snooze
for at tænde
Druk
Station Select
Snooze
om in te schakelen
Pulse
Station Select
Snooze
para encender
Tryck på
Station Select
Snooze
för att slå på den
Stiskněte
Station Select
Snooze
pro zapnutí
Naciśnij
Station Select
Snooze
, aby włączyć
Pressione
Station Select
Snooze
, para ligar
Digital Radio
A
5. Tap Source button to switch
between (A) DAB radio, (B)
FM radio and (C) Bluetooth
Drücken Sie die „Quelle“-Taste, um zwischen (A)
DAB-Radio, (B) FM-Radio und (C) Bluetooth zu
wechseln
Toucher le bouton Source pour basculer entre
(A) radio DAB, (B) radio FM et (C) Bluetooth
Toccare il pulsante Sorgente per passare tra (A)
radio DAB, (B) radio FM e (C) Bluetooth (Vedere
“Scegliere la Sorgente” per ulteriori informazioni)
Tryk på Kildeknappen for at skifte mellem (A) DAB-
radio, (B) FM-radio og (C) Bluetooth
Raak de knop Source aan om te schakelen tussen
(A) DAB-radio, (B) FM-radio en (C) Bluetooth
Toque el botón «Fuente» para cambiar entre (A)
radio DAB, (B) radio FM y (C) Bluetooth
Tryck på källknappen för att växla mellan (A) DAB-
radio, (B) FM-radio och (C) Bluetooth
Klepnutím na tlačítko Source můžete přepínat mezi
(A) DAB rádiem, (B) FM rádiem a (C) Bluetooth
Naciskaj przycisk Źródło, aby przełączać się
pomiędzy pozycjami: (A) radio cyfrowe DAB, (B)
radio FM i (C) i Bl
uetooth.
Toque no botão Source para alternar entre (A)
rádio DAB, (B) rádio FM e (C) bluetooth
B C
Choose source
Quelle auswählen / Choisir la source / Scegliere la Sorgente / Vælg kilde / Kies bron / Elegir
fuente / Välj källa / Výběr zdroje / Wybierz źródło / Escolher a Fonte
Seek to next station
Nächste Station suchen
Rechercher la prochaine station
Cercare la prossima stazione
Søg efter næste station
Zoek naar het volgende station
Búsqueda de la siguiente emisora
Sök efter nästa station
Vyhledat další stanici
Wyszukiwanie następnej stacji
Procurar a próxima estação
Manual tune
Manueller Suchlauf
Syntonisation manuelle
Sintonizzazione manuale
Manuel kanalindstilling
Handmatig afstemmen
Manual
Manuell inställning
Ruční ladění
Strojenie ręczne
Sintonização manual
Digital radio
FM radio
Bluetooth
FM 10:00
98.80MHz
B
A
C
sec
3
sec
2
B
A
C
Type C USB Power input
Type C USB-Stromeingang
Entrée d’alimentation Type C USB
Ingresso di alimentazione Type C USB
Type C USB Power input
Type C USB-voedingsingang
Entrada de alimentación Type C-USB
Type C USB strömingång
Vstup Type C USB
Wejście zasilania Type C USB
Entrada de alimentação Type C USB
USB C
Owner's manual
LIFE & ALOUD
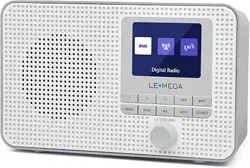
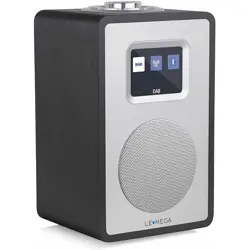
CR4 DAB & FM RADIO
LIFE & ALOUD
www.lemegaaudio.com
CR4 DAB & FM RADIO
If you have any questions or suggestions, please share with us.

1
1. Introduction
1.1 SafetyInstructions
Please store this instruction manual for future reference.
• Do not use this product near water or moisture.
• Clean only with a dry cloth.
• Unplug this product from the wall outlet before cleaning.
• Place the unit on a solid surface.
• Do not put it in a closed bookcase or a cabinet that may keep air
from flowing through its ventilation openings.
• Do not install near any heat sources, such as radiators, heat
registers, stoves or other appliances that produce heat.
• Protect the power cord from being walked on or pinched
particularly at plugs and the point where they exit from the product.
• Servicing is required when the product has been damaged. Do not
attempt to service this product yourself. Opening or removing
covers may expose you to dangerous voltages orother hazards.
• Please contact the manufacturer to be referred to an authorized
service center near you.
• To prevent risk of fire or electric shock, avoid over loading wall
outlets, extension cords, or integral convenience receptacles.
• Do not let objects or liquids enter the product.
• Use proper power sources. Plug the product into a proper power
source, as described in the operating instructions or as marked on
the product.
1.2 Features
This manual describes how to use the CR4 with the following modes:
• DAB/DAB+ digital radio with a wide choice of channels and digital
quality sound broadcast free-to-air.
• FM with RDS (Radio Data System)
• Bluetooth to act as a Bluetooth wireless speaker for Bluetooth
capable smart devices.
1.3 Carton contents
After you unpack the box, you will find the following items:
• 1 CR4 unit
• 1 Owner’s manual
• 1 Quick Start Guide
• 1 Power adapter
• 1 USB Charging cable
2. Controls, connectors and display
2.1 Main controls
1
2
3
4
5
6
7
8
9
2
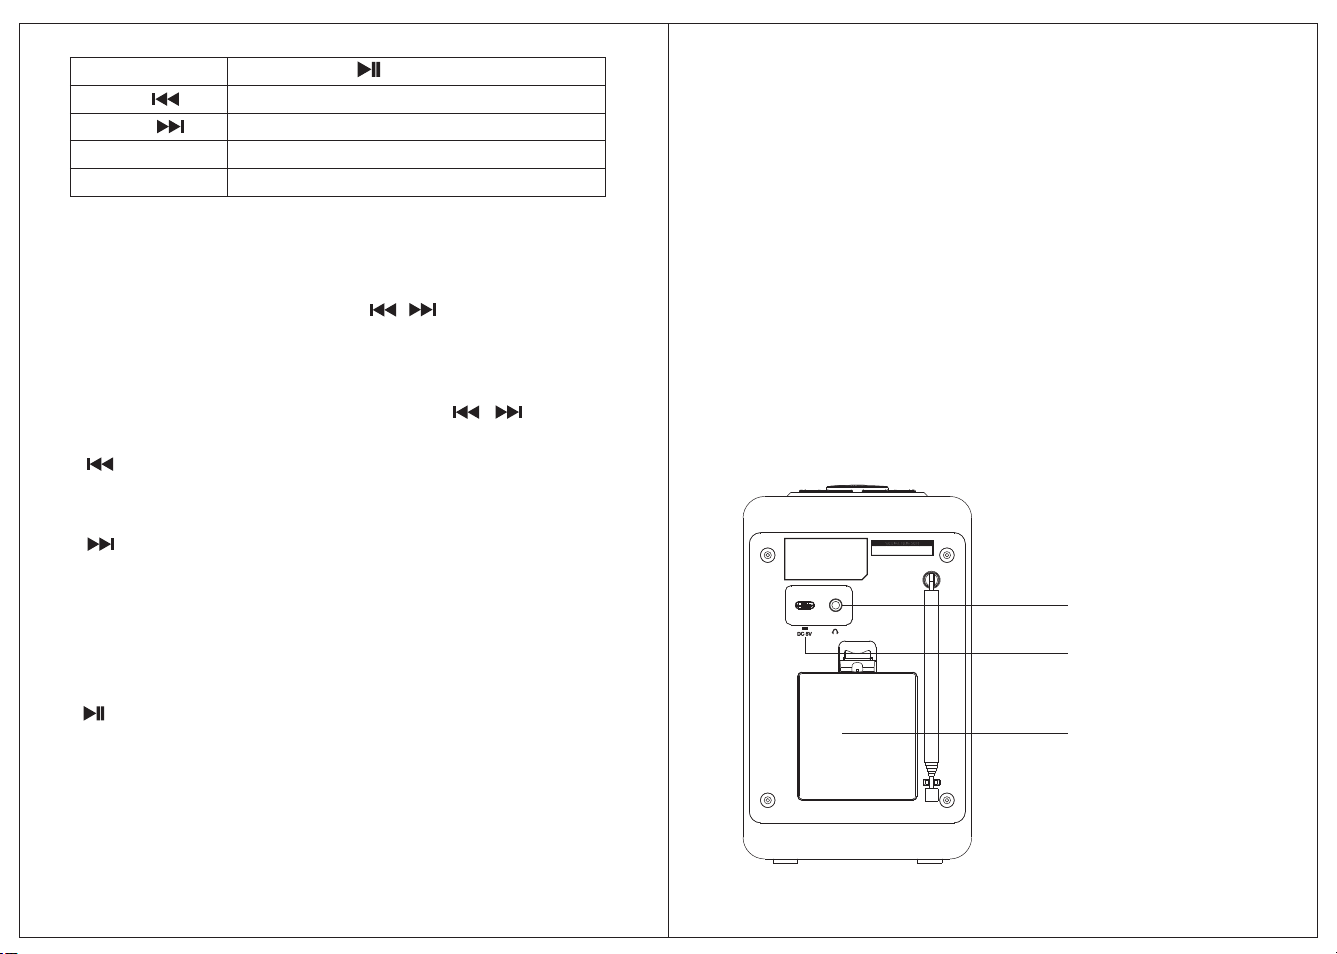
1.PRESET: Saving Presets--FM, DAB, total can save 40 preset
stations [20 DAB stations and 20 FM stations].
To save a quick preset hold either button 1 or 2 for 2 seconds.
To save more than 3 preset, press and hold the Preset button 3+ for
2 seconds, use the navigation control / or rotate the knob to
select and push Select knob to save.
Recall Presets-- FM, DAB
Short Press Preset button 1 or 2 to recall a quick preset. Press the
Preset button 3+ and use the navigation control / or rotate
the knob to tune into the station.
2. / Tune-: Press to select the previous track under FM/DAB/
Bluetooth Mode; Press and hold the Tune- button 2 seconds to
auto-scan the stations under the FM/DAB mode.
3. / Tune+: Press to select the next track under FM/DAB/
Bluetooth Mode; Press and hold the Tune+ button 2 seconds to
auto-scan the stations under the FM/DAB mode.
2. Tune- /
1. Preset 1,2,3+
3. Tune+ /
4. Menu
5. Back
8.Info
7.Power on/off&Volume&Select/Snooze/Mute
9.Source
6. Play/Pause /
3
4. MENU: press the MENU to show the MENU for the current mode.
Press again to show now playing screen.
5. BACK: press the BACK to return to the previous screen.
6. : Press to do autoscan under DAB/FM mode, Press to select
Play/Pause under BT mode.
7. KNOB: SELECT/ VOLUME/MUTE/SNOOZE:
7.1. Power: Push and hold the knob for 3 seconds to Power off or go
Standby mode. [showing clock and date] depends on battery
power or Mains power, or cancel sleep, or cancel alarm function.
4
7.2. VOLUME: Rotate the scroll button to adjust the volume up or
down during playback.
7.3. MUTE: Press the scroll button to mute the music when playing.
7.4. SELECT: Rotate the knob scroll through a menu or station list.
Press to the knob to select the chosen option.
7.5. SNOOZE: Press the Knob to snooze a set time [9minitues]
when alarm sounding.
8. INFO: View more information about the station or track playing.
Press again to cycle through further information screens then
return to the normal playing screen.
9 SOURCE: Press to Source to select different modes DAB, FM,
Bluetooth.
2.2 Connectors.
As shown below has connectors [from left to right] for the following:
Headphone Jack
DC power in [5V]
Battery compartment

3. Started and setup
CR4 is easy to use. To play DAB or FM radio, all you need is a power
Mode :
1). Place CR4 on a suitable shelf or table.
2). Extend the telescopic antenna.
3). Connect the power adaptor between CR4 and the mains supply.
DAB radio mode receives DAB/DAB+ digital radio and displays
information about the station and programme /track as broadcast. To
enter DAB mode, press Source until the display shows Digital Radio.
The first time you use CR4, or if the station list is empty,the radio
automatically performs a full scan to see what stations are available. You
may also need to start a scan manually to update the list of stations for
one of the following reasons:
New stations may become available from time to time.
If reception was not good for the original scan (for example the antenna
was not up), this may result in an empty or incomplete list of available
stations.
If you have poor reception of some stations causing the audio to break up,
you may wish to list only stations with good signal strength. To do a full
scan Select Menu > Full scan.
Once a scan is complete, the radio returns to playing the previously-
selected station or first station on the station list.
65
4.2 Manual tune
4.1 Full Scan
4. DAB radio mode
As well as the normal method of scanning, you can also manually tune to a
particular channel / frequency. This can be useful for adjusting your
antenna to achieve the best possible reception and scanning a particular
channel to update the station list.
To manually tune
Press Menu > Manual tune then use select control button to display a
particular channel/frequency, press Select to tune to that channel/
frequency.
The display shows a live indication of the received signal strength on the
selected frequency.
Adjustments to your antenna will be manifested in the received signal
strength displayed.
Note: The division in the signal strength bar indicates the audio quality
threshold – if the signal strength, as indicated by the solid rectangles, falls
below this threshold the audio quality will deteriorate.
When a
channel/frequency is selected CR4 also scans for any DAB
stations on the selected frequency and updates the station list with any
new stations found. To listen to any stations found return to the Now
playing screen and select the required station from the station list as
normal.
4.3 Prune Invalid
To remove stations that are listed but unavailable Select Menu > Prune
invalid. > Yes
4.4 DRC
This function reduces the difference between the loudest and quietest audio
being broadcast.
Effectively, this makes quiet sounds comparatively louder, and loud sounds
comparatively quieter.
Note: DRC only works if it is enabled by the broadcaster for a specific
station.
To change the DRC setting Select Menu > DRC > The options available are:
DRC high | low | off.

5 FM radio mode
FM
radio mode receives analogue radio from the FM band and displays
RDS [Radio Data System] information about the station and show [where
broadcast].
To enter FM mode: Press Source until the display shows FM Mode.
5.1 Selecting stations
The first time you select FM radio, CR4 is set to the lowest frequency
in the FM band. On subsequent selections the last used frequency/station
is displayed.
To scan for a station in FM mode
Press Play/Pause button scans up through the FM band frequencies,
showing the current frequency on the screen display.
A scan stops when a signal is found. CR4 can be set to stop at each
station or only at stations with a strong signal.
Alternatively, you can tune, using the Tune+/Tune- button
in 50 kHz steps.
5.2 Now playing information
While FM radio is playing, the screen shows its frequency, or if RDS
information is available, station name and any further RadioText'
information. If no information is available, just the frequency and a No
RadioText message is shown.
To view further information about the broadcast Press Info.
Date /Service / Pty / Freq / Signal/Power status
8
7
5.3 Settings
Scan settings
By defaul t , FM scans stop at any available station (All stations ).This
may include poor quality audio from weak stations.
O
ptions: Strong stations only | All stations
To change the scan setting, s to stop only at stations with good
signal strength
Select Menu > Scan setting then Strong stations only.
Audio settings
By defaul t, all stereo stations are reproduced in ste r e o . For weak
stations , this may result in poor quality aud. i o ,The audio quality can
be improved using mon. o .
Options: Stereo allowed | Forced mono
To play weak stations in mono
Select Menu > Audio setting > Forced mo.no
6 Bluetooth
Bluetooth mode allows CR4 to act as a wireless speaker playing audio
content from a connected Bluetooth capable device.
To enter Bluetooth mode
Press Source to choose Bluetooth mode to connect a Bluetooth capable
device.
Use your Bluetooth capable smart device to pair and connect with the
CR4.
6.1 Display information
The screen displays either a connected or disconnected message
depending on the connection state.
7 System settings
The System Settings allow you to tailor the CR4 with a variety of
options to
suit you.
To access system settings from any mode Select Menu >System Settings
>, then choose from the various options as described in the menu as
below.

109
The System Setting Menu options are:
• Sleep
• Alarm
• Equaliser
• Time/Date
• Backlight
• Language
• Factory Reset
• Software update
• Software version
To navigate through the menus
The following controls are used to move about the menu tree to
choose and select the required settings:
Select knob– [ push the Select control knob] this selects the currently
displayed option, if the option has a further sub-menu the first option of the
sub-menu is displayed. If the option is a setting value, the displayed value
is selected and either the next setting is highlighted or, if there are no
further settings, the display returns to the parent menu for that setting.
Select control knob– cycles forwards and backwards through the current
menu or setting options.
Back – jumps back to the parent menu of the currently displayed menu or
setting.
Menu
to return to the Now Playing
screen.
on the
7.1 Sleep
To set
the sleep timer while the radio is playing Press Sleep button
front panel. You can choose the sleep delay time in minutes from:
Sleep timer Off | 15 |30 | 45 | 60 | 90.
Use select control knob to cycle through the options or press Tune- / Tune+
button to choose the displayed option.
Once you select a sleep delay period, the display returns to the Now
playing screen displaying a Crescent moon icon and the remaining time,
in minutes, before the sleep time expires.
After the sleep delay period the radio switches to standby mode.
7.2 Alarms
As well as a clock/calendar, there are two
versatile wake-up alarms with
snooze facility, and a sleep function to turn the system off after a set
period of time. The alarm sound for each alarm can use a buzzer or a
selection from the audio sources.
Note: Alarms will only function when the CR4 unit is On or in Standby
mode.
An active alarm is indicated by its icon in the bottom line of the display.
Note: Alarms can be switched on or off in standby mode.
To set alarms
Press Alarm button under the Menu, use the Select control knob to
select the required Alarm 1 or 2.
To exit alarm setting mode, press Menu or Back [alternatively, the Alarm
display will timeout and automatically return to the Now Playing screen
after a certain time].
The alarm setup prompts you for the following parameters. Select a value
for each parameter in turn turning the select control knob and push knob
to confirm and move to the next parameter.
Parameters
Alarm – Off | On
Frequency - Daily | Once | Weekends | Weekdays
Note: if you choose ' Once ', you are prompted to enter the required
date .
Wake Up time – hours and minutes
Sources – Buzzer | Digital Radio| FM
If DAB or FM is chosen as the audio Mode you will also be prompted to
select the Last played station.
Duration – 15 | 30 | 45 | 60 | 90 | 120 minutes
If the alarm is not canceled CR4 returns to standby after this time
period.
Volume – rotate the Select control knob to set the required alarm volume
1-16.

1211
7.3 Equalizer
This presents a My Equaliser option to allow you to create your own
equaliser settings.
My EQ… | Normal | Classic | Jazz | Pop | Rock | Speech
7.3.1 My EQ setup…
This option allows you to set a bias in the treble and bass audio
frequencies and turn 'Loudness' On or Off. Values can be set between -7
(Minus 7) and +7 (plus 7).
Treble – (Use the select control button to choose a bias value
between -7 and +7)
Bass – (Use the select control button to choose a bias value
between -7 and +7)
Loudness – No
or Yes. (When
Yes, low-level high and low frequency
sounds are boosted to give a ‘fuller' sound.)
This is the volume the alarm will build up to. [Initially the alarm sounds at
a low volume and gradually gets louder to the set volume].
In all listening modes active alarms are indicated by displaying the
relevant
Alarm 1 and/or Alarm 2 icons.
At the set time, the alarm will sound, quietly at first, then gradually building
up to the set volume. When an alarm sounds, the icon in the display
flashes.
To cancel a sounding alarm and switch the radio to standby long press
Select Knob.
Snooze
To temporarily silence a sounding alarm, short press Select Knob for
5/10/15/30 minutes snooze period.
7.4 Time/Date
The time and date can be updated manually or automatically With
auto-update , the time and date are automatically synchronised with
national time signals broadcast over DAB and F M ([when available] .
You can also select the display format for the time and d. ate
The Time menu contains the following optio: ns
• Set Time/Date – [see below]
• Auto update - Update from Any | Update from digital radio |
Update from FM | No Update
• Set 12/24 hour - 12 | 24
• Set date format - DD-MM-YYYY | MM-DD-YYYY.
Set time/date
This option is for manually setting the time and date displayed.The time
displays as hh:mm, with the first value, hh, active (flashing). Adjust each
value using the select control knob and push Select knob to confirm. The
next value then becomes active and flashes. The date values follow and
are set in the same way.
Note: The date displays as DD-MM-YYYY or MM-DD-YYYY depending on
your choice of date format (see above).
7.5 Backlight
The CR4 has a backlight with three brightness settings, and adjustable
timeout [this is the time delay, in seconds, after which the display switches
to the Dim level].
There are three settings:
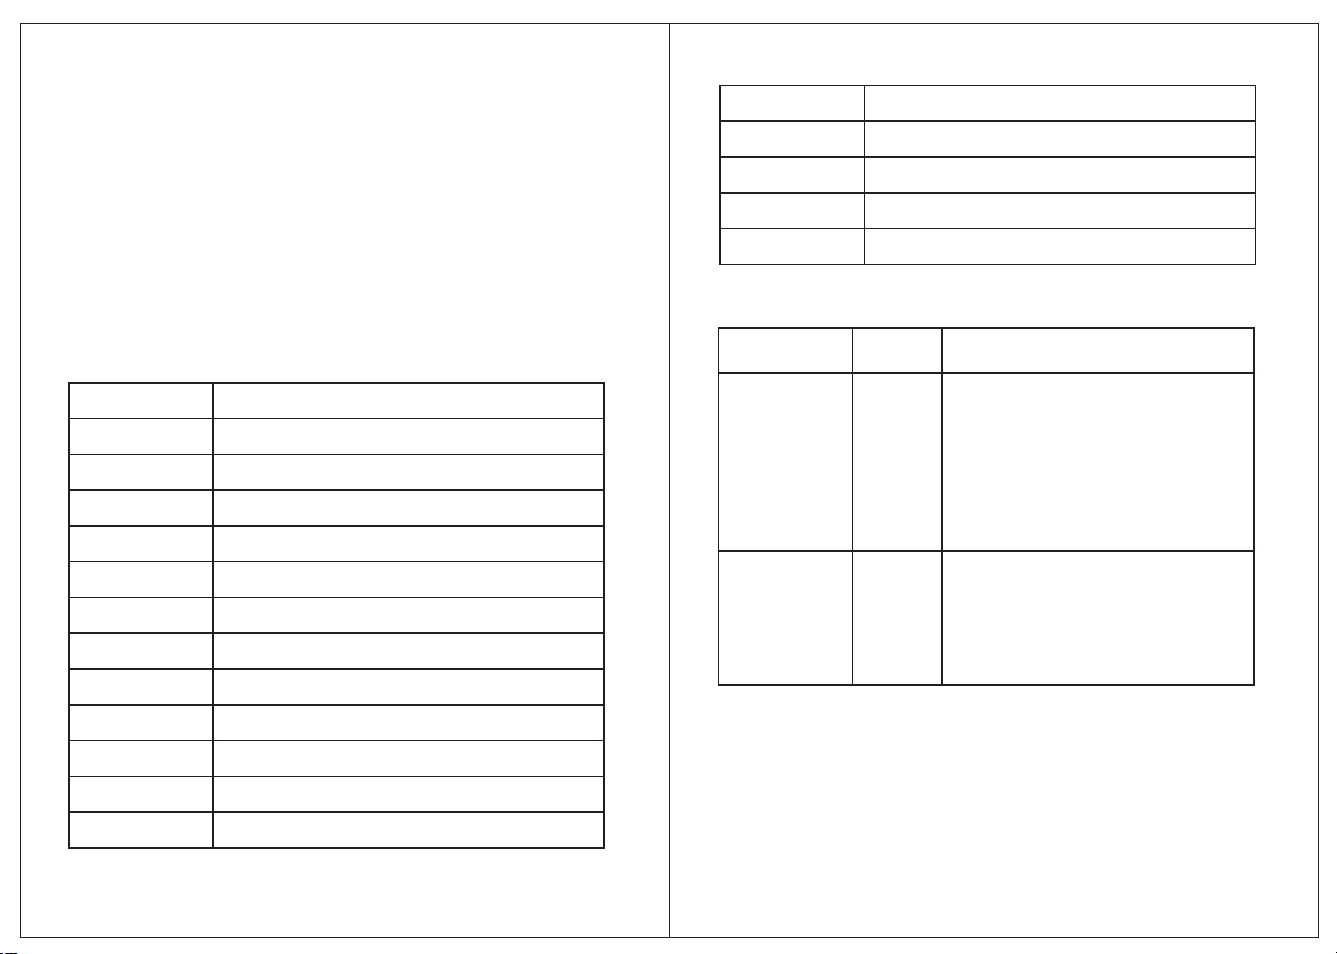
•Timeout - On | 10 | 20 | 30 | 45 | 60 | 90 | 120 | 180 sec
•On level - High | Medium | Low
•Dim level - High | Medium | Low
13 14
7.6 Language
The default language is Engli s h . To change, select Menu > System
settings > Language > then select your languag. e
7.7 Factory reset
A factory reset clears all user defi ned settings, replacing them with
the original default valu e s , so time /date , preference s settings and
DAB station list are all lo s t .
If you select Factory res e t , you are asked to confirm by selecting
“Yes”.
8 Troubleshooting and error messages
8.1 Error messages
Message
Descri ption
DAB mode
Service not availa ble
No DAB reception
Signal error
The DAB signa l ha s be en interrupted
No DAB Statio n
The current station does not broadcast an identity name.
No Name
The listed st ati on cannot be fou nd .
No statio ns found
No DAB stati ons ar e av ai lab le – ch ec k ae ri a l .
FM mode
No RadioText
No RDS text information is ava ilabl e on thi s st at ion .
No PTY
No RDS programme type information is av ai lab le.
No Name
No RDS station name is being broadcast
General messages
Update faile d
Soft ware upgrade fai le d
8.2 Troubleshooting
Check /move antenna, Move radio
Rescan high - strength stations only.
For DAB or DAB +, check the
current status of local coverage
with your national digital radio
authority .
As above then rescan stations
Solutions
Low signal
Low signal
Cause
strength
strength
FM: Hiss
DAB: burbling /
intermittent
cut-out
DAB:
No stations
available’
message
Problem
Message
Descri ption
Tim e is not set
No time value is cu rrently set o n this platform .
Time Not saved
Any ch an ge s mad e to th e time settings will b e lost.
Alarm Not saved
Any ch an ge s mad e to th e Alarm settings will b e los t.
Invalid Date
The en tered va lue do es no t match a va lid date.

Model:
Type:
Speaker:
Power:
Power Supply:
Dimension (mm):
Weight:
9 Technical Specification:
CR4
DAB & FM Radio
1X 2.5” full range speaker
5W RMS
5V DC or 4 x AA batteries [battery not included]
W110 X H175 X D100 MM
0.75KG
Specifications subject to change without no.t ice
This symbol indicates that the relevant electrical product or battery
should not be disposed of as general household waste in Europe.
To ensure the correct waste treatment of the product and battery,
please dispose them in accordance to any applicable local laws of
requirement for disposal of electrical equipment or batteries. In so
doing, you will help to conserve natural resources and improve
standards of environmental protection in treatment and disposal of
electrical waste (Waste Electrical and Electronic Equipment
Directive).
15