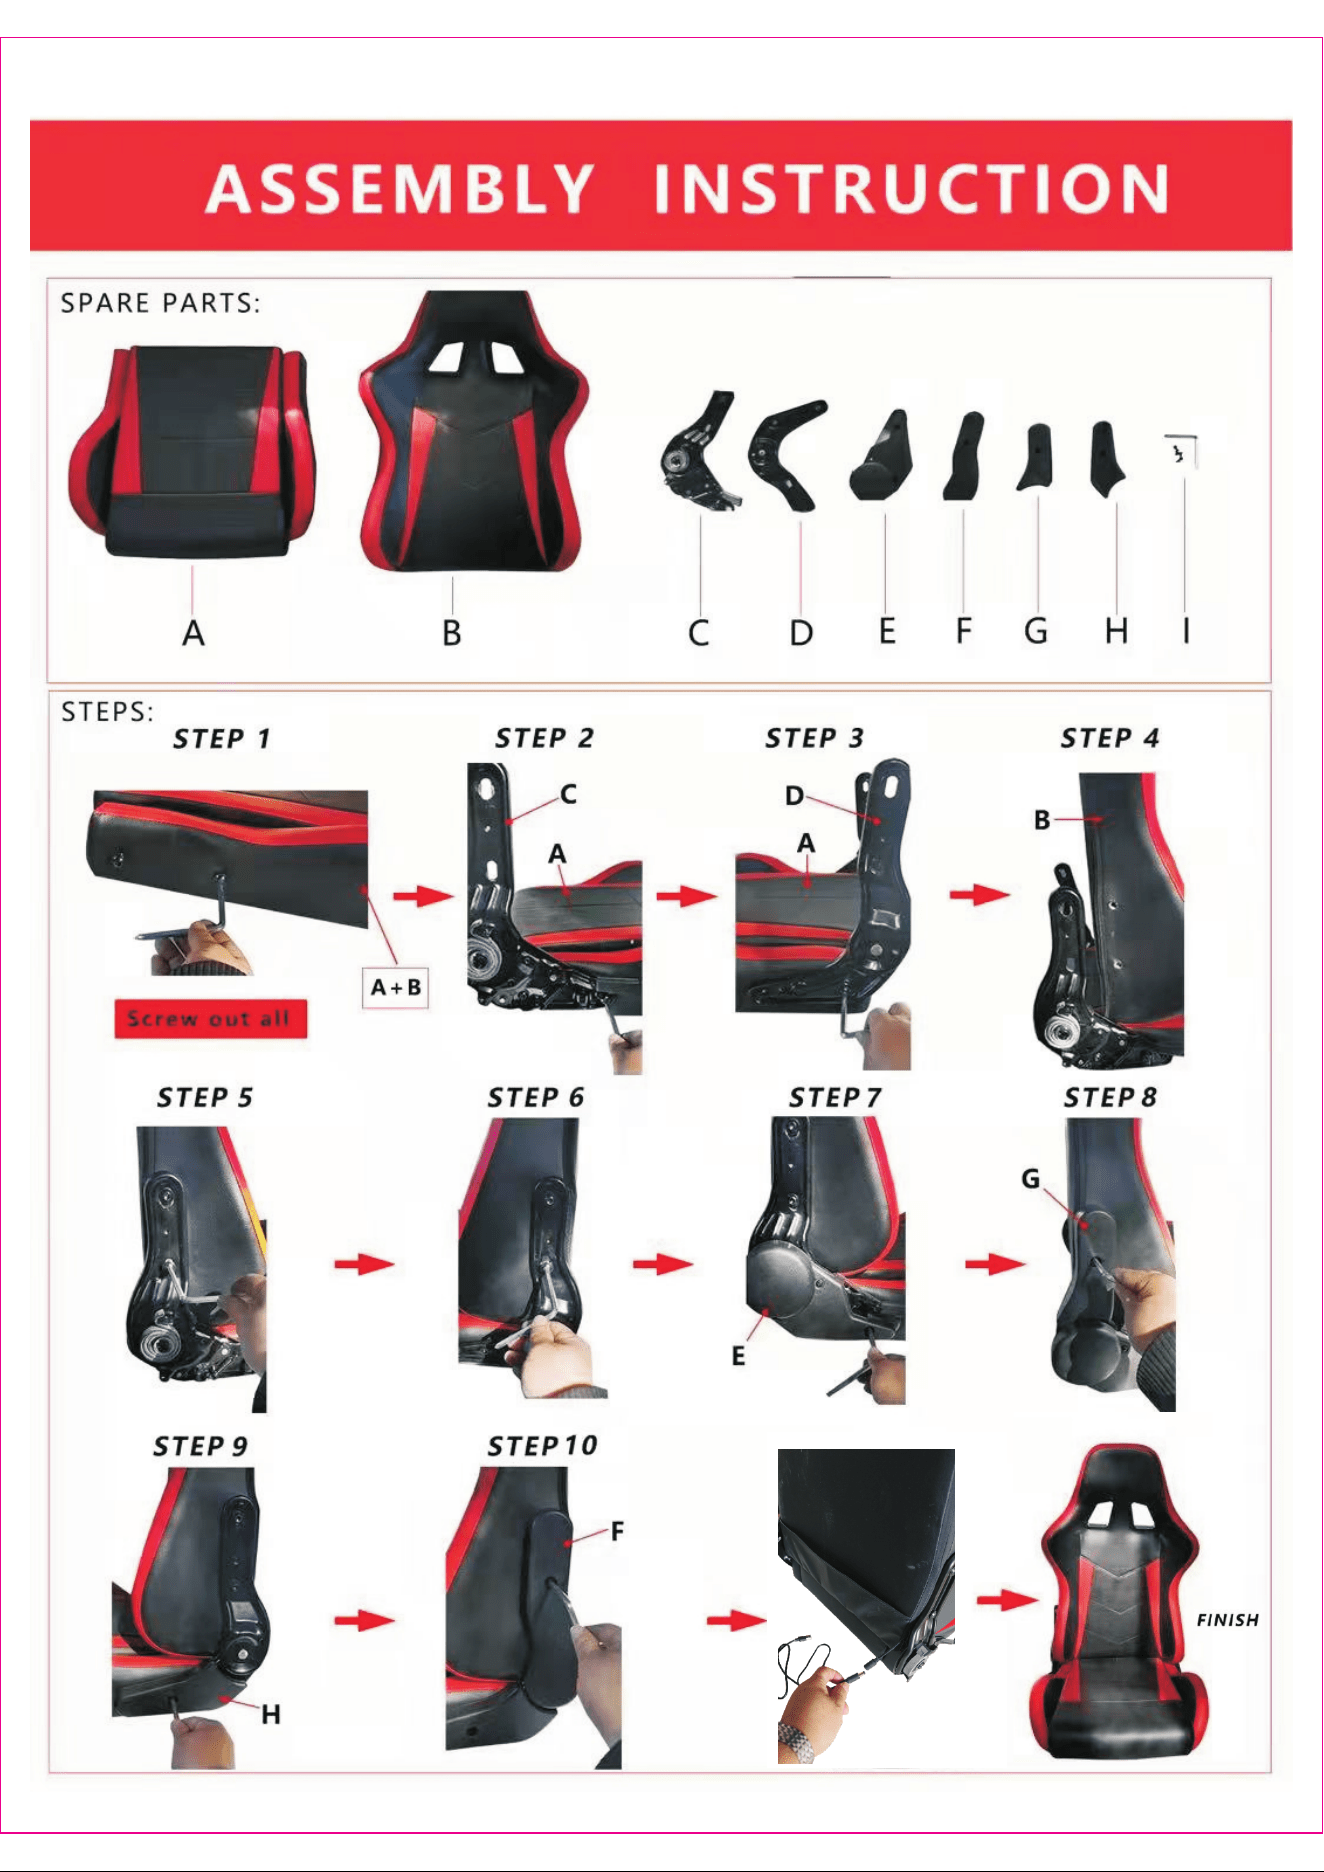
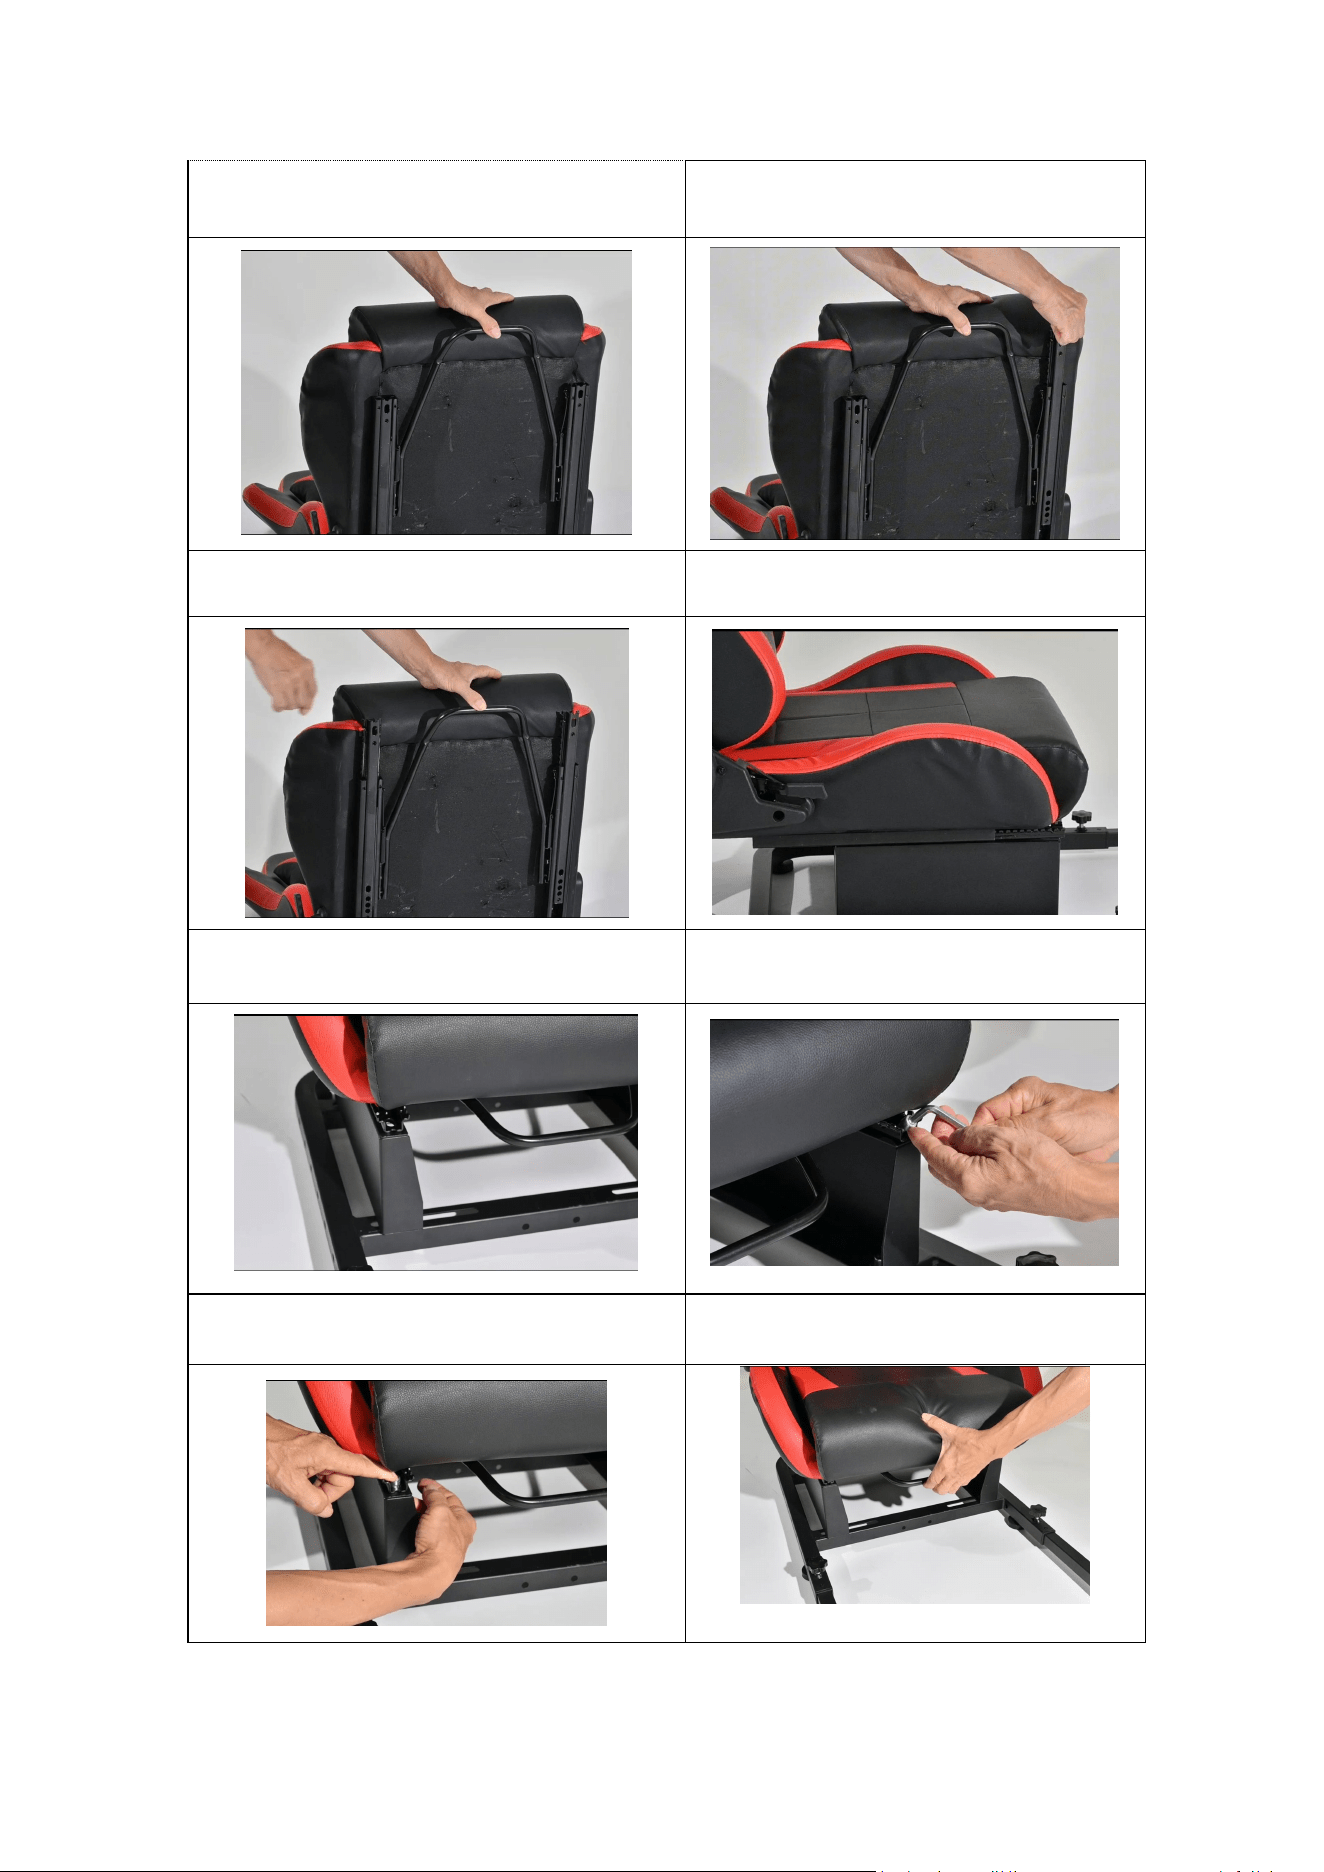
Step 1: Invert the chair and hold down the slide
rail handle with your fingers
Step 2: Remove the slide rail
Step 3: Draw the same distance on both sides
Step 4: Place the seat onto the seat bracket
Step 5: Align the mounting holes of the slide rail
with the mounting holes of the bracket
Step 6: Insert the bolt from top to bottom and
install the nut from bottom to top
Step 7: Tighten the nuts on both sides
Step 8: Press and hold the handle to slide the
seat forward
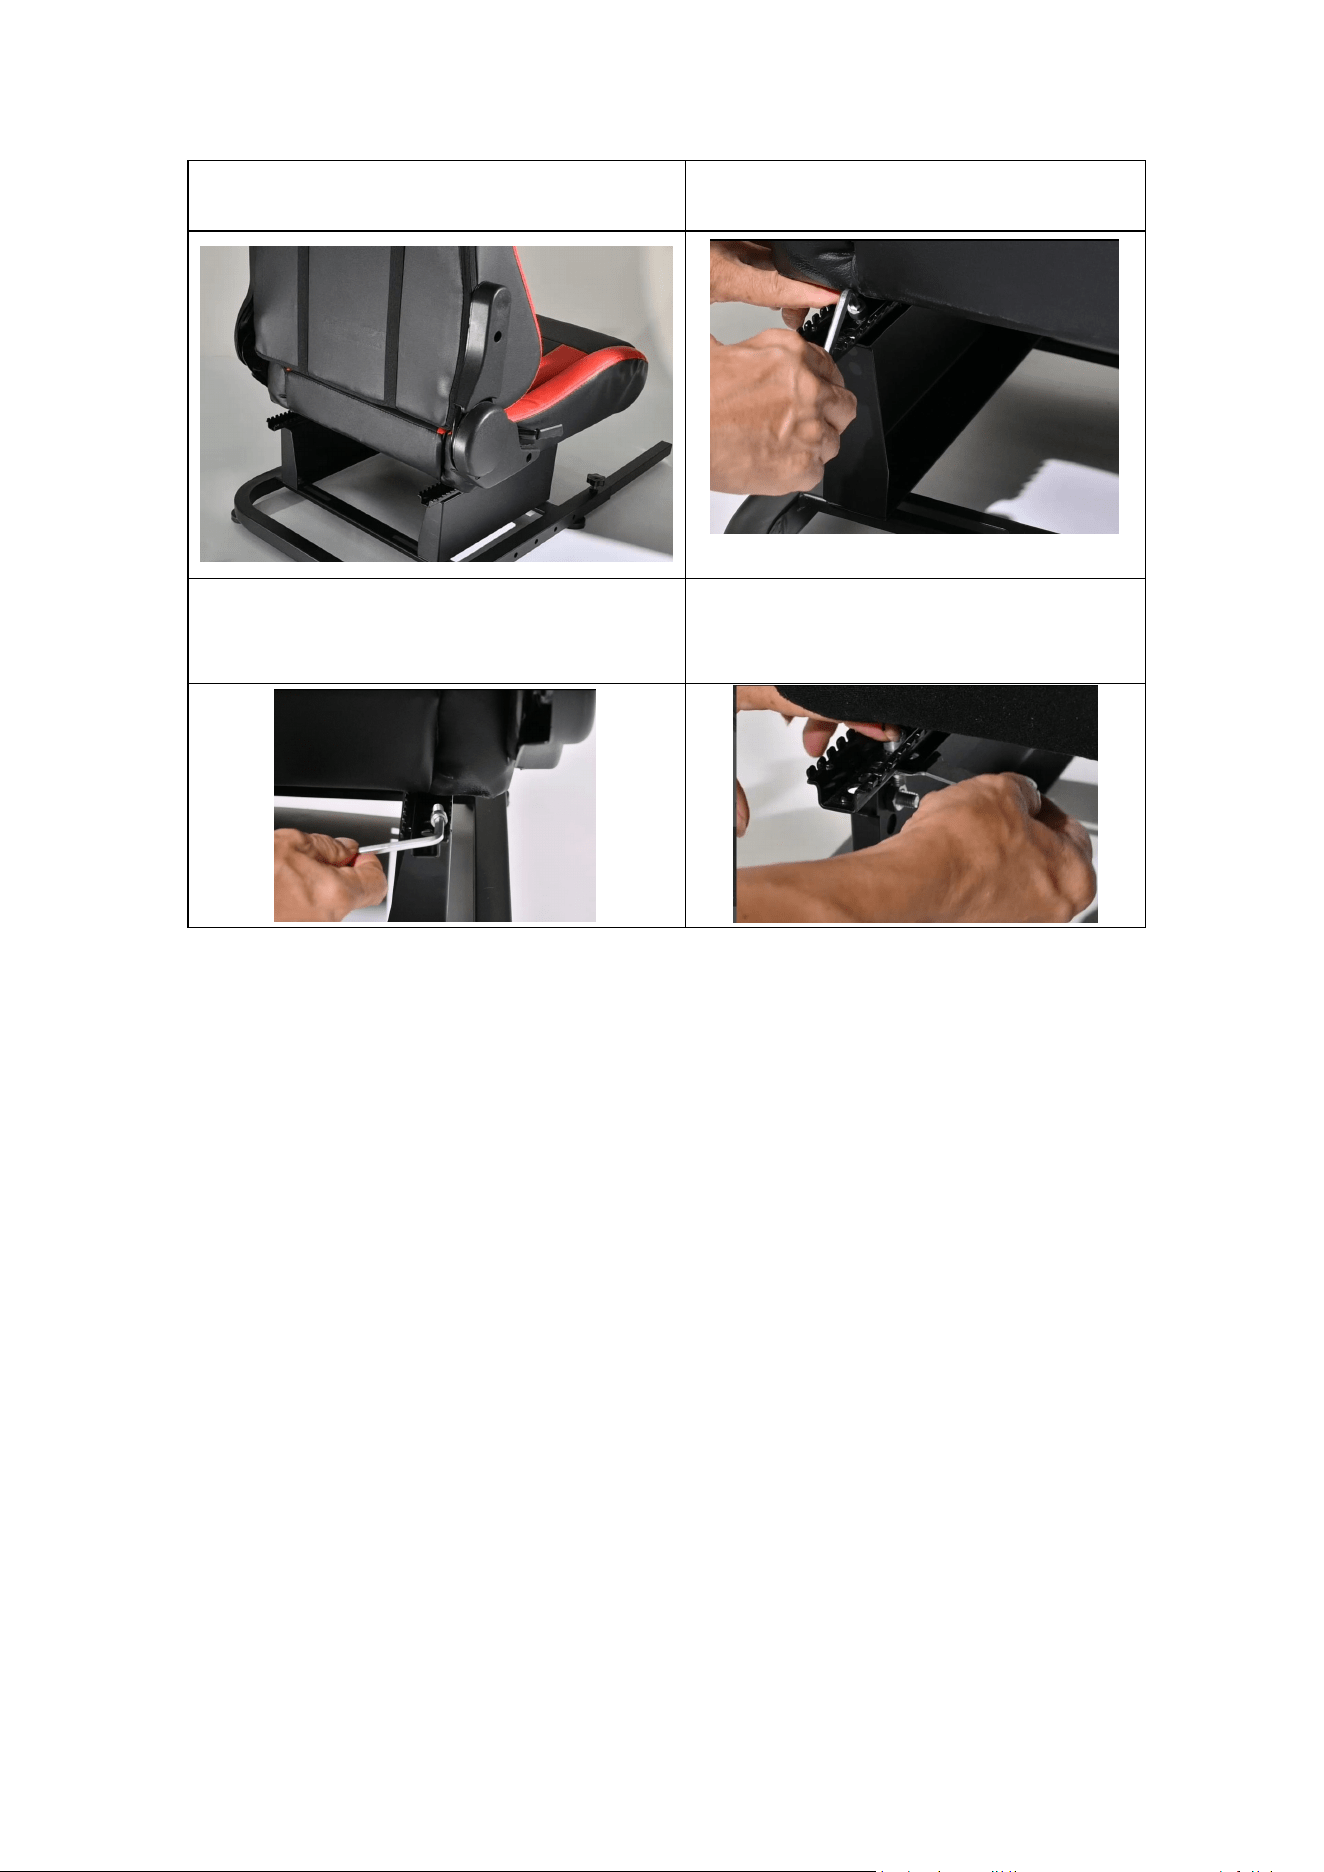
Step 9: Slide the seat forward to expose the
installation hole
Step 10: Use an Allen wrench to assist in
inserting the bolt into the installation hole
Step 11: Use an Allen wrench on both sides to
assist in inserting the bolt into the installation
hole
Step 12: Use an open-end wrench to tighten
the nut
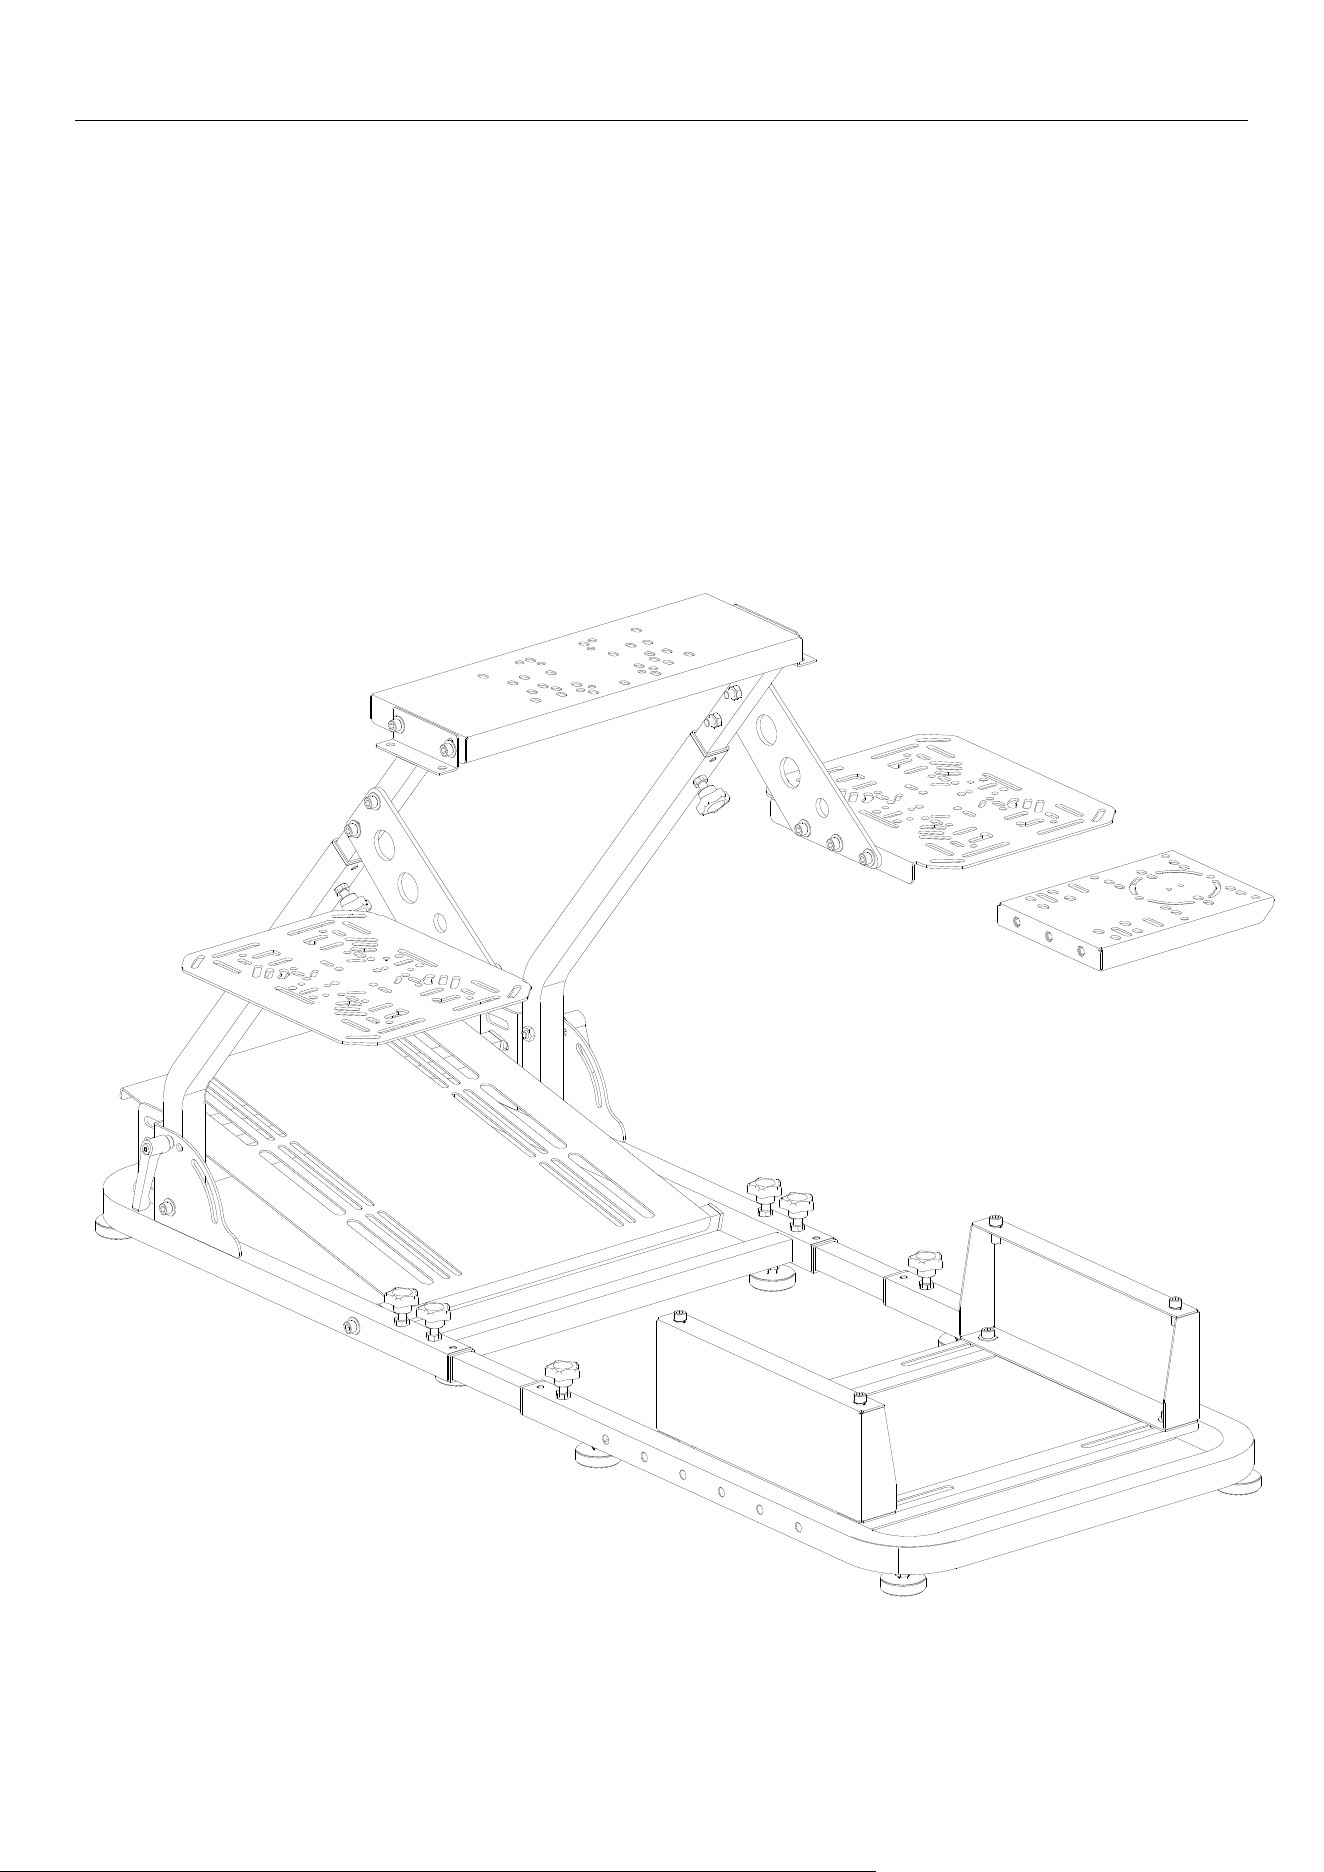
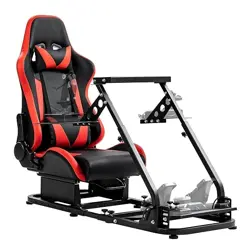
GS35 Racing Simulator Stand
1 / 6
GS35
Product Assembly Manual
GS35 Racing Simulator Stand
2 / 6
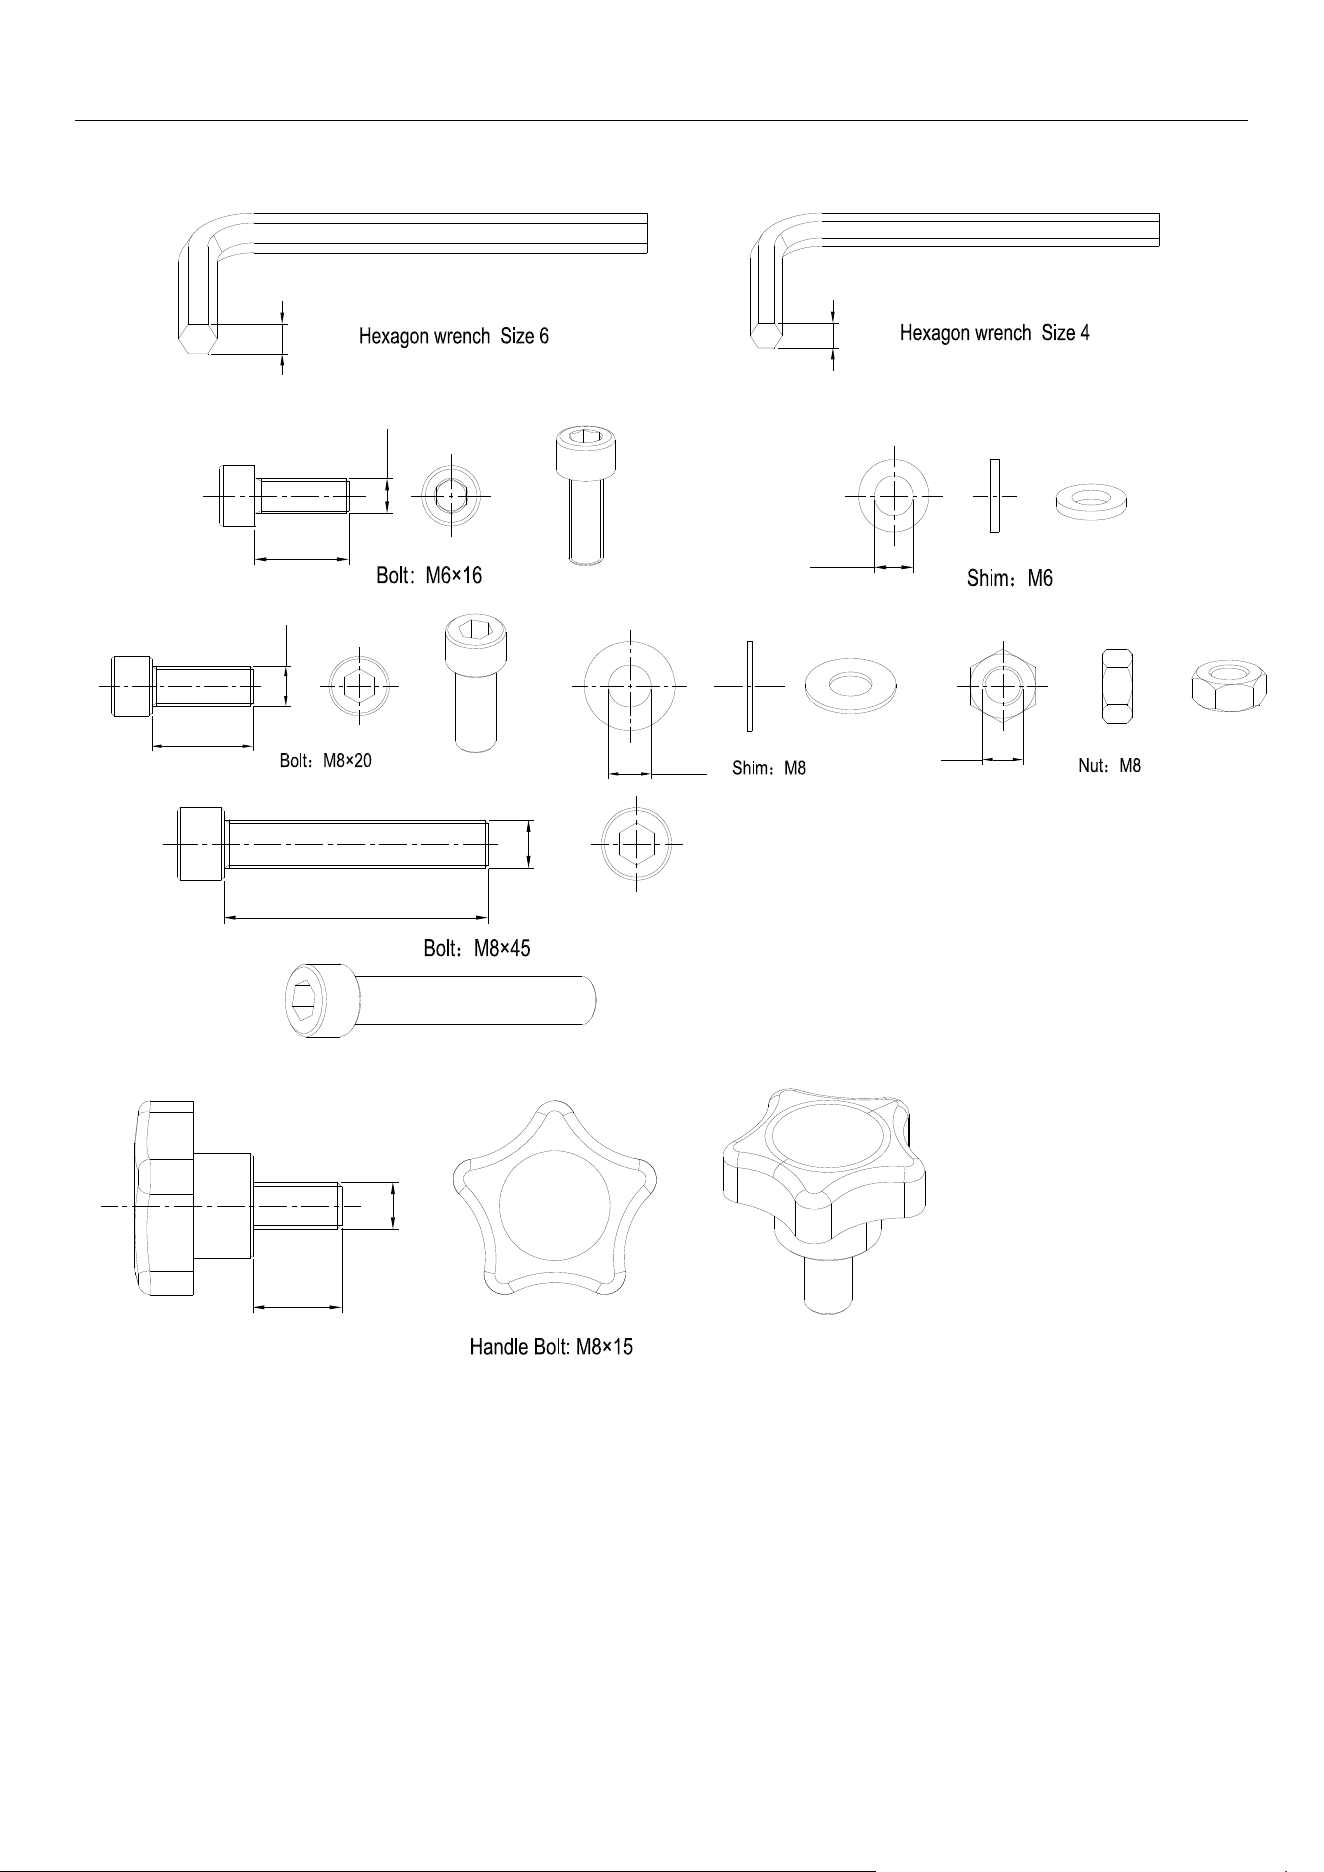
accessories explanation
6
4
16
M6
φ6.0
20
M8
φ8.0
M8
45
M8
M8
15
GS35 Racing Simulator Stand
3 / 6
Assembly Processes
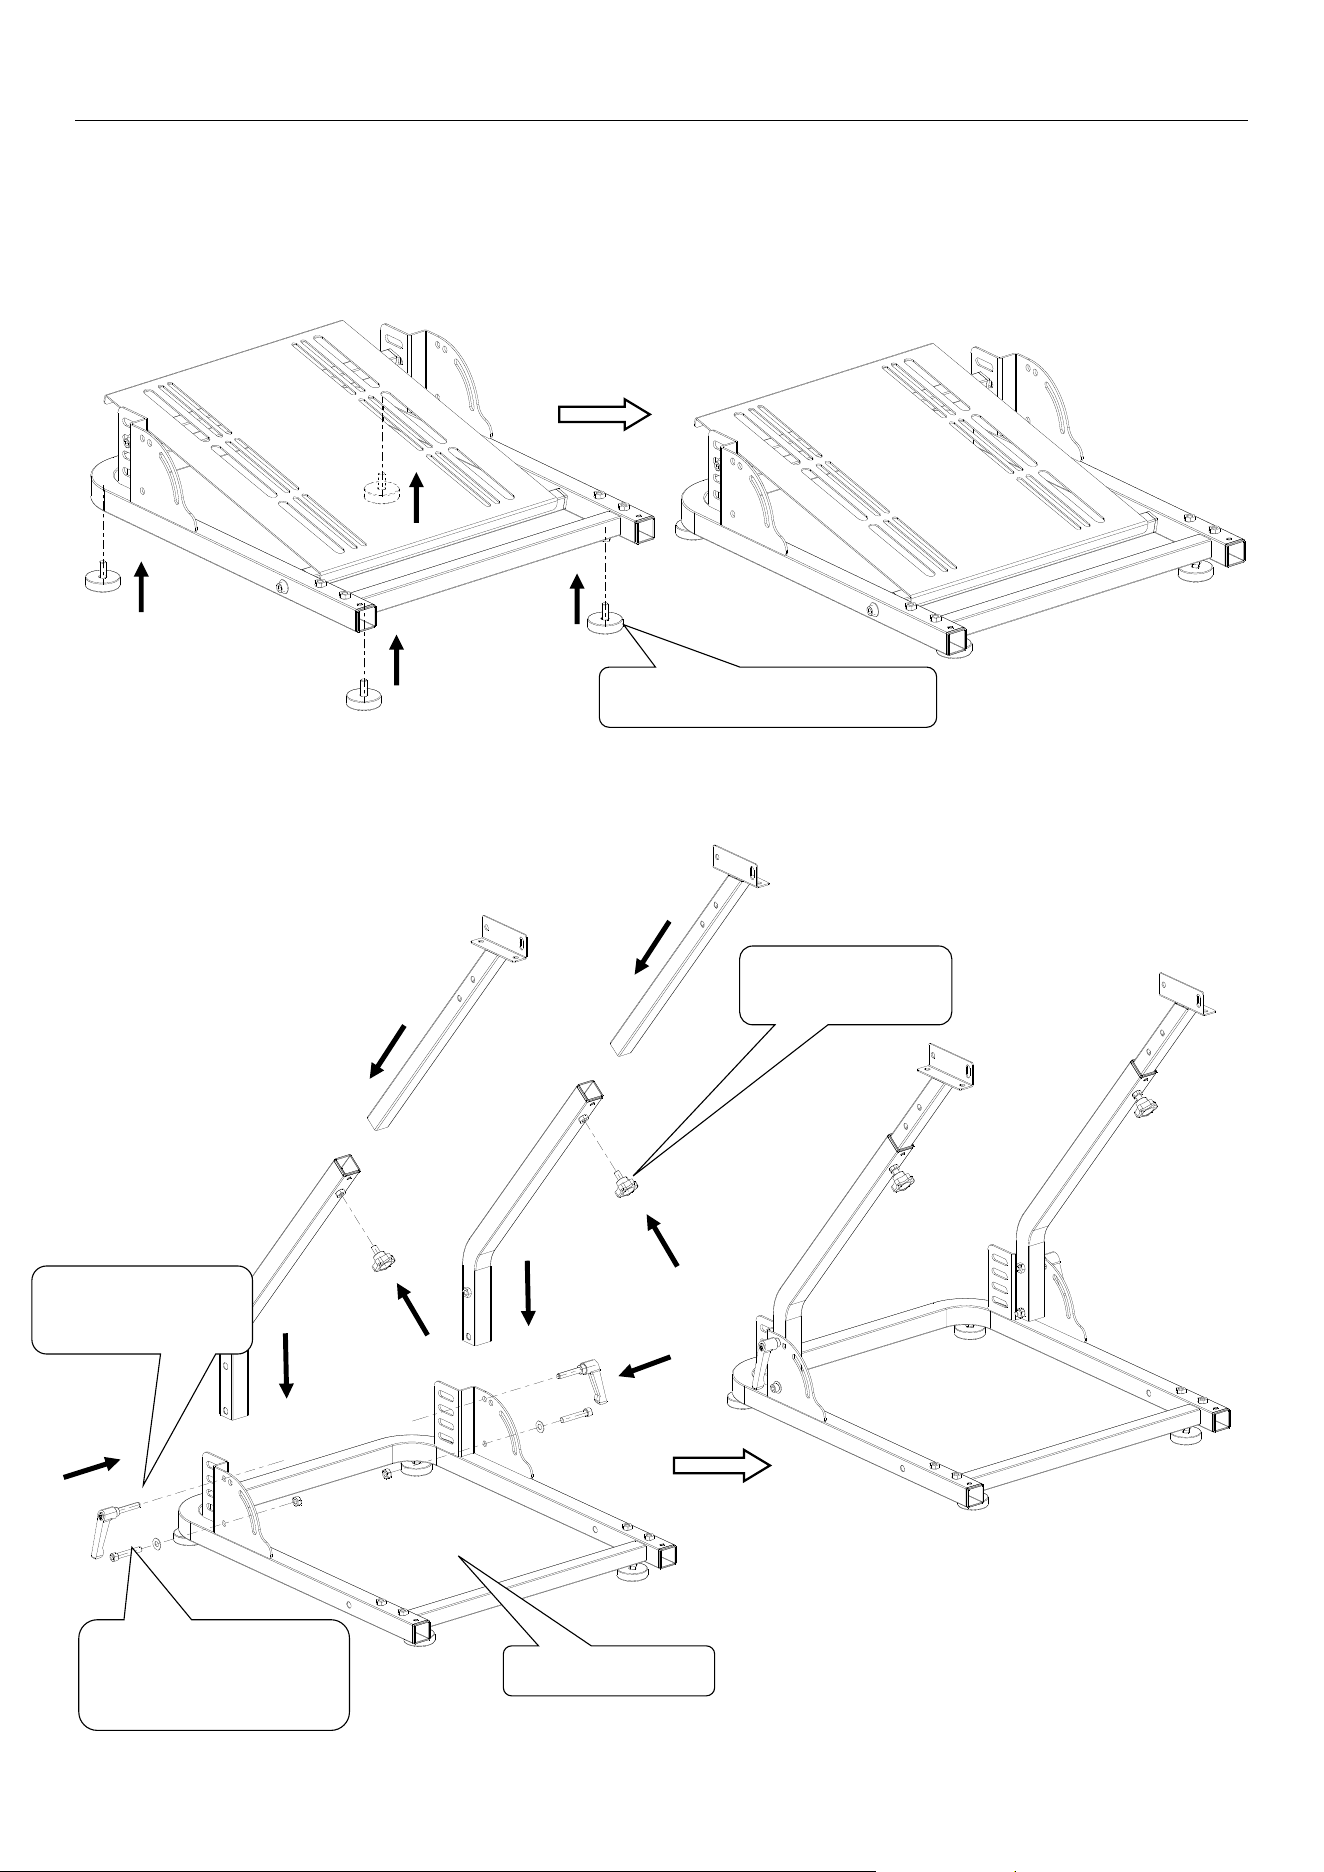
1. Assemble the anti-skid foot bolt(4 pcs)
2. Assemble left and right adjustment stand
Handle Bolt:
M8×15
(
2 PCS
)
Fastening Bolt:
M8×40 (2 PCS)
Bolt: M8×45 (2 PCS)
Shim: M8 (2 PCS)
Nut: M8
(
2 PCS
)
Foot Bolt: M8×20 (4 PCS)
Baseplate hiding
GS35 Racing Simulator Stand
4 / 6
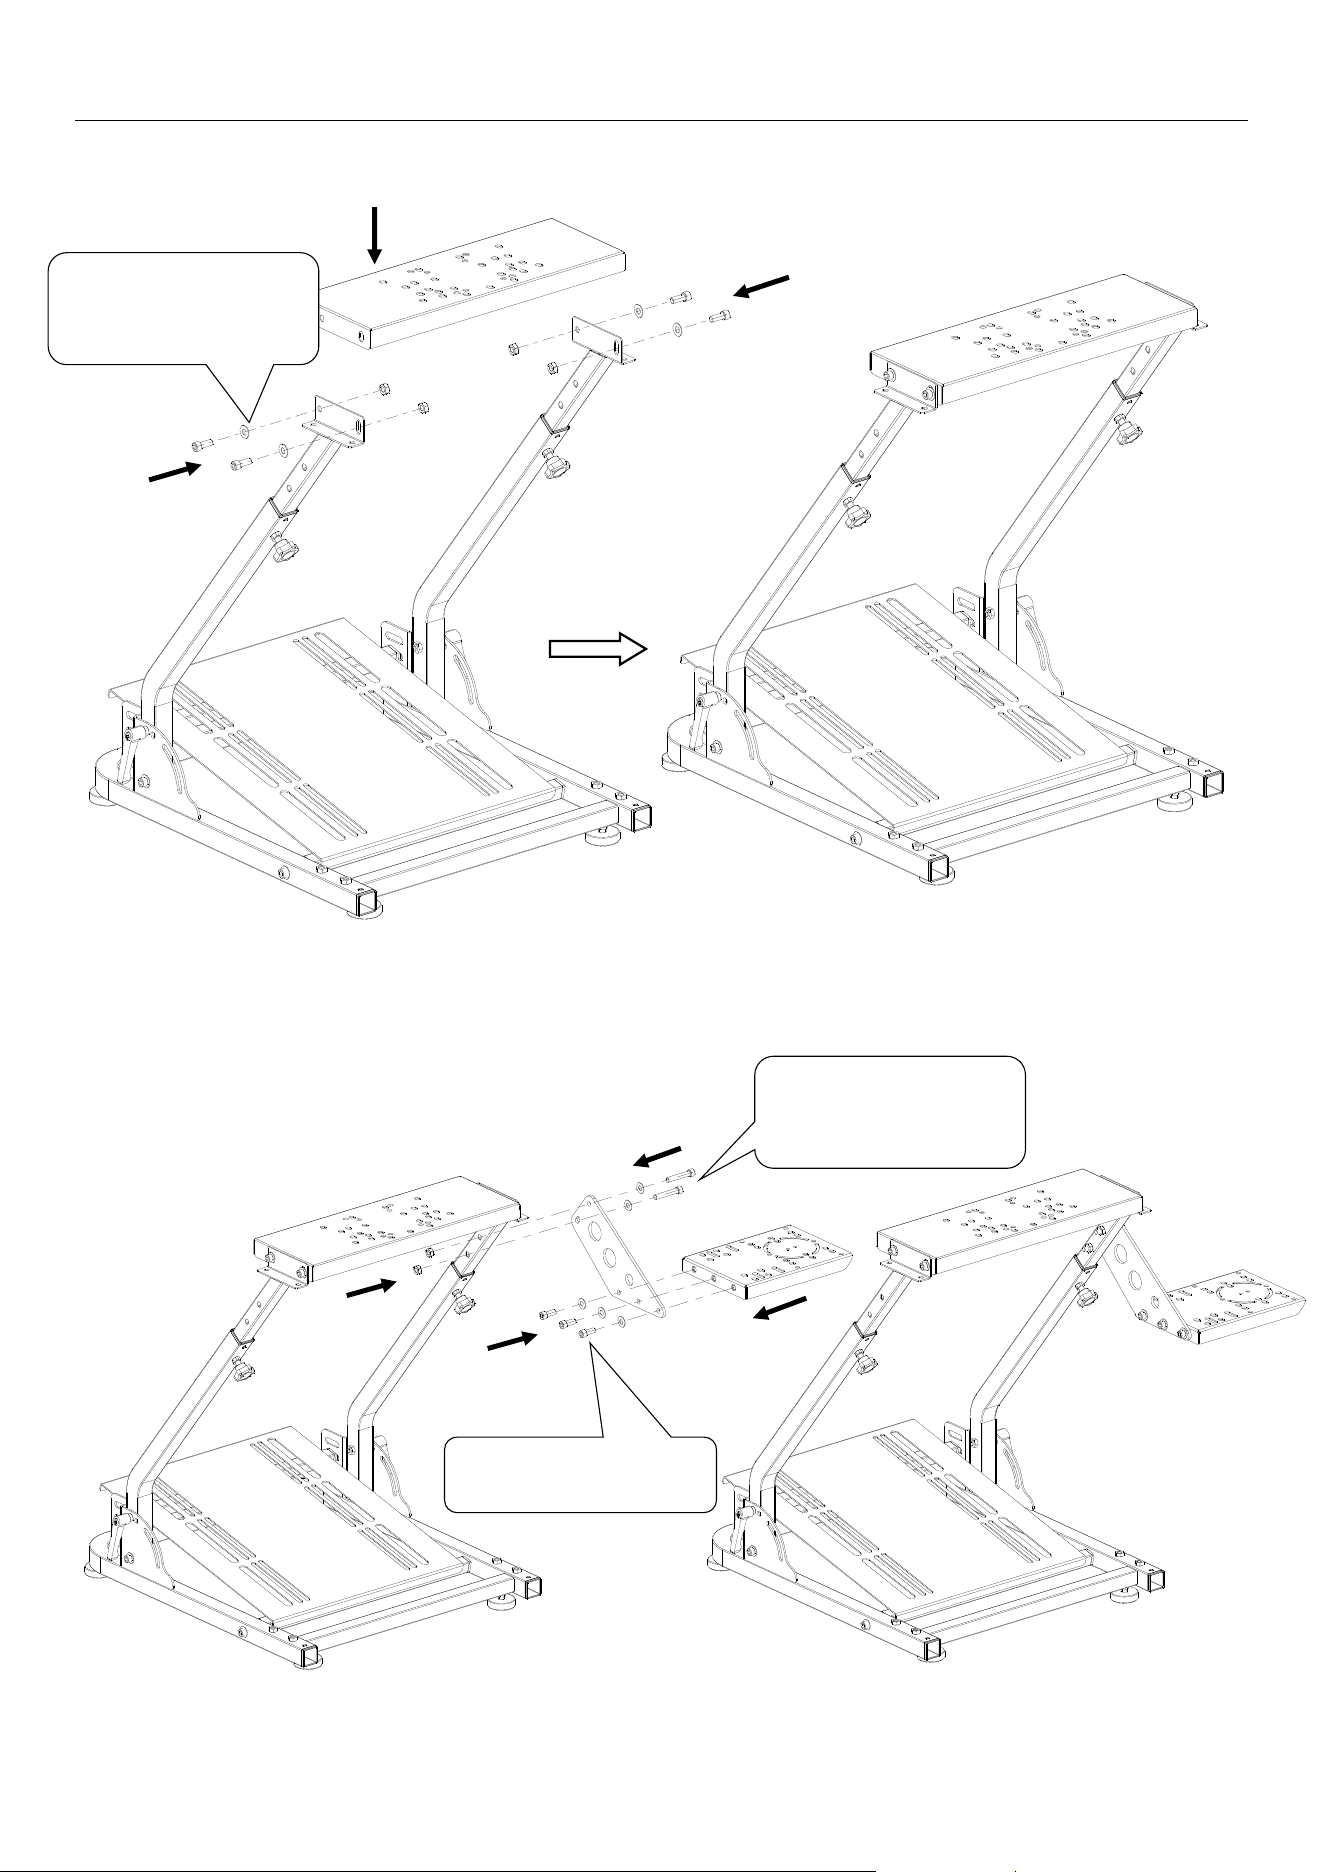
3. Assemble the steering wheel mounting stand with 4 pieces of the bolt (M8×
20) 、4 pieces of the shim (M8) and 4 pieces of the nut (M8)
4. Assemble the elbow fixing stand on the left or right,as your like,if you play
racing games
Bolt: M8×20 (4 PCS)
Shim: M8 (4 PCS)
Nut: M8 (4 PCS)
Bolt: M8×20 (3 PCS)
S
him: M
8
(
3
PCS
)
Bolt: M8×45 (2 PCS)
Shim: M8 (2 PCS)
Nut: M8 (2 PCS)
GS35 Racing Simulator Stand
5 / 6
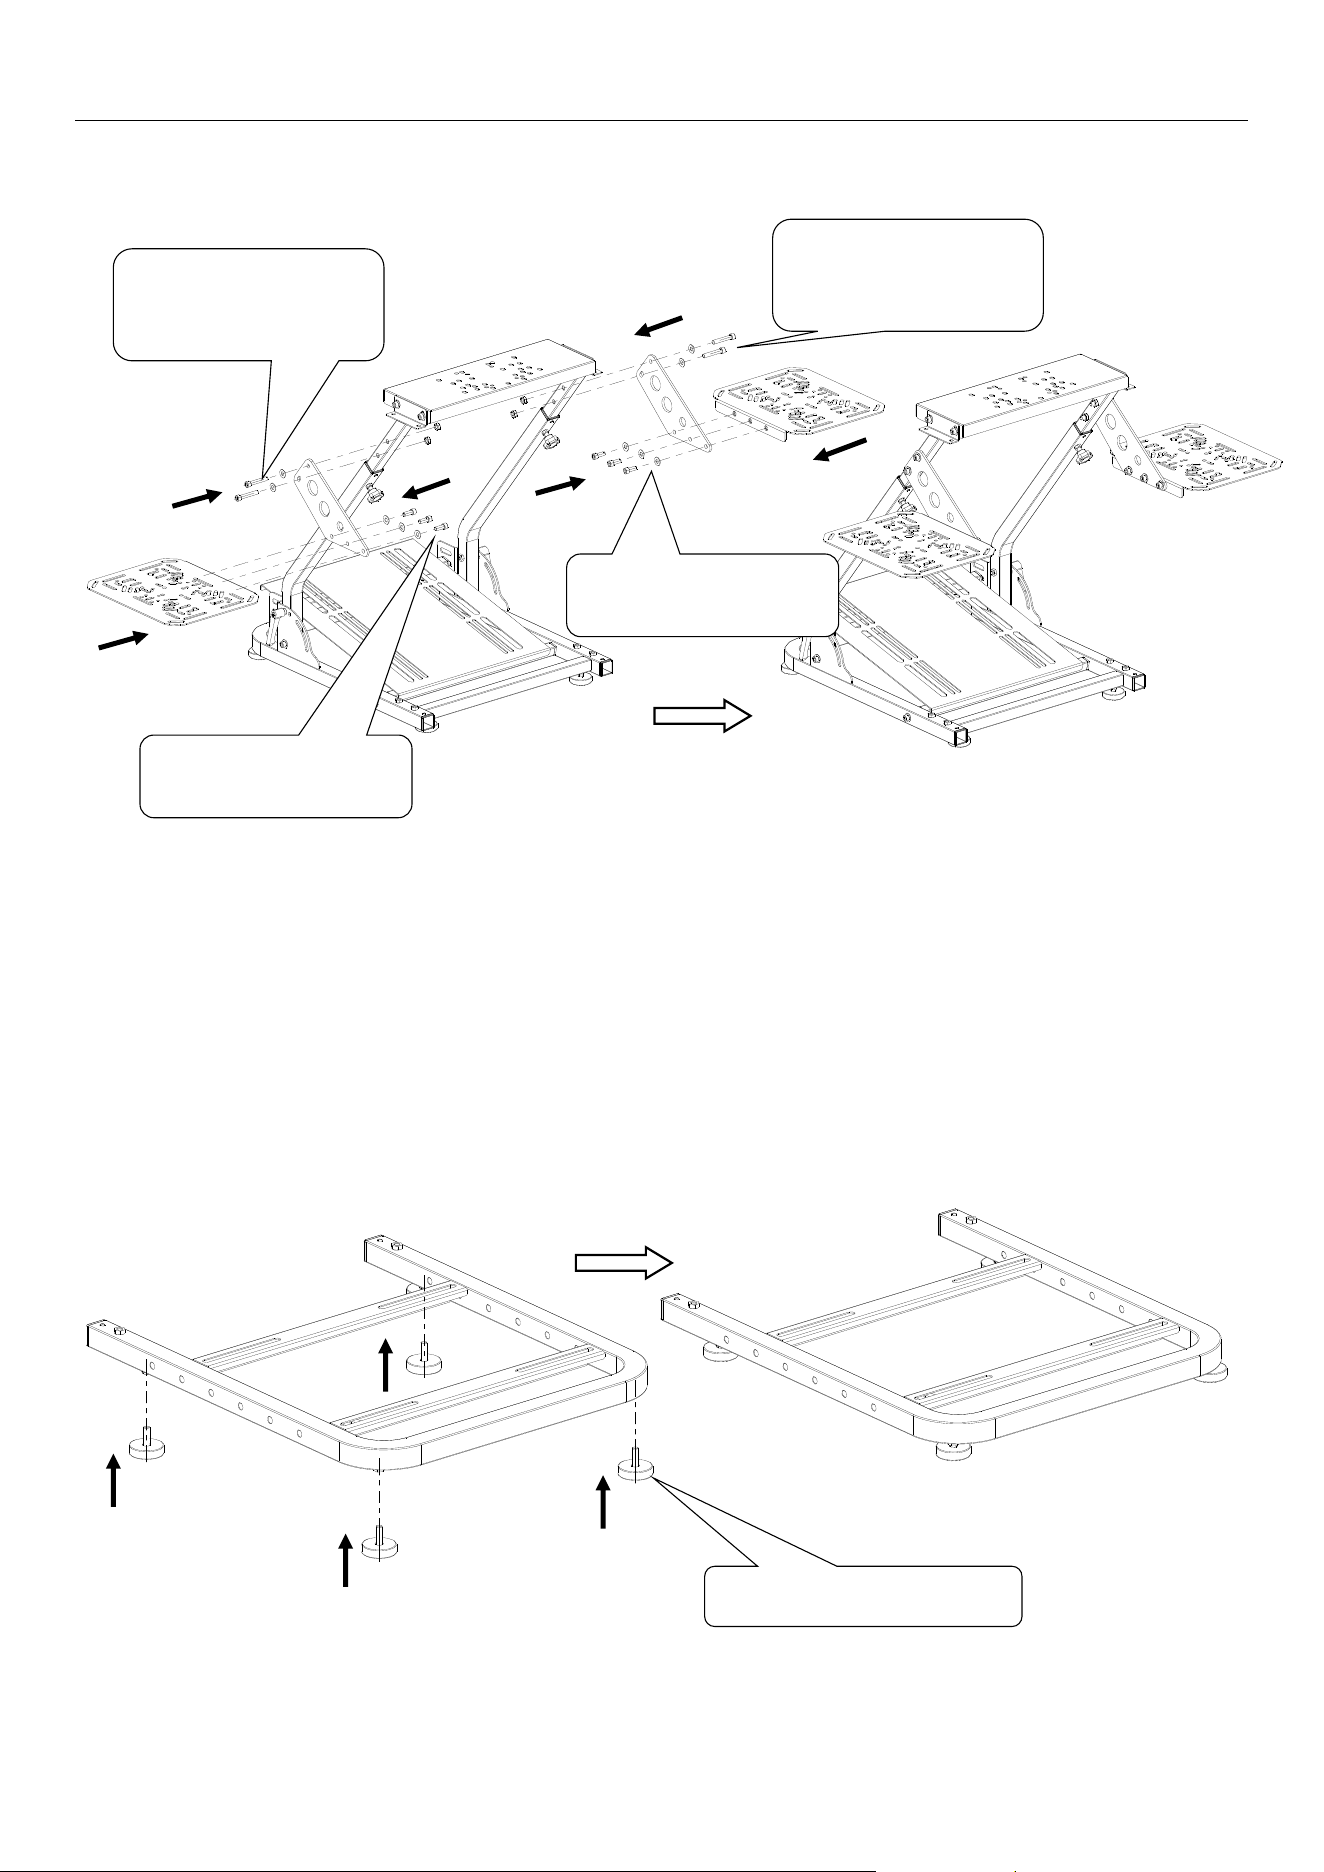
5. Assemble the fixed plate as follows,if you play flying game
6. Assemble the anti-skid foot bolt(4 pcs) to the afterpart stand
Foot Bolt: M8×20 (4 PCS)
Bolt: M8×45 (2 PCS)
Shim: M8 (2 PCS)
Nut: M8 (2 PCS)
Bolt: M8×45 (2 PCS)
Shim: M8 (2 PCS)
Nut: M8 (2 PCS)
Bolt: M8×20 (3 PCS)
Shim: M8 (3 PCS)
Bolt: M8×20 (3 PCS)
Shim: M8 (3 PCS)
GS35 Racing Simulator Stand
6 / 6
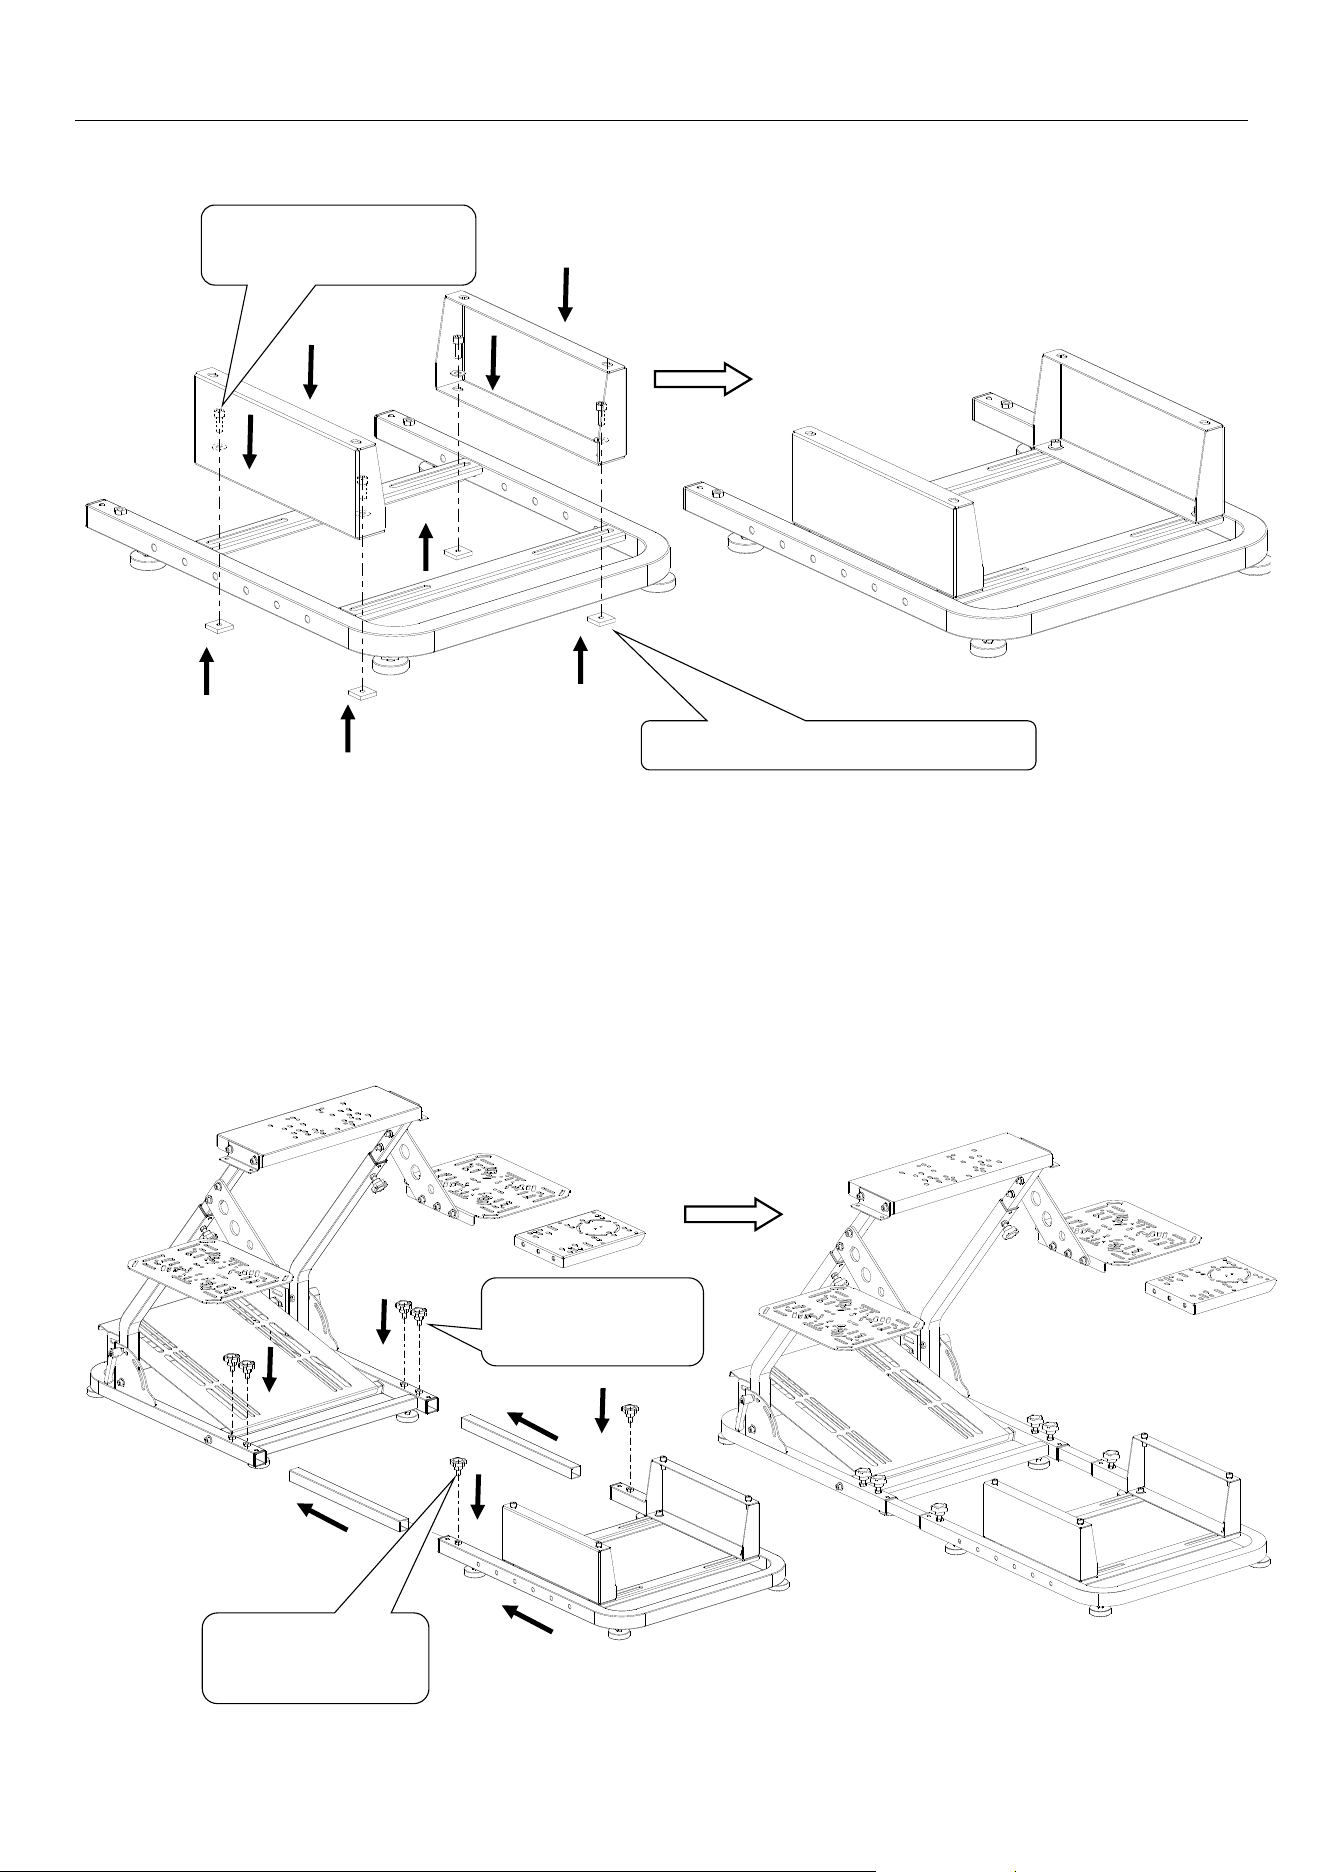
7. Assemble the seat mounting stand
8 Connect the frontpart stand
Handle Bolt:
M8×15 (4 PCS)
Handle Bolt:
M8×15 (2 PCS)
Bolt: M8×20 (4 PCS)
Shim: M8
(
4 PCS
)
Square Nut: M8 ×25×25 (4 PCS)