Read all instructions before you
operate
your
appliance
.
Save these instructions!
To installer or person assembling appliance: Leave this manual with appliance for future reference.
To consumer: Keep this manual for future reference.
www.SunstoneMP.com
Item Number:
Rocket Stove Camper Box: STARBBQ-RSBBOX

Welcome & Congratulations
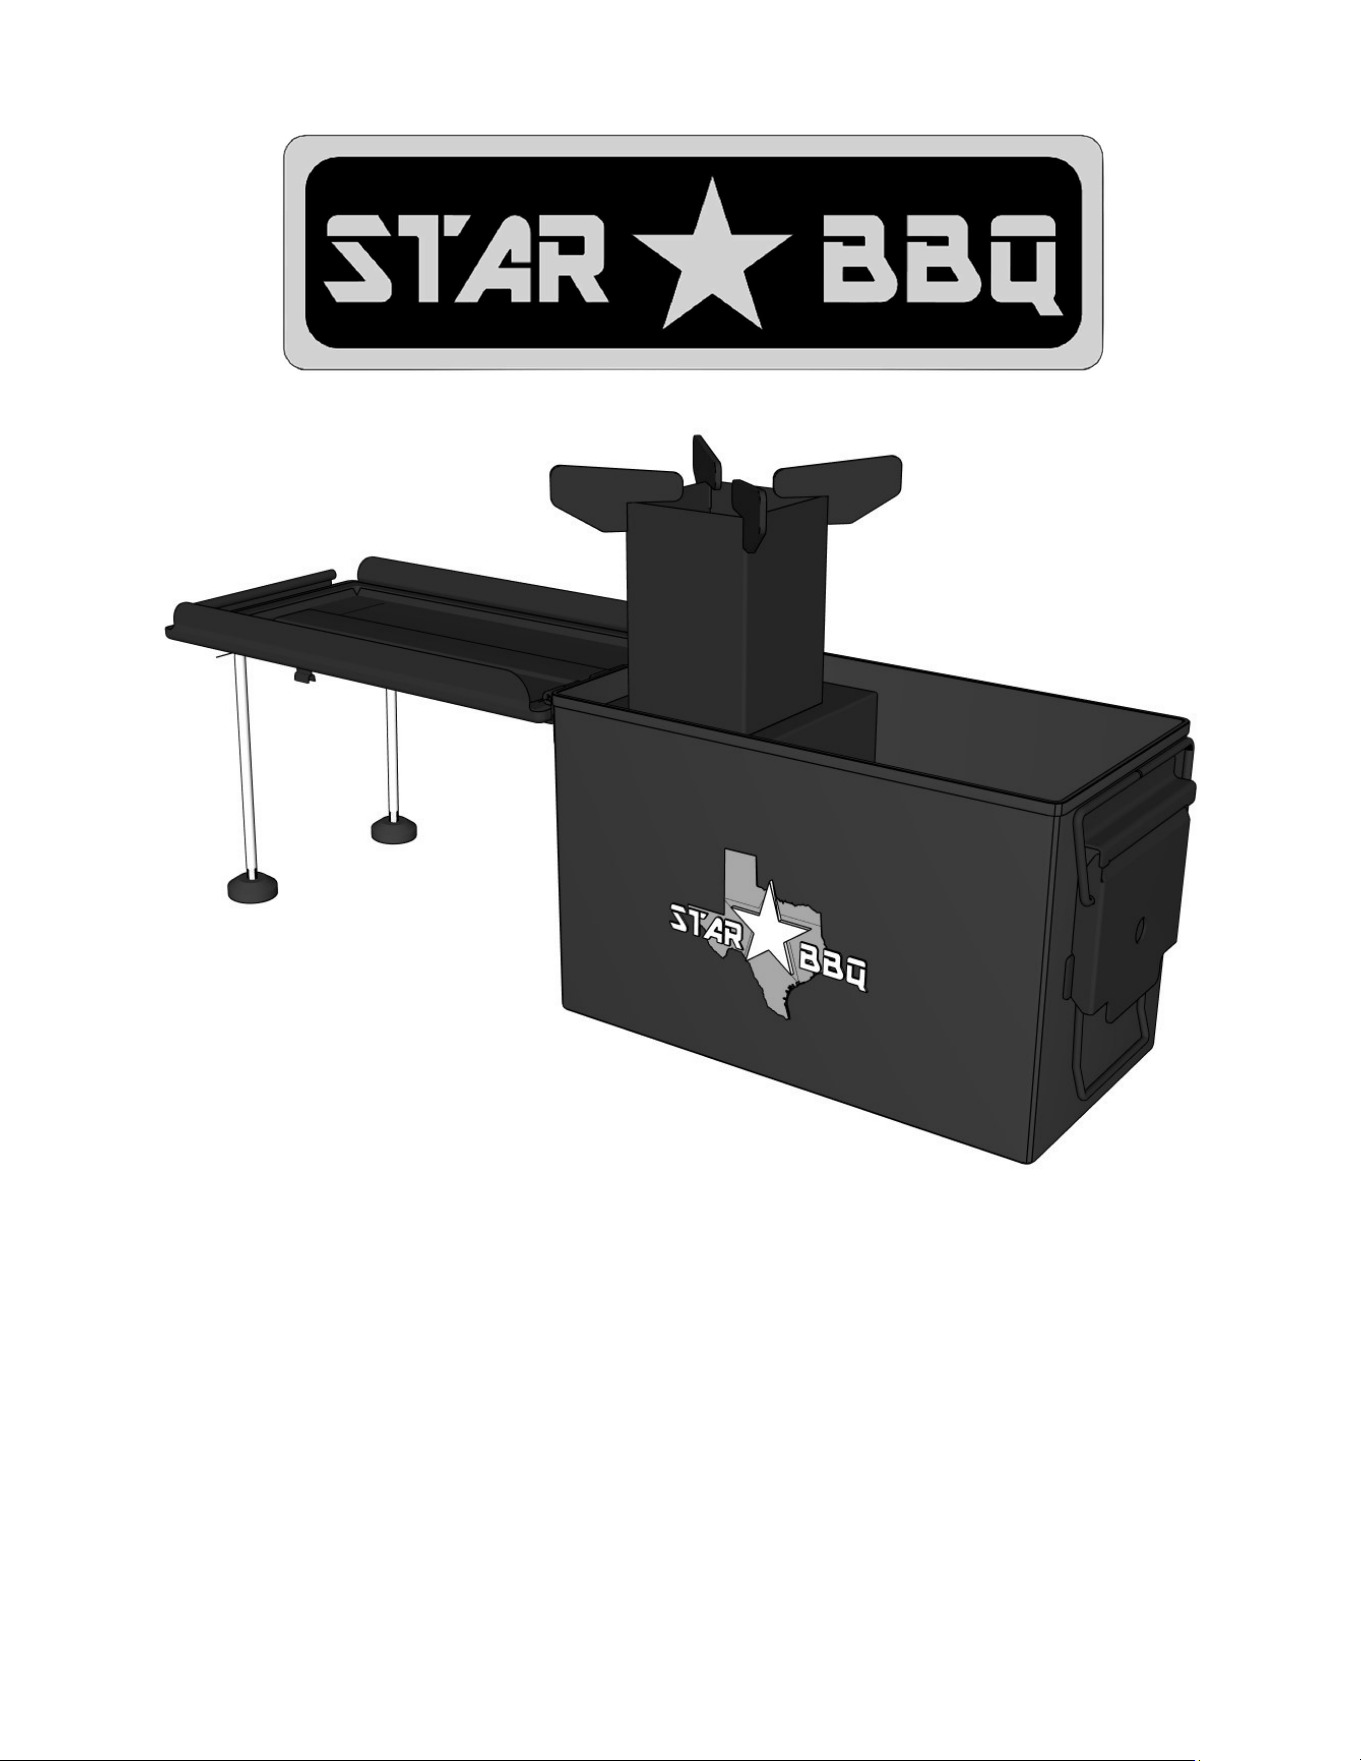
Congratulations on your purchase of the STARBBQ-RSBBOX Rocket Stove Camper Box – Military-Grade
Ammo Can Portable Charcoal Stove by Sunstone Metal Products! We are proud of this premium portable
stove and are committed to providing you with the best ownership experience possible. Your complete
satisfaction is our #1 priority.
Please take a few minutes to read this manual carefully. It contains all the information you need to safely set
up, operate, and maintain your STARBBQ-RSBBOX for years of reliable performance, efficient biomass
cooking, and memorable outdoor adventures—whether camping, overlanding, in survival situations, or in
your backyard.
We know you’re going to love cooking with family and friends around your new portable STARBBQ-
RSBBOX, and we sincerely thank you for choosing Sunstone Metal Products. We hope you’ll consider us
for all your future outdoor living needs.
Before you call: If your stove is producing excessive smoke, low heat, or not performing as expected,
check these common causes first. Most issues are resolved by verifying setup, fuel, and airflow.
Is the stove positioned on a stable, level surface allowing unrestricted airflow through the
bottom vents and fuel channel? (Critical for efficient ignition and rocket-effect burning)
Have you removed all ashes that might be blocking the air intakes, fuel channel, or ash cleaning
plate?
Are you using dry twigs, small branches, or seasoned biomass kept below the top edge of the
fuel feed opening? (Avoid oversized or green/wet fuel)
Has the fire had 5–10 minutes to fully establish (visible rocket draft, strong upward flame, and
sustained high heat)?
Is there any standing water or moisture inside the burn chamber from recent rain/exposure?
(The stove must be fully dry for best performance; wipe out any moisture and allow to air dry if
Must keep copy of your sales slip for proof of purchase.
NAME_________________________________ DATE OF PURCHASE _______________________
ADDRESS_______________________________________________________________________________
MODEL NO_____________________________INVOICE NO_______________________________________
COMPANY THAT YOU PURCHASED FROM ________________________________________________
SUNSTONE METAL PRODUCTS LLC.
16004 Central Commerce Dr, Pflugerville Texas 78660.
Business Hours.
Mon. to Thur. 9:00AM to 4:30PM
Closed Fri/Sat/Sun
Tel: 512-487-5116
Toll Free: 888-934-9449 (Technical Support Line)

Explore the innovative StarBBQ™ series, a premium collection of outdoor cooking solutions from
Sunstone Metal Products. All StarBBQ™ products are proudly designed and engineered at our facility in
North Austin, Texas. As a PROUD TEXAS COMPANY, we remain committed to delivering the highest
quality in every product we create.
StarBBQ™ offers versatile options for campfire, camping, and backyard adventures, including smokeless
fire pits, portable charcoal grills, and innovative grill inserts—all built with durable materials for reliable
performance.
Discover the StarBBQ™ Product Line by Sunstone Metal Products
Heavy-Duty Steel Fold-
Out Camper Griller
Portable Campfire Grill
and Griddle Combo |
STARBBQ-FUFP
24” Smokeless Fire Pit
w/Santa Maria Griller|
STARBBQ-
24FPBS/STARBBQ-
24SMGRIM
Folding A-Frame Camper
Charcoal Grill – Portable
and Compact | StarBBQ-
AFCG
24" Smokeless Fire Pit
Base Platform – Ultimate
Versatile Outdoor
Cooking Hub |
STARBBQ-24FPBS
24" Charcoal Griller Base
with Unlimited
Versatility and Upgrades,
like the Cart, Santa
Maria, Hood, Post-Griller
| STARBBQ-24chbs
Ultimate Charcoal
Smoker & Pizza Oven
Combo Grill Cart – All-
in-One Heavy-Duty
Outdoor Cooker |
STARBBQ-34SMK

INDEX DIRECTORY
PACKAGE CONTENTS
Verify all items are present upon unpacking:
Military-Grade Ammo Can Body (authentic M2A1 .50 cal ammo can, cold-rolled steel,
high-temp matte black powder-coated, with integrated rocket burn chamber,
chimney, fuel channel, and ash cleaning plate)
Collapsible 3-Piece Chimney (integrated and stored inside the can)
Folding Support Legs for Lid/Prep Table (integrated on lid with support feet)
Airtight Rubber Gasket Seal (pre-installed for waterproof/dustproof storage)
User Manual
Note: No additional hardware or tools required; stove is ready to open, deploy, and use out
of the box.
Section Title Page
Pre-Installation Customer Checklist 1
STARBBQ-RSBBOX – Product Dimensions 2
STARBBQ-RXBBOX – Parts Diagram 3
Step-By-Step Setup Instructions 4
Lighting Your First Fire 5
Fuel & Wood Selection 6
Troubleshooting Guide 7
Warranty Information 8

PRE-INSTALLATION CUSTOMER CHECKLIST
PAGE 1
Before First Use Checklist
Before setting up and using your STARBBQ-RSBBOX Rocket Stove Camper Box for the first
time, confirm that all items below are completed. Proper preparation ensures safe
operation, optimal airflow for efficient biomass burning, and reliable high-heat
performance.
Location & Safety Clearance: Choose an outdoor usage location that maintains a
minimum 10 ft clearance from all buildings, overhangs, tree branches, tents, vehicles, and
other combustible materials (refer to the Safety section).
Local Regulations Verified: Confirm compliance with all local fire codes, burn bans,
camping restrictions, and any air-quality “No-Burn” regulations applicable in your area.
Ground Surface Prepared: Verify the setup surface is level, stable, and non-
combustible, such as bare earth, gravel, sand, concrete, or a heat-resistant mat. Avoid grass
or flammable surfaces that could ignite.
Airflow Base Confirmed (Required): Ensure the stove is positioned on a surface that
allows unrestricted airflow to the bottom vents and fuel channel. (This is essential for
proper ignition and strong rocket-effect draft.)
Biomass Fuel Quantity Confirmed: Gather sufficient dry fuel for your needs: • Standard
sessions: enough dry twigs, small branches, or pine cones (quantity varies based on cooking
duration and group size; start with a handful for initial lighting).
Cooking Surface Suitability Verified (Critical): Confirm that the raised cooking platform
(top of chimney) is clean, stable, and free of damage. It must support cookware securely for
even heating.
Deployment Checked: Verify all components (chimney sections, folding lid legs, ash
cleaning plate, and clamps) deploy smoothly without obstruction.
Safety Gear Ready: Have proper safety equipment available, including heat-resistant
gloves, tongs, and eye protection.
Fire Safety Equipment Available: Ensure a bucket of water, sand, or fire extinguisher
rated for ordinary combustibles is within immediate reach of the stove location.
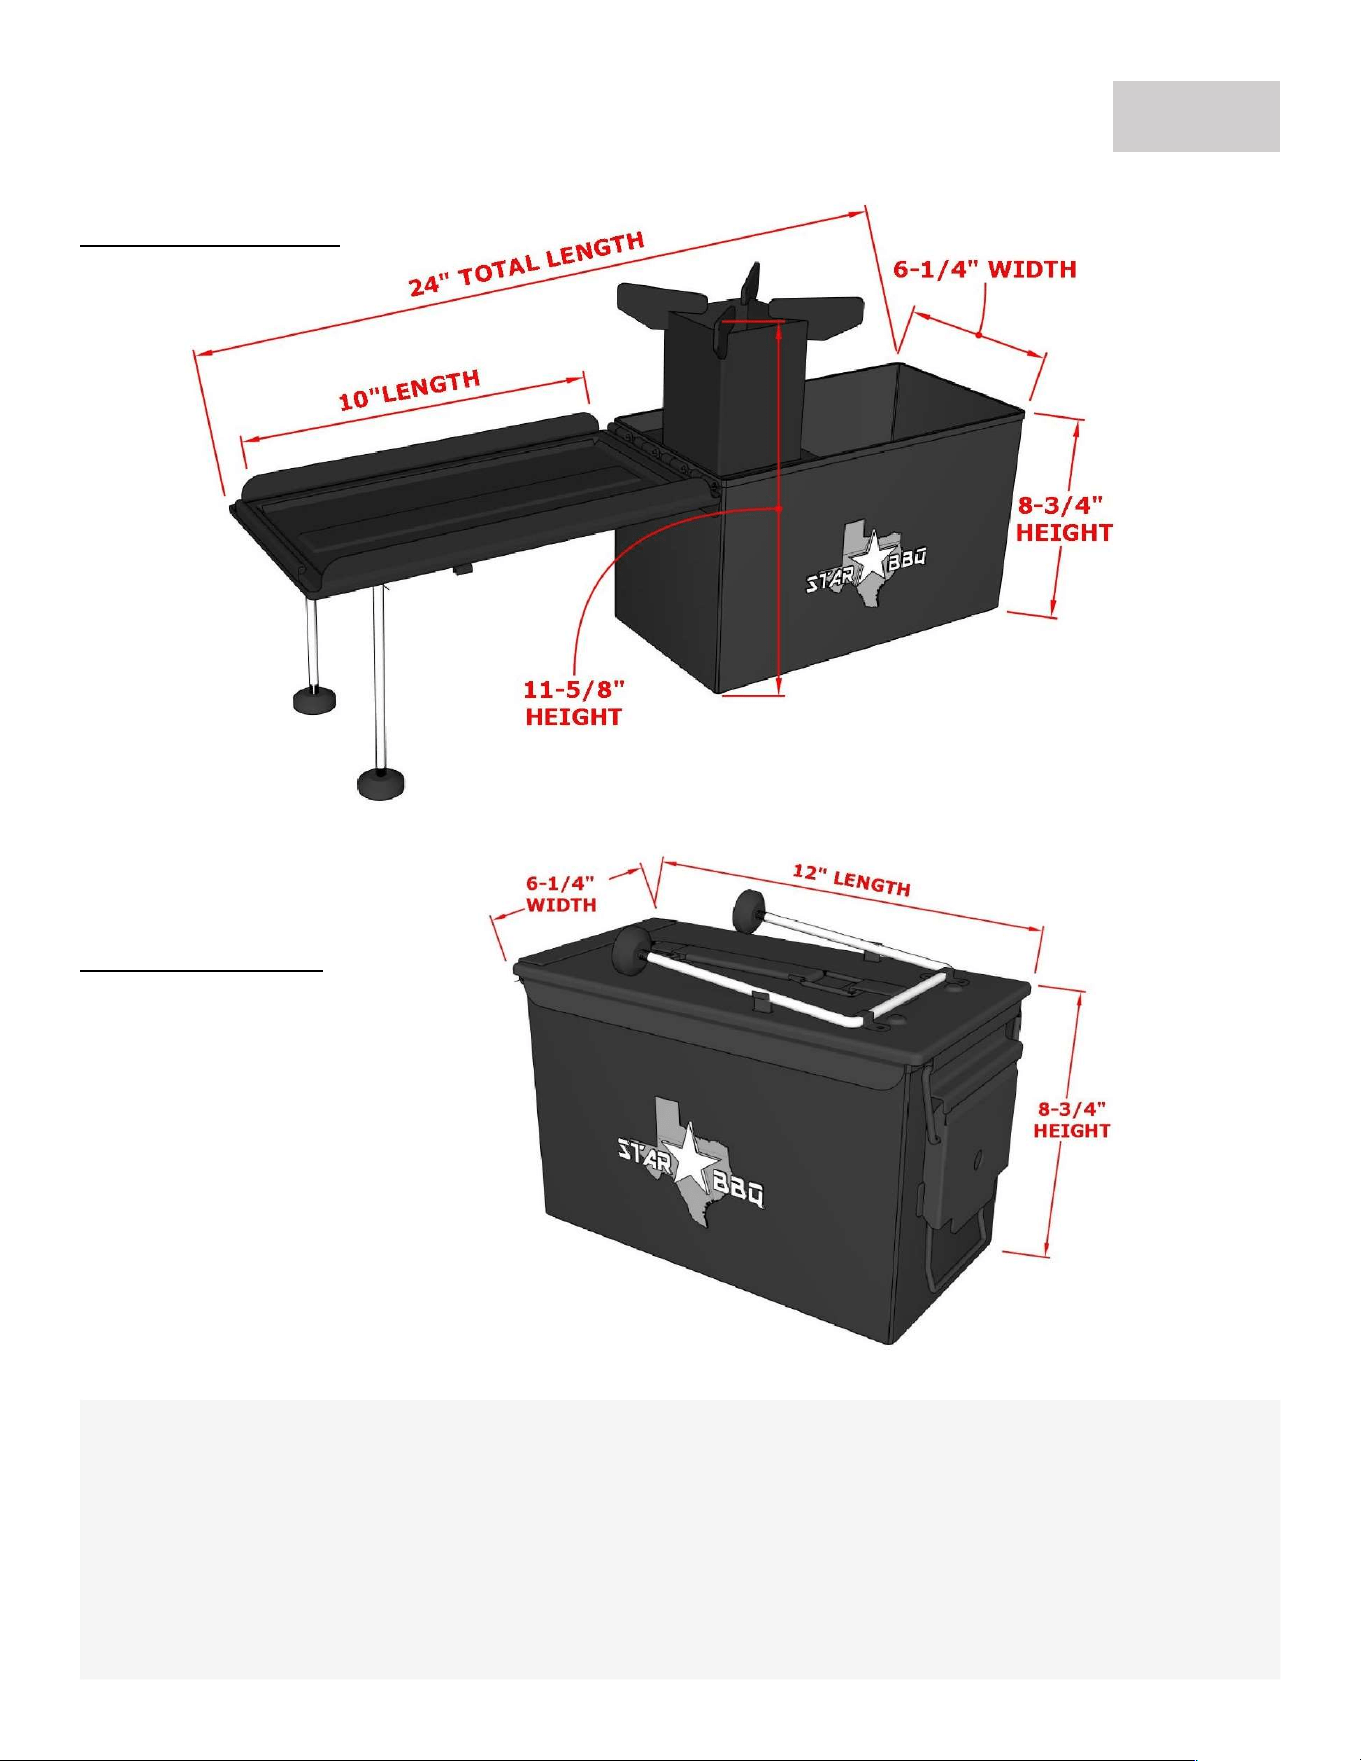
Opened Dimensions
Closed Dimensions
STARBBQ-RSBBOX – PRODUCT DIMENSIONS
PAGE 2
STARBBQ-RSBBOX— Rocket Stove Camper Box
Product Opened Dimensions: 24" L x 6-1/4" W × 8-3/4" H
11-5/8” Chimney Height, 10” Usable Length for Pots/Pans
Product Closed Dimensions: 12" L x 6-1/4" W x 8-3/4" H
Material: Powder-Coated Cold-Rolled Steel
Net Weight: 11.4 Pounds

STARBBQ-RSBBOX – PARTS DIAGRAM
PAGE 3
STARBBQ-RSBBOX
Rocket Stove Camper Box
Item No.
Part Number Description Quantity
1 STARBBQ-RSBBOX-W001X01 Rocket stove outer shell 1
2 STARBBQ-RSBBOX-W002X01 Outer cover support leg 1
3 STARBBQ-RSBBOX-W003X01 Outer cover support feet 2
4 STARBBQ-RSBBOX-H001X01 Rocket stove inner box welding 1
5 STARBBQ-RSBBOX-H004X01 Fire increasing cylinder welding 1
6 STARBBQ-RSBBOX-B014X01 Ash cleaning plate 1
7 STARBBQ-RSBBOX-W004X01 304 stainless steel saddle pipe clamps 2

Follow these step-by-step instructions to safely deploy your STARBBQ-RSBBOX. Setup takes
under 60 seconds once familiar.
1. Select and Prepare the Usage Location:
Choose a temporary outdoor location that maintains a minimum 10 ft clearance from all buildings,
overhangs, tree branches, tents, vehicles, and other combustible materials, including overhead
clearance. Confirm the surface is level, stable, and non-combustible, such as bare earth, gravel,
sand, concrete, or a heat-resistant mat. Avoid grass or flammable surfaces that could ignite. Verify
all local fire codes, burn bans, camping restrictions, and regulations before proceeding.
2. Unpack and Inspect the Stove:
Remove the stove from any packaging or vehicle storage on a flat surface. Verify all integrated
components are present and undamaged: military-grade ammo can body with rocket burn
chamber, collapsible 3-piece chimney, folding lid support legs with feet, ash cleaning plate, and
clamps. Inspect for any shipping damage to the powder-coated finish or internal parts.
3. Open and Deploy the Base Structure (Critical for Stability and Airflow):
Release the latch and open the lid fully. Extend the collapsible 3-piece chimney upward until fully
assembled and upright. Fold out the support legs on the lid downward until they lock into place,
forming a stable prep table. Position the stove on the prepared surface, ensuring the base allows
unrestricted airflow through the bottom vents and fuel channel. This elevation and open airflow are
mandatory for efficient ignition and strong rocket-effect burning. Do not block vents or place on
soft/uneven ground that could restrict airflow or cause tipping.
4. Prepare the Cooking Surface:
Confirm the top of the extended chimney (raised cooking platform) is clean and secure. It is
designed to sit level and support cookware directly.
5. Position and Level the Stove:
Confirm the stove is stable and level in all directions. Adjust leg positions or surface as needed until
secure. Proper leveling is critical to ensure even heating and prevent cookware from sliding.
6. Prepare and Add Biomass Fuel:
Gather dry twigs, small branches, pine cones, or other biomass. Load a small starter amount into
the fuel channel at the base for initial lighting. Add more fuel gradually as needed, maintaining
uniform feed for even burning. Do not overfill or use oversized/wet fuel to avoid restricting airflow.
Light the fuel using matches or a lighter through the opening; avoid accelerants like gasoline. Allow
5–10 minutes for the fire to establish a strong draft and reach optimal high heat.
STEP
-
BY
-
STEP
SETUP INSTRUCTIONS
PAGE 4

Follow these steps carefully to ensure safe ignition, efficient burning, and optimal
cooking performance:
Step 1: Start Small
Place a small amount of dry kindling, twigs, newspaper, or natural fire starters in the
fuel channel at the base of the burn chamber. Arrange a handful of additional dry twigs
or small branches loosely around or over the kindling in a loose pile. Avoid tightly
packing fuel during initial lighting.
Step 2: Maintain Proper Load Height
Keep all biomass fuel below the top edge of the fuel feed opening and burn chamber.
Overloading restricts airflow and can cause uneven burning or excessive smoke.
Step 3: Ignition
Light the fire using matches, a lighter, or natural methods. Do not use gasoline, lighter
fluid, or other chemical accelerants.
Step 4: Initial Smoke Period
Some smoke during the first 5–10 minutes is normal. During this time, the stove is
heating up and the rocket draft is establishing for consistent combustion.
Step 5: Optimal Burning Begins
As the fire reaches full heat (strong upward rocket flame and sustained high
temperatures over 1,100°F), secondary airflow optimizes for clean, efficient
performance. At this point, smoke will reduce significantly, and the stove is ready for
cooking.
Additional Note: Once established, the fire can be maintained by adding small amounts
of dry twigs or biomass as needed through the fuel channel, always ensuring even feed
and unrestricted airflow for the rocket effect.
LIGHTING YOUR FIRST FIRE
PAGE 5

For the best performance, longest burn time, and minimal smoke—especially in camping
situations where wood availability is limited—always prioritize dry, small biomass like twigs
or pine cones. These provide consistent rocket-effect heat, quick lighting, and efficient
burning with free on-site fuel. When possible, use seasoned dry hardwood sticks broken to
lengths no longer than 12–15 inches to fit the fuel channel easily.
Fuel Type Characteristics Recommended Use
Dry Twigs / Small
Branches / Pine Cones
(biomass)
Quick ignition, high-efficiency
rocket burn, minimal smoke
when dry
Primary fuel – ideal for most off-
grid camping and cooking
sessions
Dry Hardwood (oak,
hickory, maple)
Dense, sustained heat, good
draft
Excellent for longer cooks when
available
Birch or Similar Quick-burning, bright flame Great as kindling to start the fire
Softwoods (pine/fir with
high sap)
Fast burn, potential heavy
smoke
Avoid as primary fuel – use only
sparingly for kindling
Green/Wet Wood Smoky, low heat, poor draft Avoid entirely
Important:
Never overload the fuel channel or burn chamber. Keep biomass below the top edge
of the feed opening. Overloading restricts airflow and can cause excessive smoke or
uneven burning.
Maximum recommended load: Start with a handful of small dry pieces; add gradually
as needed for typical sessions. Maintain even feed for optimal rocket draft.
Maintenance & Care
1. Ash Removal: Dump cool ashes using the ash cleaning plate after every 2–3 uses or
when ash builds up and blocks vents/air intakes. This maintains essential airflow for
efficient ignition and strong rocket draft.
2. Extinguishing the Fire: Stop adding fuel and allow the fire to burn out naturally.
Smother if needed by restricting air (do not pour water directly, as rapid cooling may
damage components). Ensure fully cool before packing.
3. Weather Protection: Close and latch the ammo can securely for storage; the airtight
gasket keeps it waterproof and dustproof. Store in a dry place when not in use.
Prevent prolonged exposure to moisture; if wet, open and air dry thoroughly before
next use. Before lighting in wet conditions, shake out any standing water or debris
from the burn chamber and fuel channel.
FUEL & WOOD SELECTION
PAGE 6

TROUBLESHOOTING GUIDE
PAGE 7
This section addresses common issues with smoky operation, weak fires, instability,
excessive sparks, or post-use odors. Solutions are based on the stove's rocket design for
optimal airflow and portable biomass burning.
Q. Stove is smoky (does not burn cleanly).
Stove not fully heated yet → wait 5–10 minutes after initial lighting for the rocket draft to establish
strong upward flame and reduced smoke.
Biomass fuel is wet or unseasoned → use only dry twigs, small branches, or pine cones (≤20%
moisture ideal for off-grid use).
Fuel overloaded → keep biomass below the top edge of the fuel channel and burn chamber.
Airflow blocked → confirm boom vents, fuel channel, and ash cleaning plate are clear with no ash
buildup.
Moisture inside burn chamber → fully dry the chamber before lighng.
Q. Fire starts hard or burns weakly.
Ash level too high → dump cool ashes using the ash cleaning plate unl vents and intakes are clear.
Restricted airflow underneath → reposion on a surface allowing free airflow through boom vents
(e.g., gravel, sand, or raised ground).
Using damp fuel, oversized pieces, or debris → switch to small dry twigs/branches only.
Q. Stove feels unstable or wobbles.
Chimney not fully extended → assemble and extend the 3-piece chimney completely upright.
Lid support legs not fully deployed → fold legs down unl locked in place.
Uneven ground → reposion on level, firm surface and adjust as needed.
Components shifted during transport → re-seat chimney sections and clamps firmly.
Q. Too many sparks or popping.
Burning damp biomass, resinous softwood, or debris → switch to dry small twigs or seasoned
hardwood only.
Q. Stove smells or smokes after rain/exposure.
Moisture trapped inside → shake out water, open fully, and let burn chamber air-dry completely
(may take 1–2 dry days) before next use.
Always close and latch securely for storage; the airtight gasket provides waterproof protection
when not in use.

STARBQ
-
RSBBOX
WARRANTY
PAGE 8
ATTENTION: The Rocket Stove must be used according to the product manual. If your setup or
use does not meet the Basic Setup Instructions and guidelines outlined in this manual, ALL
WARRANTIES MAY BE VOID.
Warranty Information for STARBBQ-RSBBOX Rocket Stove Camper Box. All
Warranties Begin on Date of Purchase
LIMITED LIFETIME WARRANTY: Sunstone Metal Products warrants the military-grade cold-
rolled steel body and high-temperature powder-coat finish against burn-through, cracking, or structural
failure for as long as the original purchaser owns the product when used in normal residential or personal
outdoor settings (e.g., camping, overlanding, bushcraft, backyard use). This warranty covers defects in
material and workmanship under proper use and maintenance.
LIMITED ONE-YEAR WARRANTY: The integrated collapsible chimney, folding support legs, ash
cleaning plate, clamps, and all other components are warranted to be free from defects in material and
workmanship for a period of one (1) year from the original date of purchase.
Limitations & Exclusions
1. This warranty applies only to the original purchaser and is non-transferable.
2. Warranty is in lieu of all other warranties, expressed or implied.
3. Warranty is void if damage results from misuse, abuse, accident, alteration, improper setup/use
(including overloading the burn chamber/fuel channel or restricting airflow), use of prohibited
fuels/accelerants, or failure to follow this manual.
4. Normal cosmetic wear including heat-induced discoloration of the powder-coat finish, minor
surface scratches, or fading from prolonged sun exposure is not covered.
5. Sunstone is not responsible for damage caused by acts of nature, excessive moisture, or use in
commercial/public settings.
6. Sunstone shall not be liable for incidental, consequential, special, or contingent damages. Some
states do not allow the exclusion of consequential damages, so this limitation may not apply to
you.
7. No person or dealer has authority to modify or extend this warranty.
What Is Not Covered
Normal heat tint, discoloration, or fading of powder-coat finish
Damage from using accelerants, wet/unseasoned biomass, overloading, or oversized fuel pieces
Labor, shipping, or travel charges
Service calls for issues caused by improper use or maintenance
Damage from failure to store properly (e.g., moisture accumulation inside chamber)
Any third-party accessories or modifications
Commercial or rental use
How to Obtain Warranty Service: Contact Sunstone Metal Products directly: Address: 16004 Central
Commerce Dr., Pflugerville, TX 78660 Phone: 888-934-9449 (M–Thur. 8 am–5 pm CST) Email:
[email protected] Web: sunstonemp.com. Please have your model (STARBBQ-RSBBOX), proof of
purchase, and clear photos ready.