
ASSEMBLY INSTRUCTIONS
Drain - Underbar
Non-Cold Plate Models
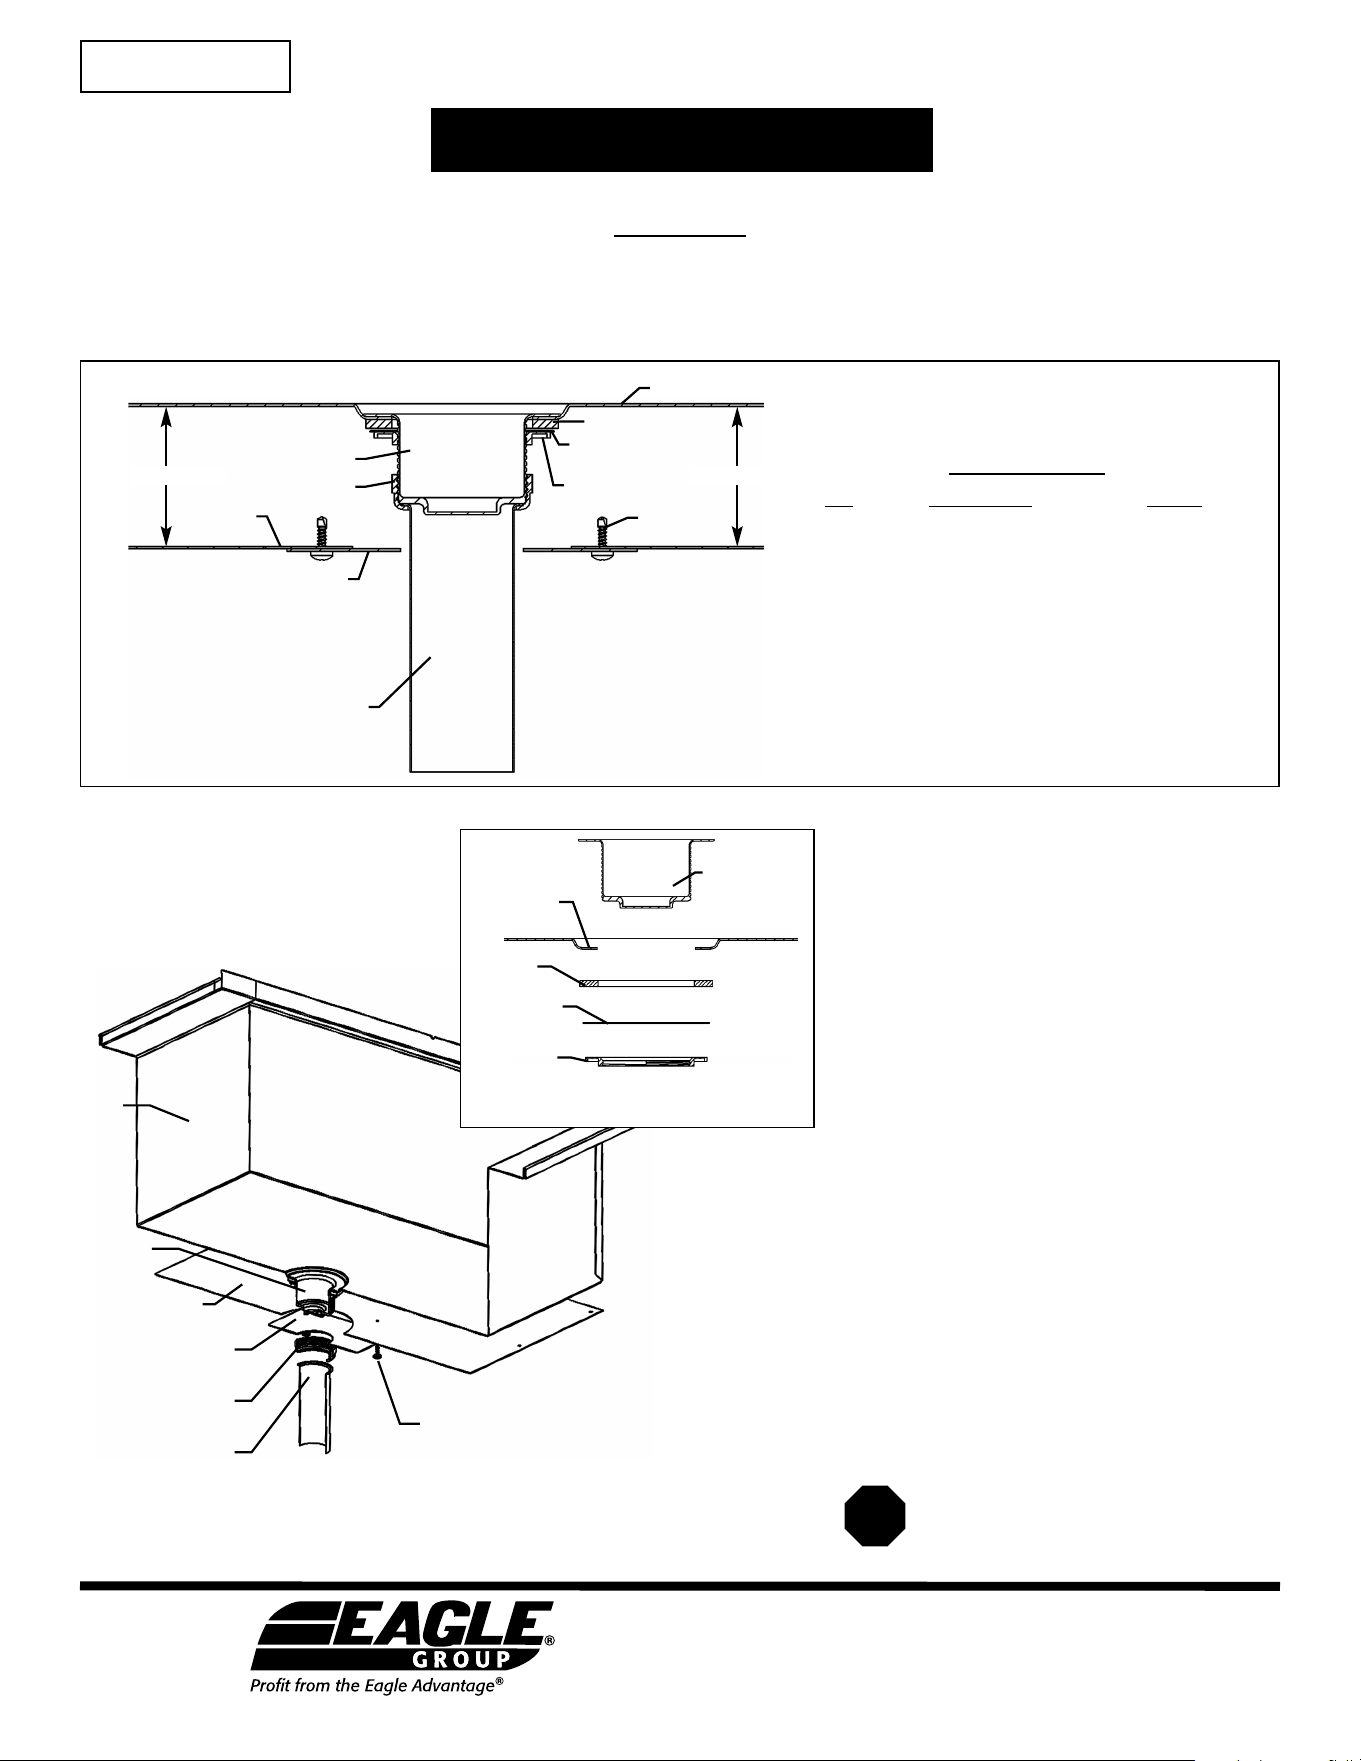
Reinstall cover plate with drive screws. Be
sure to seal or tape where bottom panel and
tail piece intersect.
Put tail piece onto drain. Screw large PVC nut
onto drain. Ensure that insulation gets pulled
close to drain assembly.
Remove cover plate from bottom of unit by
removing all four drive screws from the
bottom panel. This will make the drain hole
visible.
1) Cover Plate
2) Drain
3) Tail Piece
4) Final Step
CAUTION
INSPECT CONTENTS IMMEDIATELY AND FILE CLAIM WITH DELIVERING
CARRIER FOR ANY DAMAGE. SAVE YOUR BOX AND ALL PACKING MATERIALS.
YOU ARE RESPONSIBLE FOR DAMAGE TO YOUR UNIT IF RETURNED IMPROPERLY PACKED.
Parts List
1. . . . . . . . Drain* . . . . . . . . . . . . . 300886
1. . . . . . . . Tail Piece (PVC). . . . . 350037
1. . . . . . . . Cover . . . . . . . . . . . . . 365275
4. . . . . . . . Screws . . . . . . . . . . . . 300794
qty
description part #
* Drain consists of 1 rubber washer, 1 cardboard washer,
and 2 lock nuts
NOTE: Plumber’s Putty (not included) will be needed.
EG9898 Revised 02/24
BOWL
COVER PLATE
TAIL PIECE
LOCK
NUT
RUBBER WASHER
(End)
BOTTOM PANEL
TAIL PIECE
LOCK NUT
COVER PLATE
DRIVE
SCREWS
BOWL
DRAIN
DRIVE
SCREW
CARDBOARD
WASHER
LOCKNUT
DRAIN
BOTTOM
PANEL
INSULATION INSULATION
See figure 1 at left. Apply plumber’s putty to
drain hole sump. Next, lower drain into drain
hole. From underside of sink drain, install the
rubber washer and cardboard washer in
between the drain and the lock nut. Screw the
lock nut onto drain.
DRAIN
PLUMBERS
PUTTY HERE
RUBBER
WASHER
CARDBOARD
WASHER
LOCK NUT
figure 1
Eagle Foodservice Equipment, Eagle MHC, and SpecFAB
®
are divisions of Eagle Group. ©2024 by the Eagle Group
• 100 Industrial Boulevard, Clayton, Delaware 19938-8903 U.S.A.
• Phone: 302/653-3000 • 800/441-8440 • Fax: 302/653-2065
• www.eaglegrp.com • www.eaglemhc.com
INSTRUCTION SHEET
#301531
