
READ ALL DIRECTIONS BEFORE INSTALLATION AND USE
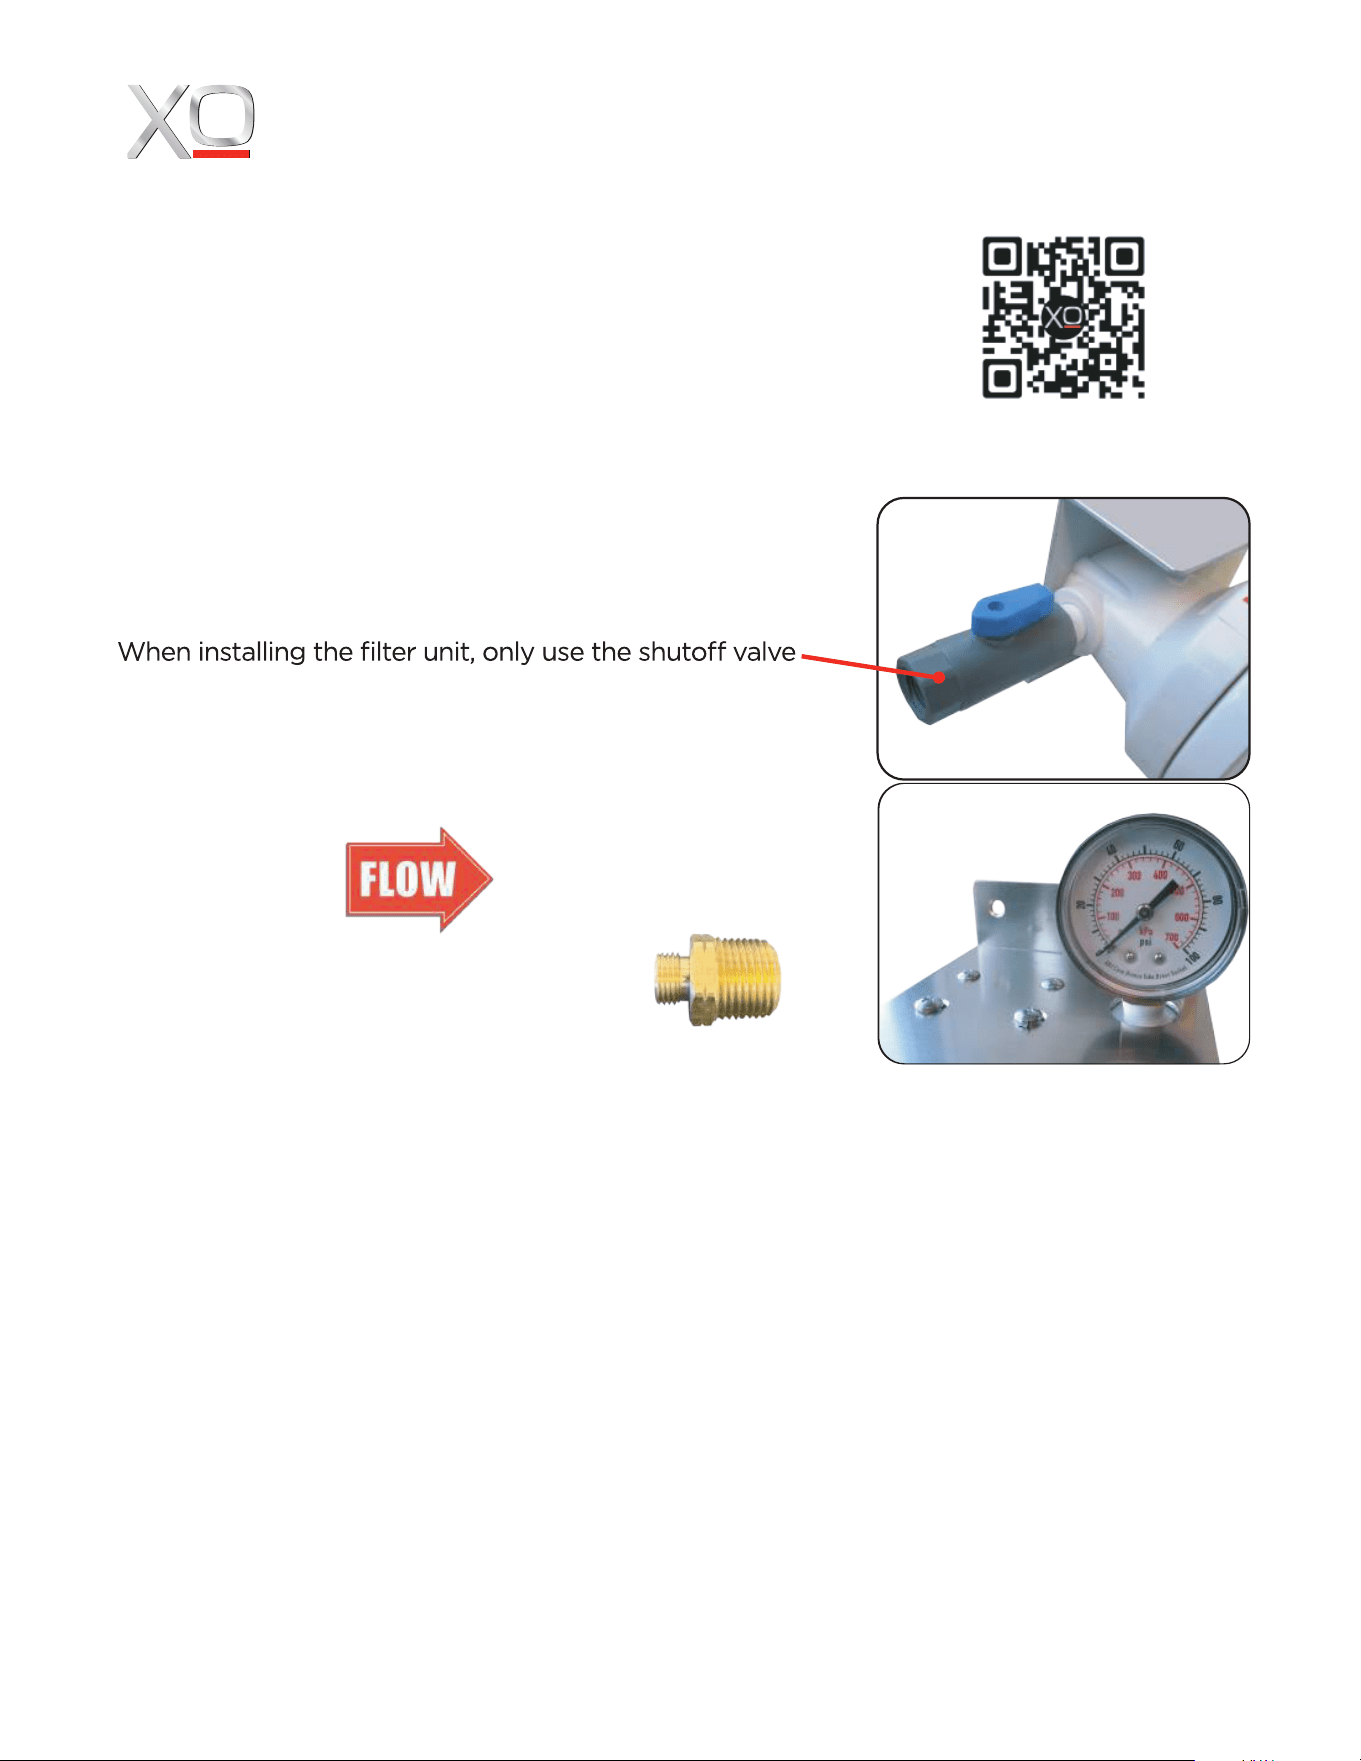
When installing the filter system, also install a drain valve
in the line after the filter to facilitate cartridge exchange.
(not included)
Your XO Water Filter System must be installed vertically
with the filter cartridges pointing straight down.
supplied.
The valve installs into the inlet side of the filter.
The filters are marked with a red directional arrow
li
Your system includes two reducing
nipples to adapt to braided 1/4” hose.
ke this one to indicate the inlet and outlet.
Install the pressure gauge supplied into the threaded
hole in the top of the system.
Exercise care. Make certain the threads are seated properly. Avoid cross threading -
this can damage the plastic fitting.
The male threads are tapered fittings designed to tighten as they go in. Use a minimum
amount of teflon tape or pipe dope as a sealant. Teflon is a lubricant - it can be deceving
when installing fittings and encourage overtightening.
Only use microbiologicall
y safe water with the filter.
Check for leaks immediately after installation.
When installing the unit, make certain there are at least 2 inches clear below to permit the
filter cartridge to be exchanged.
Use the mounting bracket to secure the filter system securely - do not allow the unit to be
supported by the water piping.
WARNING: Overtightening can crack the filter housing.
INSTALLING YOUR XO WATER FILTRATION SYSTEM
INLET SIDE OUTLET SIDE
SCAN HERE
TO WATCH
THE VIDEO
www.xoappliance.com
MODELS INCLUDED IN THIS SHEET:
XOWF1000SYS XOWF2000SYS
XOWF1001 XOWF2002*
*(XOWF2002 includes both XOWF2000L & XOWF2000C)

EXCHANGING A FILTER CARTRIDGE
Exchanging a filter cartridge is quick, easy, and requires no tools.
Step 1: Close Inlet Isolation Valve by turning the blue handle a 1/4 turn.
Step 2: Relieve pressure in the system by opening the downsteam drain valve.
Step 3: The top housing has two red indicator arrows pointing down. The cartridge has one
red arrow pointing up. Rotate the cartridge 1/4 Turn to the left to unlock and release the filter.
Step 4: Pull the cartridge straight down
to remove.
STEP 5: Remove the protective cap from the
new cartridge. Place it under the filter top
housing - align the lower red arrow with the
red OPEN arrow above - then push it straight
up into place.
Step 6: Rotate the new cartridge 1/4 Turn
to the right to lock in place.
Step 7: Open the Inlet Isolation Valve.
Step 8: Leave the drain valve open for 2 minutes to flush the system and the new filter and
then close. Always check for any leaks in the sytem and dispose of the old filter properly.
Always use the correct XO replacement filter
in your system and maintain it in accordance
with these directions. Failure to do so will
void warranty and may result in exposure to
contaminants.
MAINTAINING YOUR XO WATER FILTRATION SYSTEM
MAINTENANCE
XO cartridge filter systems are sized to filter 3000 gallons of water. In a residential
application such as use with an ice maker, this should be adequate for 12 months
depending upon the water quality. If the water pressure on your gauge drops by 10%
it is an indication that the filter is dirty and it is time to change the cartridge.
(EXAMPLE: 50 psi initially drops to 45 psi)
OPEN CLOSED
www.xoappliance.com
WARNING:
This product can expose you to
chemicals including lead, which is
known to the State of California to
cause cancer. For more information,
go to www.P65Warnings.ca.gov.
