USER MANUAL
Wa
rning notices: Before using this product, please read this manual carefully and keep it for future reference.
The design and specifications are subject to change without prior notice for product improvement. Consult
with your dealer or manufacturer for details.
All illustrations in this manual are for reference purposes only. The appearance of the actual product may vary.
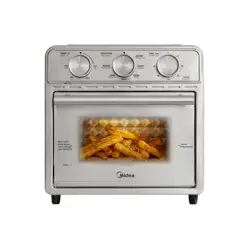
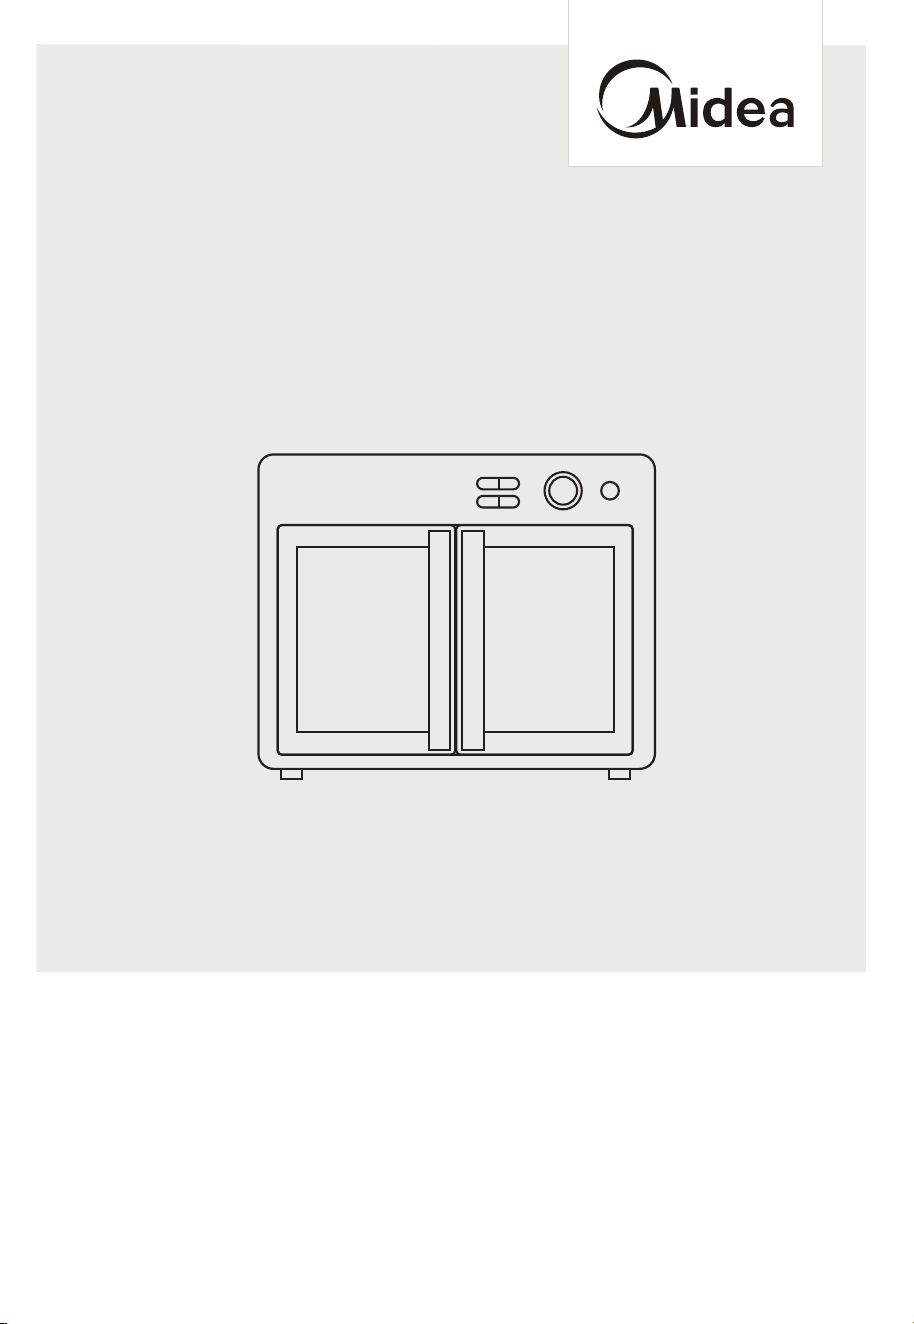
AIR FRYER OVEN
MET26C4AST-S1

CONTENTS
THANK YOU LETTER
Thank you for choosing Midea! Before using your new Midea product, please read
this manual thoroughly to ensure that you know how to operate the features and
functions that your new appliance offers in a safe way.
THANK YOU LETTER
-------------------------------------------------- 02
IMPORTANT SAFETY INSTRUCTIONS
--------------------------- 03
SHORT CORD INSTRUCTION
--------------------------------------
04
PRODUCT INTRODUCTION
-------------------------------------------
05
CONTROL PANEL
-----------------------------------------------------
-----------------------------------------------------
06
BEFORE USING FOR THE FIRST TIME
---------------------------
06
COOKING 07
--------------------------------------
COOKING GUIDELINES 12
--------------------------------------
CLEANING AND CARE 12
--------------------------------
SPECIFICATIONS 12
--------------------------------
TROUBLESHOOTING & FAQ 13
02

IMPORTANT SAFETY INSTRUCTIONS
When using electrical appliances, basic safety precautions should always be
followed, including the following :
1. Read all instructions.
2. Do not touch hot surfaces. Use handles or knobs.
3. To protect against electrical shock, do not immerse cord, plugs, or any electrical
parts in water or other liquid.
4. Close supervision is necessary when any appliance is used by or near children.
5. Unplug the appliance from the outlet when not in use and before cleaning.
Allow to cool before putting on or taking o parts.
6. Do not operate any appliance with a damaged cord or plug, after the
appliance malfunctions or after the appliance has been damaged in any manner.
Return the appliance to the nearest authorized service facility for examination,
repair, or adjustment.
7. The use of accessory attachments not recommended by the appliance manufacturer
may cause injuries.
8. Do not use outdoors.
9. Do not let the cord touch hot surfaces or hang over the edge of the table or counter.
10. Do not place the appliance in a heated oven or on or near a hot gas or electric burner.
11. Extreme caution must be used when moving an appliance containing hot oil
or other hot liquids.
12. To disconnect the appliance, turn it o via the control panel before removing the plug
from the wall outlet.
13. Do not use the appliance for other than intended use.
14. For household use only.
15. Use extreme caution when removing the tray or disposing of hot grease.
16. Do not clean with metal scouring pads. Pieces can break o the pad and touch
electrical parts, creating sparks, which creates a risk of electric shock.
17. Oversize foods or metal utensils must not be inserted in the toaster oven, as they may
create a fire or risk of electric shock.
18. A fire may occur if the toaster oven is covered by or touching flammable material,
including curtains, draperies, walls, and the like, when in operation. Do not store any
item on top of the appliance when in operation.
19. Extreme caution should be exercised when using containers constructed of materials
other than metal or glass.
20.Do not store any materials, other than the manufacturer's recommended
accessories, in this oven when not in use.
03

SAVE THESE INSTRUCTIONS
21. Do not place paper, cardboard, or plastic in the oven.
22. Do not cover the crumb tray or any part of the oven with metal foil. This will
cause overheating of the oven.
23. Caution—To ensure continued protection against risk of electric shock,
connect to properly grounded outlets only.
24. Remove the plug from the outlet when the appliance is not in use, before putting on
or taking off parts, and before cleaning. Allow the appliance to cool before handling.
25. Avoid touching moving parts.
26. During operation, press " " to pause cooking.
1. A short power-supply cord (or detachable power-supply cord) should be used to
reduce the risk resulting from becoming entangled in or tripping over a longer cord.
2. Longer detachable power-supply cords or extension cords are available and
may be used if care is exercised in their use.
3. If a longer detachable power-supply cord or extension cord is used:
•The marked electrical rating of the cord set or extension cord should be at
least as great as the electrical rating of the appliance.
•The cord should be arranged so that it will not drape over the countertop or
tabletop, where it can be pulled on by children or tripped over unintentionally.
•This appliance is grounded. The extension cord should be a similarly
grounded 3-wire cord.
SHORT CORD INSTRUCTION
(DETACHABLE POWER-SUPPLY
CORD)
04
Notes
PRODUCT INTRODUCTION
• In case of any differences between the appliance and the pictures in this manual, the
product shall prevail.
• Place the appliance on an insulated surface when using.
• The area where this oven is used should be dry. The oven should not be used outdoors.
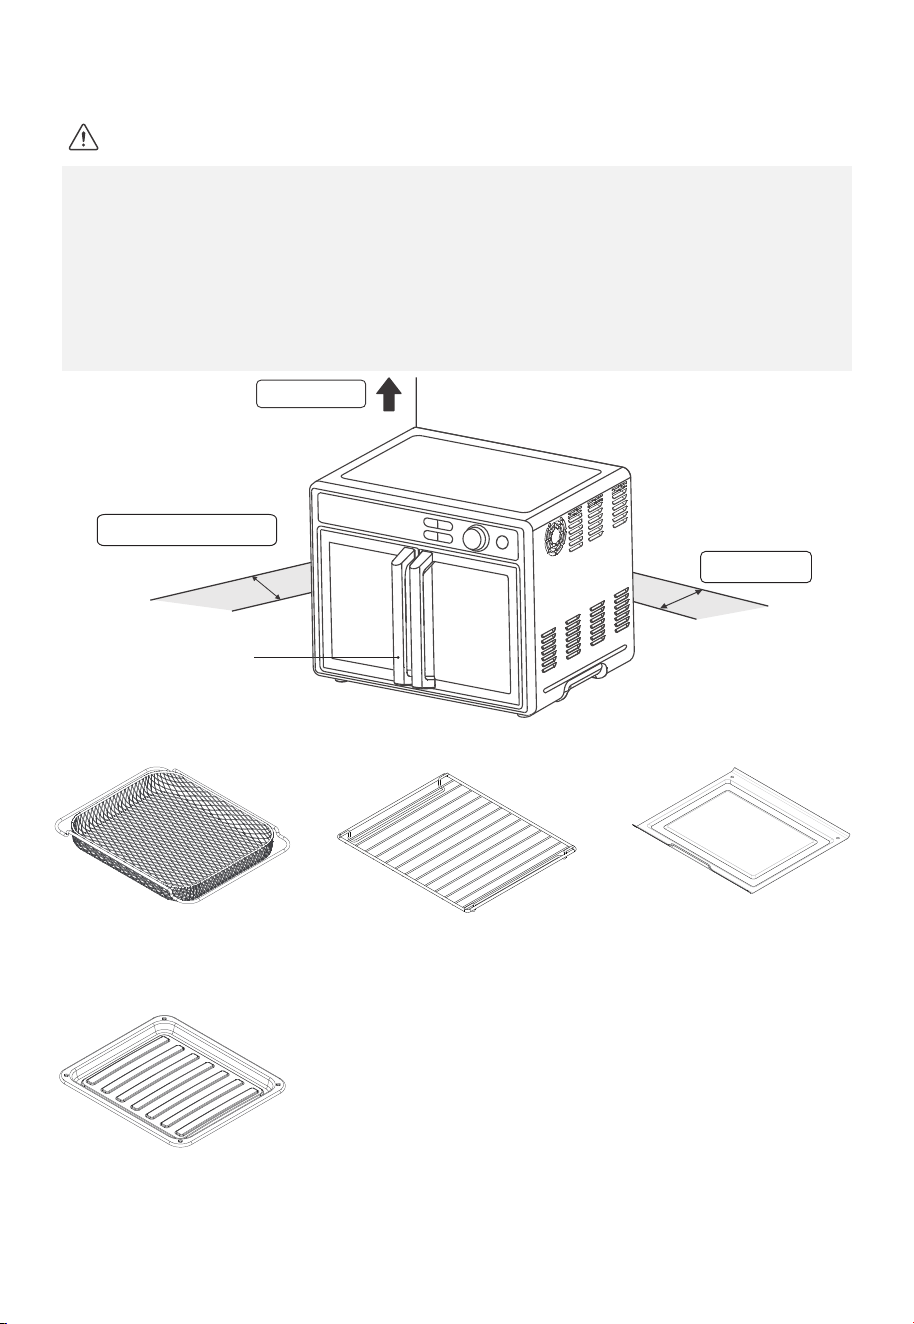
• Keep the oven at a 10-15 cm distance from walls and cabinets. Surrounding objects
may catch fire due to heat emitted from the appliance or get covered with soot.
• Maintain a 30 cm empty space between the top of the oven and any objects or walls
above.
05
top > 30 cm
Rear > 10 cm
Left and right > 10 cm
Handle
Grilling rack
with broil feature
Crumb trayAir fry basket
Baking tray
BEFORE USING FOR THE FIRST TIME
1. Remove all accessories and shipping materials packed inside the oven.
2. Wash the oven accessories (the baking rack, tray, etc.) with a small amount of dish
detergent and warm water. Do not wash the oven itself. Wipe the oven and its
accessories dry with a paper towel or dry cloth before using.
3. Place the oven on a flat counter or other stable surface. DO NOT OPERATE THE OVEN
ON THE SAME CIRCUIT AS ANOTHER APPLIANCE.
4. Place the crumb tray under the bottom heating element.
5. Make sure the crumb tray is properly installed.
6. Burn off any oils remaining in the oven before using the oven for cooking. To do so:
a. Turn the knob to select the Bake function.
b. Press the " " button, then turn the knob to adjust the temperature to 400°F.
c. Press the " " button, then turn the knob to adjust the time to 15 minutes.
d. Press the " " button to start cooking.
This will burn off any oil still on the oven.
NOTE: The oven may smoke inside during the process. This is normal
for a new oven and will not last more than 10-15 minutes.
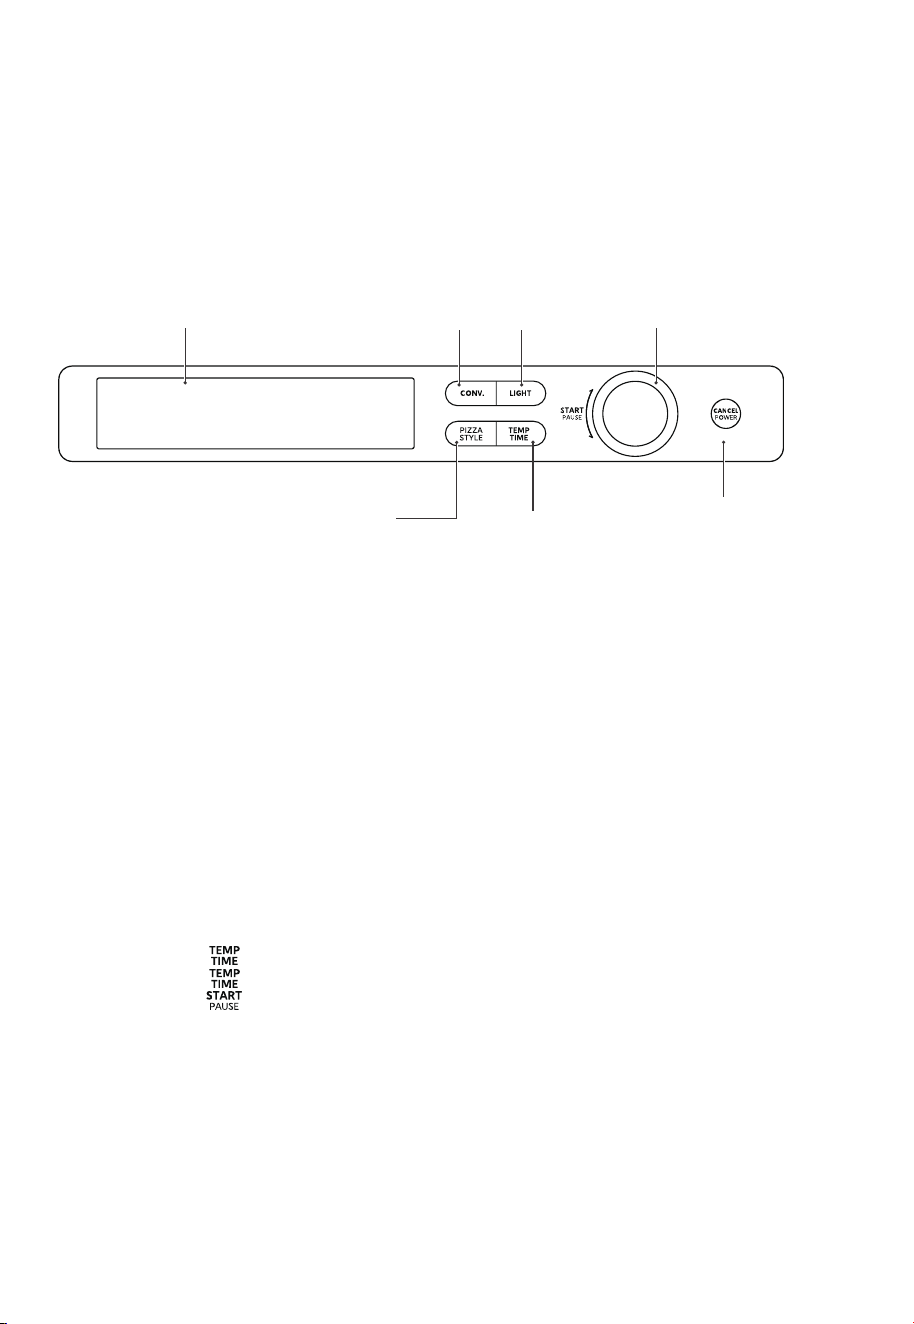
CONTROL PANEL
Display screen
Convection
Press this button to turn
convection mode on/
off.
Light
Press this
button to turn
the oven light
on/off.
Temperature/Time
Press this button to
increase or decrease the
temperature and time.
Start / Pause
Press this button to
start or pause cooking.
Turn to select desired
settings.
Cancel/Power
Press this button to
cancel selected settings
or turn off
the
display screen.
06
Pizza style
Press this button to
select a specific
pizza style function.
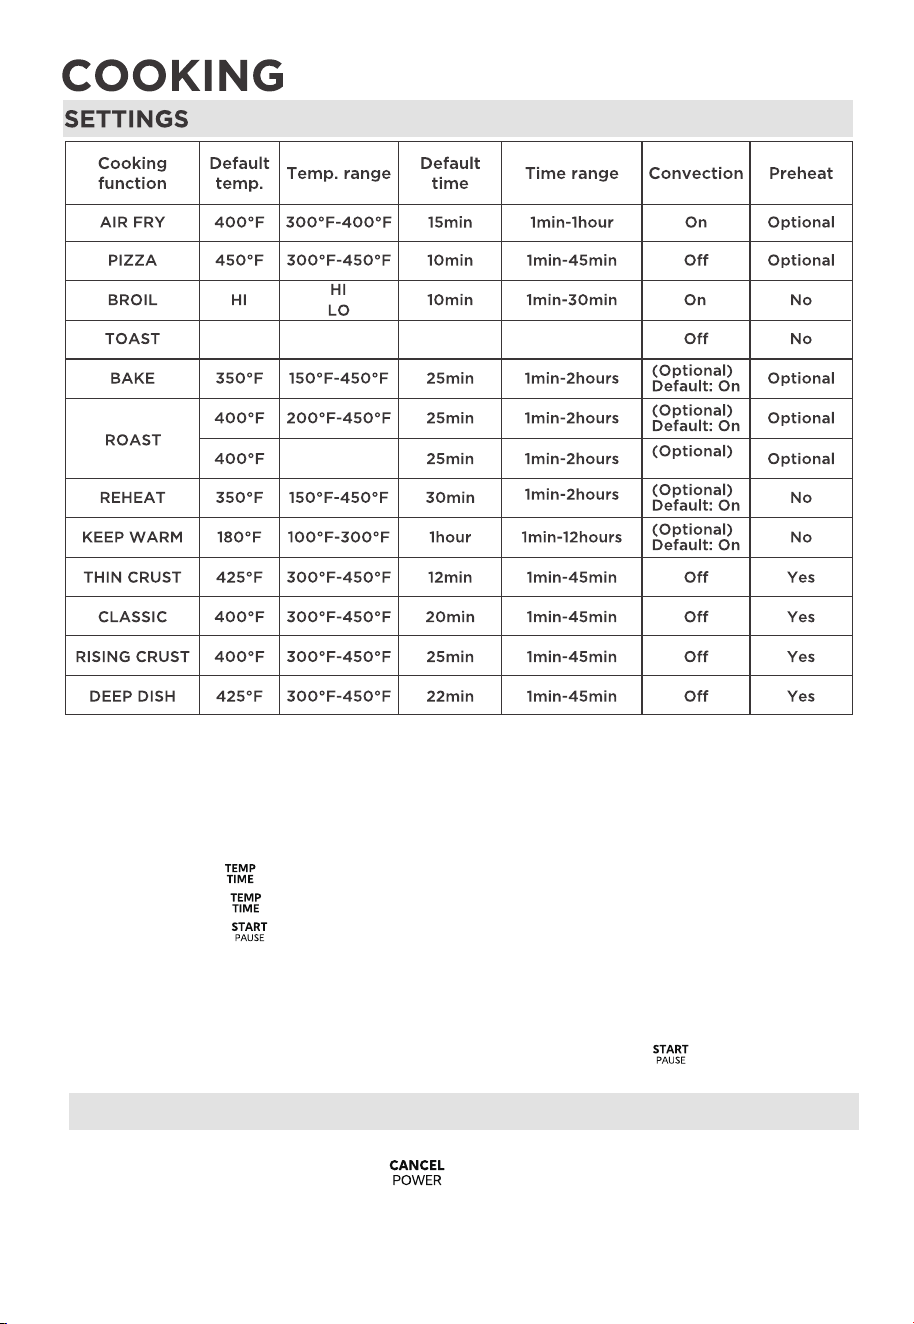
1. Turn the knob to select a function with or without preheat. The selected function will
change according to the sequence below:
Air Fry (preheat) -> Air Fry (without preheat) -> Pizza (preheat) -> Pizza (without
preheat) -> Broil -> Toast -> Bake (preheat) -> Bake (without preheat) -> Roast
(preheat) -> Roast (without preheat) -> Reheat -> Keep Warm.
FUNCTION OPERATION
1. When the oven is plugged into an outlet, the buzzer will sound once.
2. During cooking, you can press " " to cancel cooking.
3. When the cook time ends, the buzzer will sound and "End" will display.
4. Always remove food with oven mitts. The food and oven will turn very hot.
07
2. Press the "
4. Press the "
" button, then turn the knob to select the temperature.
" button, then turn the knob to select the cooking time.
" button to start cooking.
4a. If you chose a function without preheat, place the food into the oven now.
Make sure to use the correct accessory.
4b. If you chose a function with preheat, proceed to step 5.
5. If you chose a function with preheat, wait for the oven to finish preheating. When
the buzzer sounds, place the food into the oven and press the " " button to
continue cooking.
3. Press the "
4Slices 1-6Slices1-7Darkness
4
Darkness
200°F-500°F
Default: O
ECO MODE
When the oven is in ECO mode, the display screen will turn offand the
oven will use less energy.
To enter ECO mode:
1. If there is no active cooking function (i.e. the oven is in standby or cooking has ended),
the screen will turn off after 5 minutes with no operation.
2. While the appliance is in standby mode (with no active cooking functions), press
" ". The screen will turn off.
To cancel ECO mode:
Press any button or open the door to exit ECO mode. The display screen will
automatically turn on.
08
HOW TO PREHEAT
All functions are available without preheat. However, we recommend using preheat
with the Air Fry, Pizza, Bake, and Roast functions for better cooking results.
1. Turn the knob to choose the desired function.
2. Press the " " button, then turn the knob to select the temperature.
3. Press the " " button, then turn the knob to select the cooking time.
4. Press the " " button to start preheating. When the preheat temperature
is reached, the buzzer will sound. Place the food into the oven and close the
door, then press the " " button to start cooking.
RESTORE FACTORY SETTINGS FUNCTION
In the standby mode, press and hold the " " key and then immediately press
the " " key to clear all user data. If the clearing is successful, the display will
show "1" for 3 seconds; if it fails, the display will show "0" for 3 seconds.
MEMORY FUNCTION
1. Select the desired function parameters and start cooking.
When you enter the cooking mode again, the last used parameter settings will be
displayed by default.
2. The TOAST function records the portion size and browning level for the current
cooking cycle and only stores the running time of this cycle. When you adjust to a
different portion size or browning level, the default settings for this mode will be used.
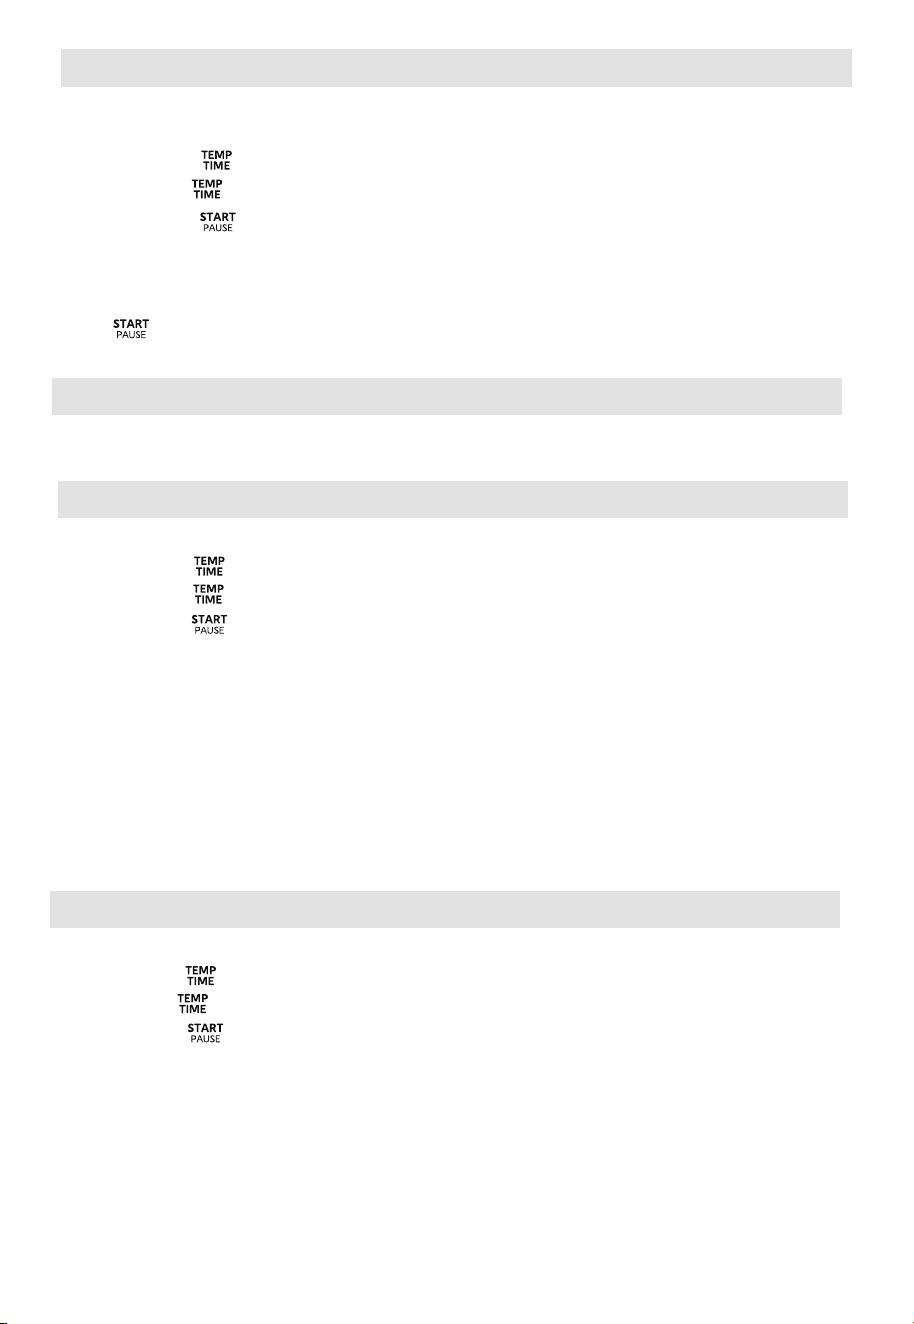
09
USING THE BROIL FUNCTION
1. Turn the knob to choose the broil function.
2. Press the "
3. Press the "
4. Press the "
" button, then turn the knob to select the temperature.
" button, then turn the knob to select the cooking time.
" button to start cooking. Make sure to use the grilling
USING THE TOAST FUNCTION
1. Turn the knob to choose the toast function.
2. Press the " " button, then turn the knob to select the darkness level.
3. Press the " " button, then turn the knob to select the number of toast slices.
4. Press the " " button to start cooking.
USING THE AIR FRY FUNCTION
1. Turn the knob to choose the air fry function with or without preheat. If preheat is
selected, PREHEAT will display at the upper left corner of the display screen.
2. Press the " " button, then turn the knob to select the temperature.
3. Press the " " button, then turn the knob to select the cooking time.
4. Press the " " button to start cooking.
4a. If you chose to air fry without preheat, place the food into the oven now.
Make sure to use the air fry basket.
5. If you chose to air fry with preheat, wait for the oven to finish preheating. When
the buzzer sounds, use the air fry basket to place the food into the oven and press
the " " button to continue cooking.
USING THE GRILLING RACK AND BAKING TRAY
The grilling rack attaches to the baking tray to create the perfect accessory
combination for broiling.
Insert the baking tray into the bottom slot of the grilling rack. When you place
your food onto the grilling rack, the attached baking tray will catch any
drippings.
rack and baking tray.
USING THE PIZZA FUNCTION
Please see page 11 for more information on using the pizza and pizza style functions.
USING THE BAKE FUNCTION
1. Turn the knob to choose the bake function with or without preheat. If preheat is
selected, PREHEAT will display at the upper left corner of the display screen.
2. Press the " " button, then turn the knob to select the temperature.
3. Press the " " button, then turn the knob to select the cooking time.
4. Press the " " button to start cooking.
2. Press the " " button, then turn the knob to select the temperature.
3. Press the " " button, then turn the knob to select the cooking time.
4. Press the " " button to start cooking.
USING THE KEEP WARM FUNCTION
1. Turn the knob to choose the keep warm function.
2. Press the " " button, then turn the knob to select the temperature.
3. Press the " " button, then turn the knob to select the cooking time.
4. Press the " " button to start cooking.
10
USING THE REHEAT FUNCTION
1. Turn the knob to choose the reheat function.
4a. If you chose to bake without preheat, place the food into the oven now.
Make sure to use the baking tray.
5. If you chose to bake with preheat, wait for the oven to finish preheating. When
the buzzer sounds, use the baking tray to place the food into the oven and press
the " " button to continue cooking.
USING THE ROAST FUNCTION
1.. Turn the knob to choose the roast function with or without prehea
2.. Press the"
" button to turn the convection function on or o.
When convection is on, the temperature range is 200°F–450°F.
When convection is o, the temperature range is 200°F–500°F.
" button, then turn the knob to select the
temperature.
" button, then turn the knob to select the cooking time.
3.. Press the"
4. Press the "
5.. Press the"
" button to start cooking.
11
Pizza
style
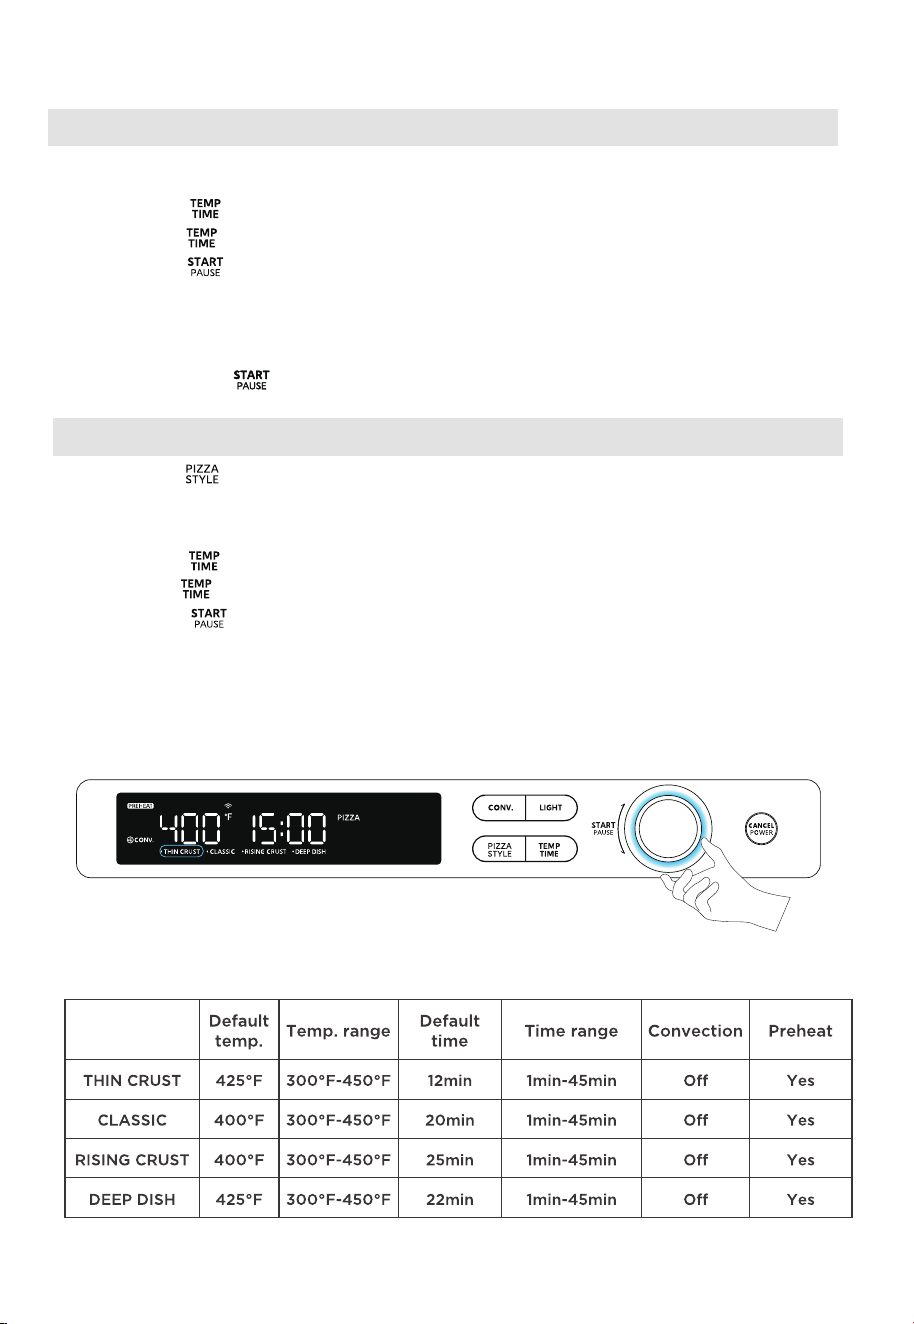
USING THE PIZZA STYLE FUNCTION
1. Press the "
" button once and the screen will display four pizza style functions.
Next, turn the knob to choose a pizza style function.
(THIN CRUST、CLASSIC、RISING CRUST、DEEP DISH)
2. Press the " " button, then turn the knob to select the temperature.
3. Press the "
" button, then turn the knob to select the cooking time.
4. Press the " " button to start cooking.
Note: The default settings in the table are based on laboratory testing. You can adjust
the temperature and time to suit your needs.
USING THE PIZZA FUNCTION
1. Turn the knob to choose the pizza function with or without preheat. If preheat is selected,
PREHEAT will display at the upper left corner of the display screen.
2. Press the "
3. Press the "
4. Press the "
" button, then turn the knob to select the temperature.
" button, then turn the knob to select the cooking time.
" button to start cooking.
4a. If you chose to use the pizza function without preheat, place the food
into the oven now. Make sure to use the baking tray.
5. If you chose to use the pizza function with preheat, wait for the oven to finish
preheating. When the buzzer sounds, use the baking tray to place the food into the
oven and press the " " button to continue cooking.

MODEL
P
MET26C4AST-S1
1750 W
SPECIFICATIONS
CLEANING AND CARE
With proper care and cleaning, your appliance will retain its appearance and remain fully
functional for a long time. We will explain here how you should correctly care for and
clean your appliance.
• Do not use glass cleaners or metal/glass scrapers for cleaning.
• Before cleaning, unplug the oven and allow it to cool completely.
• Wash all the accessories, including the baking rack and the baking tray, with mild soap
and water.
• Do not use abrasive cleansers, scrubbing brushes and chemical cleaners, as these will
cause damage to the non-stick coating of baking tray.
• Using a wet cloth to wipe the inside of the oven.
• Clean the door by using a soft cloth dampened with detergent or soap.
• Never immerse the oven in water or other liquid. Do not clean the appliance in a dishwasher.
• Any other servicing should be performed by an authorized service representative.
COOKING GUIDELINES
• Place the baking rack and baking tray in a position that will accommodate the height
of the food to be cooked.
• Food should be put onto a baking tray to avoid an accumulation
of food leftovers on the heating pipes, which could lead to a risk of fire.
• Make sure that you always use an ovenproof container in the oven. Never use
plastic or cardboard containers in the oven.
• Clean the heating pipes periodically.
• Never use glass or ceramic pans or lids.
• NEVER let oil or other liquids from the food to drip down to the bottom of the oven.
• Set the temperature as suggested by the recipe or as desired.
• Securely shut the door and set the cooking time to begin cooking.
12

TROUBLESHOOTING & FAQ
FAQ
What do I do if the oven won't turn on?
•Make sure the power cord is securely plugged into the
outlet.
•Insert the power cord into a different outlet.
•Reset the circuit breaker if necessary.
•Press the power button.
Why is my food undercooked or overcooked?
•Do not add food to the oven until it has preheated to the correct temperature.
For best results, check progress throughout cooking and remove food if the desired
level of brownness has been achieved. Remove food immediately after
the cook time is complete to avoid overcooking.
•This oven cooks faster than a traditional oven. Always keep an eye on your
food while cooking.
Why do the heating elements appear to be turning on and o?
•This is normal. The oven is designed to control temperature precisely for
every function by adjusting the heating elements’ power levels.
Why is steam coming out from the oven door?
•This is normal. The door is vented to release steam created by foods with
a high moisture content.
Why is water dripping onto the counter from under the door?
•This is normal. The condensation created by foods with a high moisture
content (such as frozen breads) may run down the inside of the door and
drip onto the counter.
Why is there noise coming from the control panel or the back of the oven?
•When the oven is hot, a fan turns on to cool down the control panel.
Why does the oven sound like it is still running even though the power is o?
•The cooling fan may continue to run even after the oven has been turned off.
This is a normal function and should not be a source of concern.
13



6