MOUSE USER MANUAL
English / 中文简体 / 中文繁體 / Deutsch / Pусский
Français/ Español / Italia / 日本語 / 한국어/ Türkçe
ภาษาไทย / بالعربية / Português (Brasil)

EnglishEnglish
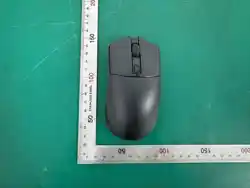
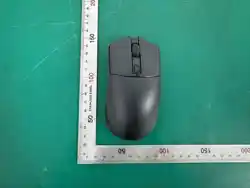
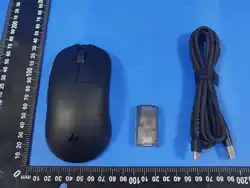
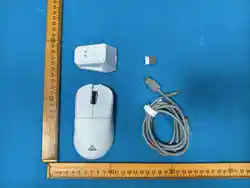
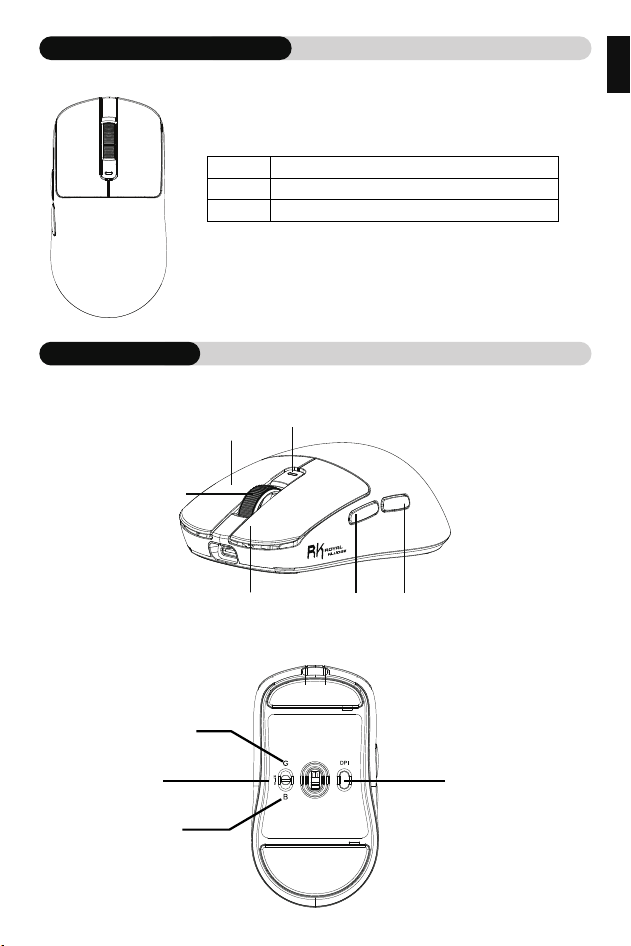
PRODUCT INFORMATION
KEY FUNCTION
2.4G mode
BT mode
Wired mode
Wireless mode shutdown
DPI regulation
Sizes
Version
Key
6 Keys
USB/2.4G/BT
119.65(L)×62.8(W)×38.3(H)±2mm
❈ This product does not support fast charging.
Advance
DPI/Mode Switch Indicator
Retreat
Left switch
Roller wheel
Right switch
English
CHARGING
Charging: The red charging light stays on, and the green light stays on when
fully charged.
Low battery reminder: When the battery is low, the indicator light flashes red.
WIRED MODE
Toggle switch to the middle position, insert the type-c data cable, and you are now
In wired mode.
BT MODE
Toggle the switch to “B” position,Long press the DPI switch button, and the code
indicator light will flash blue, which is the pairing mode.
The pairing is successfully extinguished, and the slow flashback is connected.
2.4G MODE
Toggle the switch to “G” position,Long press the DPI switch button, and the code
indicator light will flash white, which is the pairing mode.
The pairing is successfully extinguished, and the slow flashback is connected.
(Friendly reminder: Paired at the factory, no need to pair again)
DPI VALUE/SWITCH
DPI switch: 400/800/1600/3200/6000 Five-level DPI button switching.
Long press the DPI button to switch pairing codes.
Short press to switch DPI settings. The indicator light illuminates for three
seconds in the color corresponding to the selected setting before reverting to its
original state.
First DPI setting (green light): 400
Second DPI setting (cyan light): 800
Third DPI setting (purple light): 1600 (default)
Fourth DPI setting (blue light): 3200
Fifth DPI setting (white light): 6000
中文简体
DPI值/切换
DPI按键:400/800/1600/3200/6000五档DPI 按键切换。
长按DPI按键切换对码。
短按切换DPI,指示灯灯亮起三秒对应档位颜色,再恢复原来状态。
第一档DPI绿灯:400
第二档DPI青灯:800
第三档DPI紫灯:1600(默认)
第四档DPI蓝灯:3200
第五档DPI白灯:6000
充电指示灯
充电:充电红灯常亮,充满绿灯常亮。
低电量提醒:低电量时,指示灯红色闪烁。
有线模式
将开关拨动到中间位置,插入Type-C数据线,此时有线模式。
BT模式
将开关拨动到“B”位置,长按DPI切换键,对码指示灯快闪蓝光,为配对模式。
配对成功熄灭,慢闪回连。
2.4G 模式
将开关拨动到“G”位置,长按DPI切换键,对码指示灯快闪白光,为配对模式。
配对成功熄灭,慢闪回连。
(温馨提示:出厂时已配对好接收器,无需自行再次配对)
中文繁體
DPI值/切換
DPI按鍵:400/800/1600/3200/6000五檔DPI按鍵切換。
長按DPI按鍵切換對碼。
短按切換DPI,指示燈燈亮起三秒對應檔位顏色,再恢復原來狀態。
第一檔DPI綠燈:400
第二檔DPI青燈:800
第三檔DPI紫燈:1600(默認)
第四檔DPI藍燈:3200
第五檔DPI白燈:6000
充電指示燈
充電:充電紅燈常亮,充滿綠燈常亮。
低電量提醒:低電量時,指示燈紅色閃爍。
有線模式
將開關撥動到中間位置,插入Type-C數據線,此時有線模式。
BT模式
將開關撥動到“B”位置,長按DPI切換鍵,對碼指示燈快閃藍光,為配對模式。
配對成功熄滅,慢閃回連。
2.4G 模式
將開關撥動到“G”位置,長按DPI切換鍵,對碼指示燈快閃白光,為配對模式。
配對成功熄滅,慢閃回連。
(溫馨提示:出廠時已配對好接收器,無需自行再次配對)
Deutsch
DPI-WERT/UMSCHALTUNG
DPI-Taste: 400/800/1600/3200/6000 Fünfstufige DPI-Tastenumschaltung.
Drücken Sie die DPI-Taste lange, um die Kopplungscodes zu wechseln.
Drücken Sie kurz, um die DPI-Einstellungen zu wechseln. Die Anzeigeleuchte
leuchtet drei Sekunden lang in der Farbe, die der ausgewählten Einstellung
entspricht, bevor sie in ihren ursprünglichen Zustand zurückkehrt.
Erste DPI-Einstellung (grünes Licht): 400
Zweite DPI-Einstellung (cyanfarbenes Licht): 800
Dritte DPI-Einstellung (violettes Licht): 1600 (Standard)
Vierte DPI-Einstellung (blaues Licht): 3200
Fünfte DPI-Einstellung (weißes Licht): 6000
AUFLADEN
Aufladen:Rote LED leuchtet während des Ladevorgangs, grüne LED leuchtet bei
vollem Ladezustand.
Erinnerung an niedrigen Batteriestand:Die Anzeigeleuchte blinkt rot, wenn der
Batteriestand niedrig ist.
BT-MODUS
Schalten Sie den Schalter in die Position “B”,Drücken Sie lange auf die DPI-Schalter-
taste, die Pairing-Anzeige leuchtet schnell blau für den Pairing-Modus.
Erfolgreiches Pairing aus, langsames Blinken zurück zum Verbinden.
KABELGEBUNDENER MODUS
Schalten Sie den Schalter in die mittlere Position,Stecken Sie das Typ-C-Kabel ein,
dieses Mal im kabelgebundenen Modus.
2.4G-MODUS
Stellen Sie den Schalter auf die Position “G”, drücken Sie lange auf die DPI-Schalt-
taste, und die Code-Anzeige leuchtet weiß, was den Pairing-Modus anzeigt.
Pairing erfolgreich aus, langsames Blinken zurück zur Verbindung.
(Zur Erinnerung: Eine werkseitige Kopplung erfordert keine erneute Kopplung).
Pусский
Зарядка: Красный индикатор горит во время зарядки, зеленый индикатор
горит при полной зарядке.
Напоминание о низком заряде батареи:когда батарея разряжена,
индикатор мигает красным цветом.
ЗАРЯДКА
РЕЖИМ BT
Переведите переключатель в положение “B”,Нажмите и удерживайте кнопку
переключения DPI, и индикатор кода начнет мигать синим цветом, что и
является режимом сопряжения.
Сопряжение успешно гасится, и подключается медленный флешбэк.
ПРОВОДНОЙ РЕЖИМ
Переведите переключатель в среднее положение, подключите кабель
Type-C, после чего устройство перейдет в режим проводной связи.
РЕЖИМ 2.4G
Переведите переключатель в положение “G”, нажмите и удерживайте кнопку
DPI, и индикатор кода будет мигать белым цветом, что означает режим
сопряжения.
Сопряжение успешно гасится, и подключается медленный флешбек.
(Примечание: устройство уже было сопряжено на фабрике и нет необходимости в
повторном сопряжении)

Pусский
ЗНАЧЕНИЕ/ПЕРЕКЛЮЧАТЕЛЬ DPI
Переключатель DPI: 400/800/1600/3200/6000 Пятиступенчатое
переключение DPI.
Нажмите и удерживайте кнопку DPI, чтобы переключить коды сопряжения.
Короткое нажатие для переключения настроек DPI. Индикатор светится в
течение трех секунд цветом, соответствующим выбранной настройке, после
чего возвращается в исходное состояние.
Первая настройка DPI (зеленый индикатор): 400
Вторая настройка DPI (голубой индикатор): 800
Третья настройка DPI (фиолетовый индикатор): 1600 (по умолчанию)
Четвертая настройка DPI (синий индикатор): 3200
Пятая настройка DPI (белый индикатор): 6000
Français
Chargement : Le voyant rouge reste allumé pendant le chargement, le voyant
vert reste allumé lorsque la charge est complète.
Rappel de batterie faible : le voyant clignote en rouge lorsque la batterie est
faible.
CHARGEMENT
MODE CÂBLÉ
MODE BT
Basculez l'interrupteur en position “B”,Appuyez longuement sur le bouton du
commutateur DPI, l'indicateur d'appairage clignote rapidement en bleu pour le
mode d'appairage.
Basculez l'interrupteur en position centrale,Branchez le câble Type-C, cette fois
en mode .
MODE 2.4G
Basculer l'interrupteur en position “G”,Appuyez longuement sur le bouton DPI
et le voyant lumineux clignotera en blanc, indiquant le mode d'appairage.
L'appairage réussi s'éteint, le clignotement lent revient à la connexion.
Rappel amical: l'appareil a été jumelé à la sortie de l'usine, il n'est donc pas nécessaire de le
jumeler à nouveau.

Français
VALEUR DPI/CHANGEMENT
Bouton DPI : 400/800/1600/3200/6000 Bouton DPI à cinq niveaux.
Appuyez longuement sur le bouton DPI pour changer de code d'appairage.
Appuyez brièvement pour changer les paramètres DPI. Le voyant s'allume pendant
trois secondes dans la couleur correspondant au paramètre sélectionné avant de
revenir à son état d'origine.
Premier réglage DPI (voyant vert) : 400
Deuxième réglage DPI (voyant cyan) : 800
Troisième réglage DPI (voyant violet) : 1600 (par défaut)
Quatrième réglage DPI (voyant bleu) : 3200
Cinquième réglage DPI (voyant blanc) : 6000
Español
Carga:La luz roja permanece encendida durante la carga y la luz verde permanece
encendida cuando está completamente cargado.
Recordatorio de batería baja:La luz indicadora parpadea en rojo cuando la
batería está baja.
CARGA
MODO CABLEADO
Coloca el interruptor en la posición central,Enchufa el cable Type-C, esta vez en
modo cableado.
MODO 2.4G
Cambie el interruptor a la posición “G”,mantenga pulsado el botón DPI y el
indicador luminoso del código parpadeará en blanco, lo que indica que se
encuentra en modo de emparejamiento.
Emparejamiento con éxito apagado, parpadeo lento de nuevo a la conexión.
(Recordatorio: se ha emparejado cuando sale de fábrica, no es necesario emparejar
nuevamente.)
MODO BT
Coloque el interruptor en la posición “B”,Mantenga pulsado el botón del
interruptor DPI, la luz indicadora de emparejamiento parpadea rápidamente en
azul para el modo de emparejamiento.
Emparejamiento con éxito apagado, parpadeo lento de nuevo para conectar.

Español
DPI VALOR / CONMUTACIÓN
DPI botón:400/800/1600/3200/6000. Botón DPI con cinco niveles de conmutación.
Mantenga pulsado el botón DPI para cambiar los códigos de emparejamiento.
Pulse brevemente para cambiar la configuración DPI. La luz indicadora se ilumina
durante tres segundos en el color correspondiente a la configuración seleccionada
antes de volver a su estado original.
Primera configuración de DPI (luz verde): 400
Segunda configuración de DPI (luz cian): 800
Tercera configuración de DPI (luz púrpura): 1600 (predeterminada)
Cuarta configuración de DPI (luz azul): 3200
Quinta configuración de DPI (luz blanca): 6000
Italia
Carica:Spia rossa accesa durante la ricarica, spia verde accesa a ricarica completata.
Promemoria batteria scarica:la spia lampeggia in rosso quando la batteria è
scarica.
CARICA
MODALITÀ BT
Portare l'interruttore in posizione “B”,Premere a lungo il pulsante dell'interruttore
DPI, la spia di accoppiamento lampeggia velocemente in blu per la modalità di
accoppiamento.
L'accoppiamento si spegne con successo, il lampo lento torna a lampeggiare per
connettersi.
MODALITÀ CABLATA
Portare l'interruttore in posizione centrale,Collegare il cavo Type-C, questa volta in
modalità cablata.
MODALITÀ 2.4G
Portare l'interruttore in posizione “G”, premere a lungo il pulsante DPI e la spia di
indicazione del codice lampeggerà in bianco, indicando la modalità di accoppia-
mento.
L'accoppiamento si spegne con successo, la connessione torna a lampeggiare
lentamente.
(Promemoria: accoppiato in fabbrica, non è necessario accoppiarlo nuovamente)

Italia
VALORE DPI/COMMUTAZIONE
Pulsante DPI: 400/800/1600/3200/6000 Pulsante DPI a cinque livelli.
Premere a lungo il pulsante DPI per cambiare i codici di accoppiamento.
Premere brevemente per cambiare le impostazioni DPI. La spia si illumina per
tre secondi nel colore corrispondente all'impostazione selezionata prima di
tornare allo stato originale.
Prima impostazione DPI (luce verde): 400
Seconda impostazione DPI (luce ciano): 800
Terza impostazione DPI (luce viola): 1600 (impostazione predefinita)
Quarta impostazione DPI (luce blu): 3200
Quinta impostazione DPI (luce bianca): 6000
日本語
充電中: 充電中は赤色ランプが点灯し、充電完了時は緑色ランプが点灯します。
低残量バッテリーの通知: バッテリー 残量が少 なくなると、インジケーターライトが赤く点
滅します。
充電表示灯
BTモード
スイッチをBの位置に切り替えます。DPI切り替えボタンを長押しすると、インジケーターラ
イトが青色に点滅し、ペアリングモードになります。
ペアリングが正常に終了し、接続されました。
有線モード
スイッチを中間位置に切り替えて、Type-Cデータケーブルを接続すると、有線モードになり
ます。
2.4Gモード
スイッチをGの位置に切り替える,DPI切り替えボタンを長押しすると、インジケーターライ
トが白色に点滅し、ペアリングモードになります。
ペアリングが正常に終了し、接続されました。
(親切な注意事項:工場出荷時にペアリングされているため、再度ペアリングする必要はありま
せん。)
DPI値/切り替え
DPIボタン:400/800/1600/3200/6000の5段階DPIボタン切り替え。
DPIボタンを長押しするとペアリングコードを切り替えます。
短押しでDPI設定を切り替えます。インジケーターライトは選択した設定に対応する色で
3秒間点灯した後、元の状態に戻ります。
第1DPI設定(緑色点灯):400
第2DPI設定(シアン色点灯):800
第3DPI設定(紫色点灯):1600(デフォルト)
第4DPI設定(青色点灯):3200
第5DPI設定(白色点灯):6000
한국어
충전: 충전 중 빨간색 표시등이 계속 켜져 있으며, 충전이 완료되면 녹색 표시등이 계속
켜져 있습니다.
배터리 부족 알림: 배터리가 부족하면 표시등이 빨간색으로 깜박입니다.
로드 중
BT 모드
스위치를 B 위치로 전환합니다.DPI 스위치 버튼을 길게 누르면 페어링 표시등이
파란색으로 빠르게 깜박이며 페어링 모드에 들어갑니다.
페어링이 완료되면 표시등이 천천히 깜박입니다.
유선 모드
스위치를 중간 위치로 전환합니다.이번에는 유선 모드인 TYPE-C 케이블을 연결합
니다.
2.4G 모드
스위치를 “G” 위치로 전환한 후 DPI 스위치 버튼을 길게 누르면 코드 표시등이 흰색으로
깜박이며 페어링 모드가 됩니다.
페어링이 완료되면 표시등이 천천히 깜박입니다.
(참조: 공장에서 페어링되어 있으므로 다시 페어링할 필요가 없습니다)
DPI 값 설정
DPI 버튼: 400/800/1600/3200/6000 다섯 단계 DPI 버튼 전환.
DPI 버튼을 길게 눌러 페어링 코드를 전환합니다.
짧게 눌러 DPI 설정을 전환합니다. 선택한 설정에 해당하는 색상의 표시등이 3초간 점등된
후 원래 상태로 복귀합니다.
첫 번째 DPI 설정 (녹색 표시등): 400
두 번째 DPI 설정 (청록색 표시등): 800
세 번째 DPI 설정 (보라색 표시등): 1600 (기본값)
네 번째 DPI 설정 (파란색 표시등): 3200
다섯 번째 DPI 설정 (흰색 표시등): 6000
Türkçe
DPI DEĞERI/DEĞIŞTIRME
DPI düğmesi: 400/800/1600/3200/6000 Beş seviyeli DPI düğmesi
geçişi.
Eşleştirme kodlarını değiştirmek için DPI düğmesine uzun basın.
DPI ayarlarını değiştirmek için kısa basın. Gösterge ışığı, seçilen ayara
karşılık gelen renkte üç saniye yanar ve ardından orijinal durumuna geri
döner.
İlk DPI ayarı (yeşil ışık): 400
İkinci DPI ayarı (camgöbeği ışık): 800
Üçüncü DPI ayarı (mor ışık): 1600 (varsayılan)
Dördüncü DPI ayarı (mavi ışık): 3200
Beşinci DPI ayarı (beyaz ışık): 6000
Şarj: Şarj kırmızı ışığı sürekli yanar, şarj tamamlandığında yeşil ışık sürekli yanar.
Düşük pil hatırlatıcısı: Pil zayıfladığında gösterge ışığı kırmızı renkte yanıp söner.
ŞARJ
KABLOLU MODU
Anahtarı orta konuma getirin,Type-C kablosunu bu kez kablolu modda takın.
2.4G MODU
Anahtarı “G” konumuna getirin, DPI anahtar düğmesine uzun basın, kod
gösterge ışığı beyaz renkte yanıp sönecektir, bu eşleştirme modudur.
Eşleştirme başarısı kapalı, bağlantıya yavaşça geri dönün.
(Dostça hatırlatma: Fabrikada eşleştirilmiştir, tekrar eşleştirmeye gerek yoktur)
BT MODU
Anahtarı B konumuna getirin,DPI anahtar düğmesine uzun basın, eşleştirme
gösterge ışığı eşleştirme modu için mavi renkte hızlı yanıp söner.
Eşleştirme başarıyla kapatıldı, bağlanmak için yavaşça geri yanıp sönüyor.
ภาษาไทย
ค่า DPI / การสลับ
ปุ่ม DPI: 400/800/1600/3200/6000 สวิตช์ปุ่ม DPI ห้าระดับ
กดปุ่ม DPI นานเพื่อเปลี่ยนรหัสจับคู่
กดสั้นเพื่อเปลี่ยนการตั้งค่า DPI แสงชี้แสงสว่างเป็นเวลาสามวินาทีในสีที่ตรงกับการตั้งค่าที่
เลือก ก่อนที่จะกลับไปยังสถานะเดิม
การตั้งค่า DPI ครั้งแรก (แสงสีเขียว): 400
การตั้งค่า DPI ที่สอง (แสงสีขาว): 800
การตั้งค่า DPI ที่สาม (แสงสีม่วง): 1600 (ค่าเริ่มต้น)
การตั้งค่า DPI ที่สี่ (แสงสีฟ้า): 3200
การตั้งค่า DPI ที่ห้า (แสงสีขาว): 6000
การชาร์จไฟ: ไฟแดงแสดงสถานะการชาร์จ ไฟเขียวแสดงสถานะชาร์จเต็ม
เตือนแบตเตอรี่ต่ำ: เมื่อแบตเตอรี่ต่ำไฟแสดงสถานะจะกะพริบสีแดง
การชาร์จไฟ
โหมด BT
สลับสวิตช์ไปที่ตำแหน่ง B,กดปุ่มสลับ DPI ค้างไว้สักครู่ เมาส์จะเข้าสู่โหมดจับคู่
ไฟแสดงสถานะจะเปลี่ยนเป็นสีฟ้าและกะพริบอย่างรวดเร็ว
เมื่อจับคู่สำ เร็จไฟจะดับลง และเปลี่ยนเป็นกะพริบอย่างช้าๆ
โหมดสาย
ใส่สวิตช์สลับไปที่ตำแหน่งตรงกลางเสียบสายข้อมูล Type-C ในขณะที่โหมดแบบมีสาย
โหมด 2.4G
เปลี่ยนสวิตช์ไปยังตำแหน่ง "G" กดปุ่มสวิตช์ DPI ยาวและแสงบ่งชี้รหัสจะกระพริบขาวซึ่งเป็น
โหมดจับคู่
เมื่อจับคู่สำ เร็จไฟจะดับลง และเปลี่ยนเป็นกะพริบอย่างช้าๆ
(โปรดทราบ: ตัวรับสัญญาณได้ถูกจับคู่จากทางโรงงานแล้ว ไม่จําเป็นต้องจับคู่อีกครัง)
بالعربية
الشحن
الشحن: ضوء أحمر يشير إلى الشحن، ضوء أخضر يشير إلى اكتمال الشحن.
تذكير بانخفاض مستوى البطارية: عندما ينخفض مستوى البطارية، يومض
الضوء الأحمر.
الوضع السلكي
ضع المفتاح في الوضع الأوسط، وأدخل كابل البيانات من النوع C، وستكون
في وضع السلكي.
وضع BT
قم بتبديل المفتاح إلى الوضع “ B ” ، واضغط مطولاً على زر تبديل DPI ،
وسيومض ضوء مؤشر الرمز باللون الأزرق ، وهو وضع الاقتران.
تم إطفاء الاقتران بنجاح ، وتم توصيل الوميض البطيء.
وضع 2.4G
قم بتبديل المفتاح إلى الوضع “G” ، واضغط مطولاً على زر تبديل DPI ،
وسيومض ضوء مؤشر الرمز باللون الأبيض ، وهو وضع الاقتران.
تم إطفاء الاقتران بنجاح ، وتم توصيل الوميض البطيء.
(ىرخأ ةرم اهنارقإل ةجاح ال ،عنصملا يف اهنارقإ مت :يدو ريكذت)

بالعربية
قيمة DPI/التبديل
مفتاح DPI: 400/800/1600/3200/6000 زر تبديل DPI بخمسة مستويات.
اضغط مطولاً على زر DPI لتبديل رموز الاقتران.
اضغط لفترة قصيرة لتبديل إعدادات DPI. يضيء مؤشر الضوء لمدة ثلاث ثوانٍ
باللون المطابق للإعداد المحدد قبل أن يعود إلى حالته الأصلية.
إعداد DPI الأول (ضوء أخضر): 400
إعداد DPI الثاني (ضوء سماوي): 800
إعداد DPI الثالث (ضوء أرجواني): 1600 (افتراضي)
إعداد DPI الرابع (ضوء أزرق): 3200
إعداد DPI الخامس (ضوء أبيض): 6000

POR (ABNT)
CARREGAMENTO
Carregamento: Luz vermelha acesa durante o carregamento, luz verde acesa
quando totalmente carregado.
Aviso de bateria fraca: Quando a bateria estiver fraca, a luz indicadora piscará
em vermelho.
MODO COM FIO
Coloque o interruptor na posição central e conecte o cabo de dados Type-C. Agora
você está no modo com fio.
MODO BT
Coloque o interruptor na posição “B”, pressione longamente o botão do
interruptor DPI e a luz indicadora do código piscará em azul, indicando o modo
de emparelhamento.
O emparelhamento foi concluído com sucesso e o flashback lento está
conectado.
MODO 2.4G
Coloque o interruptor na posição “G”, pressione longamente o botão DPI e a luz
indicadora do código piscará em branco, indicando o modo de emparelhamen-
to.
O emparelhamento foi concluído com sucesso e o flashback lento está
conectado.
(Lembrete: emparelhado na fábrica, não é necessário emparelhar novamente)

POR (ABNT)
VALOR DPI/INTERRUPTOR
Interruptor DPI: 400/800/1600/3200/6000 Botão DPI com cinco níveis de
alternância.
Pressione longamente o botão DPI para alternar os códigos de emparelhamen-
to.
Pressione brevemente para alternar as configurações de DPI. A luz indicadora
acende por três segundos na cor correspondente à configuração selecionada
antes de retornar ao seu estado original.
Primeira configuração de DPI (luz verde): 400
Segunda configuração de DPI (luz ciano): 800
Terceira configuração de DPI (luz roxa): 1600 (padrão)
Quarta configuração de DPI (luz azul): 3200
Quinta configuração de DPI (luz branca): 6000

FCC WARNING
This device complies with part 15 of the FCC Rules. Operation is subject to the
following two conditions: (1) This device may not cause harmful interference,
and (2) this device must accept any interference received, including interfer-
ence that may cause undesired operation.
Any changes or modifications not expressly approved by the party responsible
for compliance could void the user's authority to operate the equipment.
This equipment has been tested and found to comply with the limits for a Class
B digital device, pursuant to part 15 of the FCC Rules. These limits are designed
to provide reasonable protection against harmful interference in a residential
installation. This equipment generates, uses and can radiate radio frequency
energy and, if not installed and used in accordance with the instructions, may
cause harmful interference to radio communications. However, there is no
guarantee that interference will not occur in a particular installation. If this
equipment does cause harmful interference to radio or television reception,
which can be determined by turning the equipment off and on, the user is
encouraged to try to correct the interference by one or more of the following
measures:
—Reorient or relocate the receiving antenna.
—Increase the separation between the equipment and receiver.
—Connect the equipment into an outlet on a circuit different from that to which
the receiver is connected.
—Consult the dealer or an experienced radio/TV technician for help.
FCC Radiation Exposure Statement
This equipment complies with FCC radiation exposure limits set forth for an
uncontrolled environment .
This transmitter must not be co‐located or operating in conjunction with any
other antenna or transmitter.

ISED STATEMENT
This device contains licence‐exempt transmitter(s)/receiver(s) that comply
with Innovation, Science and Economic Development Canada's licence‐ex-
empt RSS(s). Operation is
subject to the following two conditions:
(1) This device may not cause interference.
(2) This device must accept any interference, including interference that may
cause undesired operation of the device.
Cet appareil contient des émetteurs/récepteurs sans licence qui sont
conformes aux RSS sans licence d'Innovation, Sciences et Développement
économique Canada. L'exploitation est soumise aux deux conditions suivantes:
(1) Cet appareil ne doit pas causer d'interférences.
(2) Cet appareil doit accepter toute interférence, y compris les interférences qui
pourraient causer un fonctionnement indésirable de l'appareil.
Any changes or modifications not expressly approved by the party responsible
for compliance could void the user’s authority to operate the equipment.
Tous les changements ou modifications non expressément approuvée par le
responsible de la conformité pourrait vider l’utilisateur est habilité à exploiter
l’équipemen.
ISEDC Radiation Exposure Statement:
This equipment complies with ISEDC RF radiation exposure limits set forth for
an uncontrolled environment.
This transmitter must not be co‐located or operating in conjunction with any
other antenna or transmitter.
Cet appareil est
Conforme aux limitesd’exposition de rayonnement RF ISEDC établiespour un
environnement non contrôlé.
Cetémetteur ne doit pas être co‐implanté oufonctionner en onjunction avec
toute autreantenne ou transmetteur.

BATTERIES
A warning that batteries (battery pack or batteries installed) shall not be
exposed to excessive heat such as sunshine, fire or the light.
1) Replacement of a battery with an incorrect type that can defeat a safeguard;
2) Disposal of a battery into fire or a hot oven, or mechanically crushing or
cutting of a battery, that can result in an explosion;
3) Leaving a battery in an extremely high temperature surrounding environ-
ment that can result in an explosion or the leakage of flammable liquid or gas;
4)A battery subjected to extremely low air pressure that may result in an
explosion or the leakage of flammable liquid or gas.

安全にお使いいただくために
本製品を安全にご使用いただくため、以下の事項を必ずお守りください。負傷、
故障、火災等を防止します。
警告:
以下の場合は直ちに使用を中止し、電池を取り出してください
1.異物混入時:水や金属片等の異物が本製品に入った場合。そのまま使用すると、
火災や感電の原因になります。
2.異常発生時:本製品が異常に発熱している、煙や異臭がする場合。火傷防止のた
め、十分に冷えるのを確認してから電池を取り出してください。接続機器も終了
させてください。
3.落下·衝撃·破損時:本製品を落としたり、強い衝撃を与えたり、破損が認めら
れた場合。電源をOFFにしてから電池を取り出してください。
4.分解·改造禁止:分解、改造、自身による修理は行わないでください。火災、感
電、故障の原因となり、保証対象外となります。
5.火中投入禁止:火中に投入しないでください。破裂により火災や負傷の原因にな
ります。
注意:
以下の環境での使用・保管を避けてください
·日のあたる自動車内、直射日光のあたるところ
·暖房器具の周辺など高温になるところ
·多湿なところ、結露をおこすところ
·平坦でないところ、振動が発生するところ
·マグネットの近くなどの磁場が発生するところ
·ほこりの多いところ

その他の注意事項
1.防水性:
本製品は防水構造ではありません。雨、水しぶき、飲料、蒸気、汗等の液体がかか
らない場所で使用・保管してください。液体による故障の原因となります。
2.用途制限:
パソコン、スマホ、タブレット、ゲーム機用マウスとしてのみ使用してください。
誤動作が重大な影響を及ぼす恐れのある機器では使用しないでください。
3.光学センサー関連:
ガラス等の透明面や鏡等の高反射面では、センサーが正しく機能せず、ポインター
の動作が不安定になることがあります。
センサーの光(不可視光線)を直接注視しないでください。目の障害を引き起こす
恐れがあります。

法的対応事項
1. 電波法遵守
本製品は技術適合証明済(技適マーク:)
2. 廃棄処理
本製品及び電池の廃棄は、お住まいの地域の廃棄に関する条例・法令に従って処
分してください。



制造商:京恒腾伟(惠州)电子科技有限公司
地址:广东省惠州博罗县园洲镇民营一路8号
Manufacturer: JingHeng TengWei (HuiZhou)Electronic Technology Co., Ltd.
Address: No.8, Minying 1st road, Yuanzhou Town,Boluo County, Huizhou City,
Guangdong Province.
执行标准:GB/T 26245-2010
Executive standard: GB/T 26245-2010
Feel free to contact us with any product issues or questions.
We will reply as quickly as possible to ensure all your needs are handled.
166-053301-004