Product Instructions
Product No. 3515437
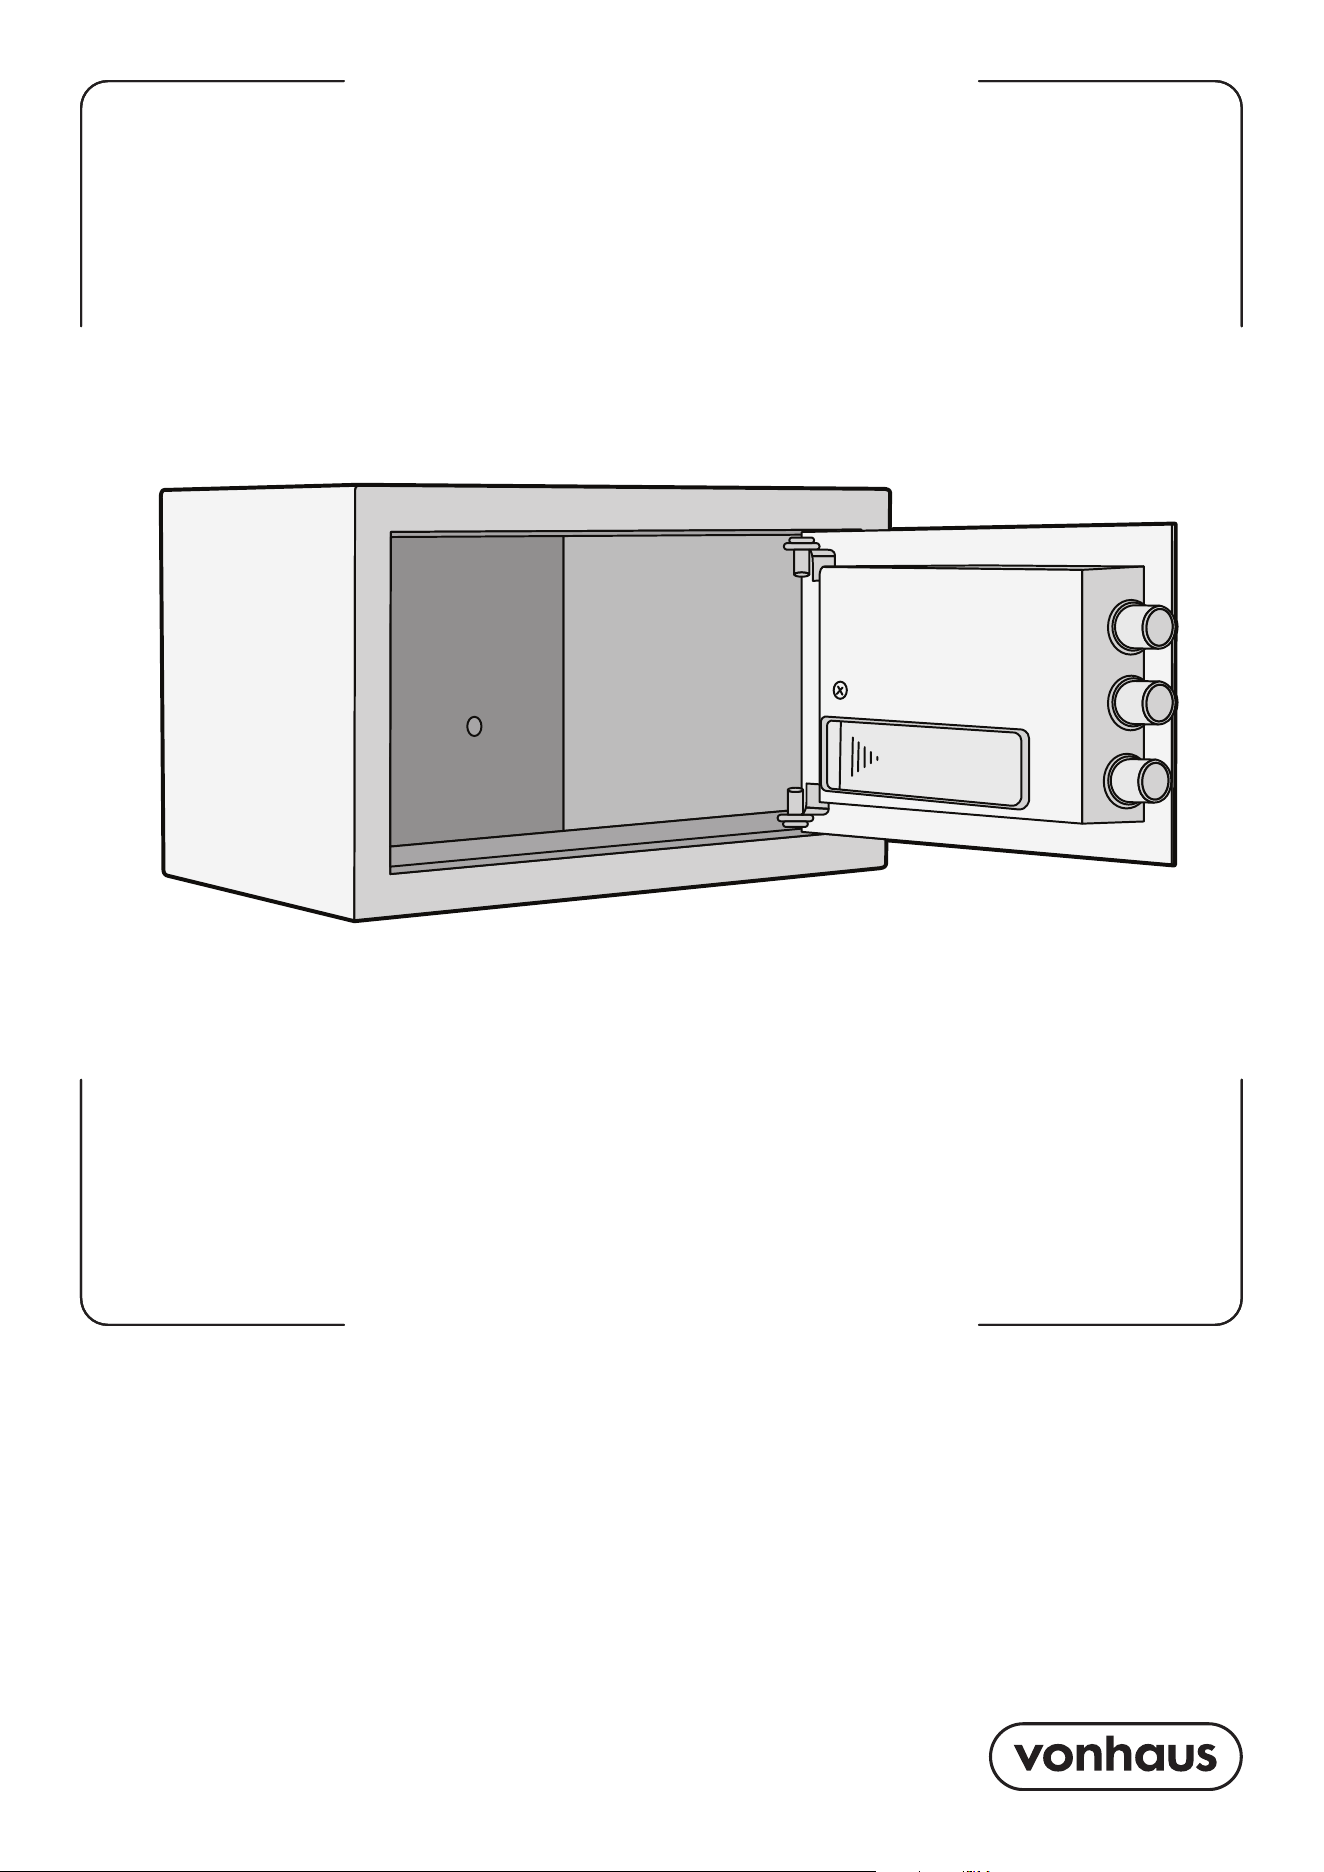
DIGITAL
SAFE SMALL
2 3
Need further help?
suppor[email protected]
See our full range at
www.vonhaus.com
Let’s get started!
Visit our product hub for
useful tips and tricks on
getting the most out of
your new product.
SCAN ME
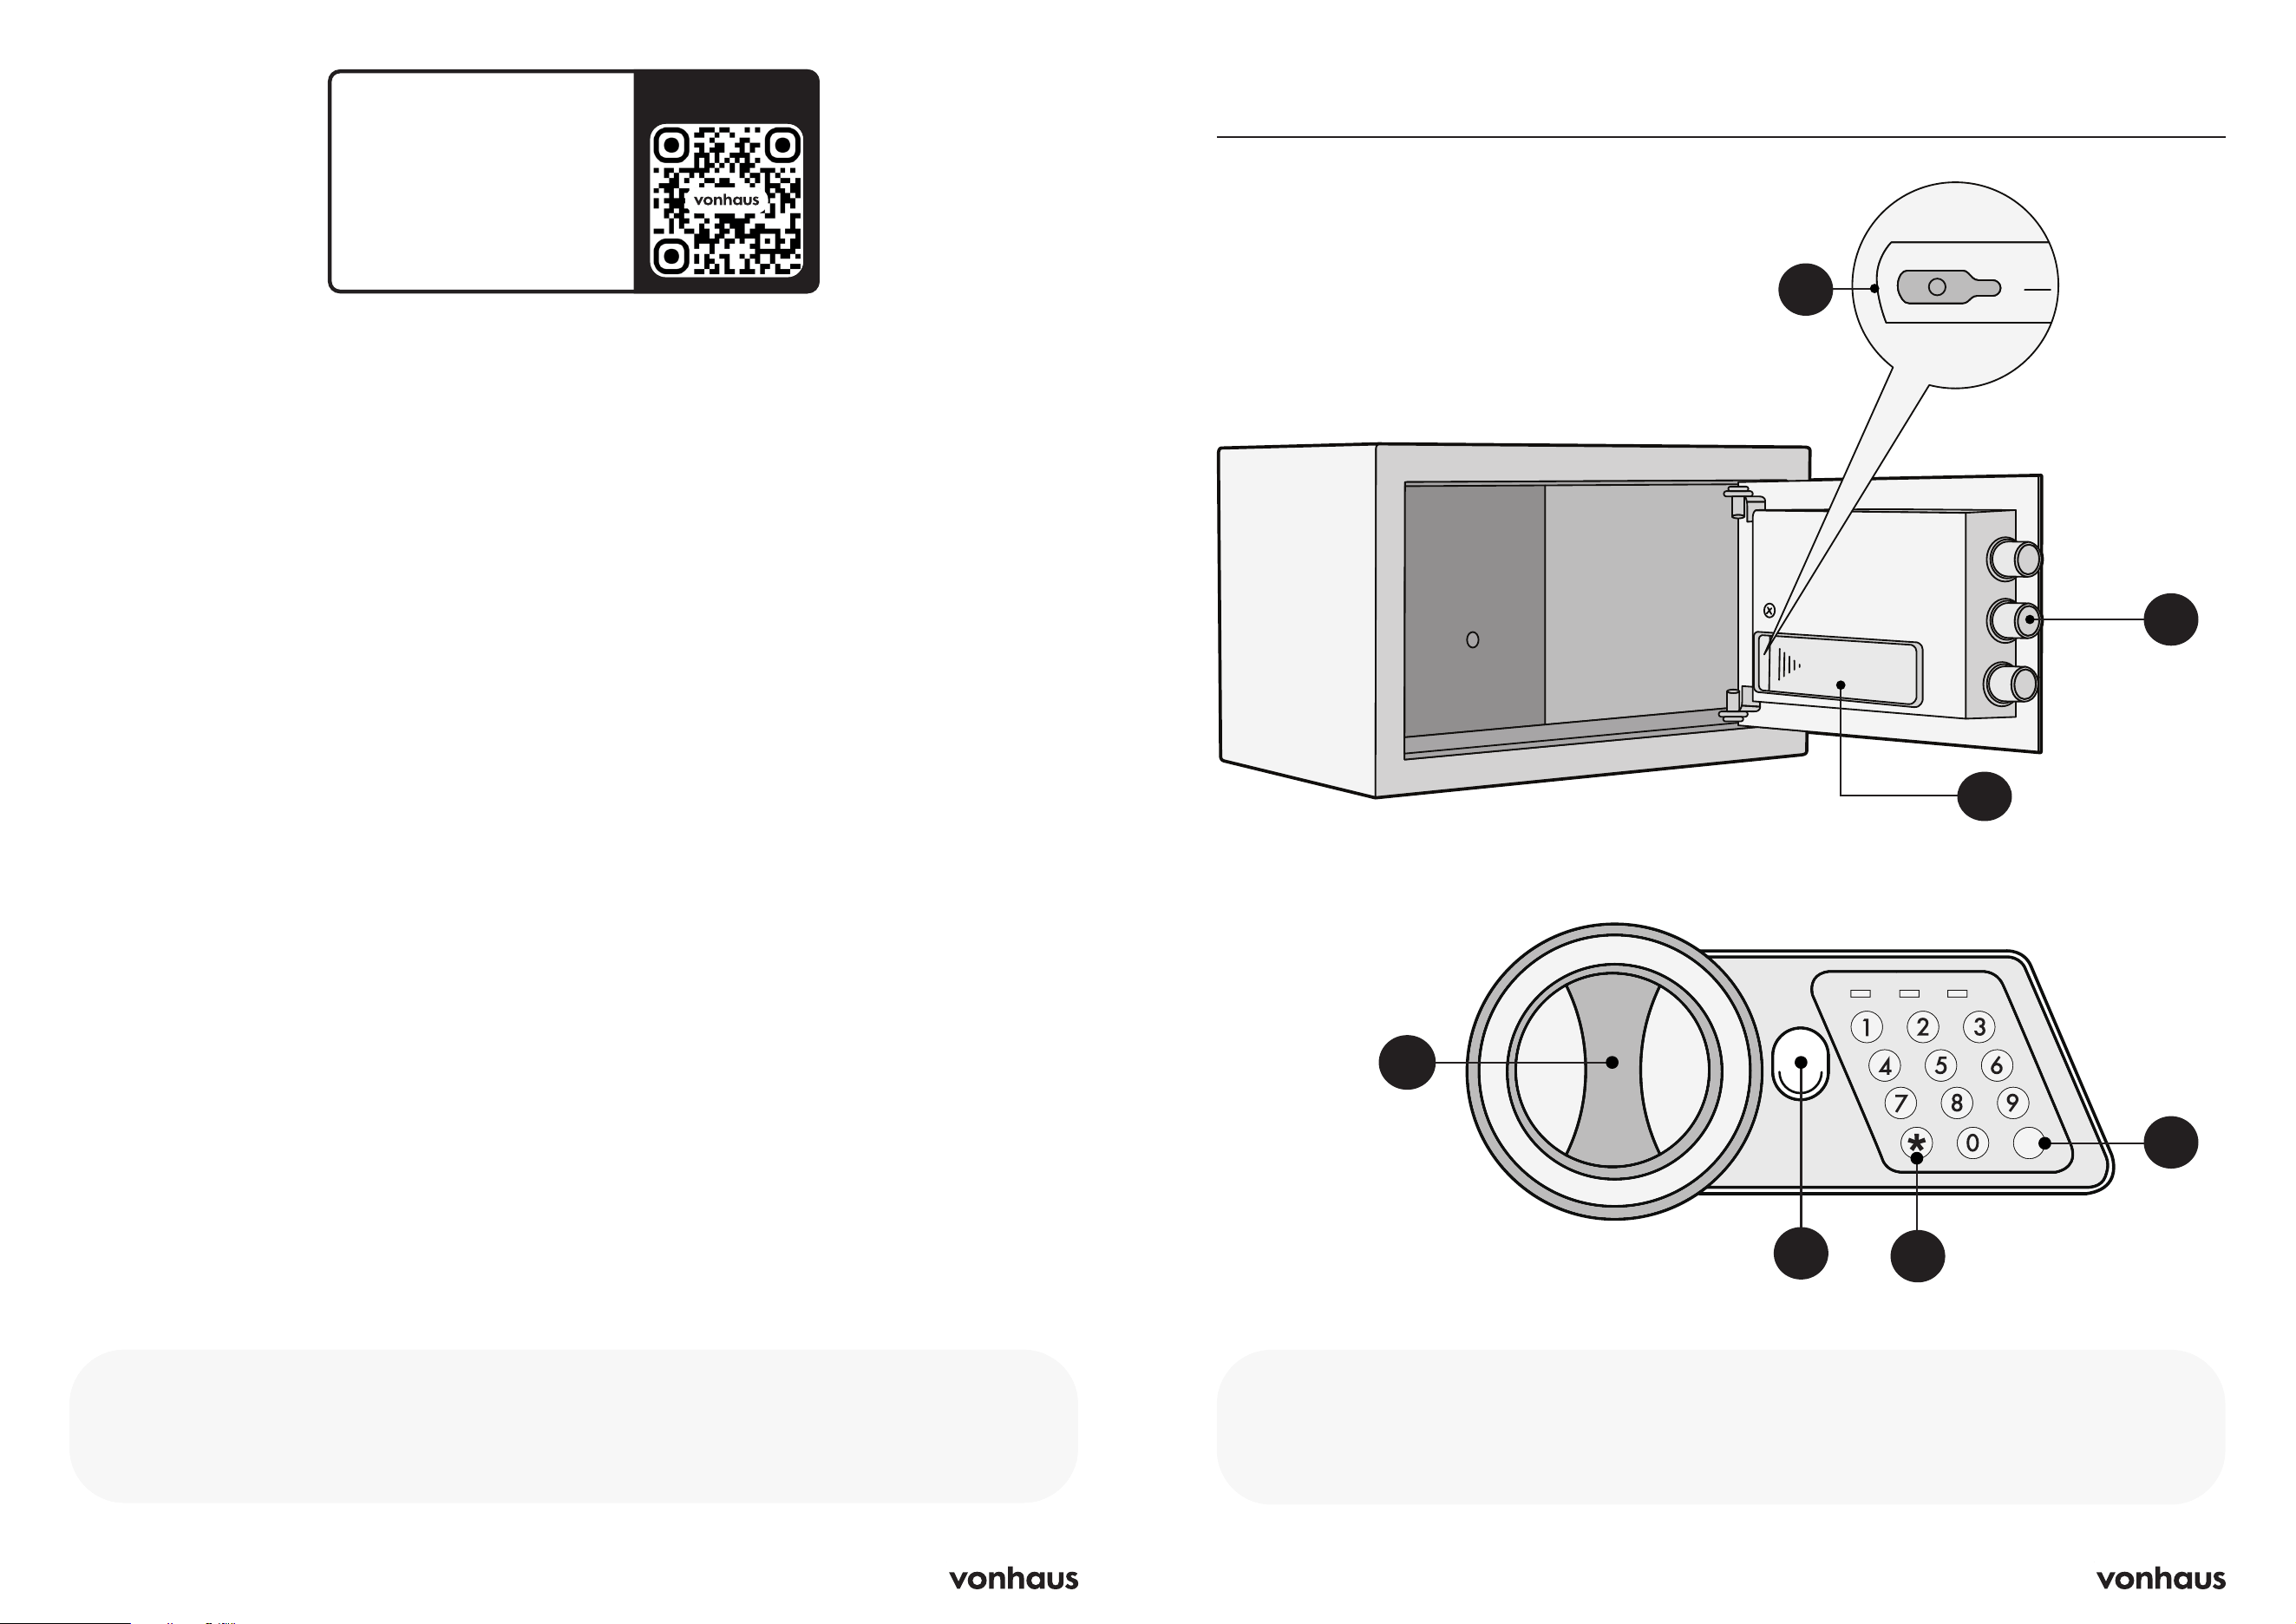
Product Diagram
A
A. Reset Button
B. Bolts
C. Battery Compartment
D. Knob
E. Emergency Lock Cover
F. Delete Button
G. Confirmation Button
C
B
#
#
PROCEED
PROCEED
LOW BATTERY
LOW BATTERY
READY
READY
#
PROCEEDLOW BATTERYREADY
D
E
F
G
4 5
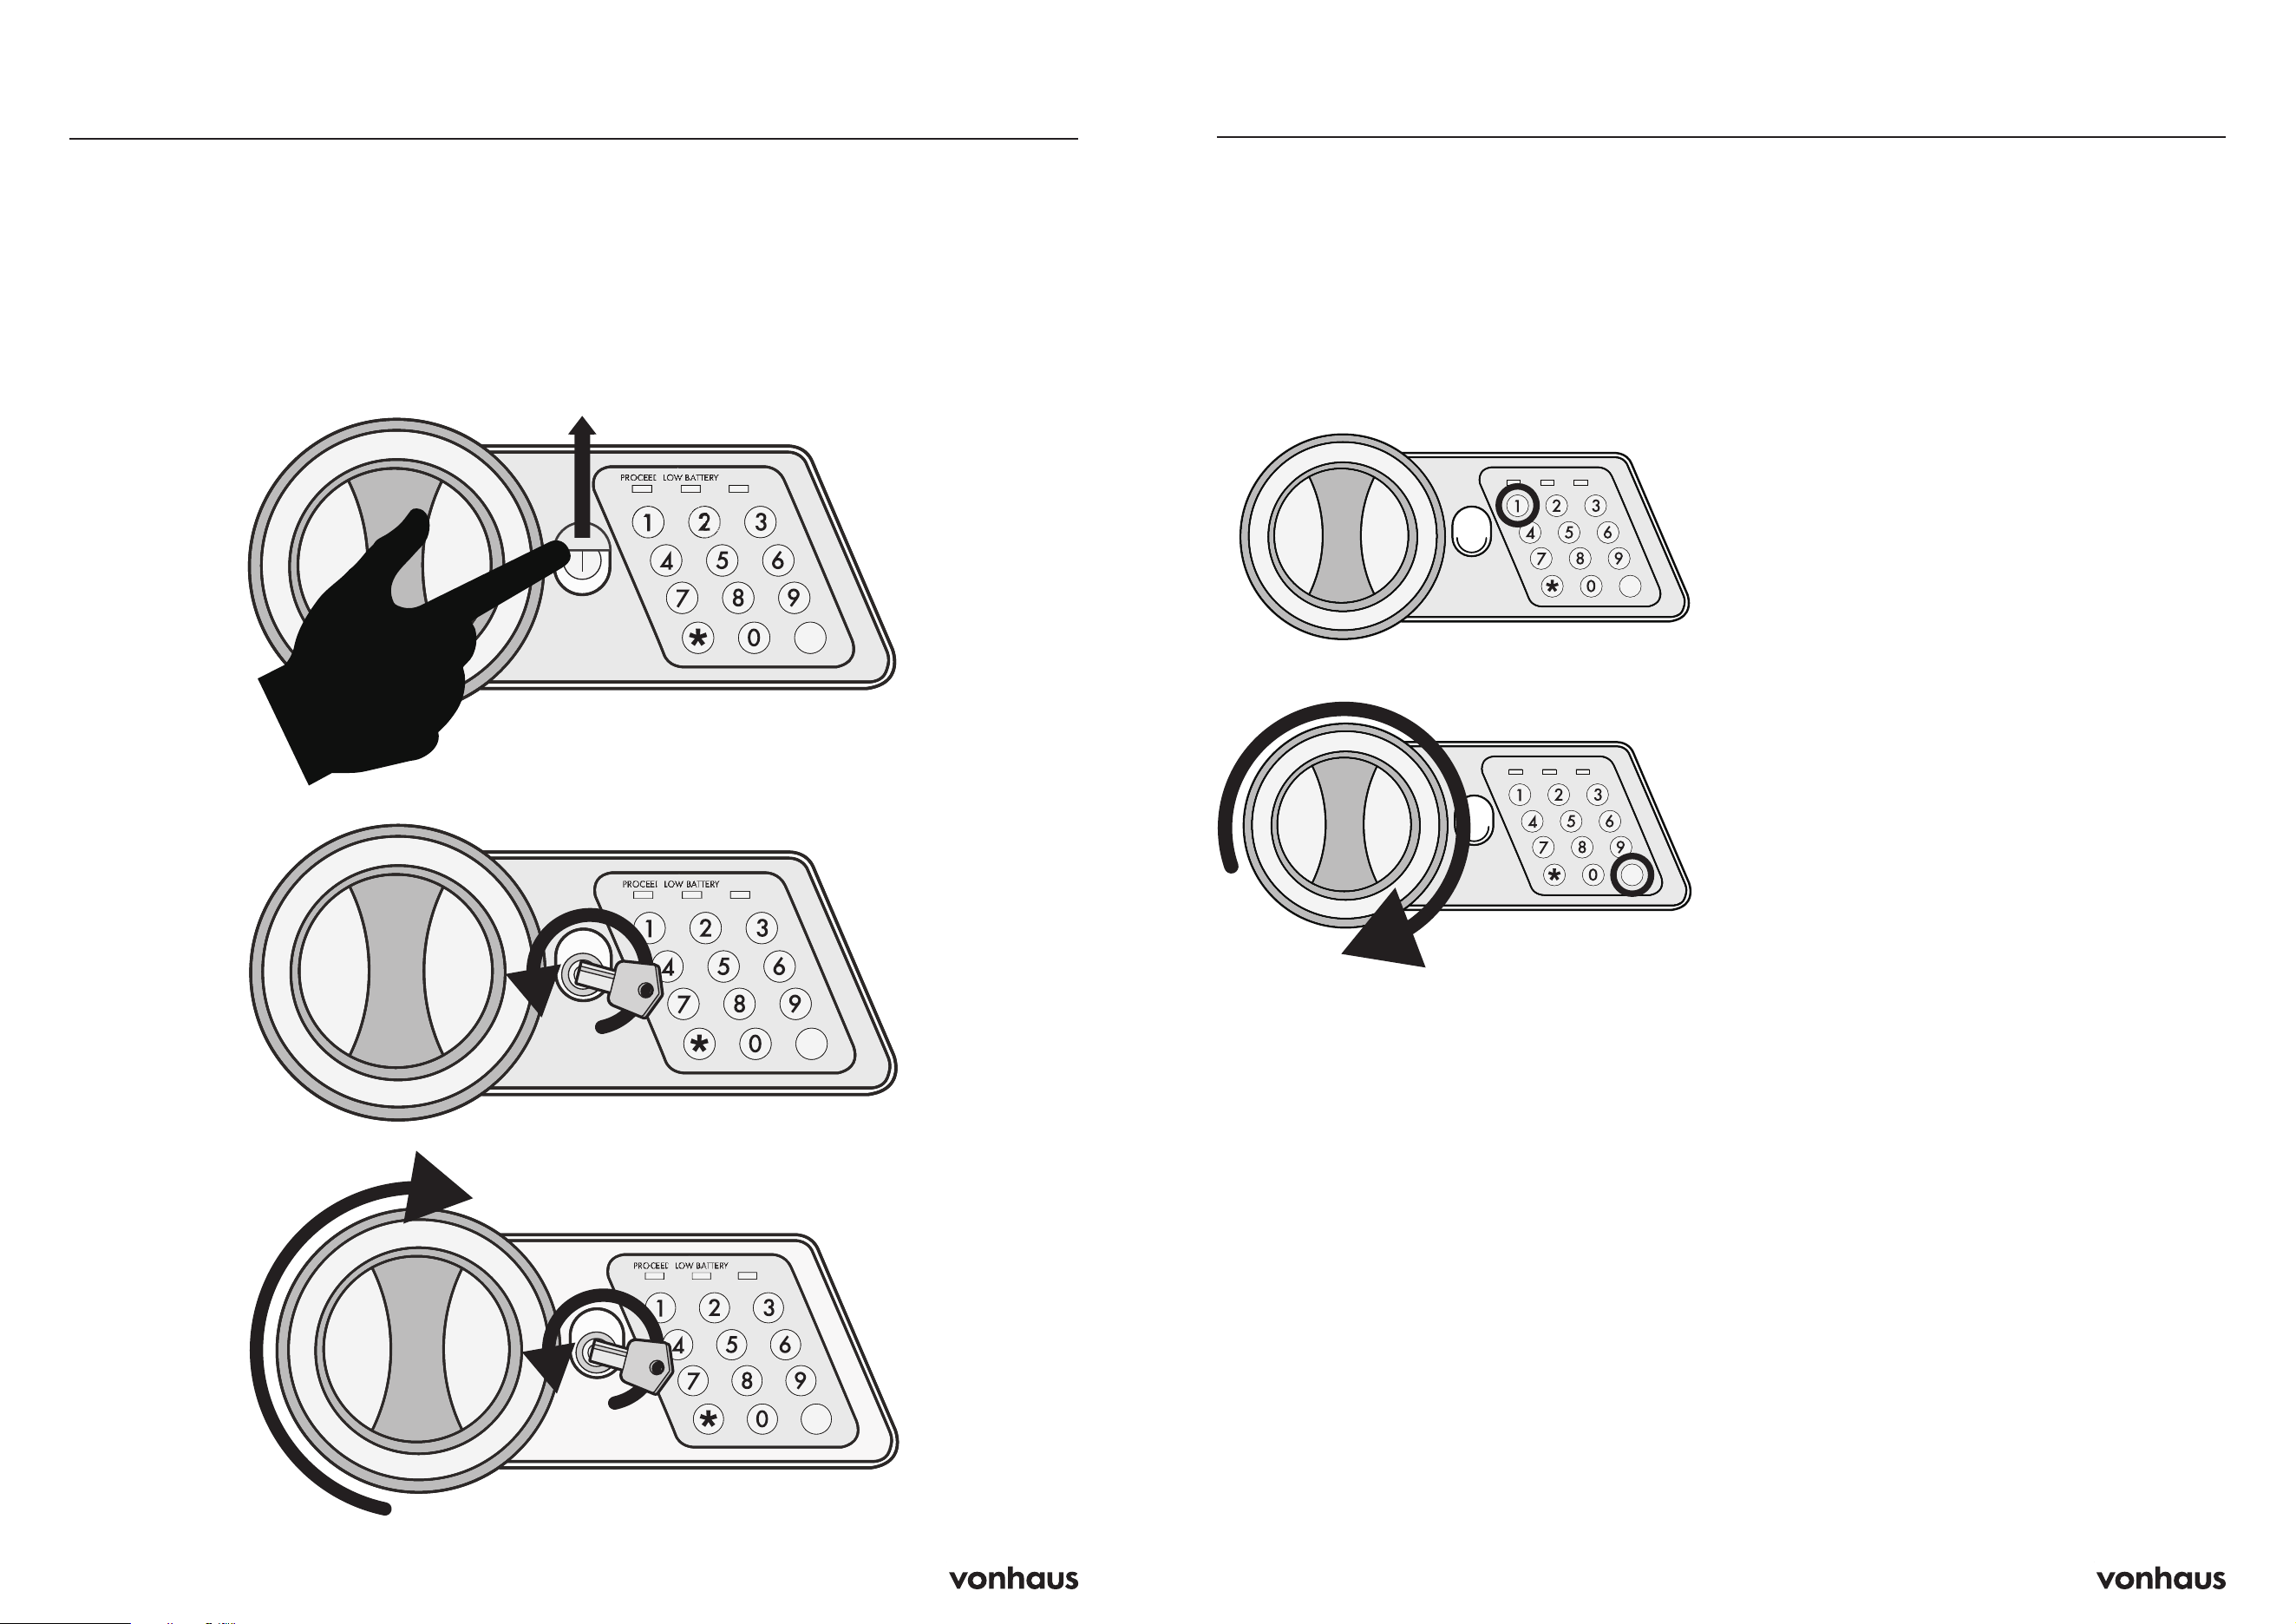
IMPORTANT! You can also use this method
to open the safe if you forget your code or the
electronics fail.
1. Slide the emergency lock cover up to reveal
the key hole.
2. Insert the emergency key and turn it
anticlockwise.
3. Then turn the knob clockwise to open the
door.
Opening for the First Time
#
READY
#
#
LOW BATTERYREADY
#
READY
#
#
LOW BATTERYREADY
PROCEED
PROCEED
#
READY
#
#
LOW BATTERYREADY
#
READY
#
#
LOW BATTERYREADY
PROCEED
PROCEED
#
READY
#
#
LOW BATTERYREADYPROCEED
To Open
1. Enter your code (each number beeps and
flashes yellow)
2. Press “#” (green light turns on)
3. Turn knob right and pull within 5 seconds
To Close
1. Close the door
2. Turn knob left to lock
Automatic Lock
• 3 continuously wrong entries will activate
warning beep for 20 seconds.
• Another 3 continuously wrong entries will
activate the warning beep for 5 minutes.
CAUTION: The keypad would be disabled
during the alarm period. You can only stop
the alarm by opening the safe with emergency
key and power-cut by removing the battery.
Setting the User Code
1. With the door open, press the reset button
once, start setting code when the yellow
light goes on.
2. Input new user code (3 to 8 digits) and
press “#” button to confirm with 2 buzzer
beeps, which indicates the acceptance and
storage of the new code.
3. If the yellow light flashes with 3 buzzer
beeps, which means the code changing is
not effective and you need to try again.
Default code: New safes come set to
“159” - change this immediately!
Mute Mode
Input “00” and “*” to activate mute mode;
input “66” and “*” to cancel mute mode.
Inserting the Batteries
1. Open the door and remove the battery
compartment cover.
2. Insert 4 X AA batteries into the battery
compartment.
3. Under normal use of the safe, the red and
green lights are on when safe unlock, it
means the voltage is low and you should
change new batteries.
CAUTION: Replace 4 fresh batteries by lining
them up in a manner as indicated by the “+”
and “-” signs. When outage for longer than
30 minutes, you should reset the user code!
PROCEED
#
#
PROCEED
PROCEED
LOW BATTERY
LOW BATTERY
READY
READY
#
LOW BATTERY READY
#
#
PROCEED
PROCEED
LOW BATTERY
LOW BATTERY
READY
READY
#
LOW BATTERY READY
PROCEED
PROCEED
Information
PROCEED
#
#
PROCEED
PROCEED
LOW BATTERY
LOW BATTERY
READY
READY
#
LOW BATTERY READY
#
#
PROCEED
PROCEED
LOW BATTERY
LOW BATTERY
READY
READY
#
LOW BATTERY READY
PROCEED
PROCEED
6 7
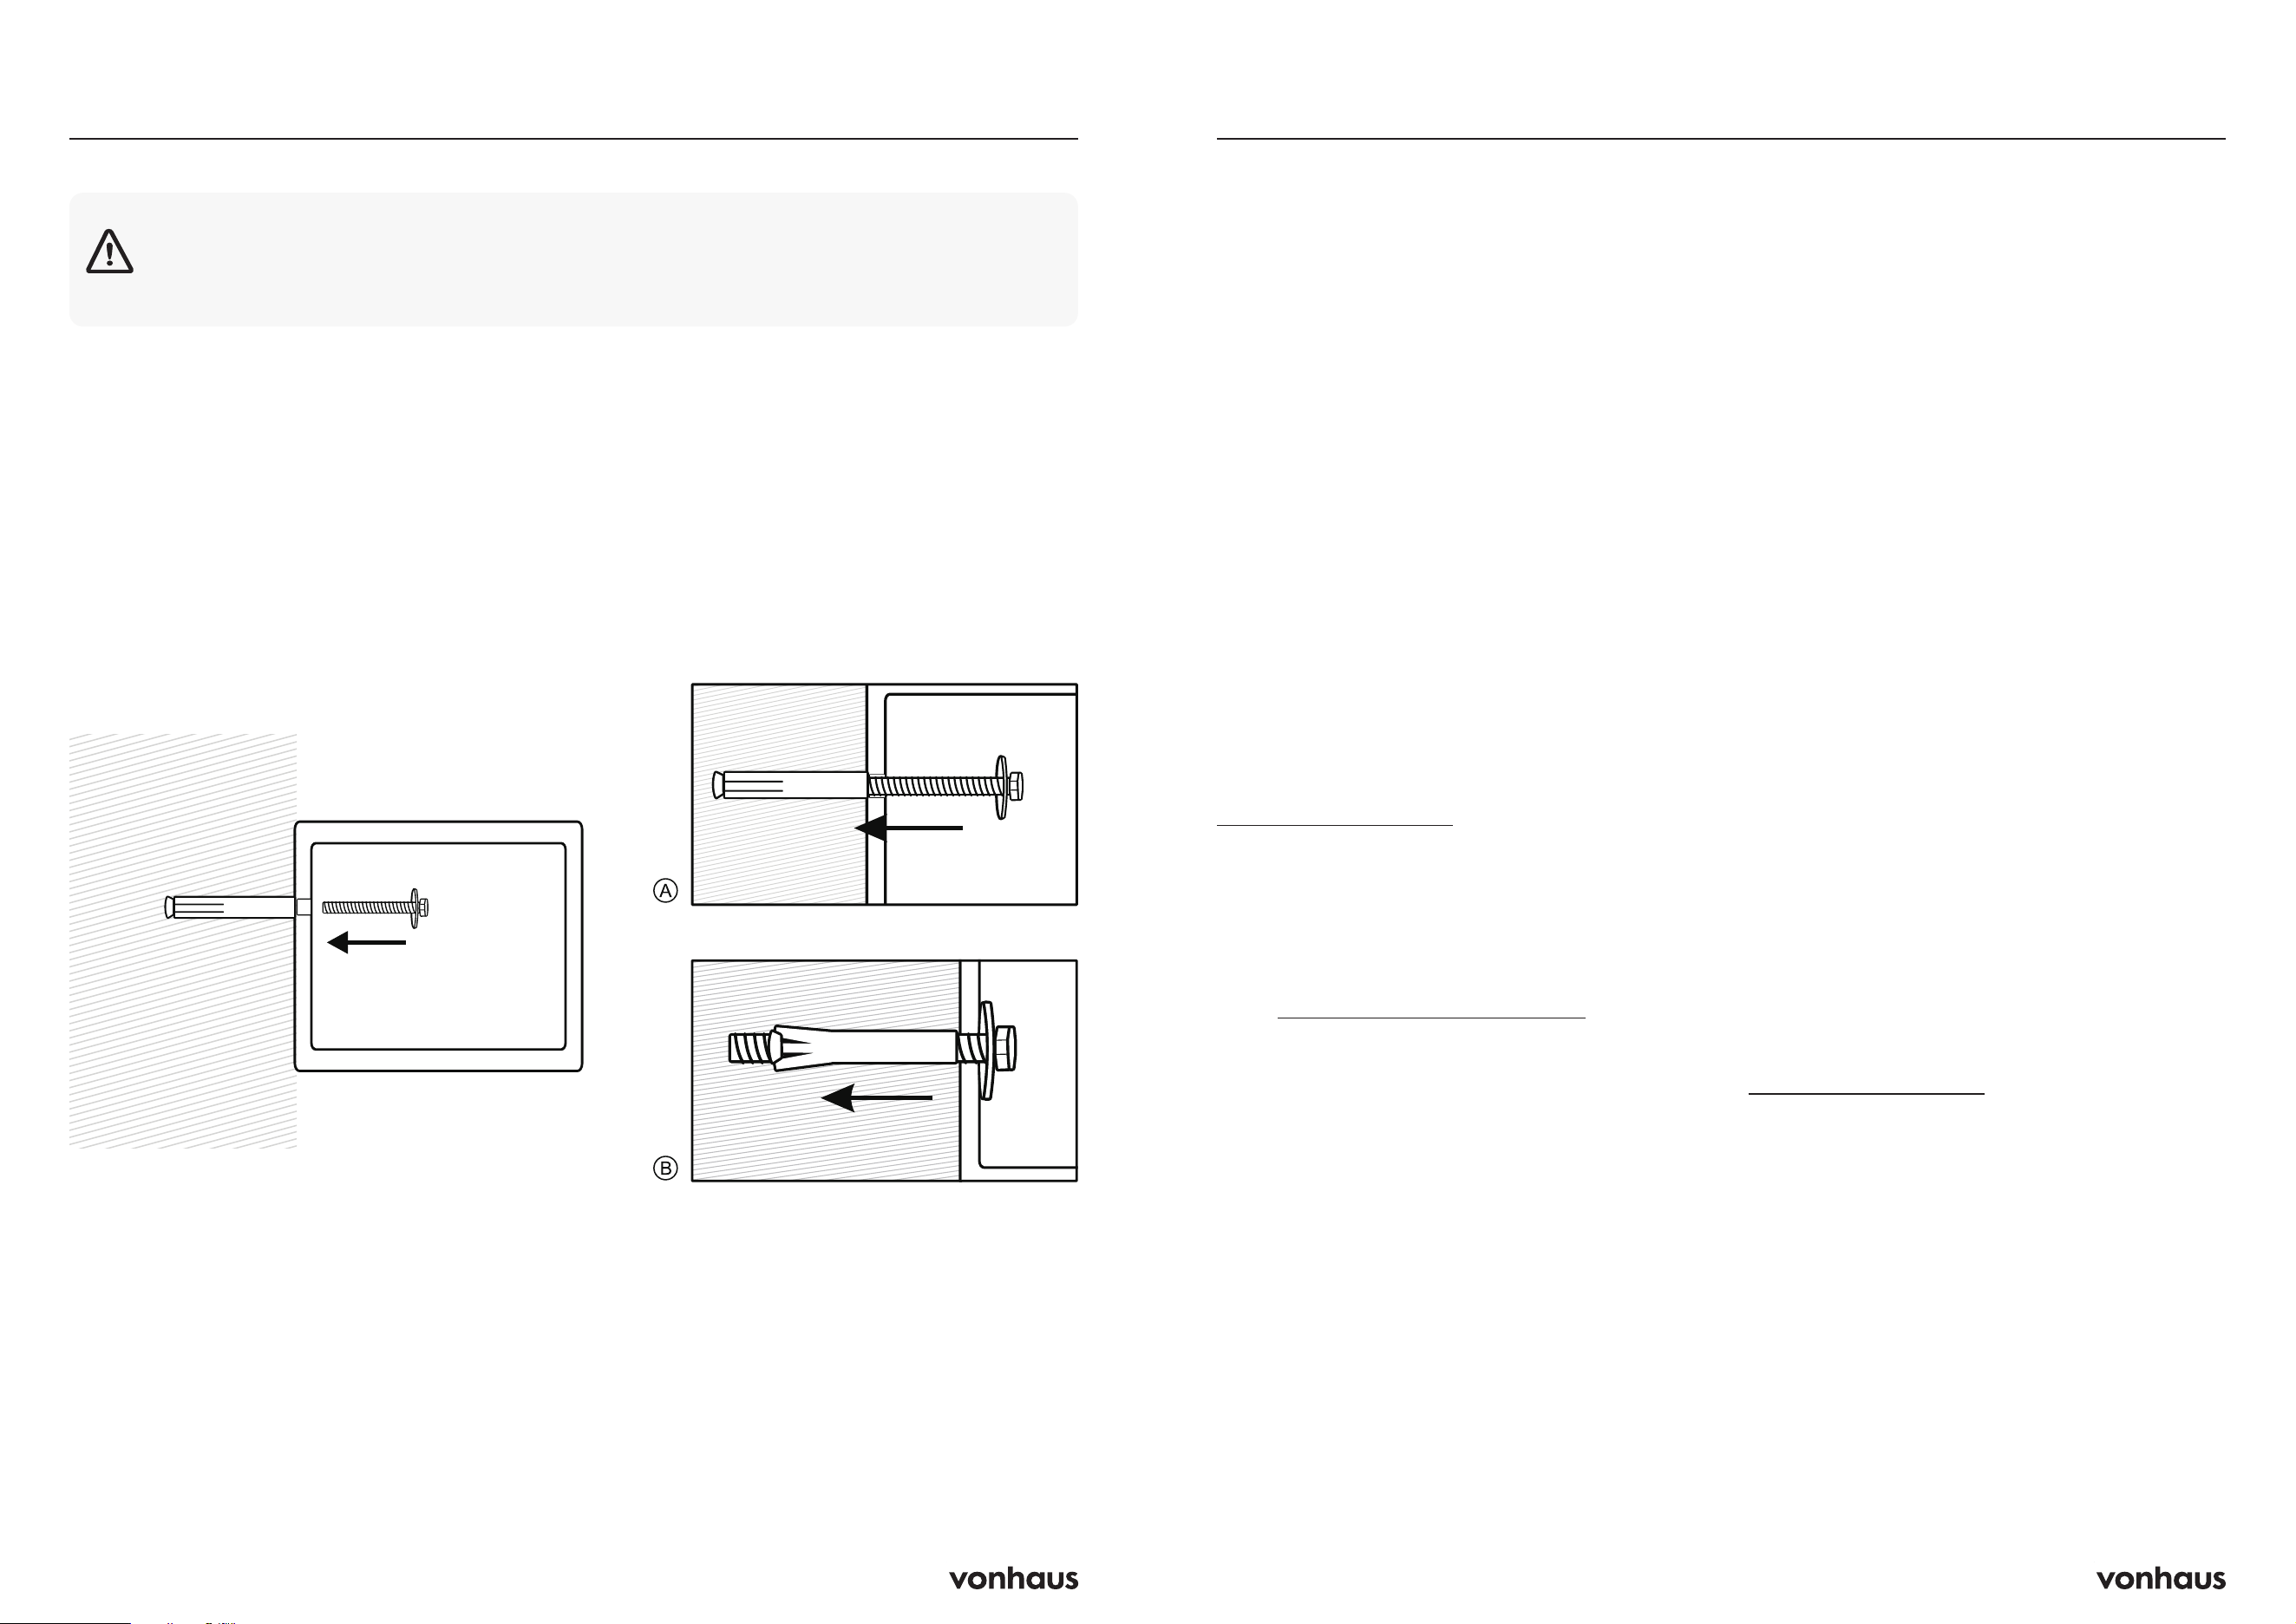
Instructions
1. Fix the safe in the place where it is not easy
to move.
2. Drill holes for expansion bolts (or clamping
screws) in the correct position.
3. Turn the expansion bolts anticlockwise to
separate them.
4. Use the expansion bolts (or clamping
screws) to secure the case to the wall.
5. Make sure the case is mounted in place as
required, then tighten all screws.
Mounting Method
CAUTION: Use expansion bolts when there is a concrete wall surface. Use clamping
screws when there is a wooden wall surface.
Information
Important Safety Notice
This product is not suitable for use by children
or by individuals with physical, sensory, or
mental impairments that may limit their ability
to operate the equipment safely, unless they
have been given supervision or instruction
concerning the safe use of the product by a
person responsible for their safety.
Improper use may result in serious injury.
Always ensure the operator is capable
of understanding and following all safety
instructions provided in this manual.
Customer Service
If you are having difficulty using this product
and require support, please contact
suppor[email protected]
Warranty
To register your product and find out if you
qualify for a free extended warranty please
go to www.vonhaus.com/warranty
Please retain a proof of purchase receipt or
statement as proof of the purchase date.
The warranty only applies if the product is used
solely in the manner indicated in the warnings
page of this manual, and all other instructions
have been followed accurately.
Any abuse of the product or the manner in
which it is used will invalidate the warranty.
Returns
Returned goods will not be accepted unless
re-packaged in its original packaging and
accompanied by a relevant and completed
returns form. This does not affect your statutory
rights.
No rights are given under this warranty to a
person acquiring the appliance second-hand
or for commercial or communal use.
Copyright
All material in this instruction manual are
copyrighted by DOMU Brands.
Any unauthorised use may violate worldwide
copyright, trademark, and other laws.
Thank You
Thank you for purchasing your product/
appliance.
Should you require assistance with your
purchase, please contact us at
suppor[email protected]
VonHaus is a registered trademark of DOMU
Brands Ltd.
Made in China for DOMU Brands Ltd.
Unit 30, Stakehill Industrial Estate
Middleton, Manchester, M24 2RW
EU Authorised Representative
Authorised Representative Service
77 Camden Street Lower
Dublin, D02 XE80
Ireland
Product No. 3515437
Let’s get started!
Visit our product hub for
useful tips and tricks on
getting the most out of
your new product.
SCAN ME