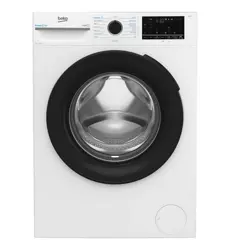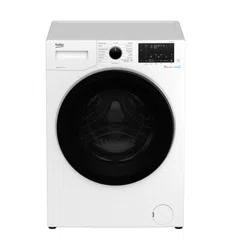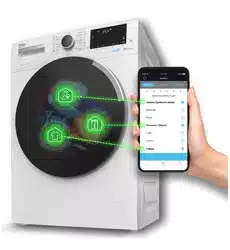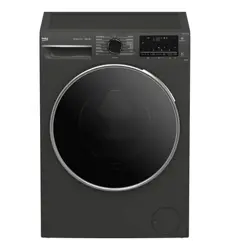
Washing Machine
User Manual
BFLB123ADG
2820533956/ EN/ / 25.12.2025 19:42
EN / 2
Please read this user manual first!
For more information, you can access the digital user manual by scan-
ning the QR code.
Dear customer,
Thank you for choosing Beko product.
We want your product, manufactured with high quality and technology, to provide you with
the best possible performance. To do this, please read the entire manual and other
provided documentation carefully before using the product.
Please follow all the warnings and information in the user manual to protect yourself and
your product from potential dangers.
Keep the user manual. If you give the product to someone else, provide the user manual as
well. The warranty terms, usage and troubleshooting methods for your product are in-
cluded in the manual.
Symbols and Definitions
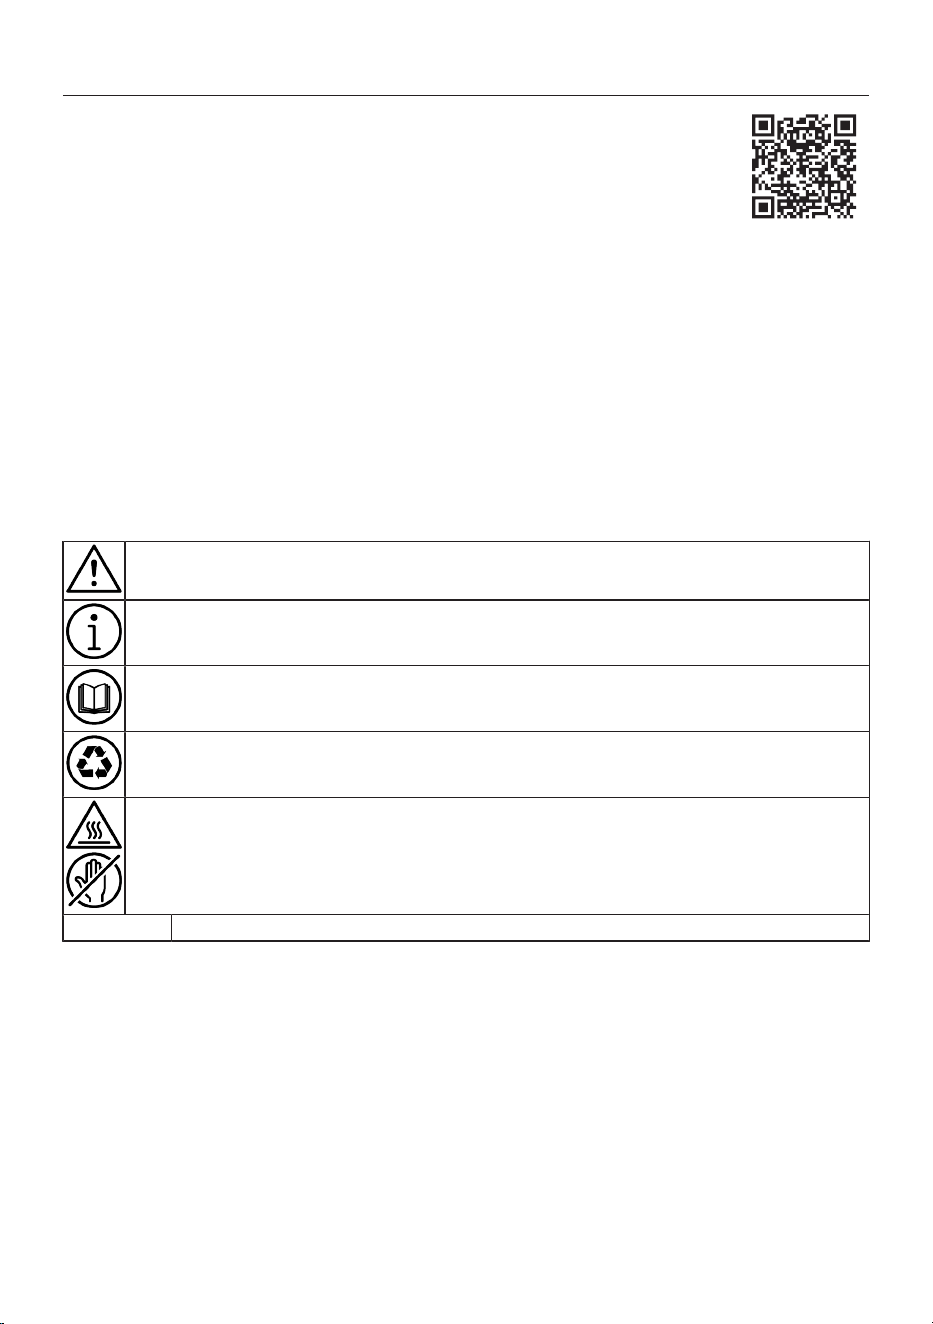
The following symbols appear in the user manual:
Danger that could result in death or injury.
Important information or useful tips for use.
Read the user manual.
Recyclable material.
Hot surface.
NOTICE Danger that could result in property damage to the product or its surroundings.
EN / 3
1 Safety Instructions
This section contains safety in-
structions to help prevent per-
sonal injury or property damage.
Our company cannot be held re-
sponsible for any damages that
may occur if these instructions
are not followed.
• Always have installation and
repairs done by an authorized
service.
• Use only original spare parts
and accessories.
• Do not repair or replace any
part of the product unless ex-
pressly stated in the user
manual.
• Do not make technical
changes to the product.
1.1 Intended Use
• This product is designed for
household use. It is not inten-
ded for commercial use. Do
not use the product for any
other purpose.
• Use only for washing and rins-
ing textiles with the appropri-
ate marking.
• This product is designed for in-
door use, such as in homes
and similar locations. For ex-
ample;
– Staff kitchens of stores, of-
fices and other work environ-
ments,
– Farmhouses,
– By customers of hotels, mo-
tels and other accommoda-
tion facilities,
– Bed and breakfast establish-
ments, hostel-like environ-
ments,
– Common areas of apartment
blocks or laundries.
1.2 Safety of Children,
Vulnerable Persons
and Pets
• This product may be used by
children aged 8 years and
older and persons with re-
duced physical, sensory or
mental capabilities or lack of
experience and knowledge if
they have been given supervi-
sion or instruction concerning
use of the product in a safe
way and understand the haz-
ards involved.
• Children under the age of 3
should be kept away unless
continuously supervised.
• Electrical products are danger-
ous for children and pets. Chil-
dren or pets should not play
with, climb on top or inside the
product. Check inside the
product before use.
EN / 4
• Use child lock to prevent chil-
dren from interfering with the
product.
• Do not forget to close the load-
ing door when leaving the
room where the product is loc-
ated. Children and pets may
get locked inside and drown.
• Children should not perform
cleaning and user mainten-
ance works without an adult’s
supervision.
• Keep the packaging materials
away from children. Risk of in-
jury and suffocation.
• Keep all detergents and addit-
ives used for the product out
of children's reach.
• Cut the power cable and break
and deactivate the locking
mechanism of the loading
door before disposing of the
product for children’s safety.
1.3 Electrical Safety
• Product should be unplugged
during installation, mainten-
ance, cleaning and repair pro-
cedures. Unplug the product or
turn off the fuse.
• Damaged power cables should
be replaced by the authorised
service in order to prevent pos-
sible danger.
• Do not tuck the power cord un-
der the product or to the rear
of the product. Do not put
heavy items on the power
cord. Do not bend, crush, or ex-
pose the power cable to heat
sources.
• Only use the original cable. Do
not use cut or damaged
cables.
• Do not use an extension cord,
multi-plug or adaptor to oper-
ate your product.
• Extension cords, multi-socket
outlets, adapters or portable
power supplies can overheat
and cause a fire. Make sure
not to place power sockets
and portable power supplies
near or behind the product.
• The plug shall be easily ac-
cessible. If this is not possible,
a mechanism that meets the
electrical legislation and that
disconnects all terminals from
the mains (fuse, switch, main
switch, etc.) shall be available
on the electrical installation.
• Do not touch the plug with wet
hands.
• When unplugging the product,
do not hold the power cord, but
the plug.
• Make sure the plug is not wet,
dirty or dusty.
EN / 5
• Never connect your product to
electricity saving devices. Such
systems are harmful to the
product.
1.4 Handling Safety
• Unplug the product before
moving, remove the water out-
let and water main connec-
tions. Drain any water left in-
side the product.
• This product is heavy, do not
handle it by yourself. It may
cause injuries if your product
falls on you. Do not hit and
drop the product while carry-
ing.
• Do not hold parts such as the
laundry loading door to lift and
move the product. The upper
tray should be tightly fixed for
moving.
• Carry the product in an upright
position. If it cannot be carried
upright, tilt it to the right side in
frontal view.
• Make sure that the hoses as
well as the power cable are not
folded, pinched or crushed
after the product is fitted into
its place after installation or
cleaning procedures.
• While the detergent drawer is
filled with detergent and/or
softener:
– Do not pull the product.
– Do not relocate the product.
– Do not tilt the product side-
ways or backwards.
– Before doing the above,
make sure to remove the de-
tergent drawer from the ma-
chine.
1.5 Installation Safety
• Check the information in the
manual and installation in-
structions to prepare the
product for installation and
make sure the electrical mains,
clean water mains and water
outlet are suitable. If not, call a
qualified electrician and
plumber to have them make
the necessary arrangements.
These operations are the re-
sponsibility of the customer.
• Prior to commencing the in-
stallation, be sure to switch off
the fuse to deactivate the
power supply for the line to
which the product will be con-
nected.
• This product is intended for
use at altitudes not exceeding
2000 meters above sea level.
• Check the product for any
damage before installing it.

EN / 6
• Always wear personal protect-
ive equipment (gloves, etc.)
during product installation,
maintenance and repair. There
is a risk of injury.
• Injuries may occur if hands are
put into uncovered slots. Close
the holes of the transportation
safety bolts with plastic plugs.
• Do not install or leave the ap-
pliance in areas exposed to en-
vironmental conditions like
rain or sunlight.
• Do not install the product at
locations where the temperat-
ure drops below 0 ºC.
• Do not place the product on a
carpet or similar surface. It
would create fire hazard since
it cannot receive air from un-
derneath.
• Place the product on a level
and hard surface and balance
with the adjustable feet.
• Connect the product to a
grounding plug protected by a
fuse suitable to the current val-
ues on the type label. Make
sure the grounding is carried
out by an expert electrician. As
required by local and national
regulations, do not use the
product without proper ground-
ing.
• Plug the product in a socket
with voltage and frequency val-
ues suitable to those indicated
on the type label.
• Do not plug the product into
loose, broken, dirty, greasy, or
water-damaged sockets.
• Use the new hose set provided
with the product. Do not re-use
old hose sets. Do not extend
the hoses.
• Connect the water inlet hose
directly to the water tap. The
pressure from the tap should
be minimum 0.1 MPa (1 bar)
and maximum 1MPa (10 bars).
10 to 80 litres of water should
be running from the tap in a
minute in order for the product
to function properly. If the wa-
ter pressure is above 1 MPa
(10 bars), a pressure-reducing
valve should be fitted. The
maximum allowed temperat-
ure is 25°C.
• It is recommended to attach a
pressure reducing valve if you
experience overflow from the
detergent dispenser during wa-
ter fill between 3.5 to 10 bars
(0.35 to 1 MPa).
• Fit the end of the water dis-
charge hose to the wastewater
drain, the sink or the bathtub.
EN / 7
• Place the power cable and
hoses in locations without risk
of tripping.
• Do not install the product be-
hind a door, a sliding door or at
another location that will pre-
vent the door from opening
completely.
• If a dryer is to be placed on the
product, fix with a suitable con-
nection apparatus obtained
from the authorised service.
• There is a risk of contact with
electrical components when
the upper tray is removed. Do
not dismantle the upper tray of
the product.
• Keep the appliance at least 1
cm from furniture.
1.6 Operational Safety
• When you are using the
product, use only detergents,
softeners, and additives suit-
able for washing machines.
• Do not use chemical solvents
on the product. These materi-
als contain an explosion risk.
• Do not operate defective or
damaged products. Unplug the
product (or turn off the fuse it
is connected to), turn off the
water tap and call an author-
ised service.
• Do not place sources of igni-
tion (burning candle, cigar-
ettes, etc.) or sources of heat
(irons, cooktops, ovens, etc.)
on top of or near the product.
Do not put inflammable/ex-
plosive materials near the
product.
• Do not stand or climb on the
product.
• Unplug the product and turn
off the tap if you will not be us-
ing the product for long peri-
ods.
• Avoid opening the detergent
drawer while the product is
running to prevent splashes.
Contact of the detergent with
your skin and eyes is danger-
ous.
• Make sure pets do not climb
inside the product. Check in-
side the product before use.
• Do not force open the locked
loading door. The door will
open once the washing is com-
pleted. If the door does not
open, use the solutions for
“loading door does not open”
error in the Troubleshooting
section.
• Do not wash items contamin-
ated with gasoline, kerosene,
benzene, reducers, alcohol or
other inflammable or explosive
materials and industrial chem-
icals.
EN / 8
• Do not directly use dry clean-
ing detergent and do not wash,
rinse or spin laundry contamin-
ated with dry cleaning deter-
gent.
• Do not place your hands into
the rotating drum. Wait until
the drum no longer rotates.
• If washing laundry at high tem-
peratures, the discharged
washing water would burn your
skin if in contact with your
skin, for ex. when the draining
hose is connected to the tap.
Do not touch the discharge wa-
ter.
• Take the following precautions
to prevent formation of biofilm
and malodours:
– Make sure the room where
the product is placed is well
ventilated.
– Wipe the door gasket and
loading door glass with a dry
and clean cloth at the end of
the programme.
• The glass of the loading door
will heat up when washing at
high temperatures. To avoid
burns, do not touch the loading
door glass and keep children
away from the product during
operation.
• Before disposing of old and in-
operable products:
1. Unplug the power plug and
remove it from the socket.
2. Cut the power cable and dis-
connect it with the plug from
the product.
3. Break the locking mechanism
of the loading door to render
it inoperable.
4. Do not allow children to play
with the discarded product.
1.7 Maintenance and
Cleaning Safety
• Before cleaning or servicing
the product, unplug it or cut
the power at the fuse.
• If you need to move the
product for cleaning, do not
pull on the loading door. The
door can break and cause in-
jury!
• Do not put hands, feet and
metal objects under or behind
your product. This can cause
jams, and any sharp edge can
cause personal injury.
• Use a clean, dry cloth to wipe
foreign material or dust from
the plug ends. When cleaning
the plug, do not use a wet or
damp cloth. Otherwise, there is
a risk of fire or electric shock.
EN / 9
• Do not wash the product with
pressure washers, by spraying
vapour, water or pouring water.
There is a risk of electrocution.
• Do not use sharp or abrasive
tools to clean the product. Do
not use household cleaners,
soap, detergent, gas, gasoline,
thinner, alcohol, varnish, etc.
while cleaning.
• Cleaning agents containing
solvents (e.g. cleaning solvent)
might reek poisonous fumes.
Do not use cleaning products
containing solvents.
• There may be detergent
residues in the detergent
drawer when you open it for
cleaning.
• Do not dismantle the filter of
the discharge pump while the
product is running.
• The temperature in the product
may rise up to 90ºC. Clean the
filter after the water in the
product cools down in order to
avoid risk of getting burnt.
2 Important Instructions for Environment
2.1 Compliance with WEEE Direct-
ive
This product complies with EU
WEEE Directive (2012/19/EU).
This product bears a classifica-
tion symbol for waste electrical
and electronic equipment
(WEEE).
This product has been manufactured with
high quality parts and materials which can
be reused and are suitable for recycling. Do
not dispose of the waste product with nor-
mal domestic and other wastes at the end
of its service life. Take it to the collection
center for the recycling of electrical and
electronic equipment. Please consult your
local authorities to learn about these collec-
tion centers.
Compliance with RoHS Directive:
The product you have purchased complies
with EU RoHS Directive (2011/65/EU). It
does not contain harmful and prohibited
materials specified in the Directive.
2.2 Package Information
Packaging materials of the product are
manufactured from recyclable materials in
accordance with our National Environment
Regulations. Do not dispose of the pack-
aging materials together with the domestic
or other wastes. Take them to the pack-
aging material collection points designated
by the local authorities.
3 Technical Specifications
Nominal Capacity (kg) 12
4 Installation
Please read the “Safety Instruc-
tions” section first!
EN / 10
Your product automatically detects
the amount of laundry placed inside
when selecting a programme.
While installing the product, before the first
use, calibration should be done to ensure
that the laundry amount is detected in the
most accurate way.
To do this, select the Drum Cleaning* pro-
gramme and cancel the spin function. Start
the programme without laundry. Wait for
the programme to finish, which will take
about 15 minutes.
*The programme name may vary depend-
ing on the model. For the appropriate pro-
gramme selection, review the programme
descriptions section.
• Preparation of the location and electrical,
tap water and wastewater installations at
the place of installation is under cus-
tomer's responsibility.
• Make sure that the water inlet and dis-
charge hoses as well as the power cable
are not folded, pinched, or crushed while
pushing the product into its place after
installation or cleaning procedures.
• Prior to installation, visually check if the
product has any defects on it. Do not
have the product installed if it is dam-
aged. Damaged products cause risks for
your safety.
4.1 Installation of Bottom Panel
Covers
With some models, the base parts
of the products are completely
closed. These models do not have
cap or covers.
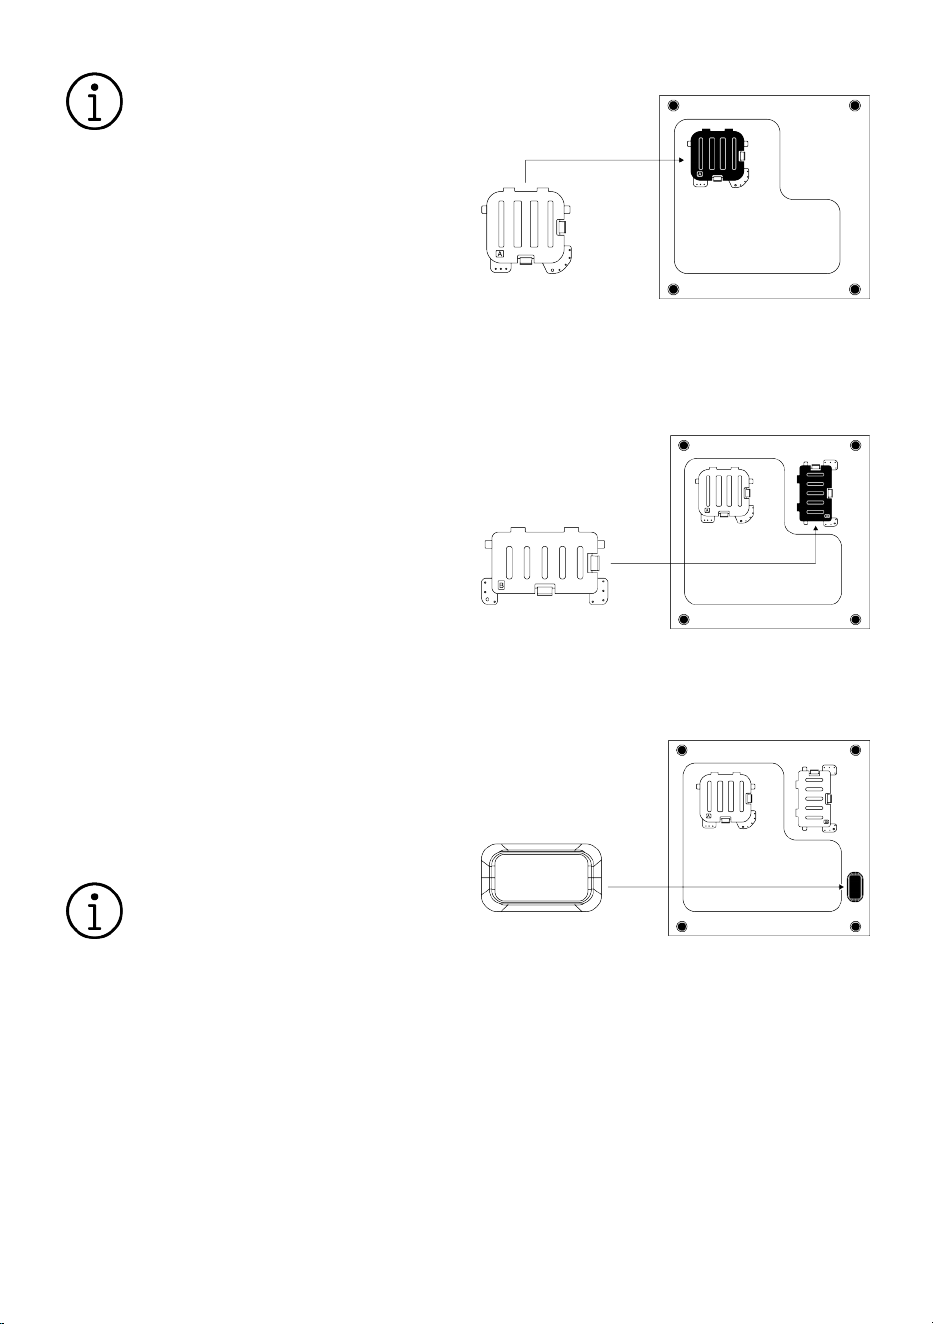
• Cap and Covers are optional. If present,
remove the packaging foam and then in-
stall the cap and covers.
Cover A
Tilt the machine back slightly. Place the
tabs of Cover A against the bottom panel.
Rotate the cover to complete the installa-
tion.
Cover B
Place the tabs of Cover B against the bot-
tom panel. Rotate the cover to complete
the installation.
Cap
Install the cap by pushing it with your fin-
ger.
4.2 Removing Transportation Safety
Bolts
1. Loosen all transportation safety bolts
with an appropriate wrench until they
turn freely.
2. Bend the inner part by pressing it at the
grip areas and pull the part out.
EN / 11
3. Attach the plastic covers supplied in the
User Manual bag into the holes on the
rear panel.
NOTICE
Remove the transportation safety
bolts before operating the product.
Otherwise, the product will get
damaged.
NOTICE
Keep the transportation safety
bolts in a safe place to reuse when
the product needs to be moved
again in the future.
Install the transportation safety
bolts in reverse order of the disas-
sembly procedure.
Never move the product without the
transportation safety bolts properly
fixed in place.
4.3 Connecting to Water Supply
NOTICE
Models with a single water inlet
should not be connected to the hot
water tap. Laundry may be dam-
aged or the product may go into
protection mode and not work.
Do not use old or used water inlet
hoses on your new product. This
may cause water leakage in your
product and stains on your laundry.
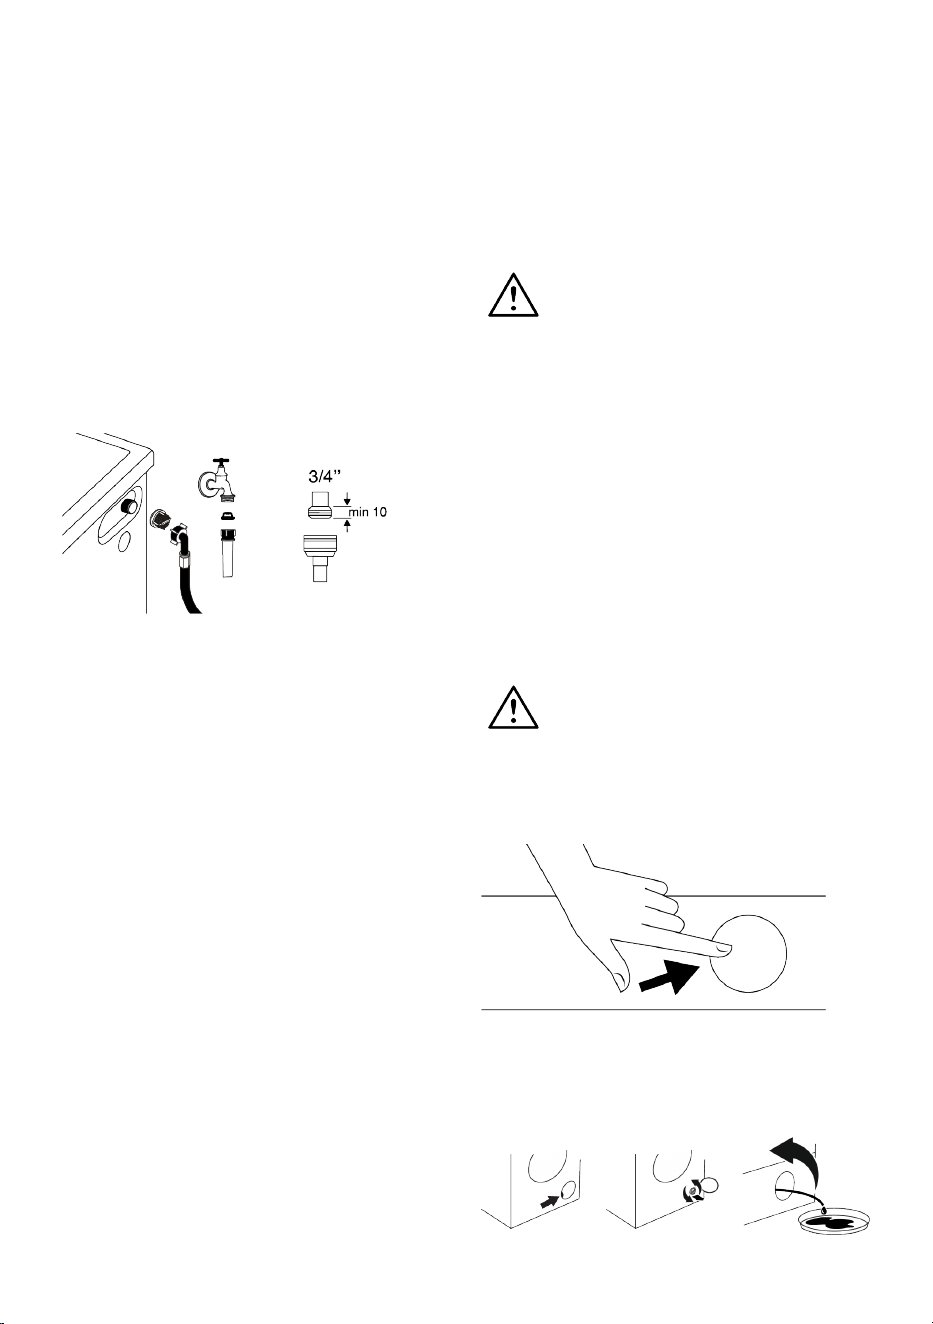
1. Tighten all hose nuts by hand. Make
sure to tighten all hose connections
completely. Never use a tool when tight-
ening nuts.
2. After completing hose connection, open
the taps all the way and check if there is
any water leakage from the connection
points. In case of a leakage, turn off the
tap and unscrew the nut. Check the seal
and tighten the nut carefully again. To
prevent possible water leaks and dam-
ages that may occur, keep the taps
closed when the product is not in use.
4.4 Connecting the Drain Hose to
the Drain
1. Attach the end of the drain hose directly
to waste water drain, washbasin or
bathtub.
Your house will be flooded if the
water draining hose is dislocated
during water draining. There is also
a risk of burning due to the high
washing temperatures. In order to
prevent such situations and make
sure that the product performs wa-
ter intake and drain processes
without any problem, fix the drain
hose securely.
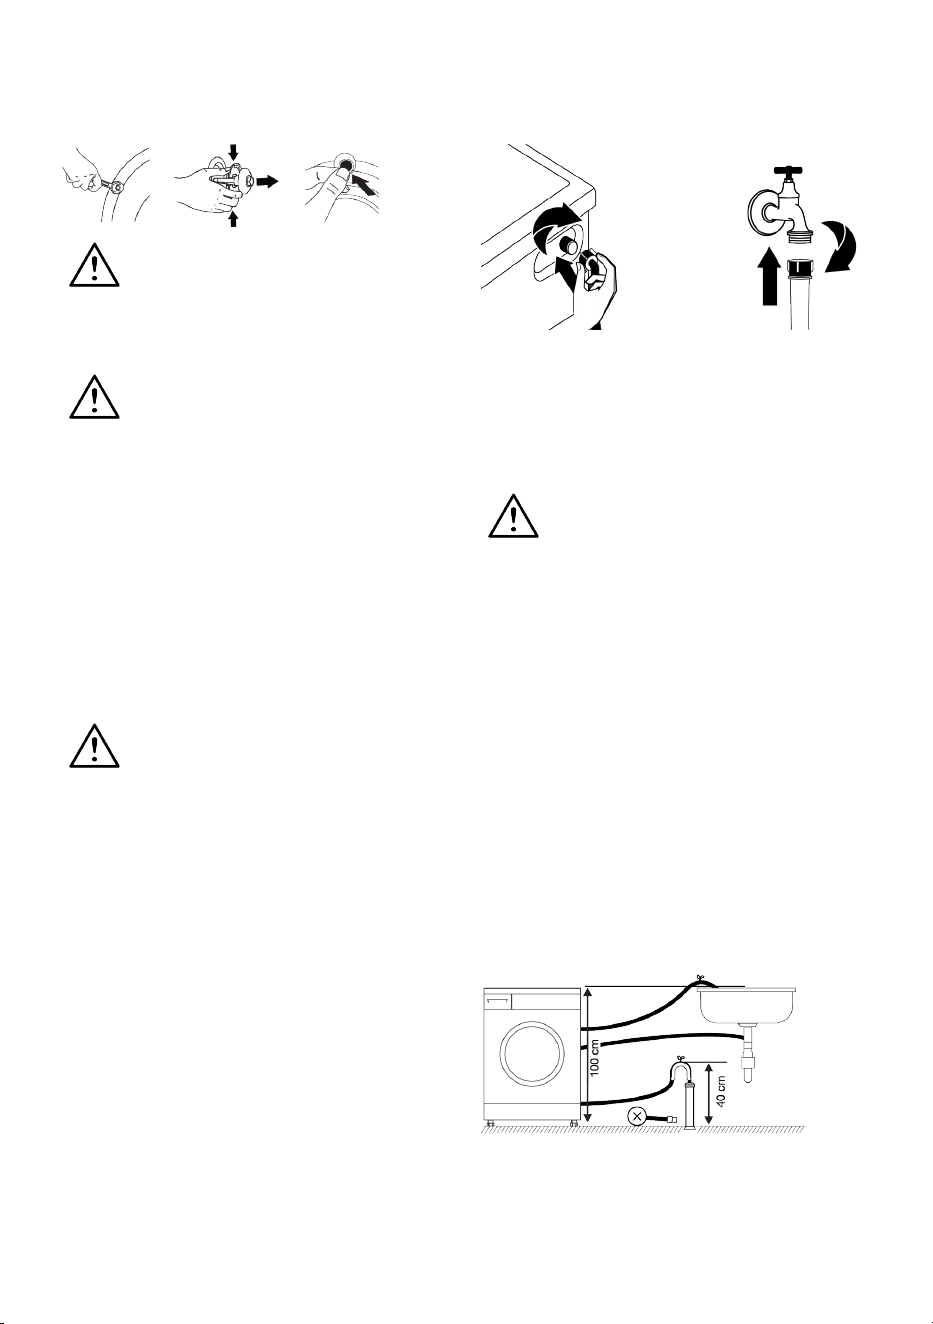
2. Connect the drain hose to a minimum
height of 40 cm and a maximum height
of 100 cm.
3. Installing the water draining hose at
ground level or close to the floor (40 cm
below) and then raising it makes water
discharge difficult and the laundry may
come out extremely wet. Thus, follow
the heights provided in the figure.
4. To prevent the waste water to go back
into the product again and to ensure
easy drainage, do not immerse the end
EN / 12
of the hose into the waste water or do
not insert it into the drain for more than
15 cm. If it is too long, cut it short.
5. The end of the hose should not be bent,
it should not be stepped on and the
hose must not be pinched between the
drain and the product. Otherwise, water
discharge issues may emerge.
6. If the length of the hose is too short, use
it by adding an original extension hose.
The overall length of the hose shall not
be longer than 3.2 m. To prevent water
leaks, always secure the connection
between the extension hose and the
draining hose of the product with a suit-
able clamp so that it does not come off
and cause leaks.
4.5 Adjusting the Feet
NOTICE
In order to ensure that the product
operates more silently and vibra-
tion-free, it must stand level and
balanced on its feet. Adjust the feet
to ensure balance. Otherwise, the
product may move from its place
and cause bumping, noise and vi-
bration problems.
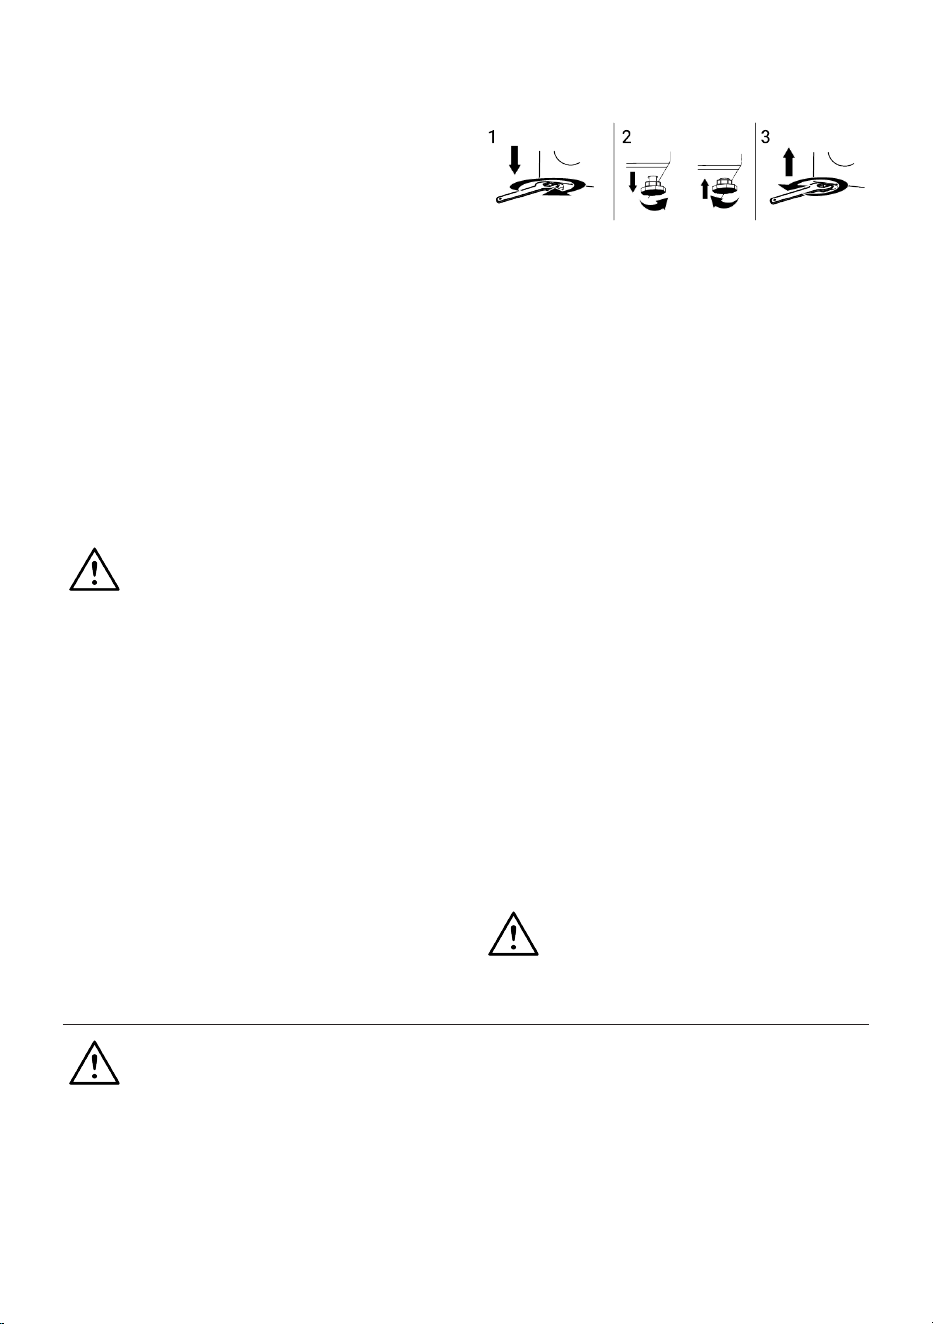
1. To loosen the nuts on the feet, rotate
the nuts clockwise using the hand tool.
2. Adjust the feet until the product stands
level and stable. To lower the feet, ro-
tate them counterclockwise. To raise
the feet, rotate them clockwise.
3. To retighten the nuts, rotate them coun-
terclockwise using the hand tool.
4.6 Electrical Connection
Connect the product to a grounded outlet
protected by a 16-amp fuse. Our company
shall not be responsible for the damages
that shall be incurred due to using the
product without grounding according to
local regulations.
• Connection must comply with national
regulations.
• The electrical connection cable infra-
structure of the product must be ad-
equate and suitable for product require-
ments. It is recommended to use a resid-
ual current device.
• Power cable plug must be within easy
reach after installation.
• If the current supply to the fuse or
breaker in the house is less than 16 amp,
have a qualified electrician install a 16-
amp supply.
• Your mains voltage must comply with the
voltage specified in the “technical spe-
cifications” section.
• Do not make connections via extension
cables or multi-plugs. Overheating and
burning may occur due to the connecting
cable.
Damaged power cables should be
replaced by the authorised service
in order to prevent possible danger.
5 Operating the Product
Please read the “Safety Instruc-
tions” section first!
EN / 13
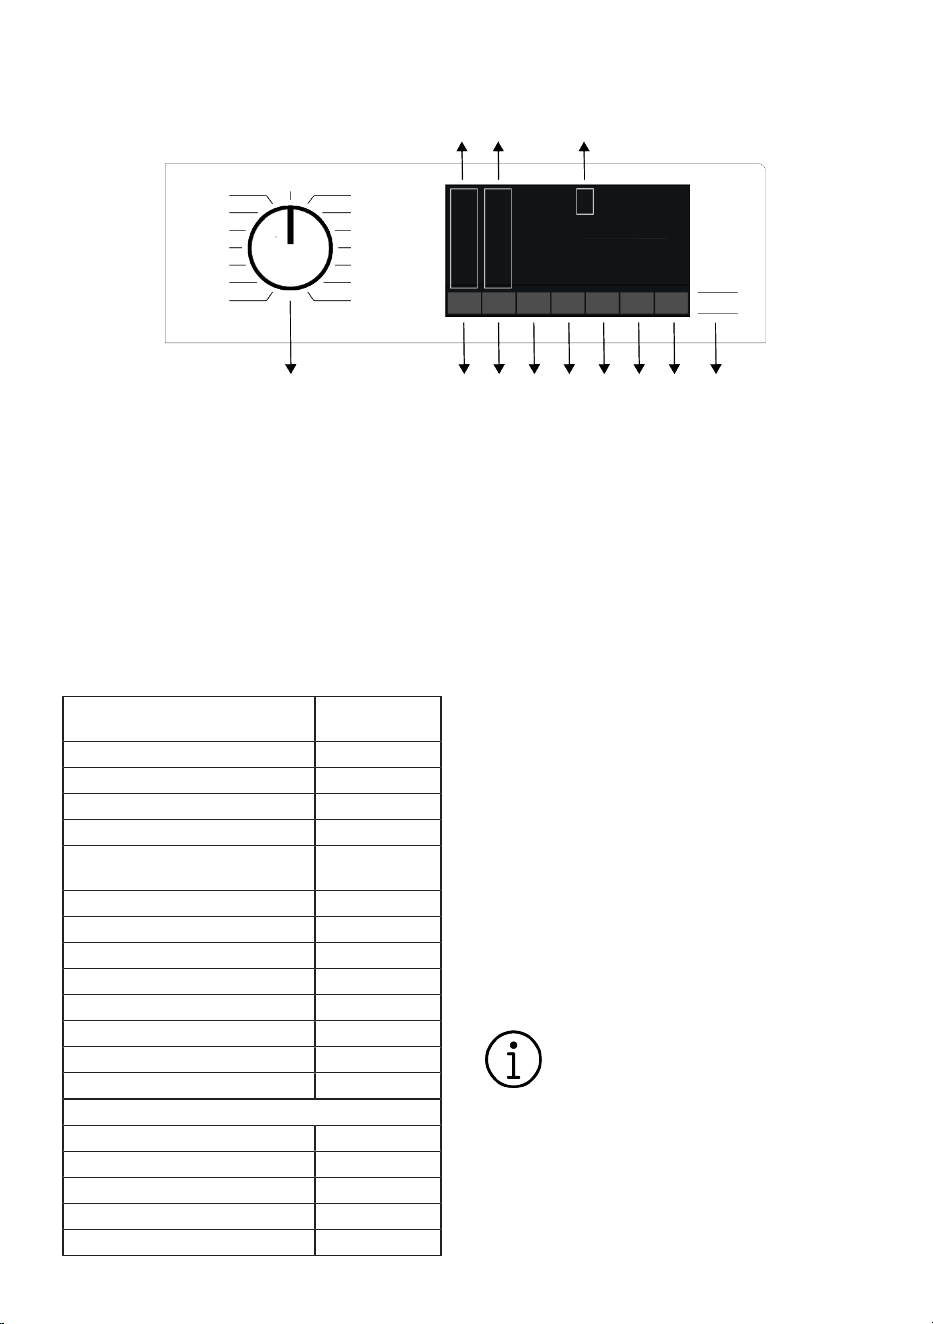
5.1 Control Panel
1
2 3 4
56789101112
1 Program Selection Button 2 Temperature Level Lights
3 Spin Speed Indicator Lights 4 Screen
5 Start/Pause (Start 1) Button 6 Remote Control Button
7 End Time Setting (Start 2) Button 8 Auxiliary Function Button 3
9 Auxiliary Function Button 2 10 Auxiliary Function Button1
11 Spin Speed Adjustment Knob 12 Temperature Adjustment Button
5.2 Program Table
Program
Maximum load
(kg)
Cottons 12,0
Cottons Eco ** 12,0
Synthetics 5,0
Daily/Quick/Quick 14’ 12,0
Daily/Quick/Quick 14’ + Fast/In-
tensive
2,0
Wool/Hand Wash 2,5
Shirts 5,0
Drum Clean -
Bedding -
Hygiene+ 9,0
Steam Refresh 1,0
ColdWash 6,0
Auto Program -
Downloaded Program *****
Outdoor/Sports 5,5
Towel 4,0
Soft Toys 2,0
Dark Care/Jeans 6,0
Underwear 2,0
- : See programme description for max-
imum load.
** : Energy label programme (AS/NZS
2040)
*****: These programs can be used with the
HomeWhiz app. Energy consumption may
increase due to connection.
5.3 Programme Selection
1. According to the "Programme table", de-
termine the programme suitable for the
type, quantity and dirt level of the laun-
dry.
Programs are limited to the highest
spin speed suitable for the fabric
type.
When choosing the program you
will use, always take into considera-
tion the fabric type, color, degree of
soiling and allowed water temperat-
ure.
EN / 14
2. Select the desired program using the
Program Selection button.
5.4 Starting the Program
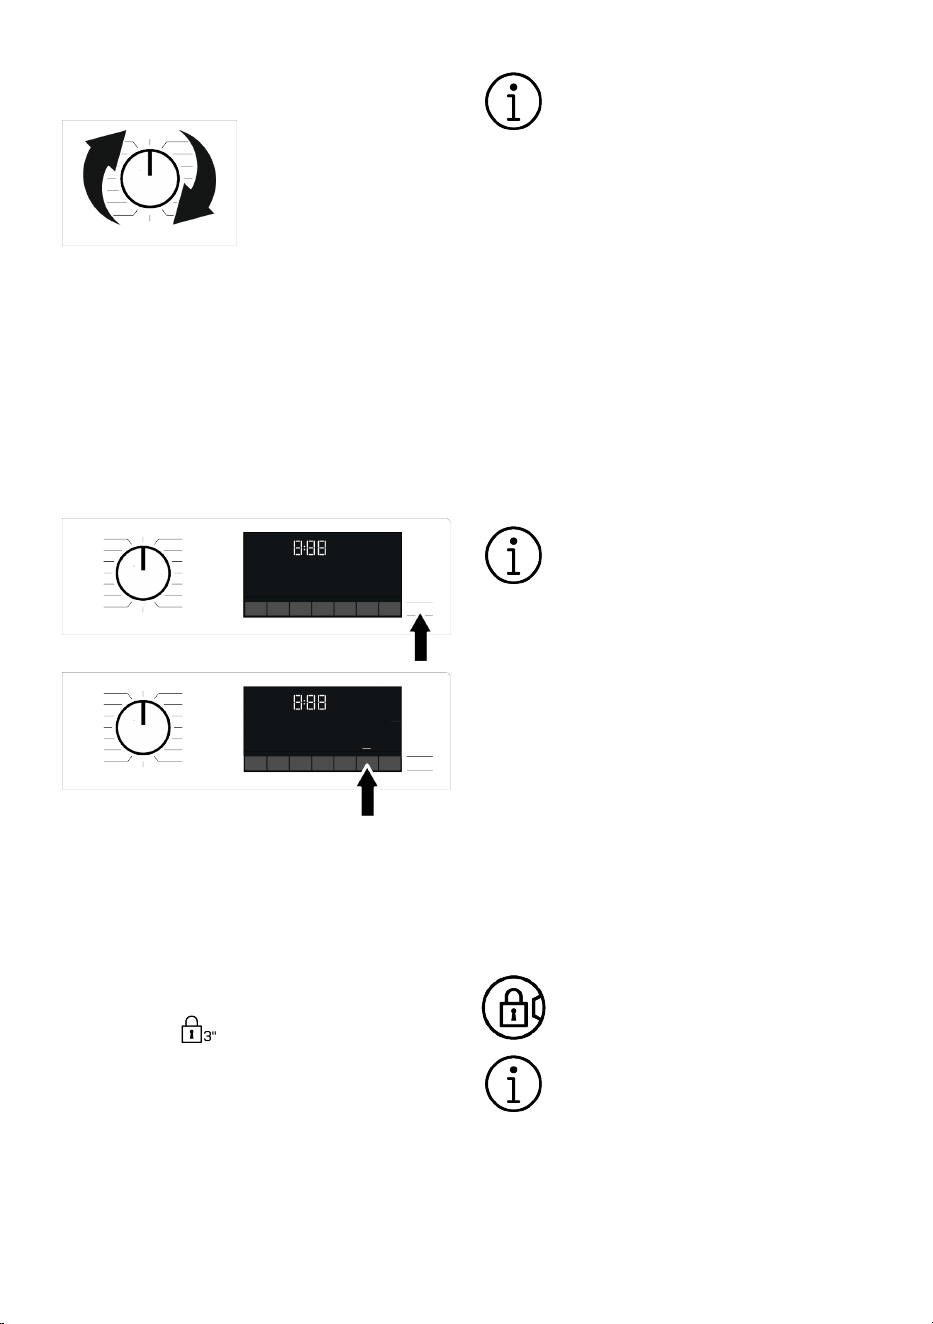
• To start the program, press the Start/
Pause (Start 1) button for about 1
second. The Start/Pause LED and the
Door Lock LED will begin to flash. Then
press the End Time Setting (Start 2) but-
ton.
• The Start/Pause button's dim light now
glows constantly, indicating that the pro-
gram has started.
• The loading door is locked. After the
loading door is locked, the door lock sym-
bol appears on the screen.
• The program follow-up indicator lights on
the screen show the current program
step.
5.5 Child Lock
• Child Lock
Use Child Lock function to prevent children
from tampering with the product. Thus you
can avoid any changes in a running pro-
gramme.
You can switch on and off the
product with On / Off button when
the Child Lock is active. When you
switch on the product again, pro-
gramme will resume from where it
has stopped.
When the Child Lock is enabled, an
audio warning will be given if the
buttons are pressed. Audio warning
will be cancelled if the buttons are
pressed five times consecutively.
To activate the child lock:
Press and hold the related auxiliary func-
tion button for 3 seconds. After the count-
down as “3-2-1" on the display is over, Child
Lock symbol appears on the display. When
this warning is displayed, you can release
the Auxiliary Function button 3.
You can activate the child lock
function only after the programme
has started. Child lock that you ac-
tivate is automatically deactivated
when the cycle ends.
To deactivate the child lock:
Press and hold the related auxiliary func-
tion button for 3 seconds. After the count-
down as “3-2-1" on the display is over, Child
Lock symbol disappears.
5.6 Loading Door Lock
There is a locking system on the loading
door of the machine that prevents opening
of the loading door in cases when the water
level is unsuitable.
"Door Locked" symbol appears on the dis-
play when the loading door is locked.
If the Remote Control Function is
selected, the door will be locked. In
order to open the door you must de-
activate Remote Control Function
by either pressing the Remote Con-
trol button or changing the pro-
gramme position.
EN / 15
Opening the loading door in case of power
failure:
In case of power failure, you can
use the loading door emergency
handle under the pump filter cap to
open the loading door manually.
To avoid any water overflow before
opening the loading door, make
sure there is no water left inside the
product.
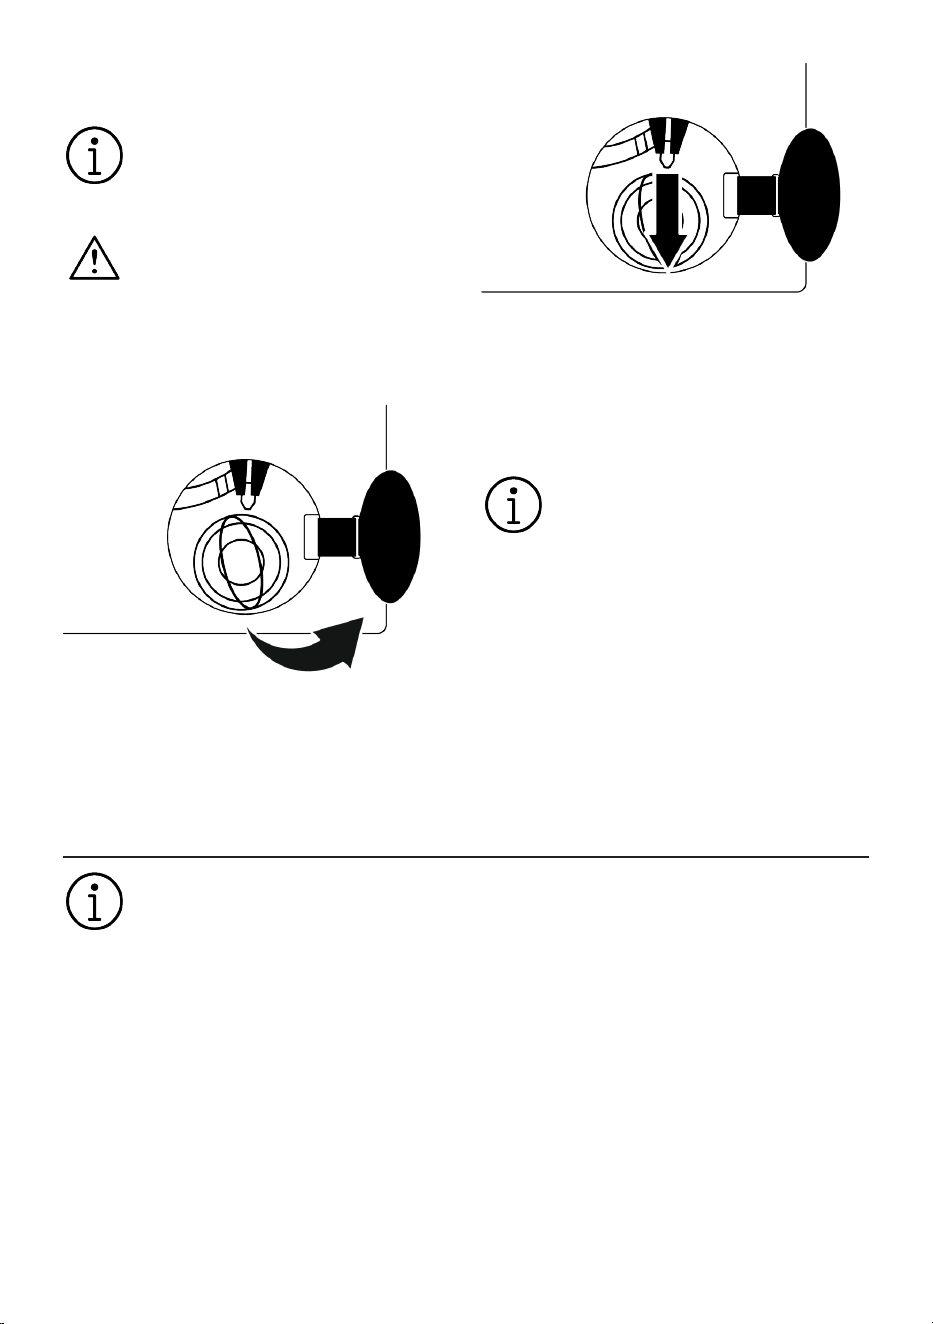
1. Turn off and unplug the product.
2. Open the pump filter lid.
3. Pull down the loading door emergency
handle with a tool and release. Then
open the loading door.
4. If the loading door does not open then
repeat the previous step.
5.7 Cancelling the Programme
The programme is cancelled when pro-
gramme selection knob is turned to a dif-
ferent programme or product is turned off
and on again using the programme selec-
tion knob.
If you turn the programme selection
knob when the Child Lock is en-
abled, the programme will not be
cancelled. You should cancel the
Child Lock first.
If you want to open the loading
door after you have cancelled the
programme but if it is not possible
to open the loading door since the
water level in the product is above
the loading door baseline, then turn
the Programme Selection knob to
Pump+Spin programme and drain
the water in the product.
6 Maintenance and Cleaning
Please read the “Safety Instruc-
tions” section first!
Service life of your product extends and fre-
quently experienced problems will be re-
duced if it is cleaned at regular intervals.
6.1 Cleaning the Detergent Drawer
When should I clean it?
• If you see any solidifed, non-fluid deter-
gent or softener when you open the com-
partment lid of the dosing tank,
• If you are not satisfied with the washing
results, the detergent or softener may
have thickened and cannot be absorbed
into the drum.
• If dosing is selected, but you have not
loaded detergent or softener for a long
time and the liquid in the compartment
has not reduced,
• If you want to change the washing
agents you have filled in the compart-
ment (e.g. if you are not satisfied with the
detergent and do not want to use it) or if
you have filled it incorrectly (e.g. if you
have filled detergent in the softener com-
partment or softener in the detergent
compartment),
• If you want to add a different brand of de-
tergent or softener from the previous
one,
EN / 16
• If you added a washing agent with differ-
ent properties (for example, if you added
detergent for colours instead of deter-
gent for whites in the compartment),
• If you added a washing agent with differ-
ent concentrations (In order not to waste
the old detergent that you emptied, you
can use it in the next wash by placing it in
the powder detergent compartment and
selecting the “powder detergent active”
position on the display).
• If the new softener to be added has the
same properties but only the smell is dif-
ferent, (keep in mind that the mixture will
have a different smell when added
without cleaning the remaining softener),
• If the product is not used for a long
period of time (e.g. during the time
between moving to and from the summer
house, 3 months or more), the liquid
washing agent may gradually thicken and
eventually solidify and the system may
not be able to dose even though it ap-
pears to be full.
How to Clean:
Before starting cleaning, turn off your
product by pressing the On/Off button and
unplug the power plug from the socket.
It is recommended that you wear
suitable gloves to avoid direct con-
tact with the detergent and other
washing agents that you will empty
from the detergent drawer.
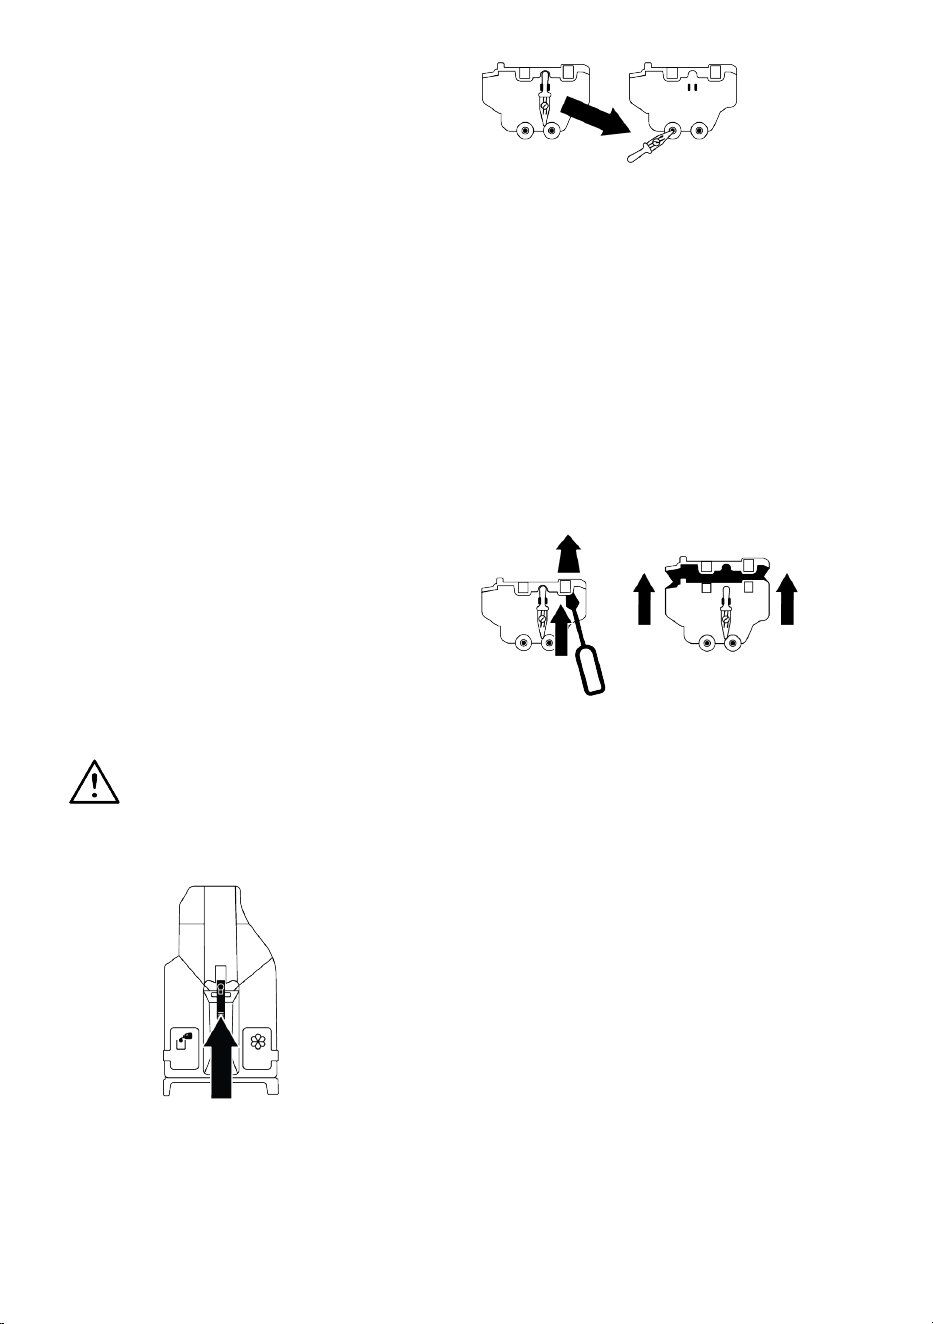
1. Press on the element indicated by the
arrow and pull the detergent drawer to-
wards you and remove it.
2. Remove the drain pipe on the back of
the drawer from its slot.
3. Bring the slot on the back of the deter-
gent compartment towards the con-
tainer into which you empty the deter-
gent.
4. Gently push the drain pipe into the slot
at the back of the detergent compart-
ment.
5. The detergent will start to drain into the
container.
6. Follow the same procedure for the
softener compartment.
7. Remove the tabs holding the top cover
of the detergent drawer with a flat-head
screwdriver (there are 6 tabs in total,
two each on the right, left and back of
the drawer) and wash the inside of the
drawer.
8. When you have completed cleaning, put
the cover back on the drawer. Make
sure that all tabs are fitted. If the tabs
do not fit, liquids may spill out of the
drawer or the detergent dispenser may
get stuck in the drawer slide or be diffi-
cult to move. Therefore make sure that
the tabs are fully engaged.
9. Put the draining tube back in its place
on the back of the drawer.
EN / 17
10.Insert the drawer back, observing the
slot and slides, and push the drawer
closed. After adding detergent and
softener, the machine will be ready for
use in programmes with dosing feature.
6.2 Cleaning the Water Intake Fil-
ters
There is a filter at the end of each water in-
take valve at the rear of the product and
also at the end of each water intake hose
where they are connected to the tap. These
filters prevent foreign substances and dirt
in the water to enter the product. Filters
should be cleaned if they are dirty.
1. Close the taps.
2. Remove the nuts of the water intake
hoses to access the filters on the water
intake valves and clean them with an ap-
propriate brush. If the filters are too
dirty, remove them from their places
with a pliers and clean in this way.
3. Take out the filters on the flat ends of
the water intake hoses together with the
gaskets and clean thoroughly under run-
ning water.
4. Replace the gaskets and filters carefully
and tighten their nuts by hand.
6.3 Draining Remaining Water and
Cleaning the Pump Filter
The filter system in your product prevents
solid items such as buttons, coins and fab-
ric fibres clogging the pump impeller during
draining of washing water. Thus, the water
will be drained without any problem and the
service life of the pump will extend.
If the product fails to drain water inside it,
the pump filter is clogged. Filter must be
cleaned whenever it is clogged or in every 3
months. Water must be drained off first to
clean the pump filter.
In addition, prior to transporting the product
(e.g., when moving to another house) water
should be drained completely.
NOTE:
Foreign substances left in the
pump filter may damage your
product or may cause noise prob-
lem.
If you live in areas prone to frost, re-
member to turn off the water tap,
disconnect the main hose, and
drain the water from the product
when it's not in use.
After each use, turn off the tap to
which the mains hose is connected.
In order to clean the dirty filter and drain
the water:
1. Unplug the product to cut off the supply
power.
Temperature of the water inside the
product may rise up to 90 ºC. To
avoid the risk of scalding, clean the
filter after the water inside the
product is cooled down.
2. Open the filter cover.
3. Follow the below procedures in order to
drain water.
If the product has an emergency water
draining hose, in order to drain the water:
EN / 18
• Pull the emergency draining hose out of
its seat.
• Place the end of the hose in a large con-
tainer. Drain the water into the container
by pulling out the plug at the end of the
hose. When the container is filled, close
the end of the hose with the plug. Drain
all water by repeating the procedure spe-
cified above after draining the container.
• When the water drain is finished, close
the end with the plug again and fix the
hose in its place.
• Unscrew the pump filter.
1. Clean any residues inside the filter as
well as fibres, if any, around the pump
impeller region.
2. Replace the filter.
3. If the filter cap is composed of two
pieces, close the filter cap by pressing
on the tab. If it is one piece, seat the
tabs in the lower part into their places
first, and then press the upper part to
close.
7 Troubleshooting
Read the “Safety Instructions” sec-
tion first!
The program does not start after closing
the machine door.
• The Start / Pause (Start 1) button and
then the End Time Setting (Start 2) but-
ton may not have been pressed. >>>
Press the Start / Pause (Start 1) button
and then the End Time Setting (Start 2)
button.
• In case of overload, the door may be diffi-
cult to close. >>> Reduce the laundry and
make sure the door closes properly.
The program cannot be started or the pro-
gram selection cannot be made.
• The product may have switched to self-
protection due to infrastructure problems
(mains voltage, water pressure, etc.). >>>
Depending on the product model, to can-
cel the program, select another program
by turning the Program Selection knob or
pressing and holding the On/Off button
for 3 seconds. The previous program will
be canceled. See.Cancelling the Pro-
gramme [}15]
The product does not absorb water.
• The tap may be closed. >>> Open the
taps.
• The water inlet hose may be kinked. >>>
Straighten the hose.
• The water inlet filter may be clogged. >>>
Clean the filter.
• The loading door may not be closed. >>>
Close the door.
The product does not drain water.
• The water drain hose may be clogged or
kinked. >>> Clean or straighten the hose.
• The pump filter may be clogged. >>>
Clean the pump filter.
The product vibrates or makes noise.
• The product may be standing unstable.
>>> Balance the product by adjusting its
feet.
• A hard object may have gotten stuck in
the pump filter. >>> Clean the pump filter.
• Transportation safety bolts may not have
been removed. >>> Remove the trans-
portation safety bolts.
• The amount of laundry in the product
may be less. >>> Load more laundry into
the product.
• Excessive laundry may have been loaded
into the product. >>> Remove some of
the laundry inside the product or
straighten the laundry with your hand and
distribute it evenly inside the product.
• The product may be resting on a hard
surface. >>> Check that the product is
not resting on anything.
Water is coming from the bottom of the
product.
• The water drain hose may be clogged or
kinked. >>> Clean or straighten the hose.
• The pump filter may be clogged. >>>
Clean the pump filter.

EN / 19
No water is visible in the product during
washing.
• Water is in the invisible part of the
product. >>> This is not a malfunction.
The loading door does not open.
• The door lock is activated due to the wa-
ter level in the product. >>> Drain the wa-
ter by running the Pump or Spin program.
• The product may be heating the water or
in the spinning phase. >>> Wait for the
program to finish.
• The front cover may remain attached due
to pressure on it. >>> The front cover is
released from its attached position and
opened by pushing and pulling the
handle.
• In cases where there is no electricity, the
loading door of the product will not open.
>>> To open the loading door of the
product, open the pump filter cover and
pull down the loading door emergency re-
lease lever located behind it. See.Loading
Door Lock [}14]
The program time does not count down. (*)
• The laundry may have created an imbal-
ance in the product. >>> Due to the unbal-
anced distribution of the laundry inside
the product, the automatic unbalanced
load detection system may have been ac-
tivated.
The product does not pass the squeezing
step. (*)
• The laundry may have created an imbal-
ance in the product. >>> Due to the unbal-
anced distribution of the laundry inside
the product, the automatic unbalanced
load detection system may have been ac-
tivated.
• The spin cycle may not have been com-
pleted because the water inside the
product could not be drained. >>> Check
the filter and drain hose.
• Excessive foam may have formed due to
excessive detergent use and the auto-
matic foam dampening system may have
been activated. >>> Use the recommen-
ded amount of detergent.
Suds are overflowing from the detergent
drawer.
• Too much detergent may have been
used. >>> Mix 1 tablespoon of softener
with ½ liter of water and pour it into the
main wash compartment of the detergent
drawer. >>> Add the appropriate amount
of detergent to the product according to
the program and maximum load stated in
the "Program table" section. When using
additional chemicals (stain removers,
bleach, etc.), reduce the amount of deter-
gent.
(*) When the laundry is not well distributed
inside the product, the product does not
proceed to the spinning step to prevent
damage to itself and the environment. Ar-
range the laundry and spin again.