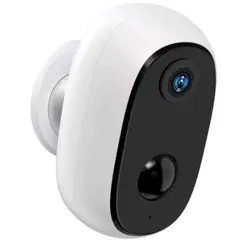
K11

Catalog
Contact Us:
📧
In the box ..............................................................01
Product Introduction ............................................01
Storage options ....................................................02
Set up the App ......................................................03
Peel & Stick Install ................................................12
FAQS .....................................................................14
01
In the box
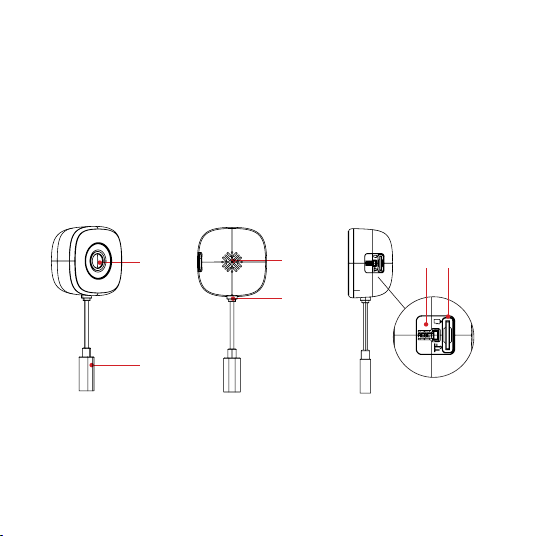
Product Introduction
Window Camera x1
Charger x1
Install the sticker x3
Type-C Cable x1
Quick Start Guide x1
Cable Clips x4
❶ Lens
❷ Power Cable
❸ Speaker
❹ Microphone
❺ Reset Button
❻ TF Card Slot
(Card not included)
❶
❸
❹
❷
❺ ❻

02
Storage options
You can store your event videos on a TF card
(not included) or in cloud storage, based on your
preference.
Option 1: TF Card. Please install the TF card only
when the camera is powered o, and use a Class 10
or higher card with 8 GB-128 GB of storage.
Option 2: Cloud Storage. New users get lifetime
8-second free cloud storage with 24-hour rolling
retention and complimentary basic person/vehicle/
pet recognition in the cloud.

03
Set up the App
1.Download and Install the App
Option 1 : Scan the QR code below to download the
"Arogal" App and set it up on your mobile phone.
Option 2: Search"Arogal"App and download it from
Google Play Store for Android or App Store for iOS.

04
· Please conrm the Arogal App icon before
downloading it. Otherwise, you can't add the camera
successfully.
· Allow "Arogal" to use mobile cellular data and
wireless network. Otherwise, you may fail to add
camera.
· Allow "Arogal" to access phone location and push
messages to the phone. Otherwise, the phone will
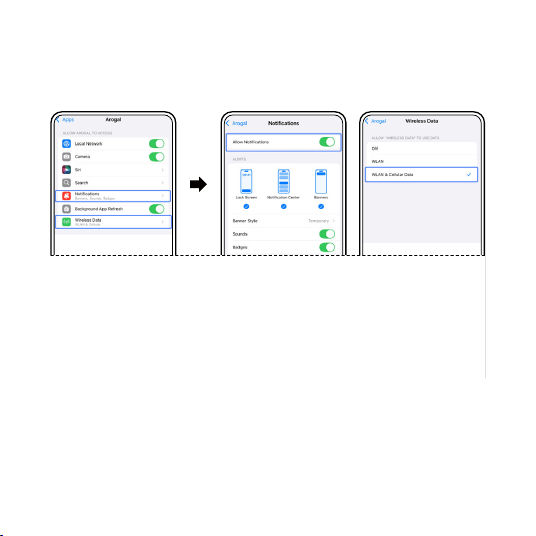
05
not receive alerts from the Arogal when motion
detection is triggered.
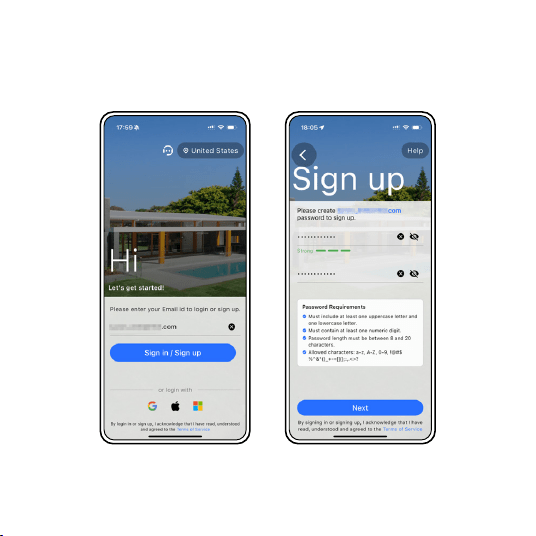
2.Register Account
(1) Create an account using your email address, and
complete email verication.
(2) Set a password for your account and remember it.
Follow the app's on-screen instructions to complete
setup.
06
07
3.Adding the Camera to the App
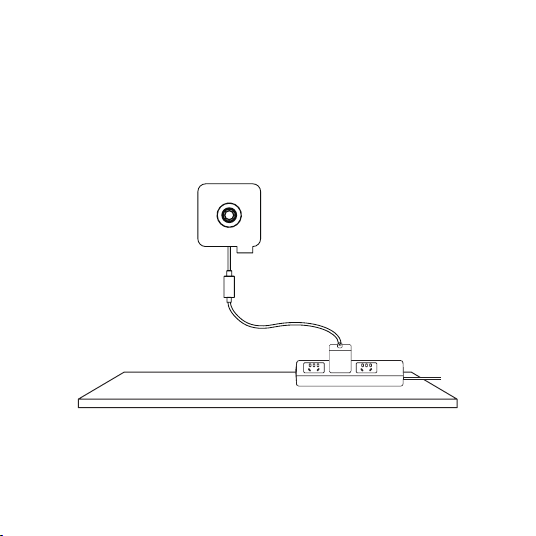
Step 1. Please connect the camera to a power source
and wait about 5 seconds. You'll hear a continuous
"beep-beep" sound.
08
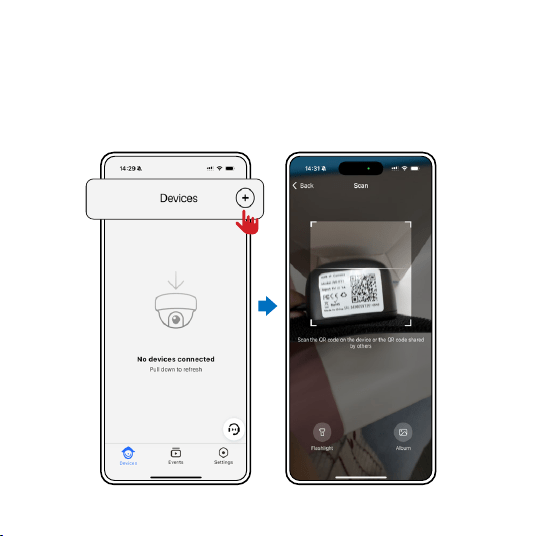
Step 2. Open the "Arogal" app and turn on your
phone's Bluetooth. Tap "+" and use your phone to
scan the QR code on the camera.
09
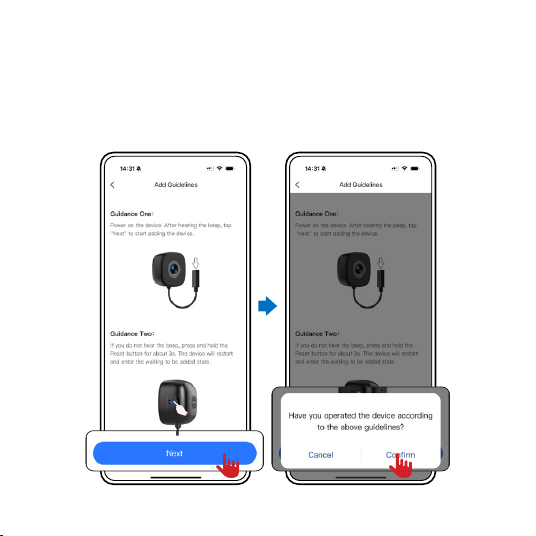
Step 3. After the camera beeps, click "Next" and
then select "Conrm".
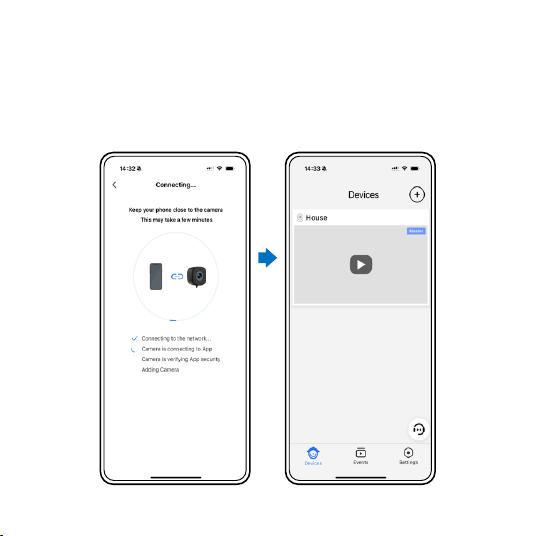
11
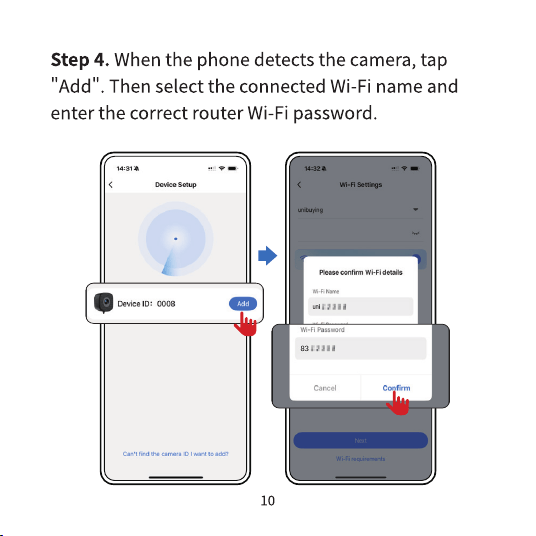
Step 5. Bring your phone close to the camera and
keep it still until you hear the sound indicating . Then
wait for the connection to nish.
12
Peel & Stick Install
The camera should be installed on a window. You
can position it on the glass according to your viewing
preferences. The device must be close to a power
outlet and within range of your router.
Note: Please conrm the desired position in
advance and ensure the window surface is clean,
dry, and dust-free before applying the sticker.
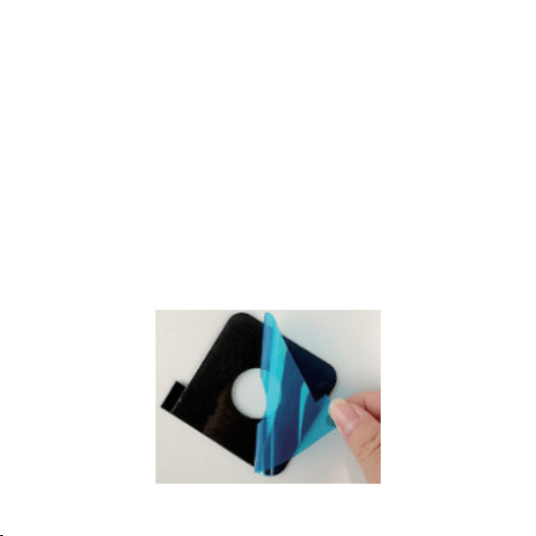
Step 1: Install the sticker.
13
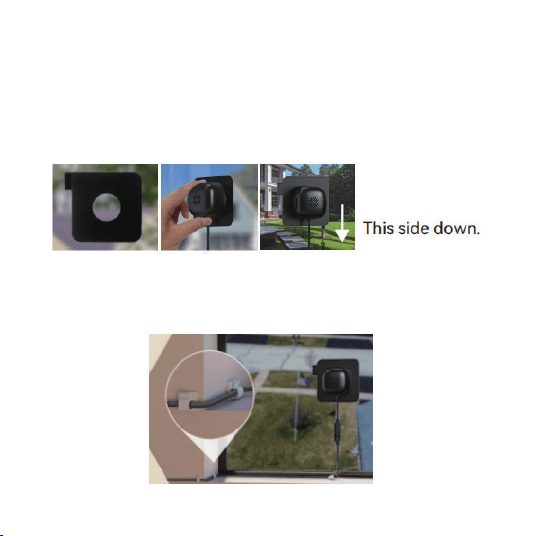
Step 2: Stick the mounting sticker on the window,
then mount the camera on it. Pay attention to the
camera's orientation during installation—the power
cord should hang vertically downward.
Step 3: The package includes 4 cable clips for
managing the power cable and keeping your home
tidy.
14
FAQS
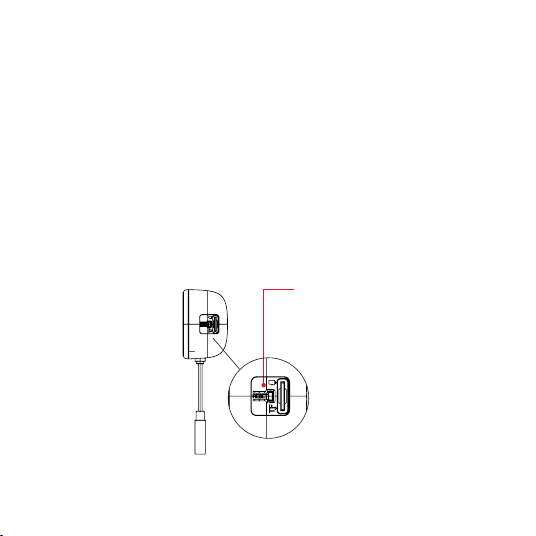
How to reset the camera?
Press and hold the Reset button 5 seconds until you
hear a voice prompt, then release it and patiently
wait for the "beep-beep" sound to conrm the
device has been successfully reset.After the camera
reset, it must be re-added to the app,refer to page
07.
Reset
button

15
Why can't the camera connect to Wi-Fi?
(1) Press and hold the Reset button until you hear a
voice prompt, then release it and wait for the "beep-
beep" sound. Repeat this process to complete the
setup.
(2) Check that the Wi-Fi password you entered is
correct. Reboot the router, then try adding the
camera again.(Refer to page 07 for the process of re-
adding the camera)
(3) Make sure your router does not have AP isolation,
MAC ltering, or other access restrictions enabled.
On some phones, you need to grant location
permission and turn on location services to scan for
Wi-Fi networks and view the Wi-Fi list.
16
How do I reconnect the camera after
changing my router or Wi-Fi password?
First, delete the camera from the app. Then, press
and hold the reset button for 5 seconds until you
hear a sound. Finally, re-add the camera to the app
and select your new Wi-Fi SSID and password.
How to share your camera ?
(1) Open the camera's Live page and tap" ".
(2) Choose Share via account ID, enter the recipient's
account ID, or choose Share via QR Code and have
them scan the code to access the shared device.
Note:The invitee must rst register and log in to
an Arogal account before they can receive a share.
Open the Arogal app and go to: Settings → Share

17
List, then tap Accept on the share invitation.
Why am I receiving too many activity
alerts or missing some alerts?
• Adjust motion detection sensitivity: Go to Device
settings → Events → Motion detection and select the
appropriate level for your needs.
• Set the alarm area: Go to Device settings → Events
→ Detection area and select the desired alarm area.
What to do if there are no video
recordings after subscribing to cloud
storage?
(1) Conrm that the cloud storage subscription is
active.

18
(2) Conrm that the cloud storage recording switch is
turned on (Device settings → More Options → Cloud
video). If you have not subscribed to cloud storage,
subscribe rst.
What to do if the camera does not
recognize the TF Card
(1) The camera only supports TF cards with a
capacity of 8–128 GB and Class 10 or higher (U1 or
above). It does not support TF cards of 128 GB or
above.
(2) Ensure that you insert the TF card correctly,
checking that the insertion direction and position
are correct.
(3) Reinsert the TF card. Power o the camera, insert
the TF card into the camera's TF card slot in the

19
correct orientation, and then power on the camera.
If the camera prompts you to format the TF card,
click "Format TF Card". If the TF card still cannot be
recognized, use a card reader to format the TF card
to FAT32 format on a computer, then reinsert it into
the camera.
(4) If the TF card cannot be recognized during use,
power o the camera, remove and reinsert the TF
card to verify whether it can be recognized. If it
still cannot be recognized, reformat the TF card or
replace it.
What to do if the phone cannot display
real-time videos when out of the home?
When at home, the phone can view real-time videos
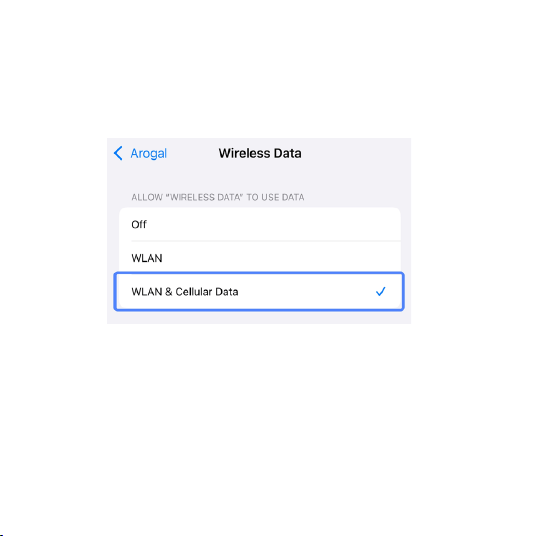
by connecting to WiFi. But when out and using 4G
20
or 5G mobile data, if the phone cannot view real-
time videos from the camera, please check whether
cellular data permission is granted to the app.
If you need further assistance, please contact our
customer support: [email protected]
21
22
ISED Statement
warning:
- English: This device complies with Industry Canada license‐
exempt RSS standard(s). Operation is subject to the following two
conditions: (1) This device may not cause interference, and (2) This
device must accept any interference, including interference that may
cause undesired operation of the device.The digital apparatus
complies with Canadian CAN ICES‐003 (B)/NMB‐3(B).
- French: Le présentappareilestconforme aux CNR d'Industrie Canada
applicables aux appareils
radio exempts de licence. L'exploitationestautorisée aux deux
conditions suivantes: (1) l'appareil ne doit pas produire de brouillage,
et (2) l'utilisateur de l'appareildoit accepter tout
brouillageradioélectriquesubi, mêmesi le brouillageest susceptible d'
encompromettre le fonctionnement.
L'appareil numérique est conforme à la canadienne CAN ICES‐003
(B)/NMB‐3(B).
RF Exposure Information:
The device has been evaluated to meet general RF exposure requirement. The
device can be
used in portable exposure condition without restriction.This equipment should
be installed
and
operated with minimum distance 20cm between the radiator and your body.