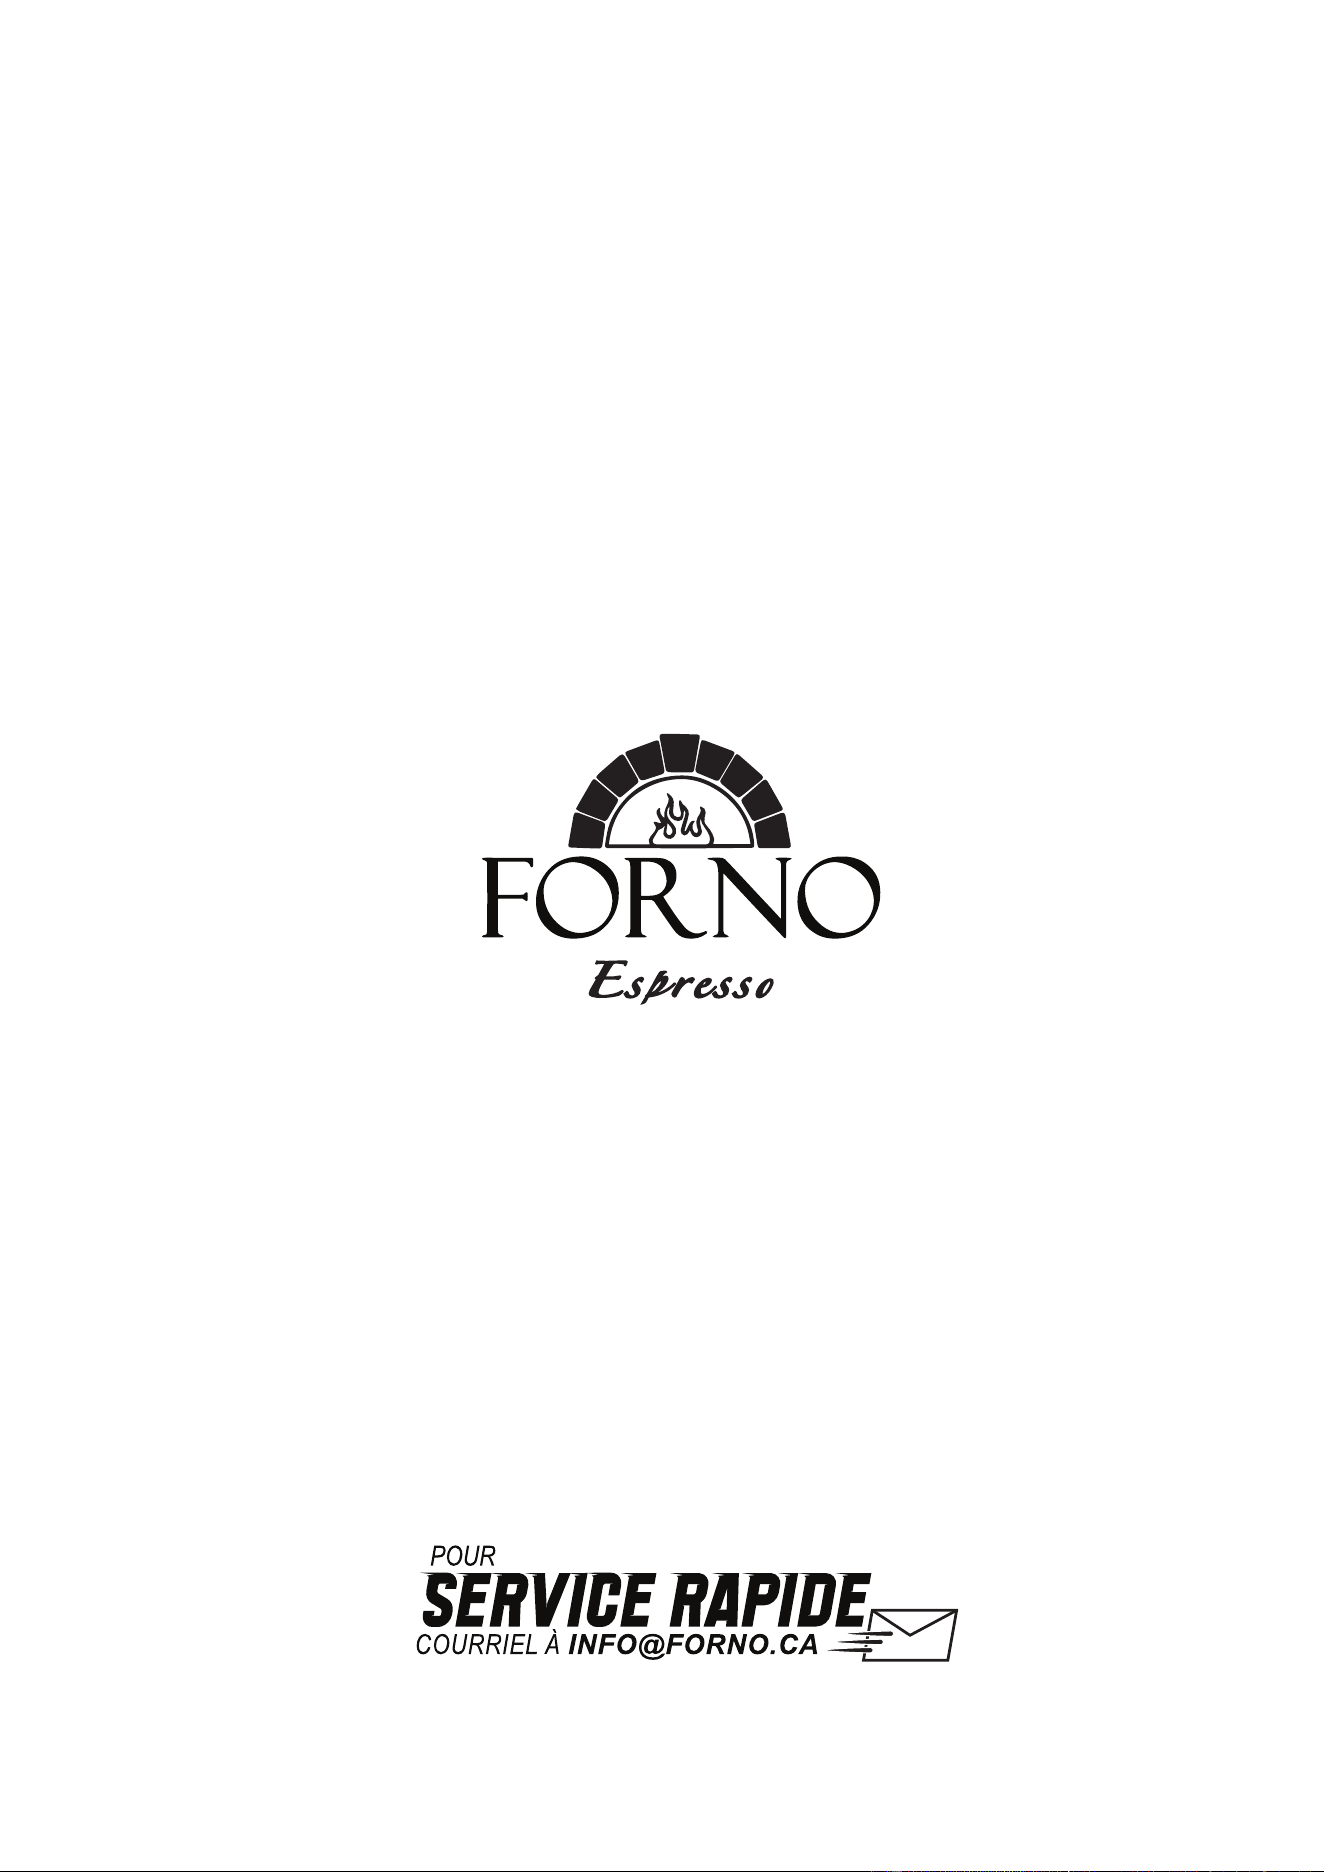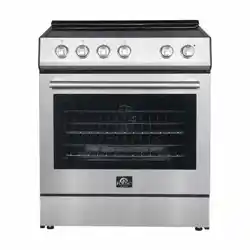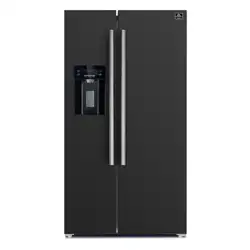
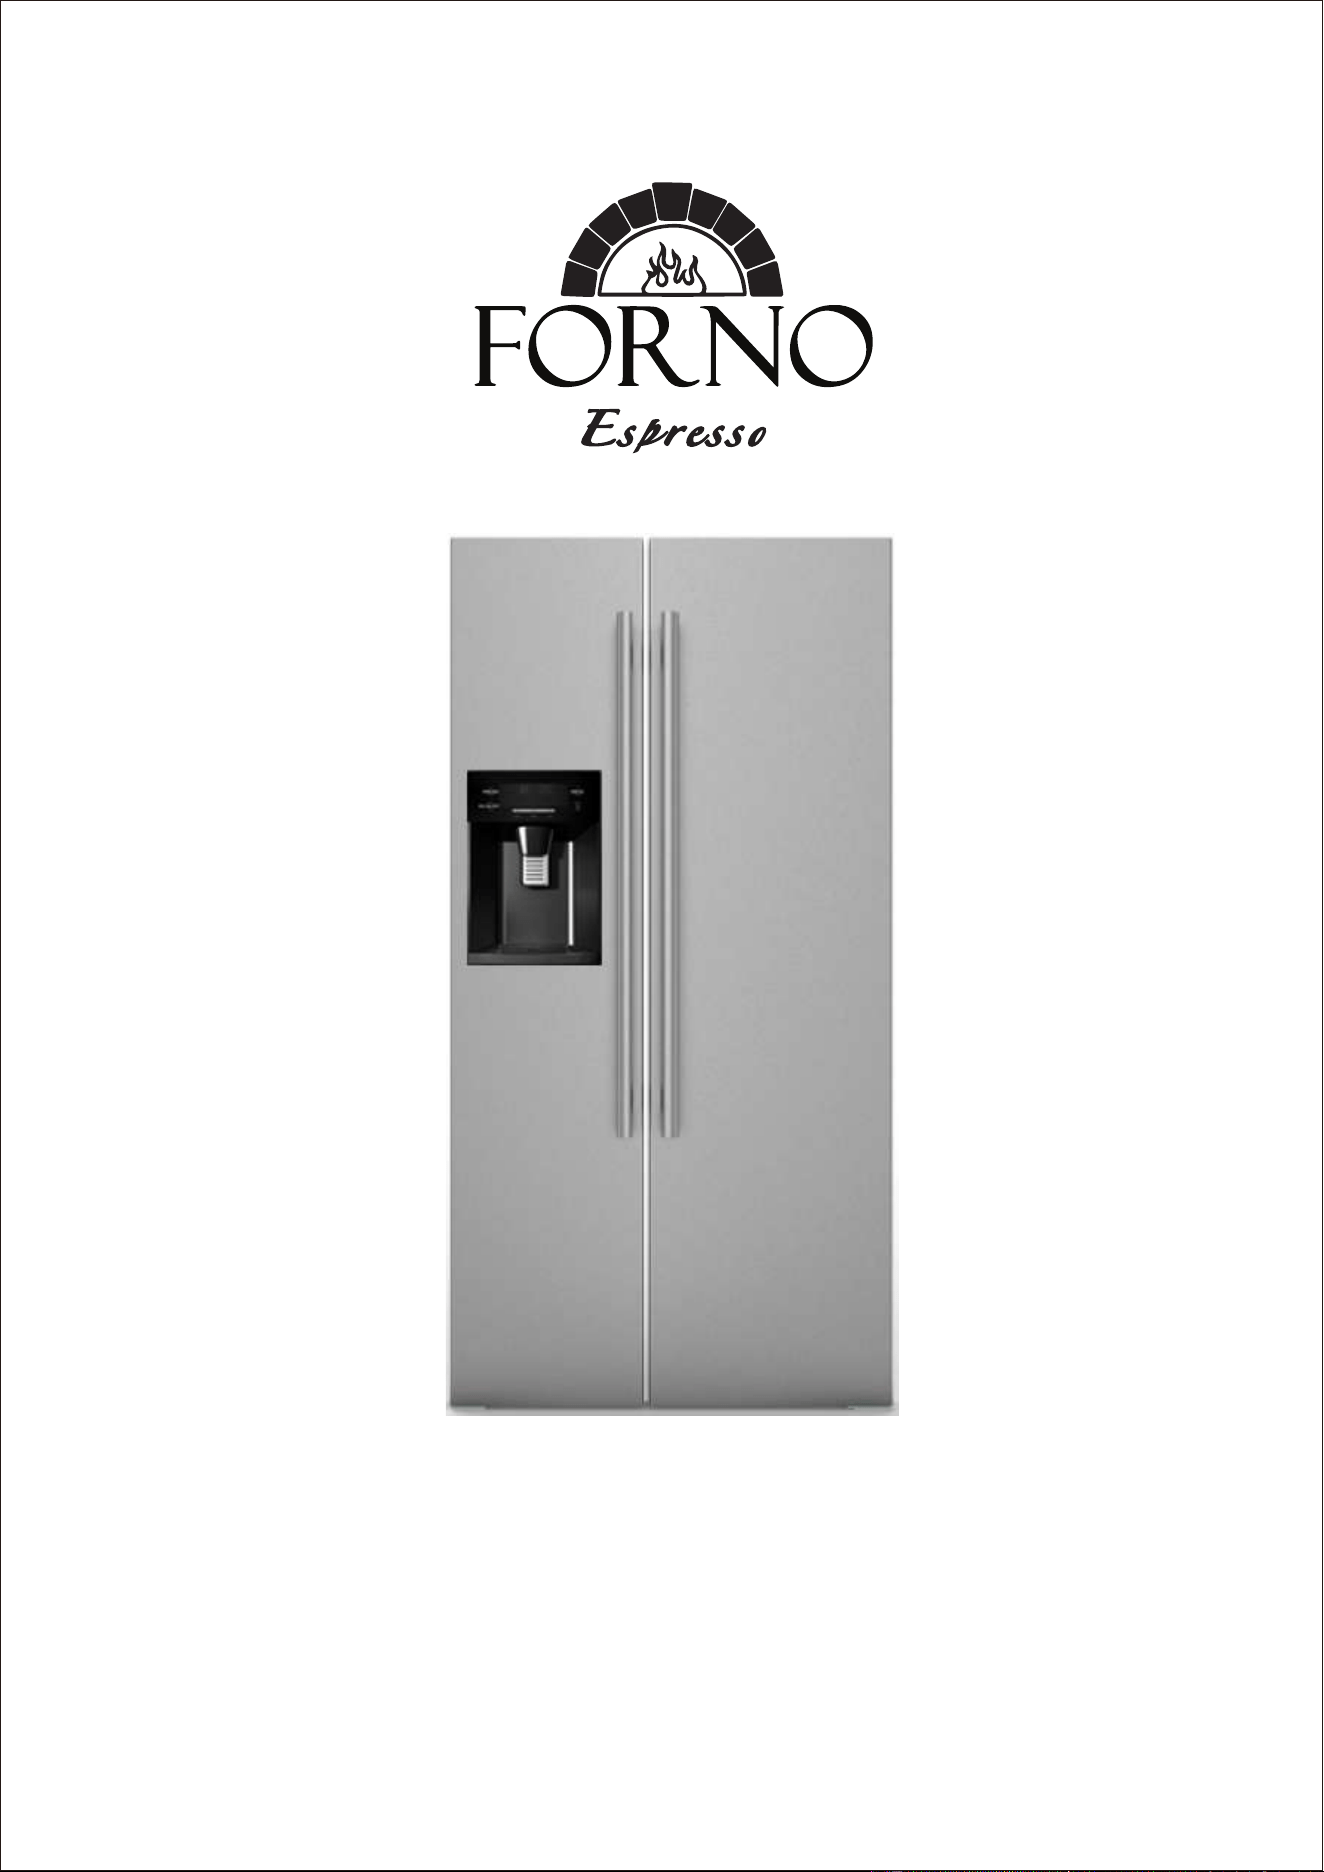
FFRBI1844-36WHT
FFRBI1844-36BLK
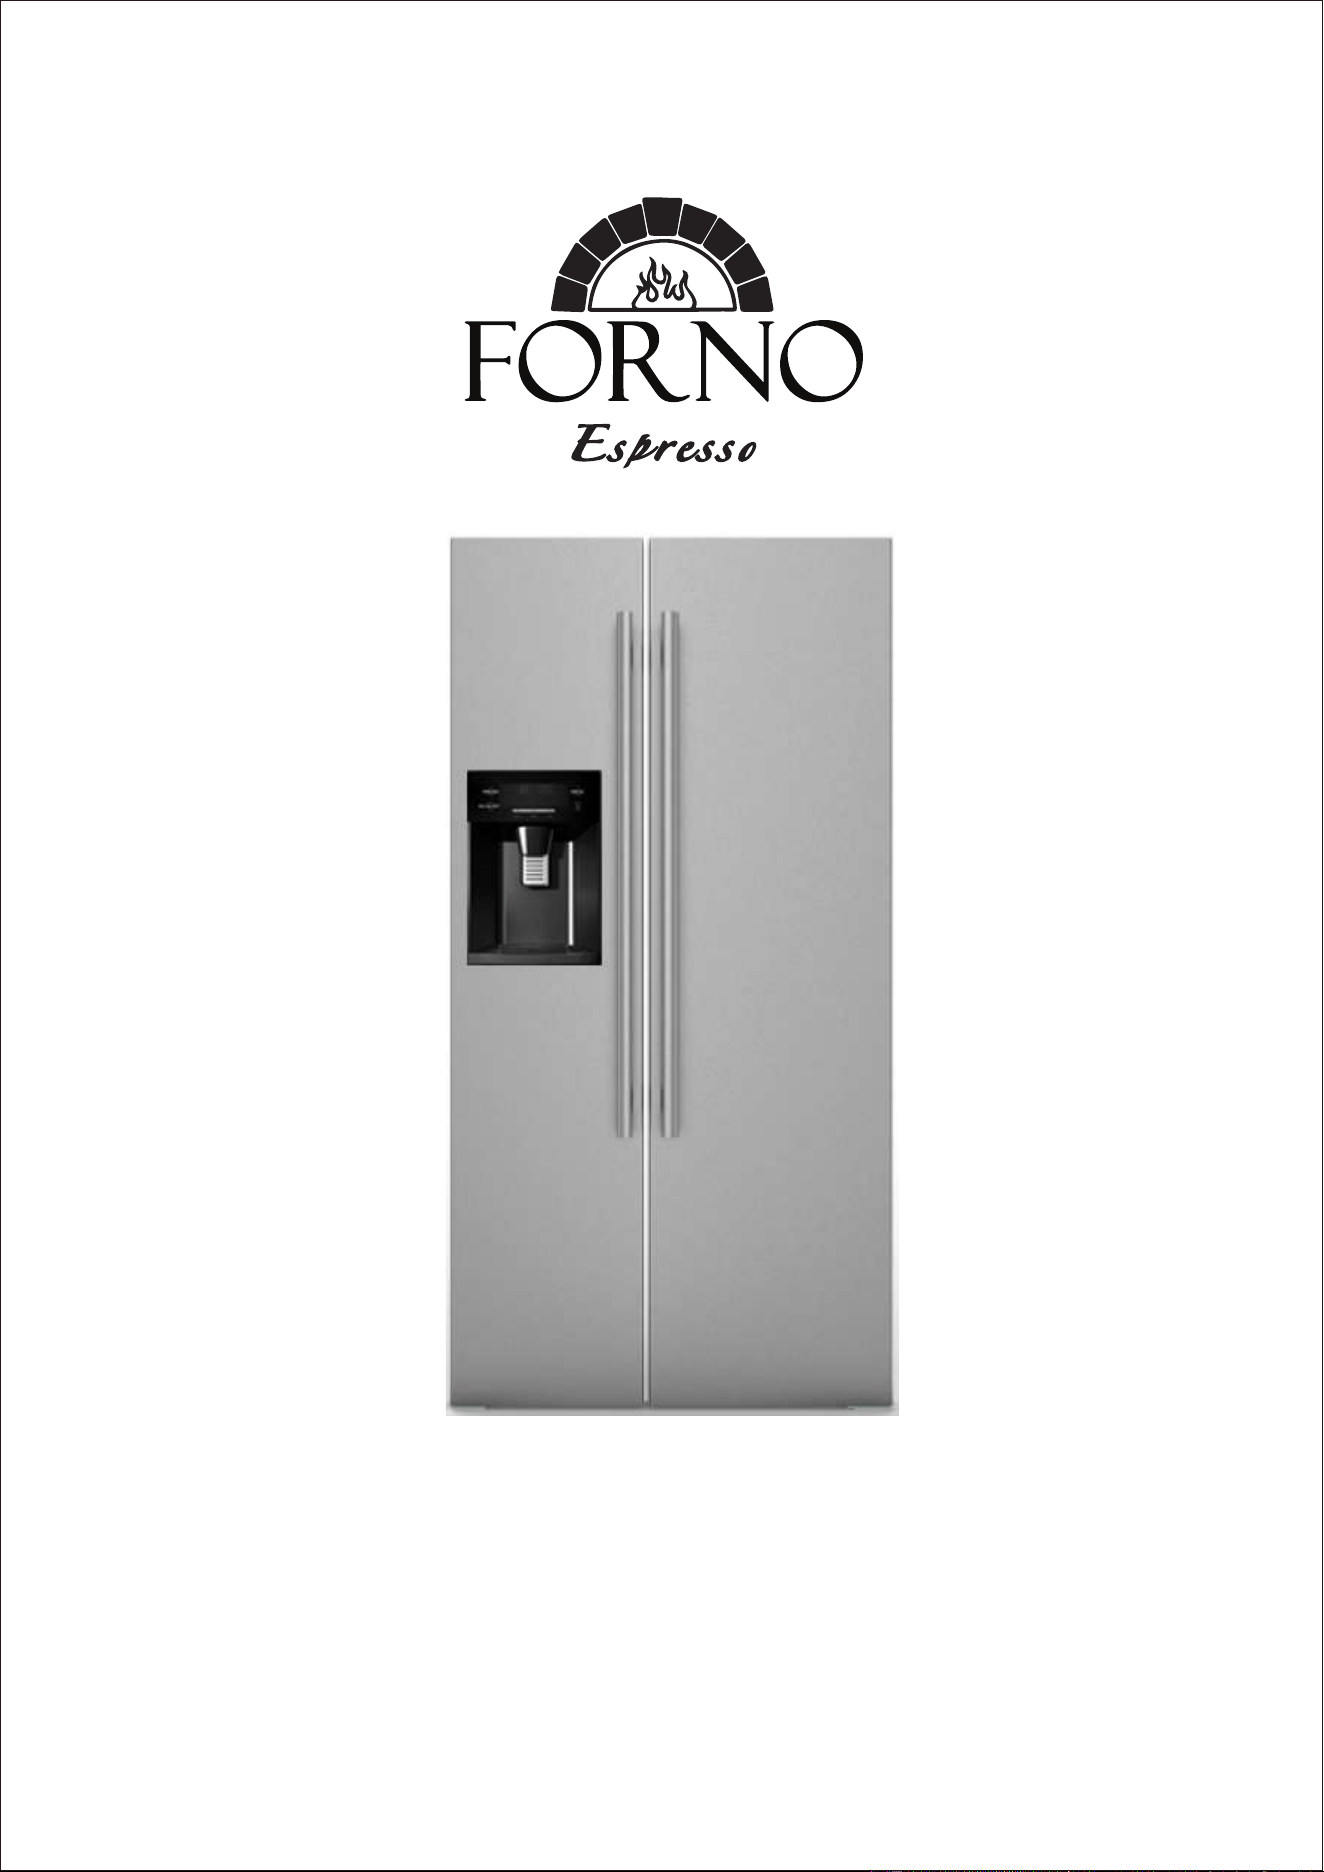
36" Side by Side Refrigerator 20.0cuft, with Ice Maker
BEFORE USE, PLEASE READ AND FOLLOW ALL SAFETY RULES AND OPERATING
INSTRUCTIONS.
®
TABLE OF CONTENTS
Switch off the ice maker / Water filter / Replace the filter
Ice and water dispenser / Ice maker install and uninstall
Ice Maker
Sabbath Mode
Wiring Diagram
Troubleshooting Guide
Energy Saving Tips
Power Failure / Vacation Time / Moving Your Appliance
Cleaning Your Appliance
Operating Your Appliance
Parts and Features
Important Safeguards
Appliance Safety
Important Safety Instructions
Customer Care
2
Electrical Connection
Ice Maker warning
Installation Instructions
3
6
7
8
9
10
11
12
13
14
15
15
16
17
17
17
18
19
3
Services in Canada and Untied States
Keep the instruction manual handy to answer your questions. If you don’t understand something or need more
assistance, please visit our website for fast support. Please provide us your name, number, address,serial number
of the product that troubleshooting, proof of purchase, and a short description of the issue. A customer service
representative will contact you as soon as possible. All warranty work needs to be authorized by FORNO customer
service. All our authorized service providers are carefully selected and rigorously trained by us.
Service InformationProduct Information
Model Number : _________________________________________
Use these numbers in any
correspondence or services calls
concerning your product.
If you received a damaged product,
immediately contact Forno.
To save time and money, before
you call for serviced, check the
troubleshooting guide. It listed the
causes of minor operation problems
that you can correct yourself.
Serial Number : __________________________________________
Date of Purchase :________________________________________
Purchase Address And Phone : _____________________________
_______________________________________________________
_______________________________________________________
Customer Care
“Need some quick help? Simply scan the qr code and get access
to our fast support form. We’re always here to assist you with any
questions or concerns you may have. So, don’t hesitate to reach out!”
Thank you for purchasing a Forno product. Please read the entire instruction manual before operating your new
appliance for the first time. Whether you are an occasional user or an expert, it will be beneficial to familiarize yourself
with the safety practices, features, operation and care recommendations of your appliance.
Both the model and serial number are listed inside the product. For warranty purposes, you will also need the date of
purchase .

4
Warranty
What
this
limited
warranty
covers:
The Warranty coverage provided by Forno Appliances in this
statement applies exclusively
to the original Forno
appliance
(“Product”)
sold
to
the
consumer
(“Purchaser”)
by
an
authorized
Forno
dealer/distributor/retailer,
purchased
and
installed
in
the
United
States
or
Canada,
and
which
has
always
remained
within
the
original
country
of purchase (the United States or Canada). Warranty coverage is activated on the date of the
Product's
original
retail purchase and has a duration of two
(2)
years.This warranty does not cover installation at the time
of purchase or during replacement.
Warranty
coverage
is
non-transferable.
In
the
event
of
replacement
of
parts
or
of
the
entire
product,
the
replacement
Product
(or
parts)
shall
assume
the
remaining
original
Warranty
activated
with
the
original
retail
purchase document. This Warranty
shall not be extended with
respect to such replacement.
Forno Appliances
will
repair or replace any component/part which
fails or proves defective due to materials
and/or workmanship
within
2
years
of
the
date
of
the
original
retail
purchase
and
under
conditions
of
ordinary
residential,
non-commercial
use. Repair or replacement will be free of charge, including labor at standard rates and shipping
expenses. Purchaser is responsible for making
the Product reasonably accessible for service. Repair service
must be
performed by a
Forno Authorized Service company
during normal working hours.
IMPORTANT
Retain
proof
of
original
purchase
to
establish
warranty
period.
Forno’s
liability
on
any
claim
of
any
kind,
with
respect
to the goods and/or services provided, shall in no
event exceed the value of the goods or service or part
there
of which has
given rise to the claim.
30-Day
Cosmetic
Warranty
The
Purchaser
must
inspect
the
product
at
the
time
of
delivery.
Forno
warrants
that
the
Product
is
free
from
manufacturing
defects in materials and workmanship
for a period of thirty (30) days
from date
of
the original retail
purchase of the Product.
This
coverage includes:
-
Paint
blemishes
- Chips
-
Macroscopic finish
defects
Cosmetic
warranty
does NOT cover:
>
issues resulting from incorrect transport, handling and/or
installation (e.g.: dents, broken, warped or deformed
structures or components, cracked or otherwise damaged glass
components);
>
slight color variations on painted/enameled components;
>
differences caused by natural or artificial lighting, location
or other
analogous factors;
> stains/corrosion/discoloration
caused by external
substances and/or environmental factors;
> labor costs, display,
floor,
B-stock,
out-
of-box,“as is” appliances
and demo units.
How to receive service
To receive warranty services, the Purchaser must contact the Forno Support department in order to determine
the problem and the required service
procedures. Troubleshooting with
a customer
service representative will be
necessary
before
moving
forward
with
the
service.
Model
number,
serial
number
and
date
of
original
retail
purchase
will
be requested.

5
THERE ARE NO EXPRESS
WARRANTIES OTHER THAN THOSE LISTED AND DESCRIBED ABOVE, AND NO
WARRANTIES, EITHER EXPRESS OR IMPLIED, INCLUDING, BUT NOT LIMITED TO, ANY IMPLIED
WARRANTIES
OF MERCHANTABILITY OR FITNESS FOR A PARTICULAR PURPOSE THAT SHALL APPLY
AFTER THE EXPRESS WARRANTY PERIODS STATED ABOVE, AND NO OTHER EXPRESS WARRANTY OR
GUARANTEE
GIVEN BY ANY PERSON, FIRM OR CORPORATION WITH RESPECT TO THIS PRODUCT
SHALL BE BINDING ON FORNO. FORNO SHALL NOT BE LIABLE FOR LOSS OF REVENUE OR PROFITS,
FAILURE TO REALIZE SAVINGS OR OTHER BENEFITS, TIME AWAY FROM WORK, MEALS, LOSS OF FOOD
OR
BEVERAGES, TRAVELING OR HOTEL EXPENSES, EXPENSES TO RENT OR PURCHASE APPLIANCES,
REMODELING/CONSTRUCTION EXPENSES IN EXCESS OF DIRECT DAMAGES WHICH ARE UNDENIABLY
CAUSED EXCLUSIVELY BY FORNO OR ANY OTHER SPECIAL, INCIDENTAL OR CONSEQUENTIAL
DAMAGES CAUSED BY THE USE, MISUSE OR INABILITY TO USE THIS PRODUCT, REGARDLESS OF THE
LEGAL
THEORY ON WHICH THE CLAIM IS BASED, AND EVEN IF FORNO HAS BEEN ADVISED OF THE
POSSIBILITY OF SUCH DAMAGES. NOR SHALL RECOVERY OF ANY KIND AGAINST FORNO BE GREATER
IN AMOUNT THAN THE PURCHASE PRICE OF THE PRODUCT SOLD BY FORNO AND CAUSING THE
ALLEGED
DAMAGE.WITHOUT PREJUDICE TO THE FOREGOING, PURCHASER ASSUMES ALL RISK AND
LIABILITY FOR LOSS, DAMAGE OR INJURY TO PURCHASER AND PURCHASER’S PROPERTY AND TO
OTHERS AND THEIR
PROPERTY ARISING FROM THE USE, MISUSE, OR INABILITY TO USE THIS PRODUCT
SOLD BY FORNO THAT IS NOT A
DIRECT RESULT OF NEGLIGENCE ON THE PART OF FORNO THIS
LIMITED WARRANTY SHALL NOT EXTEND TO ANYONE OTHER THAN THE ORIGINAL PURCHASER OF
THIS PRODUCT, IS NON-TRANSFERABLE, AND STATES YOUR EXCLUSIVE REMEDY.
> Use of the Product in any
non-residential,
commercial application.
> Use of the Product for anything other than its
intended purpose.
> Repair services provided by anyone other than a
Forno
Authorized Service
agency.
> Damages or repair services to correct services
provided by unauthorized parties or the use of
unauthorized parts.
>
Installation not in accordance with
local/state/city/county fire codes, electrical codes, gas
codes, plumbing codes, building codes, laws or
regulations.
>
Defects or damage due to improper storage of the
Product.
>
Defects,damage or missing parts on products sold
out of the original factory packaging or from displays.
> Service calls or repairs
to correct an incorrect
installation
of the Product and/or related accessories.
> Replacement of parts/service calls to connect,
convert
or otherwise repair the electrical wiring and/or
gas line in order to properly use the product.
> Replacement of parts/service calls to provide
instructions and
information
on the use of the Product.
> Replacement of parts/service calls to correct issues
arising from the product being used in a manner other
than what is normal and customary for residential use.
> Replacement of parts/service calls due to wear and
tear
of components such as seals, knobs, pan
supports, shelving, cutlery baskets, buttons, touch
displays, scratched or broken ceramic-glass tops.
> Replacement of parts/service calls for lack
of/improper maintenance, including but not limited to:
build up of residues, stains,
scratches, discoloration,
corrosion.
> Defects and damages arising from accidents,
alteration, misuse, abuse or improper installation.
> Defects and damages arising from Product
transport, logistics and handling.
Inspection
of the
product must be made at time of delivery. Following
receipt and inspection, the selling dealer/delivery
company must be
notified of any issues arising from
handling, transport and logistics.
>
Defects and damages arising from external forces
beyond the control of Forno Appliances, including but
not
limited to wind, rain, sand, fires,
floods,
mudslides,
freezing temperatures, excessive moisture or
extended exposure to humidity, power surges,
lightning, structural failures surrounding the appliance
and other acts of God.
> Products whose serial number has been
altered/damaged/tampered with. In no case shall
Forno be held liable or responsible for damage to
surrounding property, including furniture, cabinetry,
flooring, panels, and other structures surrounding the
Product. Forno is neither liable nor responsible for the
Product if it is located in a remote area or an area
where certified trained technicians are not reasonably
available. Purchaser must bear any transportation and
delivery costs of the Product to the nearest Authorized
Service Center or the additional travel
expenses of a
certified trained technician
Warranty Exclusions: What Is Not Covered
APPLIANCE SAFETY
Your safety and the safety of others are very important.
We have provided many important safety messages in this manual and on your appliance.
Always read and obey all safety messages.
All safety messages will alert you to what the potential hazard is, tell you how to reduce the chance
of injury, and let you know what can happen if the instructions are not followed.
This is the Safety Alert Symbol. This symbol alerts you to potential hazards that
can kill or injure you and others.
All safety messages will follow the Safety Alert Symbol and either the words
“DANGER”, “WARNING” or “CAUTION”.
DANGER means that failure to heed this safety
instruction may result in severe personal injury
or death.
WARNING means that failure to heed this safety
instruction may result in extensive product
damage, serious personal injury, or death.
CAUTION means that failure to heed this safety
statement may result in minor or moderate
personal injury, or property or equipment damage.
WARNING:
REFRIGERANT GAS WARNINGS
DANGER - Risk of fire or explosion. Flammable refrigerant used.
DO NOT use mechanical devices to defrost refrigerator. DO NOT puncture refrigerant tubing.
DANGER - Risk of fire or explosion. Flammable refrigerant used.
To be repaired only by trained service personnel. DO NOT puncture refrigerant tubing.
CAUTION - Risk of fire or explosion. Flammable refrigerant used.
Consult repair manual / owner’s guide before attempting to service this product.
All safety precautions must be followed.
CAUTION - Risk of fire or explosion. Dispose of property in accordance with federal or local
regulations. Flammable refrigerant used.
CAUTION - Risk of fire or explosion due to puncture of refrigerant tubing;
Follow handling instructions carefully. Flammable refrigerant used.
May cause cancer and reproductive harm
6
Follow handling instructions carefully. Flammable refrigerant used.
IMPORTANT SAFEGUARDS
Before the beverage cooler is used, it must be properly positioned and installed as described
in this manual, so read the manual carefully. To reduce the risk of fire, electrical shock or injury
when using the beverage cooler, follow basic precautions, including the following:
• Plug into a grounded 3-prong outlet, do not remove grounding prong, do not use an adapter, and do not use an
extension cord.
•Reinstall all panels before operating.
•It is recommended that a separate circuit, powering only your beverage cooler, be provided. Use receptacles that
cannot be turned off by a switch or pull chain.
•Never clean appliance parts with flammable fluids. These fumes can create a fire hazard or explosion.
Do not store or use gasoline or other flammable vapours and liquids in the vicinity of this or any other appliance.
The fumes can create a fire hazard or explosion.
•Before proceeding with cleaning and maintenance operations, make sure the unit’s power cord is unplugged.
•Do not connect or disconnect the electric plug when your hands are wet.
•Unplug the appliance or disconnect the power before cleaning or servicing. Failure to do so can result in electrical
shock or death.
•Do not attempt to repair or replace any part of your appliance unless it is specifically recommended in this material.
All other servicing should be left to a qualified technician.
• Use two or more people to move and install the appliance. Failure to do so can result in an injury to the back or
other part of the body.
•To ensure proper ventilation for your appliance, the unit must be completely unobstructed. Choose a well-ventilated
area with temperatures above 55ºF (13ºC) and below 90ºF (32ºC). This unit must be installed in an area protected
from the elements, such as wind, rain, water spray or sunlight.
•The appliance should not be located next to ovens, grills or other sources of high heat.
•The appliance must be installed with all electrical, water and drain connections in accordance with state and local
codes. A standard electrical supply (115 VAC only, 60 Hz), properly grounded in accordance with the National
Electrical Code and local codes and ordinances is required.
•Do not kink or pinch the appliance’s power supply cord.
•The fuse (or circuit breaker) size should be 15 amperes.
•It is important for the appliance to be leveled in order to work properly. You may need to make several adjustments
to level it.
•All installations must be in accordance with local plumbing code requirements.
•Make sure that the pipes are not pinched or kinked or damaged during installation.
•Check for leaks after connection.
•Never allow children to operate, play with or crawl inside the appliance
•Do not use solvent-based cleaning agents or abrasives on the interior surface. These cleaners may damage or
discolour the interior.
•Do not use this appliance for uses other than its intended purpose.
7
8
**
The section separator area contains a condensation-free heater and will be warm to the touch during the
anti-condensation cycle to prevent condensation forming between the two sections.
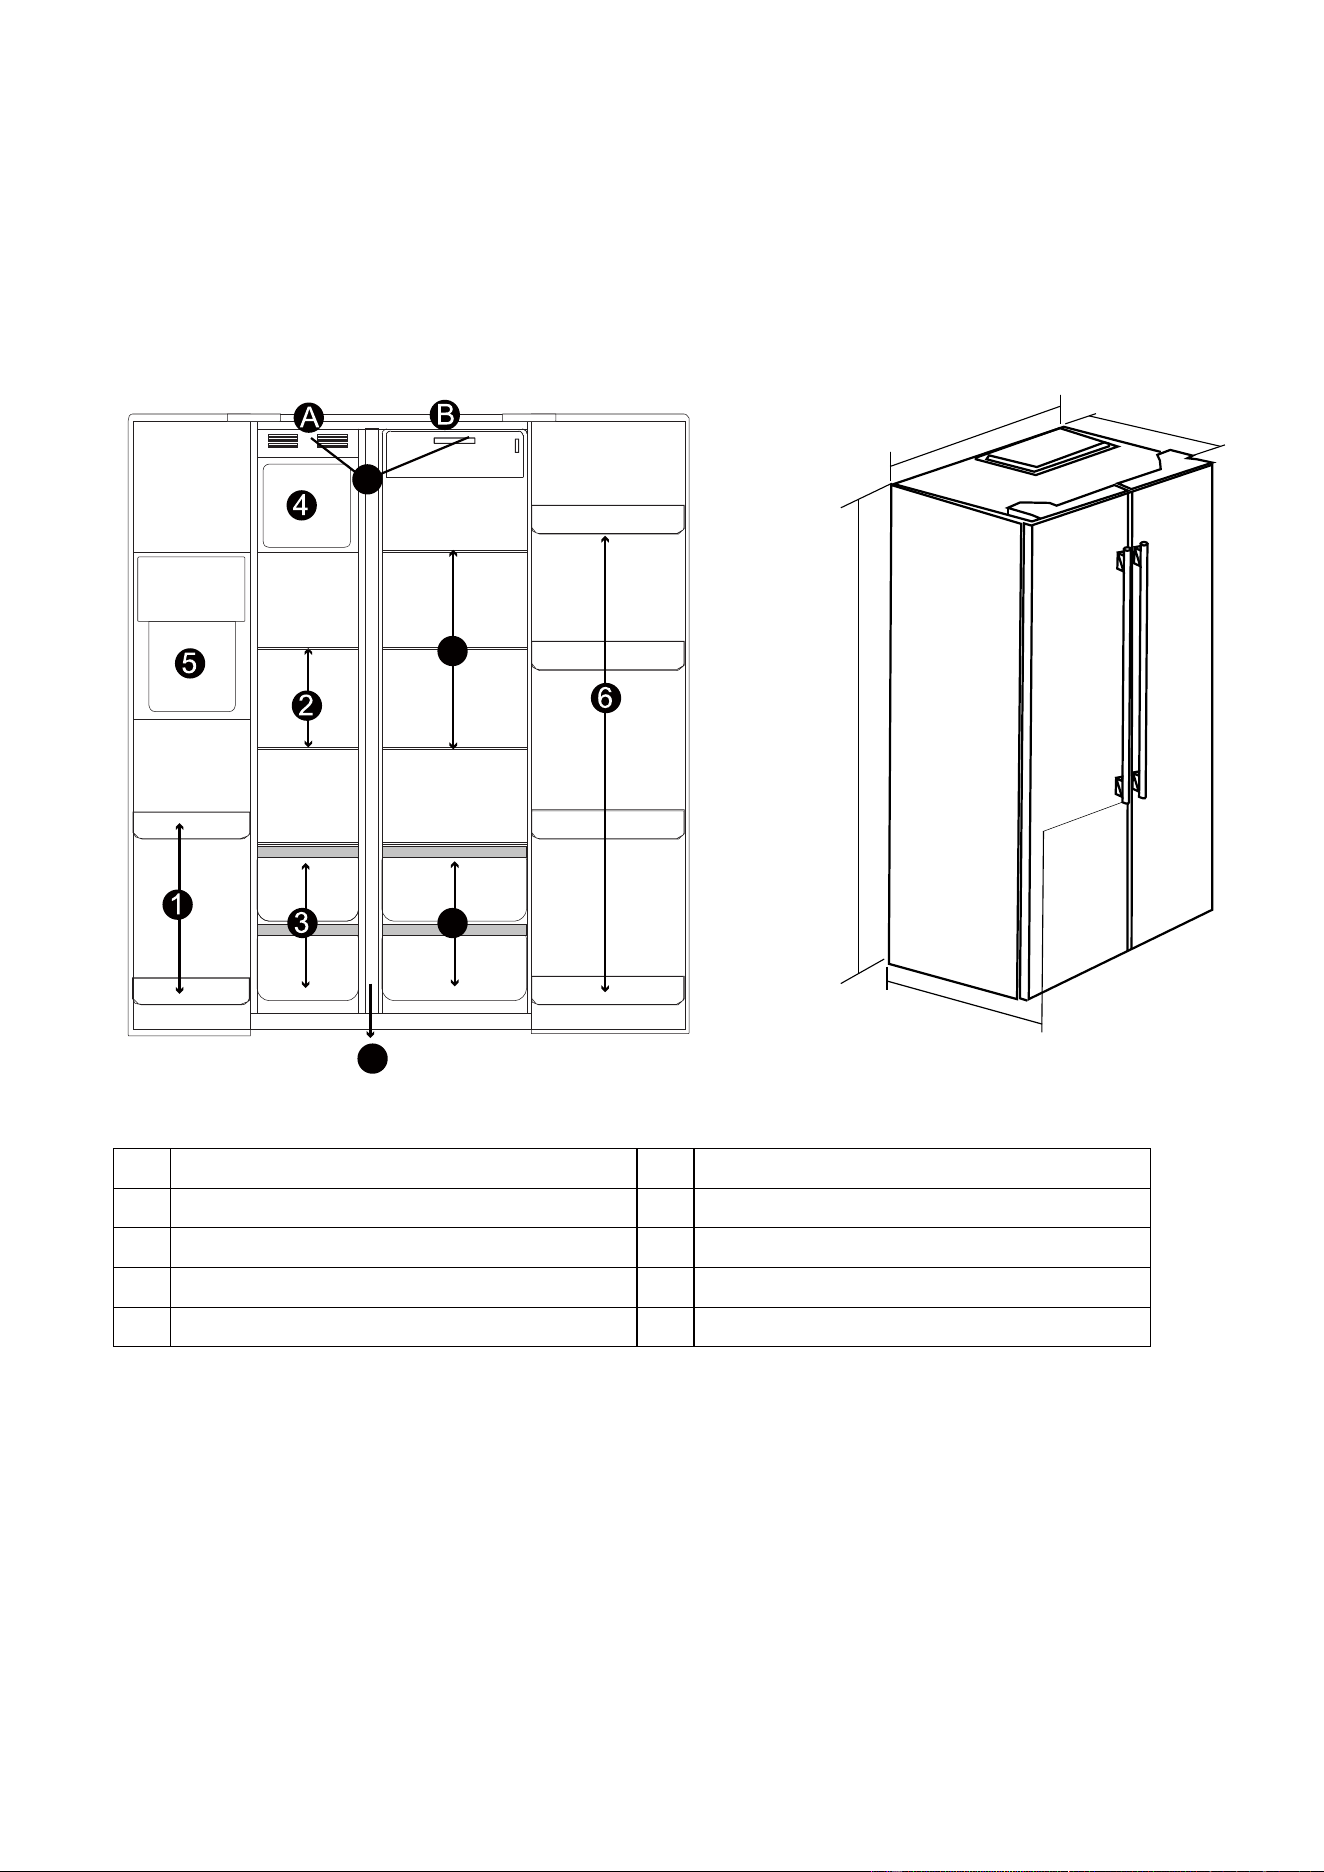
PARTS AND FEATURES
Note
1 (2) Freezer Door Bins
2 (2) Freezer Shelves
3 (2) Freezer Drawers with Glass Cover
4 (1) Ice storage box
5 (1)Dispenser
6 (4) Refrigerator Door Bins
7 (3) Refrigerator Shelves
8 (2) Vegetable Crispers with Glass Cover
9 LED Interior Lighting in Each Section
10 Section Separator
10
7
8
9
35.87"
24.01''
29.76"
70.08''
IMPORTANT SAFETY INSTRUCTIONS
WARNING
To reduce the risk of fire, electrical shock, or
injury when using your refrigerator-freezer,
follow these basic precautions:
•Read all instructions before using the refrigerator-freezer.
•
DANGER or WARNING: Risk of child entrapment. Before you throw away your old refrigerator or
freezer:
- Take off the doors.
- Leave the shelves in place so that children may not easily climb inside.
•Never allow children to operate, play with, or crawl inside the refrigerator-freezer.
•Never clean refrigerator-freezer parts with flammable fluids. The fumes can create a fire hazard or
explosion.
•Do not store or use gasoline or any other flammable vapours and liquids in the vicinity of this or any
other refrigerator-freezer. The fumes can create a fire or explosion hazard.
•This appliance is not intended for use by persons (including children) with reduced physical, sensory
or mental capabilities, or lack of experience and knowledge, unless they are being supervised or given
instructions on the use of the appliance by a person who is responsible for their safety.
•Children should be supervised to ensure that they do not play with the appliance.
•If the power cord is damaged, it must be replaced by the manufacturer, its service agent or similar
qualified person in order to avoid a hazard.
•Do not store explosive substances such as aerosol cans with a flammable propellant in this appliance.
•WARNING: Keep ventilation openings in the appliance enclosure or the built-in structure clear of
obstruction.
•WARNING: Do not use mechanical devices or other means to accelerate the
defrosting process, other than those recommended by the manufacturer.
•WARNING: Do not damage the refrigerant circuit.
•WARNING: Do not use electrical appliances inside the food storage compartments of the appliance,
unless they are of the type recommended by the manufacturer.
•This appliance is intended to be used in household and similar applications such as staff kitchen areas
in shops, offices and other work environments; farmhouses and by clients in hotels, motels and other
hospitality environments; bed and breakfast type environments; catering and similar non-retail
applications.
•If the LED light is damaged, it must be replaced by the manufacturer, its service agent or similarly
qualified person in order to avoid hazards.
•The new hose-sets supplied with the appliance are to be used. Any old hose-sets should not be re-used.
•WARNING: Connect to potable water supply only.
-Save these instructions-
9
10
INSTALLATION INSTRUCTIONS
Before Using Your Appliance
• Remove the exterior and interior packaging.
• Check to be sure you have all the following parts:
• Locate the unit away from direct sunlight and heat sources (stove, heater, radiator, etc.). Direct sunlight may
affect the acrylic coating and heat sources may increase power consumption. Extreme cold room temperatures
may also cause the refrigerator- freezer to not perform properly.
• Avoid placing the unit in a moist area.
• Plug the unit into an exclusive, properly-installed grounded wall outlet. Do not under any circumstances cut or
remove the third (ground) prong from the power cord. Any questions concerning power and/or grounding should
be directed to a certified electrician or an authorized FORNO Products service centre.
※The appliance is equipped with an automatic alarm which indicates that one of the doors of the appliance are
opened for a longer period of time.
1. If one of the doors is opened for more than 1 minute,an acoustic warning signal sound.
2. If the door is opened for a prolonged period of time, the acoustic warning signal will sound three times every
30 seconds.
The door alarm can also be quitted permanently by closing the corresponding door.
In order to save energy a prolonged opening of the doors should be avoided.
Door alarm
Fridge compartment switch off/on
(2) Freezer Door Bins1
(2) Freezer Shelves2
(2) Freezer Drawers with Glass Cover3
(1) Ice storage box4
(1)Dispenser5
(4) Refrigerator Door Bins6
(3) Refrigerator Shelves7
(2) Vegetable Crispers with Glass Cover8
Minimum Space Allowances
Top
Sides
Back
•
Before connecting the unit to the power source, let it stand upright for approximately 24
hours. This will
reduce
the possibility of a malfunction in the cooling system due to handling during transportation.
• Clean the interior surface with lukewarm water using a soft cloth.
Installing Your Appliance
• Place your refrigerator-freezer on a floor that is strong enough to support the refrigerator- freezer when
it is fully loaded. To level your refrigerator-freezer, adjust the leveling legs at the bottom of unit.
• ALLOW TWO
(2)INCHES OF SPACE BETWEEN THE BACK OF THE APPLIANCE AND THE
WALL AS WELL AS A MINIMUM OF TWO (2)INCHES AT EACH SIDE OF THE UNIT AND FOUR
(4) INCHES AT THE TOP, WHICH ALLOWS PROPER AIR CIRCULATION TO COOL
THE COMPRESSOR AND CONDENSER.
Four (4) inches
Two (2) inches on each side
Two (2) inches at the back
※Long press"REF.TEMP"button for 10 seconds to set fridge compartment on/off,when fridge compartment
is switched off,the fridge temperature digital display will go off;under the fridge compartment switched off
state,long press
"REF.TEMP"button for 10 seconds to restart fridge function.
11
Improper use of the grounded plug can result in an electrical shock hazard. If the power cord is damaged, have
it replaced by an authorized FORNO Products service centre.
This appliance should be properly grounded for your safety. The power cord of this appliance is equipped with
a three-prong plug, which mates with standard three prong wall outlets to minimize the chance of electrical shock.
Do not under any circumstances cut or remove the third (ground) prong from the supplied power cord.
This appliance requires a standard 115 Volt~/60Hz electrical outlet with three-prong ground plug.
The cord should be secured behind the appliance and not left exposed or dangling to prevent accidental injury.
Never unplug the appliance by pulling the power cord. Always grip the plug firmly and pull straight out from
the receptacle.
Do not use an extension cord with this appliance. If the power cord is too short, have a qualified electrician or
service technician install an outlet near the appliance.
EXTENSION CORD
Because of potential safety hazards under certain conditions, it is strongly recommended that you do not use
an extension cord with this unit. However, if you must use an extension cord it is absolutely necessary that it
be a UL/CUL-Listed,3-wire grounded appliance-type extension cord with a ground plug and outlet, and that
the electrical rating of the cord be 115 volts and at least 15 amperes.
SURGE PROTECTOR
Most electrical appliances use a series of electric control boards to operate. These boards are very susceptible
to power surges and could be damaged or destroyed.
If the appliance is going to be used in an area or if your city / country is prone to power surges / outages; it is
suggested that you use a power surge protector for all electrical devices / appliances you use. The surge
protector that you select must have a surge block high enough to protect the appliance it is connected to.
If you have any questions regarding the type and size of surge protector needed, contact a licensed electrician
in your area.
Damages due to power surges are not considered a manufacturer covered defect and will void your product
warranty.
Electrical Connection
Warning
• Do not place your hand into the mechanical part of the ice maker (above the ice making tray).
Doing so may result in injury.
• To avoid electric shock, which can cause death or severe personal injury, disconnect the refrigerator from
electrical power before connecting a water supply line to the refrigerator.
• The ice maker kit should be installed only by an authorized service technician.
• Connect the ice maker to a drinkable water supply only.
• DO NOT install water supply tubing in areas where temperatures fall below freezing.
• If the water supply is from a water softener, ensure that the softener is maintained and working properly.
Chemicals from a malfunctioning softener can damage the ice maker.
Tips
• If the ice maker will be turned off for a long period of time, turn the water supply valve to the closed position.
• Switch off the ice maker when cleaning the freezer or during short vacations.
• It takes approximately 8-24 hours for the ice maker to start producing normal ice cubes. Air in new
plumbing lines may cause ice maker to cycle two or three times before making a full tray of ice.
New plumbing may cause ice to be discoloured or to have poor flavour during the first 24 hours.
Making Ice Cubes
• Make sure to disconnect the refrigerator from the electrical power supply before installing the water supply
pipes properly according to the installation manual. Once the water supply is connected properly, connect
the refrigerator to the electrical power supply.
• The time needed to make ice will vary according to room temperature, water type, amount and temperature
of the water inside the ice making tray, as well as the machine’s status.
• The size of the ice cubes will vary according to the amount of water inside the ice storage box.
• The ice cubes will stick together or become smaller when storing for extended periods of time.
• Be careful not to injure your hand when breaking apart ice cubes that are stuck together.
The water supply system must be installed and connected by a professional technician.
(WARNING: Connect to drinkable water supply only.)
Access to a household cold water line with water pressure:
Min. pressure: 1.4bar
Max. pressure: 6.9bar
• A shutoff valve to connect the water supply line to your household water system.
DO NOT use a self-piercing type shutoff valve.
To Connect Water Supply Line to Ice maker Inlet Valve
• Disconnect refrigerator from electrical power supply.
• Remove all installation accessories (water pipe, connector, washer, clip) from inside the refrigerator.
• Tighten all connections where they might leak, turn on the water supply at shutoff valve.
• Reconnect refrigerator to the electrical power supply.
Tips
The ice maker will work normally only when its sensor detects the environment temperature to reach-13°C.
When the first time the refrigerator is plugged-in, after 8-24 hours(depending on the amount of food stored
in the refrigerator),the ice maker will start to work normally when it is at ON position.After the ice maker has
been working for 72 hours,the storage tray will be full of ice-cube.
12
13
OPERATING YOUR APPLIANCE
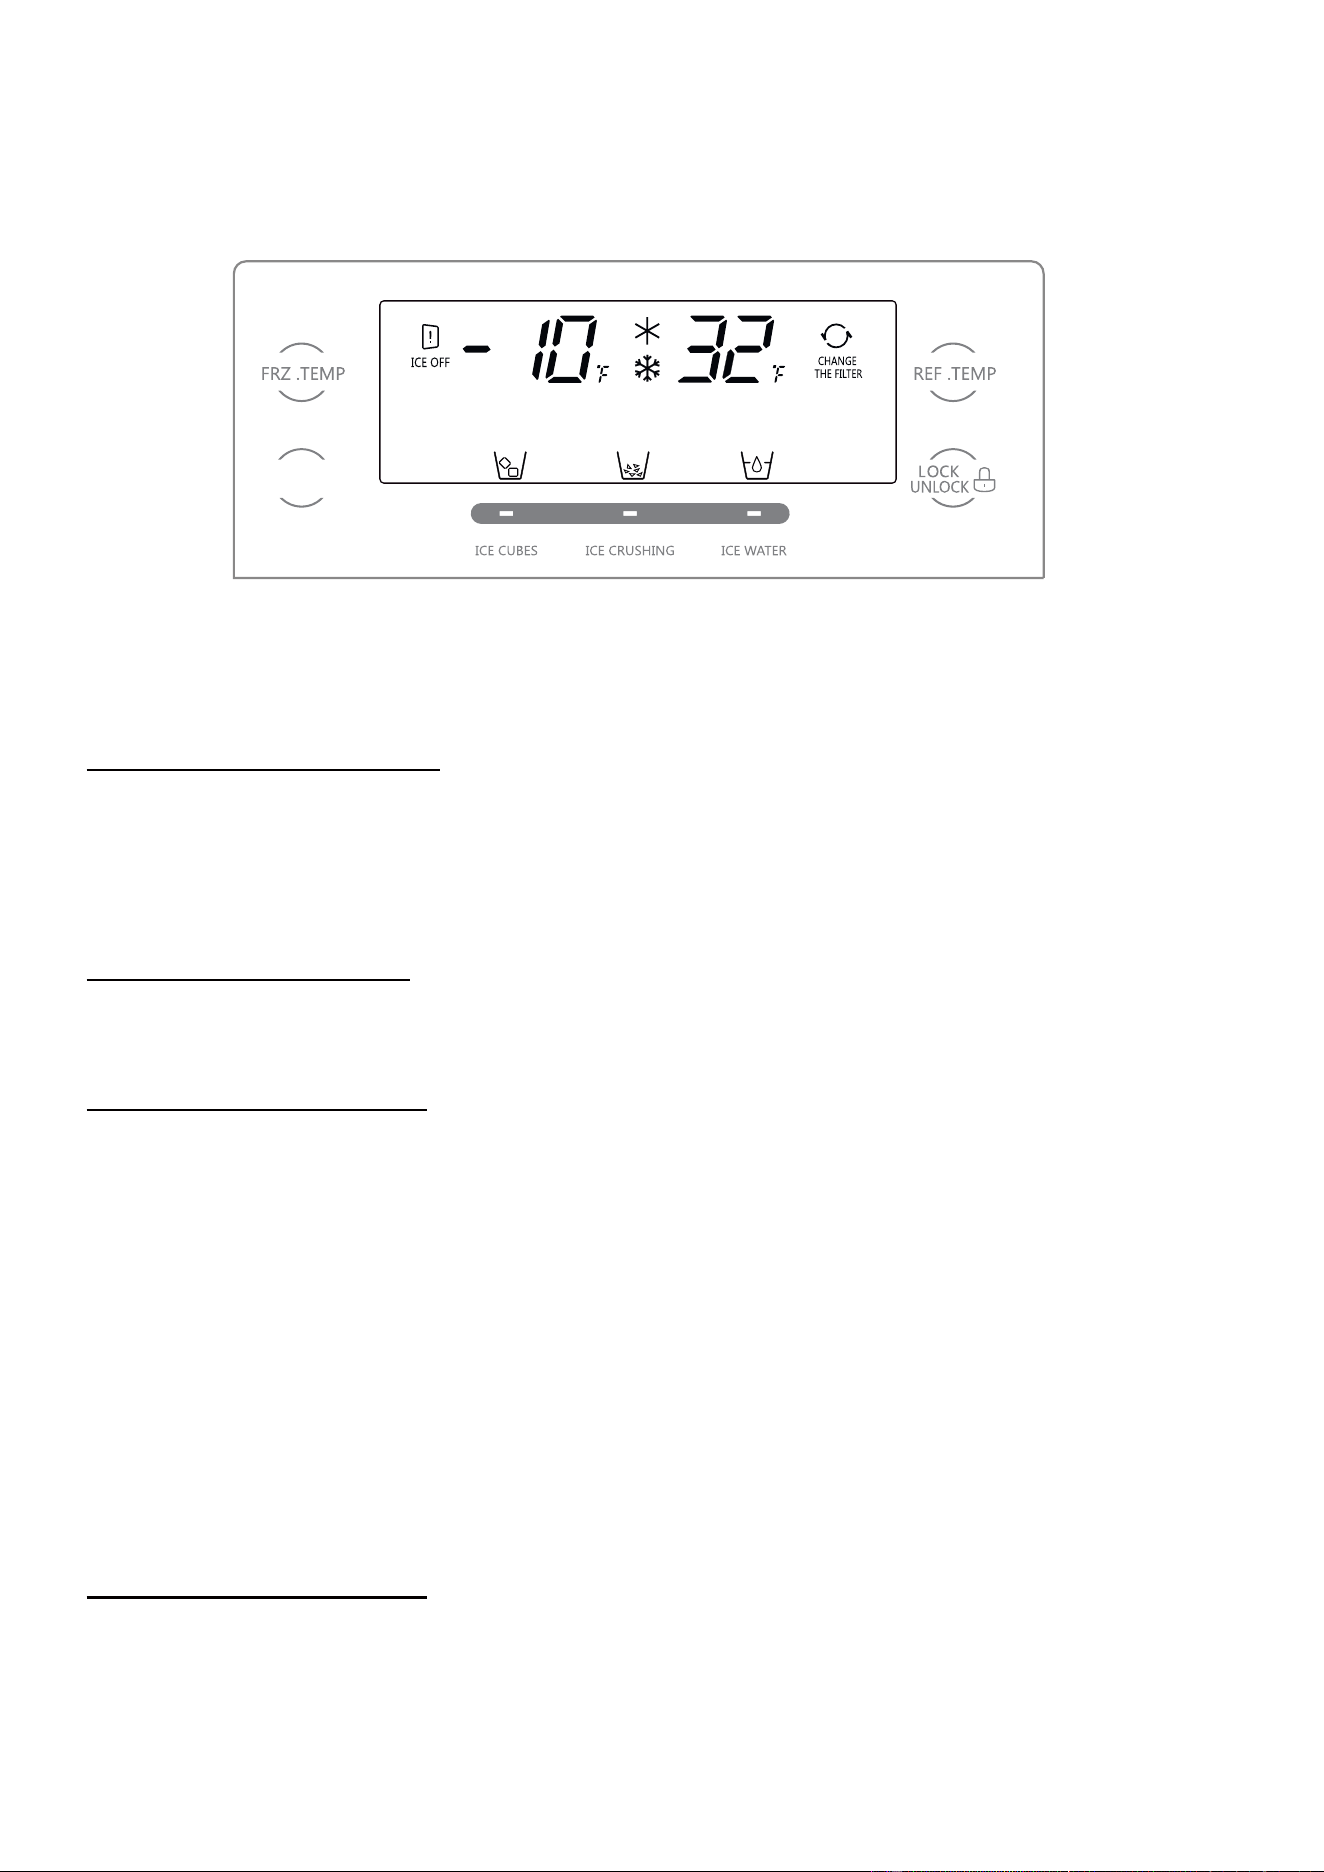
Set temperature range:
1.Fridge temperature range: 32~43°F (Default value 38°F)
2.Freezer temperature range: -10~5°F (Default value -2°F)
CONTROL PANEL – CHILD LOCK
This product has button lock funtion.
When lock the control panel,the other buttons are inoperable,if touch other buttons,REF.TEMP and FRZ.TEMP
icon will flash.
To exit lock mode,press and hold the lock button for 3s.
CONTROL PANEL – STANDBY
The CONTROL PANEL will go dark after approximately 20 seconds of no activity.
To reactivate the display, simply press any of the buttons on the control panel.
Setting the Temperature Control
• Your unit has one control for regulating the temperature. The temperature control is located on the side of the
refrigerator compartment door.
• The first time you turn the unit on, the unit will start at the factory-set default temperature, which is 38ºF in the
refrigerator compartment and -02ºF in the freezer compartment.
• The first time you turn the unit on, adjust the temperature in the refrigerator compartment to 32ºF and run for
at least 4 hours before placing food inside. This will ensure that the freezer compartment is thoroughly chilled
and the refrigerator compartment is stabilized before food is placed inside. Then adjust the temperature setting
to your desired setting.
• To adjust the temperature in each zone, press the appropriate zone button, and the selected zone will flash
on and off.
R-chamber temperature setting
• The default temperature of the fridge is 38ºF. To change the temperature press the REF.TEMP button to cycle
through the set temperatures:
→38→36→34→32→32+ (Super fridge)→43→41→39→38
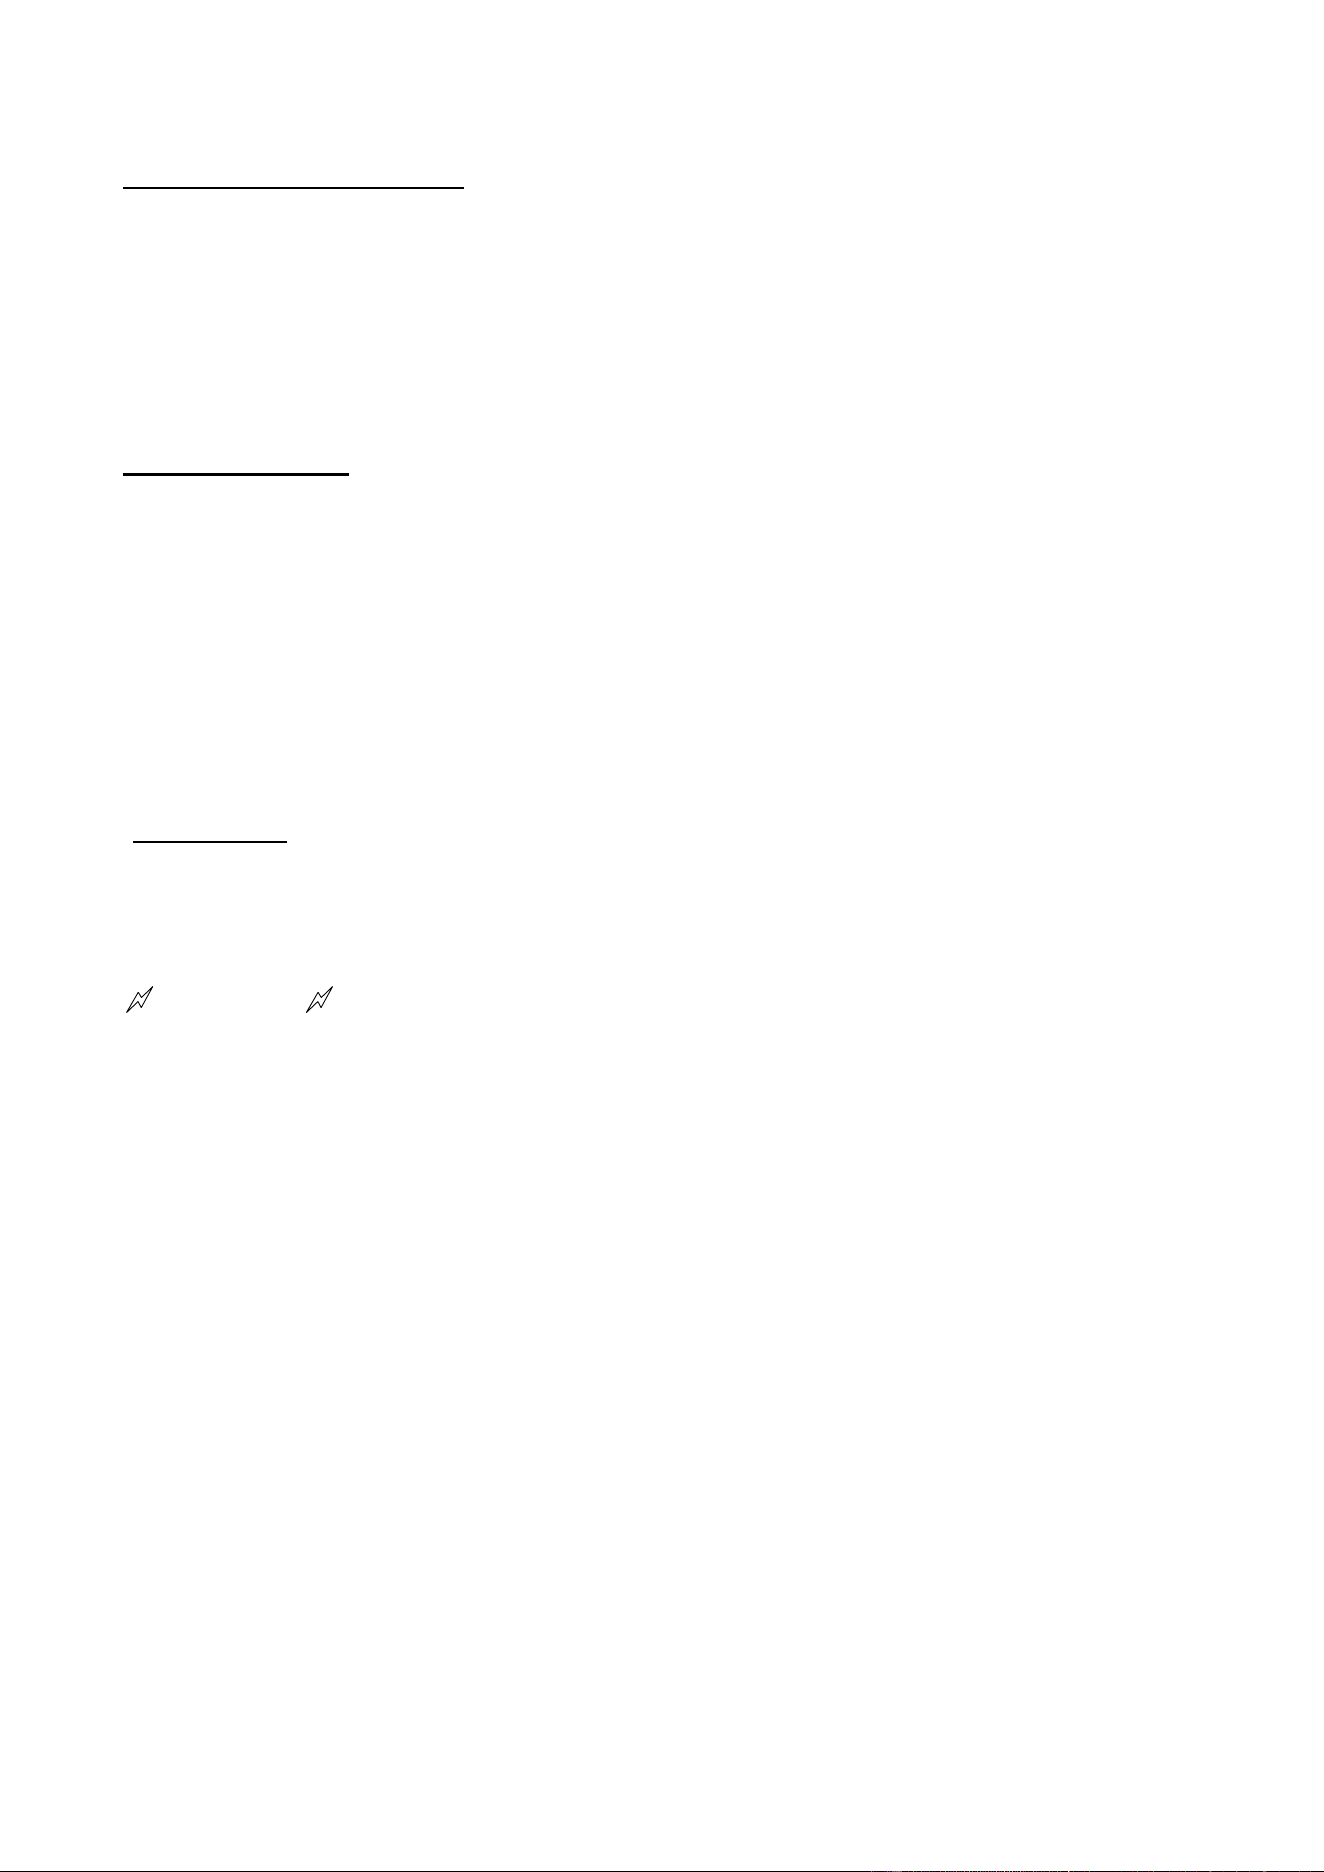
ICE ON/OFF
Ice Maker
14
This ice maker works automatically (automatic water supply, automatic production and detaching of ice
cubes), therefore there is no need to supply water manually. When the ice cube storage is full, the sensor
rod will automatically send a signal to the machine to stop making ice.
F-chamber temperature setting
CAUTION: Do not put fresh roods directly on the frozen foods.
• The default temperature of the freezer is -02ºF.To change the temperature press the FRZ.TEMP button to cycle
through the set temperatures:
-02→-04→-06→-08→-10→-10+ (Super freezer)→05→04→02→00.
Sabbath Mode
Do not take ice cubes with fragile containers to avoid injuries caused by breakage.
Do not touch the ice outlet with fingers to prevent crushed ice from injuring hands.
Other precautions:
• Do not use too deep, narrow or soft cups, and put the cup close to the ice outlet to prevent ice cubes from
jumping on the ground; keep a proper distance between the cup and ice outlet; if the cup is too close to the ice
outlet, it may obstruct ice discharge; after the cup is full. release the ice discharge button to prevent ice cubes
from spilling on the ground.
• When taking ice or water, please keep the cup at the ice outlet for 2s ~ 3s after releasing the ice discharge
button, because there may be ice or water coming out at the moment. After confirming there is no ice or water
coming out, just take away the cup.
• lf using crushed ice function only, the ice outlet may be blocked by crushed ice, and remove residual crushed
ice; when selecting ice cube after crushed ice, there may be a little crushed ice.
• In case of power-off for a long time, ice in the ice storage box may melt into water which then flows into the
freezing chamber; in this case, take out the ice storage box and discard ice, and wipe away water in the ice
storage box and freezing chamber.
When a new refrigerator is started, attention shall be paid to the following:
• When taking ice cubes or crushed ice,please take off the thermal insulation cover; while at other times,please
make sure the thermal insulation cover is covered export.
• When taking water from a new refrigerator for the first time, press and hold the ice discharge button, take the
first 1 ~2 L of water and discard and then take water for drinking;
• When using the ice maker for the first time, the first box of ice is not suitable for eating from the point of
sanitation.
WARNING
1. How to enter Sabbath mode:
when the freezer is open, press and hold the "Fridge" button + the "Lock" button for 10 seconds;
2. In Sabbath mode:
a.There is no door opening alarm;
b.The LED lights in both refrigerator and freezer compartment are off;
c.The display panel does not display unless it is adjusted manually ;
*In Sabbath mode, it will still display and emit light after touching the panel, but it will turn off after waiting for 20
seconds without operation or after opening and closing the door once.
d.The refrigerator meets the normal refrigeration demand;
3. How to exit Sabbath mode:
a.When the freezer is open, press and hold the “Fridge” button + the “Lock” button for 10 seconds to exit manually;
b.When the working period of Sabbath mode exceeds 80 hours, it will automatically exit.
15
Make ice
The ice maker and ice storage box are arranged at the upper part of freezing chamber. When using the ice maker,
please make sure that the ice maker switch is turned on and the water system is connected, and the ice maker will make
ice automatically; when the ice storage box is full of ice, the ice making process will stop automatically.
The ice maker can make about 1,500g of ice every 24 hours.
When the freezing chamber reaches the set temperature, the ice maker can make the first batch of ice just for several
hours.
CAUTION:
When the ice maker is making ice cubes, you may hear the beep from water valve, flowing sound of water into ice
maker, and falling sound of ice cubes.
The catch basin shall be cleared timely to prevent water from spilling to destroy the floor.
Ice maker install and uninstall
lt is suggested to remove the ice maker, clean, and then install when it is used for the first
time or for a long time.
Please power off the refrigerator before removal.
Take out the ice storage box ,lift forcibly with both hands, and then pull it out;
Clean, dry and then install.
When installing the ice storage box , align the bottom with the rails at both sides, put into
the rails, and then push;
Ice and water dispenser
Tips
The ice maker will work normally only when its sensor detects the environment temperature to reach-13°℃.
When the first time the refrigerator is plugged-in,after 8-24 hours(depending on the amount of food stored in the
refrigerator), the ice maker will start to work normally when it is at ON position. After the ice maker has been
working for 72 hours, the storage tray will be full of ice-cube.
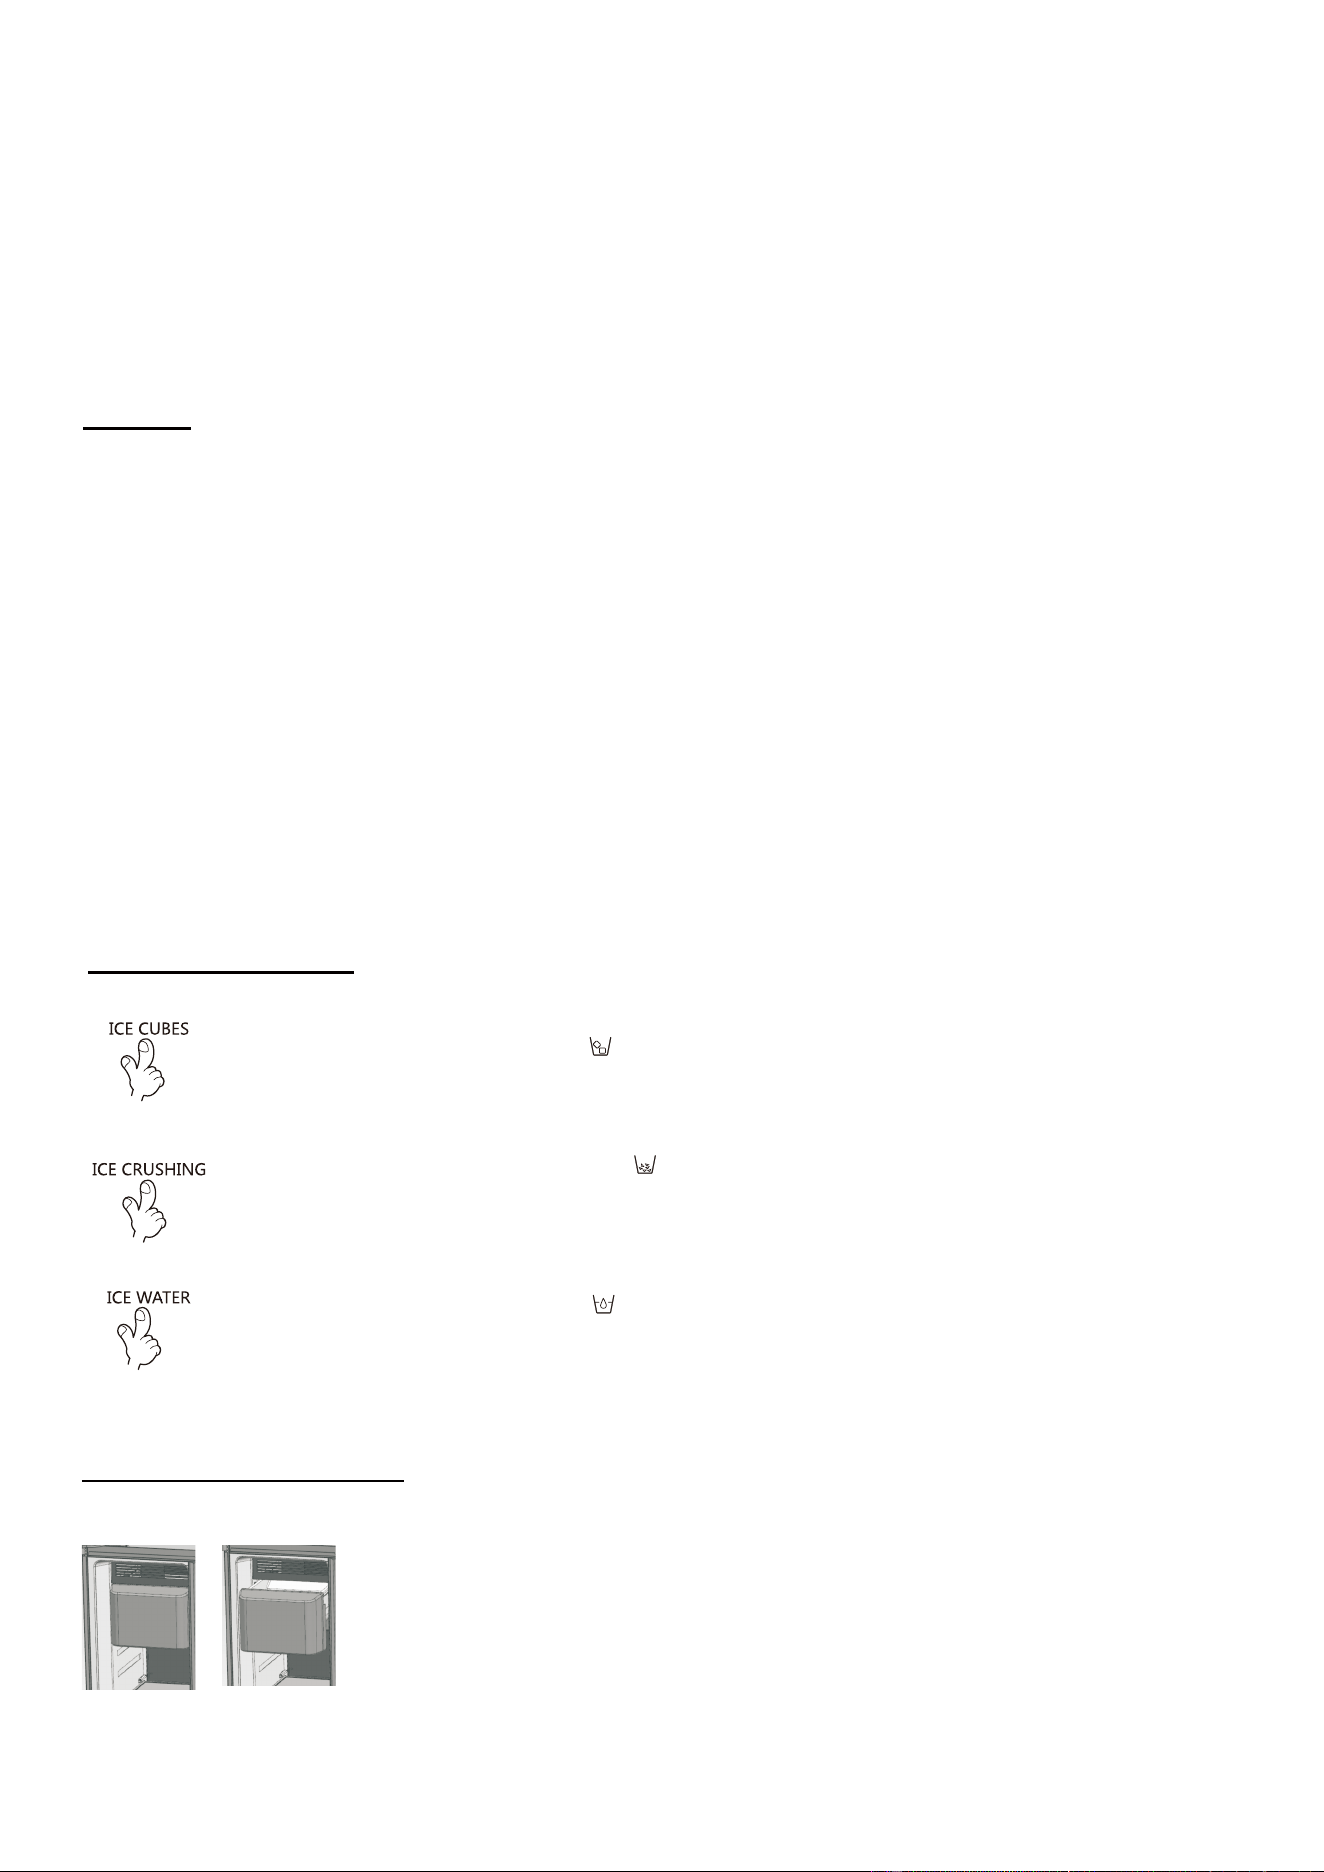
• Touch “ICE CUBES” button, if [ ] indicator comes on, press and hold ice discharge button with
the glass cup, and ice cubes will come out.
• Touch “ICE CRUSHING” button, if [ ] indicator comes on, press and hold ice discharge button
with the glass cup, and crushed ice will come out.
• Touch “ICE WATER” button, if [ ] indicator comes on, press and hold ice discharge button with
the glass cup, and cold water will come out.
It takes about one minute to pump water into the water tank first time after product installation or replacing
water tank. This process doesn't repeat later in daily use.
16
Water filter
CAUTION:
• Do not use the lce / Water Dispensing system at places where water quality is poor or water pollution is not confirmed
fully.
• The filter can be bought from After-sales Service Center.
• The filter element in the ice maker can be using 180 days. After 165 days using, the indicator lamp of the filter element
will flash. the icon of the display of the filter element will always bright more than 180 days. lt reminds the users need
replace the filter element.After replacing the filter element, press "ICE WATER" more than 5 seconds, the changing icon
of filter element will extinguish.
lmportant information on water filter
• lf the refrigerator is idle for a long time or drinking water has abnormal taste, clean the water system fully, and just take
water from the ice and water dispenser for several minutes. lf there is bad odor or taste, the filter shall be replaced.
Replace the filter
• Before replacing the filter, you must disconnect the power plug of refrigerator or turn off the main power switch, and cut
off the water source.
• Unscrew and take down the filter according to the arrow indication on the filter;
• Insert the new filter, and tighten;
• After replacing the filter, take some water from the ice and water dispenser to remove air from the water system;
• Discard the waste filter directly into a garbage can
CAUTION:
The water filter aims at the particles in water, other than bacteria or microorganisms.
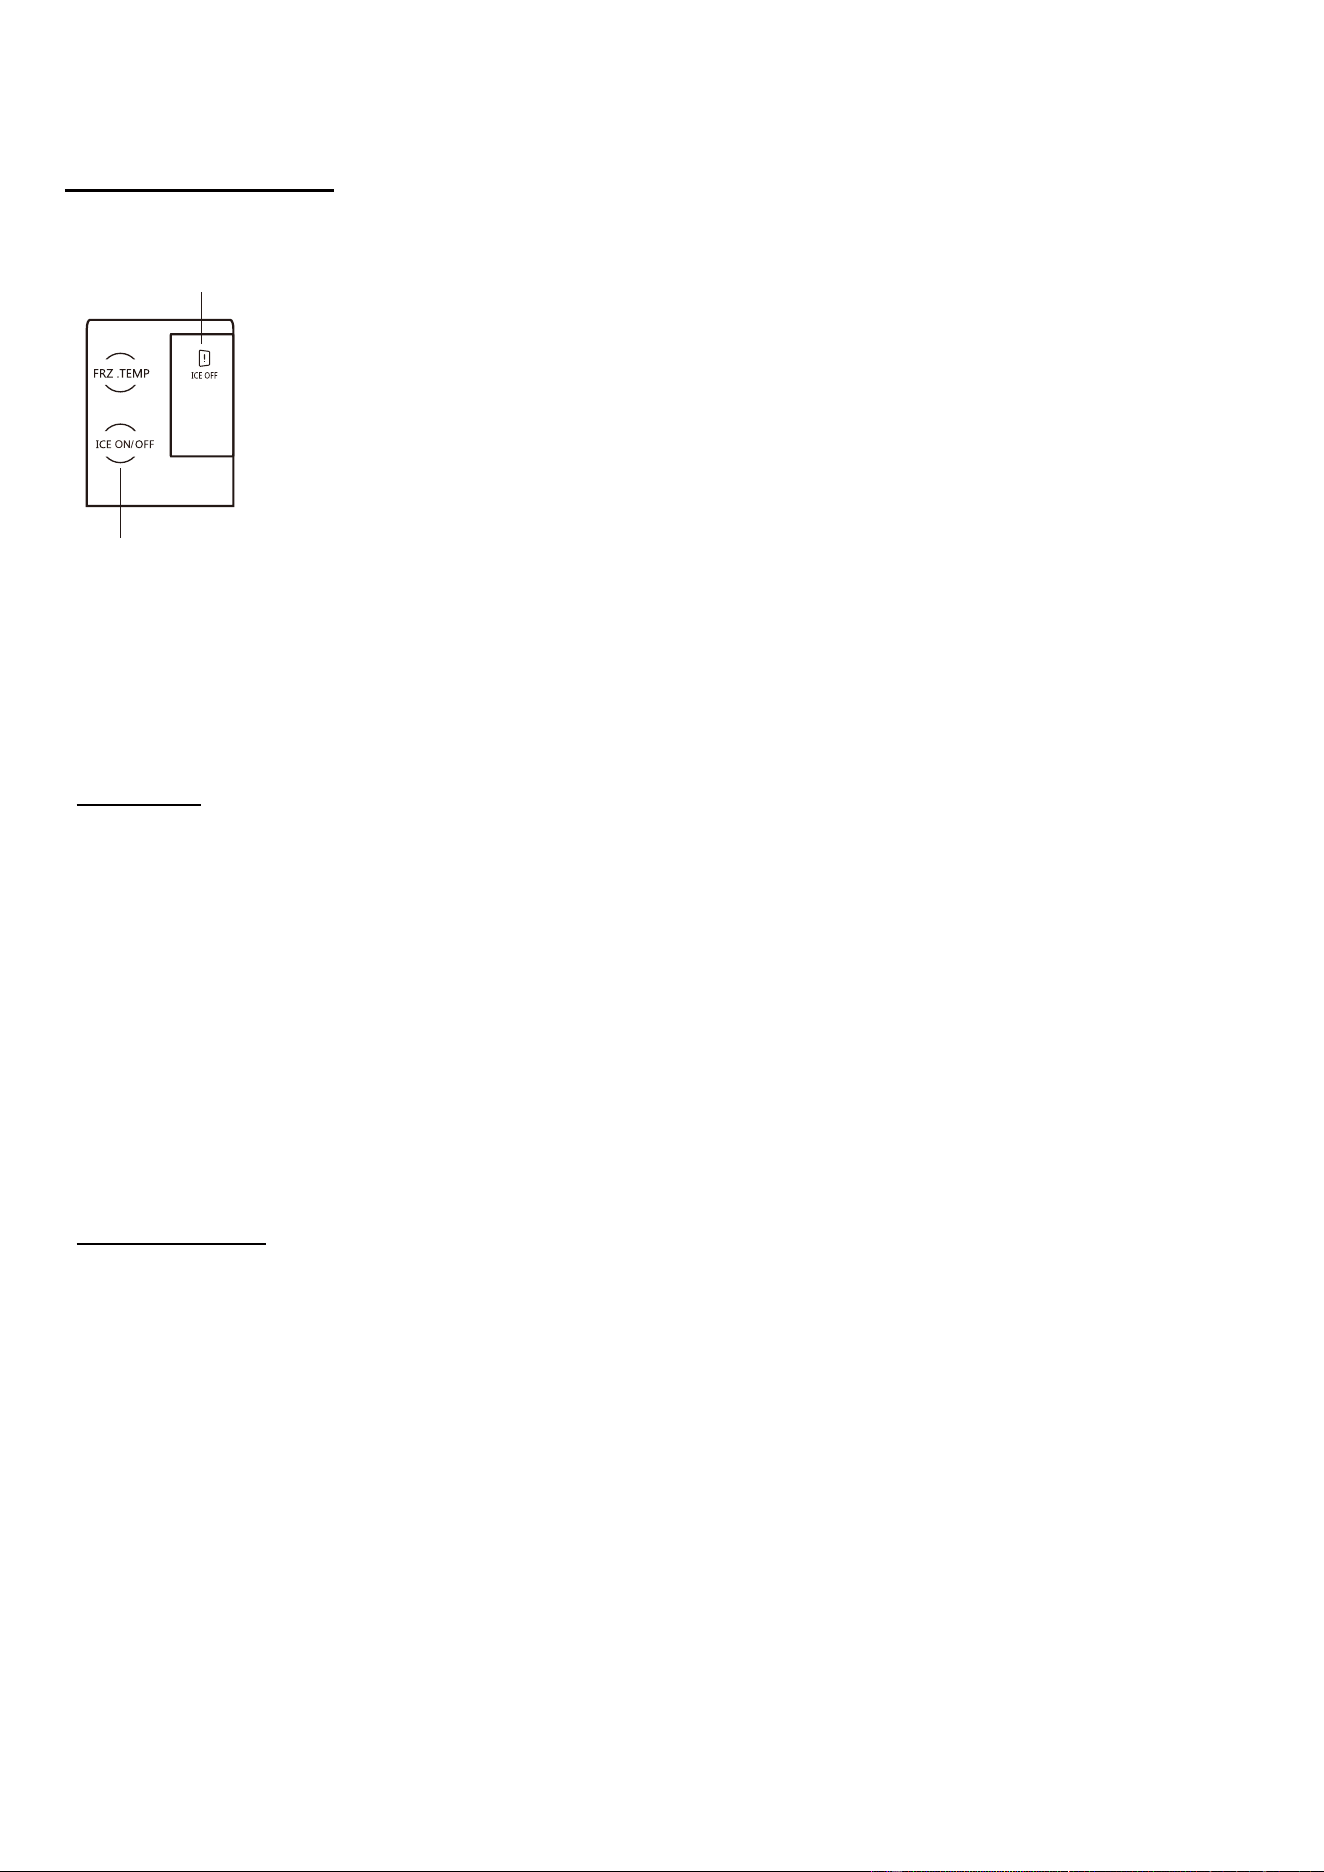
Switch off the ice maker
lf the ice maker function is not needed for a long time, please switch off the ice maker
temporarily;
Hint: This only disables the ice making function; the remaining ice in the ice storage box can
be taken still, and water system operates normally.
Press“ICE ON/OFF” button for 3s to switch off the ice maker,then the ICE ON/OFF icon is
lighted.
After the ice maker is turned off, the ice/water icon on the control panel is displayed still,and
“ICE CUBES /ICE CRUSHING/ICE WATER" button is enabled, not affecting ice/water
discharge.
CAUTION:
Before switching off the ice maker, you must disconnect the water system of refrigerator
several hours in advance; after switching off the ice maker, empty and clean the ice storage
box, and then put it back.
When the ice maker function is enabled, if there is ice in the ice storage box still, ice may
fall during self-check of the refrigerator.
Ice maker
on/off button
Ice maker
OFF icon
NOTE:
WE DO NOT RECOMMEND INSTALLING THE REFRIGERATOR WHERE THE TEMPERATURE
WILL DROP BELOW 32ºF (0ºC) OR RISE ABOVE 110ºF (43ºC). THE COMPRESSOR WILL NOT
BE ABLE TO MAINTAIN PROPER TEMPERATURES INSIDE THE REFRIGERATOR.
FOR INSTALLATIONS WHERE THE TEMPERATURES WILL DROP BELOW 32º, SET THE
FREEZER TEMPERATURE CONTROL TO THE “COLDEST” SETTING. THIS WILL IMPROVE
THE FUNCTIONING THE REFRIGERATOR UNDER THESE CONDITIONS.
CARE AND MAINTENANCE
Cleaning Your Appliance
• Unplug the unit and remove the food and bins.
• Wash the inside with a warm water and baking soda solution. The solution should be about 2 tablespoons
of baking soda to a quart of water.
• Wash the bins with a mild detergent solution.
• The outside of the unit should be cleaned with mild detergent and warm water.
• During cleaning, make sure that no water will enter the switch, control panel, door lamp and top control box.
• Remove dirt from the outside of refrigerator with mild cleaner,then wipe with clean soft cloth, and let the
refrigerator dry naturally.
• When cleaning door sealing strip, always use clean water, wipe with dry cloth and let it dry naturally. Wet
soft cloth with warm water or neutral cleaner to wipe the refrigerator body except the door sealing strip.
• lt is forbidden to flush the refrigerator directly with water, which will affect electrical insulation properties, etc.
• lt is forbidden to clean the refrigerator with metal wipers,ware brushes, coarse abrasive cleaners, strong
alkaline detergents, or flammable or toxic cleaning fluids
CAUTION
Failure to unplug the refrigerator-freezer could result in electrical shock or personal injury.
Power Failure
• Most power failures are corrected within a few hours and should not affect the temperature of your
refrigerator-freezer if you minimize the number of times the door is opened. If the power is going to be off
for a longer period of time, you need to take the proper steps to protect your food.
Vacation Time
Short vacations: Leave the unit operating during vacations lasting less than three weeks.
Long vacations: If the appliance will not be used for several months, remove all food and unplug the power
cord. Clean and dry the interior thoroughly. To prevent odour and mold growth, leave the door open slightly,
wedging it open if necessary.
Moving Your Appliance
• Remove all food inside the appliance.
• Securely tape down all loose items inside the unit.
• Turn the leveling screws up to the base to avoid damage.
• Tape the door shut.
• Be sure the unit stays in the upright position during transportation.
Energy Saving Tips
• The unit should be located in the coolest area of the room, away from heat-producing appliances or
heating ducts, and out of direct sunlight.
• Let hot foods cool to room temperature before placing them in the unit. Overloading the unit forces the
compressor to run longer. Foods that freeze too slowly may lose quality or spoil.
• Be sure to wrap foods properly, and wipe containers dry before placing them in the unit. This cuts down
on frost build-up inside the freezer.
• Organize and label food to reduce the frequency of door openings and extended searches for items inside
the unit. Remove as many items as needed at one time and close the door as soon as possible.
17
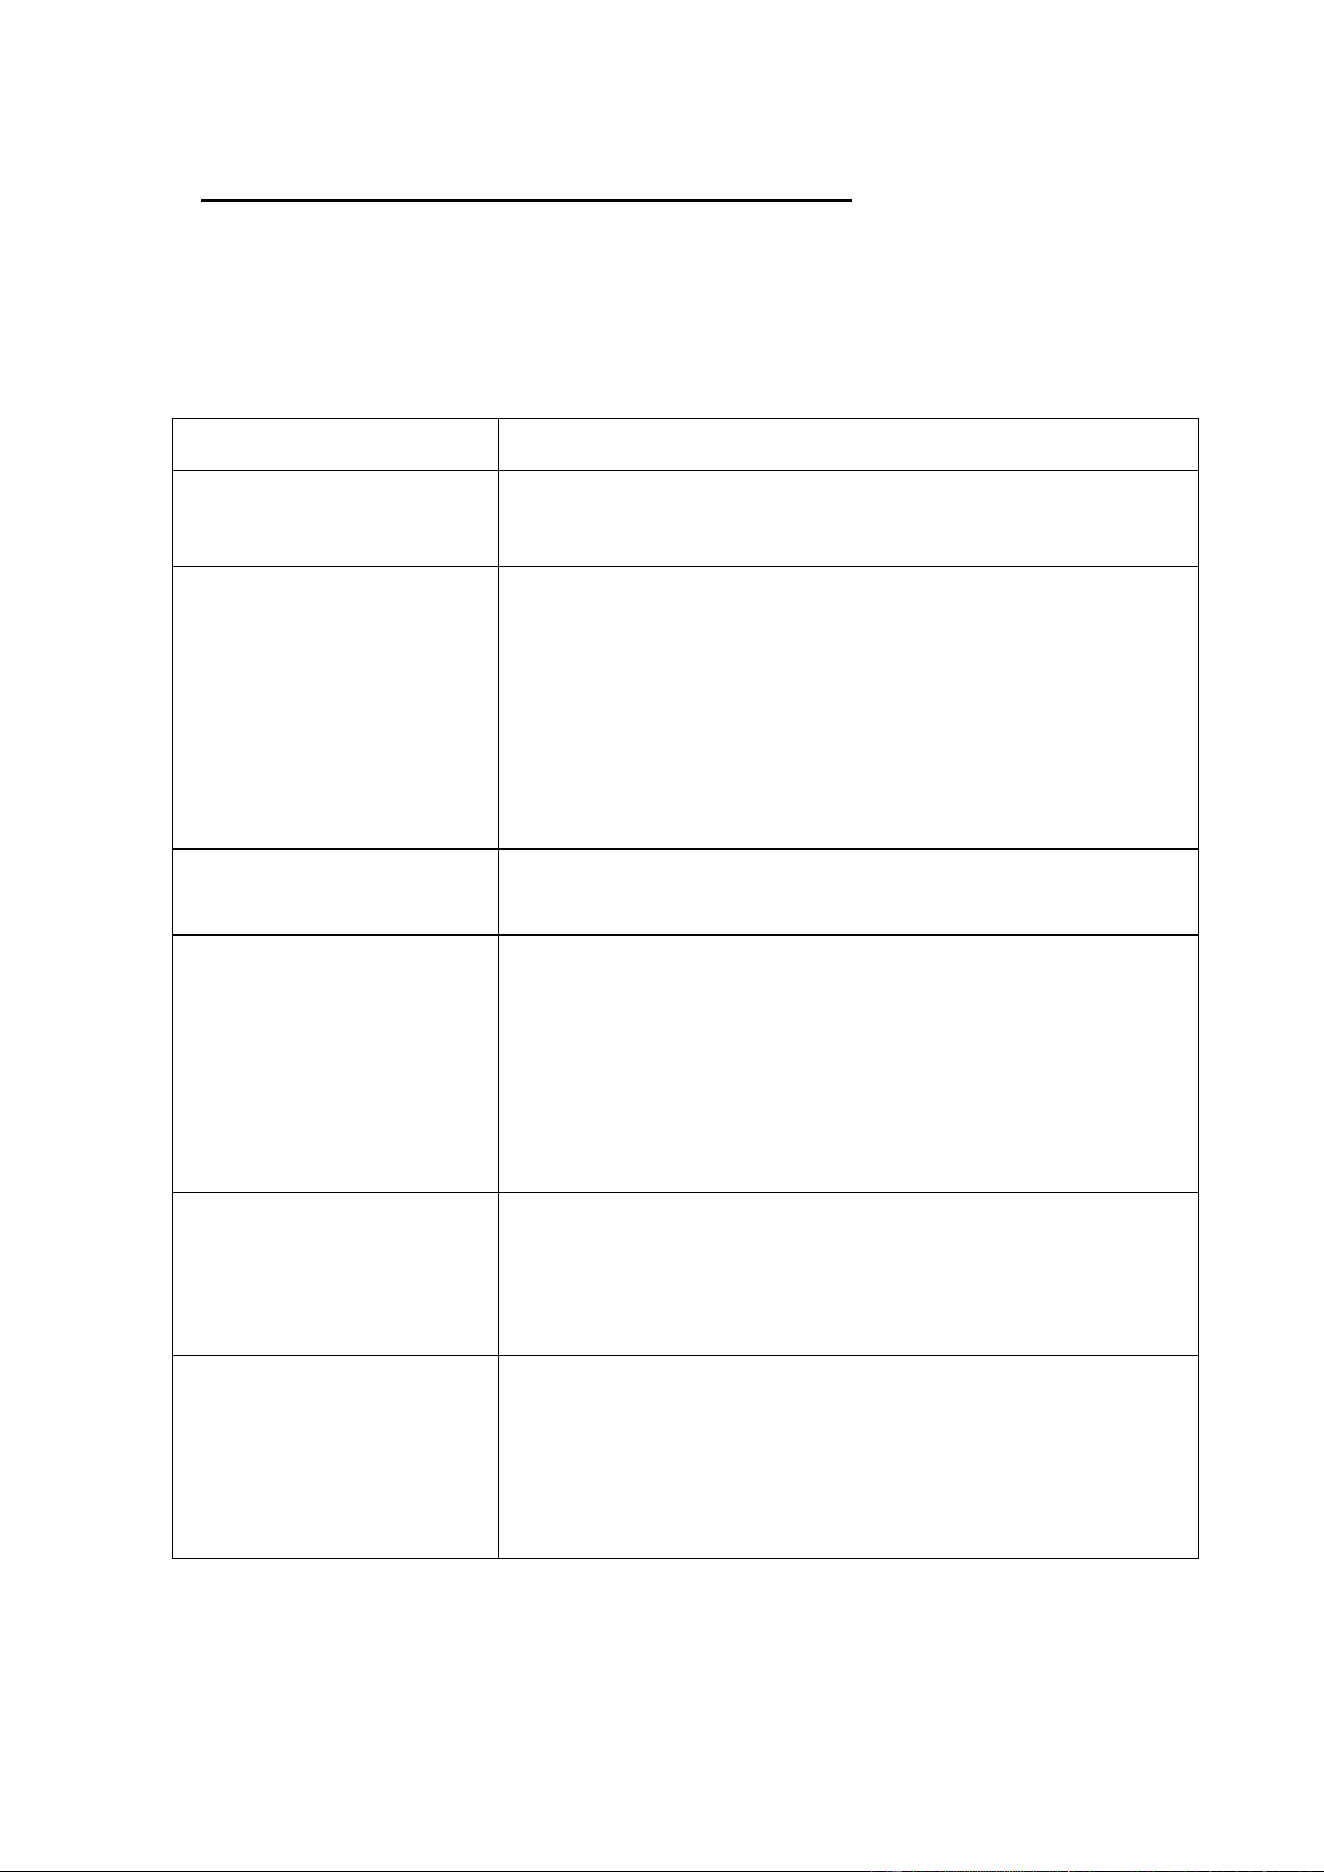
PROBLEMS WITH YOUR APPLIANCE?
You can solve many common refrigerator-freezer problems easily, saving you the cost of a possible service
call. Try the suggestions below to see if you can solve the problem before calling for service.
Unit does not operate.
Not plugged in.
The circuit breaker tripped or there is a blown fuse.
Compressor turns on and
off frequently.
The room temperature is hotter than normal.
A large amount of food has been added to the refrigerator - freezer.
The door is being opened too often.
The door is not closed completely.
The temperature control is not set correctly.
The door gasket does not seal properly.
The refrigerator-freezer does not have the correct clearances.
Vibrations. Check to make sure that the refrigerator-freezer is level.
Section separator seems to
be warm to the touch.
This is normal.
The section separator area contains an
anti-condensation heater and will be warm to the touch during the
anti-condensation cycle to prevent condensation forming between
the twosections.
The unit seems to make too
much noise.
The rattling noise may come from the flow of refrigerant,
which is normal.
As each cycle ends, you may hear gurgling sounds caused by the
flow of refrigerant in your refrigerator - freezer.
Contraction and expansion of the inside walls may cause popping
and crackling noises.
The unit is not level.
The door will not close
properly.
The unit is not level.
The door is reversed and not properly installed.
The gasket is dirty.
The bins are out alignment.
TROUBLESHOOTING GUIDE
PROBLEM POSSIBLE CAUSE
18
NOTE:
• IF THE UNIT IS UNPLUGGED, HAS LOST POWER, OR IT IS TURNED OFF. YOU MUST WAIT
3 TO 5 MINUTES BEFORE RESTARTING THE UNIT. IF YOU ATTEMPT TO RESTART BEFORE
THIS TIME DELAY, THE REFRIGERATOR-FREEZER WILL NOT START.
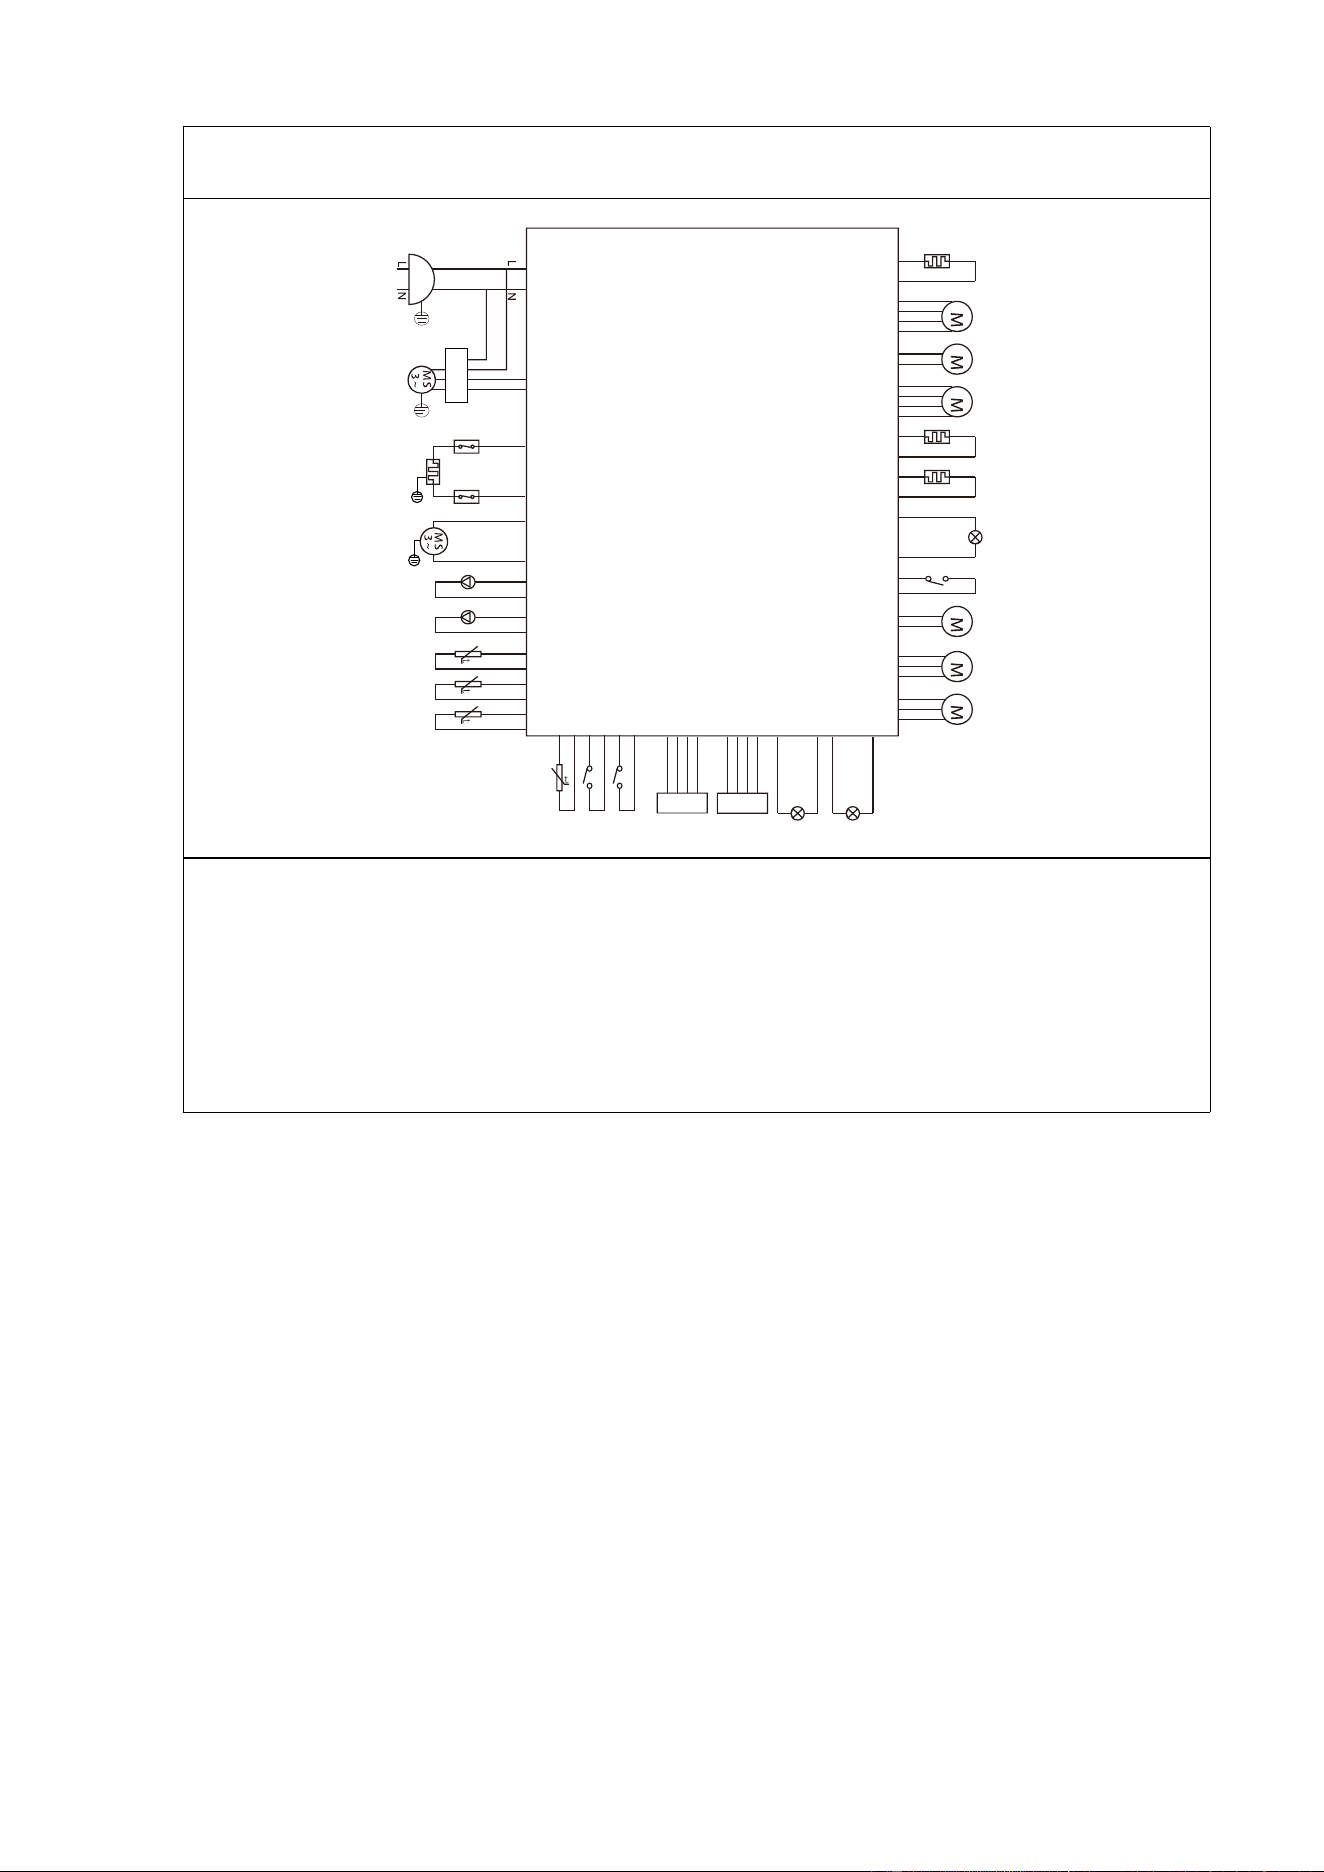
WIRING DIAGRAM
19
a-Signal
b-Inverter
c-Compressor
d-Thermal protector
e-Defrost heater
f-Push ice motor
g-Drinking water valve
h-I/M water valve
i-R. sensor
g-F. sensor
k-Defrost sensor
l-I/M sensor
m-F.door switch
n-R.door switch
o-Temp. and Humidity sensor
p-Display board
q-F. lamp
r-R. lamp
s-F. fan motor
t-Condenser fan motor
u-Ice outlet valve motor
v-Micro switch
w-IWD lamp
x-Ice uotlet valve heater
y-IWD heater
z-I/M drive
aa-Ice select motor
ab-Stepping motor
ac-Damper heater
Control Board
a
d
e
f
g
h
i
j
k
l m n o p
q
s
t
u
v
x
y
z
aa
ab
ac
w
r
b
c
FFRBI1844-36WHT
FFRBI1844-36BLK
Réfrigérateur-congélateur 36 po côte à côte de 20,0 pieds cubes,
avec machine à glaçons
AVANT UTILISATION, VEUILLEZ LIRE ET SUIVRE TOUTES LES RÈGLES DE SÉCURITÉ ET
LES INSTRUCTIONS D'UTILISATION.
®
21
TABLE DES MATIÈRES
Diagramme de câblage
Guide de dépannage
Utilisation de votre appareil
Mode sabbat
Machine à glaçons automatique / Distributeur de glace et d’eau /
Installation et désinstallation de la machine à glaçons
Mise hors tension de la machine à glaçons / Filtre à eau / Replacement du filtre
Pièces et caractéristiques
Sécurité de l'appareil
Consignes de sécurité importanes
Avertissement de la machine à glace
Connexionélectrique
Instructions d'installation
Consignes de sécurité importantes
Service à la clientèle 22
25
26
27
28
29
30
31
32
33
34
34
35
36
36
36
36
37
38
Conseils d'économied'énergie
Panne de courant / Périodes de vacances / Déplacement de votre appareil
Nettoyage de votre appareil
Nettoyage et entretien
22
Merci d'avoir acheté un produit Forno. Veuillez lire l'intégralité du manuel d'instructions avant d'utiliser votre nouvel
appareil pour la première fois. Que vous soyez un utilisateur occasionnel ou un expert, il vous sera utile de vous
familiariser avec les pratiques de sécurité, les caractéristiques, le fonctionnement et les recommandations d'entretien
de votre appareil.
Le modèle et le numéro de série sont indiqués à l'intérieur du produit. Pour les besoins de la garantie, vous aurez
également besoin de la date d'achat.
Services au Canada et aux États-Unis
Gardez le manuel d'instructions à portée de main pour répondre à vos questions. Si vous ne comprenez pas quelque
chose ou si vous avez besoin de plus d'aide, veuillez consulter notre site web pour une assistance rapide. Veuillez
nous fournir vos nom, numéro, adresse, numéro de série du produit en panne, la preuve d'achat et une brève
description du problème. Un représentant du service clientèle vous contactera dès que possible. Toute intervention
sous garantie doit être autorisée par le service clientèle de FORNO. Tous nos prestataires de services agréés sont
soigneusement sélectionnés et rigoureusement formés par nos soins.
Informations sur le produit Informations sur les services
Numéro de modèle : ______________________________________
Utilisez ces numéros dans toute
correspondance ou appel de
service concernant votre produit.
Si vous avez reçu un produit
endommagé, contactez
immédiatement Forno.
Pour gagner du temps et de
l'argent, consultez le guide de
dépannage avant de faire appel à
un service d'entretien. Il énumère
les causes des problèmes mineurs
de fonctionnement que vous
pouvez corriger vous-même.
Numéro de série : _______________________________________
Date d'achat :________________________________________
Adresse et numéro de téléphone pour l'achat : _________________
_______________________________________________________
_______________________________________________________
Service clientèle
"Besoin d'une aide rapide ? Il sut de scanner le code qr pour accéder
à notre formulaire d'assistance rapide. Nous sommes toujours à votre
disposition pour répondre à vos questions ou à vos préoccupations.
N'hésitez donc pas à nous contacter !"
23
Garantie
Ce que couvre cette garantie limitée :
La couverture de la garantie fournie par Forno Appliances dans la
présente déclaration s’applique exclusivement à l’appareil Forno
original (“ Produit “) vendu au consommateur (“ Acheteur “) par
un concessionnaire/distributeur/détaillant Forno agréé, acheté
et installé aux États-Unis ou au Canada, et qui est toujours resté
dans le pays d’achat d’origine (les États-Unis ou le Canada). La
couverture de la garantie est activée à la date de l’achat initial du
produit au détail et a une durée de deux (2) ans. Cette garantie
ne couvre pas l’installation lors de l’achat ni lors du
remplacement.
La couverture de la garantie n’est pas transférable. En cas
de remplacement de pièces ou de l’ensemble du produit, le
SURGXLWGHUHPSODFHPHQWRXOHVSLqFHVEpQp¿FLHUDGHOD
garantie d’origine restante, activée avec le document d’achat
au détail d’origine. La présente garantie n’est pas étendue à ce
remplacement. Forno Appliances réparera ou remplacera tout
composant/partie qui tombe en panne ou s’avère défectueux
en raison des matériaux et/ou de la fabrication dans les deux
ans suivant la date de l’achat au détail d’origine et dans des
conditions d’utilisation résidentielle ordinaire et non commerciale.
La réparation ou le remplacement sera gratuit, y compris la main-
d’œuvre aux taux standard et les frais d’expédition. Il incombe
à l’acheteur de rendre le produit raisonnablement accessible
pour l’entretien. Le service de réparation doit être effectué par
une société de service agréée par Forno pendant les heures
normales de travail.
Important
Conserver la preuve de l’achat original pour établir la période
de garantie. La responsabilité de Forno pour toute réclamation
de quelque nature que ce soit, concernant les marchandises et/
ou les services fournis, ne peut en aucun cas dépasser la valeur
des marchandises ou du service ou de la partie de ceux-ci qui a
donné lieu à la réclamation.
Garantie cosmétique de 30 jours
L’acheteur doit inspecter le produit au moment de la livraison.
Forno garantit que le produit est exempt de défauts de fabrication
et de main-d’œuvre pendant une période de trente (30) jours à
compter de la date d’achat au détail du produit.
Cette couverture comprend
• Les défauts de peinture
• les éclats
• OHVGpIDXWVGH¿QLWLRQPDFURVFRSLTXHV
La garantie cosmétique ne couvre PAS :
• Problèmes résultant d’un transport, d’une manipulation et/ou
d’une installation incorrects (par exemple : bosses, structures
ou composants cassés, gauchis ou déformés, composants en
YHUUH¿VVXUpVRXDXWUHPHQWHQGRPPDJpV
• Légères variations de couleur sur les composants peints/
pPDLOOpV
• OHVGLIIpUHQFHVGXHVjO¶pFODLUDJHQDWXUHORXDUWL¿FLHOj
O¶HPSODFHPHQWRXjG¶DXWUHVIDFWHXUVDQDORJXHV!OHV
taches/corrosion/décoloration dues à des substances
H[WHUQHVHWRXjGHVIDFWHXUVHQYLURQQHPHQWDX[!OHVFRWV
de main-d’œuvre, les appareils d’exposition, d’étage, de stock
B, hors boîte, “en l’état” et les appareils de démonstration.
Comment recevoir un service
3RXUEpQp¿FLHUGHVVHUYLFHVGHJDUDQWLHO¶DFKHWHXUGRLWFRQWDFWHU
OHVHUYLFHG¶DVVLVWDQFHGH)RUQRD¿QGHGpWHUPLQHUOHSUREOqPH
et les procédures de service requises. Un dépannage avec
un représentant du service clientèle sera nécessaire avant de
procéder à l’intervention. Le numéro de modèle, le numéro de
série et la date d’achat au détail seront demandés.
Exclusions de la garantie : Ce qui n’est pas couvert.
• L’utilisation du produit dans une application commerciale non
résidentielle.
• /¶XWLOLVDWLRQGXSURGXLWjG¶DXWUHV¿QVTXHFHOOHVSRXUOHVTXHOOHV
il a été conçu.
• Les services de réparation fournis par toute personne autre
qu’une agence de service agréée par Forno.
• Dommages ou services de réparation pour corriger des services
fournis par des parties non autorisées ou l’utilisation de pièces
non autorisées.
• Installation non conforme aux codes locaux/de l’État/de la
ville/du comté en matière d’incendie, d’électricité, de gaz, de
plomberie, de construction, aux lois ou aux réglementations.
• Défauts ou dommages dus à un stockage inapproprié du
produit.
• Les défauts, les dommages ou les pièces manquantes sur les
produits vendus hors de l’emballage d’origine de l’usine ou
GHVSUpVHQWRLUV!/HVDSSHOVGHVHUYLFHRXOHVUpSDUDWLRQV
visant à corriger une installation incorrecte du produit et/ou des
accessoires connexes.
• Remplacement de pièces/appels de service pour connecter,
convertir ou réparer de toute autre manière le câblage électrique
HWRXODFRQGXLWHGHJD]D¿QG¶XWLOLVHUFRUUHFWHPHQWOHSURGXLW
• Remplacement des pièces/appels de service pour fournir des
instructions et des informations sur l’utilisation du produit.
• Remplacement de pièces/appels de service pour corriger des
problèmes résultant de l’utilisation du produit d’une manière
autre que celle qui est normale et habituelle pour un usage
résidentiel.
• Remplacement des pièces/appels de service en raison de
l’usure des composants tels que les joints, les boutons, les
supports de casseroles, les étagères, les paniers à couverts, les
boutons, les écrans tactiles, les dessus en vitrocéramique rayés
ou cassés.
• Remplacement de pièces/appels de service en raison d’un
manque d’entretien ou d’un entretien inadéquat, y compris,
mais sans s’y limiter, l’accumulation de résidus, de taches,
G¶pUDÀXUHVGHGpFRORUDWLRQHWGHFRUURVLRQ
• 'pIDXWVHWGRPPDJHVUpVXOWDQWG¶DFFLGHQWVGHPRGL¿FDWLRQV
d’une mauvaise utilisation, d’un abus ou d’une installation
incorrecte.
• Les défauts et dommages résultant du transport, de la logistique
et de la manipulation du produit. L’inspection du produit doit
être effectuée au moment de la livraison. Après réception
et inspection, le revendeur/livreur doit être informé de tout
problème lié à la manutention, au transport et à la logistique.
• Les défauts et les dommages résultant de forces extérieures
échappant au contrôle de Forno Appliances, y compris, mais
sans s’y limiter, le vent, la pluie, le sable, les incendies, les
inondations, les coulées de boue, les températures glaciales,
l’humidité excessive ou l’exposition prolongée à l’humidité, les
surtensions,
• la foudre, les défaillances structurelles entourant l’appareil et
d’autres cas de force majeure.
• /HVSURGXLWVGRQWOHQXPpURGHVpULHDpWpPRGL¿pHQGRPPDJp
ou altéré. Forno ne peut en aucun cas être tenu pour
responsable des dommages causés aux biens environnants,
y compris les cabinets, les armoires, les revêtements de sol,
les panneaux et autres structures entourant le produit. Forno
n’est pas responsable du Produit s’il est situé dans une région
pORLJQpHRXGDQVXQHUpJLRQRGHVWHFKQLFLHQVFHUWL¿pVHW
formés ne sont pas raisonnablement disponibles. L’acheteur doit
prendre en charge tous les frais de transport et de livraison du
produit jusqu’au centre de service agréé le plus proche ou les
IUDLVGHGpSODFHPHQWVXSSOpPHQWDLUHVG¶XQWHFKQLFLHQFHUWL¿p
24
IL N’EXISTE AUCUNE GARANTIE EXPRESSE AUTRE QUE CELLES ÉNUMÉRÉES ET DÉCRITES CI-DESSUS, ET AUCUNE GARANTIES, EXPRESSES
OU IMPLICITES, Y COMPRIS, MAIS SANS S’Y LIMITER, TOUTE GARANTIE IMPLICITE GARANTIES DE QUALITÉ MARCHANDE OU D’ADÉQUATION
À UN USAGE PARTICULIER QUI S’APPLIQUERONT APRÈS LES PÉRIODES DE GARANTIE EXPRESSE INDIQUÉES CI-DESSUS, ET AUCUNE
AUTRE GARANTIE EXPRESSE OU GARANTIE DONNÉE PAR TOUTE PERSONNE, ENTREPRISE OU SOCIÉTÉ CONCERNANT CE PRODUIT SERA
OBLIGATOIRE POUR FORNO. FORNO NE SERA PAS RESPONSABLE DE LA PERTE DE REVENUS OU DE PROFITS, DÉFAUT DE RÉALISER DES
ÉCONOMIES OU D’AUTRES AVANTAGES, TEMPS D’ABSENCE DU TRAVAIL, REPAS, PERTE DE NOURRITURE OU BOISSONS, FRAIS DE VOYAGE
OU D’HOTEL, FRAIS DE LOCATION OU D’ACHAT D’APPAREILS, DÉPENSES DE REMODELAGE/CONSTRUCTION SUPÉRIEURES AUX DOMMAGES
DIRECTS INDÉNIABLES CAUSÉ EXCLUSIVEMENT PAR FORNO OU TOUT AUTRE SPÉCIAL, ACCESSOIRE OU CONSÉCUTIF LES DOMMAGES
CAUSÉS PAR L’UTILISATION, LA MAUVAISE UTILISATION OU L’INCAPACITÉ D’UTILISER CE PRODUIT, INDÉPENDAMMENT DU THÉORIE JURIDIQUE
SUR LAQUELLE LA RÉCLAMATION EST BASÉE, ET MÊME SI FORNO A ÉTÉ AVISÉ DE LA POSSIBILITÉ DE TELS DOMMAGES. DE PLUS, LA
RÉCUPÉRATION DE QUELQUE NATURE QUE CE SOIT CONTRE FORNO NE SERA PLUS GRANDE D’UN MONTANT QUE LE PRIX D’ACHAT DU
PRODUIT VENDU PAR FORNO ET CAUSANT LE DOMMAGES ALLÉGUÉS. SANS PRÉJUDICE DE CE QUI PRÉCÈDE, L’ACHETEUR ASSUME TOUS LES
RISQUES ET RESPONSABILITÉ POUR PERTE, DOMMAGE OU BLESSURE À L’ACHETEUR ET À LA PROPRIÉTÉ D E L’ACHETEUR ET À AUTRES ET
LEURS PROPRIÉTÉS DÉCOULANT DE L’UTILISATION, DE LA MAUVAISE UTILISATION OU DE L ‘INCAPACITÉ À UTILISER CE PRODUIT VENDU PAR
FORNO QUI N’EST PAS LE RÉSULTAT DIRECT D’UNE NÉGLIGENCE DE LA PART DE FORNO LA GARANTIE LIMITÉE NE S’ÉTENDRA À PERSONNE
AUTRE QUE L’ACHETEUR INITIAL DE CE PRODUIT N’EST PAS TRANSFÉRABLE ET ÉNONCE VOTRE RECOURS EXCLUSIF.
Garantie (suite)
25
SÉCURITÉ DE L'APPAREIL
Votre sécurité et celle des autres sont très importantes pour nous.
Nous avons fourni de nombreux messages de sécurité importants dans ce manuel et sur votre appareil.
Toujours lire et suivre les consignes de sécurité.
AVERTISSEMENT:
AVERTISSEMENTS RELATIFS AU GAZ RÉFRIGÉRANT
Produit cancérigène et responsable de troubles liés à la reproduction
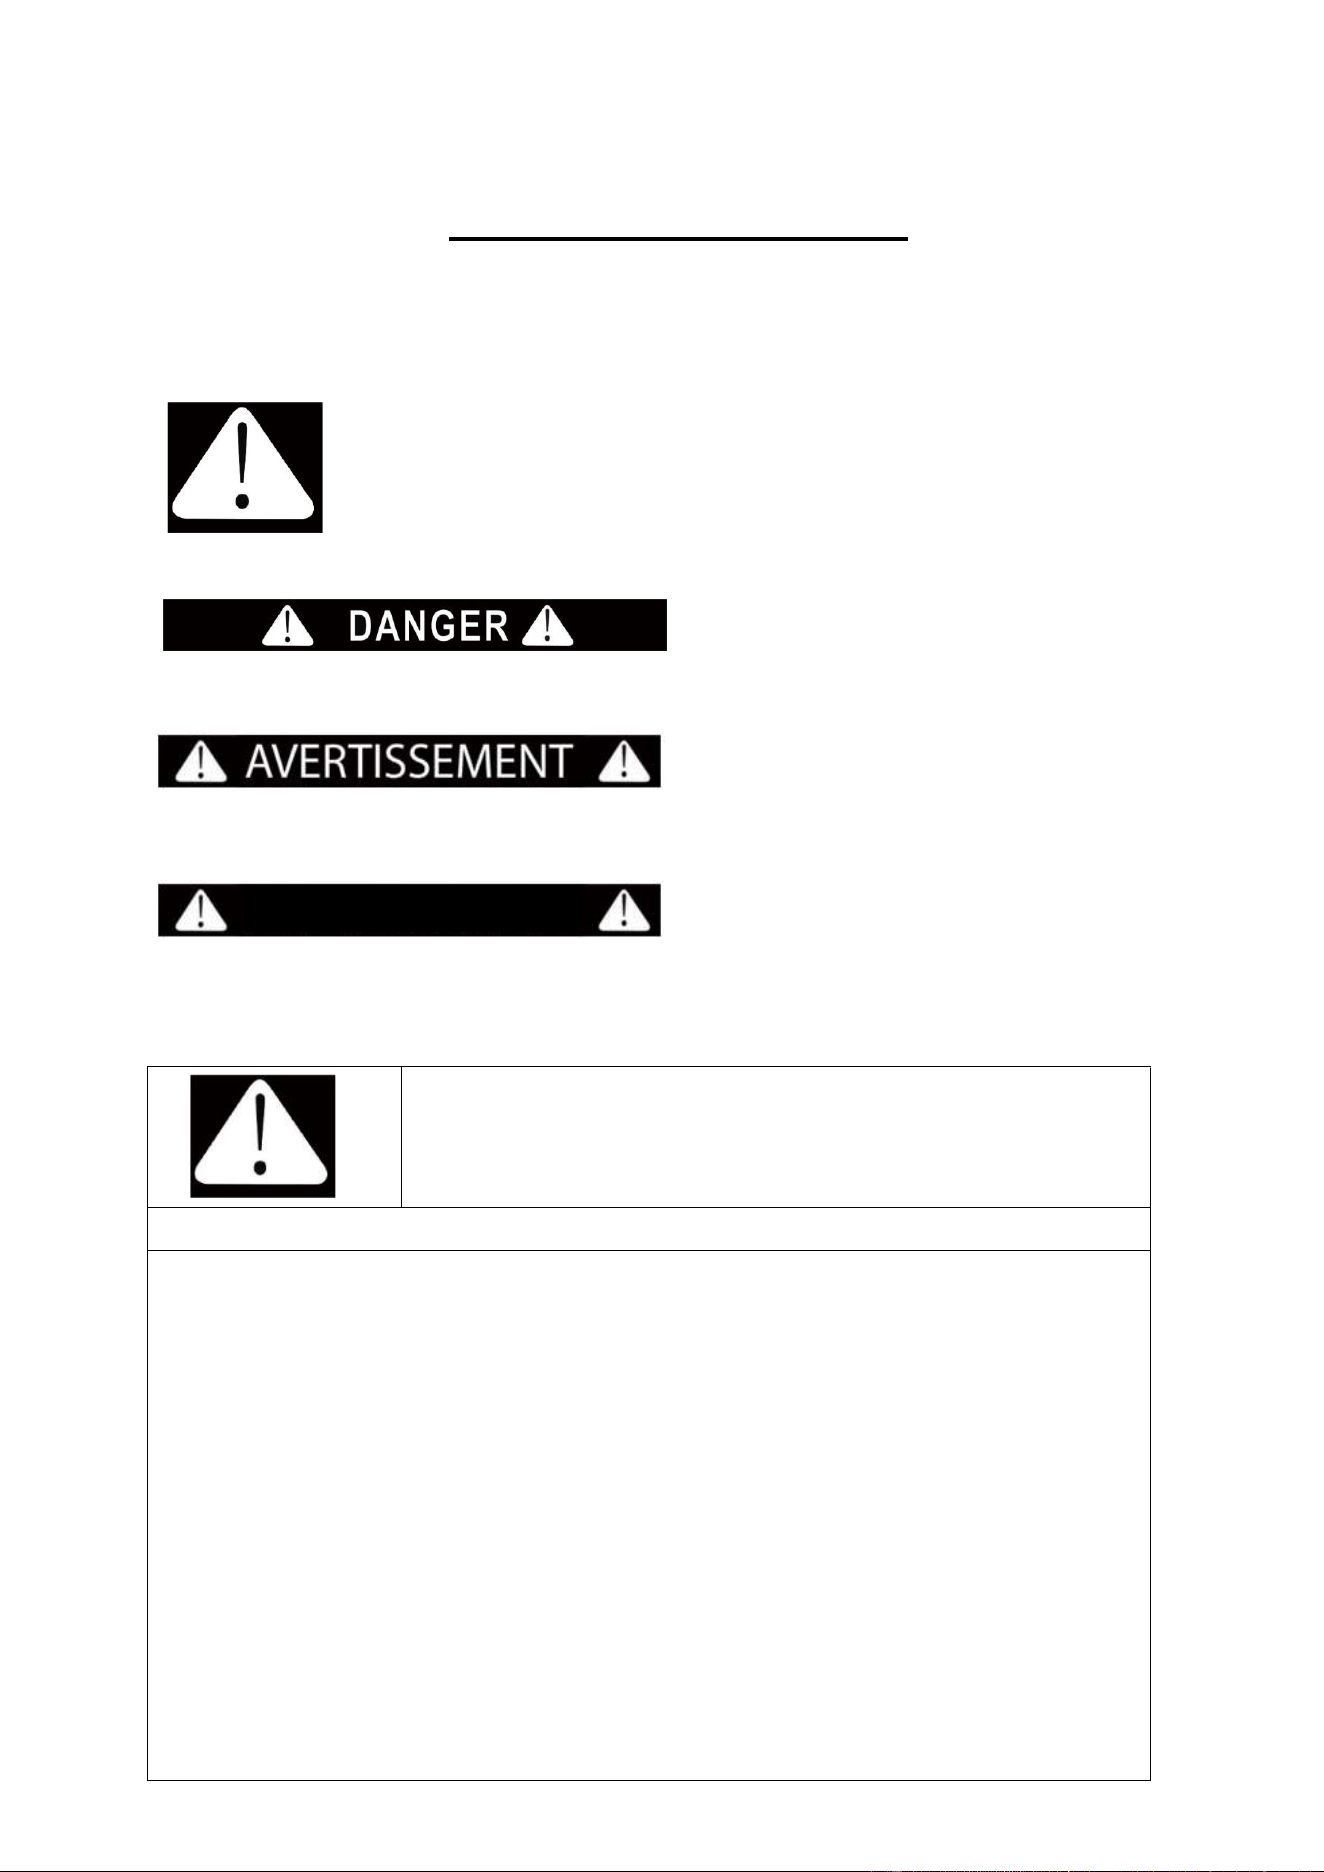
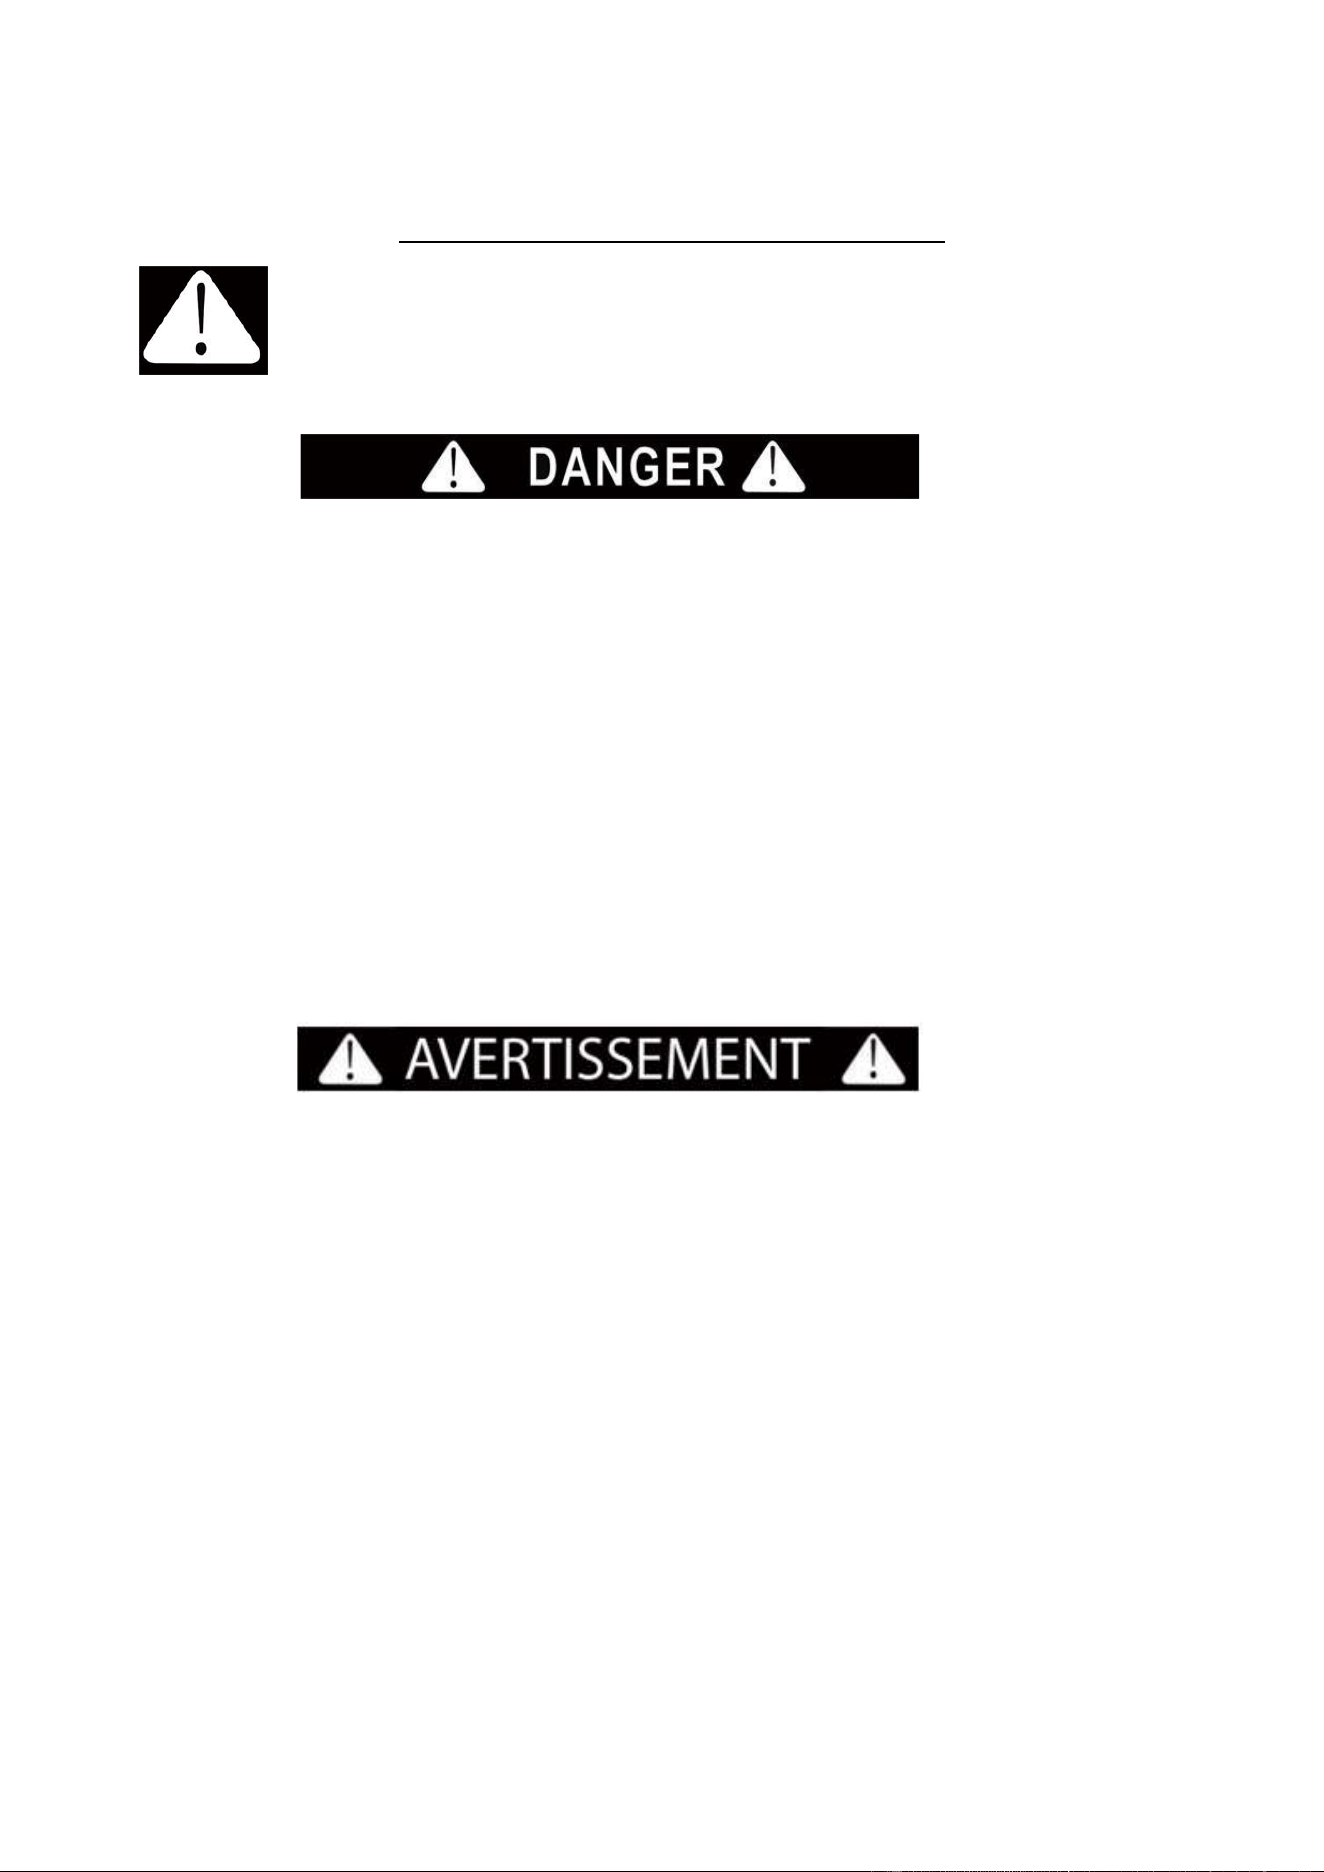
Symbole d’alerte de sécurité. Ce symbole vous alerte sur les
dangers potentiels pouvant vous tuer et blesser d’autres
personnes.
Tous les messages de sécurité suivront le Symbole d’alerte de
sécurité et les mots « DANGER », « AVERTISSEMENT » ou «
MISE EN GARDE ».
Le symbole « Danger » signifie que le
non-respect de cette consigne peut causer de
graves blessures corporelles ou entraîner la
mort.
Le symbole « Avertissement » signifie que le
non-respect de cette consigne de sécurité
peut entraîner de sérieux dommages au
produit, des blessures graves ou la mort.
Le symbole MISE EN GARDE signifie que le
non-respect de cette consigne de sécurité
peut entraîner des blessures mineures ou
modérées ou des dommages matériels.
MISE EN GARDE
Tous les messages de sécurité vous alerteront sur les dangers potentiels, en vous informant sur la manière
de réduire les risques de blessures et sur ce qui peut arriver si les consignes ne sont pas respectées.
DANGER Risque d’incendie ou d’explosion. Frigorigène inflammable utilisé. Ne pas utiliser d’appareils
mécaniques pour dégivrer le réfrigérateur. Ne pas perforer la conduite de frigorigène.
DANGER Risque d’incendie ou d’explosion. Frigorigène inflammable utilisé. La réparation doit
être aite seulement par un personnel qualifié. Ne pas perforer la conduite de frigorigène.
ATTENTION Risque d’incendie ou d’explosion. Frigorigène inflammable utilisé. Consulter le manuel
de réparation/manuel du propriétaire avant d’entreprendre l’entretien de ce produit. Toutes les mesures de
sécurité doivent être respectées.
ATTENTION Risque d’incendie ou d’explosion. Éliminer convenablement conformément à la
réglementation fédérale ou locale Frigorigène inflammable utilisé.
ATTENTION La perforation de la conduite de frigorigène peut entraîner un incendie ou une explosion. Suivre
avec soin les instructions fournies. Frigorigène inflammable utilisé.
DANGER Risque d’incendie ou d’explosion. Frigorigène inflammable utilisé. Ne pas utiliser d’appareils
mécaniques pour dégivrer le réfrigérateur. Ne pas perforer la conduite de frigorigène.
DANGER Risque d’incendie ou d’explosion. Frigorigène inflammable utilisé. La réparation doit
être aite seulement par un personnel qualifié. Ne pas perforer la conduite de frigorigène.
ATTENTION Risque d’incendie ou d’explosion. Frigorigène inflammable utilisé. Consulter le manuel
de réparation/manuel du propriétaire avant d’entreprendre l’entretien de ce produit. Toutes les mesures de
sécurité doivent être respectées.
ATTENTION Risque d’incendie ou d’explosion. Éliminer convenablement conformément à la
réglementation fédérale ou locale Frigorigène inflammable utilisé.
ATTENTION La perforation de la conduite de frigorigène peut entraîner un incendie ou une explosion. Suivre
avec soin les instructions fournies. Frigorigène inflammable utilisé.
26
CONSIGNES DE SÉCURITÉ IMPORTANTES
Lire attentivement le présent manuel et installer et positionner correctement l’appareil
avant d’utiliser le refroidisseur de boissons. Pour réduire les risques d’incendie,
d’électrocution ou de blessures lors de l’utilisation du refroidisseur de boissons, suivez ces
précautions de base :
• Brancher sur une prise à 3 broches mise à la terre; ne pas retirer la broche de mise à la terre; ne pas utiliser
d’adaptateur et ne pas utiliser de rallonge.
• Remplacer tous les panneaux avant la mise en marche.
• Il est recommandé d’utiliser un circuit distinct et réservé au refroidisseur de boissons uniquement. Utiliser des
prises qui ne peuvent pas être désactivées par un commutateur ou interrupteur à tirage.
• Ne jamais nettoyer les pièces de l’appareil avec des liquides inflammables. Les émanations peuvent provoquer
un risque d’incendie ou d’explosion. Ne pas ranger ou utiliser de l’essence ou d’autres vapeurs et liquides
inflammables à proximité de cet appareil ou de tout autre appareil. Les émanations peuvent provoquer un risque
d’incendie ou d’explosion.
• Avant de procéder aux opérations de nettoyage et d’entretien, assurez-vous que la ligne d’alimentation
électrique de l’appareil est débranchée.
• Ne pas brancher ou débrancher la prise électrique avec les mains mouillées.
• Débrancher l’appareil ou couper le courant avant le nettoyage ou l’entretien. Le non-respect de cette consigne
peut entraîner une décharge électrique ou la mort.
• Ne pas tenter de réparer ou de remplacer une partie de votre appareil à moins qu’il ne soit spécifiquement
recommandé de le faire dans ce manuel. Toutes les autres réparations doivent être confiées à un technicien
qualifié.
• Il faut deux personnes ou plus pour déplacer et installer le réfrigérateur. Le non-respect de cette consigne peut
causer des blessures au dos ou autres.
• Pour assurer une ventilation appropriée de votre appareil, il doit être complètement dégagé. Choisissez un
endroit bien aéré avec des températures supérieures à 55 °F (13 °C) et en dessous de 90 °F (32 °C). Cet
appareil doit être installé dans une zone protégée des éléments, tels que le vent, la pluie, les gouttelettes d’eau
ou la lumière du soleil.
• L’appareil ne doit pas être situé à proximité de fours, grilles ou d’autres sources de chaleur intense.
• Cet appareil doit être installé avec tous les raccordements d’électricité, d’arrivée d’eau et de vidange
conformément aux codes régionaux et locaux. Une alimentation électrique standard (115 V CA seulement,
60Hz), correctement mise à la terre conformément au Code national de l’électricité et aux codes et ordonnances
locaux est requise.
• Ne pliez pas et ne pincez pas le cordon d’alimentation de l’appareil.
• La taille du fusible (ou du disjoncteur) doit être de 15 ampères.
• Il est important que l’appareil soit mis à niveau pour fonctionner correctement. Vous devrez peut-être faire
plusieurs ajustements pour le niveler.
• Toutes les installations doivent être effectuées conformément aux exigences des codes locaux de plomberie.
• Assurez-vous que les tuyaux ne sont pas pincés, pliés ou endommagés lors de l’installation.
• Vérifiez les fuites après le raccordement.
• Ne laissez jamais les enfants utiliser, jouer ou grimper à l’intérieur de l’appareil.
• N’utilisez pas de produits de nettoyage à base de solvants ni d’abrasifs à l’intérieur. Ces nettoyants peuvent
endommager ou décolorer l’intérieur.
• Ne pas utiliser cet appareil à des fins autres que celles prévues.
27
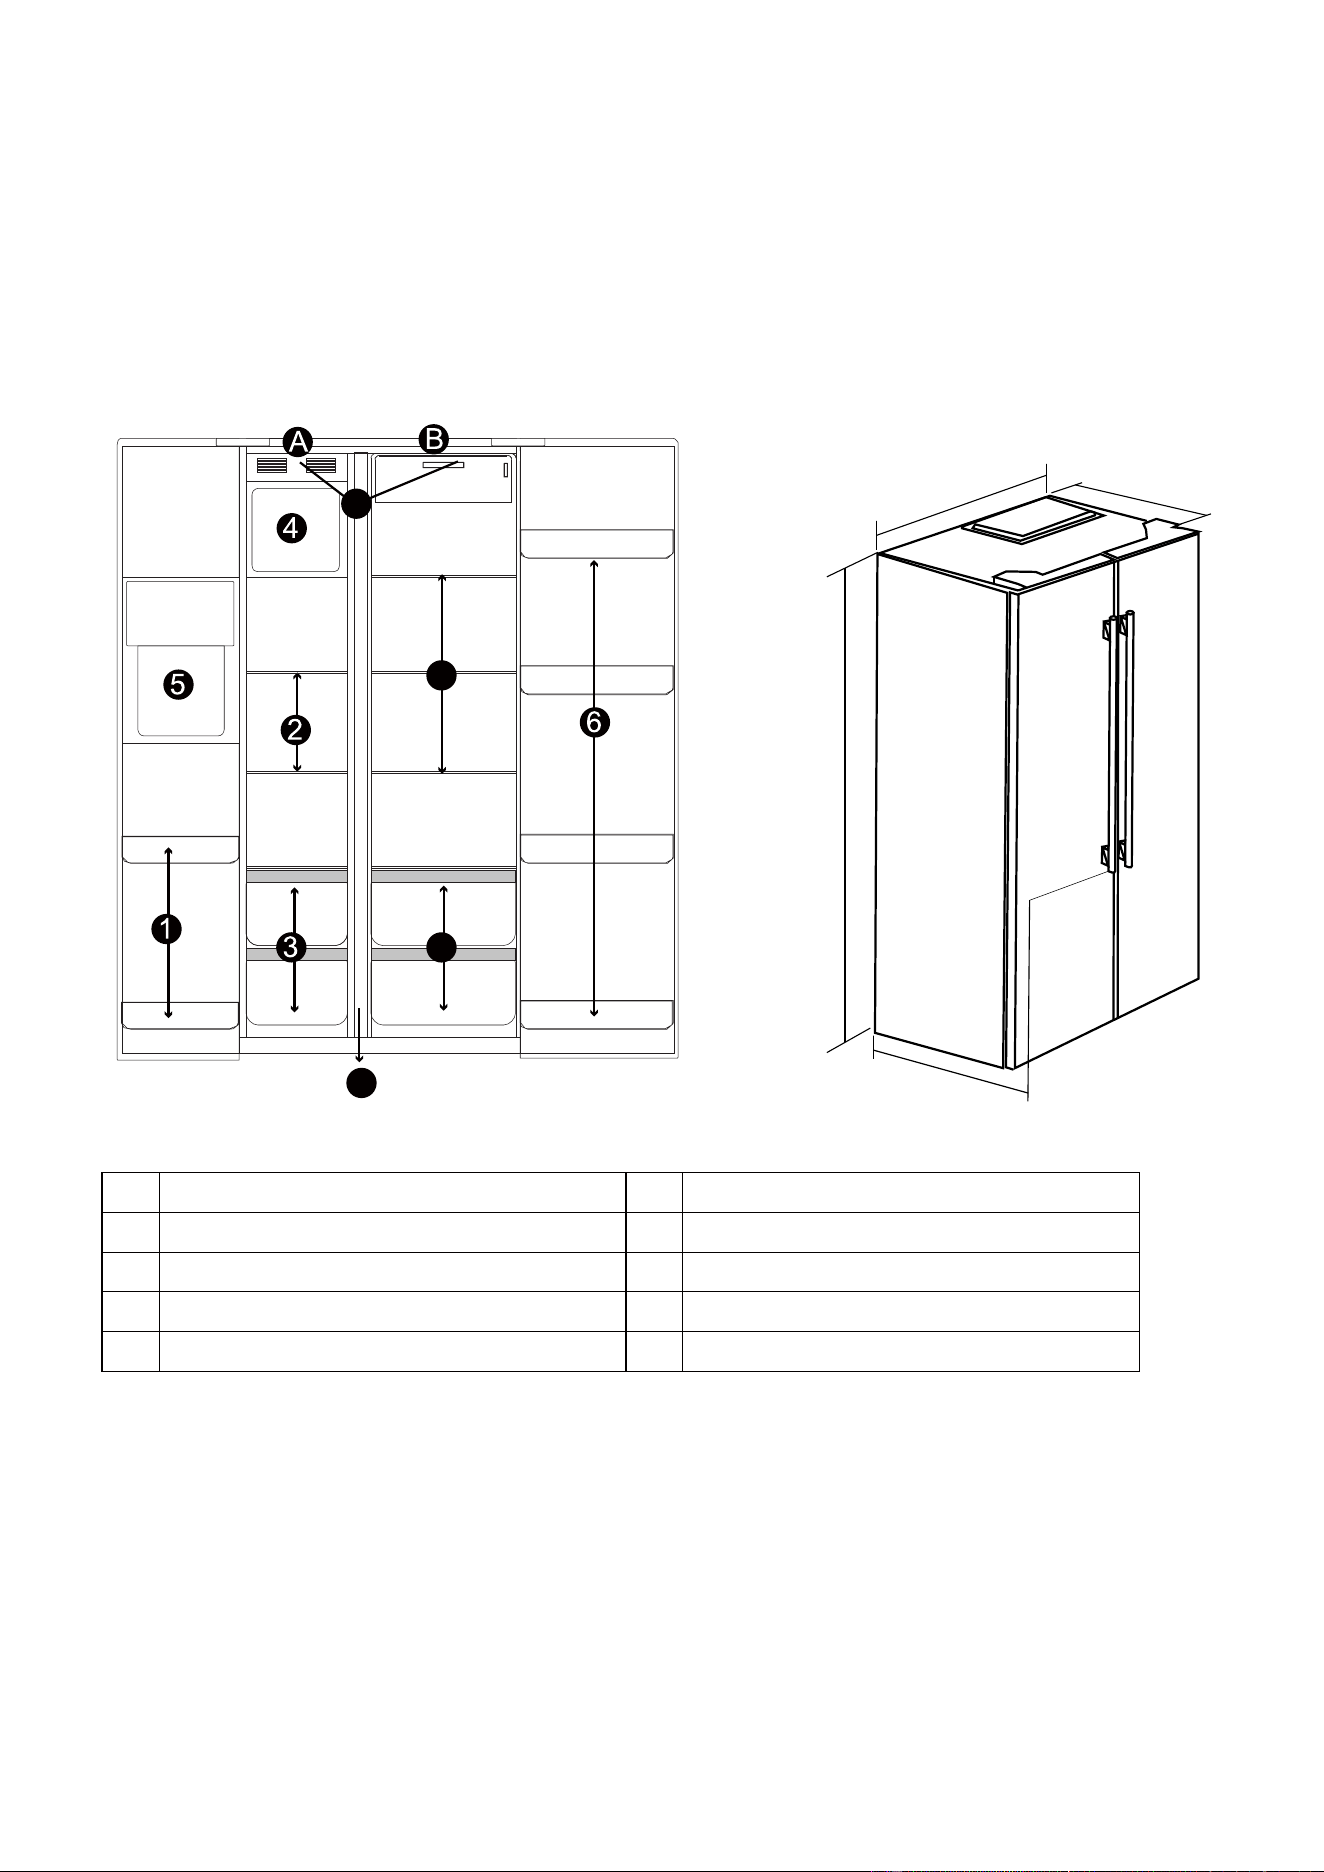
PIÈCES ET CARACTÉRISTIQUES
** Remarque
La zone du séparateur de sections contient un dispositif de chauffage anti-condensation et sera chaude au
toucher lors du cycle d’anti-condensation pour éviter la formation de condensation entre les deux sections.
1 (2) Plateau de la porte du congélateur
2 (2) Tablettes en verre du congélateur
3 (2) Tiroir du congélateur
4 (1) Bac à glaçons
5 (1)Distributeur
6 (4) Plateau de la porte du réfrigérateur
7 (3) Tablettes en verre du réfrigérateur
8 (2) Tiroir du réfrigérateur
9 LED Light
10 Séparateur de section
10
7
8
9
35.87"
24.01''
29.76"
70.08''
28
CONSIGNES DE SÉCURITÉ IMPORTANTES
AVERTISSEMENT
Pour réduire le risque d'incendie, de choc
électrique ou de blessurelors de l'utilisation
de votre réfrigérateur
- congélateur, suivez ces précautions de base:
• Liseztoutes les instructions avant d'utiliser le réfrigérateur-congélateur.
• DANGER ou AVERTISSEMENT: Risque d’enfermer les enfants.
•Le piégeage et la suffocation des enfants ne sont pas des problèmes du passé. Les
réfrigérateurs-congélateurs jeté s ou abandonnés sont toujours dangereux mêmes'ils "resteront
assis dans le garage quelques jours".
• Avant de jeter votre vieux réfrigérateur ou congélateur :
-Retirer les portes.
-Laisser les tablettes en place de façon à empêcher l’accès aux enfants.
• Ne laissez jamais les enfants utiliser, jouer ou ramper à l'intérieur du réfrigérateur-congélateur.
• Ne nettoyez jamais les pièces du réfrigérateur-congélateur avec des liquides inflammables.
• Les fumées peuventcréer un risque d'incendie ou d'explosion.
• Ne stockez pas et n'utilisez pas d'essence ni aucun autre liquide ou vapeur inflammable à proximité
de ce réfrigérateurou de tout autre réfrigérateur-congélateur. Les fumées peuvent créer un risque
d'incendie ou d'explosion.
• Cet appareil n'est pas destiné à être utilisé par des personnes (y compris des enfants) ayant des
capacités physiques, sensorielles ou m entales réduites, ou un manque d'expérience et de
connaissances, sauf si elle s ont reçu une supervision ou des instructions concernant l'utilisation de
l'appareil par une personne responsable de leur sécurité.
• Les enfants doivent être surveillés pour s'assurerqu'ils ne jouent pas avec l'appareil.
• Si le cordon d'alimentation est endommagé, il doit être remplacé par le fabricant, son agent de
service ou une personne qualifiée similaire afin d'éviter tout danger.
• Ne stockez pas de substances explosives telles que des bombes aérosols avec un propulseur
inflammable dans cetappareil.
• AVERTISSEMENT Les prises d’air de l’enceinte de l’appareil ou de la structure encastré doivent être
dégagées en tout temps.
• AVERTISSEMENT Ne pas utiliser d’appareils mécaniques ou autres moyens pour accélérer le
dégivrage que ceux recommandés par le fabricant.
• AVERTISSEMENT Ne pas endommager le circuit frigorigène.
• AVERTISSEMENT Ne pas utiliser d’appareils électriques à l’intérieur du compartiment deconservation
des aliments de cet appareil, sauf s’ilssont du type recommandé par le fabricant.
• Cet apparei l est destiné à être utilisé dans des applications domestiques et similaires comme zones
de cuisine du personnel dans les magasins, bureaux et autres environnements de travail; maisons
de ferme et par les clients dans les hôtels, motels et autres environnements de type résidentiel;
environnements de type chambres d'hôtes; restauration et applications similaires non commerciales.
-Enregistrez ces instructions-
• Si la lumière LED est endommagée, elle doit être remplacée par le fabricant, son agent de service ou
une personne de qualification similaire afin d'éviter les dangers.
• Les tuyaux fournis avec l'appareil doivent êtreutilisé. Les anciens ensembles de tuyaux ne doivent pas
être réutilisés.
AVERTISSEMENT : Connexion à une source d’eau potable seulement.
Cet appareil est équipé d’une alarme automatique qui indique que l’une des portes de
l’appareil est ouverte depuis un certain temps.
1. Un signal d’avertissement sonore retentit si l’une des portes est ouverte pendant plus de une (1) minute.
2. Si la porte est ouverte pendant une longue période, le signal d’avertissement sonore retentit trois (3)
fois toutes les 30 secondes.
L’alarme de porte cesse automatiquement dès que la porte est fermée.
Évitez d’ouvrir les portes
pendant de longues périodes pour économiser l’énergie.
Alarme de porte
INSTRUCTIONS D'INSTALLATION
• Retirez tout le matériel d’emballage intérieur et extérieur.
• Vérifiez qu’il ne vous manque aucune pièce :
• Posez votre réfrigérateur-congélateur sur un plancher assez solide pour supporter le poids de l’appareil
plein. Pour mettre votre réfrigérateur-congélateur à niveau, réglez les pieds de mise à niveau situés au
bas de l’appareil.
• LAISSEZ DE (2) POUCES DE DISTANCE ENTRE L’ARRIÈRE DE L’APPAREIL ET LE MUR,
(2) POUCES DE CHAQUE CÔTÉ DE L’APPAREIL ET UN (4) POUCES AU-DESSUS POUR
PERMETTRE UNE AÉRATION ADÉQUATE AFIN DE REFROIDIR LE COMPRESSEUR ET LE
CONDENSEUR.
Distances minimales requises
Dessus
Côtés
Arrière
Un (4) pouces
Un (2) pouces de chaque côté
Trois à cinq (2) pouces à l’arrière
Avant d’utiliser votre appareil
Installation de votre appareil
• Installez l’appareil loin de la lumière directe du soleil et de toute source de chaleur (cuisinière,
chaufferette, radiateur, etc.). La lumière directe du soleil peut endommager le revêtement acrylique et
les sources de chaleur peuvent augmenter la consommation électrique. Des températures ambiantes
extrêmement froides peuvent également nuire au bon fonctionnement du réfrigérateur-congélateur.
• Évitez d’installer l’appareil dans des endroits humides.
• Branchez l’appareil dans une prise électrique dédiée et correctement mise à la terre. En aucun cas,
vous ne devez couper ou retirer la troisième broche (mise à la terre) du cordon d’alimentation. Les
questions concernant l’alimentation électrique et/ou la mise à la terre doivent être portées à l’attention
d’un électricien certifié ou d’un centre de réparation de produits FORNO agréé.
Arrêt / marche du compartiment réfrigérateur
(2) Plateau de la porte du congélateur1
(2) Tablettes en verre du congélateur2
(2) Tiroir du congélateur3
(1) Bac à glaçons4
(1)Distributeur5
(4) Plateau de la porte du réfrigérateur6
(3) Tablettes en verre du réfrigérateur7
(2) Tiroir du réfrigérateur8
• Avant de brancher l’appareil, laissez-le en position verticale pendant environ (24) heures afin de
réduire le risque de mauvais fonctionnement du système de refroidissement dû au transport.
• Nettoyez la surface intérieure à l’eau tiède avec un linge doux.
Appuyez longuement sur le bouton «réfrigérateur» pendant 10 secondes pour activer / désactiver le
compartiment réfrigérateur, lorsque le compartiment réfrigérateur est éteint, l'affichage numérique de la
température du réfrigérateur s'éteint; sous l'état du compartiment réfrigérateur éteint, appuyez longuement sur le
bouton «réfrigérateur» pendant 10 secondes pour redémarrer la fonction réfrigérateur.
29
30
Connexion électrique
Avertissement
L’utilisation inadéquate de la fiche de mise à la terre peut entraîner un risque d’électrocution. Si le cordon
d’alimentation est endommagé, faites-le remplacer par un centre agréé de réparation de produits FORNO.
Cet appareil doit être correctement mis à la terre pour votre sécurité. Le cordon d’alimentation de cet appareil
est équipé d’une fiche à trois broches qui correspond à une prise électrique standard à trois broches afin de
réduire les risques d’électrocution.
Vous ne devez en aucun cas couper ou retirer la troisième broche du cordon d’alimentation fourni avec
l’appareil.
Cet appareil requiert une prise électrique tripolaire de 115 V~/60Hz.
Le cordon d’alimentation doit être sécurisé derrière l’appareil et ne doit ni pendre ni être visible pour prévenir
toute blessure accidentelle.
Ne jamais débrancher l’appareil en tirant sur le cordon d’alimentation. Saisissez fermement la fiche et
retirez-la de la prise.
N’utilisez pas de rallonge avec cet appareil. Si le cordon d’alimentation est trop court, faites appel à un
électricien qualifié ou à un technicien pour l’installation d’une prise près de l’appareil.
RALLONGE
En raison des dangers de sécurité potentiels pouvant survenir dans certaines conditions, il est fortement
recommandé de ne pas utiliser de rallonge avec cet appareil. Si vous devez néanmoins utiliser une rallonge,
cette dernière doit obligatoirement être équipée d’une fiche à trois fils avec sortie homologuée UL/CUL et
avoir une tension électrique de 115 volts et une intensité d’au moins 15 ampères.
LIMITEUR DE SURTENSION
La plupart des appareils électriques fonctionnent au moyen de différentes gammes de panneaux de
commande électriques. Ces panneaux sont sensibles aux surtensions et peuvent être endommagés ou
détruits.
Si vous devez utiliser l’appareil dans une zone de votre ville / pays sensible aux surtensions, il est
recommandé d’utiliser un limiteur de surtension pour tous vos appareils et équipements électriques. Le
limiteur de surtension que vous choisirez doit être équipé d’un bloc de limitation de surtension suffisamment
puissant pour protéger l’appareil auquel il est relié. Si vous avez des questions concernant le type et la taille
du limiteur de surtension qu’il vous faut, contactez un électricien agréé près de chez vous.
Les dommages résultant de surtensions ne sont pas considérés comme un défaut couvert par le fabricant et
annulent la garantie de votre produit.
Cette machine à glaçons fonctionne automatiquement (alimentation automatique d’eau, production et
séparation automatique des glaçons ; vous n’avez donc pas besoin d’ajouter d’eau manuellement. Une fois le
moule à glaçons rempli, la tige du capteur envoie automatiquement un signal à la machine lui indiquant de
cesser la production de glace.
31
• Ne mettez pas les mains dans les pièces mécaniques de la machine à glaçons (située au-dessus
du bac de production de glace) pour éviter tout risque de blessures.
• Pour éviter une décharge électrique qui pourrait causer de graves blessures ou même la mort,
coupez l’alimentation électrique du réfrigérateur avant de le raccorder à l’alimentation en eau.
La trousse de la machine à glaçons devrait être installée par un technicien d’entretien autorisé
uniquement.
• Raccordez la machine à glaçons à une source d’eau potable.
• N’INSTALLEZ PAS de tuyau d’alimentation en eau dans les régions où les températures
descendent sous le point de congélation.
• Si l’alimentation en eau provient d’un adoucisseur d’eau, assurez-vous que l’adoucisseur fonctionne
bien et qu’il est bien entretenu. Les produits chimiques contenus dans un adoucisseur d’eau défaillant
peuvent endommager la machine à glaçons.
Conseils.
• Si la machine à glaçons est éteinte pendant une période prolongée, fermez le robinet d’alimentation
en eau.
• Arrêtez la machine à glaçons lorsque vous nettoyez le congélateur ou lorsque vous partez en
vacances durant une courte période.
• La machine à glaçons nécessite environ 8-24 heures pour commencer à produire normalement de
glaçons. L’air contenu dans la tuyauterie neuve peut provoquer deux ou trois cycles à vide avant que
la machine à glaçons ne produise un plein bac à glaçons. La tuyauterie neuve peut également
produire de la glace décolorée et lui donner un goût étrange durant les 24 premières heures.
Fabrication de glaçons
• Débranchez le réfrigérateur de sa source d’alimentation avant d’installer les tuyaux d’alimentation
en eau conformément aux consignes du présent manuel. Après avoir raccordé le tuyau d’alimentation
en eau, rebranchez le réfrigérateur.
• Le temps requis pour produire de la glace dépend de l’état de la machine et varie selon la
température ambiante, le type d’eau utilisée et la température de l’eau dans le bac de production.
• La taille des glaçons varie selon la quantité d’eau à l’intérieur du bac de fabrication de glaçons.
• Les glaçons restent collés ou rapetissent s’ils sont stockés pendant de longues périodes.
• Faites attention de ne pas vous blesser les mains lorsque vous séparez les glaçons collés.
Avant d’installer l’alimentation en eau, vous aurez besoin :
AVERTISSEMENT : Connexion à une source d’eau potable seulement.
• Accès à une canalisation d’eau froide domestique d’une pression se situant entre 1.4 et 6,9
bars.
• Un robinet d’arrêt qui raccorde l’alimentation en eau à votre système de distribution d’eau
domestique. NE PAS utiliser de robinets d’arrêt de type auto-perceur.
Pour raccorder l’alimentation au robinet d’arrivée de la machine à glaçons
• Débranchez le réfrigérateur de sa source d’alimentation.
• Videz le réfrigérateur de tous les accessoires d’installation (conduite d’eau, connecteur, rondelle,
attache).
• Serrez tous les raccordements qui risquent de fuir et ouvrez l’alimentation d’eau au robinet d’arrêt.
• Rebranchez le réfrigérateur à la source d’alimentation.
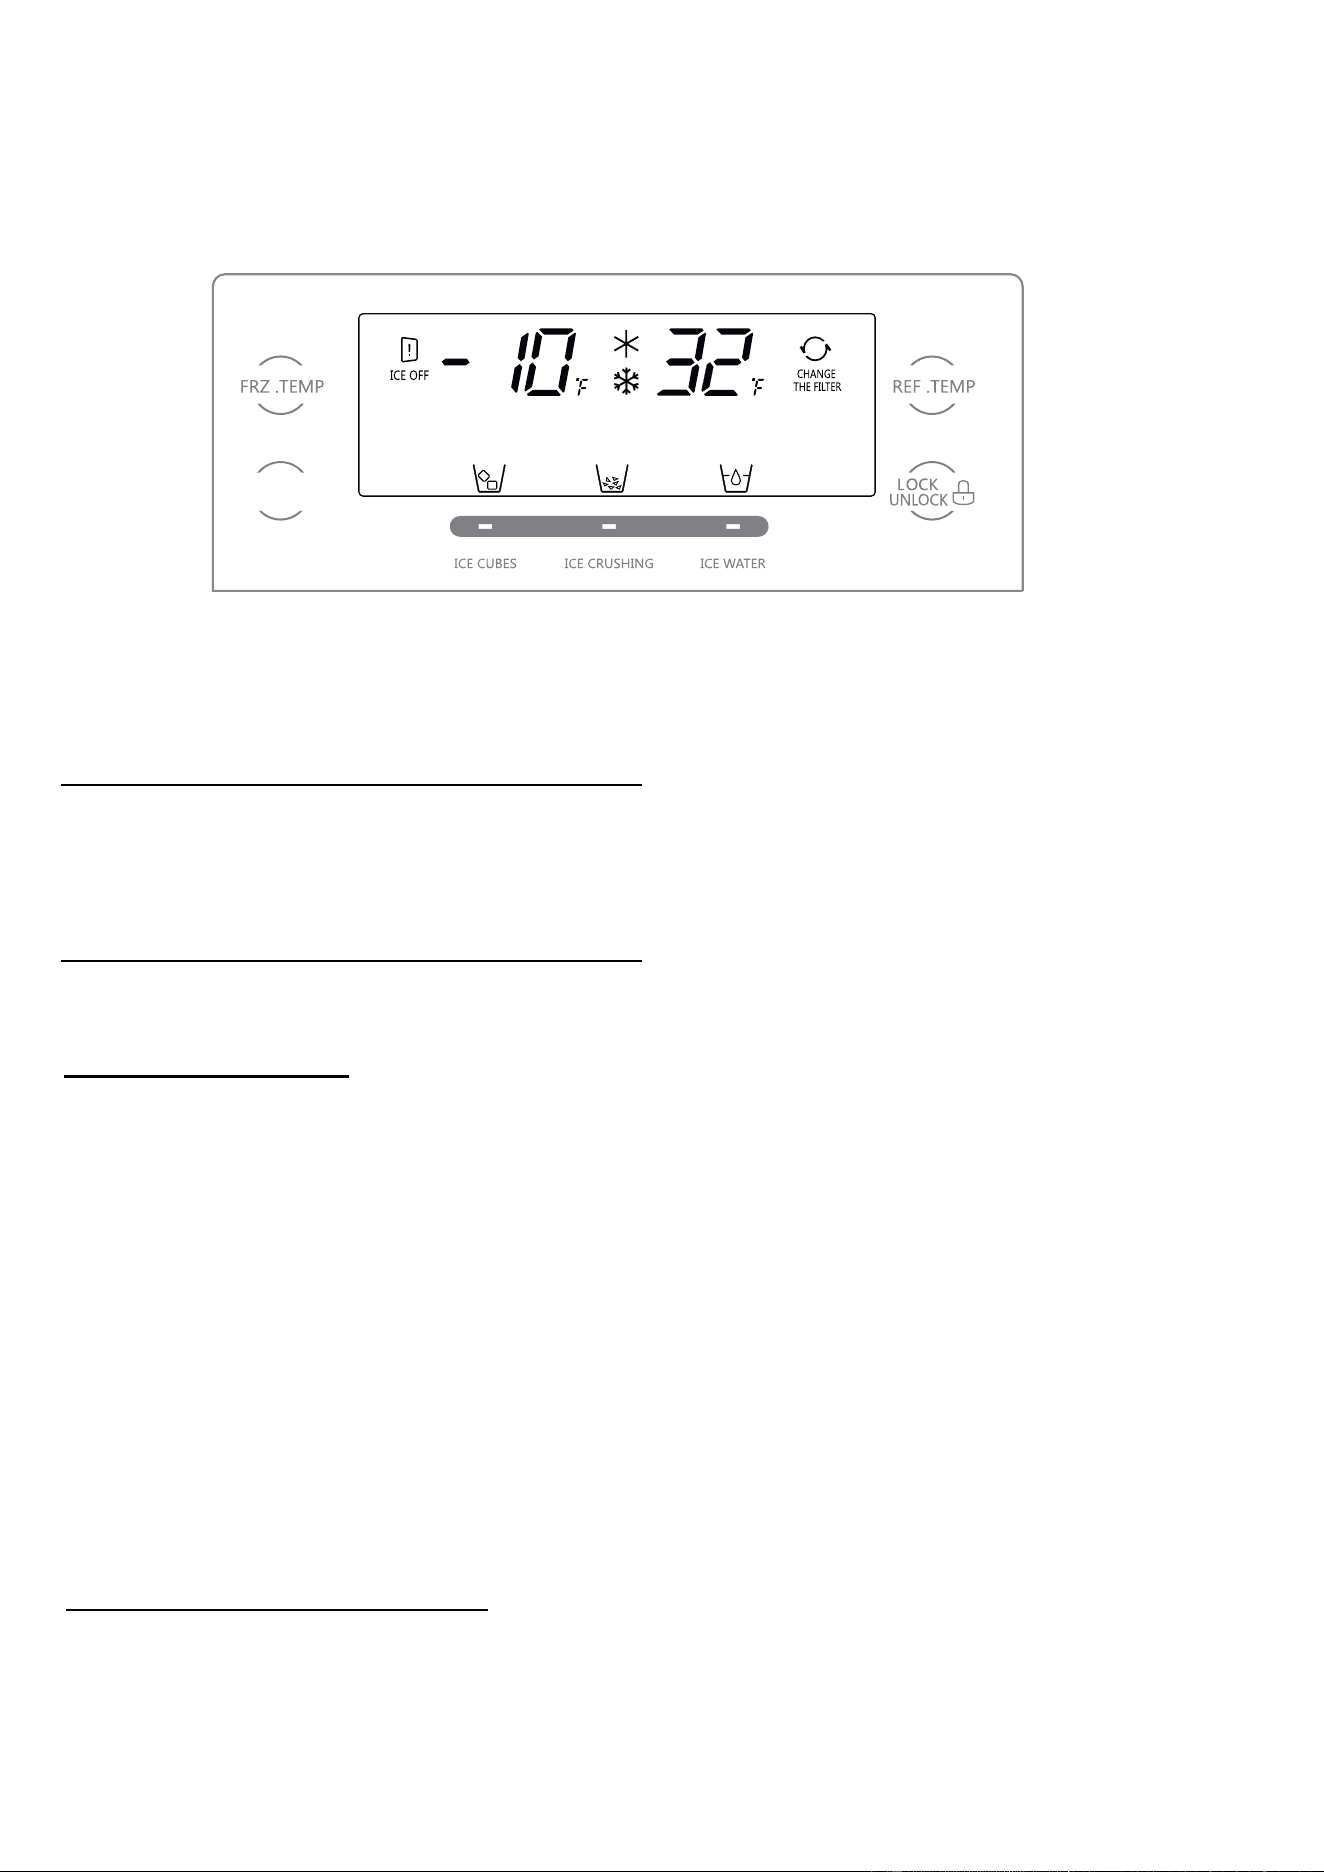
32
PANNEAU DE COMMANDE – SÉCURITÉ DES ENFANTS
Ce produit est doté d’une fonction de verrouillage des boutons.
En cas de verrouillage du panneau de commande, les autres boutons sont inopérants, en touchant les autres
boutons, les icônes REF.TEMP et FRZ.TEMP clignoteront.
Pour quitter le mode verrouillage, appuyez sur le bouton de verrouillage et maintenez-le enfoncé pendant 3s.
Le PANNEAU DE COMMANDE s’assombrit après 20 secondes d’inactivité.
Pour réactiver l’affichage, il suffit d’appuyer sur n’importe quelle touche du panneau de commande.
PANNEAU DE COMMANDE – VEILLE
Réglage de la température
• Votre appareil est équipé d’une fonction de réglage de la température. La touche de réglage de la température
se trouve à l’extérieur de la porte du compartiment du réfrigérateur.
• Lorsque vous mettez l’appareil en service pour la première fois, l’appareil démarre à la température par défaut
réglée en usine soit 38 ºF pour la section réfrigération et -2 ºF pour la section congélation.
• Lorsque vous mettez l’appareil en service pour la première fois, réglez la température du compartiment
réfrigérateur à 32 ºF et laissez-le fonctionner à cette température pendant au moins quatre (4) heures avant de
ranger des aliments à l’intérieur. Cette procédure assure un refroidissement complet du congélateur et une
stabilisation du compartiment réfrigérateur avant le rangement des aliments. Réglez ensuite la température
selon vos besoins.
• Pour régler la température de chaque zone, appuyez sur la touche de la zone appropriée. La zone
sélectionnée se met à clignoter.
UTILISATION DE VOTRE APPAREIL
Réglage de la plage de température : Mode degrés Fahrenheit
1. Plage de la température du réfrigérateur : 32~43 °F (la valeur par défaut est de 38 °F)
2. Plage de la température du congélateur : -10~5 °F (la valeur par défaut est de -2 °F).
Réglage de température du réfrigérateur
•La température par défaut du réfrigérateur est de 38ºF. Le bouton REF.TEMP permet de modifier la température
en faisant défiler les températures réglées:
→38→36→34→32→32+ (Super fridge)→43→41→39→38
ICE ON/OFF
33
Réglage de la température du congélateur
MISE EN GARDE : Ne pas placer les aliments frais directement sur les aliments congelés.
• La température par défaut du congélateur est de -02 °F.Le bouton FRZ.TEMP permet de modifier la
température en faisant défiler les températures réglées:
-02→-04→-06→-08→-10→-10+ (Super freezer)→05→04→02→00.
Mode sabbat
Ne prenez pas de glaçons à l’aide de récipients fragiles pour éviter les blessures causées par le bris.
Ne touchez pas la sortie des glaçons avec les doigts pour éviter que la glace concassée ne blesse
votre main.
Lors de la mise en service d’un nouveau réfrigérateur, prêtez attention aux points suivants :
En prenant des glaçons ou de la glace concassée, veuillez retirer le couvercle de l’isolation thermique ;
à d’autres moments, assurez-vous que le couvercle de l’isolation thermique est retiré.
En prenant de l’eau pour la première fois d’un nouveau réfrigérateur, appuyez sur le bouton de distribution de
la glace et maintenez-le enfoncé, laissez s’écouler les premiers 1 à 2 litres d’eau et jetez-les, puis prélevez de
l’eau à boire ;
Lorsque vous utilisez la machine à glaçons pour la première fois, il faut savoir que le premier bac à glaçons
produit n’est pas propre à la consommation d’un point de vue sanitaire.
Autres précautions :
N’utilisez pas de gobelets trop profonds, trop étroits ou trop mous, et placez le gobelet près de la sortie de glace
pour éviter que les glaçons ne rebondissent sur le sol ; gardez une distance appropriée entre le gobelet et la
sortie de glace ; si le gobelet est trop près de la sortie de glace, il peut obstruer la sortie de la glace ; pour éviter
que les glaçons ne se répandent sur le sol, relâchez le bouton de sortie de la glace lorsque le gobelet est plein.
Lorsque vous prenez de la glace ou de l’eau, gardez le gobelet près de la sortie de glace pendant 2 à 3 secondes
après avoir relâché le bouton de distribution de la glace car de la glace ou de l’eau peuvent encore se déverser
à ce moment-là. Après avoir constaté qu’il n’y a pas de glace ou d’eau qui se déverse, retirez simplement le
gobelet.
Si vous utilisez uniquement la fonction de glace concassée, la sortie de glace peut être bloquée par de la glace
concassée, et vous devez retirer les résidus de glace concassée ; lorsque vous sélectionnez le glaçon après la
glace concassée, il peut y avoir un peu de glace concassée.
En cas d’arrêt prolongé de l’appareil, la glace contenue dans le bac à glaçons peut fondre et l’eau s’écoule
ensuite dans le congélateur ; dans ce cas, retirez le bac à glaçons et jetez la glace, puis essuyez l’eau qui se
trouve dans le bac à glaçons et dans le congélateur.
AVERTISSEMENT
1. Comment entrer en mode Sabbat:
lorsque le congélateur est ouvert, appuyez et maintenez le bouton «Fridge» + le bouton «Lock» pendant 10
secondes;
2. En mode Sabbat:
a, il n'y a pas d'alarme d'ouverture de porte;
b, les voyants LED du réfrigérateur et du congélateur sont éteints;
c, Le panneau d'affichage ne s'affichera pas à moins qu'il ne soit ajusté par l'homme;
*En mode Sabbat, il continuera d'afficher et d'émettre de la lumière après avoir touché le panneau, mais il
s'éteindra après avoir attendu 20 secondes sans opération ou après avoir ouvert et fermé la porte une fois.
d, le réfrigérateur répond à la demande normale de réfrigération;
3. Comment quitter le mode Sabbat:
a, Lorsque le congélateur est ouvert, appuyez et maintenez le bouton «Fridge» + le bouton «Lock» pendant
10 secondes pour sortir manuellement;
b, lorsque le temps de travail du mode Sabbat dépasse 80 heures, il se terminera automatiquement.
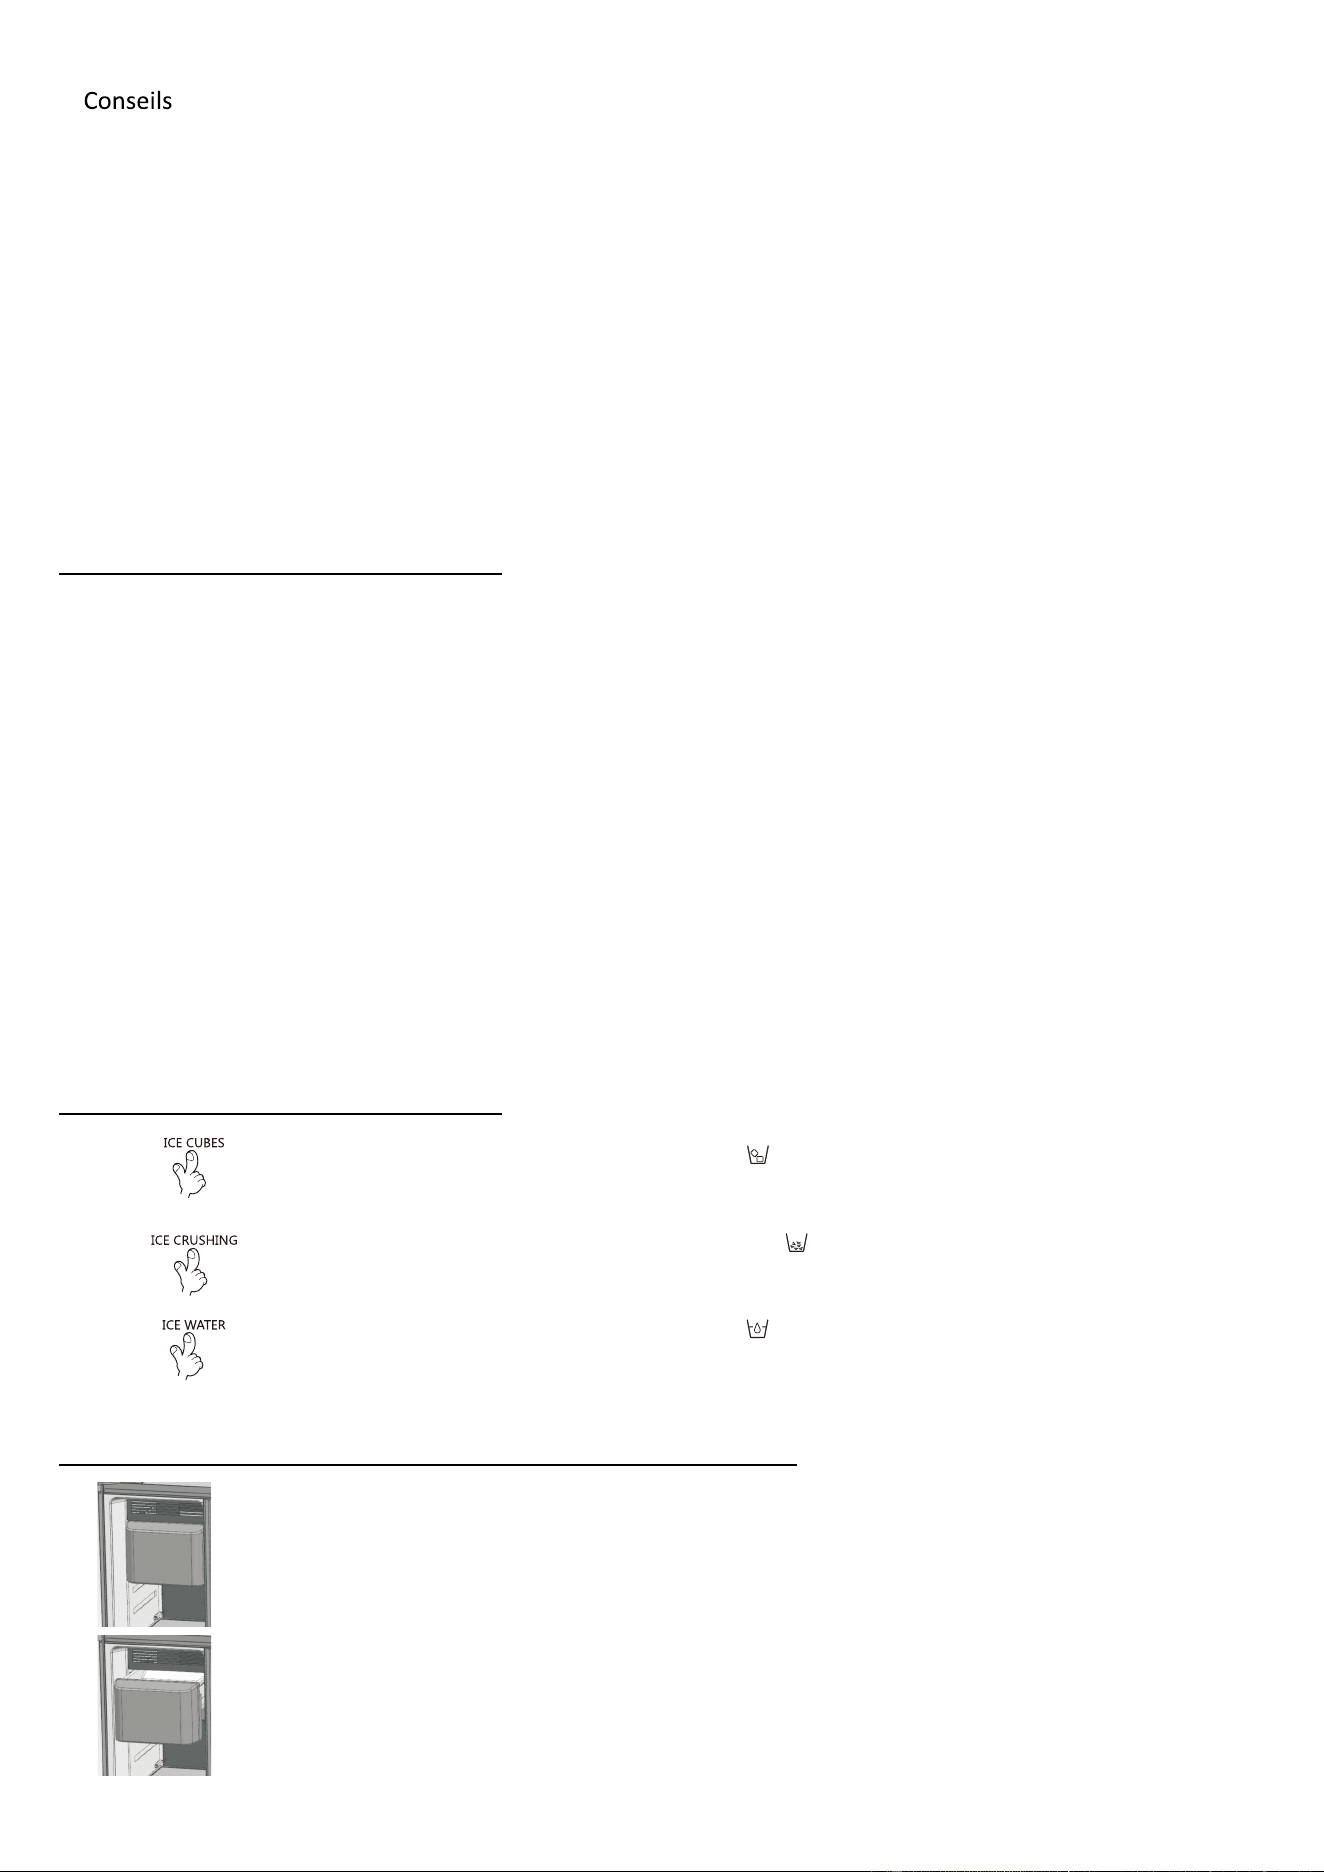
34
Machine à glaçons automatique
La machine à glaçons et le bac à glaçons se retrouvent dans la partie supérieure du congélateur. Lors de l’utilisation de
la machine à glaçons, assurez-vous que l’interrupteur de la machine à glaçons est allumé et que le système d’eau est
raccordé. La machine à glaçons fabriquera automatiquement de la glace ; lorsque le bac à glaçons est rempli de glaçons,
le processus de fabrication de la glace s’arrêtera automatiquement.
La machine à glaçons peut produire environ 1 500 g de glace en 24 heures.
Lorsque le congélateur atteint la température définie, la machine à glaçons peut fabriquer le premier lot de glaçons en
quelques heures seulement.
MISE EN GARDE :
Durant la fabrication des glaçons, vous pouvez entendre le bip de la vanne d’eau, le bruit de l’eau qui coule dans la
machine à glaçons et le bruit des glaçons qui tombent.
Le bassin récepteur doit être dégagé à temps pour éviter tout déversement d’eau qui pourrait abîmer le sol.
Distributeur de glace et d’eau
Installation et désinstallation de la machine à glaçons
Appuyez sur le bouton ICE CUBES ; si le voyant[ ]s’allume, appuyez et maintenez le bouton de
distribution des glaçons avec le gobelet en verre et les glaçons en sortiront.
Appuyez sur le bouton ICE CRUSHING ; si le voyant[ ]s’allume, appuyez et maintenez le bouton
de distribution des glaçons avec le gobelet en verre et la glace concassée en sortira.
Appuyez sur le bouton ICE WATER ; si le voyant[ ]s’allume, appuyez et maintenez le bouton de
distribution des glaçons avec le gobelet en verre et de l’eau froide en sortira.
Il est conseillé de retirer la machine à glaçons, de la nettoyer, puis de l’installer lorsqu’elle est utilisée
pour la première fois ou pendant une longue période.
Veuillez éteindre le réfrigérateur avant de la retirer.
Retirez le bac à glaçons, soulevez-le énergiquement avec les deux mains, puis retirez-le ;
Nettoyez, séchez, puis installez.
Lors de l’installation du bac à glaçons, alignez le fond avec les rails des deux côtés, insérez-le dans
les rails, puis poussez.
La machine à glaçons fonctionne normalement uniquement lorsque le capteur détecte que la température ambiante
atteint - 13°C.
Après le premier branchement du réfrigérateur, après une durée de 8 à 24 heures (selon la quantité d'aliments
entreposés dans le refrigérateur), la machine à glaçons commence à fonctionner normalement lorsqu'elle est en
position « ON ». Après 72 heures de fonctionnement, la boîte de rangement sera pleine de glaçons.
Il faut environ une minute pour pomper l'eau dans le réservoir d'eau la première fois après l'installation du produit ou le
remplacement du réservoir d'eau. Ce processus ne se répète pas plus tard dans l'utilisation quotidienne.
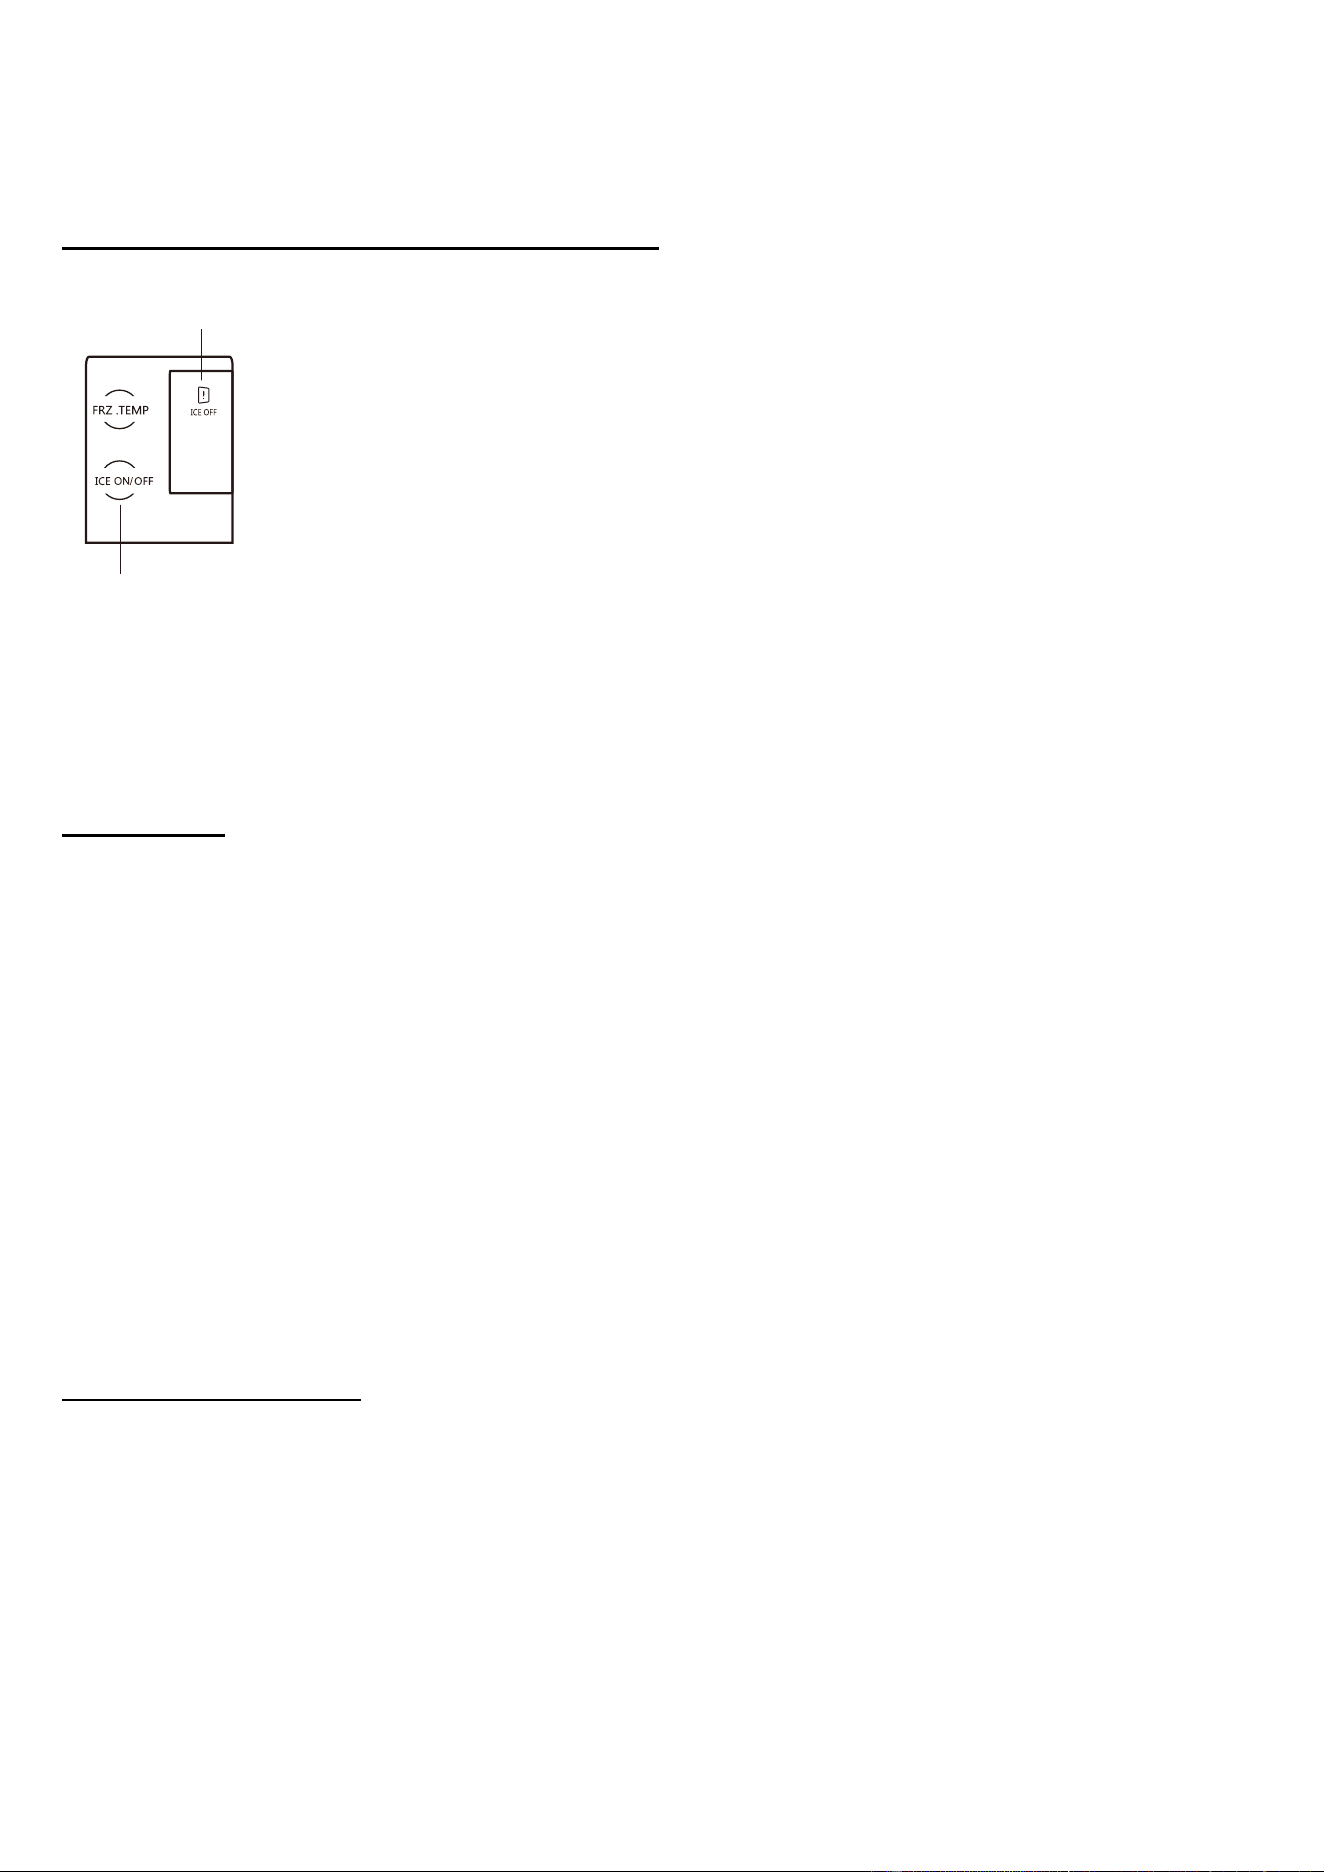
35
Bouton marche/arrêt de
la machine à glaçons
Icône ARRÊT de la
machine à glaçons
Mise hors tension de la machine à glaçons
Filtre à eau
Si la fonction de la machine à glaçons n’est pas nécessaire pendant une longue période, veuillez
l’éteindre temporairement ;
Conseil : Cela ne désactive que la fonction de production de glaçons ; les glaçons restants dans
le bac à glace peuvent être conservés et le système d’eau fonctionne normalement.
■En appuyant sur le bouton ICE ON/OFF pendant 3 secondes pour éteindre la machine à
glaçons, l’icône ICE ON/OFF s’allume.
■Après l’arrêt de la machine à glaçons, l’icône de glaçons/eau située sur le panneau de
commande reste affichée, et le bouton ICE CUBES / ICE CRUSHING / ICE WATER est activé,
sans affecter l’évacuation des glaçons ou de l’eau.
MISE EN GARDE :
Avant d’éteindre la machine à glaçons, vous devez débrancher l’alimentation en eau du
réfrigérateur plusieurs heures à l’avance ; après avoir éteint la machine à glaçons, videz et
nettoyez le bac à glaçons, puis remettez-le en place.
Lorsque la fonction de la machine à glaçons est activée et qu’il y a encore de la glace dans le
bac à glaçons, la glace peut tomber pendant l’autovérification du réfrigérateur.
ATTENTION
N’utilisez pas le distributeur d’eau et de glaçons dans des endroits où la qualité de l’eau est mauvaise ou si la pollution
d’eau n’est pas entièrement confirmée.
On peut acheter le filtre au centre de service après-vente.
Le dispositif de filtration de la machine à glaçons peut être utilisé pendant 180 jours. Après 165 jours d’utilisation, le
témoin de l’élément filtrant clignote. L’icône de l’écran de l’élément filtrant reste toujours allumée au-delà de 180 jours.
Cela rappelle à l’utilisateur qu’il faut remplacer l’élément filtrant. Après le remplacement de l’élément filtrant, appuyez
sur ICE WATER pendant plus de 5 secondes, l’icône de changement de cet élément s’éteint.
Informations importantes concernant le filtre à eau
Si le réfrigérateur reste inutilisé pendant une longue période ou si l’eau potable présente un goût anormal, nettoyez
complètement le système d’eau et prélevez de l’eau du distributeur d’eau et de glaçons pendant plusieurs minutes.
S’il y a une odeur désagréable ou un mauvais goût, le filtre doit être remplacé.
Replacement du filtre
Avant de remplacer le filtre, on doit débrancher la fiche d’alimentation du réfrigérateur ou éteindre l’interrupteur principal,
et couper la source d’eau.
Dévissez et retirez le filtre en suivant les indications de la flèche située sur le filtre ;
Insérez le nouveau filtre et serrez-le ;
Après avoir remplacé le filtre, prélevez un peu d’eau du distributeur de glaçons et d’eau pour éliminer l’air du système
d’eau ;
Jetez directement le filtre usagé dans une poubelle.
MISE EN GARDE :
Le filtre à eau vise les particules contenues dans l’eau, autres que les bactéries ou les micro-organismes.
36
REMARQUE :
IL N’EST PAS RECOMMANDÉ D’INSTALLER LE RÉFRIGÉRATEUR DANS DES ENDROITS
OÙ LA TEMPÉRATURE DESCEND EN DESSOUS DE 32 ºF (0 ºC) OU S’ÉLÈVE À 110 ºF
(43 ºC). LE COMPRESSEUR NE POURRA PAS MAINTENIR DES TEMPÉRATURES
APPROPRIÉES À L’INTÉRIEUR DU RÉFRIGÉRATEUR.
POUR UNE INSTALLATION DANS DES ENDROITS OÙ LA TEMPÉRATURE DESCEND EN
DESSOUS DE 32 ºF, RÉGLEZ LA TEMPÉRATURE DU CONGÉLATEUR À LA TEMPÉRATURE
LA PLUS FROIDE POUR AMÉLIORER LE FONCTIONNEMENT DU RÉFRIGÉRATEUR
DANS CES CONDITIONS.
NETTOYAGE ET ENTRETIEN
Nettoyage de votre appareil
• Débranchez l’appareil et sortez les aliments et les paniers.
• Lavez l’intérieur à l’eau chaude avec une solution de bicarbonate de soude. La solution doit être de 2
c. à soupe de bicarbonate de soude pour un litre d’eau.
• Lavez les paniers avec une solution de détergent doux.
• Nettoyez l’extérieur de l’appareil avec un détergent doux et de l’eau chaude.
MISE EN GARDE
Ne pas débrancher le réfrigérateur-congélateur pourrait entraîner une décharge électrique ou
des blessures corporelles.
Panne de courant
La plupart des pannes de courant sont corrigées en quelques heures et ne devraient pas affecter la
température de votre réfrigérateur-congélateur si vous réduisez le nombre de fois que la porte est
ouverte. S’il n’y a pas de courant pendant une période prolongée, vous devez prendre les mesures
appropriées pour protéger votre nourriture.
Périodes de vacances
Courts séjours : Laissez l’appareil fonctionner pendant des congés de moins de trois semaines.
Longues vacances : Si l’appareil n’est pas utilisé pendant plusieurs mois, retirez tous les aliments et
débranchez le cordon d’alimentation. Nettoyez et séchez soigneusement l’intérieur. Pour éviter les
odeurs et la croissance des moisissures, laissez la porte entrouverte : bloquez-la ouverte si nécessaire.
Déplacement de votre appareil
• Retirez tous les aliments.
• Fixez solidement tous les articles en vrac à l’intérieur de l’appareil avec du ruban adhésif.
• Tournez les vis de nivelage jusqu’à la base pour éviter tout dommage.
• Fermez la porte avec du ruban adhésif.
• Assurez-vous que l’appareil reste en position verticale pendant le transport.
Conseils d’économied’énergie
• L’appareil doit être situé dans la zone la plus fraîche de la pièce, loin des appareils produisant de la
chaleur ou des conduits de chauffage et loin de la lumière solaire directe.
• Laissez refroidir les aliments chauds à la température ambiante avant de les placer dans l’appareil.
Surcharger l’appareil oblige le compresseur à fonctionner plus longtemps. Les aliments qui gèlent trop
lentement peuvent perdre en qualité ou se gâter.
• Assurez-vous d’emballer les aliments et essuyez les contenants avant de les placer dans l’appareil.
Cela réduit l’accumulation de givre à l’intérieur du congélateur.
• Rangez correctement et étiquetez clairement la nourriture pour réduire les ouvertures de porte et les
recherches prolongées. Retirez autant d’articles que nécessaire en une seule fois et refermez la porte
le plus rapidement possible.
37
DES PROBLÈMES AVEC VOTRE APPAREIL?
L'unité ne fonctionne pas.
L’appareil n’est pas branché.
Le disjoncteur s’est déclenché ou un fusible a sauté.
Le compresseur s’active et
s’éteint fréquemment.
La température ambiante est plus élevée que d’habitude.
Il y a trop de nourriture dans le réfrigérateur - congélateur.
La porte est ouverte trop souvent.
La porte n’est pas complètement fermée.
La température est mal réglée. Le joint de porte est défectueux.
Les distances minimales requises du réfrigérateur-congélateur
ne sont pas respectées.
Vibrations. Vérifiez que le réfrigérateur – congélateur est bien au niveau.
Le séparateur de section
est chaud au toucher.
Ceci est normal.
La zone de la section du séparateur contient un dispositif de
chauffage anti-condensation qui est chaud au toucher lors du
cycle d’anti-condensation pour empêcher la formation de
condensation entre les deux sections.
L’appareil semble faire trop
de bruit.
Le bruit de cliquetis peut provenir de l’écoulement du réfrigérant,
ce qui est normal.
À la fin de chaque cycle, vous pouvez entendre des gargouillis
produits par l’écoulement du réfrigérant dans votre
réfrigérateur-congélateur.
La contraction et la dilatation des parois internes de l’appareil
peuvent causer des bruits de craquement et de martèlement.
L’appareil n’est pas au niveau.
La porte ne ferme pas bien.
L’appareil n’est pas au niveau.
La porte est inversée et incorrectement installée.
Le joint est sale.
Les paniers sont hors de position.
GUIDE DE DÉPANNAGE
PROBLÈME CAUSE PROBABLE
Vous pouvez résoudre facilement de nombreux problèmes courants de votre réfrigérateur-congélateur,
vous permettant ainsi d’économiser le coût éventuel d’un appel de service. Essayez les suggestions
ci-dessous pour voir si vous pouvez résoudre le problème avant d’appeler le service de réparation.
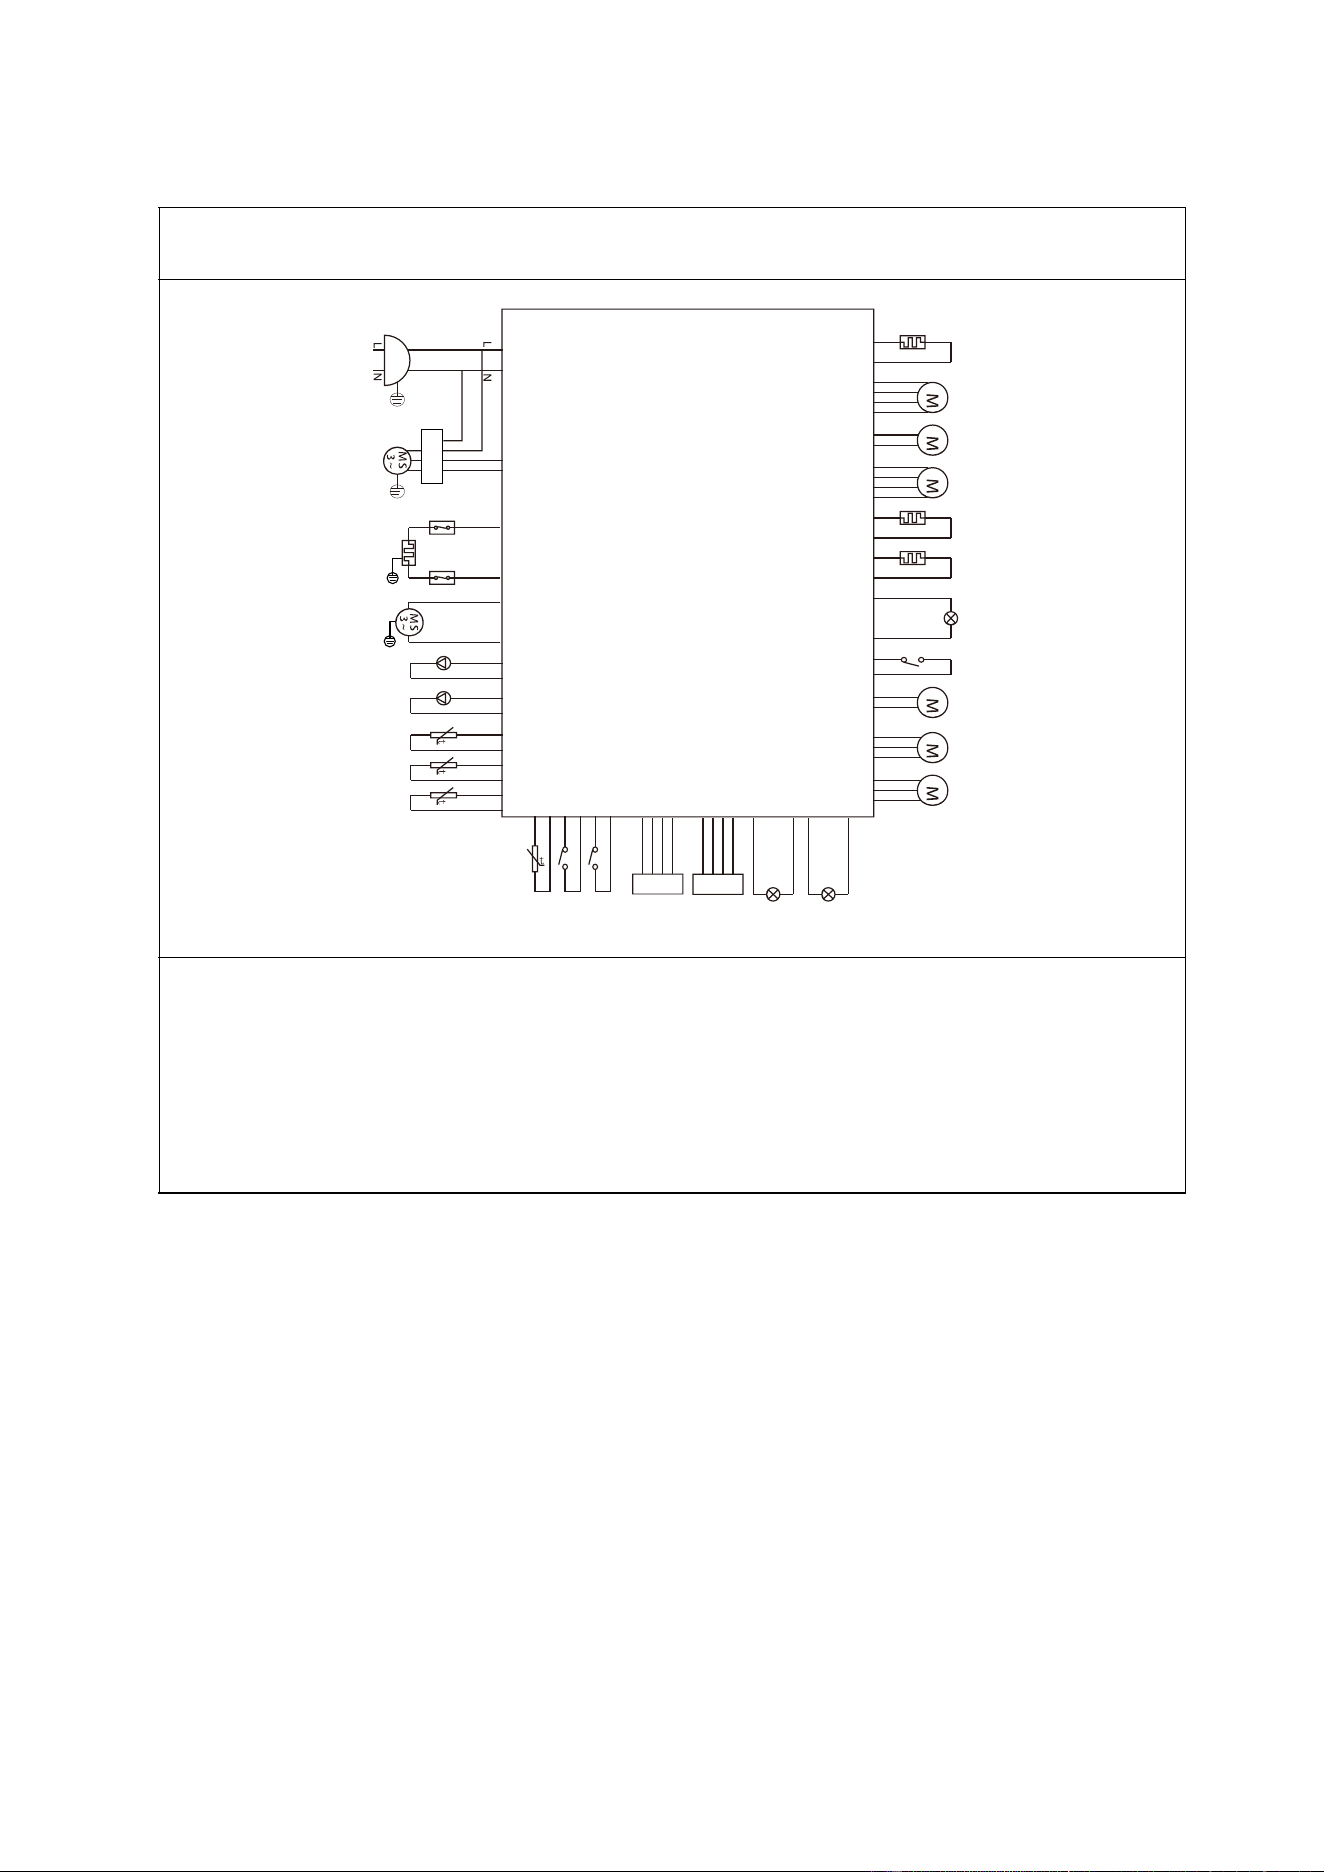
38
DIAGRAMME DE CÂBLAGE
Control Board
a
d
e
f
g
h
i
j
k
l m n o p
q
s
t
u
v
x
y
z
aa
ab
ac
w
r
b
c
a-Signal
b-onduleur
c-Compresseur
d-Protecteur thermique
e-Réchauffeur de
dégivrage
f-moteur de glace
g-valve eau potable
h-I/M valve d'eau
i-AR. capteur
g-AV. capteur
k-capteur de dégivrage
l-I/M capteur
m-AV.interrupteur de porte
n-AR.interrupteur de porte
o-Temp. et capteur d'humidité
p-Tableau d'affichage
q-F. lampe
r-AR. lampe
s-AV. moteur de ventilateur
t-Moteur du ventilateur du
condenseur
u-Moteur de valve de sortie
de glace
v-Micro interrupteur
w-IWD lampe
x-Réchauffeur de valve de sortie de glace
y-IWD réchaud
z-I/M conducteur
aa-Moteur de sélection de glace
aa-ab-Moteur à pas ac-Chauffage de registre