1 2
3
4
5
ORGBRO
USER’S GUIDE
Thermal label printer
BENUTZERHANDBUCH
Thermoetikettendrucker
GUIDE DE L'UTILISATEUR
Imprimante d'étiquettes thermique
GUIDA PER L'UTENTE
Stampante per etichette termiche
Z3
ORGBRO
USER’S GUIDE
Thermal label printer
BENUTZERHANDBUCH
THERMODRUCKER FÜR ETIKETTEN
GUIDE DE L'UTILISATEUR
IMPRIMANTE THERMIQUE D'ÉTIQUETTES
GUIDA PER L'UTENTE
STAMPANTE TERMICA PER ETICHETTE
Z3
ORGBRO
ENGLISH
01 General Description
Power Button
Feed Button
Open-Cover
Button
Screen
Reset Key
Charging Port
Feed
Button
Power
Button
Button Function Operating Instruction
Power on/off.
Switch the main menu options. Press once.
Confirm the selected
parameter options.
Paper feeding.
(In the "Ready" state)
Navigate through the parameter
options under the main menu.
Press once.
Reset
Key
Perform a forced shutdown if the
device is behaving abnormally.
Press and hold the button.
Press and hold for 2 seconds.
For Gap/Black Mark: Press once to feed one
label.
For Continuous: Press and hold to feed paper,
release to stop.
Insert a pin into the reset hole and
press once.
02 Consumable Installation
1. Press the
Open-Cover Button on
the left to open the
cover.
2. Pull the lock buckle on the
paper baffle to the "open"
position, and adjust the
paper guides to the correct
position according to the
paper width.
3. Load the paper roll into the
paper compartment with the
printing side facing down.
(Caution: Sharp serrated blade
is exposed when cover is
open.)
4. Slide the paper baffle
to fix the paper roll and
push the lock buckle to
the "close" position.
5. Pull a small length of
label/media out beyond the
print head before closing
the cover.
6. After powering on, adjust the
label type to match the loaded
labels (Default: Gap).
05 Screen Description
Gap Continuous
Z3-XXXX
Ready
Disconnected
Battery level Be charging
Connected
Black Mark
Label Type
Battery Status
Bluetooth
Model- MAC
Printer Status
03 Connect via Mobile Phone
4. Open the "4Barcod" APP and tap
"Disconnect" in the upper-right corner.
5. Select your device from
the list that appears.
3. Turn on Bluetooth on
your phone.
2. Press and hold to power
on.
2. Press and hold to power on.
Z3
BT WiFi
Z3
BT WiFi
Z3
BT WiFi
Z3
BT WiFi
4Barcode
X
Disconnect
6. Perform editing and printing operations
inside the 4BarCode application.
4. After the driver is installed, you can proceed with printing on the computer.
04 Connect via Computer
1. Connect the printer to the computer via a USB
cable.
Options Parameter
Default
Label Type
Selftest
1
2
3
4
5
6
Start
1min / 3min / 5min / Never
0.5h / 1h / Never
Restore
Confirm
Continuous / Gap / Black Mark
Label Calibration
Sleep Time
Shutdown Time
Factory Setting
Gap
/
/
1min
Never
/
7 Languages
English
Setting Menu
English / Français / Deutsch / Italiano / Español / 한국어 / 日本
語 / 繁體中文 / Русский / Português / Nederlands
06 Product Information
If the product has quality problems or any
suggestions, please contact us promptly
through the after-sales service e-mail, we will
give you a satisfactory answer.
support@orgbro.com
Return and exchange instructions:
Returns and exchanges please ensure that the goods are intact and do not affect the sale; we will
provide you with service as soon as possible after receiving the request.
Scan code to
register - Free
6 months
warranty!
WARRANTY CARD
Follow our official social media to unlock exclusive perks!
---------------------------------------------------
Instagram: orgbro_printer
Facebook: ORGBROPrinter
YouTube: @ORGBRO_Printer
X: orgbro_printer
WhatsApp: +86 13246387664
EVATOST CONSULTING LTD
Office 101 32 Threadneedle Street, London,
United Kingdom, EC2R 8AY
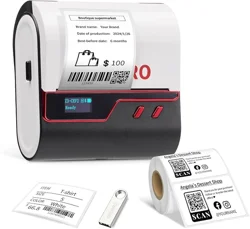
1
Thermal label printer
5
User's Guide
3
Type-C Charging Cable
4
USB Disk
2
Thermal labels
Troubleshoot
No label Out of label, please reload the label.
The cover is not closed tightly, please close again.
The temperature of the print head is too high, please wait for one minute or more until the
temperature goes down.
Cover opened
Overheat
Label error
1. Set the
"Label Type" of the device to match the type of label installed in it.
2. Select the "Label Calibration" function to calibrate the label.
Brand ORGBRO Name Thermal label printer
Model Z3 Connection USB/Bluetooth
Resolution 203DPI Charging Port Type-C
Product Size 112.3x112.2x61.2mm Battery Capacity 2200mAh
Maximum Label Width 80mm Label Types
Gap/Continuous/Black Mark
Compatible OS Windows, macOS, Linux,ChromeOS, Android, iOS
Gap Continuous
Z3-XXXX
Ready
Black Mark
01 Allgemeine Beschreibung
Ein-/Aus-Taste
Einzugstaste
Taste zum Öffnen
der Abdeckung
Bildschirm
Reset-Taste
Ladeanschluss
Einzug-
staste
Ein-/
Aus-T
aste
Taste Funktion Bedienungsanleitung
Ein-/Ausschalten.
Wechseln zwischen den
Optionen des Hauptmenüs.
Einmal drücken.
Bestätigen der ausgewähl-
ten Parameteroptionen.
Papierzufuhr.
(Im Status „Bereit”)
Navigieren durch die Parame-
teroptionen im Hauptmenü.
Einmal drücken.
Reset-
Taste
Durchführen einer erzwungenen
Abschaltung, wenn das Gerät sich
abnormal verhält.
Die Taste gedrückt halten.
2 Sekunden lang gedrückt halten.
Für Lücke/schwarze Markierung: Einmal drücken,
um ein Etikett zuzuführen.
Für Endlos: Gedrückt halten, um Papier zuzuführen,
loslassen, um zu stoppen.
Stecken Sie eine Nadel in die
Reset-Öffnung und drücken Sie einmal.
02 Installation von Verbrauchsmaterialien
1. Drücken Sie die
Taste „Open-Cover“ auf
der linken Seite, um die
Abdeckung zu öffnen.
2. Ziehen Sie die Verriege-
lungsschnalle an der
Papierführung in die Position
„Open“ und stellen Sie die
Papierführungen entsprechend
der Papierbreite auf die richtige
Position ein.
3. Legen Sie die Papierrolle mit der
Druckseite nach unten in das
Papierfach ein. (Achtung: Bei
geöffneter Abdeckung liegt eine
scharfe gezackte Klinge frei.)
4. Schieben Sie die
Papierführung, um die
Papierrolle zu fixieren, und
schieben Sie die
Verriegelungsschnalle in
die Position „geschlossen”.
5. Ziehen Sie vor dem
Schließen der Abdeckung
ein kleines Stück Etikett/Me-
dium über den Druckkopf
hinaus.
6. Nach dem Einschalten passen
Sie den Etikettentyp an die
eingelegten Etiketten an.
(Standard: Abstand.)
05 Bildschirmbeschreibung
Abstand Dauerbetrieb
Z3-XXXX
Bereit
Getrennt
Batteriestand Lädt
Verbunden
Schwarz-
marke
Etikettentyp
Batteriestatus
Bluetooth
Modell – MAC
Druckerstatus
03 Verbindung über mobiltelefon
2. Halten Sie die Taste gedrückt,
um das Gerät einzuschalten.
2. Halten Sie die Taste gedrückt, um
das Gerät einzuschalten.
3. Treiberinstallation.
4. Nach der Installation des Treibers können Sie mit dem Drucken auf dem
Computer fortfahren.
1. Verbinden Sie den Drucker über
ein USB-Kabel mit dem Computer.
English / Français / Deutsch / Italiano / Español / 한국어
/ 日本語 / 繁體中文 / Русский / Português / Nederlands
Optionen Parameter Standard
Etikettentyp
Selbsttest
1
2
3
4
5
6
Starten
1 min/3 min/5 min/Nie
0,5 h/1 h/Nie
Wiederherstellen
Bestätigen
Abstand/Schwarzmarke/Dauerbetrieb
Etikettenkalibrierung
Ruhezeit
Abschaltzeit
Werkseinstellungen
Abstand
/
/
1min
Nie
/
7 Sprache
English
Einstellungsmenü
06 Produktinformationen
Fehlerbehebung
Kein Etikett Etiketten sind aufgebraucht, bitte Etiketten nachfüllen.
Die Abdeckung ist nicht fest verschlossen, bitte erneut schließen.
Die Temperatur des Druckkopfs ist zu hoch, bitte warten Sie mindestens
eine Minute, bis die Temperatur gesunken ist.
Deckel geöffnet
Überhitzung
Etikettenfehler
1. Stellen Sie den „Etikettentyp” des Geräts entsprechend dem Typ der
eingelegten Etiketten ein.
2. Wählen Sie die Funktion „Etikettenkalibrierung”, um das Etikett zu kalibrieren.
Marke ORGBRO Name Thermodrucker für Etiketten
Modell Z3 Anschluss USB/Bluetooth
Auflösung 203 DPI Ladeanschluss Typ C
Produktgröße 112,3 x 112,2 x 61,2 mm Akkukapazität 2200 mAh
Maximale Etikettenbreite 80 mm Etiketentyp
Abstand/Schwarzmarke/Dauerbetrieb
Kompatible Betriebssysteme Windows, macOS, Linux, ChromeOS, Android, iOS
Abstand Dauerbetrieb
Z3-XXXX
Bereit
Schwarz-
marke
01 Description générale
Bouton d'alimentation
Bouton d'alimentation
papier
Bouton d'ouverture
du capot
Écran
Touche de réinitialisation
Port de chargement
Bouton
d'alimen-
tation
papier
Bouton
d'alimen-
tation
Bouton Fonction Mode d'emploi
Mise sous/hors tension.
Changement des options
du menu principal.
Appuyer une fois.
Confirmer les options de
paramètres sélectionnées.
Alimentation papier.
(En état « Prêt »)
Naviguer parmi les
options de paramètres
dans le menu principal.
Appuyez une fois.
Touche
de réini-
tialisation
Effectuer un arrêt
forcé si l'appareil
fonctionne de manière
anormale.
Appuyez sur le bouton et maintenez-le enfoncé.
Appuyer et maintenir enfoncé pendant 2 secondes.
Pour l'espacement/la marque noire : appuyer une fois
pour alimenter une étiquette.
Pour le mode continu : appuyer et maintenir enfoncé
pour alimenter le papier, relâcher pour arrêter.
Insérez une épingle dans le trou de réinitialisation et
appuyez une fois.
02 Installation des consommables
1. Appuyez sur le
bouton d'ouverture du
couvercle situé à
gauche pour ouvrir le
couvercle.
2. Tirez la boucle de
verrouillage du déflecteur de
papier en position « ouverte »
et réglez les guides de papier à
la position correcte en fonction
de la largeur du papier.
3. Chargez le rouleau de papier
dans le compartiment à papier,
côté impression vers le bas.
(Attention : une lame dentelée
tranchante est exposée lorsque le
couvercle est ouvert.)
4. Faites glisser le
déflecteur de papier
pour fixer le rouleau de
papier et poussez la
boucle de verrouillage
en position « fermée ».
5. Tirez une petite longueur
d'étiquette/support au-delà
de la tête d'impression avant
de fermer le couvercle.
6. Après la mise sous tension,
réglez le type d'étiquette en
fonction des étiquettes
chargées.
(Par défaut : Espacement.)
05 Description de l'écran
Espacement Continu
Z3-XXXX
Prêt
Déconnecté
Niveau de la batterie
En charge
Connecté
Marque noire
Type d'étiquette
État de la batterie
Bluetooth
Modèle - MAC
État de l'im-
primante
03 Connexion via téléphone mobile
2. Appuyez sur le bouton
et maintenez-le enfoncé
pour mettre l'imprimante
sous tension.
2. Appuyez sur le bouton et maintenez-le
enfoncé pour mettre l'imprimante sous
tension.
4Barcode
X
Déconnecter
3. Installation du pilote.
4. Une fois le pilote installé, vous pouvez procéder à l'impression sur l'ordinateur.
04 Connexion via un ordinateur
1. Connectez l'imprimante à l'ordinateur
à l'aide d'un câble USB.
English / Français / Deutsch / Italiano / Español / 한국어
/ 日本語 / 繁體中文 / Русский / Português / Nederlands
Options Paramètre Par défaut
Type d'étiquette
Autotest
1
2
3
4
5
6
Démarrer
1 min/3 min/5 min/Jamais
0,5 h/1 h/Jamais
Restaurer
Confirmer
Espacement/Continu/Marque noire
Calibration d'étiquette
Temps de veille
Heure d'arrêt
Réglages d'usine
Espacement
/
/
1min
Jamais
/
7 Langues
English
Menu de configuration
06 Informations sur le produit
Marque ORGBRO Nom Imprimante thermique d'étiquettes
Modèle Z3 Connexion USB/Bluetooth
Résolution 203 DPI Port de chargement Type-C
Dimensions du produit 112,3 x 112,2 x 61,2 mm Capacité de la batterie 2200 mAh
Largeur maximale des étiquettes 80 mm Types d'étiquettes
Systèmes d'exploitation compatibles Windows, macOS, Linux, ChromeOS, Android, iOS
Espacement
Continu
Z3-XXXX
Prêt
Marque
noire
01 Descrizione generale
Pulsante di
accensione
Pulsante di
alimentazione
Pulsante di apertura
del coperchio
Schermo
Tasto di ripristino
Porta di ricarica
02 Installazione dei materiali di consumo
1. Premere il pulsante di
apertura del coperchio
sulla sinistra per aprire il
coperchio.
2. Tirare la fibbia di blocco
sul deflettore della carta in
posizione “aperta” e regolare
le guide della carta nella
posizione corretta in base
alla larghezza della carta.
3. Caricare il rotolo di carta nel
vano carta con il lato di stampa
rivolto verso il basso.
(Attenzione: quando il
coperchio è aperto, la lama
seghettata affilata è esposta).
4. Far scorrere il
deflettore della carta per
fissare il rotolo di carta e
spingere la fibbia di
blocco in posizione
“chiusa”.
5. Estrarre una piccola
lunghezza di etichetta/-
supporto oltre la testina
di stampa prima di
chiudere il coperchio.
6. Dopo l'accensione, regolare il
tipo di etichetta in modo che
corrisponda alle etichette caricate
(Impostazione predefinita:
Spazio.)
05 Descrizione dello schermo
Spazio Continuo
Z3-XXXX
Pronto
Disconnesso
Livello della batteria
In carica
Connesso
Segno nero
Tipo di etichetta
Stato della batteria
Bluetooth
Modello - MAC
Stato della
stampante
03 Connessione tramite telefono cellulare
2. Tenere premuto
per accendere.
2. Tenere premuto per
accendere.
4Barcode
X
Non connesso
3. Installazione del driver.
4. Dopo aver installato il driver, è possibile procedere con la stampa
dal computer.
04 Collegamento tramite computer
1. Collegare la stampante al computer
tramite un cavo USB.
English / Français / Deutsch / Italiano / Español / 한국어
/ 日本語 / 繁體中文 / Русский / Português / Nederlands
Opzioni
Parametro
Predefinito
Tipo di etichetta
Autotest
1
2
3
4
5
6
Avvia
1 min/3 min/5 min/Mai
0,5 h/1 h/Mai
Ripristina
Conferma
Spazio/Segno nero/Continuo
Calibrazione etichetta
Tempo di standby
Tempo di spegnimento
Impostazioni di fabbrica
Spazio
/
/
1 min
Mai
/
7 Lingue
English
Menu impostazioni
06 Informazioni sul prodotto
Risoluzione dei problemi
Nessuna
etichetta
Etichette esaurite, ricaricare le etichette.
Il coperchio non è chiuso correttamente, richiuderlo.
La temperatura della testina di stampa è troppo alta, attendere almeno un minuto
affinché la temperatura si abbassi.
Copertura
aperta
Surrisca-
ldamento
Errore
etichetta
1. Impostare il “Tipo di etichetta” del dispositivo in modo che corrisponda al tipo di
etichetta installata.
2. Selezionare la funzione “Calibrazione etichetta” per calibrare l'etichetta.
Marca ORGBRO Nome Stampante termica per etichette
Modello Z3 Connessione USB/Bluetooth
Risoluzione 203 DPI Porta di ricarica Type-C
Dimensioni del prodotto 112,3 x 112,2 x 61,2 mm Capacità della batteria 2200 mAh
Larghezza massima dell'etichetta 80 mm Tipi di etichette
Sistema operativo compatibile Windows, macOS, Linux, ChromeOS, Android, iOS
1
Thermodrucker für Etiketten
5
Benutzerhandbuch
3
Typ-C-Ladekabel
4
USB-Stick
2
Thermisches Etikettenpapier
1
Imprimante thermique d'étiquettes
5
Guide de l'utilisateur
3
Câble de chargement de type C
4
Disque USB
2
Papier étiquette thermique
1
Stampante termica per etichette
5
Guida per l'utente
3
Cavo di ricarica Type-C
4
Disco USB
2
Carta etichetta termica
Spazio Continuo
Z3-XXXX
Pronto
Segno nero
4. Öffnen Sie die App „4Barcode”
und tippen Sie oben rechts auf
„Nicht verbunden”.
5. SWählen Sie Ihr Gerät aus
der angezeigten Liste aus.
3. Schalten Sie Bluetooth
auf Ihrem Smartphone ein.
4Barcode
X
Nicht verbunden
6. Führen Sie die Bearbeitungs- und Druckvorgänge in
der 4BarCode-Anwendung durch.
4. Ouvrez l'application « 4Barcode
» et appuyez sur « Déconnecter »
dans le coin supérieur droit.
5. Sélectionnez votre
appareil dans la liste qui
s'affiche.
3. Activez le Bluetooth
sur votre téléphone.
6. Effectuez les opérations d'édition et
d'impression dans l'application
4BarCode.
4. Apri l'APP “4Barcode” e
tocca “Non connesso”
nell'angolo in alto a destra.
5. Seleziona il tuo dispositi-
vo dall'elenco che appare.
3. Attiva il Bluetooth
sul tuo telefono.
6. Esegui le operazioni di modifica e stampa
all'interno dell'applicazione 4BarCode.
Methode 1: Suchen Sie nach einem kostenlosen USB-Treiber für Ihren Drucker.
Methode 2: Für Treiber-Downloads oder Fehlerbehebung besuchen Sie bitte
die offizielle Website: https://orgbro.com/support/
Methode 3: Wenn Sie Ihren USB-Treiber verloren haben oder den Treiber nicht
von der oben genannten Website herunterladen können, wenden Sie sich bitte
an unseren Kundendienst unter [email protected].
Detailliertes Video zur Treiberinstallation
Unterstützte Computersysteme: Windows/macOS/Linux/ChromeOS
3. Driver installation.
Method 1: Check for complimentary USB driver with your printer.
Method 2: For driver downloads or troubleshooting, please visit the
official website link: https://orgbro.com/support/
Method 3: If you've lost your USB driver or can't download the driver from
the website above, please contact our customer service team at
Get detailed driver install video
Supporting Computer System: Windows/macOS/Linux/ChromeOS
Méthode 1 : vérifiez si un pilote USB gratuit est fourni avec votre impriman-
te.
Méthode 2 : pour télécharger le pilote ou obtenir de l'aide, rendez-vous sur le
site officiel : https://orgbro.com/support/
Méthode 3 : si vous avez perdu votre pilote USB ou si vous ne parvenez pas
à le télécharger à partir du site Web ci-dessus, veuillez contacter notre
service clientèle à l'adresse support@orgbro.com.
Obtenir une vidéo détaillée sur l'installation du pilote
Systèmes d'exploitation pris en charge : Windows/macOS/Linux/ChromeOS
04 Über den Computer verbinden
Dépannage
Aucune étiquette Plus d'étiquettes, veuillez recharger les étiquettes.
Le couvercle n'est pas bien fermé, veuillez le refermer.
Couvercle ouvert
Surchauffe
Erreur d'étiquette
1. Réglez le « Type d'étiquette » de l'appareil en fonction du type d'étiquette installé.
2. Sélectionnez la fonction « Calibration d'étiquette » pour calibrer les étiquettes.
La température de la tête d'impression est trop élevée, veuillez attendre
une minute ou plus jusqu'à ce que la température baisse.
Pulsante
di alimen-
tazione
Pulsante
di accen-
sione
Pulsante Funzione Istruzioni operative
Accensione/spegnimento.
Passaggio tra le opzioni
del menu principale.
Premere una volta.
Conferma delle opzioni dei
parametri selezionati.
Alimentazione carta.
(In stato “Pronto”)
Navigazione tra le
opzioni dei parametri
nel menu principale.
Premere una volta.
Tasto di
ripristino
Tenere premuto il pulsante.
Tenere premuto per 2 secondi.
Per Gap/Black Mark: premere una volta per
alimentare un'etichetta.
Per Continuous: tenere premuto per alimentare
la carta, rilasciare per interrompere.
Inserire un perno nel foro di reset e premere
una volta.
Esecuzione di uno
spegnimento forzato se il
dispositivo presenta un
comportamento anomalo.
Metodo 1: Verifica la presenza di un driver USB gratuito con la stampante.
Metodo 2: Per scaricare il driver o risolvere eventuali problemi, visita il sito
web ufficiale: https://orgbro.com/support/
Metodo 3: Se hai perso il driver USB o non riesci a scaricarlo dal sito web
sopra indicato, contatta il nostro servizio clienti all'indirizzo
Guarda il video dettagliato sull'installazione del driver
Sistemi operativi supportati: Windows/macOS/Linux/ChromeOS
support@orgbro.com
support@orgbro.com
support@orgbro.com
Bei Qualitätsproblemen oder Anregungen
kontaktieren Sie uns bitte umgehend per
After-Sales-E-Mail. Wir geben Ihnen
zufriedenstellende Antwort.
Rücksendebedingungen:
Ware muss unbeschädigt und in verkaufsfähigem Zustand sein. Wir
bearbeiten Anfragen schnellstmöglich.
GARANTIEKARTE
Code scannen für
Registrierung - 6
Monate kostenlose
Garantie.
---------------------------------------------------
Si le produit présente des problèmes de qualité ou
si vous avez des suggestions, veuillez nous
contacter rapidement via l'e-mail du service
après-vente, nous vous donnerons une réponse
satisfaisante.
Instructions de retour et d'échange :
Les retours et échanges doivent s'effectuer avec les marchandises
intactes et sans affecter la revente ; nous vous fournirons un service
dès que possible après réception de la demande.
Scannez le code
pour vous
inscrire -
Garantie gratuite
de 6 mois
CARTE DE GARANTIE
---------------------------------------------------
Scansiona il codice
per registrarti -
Garanzia gratuita
di 6 mesi
CARTA DI GARANZIA
---------------------------------------------------
Se il prodotto presenta problemi di qualità o
suggerimenti, contattaci tempestivamente
tramite l'e-mail del servizio post-vendita, ti
daremo una risposta soddisfacente.
Istruzioni per resi e cambi:
I resi e i cambi si prega di assicurarsi che la merce sia intatta e non
influenzi la vendita; ti forniremo il servizio il prima possibile dopo aver
ricevuto la richiesta.
Folgen Sie uns in sozialen Medien für exklusive Angebote!
Suivez nos réseaux sociaux officiels pour débloquer des avantages exclusifs !
Seguici sui nostri social media ufficiali per sbloccare vantaggi esclusivi!
CALLE RIO TORMES NUM.1, PLANTA 1, DERECHA,
OFICINA 3, Fuenlabrada,Madrid,28947 Spain
CALLE RIO TORMES NUM.1, PLANTA 1, DERECHA,
OFICINA 3, Fuenlabrada,Madrid,28947 Spain
CALLE RIO TORMES NUM.1, PLANTA 1, DERECHA,
OFICINA 3, Fuenlabrada,Madrid,28947 Spain
SUCCESS COURIER SL
SUCCESS COURIER SL
SUCCESS COURIER SL
Le présentappareilestconforme aux CNR Innovation,SciencesetDéveloppementéconomiqueCanada Canadaapplica-
bles aux appareils radio exempts de licence. L'exploitationestautorisée aux deux conditions suivantes:
(1) l'appareil ne doit pas produire de brouillage,
(2) l'utilisateur de l'appareildoit accepter tout brouillageradioélectriquesubi, mêmesi le brouillageest susceptible
d'encompromettre le fonctionnement.
le dispositif a été évalué à satisfaire l'exigence générale de l'exposition aux rf.
l'appareil peut être utilisé dans des conditions d'exposition portatif sans restriction.
INNOVATION, SCIENCE AND ECONOMIC DEVELOPMENT CANADA NOTICE:
PMN: Thermal label printer HVIN: Z3
This device complies with Innovation, Science and Economic Development Canada licence-exempt RSS standard(s).
Operation is subject to the following two conditions:
(1) This device may not cause interference.
(2) This device must accept any interference, including interference that may cause undesired operation of the device.
ThedevicehasbeenevaluatedtomeetgeneralRFexposurerequirement.
Thedevicecanbeusedinportable exposureconditionwithoutrestriction.
FCC STATEMENT : This device complies with Part 15 of the FCC Rules. Operation is subject to the following two
conditions: This device may not cause harmful interference, and this device must accept any interference received,
including interference that may cause undesired operation.
WARNING: Changes or modifications not expressly approved by the party responsible for compliance could void the
user's authority to operate the equipment.
NOTE: This equipment has been tested and found to comply with the limits for a Class B digital device, pursuant to
Part 15 of the FCC Rules. These limits are designed to provide reasonable protection against harmful interference in
a residential installation. This equipment generates uses and can radiate radio frequency energy and, if not installed
and used in accordance with the instructions, may cause harmful interference to radio communications. However,
there is no guarantee that interference will not occur in a particular installation. If this equipment does cause
harmful interference to radio or television reception, which can be determined by turning the equipment off and on,
the user is encouraged to try to correct the interference by one or more of the following measures:
Reorient or relocate the receiving antenna. Increase the separation between the equipment and receiver.
Connect the equipment into an outlet on a circuit different from that to which the receiver is connected.
Consult the dealer or an experienced radio/TV technician for help.
RF WARNING STATEMENT:
The device has been evaluated to meet general RF exposure requirement. The device can be used in portable
exposure condition without restriction.
Espacement/Marque noire/Continu
Spazio/Segno nero/Continuo
R
220-J10103
Android requires
Location Services to
be enabled to find
nearby Bluetooth
devices.
!
NOTE
DEUTSCH
FRANÇAIS
ITALIANO
!
Bei Android-Geräten
müssen die Standort-
dienste aktiviert sein,
um Bluetooth-Geräte
in der Nähe zu finden.
HINWEIS
!
Les appareils Android
nécessitent l'activation
des services de locali-
sation pour trouver les
appareils Bluetooth à
proximité.
REMARQUE
!
I dispositivi Android
richiedono l'attivazione
dei servizi di localizzazi
one per trovare i
dispositivi Bluetooth
nelle vicinanze.
NOTE
1. Download APP.
Scan the QR code or search for "4BarCode" in
your app store to install the application.
Method 1:
Using Legacy "4BarCode" App.
4BarCode
4BarCode
Scan the QR code or search for "Snap & Tag"
in your app store to install the application.
Method 2:
Using New "Snap & Tag" App.
Snap & Tag
Snap & Tag
Snap & Tag
1. App herunterladen.
4BarCode
4BarCode
Snap & Tag
Snap & Tag
Snap & Tag
Methode 1:
Nutzen Sie die bisherige "4BarCode"-App.
Scannen Sie den QR-Code oder suchen Sie im
App Store nach "4BarCode".
Methode 2:
Nutzen Sie die neue "Snap & Tag"-App.
Scannen Sie den QR-Code oder suchen Sie im
App Store nach "Snap & Tag".
1. Télécharger l'application.
4BarCode
4BarCode
Snap & Tag
Snap & Tag
Snap & Tag
Méthode 1 :
Utilisation de l'ancienne application "4BarCode".
Méthode 2 :
Utilisation de la nouvelle application "Snap & Tag".
Scannez le code QR ou recherchez "4BarCode"
dans votre magasin d'applications pour l'installer.
Scannez le code QR ou recherchez "Snap & Tag" dans
votre magasin d'applications pour l'installer.
1. Scaricare l'App.
4BarCode
4BarCode
Snap & Tag
Snap & Tag
Snap & Tag
Metodo 1:
Utilizzo della vecchia App "4BarCode".
Metodo 2:
Utilizzo della nuova App "Snap & Tag".
Scansionare il codice QR o cercare "4BarCode" nel
vostro app store per installare l'applicazione.
Scansionare il codice QR o cercare "Snap & Tag" nel
vostro app store per installare l'applicazione.
1
2
3
4
5
ORGBRO
Z3
ORGBRO
USER’S GUIDE
Thermal label printer
BENUTZERHANDBUCH
THERMODRUCKER FÜR ETIKETTEN
GUIDE DE L'UTILISATEUR
IMPRIMANTE THERMIQUE D'ÉTIQUETTES
GUIDA PER L'UTENTE
STAMPANTE TERMICA PER ETICHETTE
Z3
ORGBRO
01 General Description
Instagram: orgbro_printer
Facebook: ORGBROPrinter
YouTube: @ORGBRO_Printer
X: orgbro_printer
WhatsApp: +86 13246387664
Botón de
alimen-
tación
Botón de
encendido
Botón Función Instrucciones de funcionamiento
Encendido/apagado.
Cambiar las opciones
del menú principal.
Pulsar una vez.
Confirmar las opciones de
parámetros seleccionadas.
Alimentación de papel.
(En estado «Listo»)
Navegar por las opciones
de parámetros del menú
principal.
Pulse una vez.
Tecla de
reinicio
Realizar un apagado forzado
si el dispositivo funciona de
forma anómala.
Mantenga pulsado el botón.
Mantener pulsado durante 2 segundos.
Para espacio/marca negra: pulsar una vez para
alimentar una etiqueta.
Para continuo: mantener pulsado para alimentar
papel, soltar para detener.
Inserte un alfiler en el orificio de reinicio y pulse
una vez.
Botón de
encendido
Botón de
alimentación
Botón para
abrir la cubierta
Pantalla
Tecla de reinicio
Puerto de carga
ESPAÑOL
02 Instalación de consumibles
1. Pulse el botón de
apertura de la cubierta
situado a la izquierda
para abrir la cubierta.
2. Tire de la hebilla de bloqueo
del deflector de papel hasta la
posición «abierta» y ajuste las
guías de papel a la posición
correcta según el ancho del
papel.
3. Cargue el rollo de papel en el
compartimento con la cara de
impresión hacia abajo.
(Precaución: cuando se abre la
cubierta, queda expuesta una
cuchilla dentada afilada).
4. Deslice el deflector de
papel para fijar el rollo de
papel y empuje la hebilla
de bloqueo a la posición
«cerrada».
5. Tire de un pequeño trozo
de etiqueta/soporte más allá
del cabezal de impresión
antes de cerrar la cubierta.
6. Después de encender la
impresora, ajuste el tipo de
etiqueta para que coincida
con las etiquetas cargadas.
(Predeterminado: Espacio.)
Espacio
Continuo
Z3-XXXX
Listo
Marca
negra
05 Descripción de la pantalla
Espacio Continuo
Z3-XXXX
Listo
Desconectado
Nivel de batería
Cargando
Conectado
Marca negra
Tipo de etiqueta
Estado de la batería
Bluetooth
Modelo: MAC
Estado de la
impresora
Opciones Parámetro
Predeterminado
Tipo de etiqueta
Autocomprobación
1
2
3
4
5
6
Iniciar
1 min/3 min/5 min/Nunca
0,5 h/1 h/Nunca
Restaurar
Confirmar
Espacio/Marca negra/Continuo
Calibración de
etiquetas
Tiempo de espera
Tiempo de apagado
Configuración de
fábrica
Espacio
/
/
1 min
Nunca
/
7 Idioma
English
Menú de configuración
Solución de problemas
Sin etiqueta No hay etiquetas, vuelva a cargarlas.
La tapa no está bien cerrada, vuelva a cerrarla.
La temperatura del cabezal de impresión es demasiado alta, espere un
minuto o más hasta que baje la temperatura.
Cubierta abierta
Sobrecalentamiento
Error de etiqueta
1. Configure el «Tipo de etiqueta» del dispositivo para que coincida con el tipo de
etiqueta instalada en él.
2. Seleccione la función «Calibración de etiquetas» para calibrar la etiqueta.
English / Français / Deutsch / Italiano / Español / 한국어
/ 日本語 / 繁體中文 / Русский / Português / Nederlands
2. Mantenga pulsado para
encenderla.
!
NOTE
Los dispositivos Android
requieren que los
servicios de localización
estén activados para e
ncontrar dispositivos
Bluetooth cercanos.
Z3
BT WiFi
03 Conectar a través del teléfono móvil
4. Abra la aplicación «4Barcode» y
pulse «Desconectar» en la esquina
superior derecha.
5. Seleccione su
dispositivo en la lista que
aparece.
3. Active el Bluetooth en su
teléfono.
4Barcode
X
Desconectar
6. Realice las operaciones de edición e
impresión dentro de la aplicación 4BarCode.
2. Mantenga pulsado para
encenderla.
4. Una vez instalado el controlador, puede proceder a imprimir desde el
ordenador.
04 Conexión a través del ordenador
1. Conecte la impresora al
ordenador mediante un cable USB.
3. Instalación del controlador.
Método 1: Compruebe si hay un controlador USB gratuito con su impresora.
Método 2: Para descargar controladores o solucionar problemas, visite el
enlace del sitio web oficial: https://orgbro.com/support/
Método 3: Si ha perdido su controlador USB o no puede descargar el
controlador desde el sitio web anterior, póngase en contacto con nuestro
equipo de atención al cliente en [email protected].
Obtenga un vídeo detallado sobre la instalación del controlador
Sistemas informáticos compatibles: Windows/macOS/Linux/ChromeOS
06 Información del producto
Marca ORGBRO Nombre Impresora térmica de etiquetas
Modelo Z3 Conexión USB/Bluetooth
Resolución 203 ppp Puerto de carga Tipo C
Tamaño del producto 112,3 x 112,2 x 61,2 mm Capacidad de la batería 2200 mAh
Ancho máximo de la etiqueta 80 mm Tipos de etiquetas
Sistema operativo compatible Windows, macOS, Linux, ChromeOS, Android, iOS
Espacio/Continuo/Marca negra
---------------------------------------------------
SUCCESS COURIER SL
CALLE RIO TORMES NUM.1, PLANTA 1, DERECHA,
OFICINA 3, Fuenlabrada,Madrid,28947 Spain
Si el producto tiene problemas de calidad o alguna
sugerencia, contáctenos oportunamente a través del
correo electrónico de servicio postventa, le daremos
una respuesta satisfactoria.
Instrucciones de devolución y cambio:
Las devoluciones y cambios, por favor asegúrese de que las
mercancías estén intactas y no afecten la venta; le brindaremos
servicio lo antes posible después de recibir la solicitud.
Escanee el
código para
registrarse - 6
meses de
garantía gratuita
TARJETA DE GARANTÍA
support@orgbro.com
GUÍA DEL USUARIO
Impresora de etiquetas térmica
GUIA DO UTILIZADOR
Impressora de etiquetas térmica
GEBRUIKERSHANDLEIDING
Thermisch etikettenprinter
ユーザーガイド
サーマルラベルプリンター
This marking indicates that this product should not be disposed with other household wastes throughout the
EU. To prevent possible harm to the environment or human health from uncontrolled waste disposal, recycle it
responsibly to promote the sustainable reuse of material resources. To return your used device, please use the
return and collection systems or contact the retailer where the product was purchased. They can take this
product for environmental safe recycling.
Diese Kennzeichnung weist darauf hin, dass dieses Produkt nicht zusammen mit anderen Haushaltsabfällen in der EU
entsorgt werden darf. Um mögliche Schäden für die Umwelt oder die menschliche Gesundheit durch unkontrollierte
Abfallentsorgung zu vermeiden, recyceln Sie es verantwortungsbewusst, um die nachhaltige Wiederverwendung von
Materialressourcen zu fördern. Um Ihr gebrauchtes Gerät zurückzugeben, nutzen Sie bitte die Rückgabe- und
Sammelsysteme oder wenden Sie sich an den Händler, bei dem Sie das Produkt gekauft haben. Dieser kann das
Produkt für ein umweltgerechtes Recycling entgegennehmen.
Ce marquage indique que ce produit ne doit pas être jeté avec les autres déchets ménagers dans l'Union européenne.
Afin d'éviter tout risque pour l'environnement ou la santé humaine lié à une élimination incontrôlée des déchets,
recyclez-le de manière responsable afin de favoriser la réutilisation durable des ressources matérielles. Pour retourner
votre appareil usagé, veuillez utiliser les systèmes de retour et de collecte ou contacter le revendeur auprès duquel
vous avez acheté le produit. Ils peuvent prendre en charge ce produit pour un recyclage respectueux de l'environne-
ment.
Questo simbolo indica che questo prodotto non deve essere smaltito insieme agli altri rifiuti domestici in tutta l'UE.
Per evitare possibili danni all'ambiente o alla salute umana causati dallo smaltimento incontrollato dei rifiuti, riciclarlo
in modo responsabile per promuovere il riutilizzo sostenibile delle risorse materiali. Per restituire il dispositivo usato,
utilizzare i sistemi di restituzione e raccolta o contattare il rivenditore presso il quale è stato acquistato il prodotto.
Questi potranno ritirare il prodotto per un riciclaggio sicuro dal punto di vista ambientale.
Esta marca indica que este producto no debe desecharse junto con otros residuos domésticos en toda la UE. Para
evitar posibles daños al medio ambiente o a la salud humana derivados de una eliminación incontrolada de residuos,
recíclelo de forma responsable para promover la reutilización sostenible de los recursos materiales. Para devolver su
dispositivo usado, utilice los sistemas de devolución y recogida o póngase en contacto con el distribuidor donde
compró el producto. Ellos pueden recoger este producto para su reciclaje seguro y respetuoso con el medio
ambiente.
Esta marcação indica que este produto não deve ser eliminado juntamente com outros resíduos domésticos em toda a
UE. Para evitar possíveis danos ao ambiente ou à saúde humana decorrentes da eliminação descontrolada de resíduos,
recicle-o de forma responsável para promover a reutilização sustentável dos recursos materiais. Para devolver o seu
dispositivo usado, utilize os sistemas de devolução e recolha ou contacte o revendedor onde o produto foi adquirido.
Eles podem recolher este produto para uma reciclagem segura do ponto de vista ambiental.
Deze markering geeft aan dat dit product niet samen met ander huishoudelijk afval in de EU mag worden weggegooid.
Om mogelijke schade aan het milieu of de menselijke gezondheid door ongecontroleerde afvalverwerking te
voorkomen, dient u het op verantwoorde wijze te recyclen om het duurzame hergebruik van materiële hulpbronnen te
bevorderen. Om uw gebruikte apparaat in te leveren, kunt u gebruikmaken van de retour- en inzamelsystemen of
contact opnemen met de winkel waar u het product hebt gekocht. Zij kunnen dit product in ontvangst nemen voor
milieuvriendelijke recycling.
このマークは、この製品がEU全域で他の家庭ごみと一緒に廃棄してはならないことを示しています。不適切な廃棄による
環境や人体への危害を防止するため、責任を持ってリサイクルし、材料資源の持続可能な再利用を促進してください。使用
済みのデバイスを返却する際は、返却・回収システムをご利用いただくか、製品を購入した小売店までご連絡ください。彼
らはこの製品を環境への影響を最小限に抑えたリサイクルのために回収します。
1
5
3
4
2
Impresora térmica de etiquetas
Guía del usuario
Cable de carga tipo C
Disco USB
Papel térmico de etiquetas
1
5
3
4
2
Impressora térmica de etiquetas
Guia do utilizador
Cabo de carregamento tipo C
Disco USB
Etiqueta térmica
1
5
3
4
2
Thermische labelprinter
Gebruikershandleiding
Type-C-oplaadkabel
USB-stick
Thermisches etikettenpapier
5
ユーザーガイド
1
3
4
2
サーマルラベルプリンター
Type-C充電ケーブル
USBディスク
サーマルラベル紙
公式ソーシャルメディアをフォローして、限定特典をゲット!
Volg onze officiële sociale media om exclusieve voordelen te ontgrendelen!
Siga as nossas redes sociais oficiais para desbloquear vantagens exclusivas!
¡Siga nuestras redes sociales oficiales para desbloquear beneficios exclusivos!
PORTUGUÊS
01 Descrição geral
Botão liga/desliga
Botão de alimentação
Botão para
abrir a tampa
Ecrã
Tecla de reinicialização
Porta de carregamento
Botão de
alimen-
tação
Botão
liga/
desliga
Botão Função Instruções de funcionamento
Ligar/desligar.
Alternar entre as opções do
menu principal.
Prima uma vez.
Confirmar as opções de
parâmetros selecionadas.
Alimentação de papel.
(No estado «Pronto»)
Navegar pelas opções de
parâmetros no menu principal.
Pressione uma vez.
Tecla de
reinicia-
lização
Executar um encerramento
forçado se o dispositivo estiver
a funcionar de forma anormal.
Pressione e mantenha pressionado o botão.
Mantenha premido durante 2 segundos.
Para intervalo/marca preta: prima uma vez para
alimentar uma etiqueta.
Para contínuo: mantenha premido para alimentar
o papel, solte para parar.
Insira um alfinete no orifício de reinicialização e
pressione uma vez.
02 Instalação de consumíveis
1. Pressione o botão
Abrir tampa à esquerda
para abrir a tampa.
2. Puxe a fivela de bloqueio
no defletor de papel para a
posição “aberta” e ajuste as
guias de papel para a
posição correta de acordo
com a largura do papel.
3. Coloque o rolo de papel no
compartimento de papel com o
lado de impressão voltado para
baixo. (Cuidado: uma lâmina
serrilhada afiada fica exposta
quando a tampa está aberta.)
4. Deslize o defletor de
papel para fixar o rolo de
papel e empurre a fivela de
bloqueio para a posição
“fechar”.
5. Puxe um pequeno
comprimento de
etiqueta/mídia para além
da cabeça de impressão
antes de fechar a tampa.
6. Após ligar, ajuste o tipo de
etiqueta para corresponder
às etiquetas carregadas
(Padrão: Espaço.)
05 Descrição do ecrã
Espaço Contínuo
Z3-XXXX
Pronto
Desligado
Nível da bateria
A carregar
Ligado
Marca Preta
Tipo de etiqueta
Estado da bateria
Bluetooth
Modelo - MAC
Estado da
impressora
Opções Parâmetro Padrão
Tipo de Etiqueta
Autoteste
1
2
3
4
5
6
Iniciar
1 min/3 min/5 min/Nunca
0,5 h/1 h/Nunca
Restaurar
Confirmar
Espaço/Marca Preta/Contínuo
Calibração de Etiqueta
Tempo de Suspensão
Tempo de Desligamento
Configuração de Fábrica
Espaço
/
/
1 min
Nunca
/
7 Idioma
English
Menu de configuração
Resolução de problemas
Sem Etiqueta Sem etiqueta, recarregue a etiqueta.
A tampa não está bem fechada, feche novamente.
A temperatura da cabeça de impressão está muito alta, aguarde
um minuto ou mais até que a temperatura baixe.
Tampa Aberta
Sobreaquecimento
Erro de Etiqueta
1.Defina o «Tipo de Etiqueta» do dispositivo para corresponder ao tipo
de etiqueta instalada nele.
2. Selecione a função «Calibração da Etiqueta» para calibrar a etiqueta.
Espaço
Contínuo
Z3-XXXX
Pronto
Marca
Preta
English / Français / Deutsch / Italiano / Español / 한국어
/ 日本語 / 繁體中文 / Русский / Português / Nederlands
!
NOTE
Os dispositivos Android
requerem que os Serviços
de Localização estejam
ativados para encontrar
dispositivos Bluetooth
próximos.
2. Mantenha premido para ligar.
2. Mantenha premido
para ligar.
04 Ligar através do computador
1. Ligue a impressora ao computador
através de um cabo USB.
4. Após a instalação do controlador, pode prosseguir com a
impressão no computador.
06 Informações do produto
Marca ORGBRO Nome Impressora térmica de etiquetas
Modelo Z3 Conexão USB/Bluetooth
Resolução 203DPI Porta de carregamento Tipo C
Tamanho do produto 112,3 x 112,2 x 61,2 mm Capacidade da bateria 2200 mAh
Largura máxima da etiqueta 80 mm Tipos de etiqueta
SO compatível Windows, macOS, Linux, ChromeOS, Android, iOS
Z3
BT WiFi
03 Ligar através do telemóvel
4. Abra a aplicação «4Barcode»
e toque em «Desligar» no canto
superior direito.
5. Selecione o seu dispositi-
vo na lista que aparece.
3. Ligue o Bluetooth
no seu telemóvel.
4Barcode
X
Desligar
6. Realize as operações de edição e impressão
dentro da aplicação 4BarCode.
3. Instalação do controlador.
Método 1: Verifique se há um disco USB gratuito com a sua impressora.
Método 2: Para descarregar o controlador ou resolver problemas, visite o
link do site oficial: https://orgbro.com/support/
Método 3: Se perdeu o disco USB ou não consegue descarregar o controla-
dor do site acima, contacte a nossa equipa de apoio ao cliente em
Veja o vídeo detalhado de instalação do driver
Sistema informático compatível: Windows/macOS/Linux/ChromeOS
Se o produto tiver problemas de qualidade ou se
tiver alguma sugestão, entre em contacto
connosco imediatamente através do e-mail do
serviço pós-venda, nós lhe daremos uma
resposta satisfatória.
Instruções de devolução e troca:
Para devoluções e trocas, certifique-se de que os produtos estejam
intactos e não afetem a venda; forneceremos o serviço o mais rápido
possível após recebermos a solicitação.
CARTÃO DE GARANTIA
Digitalize o código
para registrar -
Garantia gratuita
de 6 meses
---------------------------------------------------
SUCCESS COURIER SL
CALLE RIO TORMES NUM.1, PLANTA 1, DERECHA,
OFICINA 3, Fuenlabrada,Madrid,28947 Spain
support@orgbro.com
Espaço/Marca Preta/Contínuo
NEDERLANDS
日本語
01 Algemene beschrijving
Aan/uit-knop
Invoerknop
Knop om de
klep te openen
Scherm
Resetknop
Oplaadpoort
Invoer-
knop
Aan/uit-
knop
Knop Functie Bedieningsinstructies
In- en uitschakelen.
Schakelen tussen de
opties in het hoofdmenu.
Eenmaal indrukken.
De geselecteerde para-
meteropties bevestigen.
Papier invoeren.
(In de status “Klaar”)
Navigeren door de
parameteropties onder
het hoofdmenu.
Druk eenmaal.
Reset-
knop
Het apparaat geforceerd
uitschakelen als het
zich abnormaal gedraagt.
Houd de knop ingedrukt.
2 seconden ingedrukt houden.
Voor tussenruimte/zwarte markering: eenmaal
indrukken om één label in te voeren. Voor
continu: ingedrukt houden om papier in te
voeren, loslaten om te stoppen.
Steek een pin in het resetgat en druk eenmaal.
02 Installatie van verbruiksartikelen
1. Druk op de knop
Open-Cover aan de
linkerkant om het
deksel te openen.
2. Trek de vergrendelings-
gesp op de papiergeleider
naar de stand “open” en
stel de papiergeleiders af
op de juiste positie in
overeenstemming met de
papierbreedte.
3. Plaats de papierrol in het
papiercompartiment met de
afdrukkant naar beneden. (Let
op: wanneer de klep open is,
komt een scherp gekarteld
mesje bloot te liggen.)
4. Schuif de papierge-
leider om de papierrol
vast te zetten en duw de
vergrendelingsgesp naar
de stand ‘close’
(gesloten).
5. Trek een klein stukje
label/media uit de
printkop voordat u de
klep sluit.
6. Na het inschakelen stelt u
het labeltype in dat overeen-
komt met de geladen labels
Standaard: Papierloos.
05 Beschrijving van het scherm
Papierloos Continu
Z3-XXXX
Klaar
Verbinding verbroken
Batterijniveau
Bezig met opladen
Verbonden
Zwarte
Markering
Labeltype
Batterijstatus
Bluetooth
Model - MAC
Printerstatus
Opties Parameter Standaard
Labeltype
Zelftest
1
2
3
4
5
6
Start
1 min/3 min/5 min/Nooit
0,5 u/1 u/Nooit
Herstellen
Bevestigen
Papierloos /Continu/ Zwarte Markering
Labelkalibratie
Slaaptijd
Uitschakeltijd
Fabrieksinstellingen
Papierloos
/
/
1 min
Nooit
/
7 Taal
English
Instellingenmenu
Probleemoplossing
Geen Label Geen labels meer, laad de labels opnieuw.
De klep is niet goed gesloten, sluit deze opnieuw.
De temperatuur van de printkop is te hoog, wacht een minuut of langer
totdat de temperatuur is gedaald.
Deksel geopend
Oververhitting
Labelfout
1. Stel het “Labeltype” van het apparaat in op het type label dat erin is geïnstalleerd.
2. Selecteer de functie “Labelkalibratie” om het label te kalibreren.
Papierloos Continu
Z3-XXXX
Klaar
Zwarte
Markering
English / Français / Deutsch / Italiano / Español / 한국어
/ 日本語 / 繁體中文 / Русский / Português / Nederlands
!
OPMERKING
Op Android-apparaten
moet Locatieservices
zijn ingeschakeld om
Bluetooth-apparaten in
de buurt te kunnen vinden.
2. Houd ingedrukt om in te schakelen.
2. Houd ingedrukt om in te
schakelen.
04 Verbinden via computer
1. Sluit de printer aan op de
computer via een USB-kabel.
4. Nadat het stuurprogramma is geïnstalleerd, kunt u doorgaan met afdrukken
op de computer.
06 Productinformatie
Merk ORGBRO Naam Thermische labelprinter
Model Z3 Aansluiting USB/Bluetooth
Resolutie 203 DPI Oplaadpoort Type-C
Productafmetingen
112,3 x 112,2 x 61,2 mm Batterijcapaciteit 2200 mAh
Maximale labelbreedte 80 mm Labeltypes
Compatibele besturingssystemen
Windows, macOS, Linux, ChromeOS, Android, iOS
Z3
BT WiFi
03 Verbinden via mobiele telefoon
4. Open de app “4Barcode” en
tik op “Verbinding verbreken” in
de rechterbovenhoek.
5. Selecteer uw apparaat
in de lijst die verschijnt.
3. Schakel Bluetooth
in op uw telefoon.
4Barcode
X
Verbinding verbreken
6. Voer bewerkings- en afdrukbew-
erkingen uit in de 4BarCode-app.
3. Stuurprogramma installeren.
Ondersteunde computersystemen: Windows/macOS/Linux/ChromeOS
Methode 1: Controleer of er een gratis USB-stuurprogramma bij uw printer is
geleverd.
Methode 2: Ga voor het downloaden van stuurprogramma's of het oplossen
van problemen naar de officiële website:
https://orgbro.com/support/
Methode 3: Als u uw USB-stuurprogramma kwijt bent of het stuurprogramma
niet kunt downloaden van de bovenstaande website, neem dan contact op
met onze klantenservice via [email protected].
Bekijk de gedetailleerde video over het
installeren van stuurprogramma's
Als het product kwaliteitsproblemen heeft of als u
suggesties heeft, neem dan onmiddellijk contact
met ons op via de e-mail van de klantenservice. Wij
zullen u een bevredigend antwoord geven.
Instructies voor retourneren en ruilen:
Zorg er bij retourneren en ruilen voor dat de goederen intact zijn en
de verkoop niet beïnvloeden; wij zullen u zo snel mogelijk na
ontvangst van het verzoek van dienst zijn.
Scan de code om
te registreren -
Gratis garantie
van 6 maanden
GARANTIEKAART
---------------------------------------------------
SUCCESS COURIER SL
CALLE RIO TORMES NUM.1, PLANTA 1, DERECHA,
OFICINA 3, Fuenlabrada,Madrid,28947 Spain
support@orgbro.com
Papierloos /Continu/ Zwarte Markering
01概要
電源ボタン
給紙ボタン
カバー開閉ボタン
画面
リセ ット キ ー
充電ポート
給紙ボ
タン
電源ボ
タン
ボタン 機能 操作手順
電源のオン/オフ。
メインメニューのオプ
ションを切り替えます。
1回押す。
選択したパラメーター
オプションを確認。
用紙給紙。
(「準備完了」状態時)
メインメニュー下のパラ
メーターオプションをナ
ビゲ ート。
1回押す。
リセ ット
キー
デバイスが異常動作し
た場合、強制シャットダ
ウンを実行。
ボタンを長押しする。
2秒間長押し。
ギャップ/ブラックマーク:1回押して1枚のラベルを給紙。
連続給紙:長押しで給紙を開始し、離すと停止。
リセット穴にピンを挿入し、1回押す。
02消耗品取り付け
1. 左側の「カバーオー
プンボタン」を押してカ
バーを開ける。
2. 紙ガ イド の ロックバック
ルを「オープン」位置に引っ
ぱり、紙の幅に合わせて紙
ガイドを適切な位置に調整
する。
3. 印刷面を下向きに紙コンパー
トメントに紙ロールを挿入します
。(注意:カバーを開けた際に鋭
いギザギザの刃が露出します。)
4. 紙バフをスライドさせて
紙ロールを固定し、ロック
バックルを「閉」位置に押し
込みます。
5. カバーを閉じる前に、
プリントヘッドを超えてラ
ベル/メディアを少し引き
出します。
6. 電源を入れた後、ラベルの種類
を挿入したラベルに合わせます。
(デフォルト: ギャップ。)
05画面説明
ギャップ 連続
Z3-XXXX
準備完了
接続解除
バッテリーレベル
充電中
接続中
ブラックマーク
ラベルタイプ
バッテリー状 態
Bluetooth
モデル - MAC
プリンター状態
オプ ション パラメーター デフォルト
ラベルタイプ
自己診断
1
2
3
4
5
6
スタート
1分/3分/5分/決して
0.5時/1時/決して
復元
確認
連続/ギャップ/ブラックマーク
ラベ ル キャリブレ
ーション
スリープタイム
シャット ダ ウン 時 間
工場設定
ギャップ
/
/
1分
決して
/
7 言語
English
設 定メニュー
トラブ ル シュー ティング
ラベルなし ラベルが切れています。ラベルを再装填してください。
カバーが十分に閉まっていません。再度閉じてください。
プリントヘッドの温度が高すぎます。温度が下がるまで1分以上お待ちください。
カバー開放
過熱
ラベルエラー
1.デバイスの「ラベルタイプ」を、インストールされているラベルの種類に合わせます。
2.「ラベルキャリブレーション」機能を選択してラベルをキャリブレーションしてください。
ギャップ 連続
Z3-XXXX
準備完了
ブラックマーク
English / Français / Deutsch / Italiano / Español / 한국어 /
日本語 / 繁體中文 / Русский / Português / Nederlands
!
注意
Androidデバイスでは、近
くの Bluetoothデバイスを
検索するために位置情報
サービスが有効になって
いる必要があります。
2. 電源ボタンを長押しして電
源を入れます。
2.電源ボタンを長押し
して電源を入れます。
04コンピュータ経由で接続
1. プリンターをUSBケーブルでコンピュ
ータに接 続します。
4. ドライバーのインストールが完了したら、コンピュータで印刷を開始できます。
06製品情報
ブランド ORGBRO 名前 サーマルラベルプリンター
モデル Z3 接続 USB/Bluetooth
解像度 203DPI 充電ポート Type-C
製品サイズ 112.3x112.2x61.2mm バッテリー容量 2200mAh
最大ラベル幅 80mm ラベル種類
対応OS Windows、macOS、Linux、ChromeOS、Android、iOS
Z3
BT WiFi
03モバイルフォン経由で接続
4.「4Barcode」アプリを開き、右
上 角 の「接 続 なし」をタップしま
す 。
5.表示されるリストから
デバイスを選択します。
3.スマートフォンで
Bluetoothをオンにします。
4Barcode
X
接続なし
6.4BarCodeアプリ内で編集と印刷操作
を 行 い ま す 。
3. ドライバーのインストール。
方法1:プリンターに付属のUSBドライバーを確認してください。
方法2:ドライバーのダウンロードやトラブルシューティングについては、公式
ウェブサイトリンクをご覧ください:https://orgbro.com/support/
方法3:USBドライバーを紛失した場合や、上記のウェブサイトからドライバー
をダウンロードできない場合は、カスタマーサービスチームまでご連絡くださ
詳細なドライバーインストール動画を入手
対応コンピュータシステム:Windows/macOS/Linux/ChromeOS
コードをスキャンし
て登録 - 6ヶ月間の
無料保証
保証カード
---------------------------------------------------
製品に品質問題やご意見がある場合は、アフター
サービスメールを通じて速やかにご連絡ください
。ご満足いただける回答を提供いたします。
返品・交換の手順:
返品・交換の際は、商品が未開封で再販可能な状態であることを
ご確認ください。ご要望を受け次第、速やかにサービスを提供い
たします。
support@orgbro.com
連続/ギャップ/ブラックマーク
1. Descargar la Aplicación.
4BarCode
4BarCode
Snap & Tag
Snap & Tag
Snap & Tag
Método 1:
Usando la aplicación heredada "4BarCode".
Método 2:
Usando la nueva aplicación "Snap & Tag".
Escanee el código QR o busque "4BarCode" en su
tienda de aplicaciones para instalar la aplicación.
Escanee el código QR o busque "Snap & Tag" en su
tienda de aplicaciones para instalar la aplicación.
1. Baixe o aplicativo.
4BarCode
4BarCode
Snap & Tag
Snap & Tag
Snap & Tag
Método 1:
Usando o aplicativo antigo “4BarCode”.
Digitalize o código QR ou procure por “4BarCode” na
sua loja de aplicativos para instalar o aplicativo.
Método 2:
Usando o novo aplicativo “Snap & Tag”.
Digitalize o código QR ou procure por “Snap & Tag” na
sua loja de aplicações para instalar a aplicação.
1. App downloaden.
4BarCode
4BarCode
Snap & Tag
Snap & Tag
Snap & Tag
Methode 1:
De oude “4BarCode”-app gebruiken.
Methode 2:
De nieuwe “Snap & Tag”-app gebruiken.
Scan de QR-code of zoek naar “4BarCode” in
uw app store om de applicatie te installeren.
Scan de QR-code of zoek naar “Snap & Tag” in uw
app store om de applicatie te installeren.
1.アプリダウンロード。
4BarCode
4BarCode
Snap & Tag
Snap & Tag
Snap & Tag
方法1:
旧「4BarCode」アプリを使用。
方法2:
新「Snap&Tag」アプリを使用。
QRコードをスキャンするか、アプリストアで「4BarCode
」を検 索してアプリをインストールします。
QRコードをスキャンするか、アプリストアで「Snap&Tag
」を検 索してアプリをインストールしてください。

