Tap Installation
www.abey.com.au
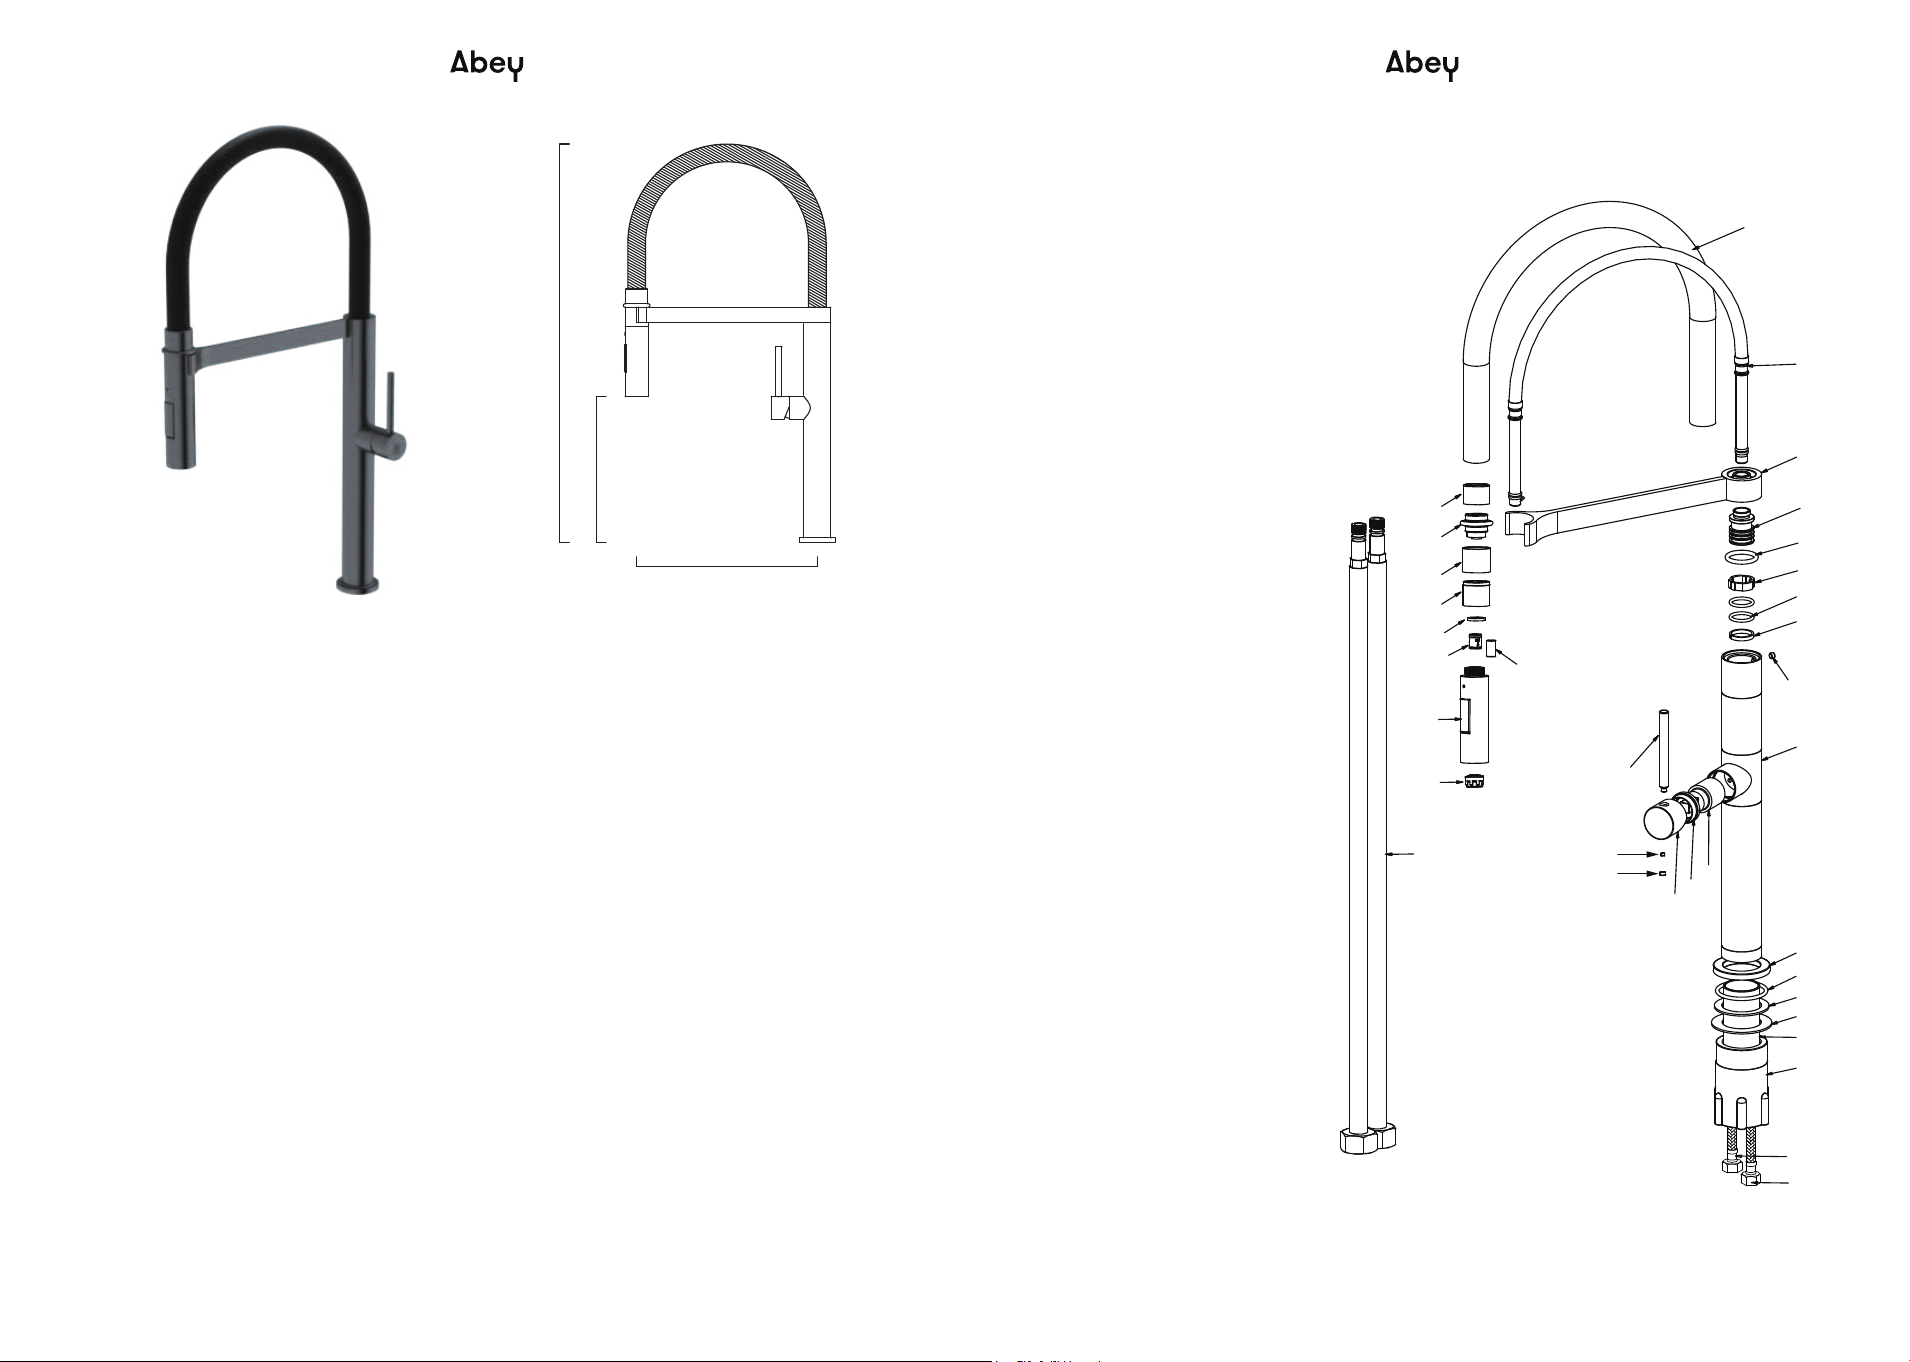
KTA019KTA019
34
6
7
8
9
4
10
11
12
13
14
15
16
17
18
19
25
24
23
20
26
27
28
30
31
1
2
3
5
32
33
29
21
22
Parts List
21 Screw
26 Base
13 Outlet connecter
16 Guide nut
5 O-ring
23 Handle cap
1 Aerator
2 Pull out spray
12 Spout
25 Cartridge
24 Decora�ve cap
10 Rubber hose
11 Outlet flexible hose
8 Pull out spray Connecter
7 Steel sleeve
4 Cylindrical magnet
9 Ring magnet
19 Tap body
17 O-Ring
14 O-Ring
29 Steel washer
6 Connecter
28 Plas�c washer
31 Plas�c locking nut
15 Guide sleeve
27 O-ring
30 Locking Screw
22 Cover
18 Screw
20 Pin lever
34 Flexible hose
32 Connec�on tube - cold
33 Connec�on tube - hot
3 Check-valve
Care and Maintenance
In order to ensure proper func�on over the life�me of the tap, smoothly
operate the handle and pull-out hand shower during use. When installing
do not over �ghten the locking nut. Regularly clean the tap with a so�,
damp cloth and avoid abrasive cleaners, steel wool, and strong chemicals.
Notes
All pipework must be thoroughly flushed prior to installa�on as foreign
materials may block the flow .
1.
Aerator and the flow control can be removed with standard tool and
cleaned.
2.
If a screen-filter is fi�ed into the tap, remove it and flush the pipes
and tap to remove grit. Then re-insert the screen.
3.
Working Specifica�ons
Working pressure: 20-100 psi
Working temperature: 1-60°C
This tap must be installed with isola�ng/wall valves in accordance with
local installa�on codes. All Abey taps are strongly recommended to be
installed by a licensed plumber. Improper installa�on may void the
warranty.
235mm
518mm
190mm
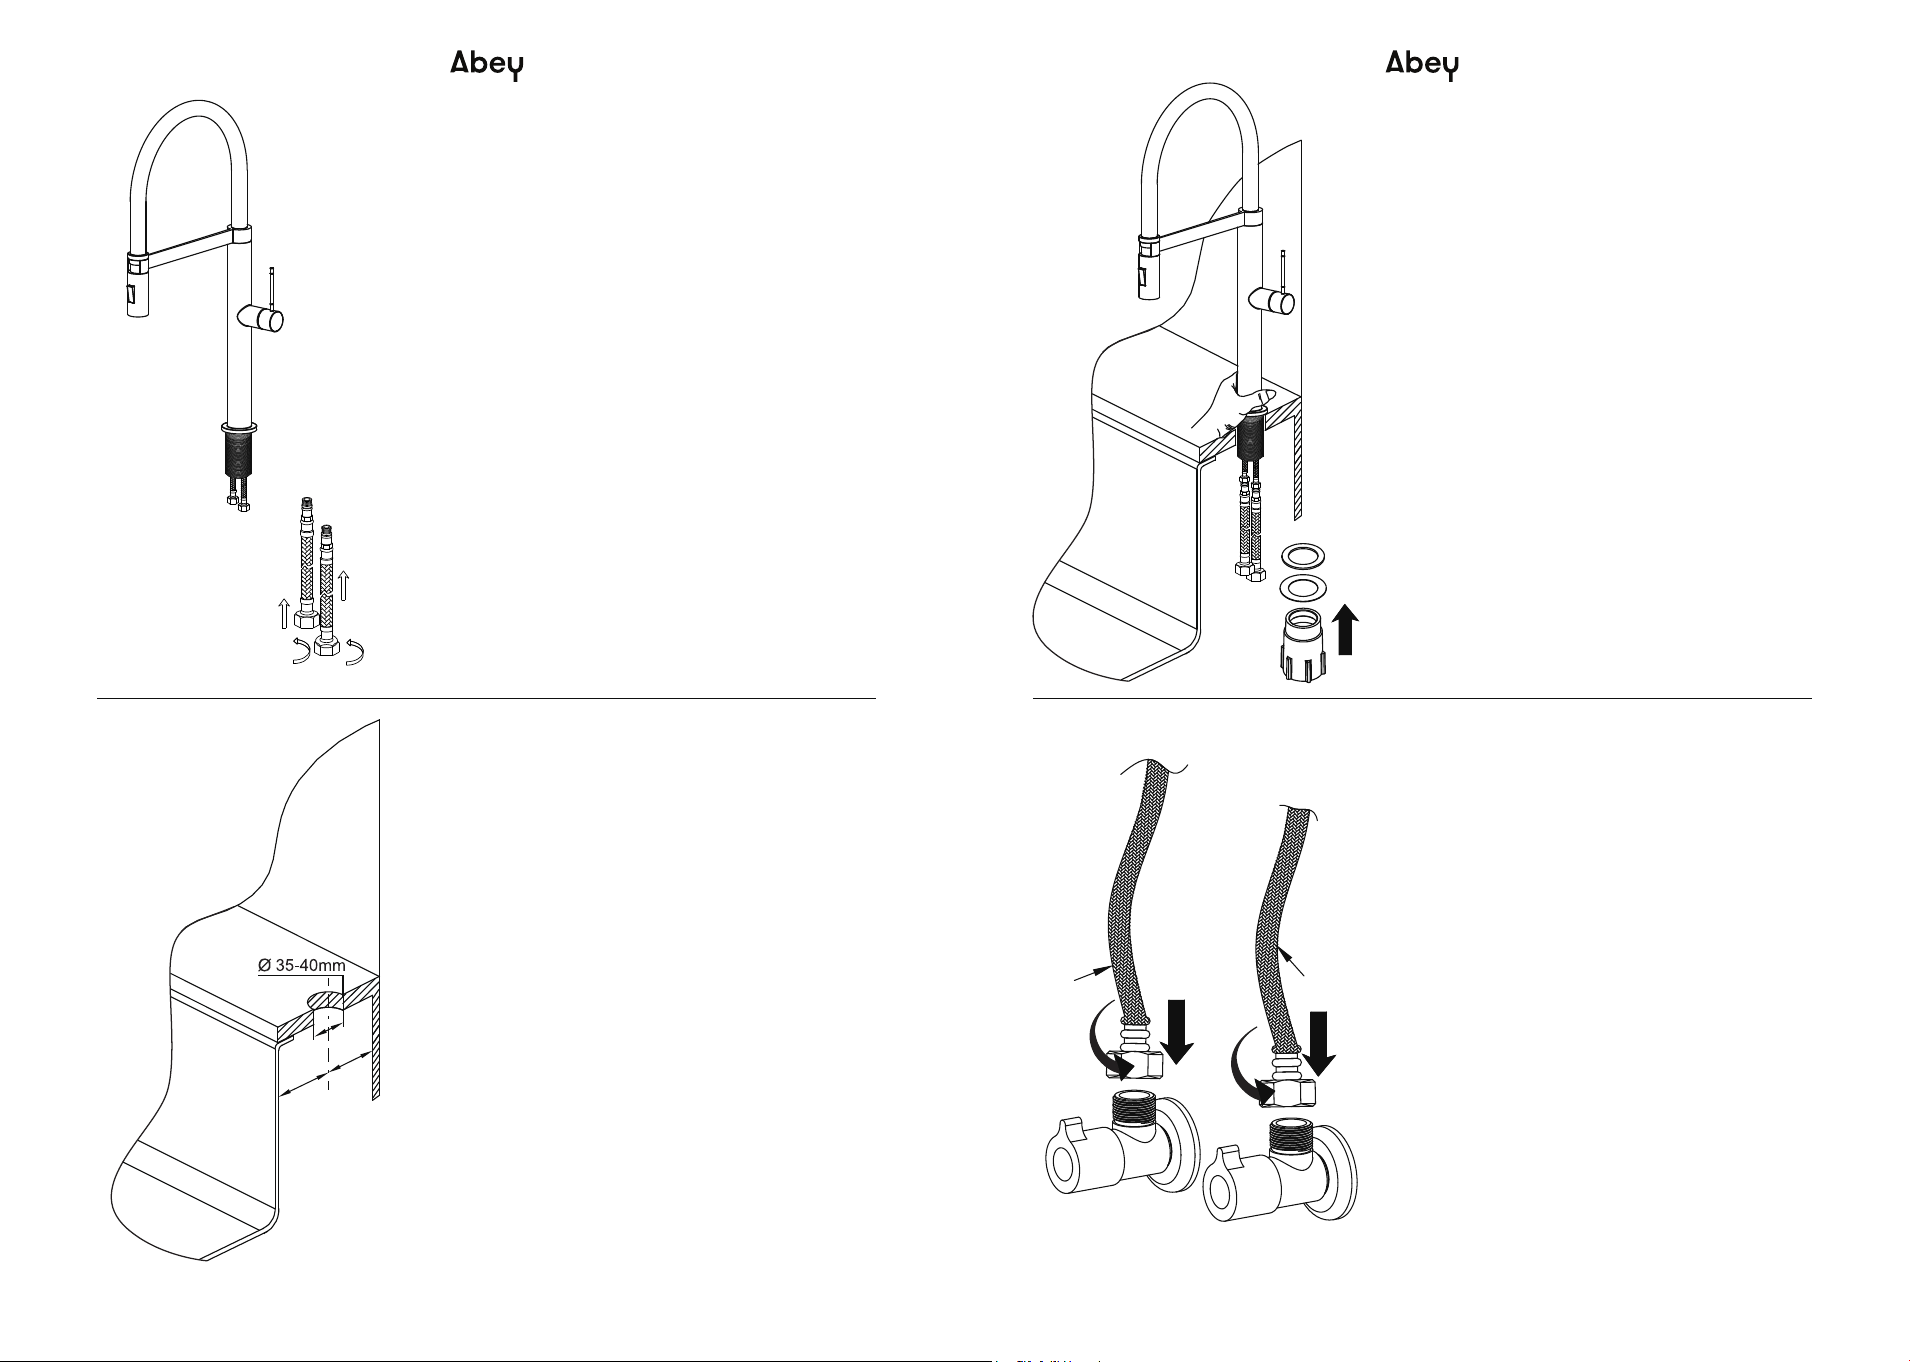
KTA019KTA019
Insert the tap into the countertop and ensure
the O-ring (27) is secure in the groove of the
tap body. Then slide the washers (28 and 29)
onto the threaded body of the tap followed by
the nut (31) in the order shown in the diagram.
Tighten the nut (31) by hand and ensure the tap
is correctly aligned above the countertop.
Step 3
Locate a hole centre in the countertop at least
50mm from the wall and with enough clearance
to the rim/flange of the sink. Dim. A >50mm(2”)
and Dim. B >50mm (2”) . If you need to locate the
tap within these dimensions, you should ensure
enough clearance for the moun�ng washers and
nut (28,29,31). Cut a hole 35 to 40mm diameter
into the countertop .
Step 2
A�ach the hoses (34) to the Connec�on tube
(32,33) and �ghten firmly. Do not use thread
tape, as the water-�ght seal is provided by
O-rings. Do not over �ghten.
Step 1
Note: Use the hose with RED braid-strands
for the hot water connec�on. Connect hot
water to the rigid pipe with red marking.
Flush the wall valves to ensure no grit enters the
tap. Now a�ach the hoses to the wall valves
ensuring the hose with RED braid a�aches to the
hot water outlet.
Step 4
SINK WALL
WALL
HOT
COLD
SINK WALL
WALL
A
B
KTA019
SINK WALL
WALL
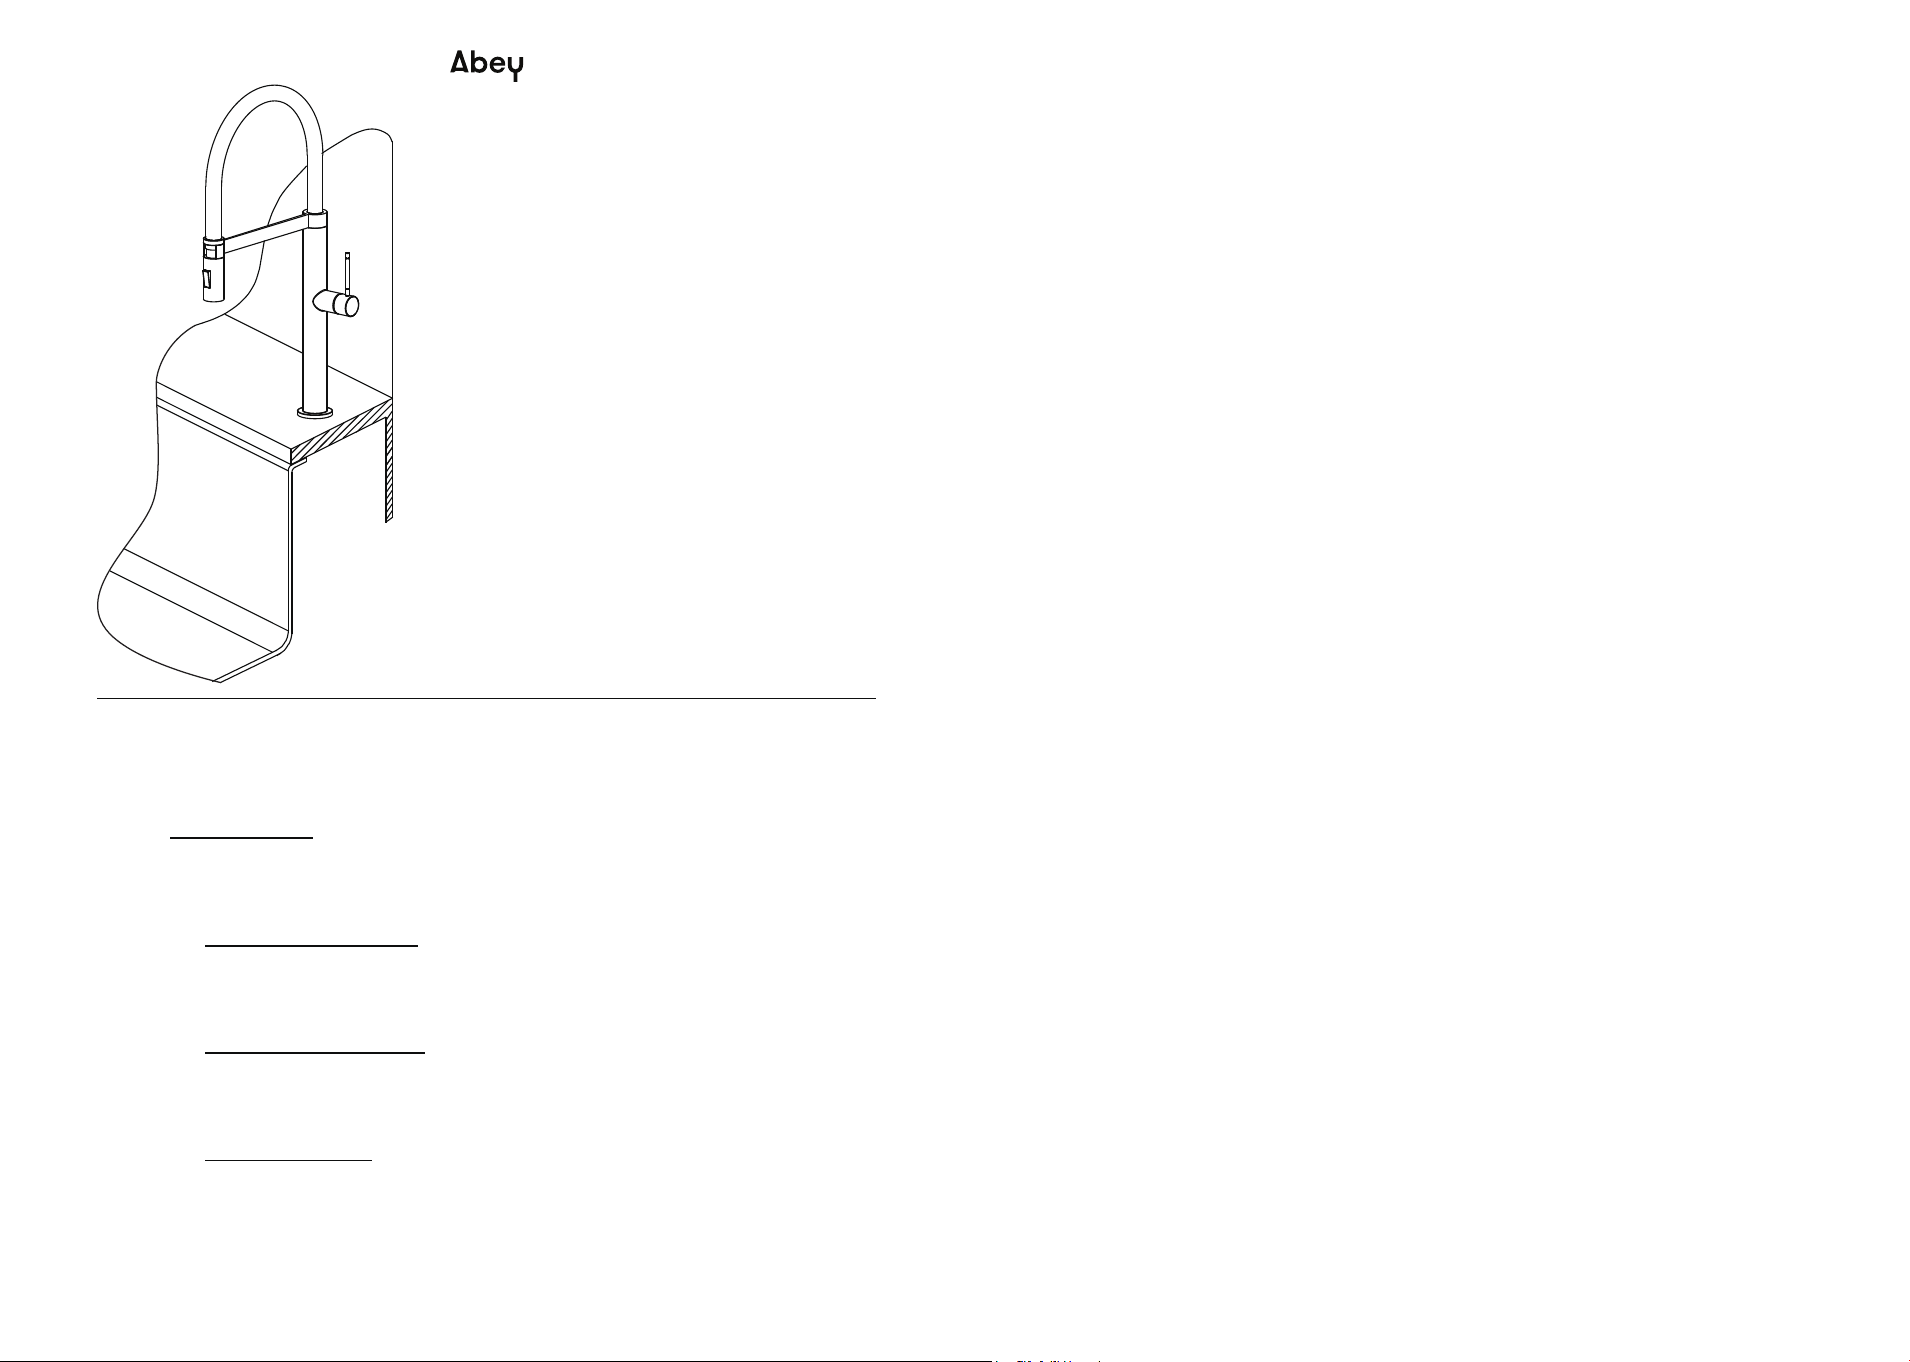
Test the tap flow and mix func�ons. If any grit
etc has entered the tap you can easily remove
the aerator(1) and clean/rea�ach.
Step 5
Troubleshoo�ng
1. If water is leaking from the connec�on tube joints (32,33) you should
re�ghten the flexible hoses (34). It is possible that these connec�ons
have loosened when the flexible hoses are �ghtened to the wall valves.
2. If the water stream is uneven it is possible that debris or grit has blocked
the aerator. You can remove the �p of the spout and backflush the aerator.
Firmly re�ghten the retaining nut.
3. If the tap is lose or rota�ng at the base as it enters the countertop you
should re�ghten the nut (31) ensuring the handle lever assembly is correctly
posi�oned.
4. If the spout (12) is loose at the connec�on to the body (19) you may need to
gently �ghten the small grub screw (18). Do not over �ghten the grub screw
or the spout will not rotate.