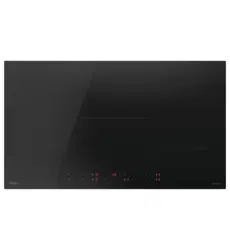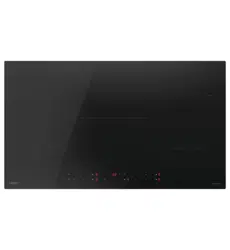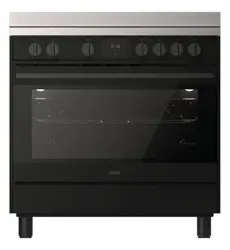

H500
HOR60S11CESX2
H300
HOR90S8CESX2, HOR90S8CEBX2
Ceramic Freestanding
Oven
USER GUIDE NZ AU


3
CONTENTS
Safety and warnings ................................................................................ 5
Product overview ...................................................................................10
First use ................................................................................................13
Cooking functions-H300 ........................................................................16
Cooking functions-H500 ........................................................................17
Care and cleaning...................................................................................18
Cleaning the oven door...........................................................................19
Hydro clean ...........................................................................................21
Troubleshooting.....................................................................................22
Manufacturer's warranty.........................................................................23
Customer service...................................................................................25

4
5
SAFETY AND WARNINGS
!
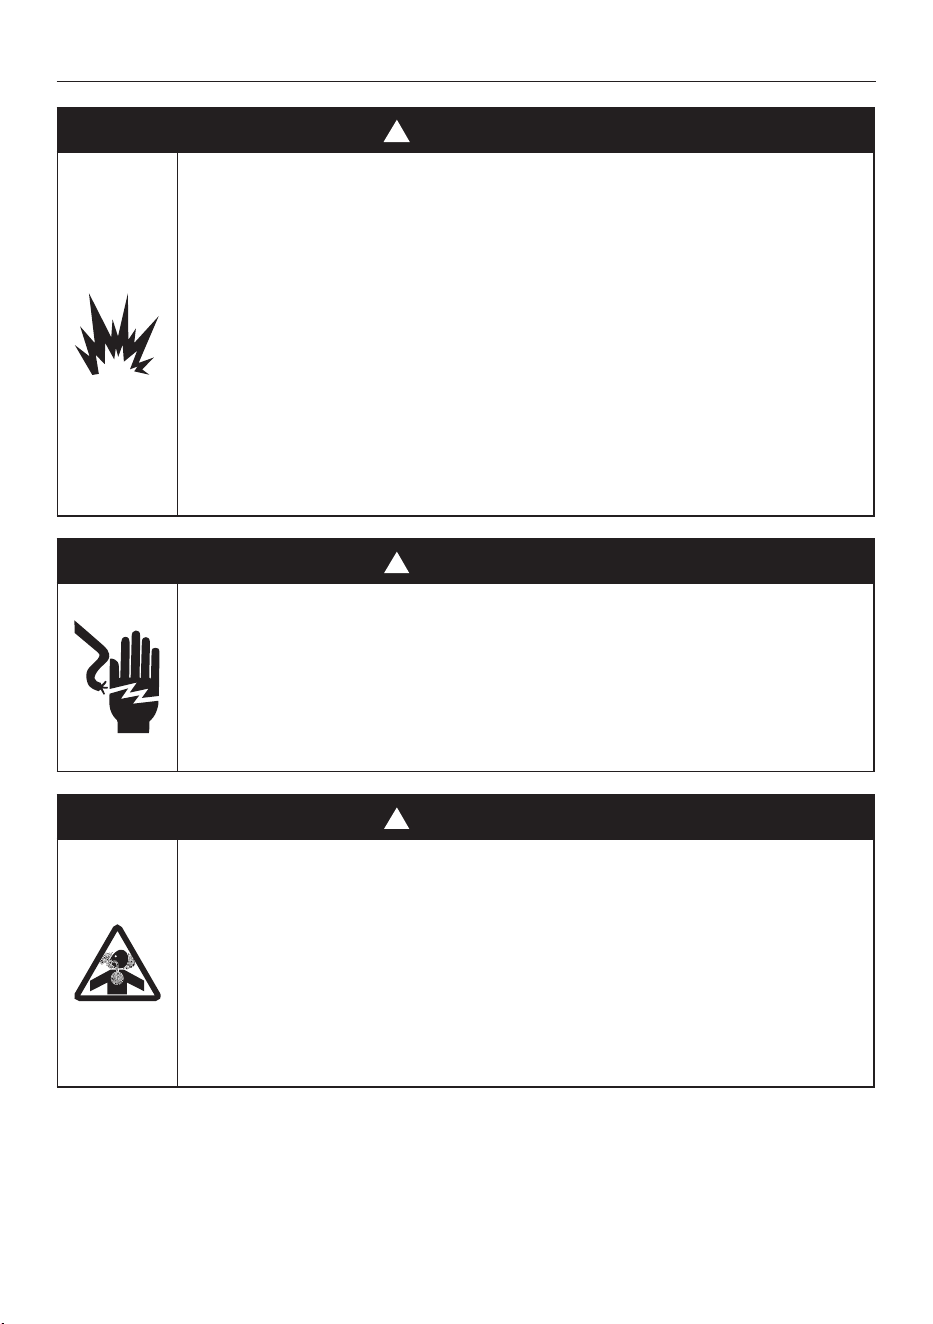
WARNING!
Explosion Hazard
Failure to follow this advice may result in
death or serious injury.
• Do not store flammable materials such as
gasoline near the cooktop.
• Do not use or store flammable materials
in the appliance drawer or near this
appliance
• Do not spray aerosols on the vicinity of
this appliance while it is in operation.
!
WARNING!
Electrical Shock Hazard
Failure to follow this advice may result in
electrical shock or death.
• Switch the cooker off at the wall before
replacing fuses or the oven lamp.
!
WARNING!
Poisoning Hazard
Failure to follow this advice may result in
poisoning or death.
• Do not use this appliance as a space
heater. Doing so may result in carbon
monoxide poisoning and overheating of
the appliance.
6
SAFETY AND WARNINGS
!
WARNING!
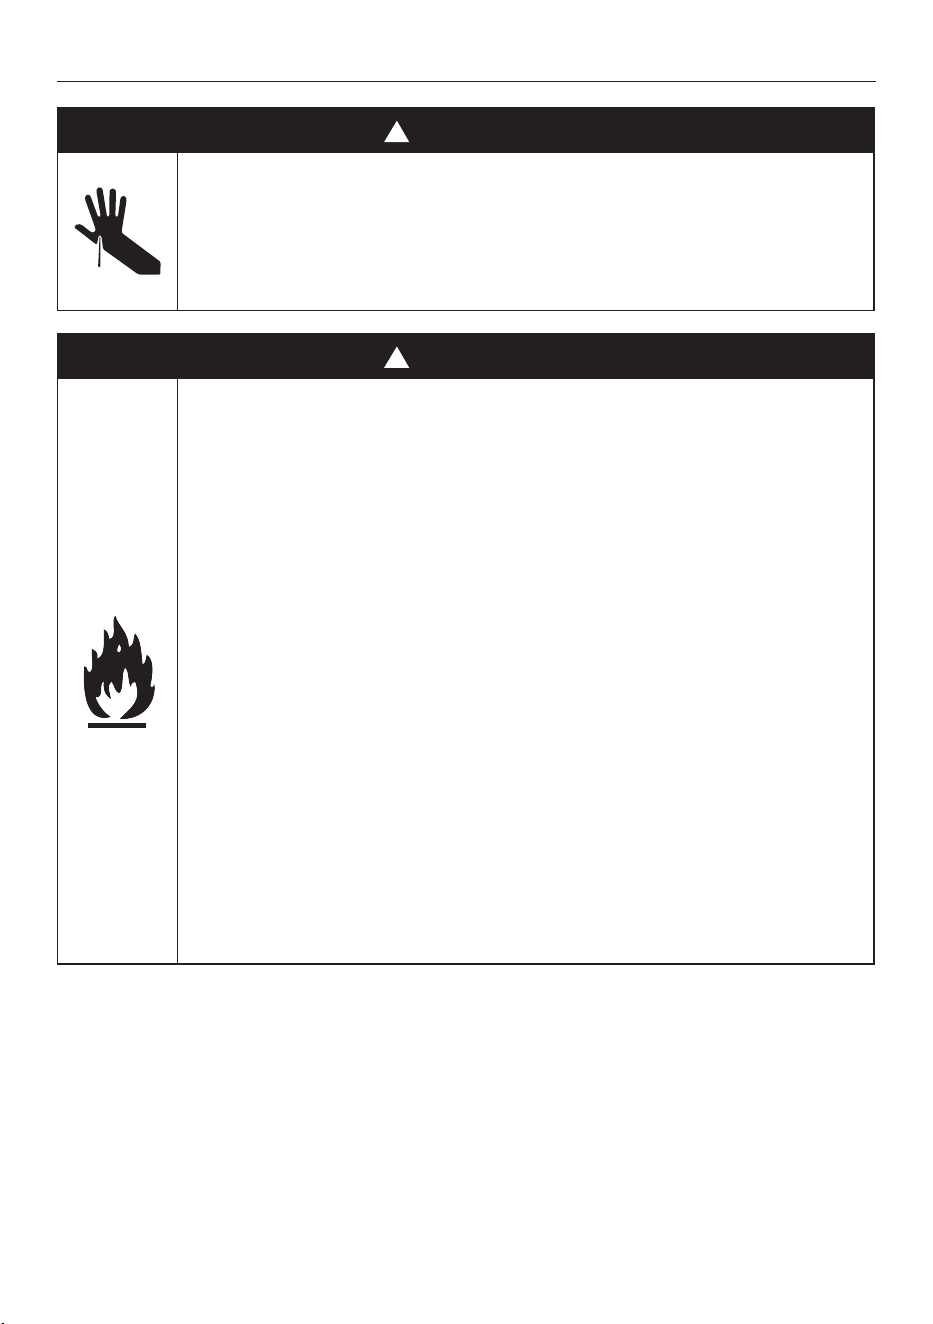
Cut Hazard
Failure to use caution could result in injury
or cuts.
• Take care - some edges are sharp.
!
WARNING!
Fire Hazard
Failure to follow this advice may result in
overheating, burning, and injury.
• Never leave the cooktop unattended when
in use. Boilover causes smoking and greasy
spillovers that may ignite.
• Do not place aluminium foil, dishes, trays,
water or ice on the oven floor during
cooking, as doing so will irreversibly
damage the enamel; lining the oven with
aluminium foil may even cause fire.
• Never use your appliance for warming
or heating the room. Persons could be
burned or injured or a fire could start.
• Storage in or on appliance: flammable
materials should not be stored in an oven
or near its surface.
7
SAFETY AND WARNINGS
!
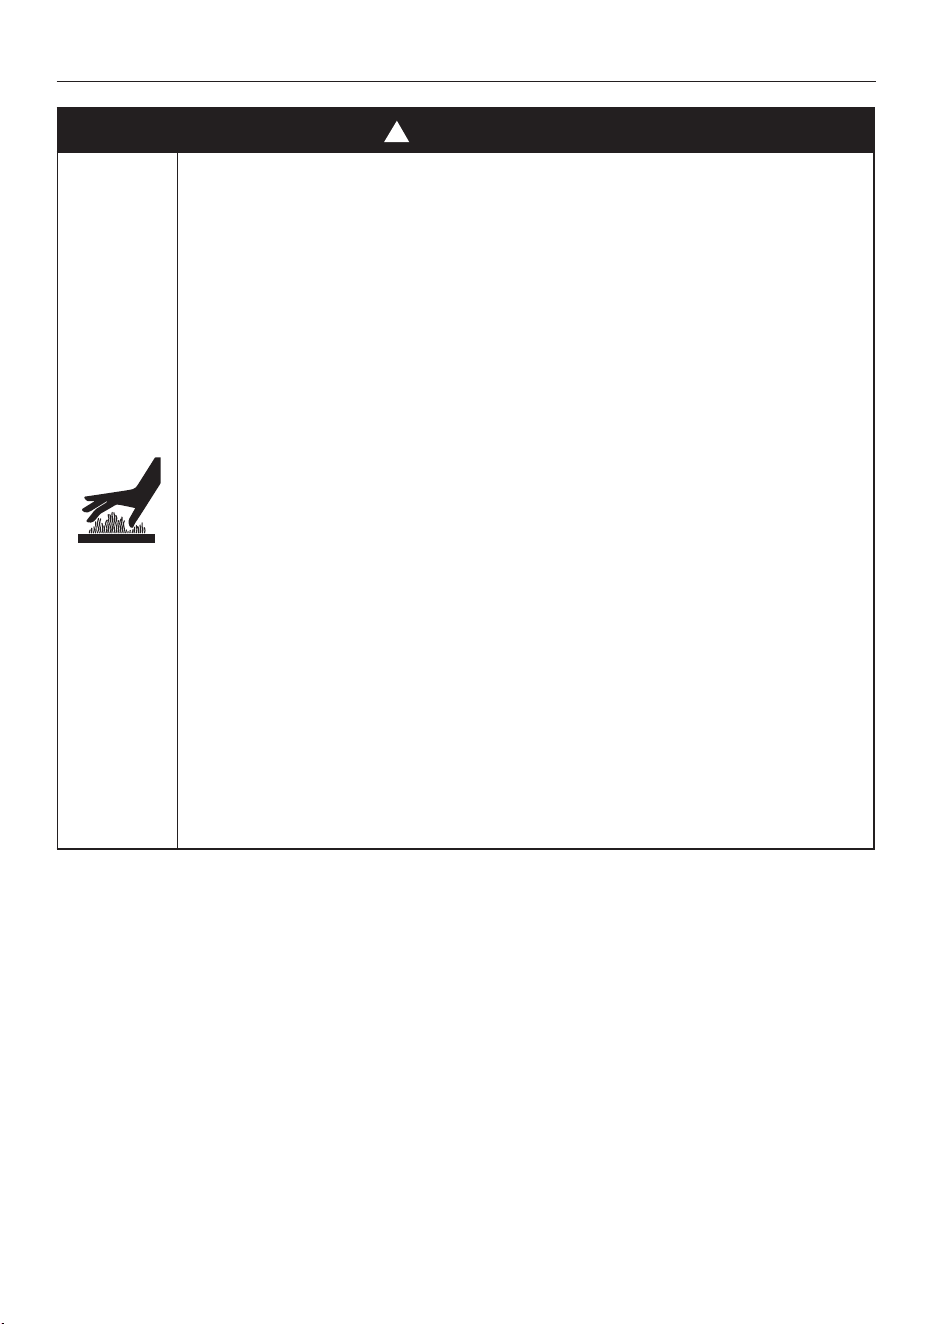
WARNING!
Hot Surface Hazard
Failure to follow this advice could result in
burns and scalds.
• Accessible parts may become hot when
this cooker is in use.
• To avoid burns and scalds keep children
away.
• Do not touch hot surfaces inside the oven.
• Use oven mitts or other protection when
handling hot surfaces such as oven shelves
or dishes.
• Take care when opening the oven door.
• Let hot air or steam escape before
removing or replacing food.
• Do not touch the cooktop components,
burners, trivets/pan supports or the base
when hot.
• Before cleaning, turn the cooker off and
make sure it is cool.

8
SAFETY AND WARNINGS
READ AND SAVE THIS GUIDE
IMPORTANT SAFETY INSTRUCTIONS
To reduce the risk of fire, electrical shock, injury to persons or damage when using the oven,
follow the important safety instructions listed below. Read all the instructions before using the
oven. Use the oven only for its intended purpose as described in these instructions.
General
• Be sure your appliance is properly installed and earthed by a qualified technician.
• Isolating switch: make sure this oven is connected to a circuit which incorporates an isolating switch
providing full disconnection from the power supply.
• Household appliances are not intended to be played with by children.
• Do not leave children alone. Children should not be left alone or unattended in the area where the
appliance is in use. They should never be allowed to sit or stand on any part of the appliance.
• When heating food in plastic or paper containers, keep an eye on the oven due to the possibility of
ignition.
• Children of less than 8 years old must be kept away from the appliance unless continuously
supervised.
• This appliance can be used by children aged from 8 years and above, and persons with reduced
physical, sensory or mental capabilities or lack of experience and knowledge, if they have been given
supervision or instruction concerning the use of the appliance in a safe way and they understand the
hazards involved.
• The contents of feeding bottles and baby food jars shall be stirred or shaken and the temperature
checked before consumption, in order to avoid burns.
• Do not store things children might want above the oven. Children could be burned or injured while
climbing on the oven to retrieve items.
• Cleaning and user maintenance shall not be done by children without supervision.
• Clean only the parts of parts listed in this manual.
• Do not place aluminium foil, dishes, trays, water or ice on the oven floor during cooking as this will
irreversibly damage the enamel.
• Do not modify this appliance.
• Always position shelves in the desired location while the oven is cool (before preheating). If a shelf
must be removed while the oven is hot, do not let the oven mitts or potholder contact hot heating
elements in the oven or the base of the oven.
• Do not place heavy objects on the oven door.
• Do not heat unopened food containers. They can build up pressure that may cause the container to
burst and result in injury.
• The cooking chamber must only be cooled with the door closed. Check that nothing is stuck on the
door of the appliance. Even if the door is only ajar, nearby cabinets can be damaged over time.
• Do not rest or lean on the open door of the appliance and do not put dishware or accessories on it.
• This appliance is intended to be used in household and similar applications such as:
• Staff kitchen areas in shops, offices and other working environments;
• Farm houses;
• By clients in hotels, motels and other residential environments;
• Bed and breakfast type environments.
• Always keep oven vents unobstructed.
• Do not use the oven if the door or the seals of the door are damaged. The oven may not be used until
it is repaired by a qualified service technician.

9
SAFETY AND WARNINGS
• Do not operate your appliance by means of an external timer or separate remote control system.
• Do not use harsh abrasive cleaners or sharp metal scrapers to clean the oven door glass, since they
can scratch the surface, which may result in shattering of the glass.
• CAUTION: Hot air can blow from the vent at the base of the oven as part of the oven’s cooling system.
Installation
• Ensure your appliance is properly installed and earthed by a qualified technician.
• Ensure this oven is connected to a circuit which incorporates an isolating switch providing full
disconnection from the power supply.
• Do not install or operate the appliance if it is damaged or not working properly. If you receive a
damaged product, contact your dealer or installer immediately.
• Please make this information available to the person installing the appliance—doing so could reduce
your installation costs.
• This appliance must be installed and connected to the mains power supply only by a suitably qualified
person according to these installation instructions and in compliance with any applicable local building
and electricity regulations. Failure to install the appliance correctly could invalidate any warranty or
liability claims.
• If the power supply cable is damaged, it must be replaced by the manufacturer, its service agent or
similarly qualified person in order to avoid a hazard.
• Isolating switch: make sure this oven is connected to a circuit which incorporates an isolating switch
providing full disconnection from the power supply in accordance with the wiring rules.
• The oven must be earthed.
• Do not use adaptors, reducers or branching devices to connect the oven to the mains electricity
supply, as they can cause overheating and burning.
• The appliance must not be installed behind a decorative door in order to avoid overheating.
• Please take extra care not to damage the lower trim of the oven during installation. The trim is
important for correct air circulation and allows the door to open and close without obstruction. The
manufacturer does not accept any responsibility for damage resulting from incorrect installation.
Food safety
• Leave food in the oven for as short a time as possible before and after cooking. This is to avoid
contamination by organisms which may cause food poisoning. Take particular care during warm
weather.
Servicing
• Do not repair or replace any part of the appliance unless specifically recommended in the user
guide. All other servicing should be undertaken by a Fisher & Paykel trained and supported service
technician or qualified person.
Fire Hazard
• Do not use water on grease fires. Smother the fire or flame or use a dry chemical or foam type
extinguisher.
• Use only dry oven mitts or potholders. Moist or damp potholders on hot surfaces could result in
burns from steam. Do not let potholders touch hot areas or heating elements. Do not use a towel
or a bulky cloth for a potholder. It could catch fire.
• Do not heat unopened food containers. They can build up pressure that may cause the container
to burst and result in injury.
10
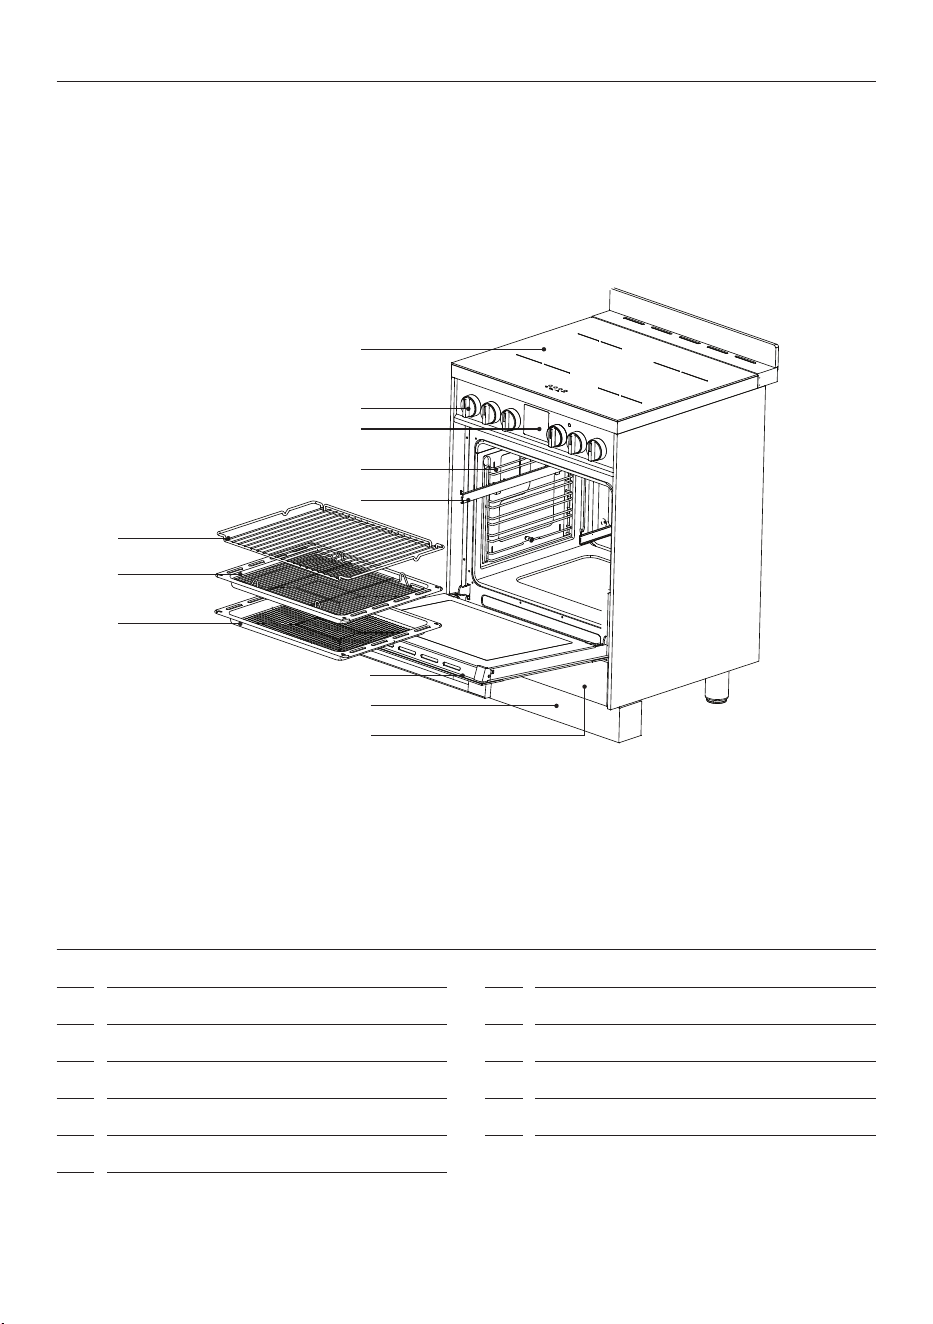
Features and accessories
1
Elements
2
Control dials
3
Control panel
4
Side racks
5
Telescopic sliders*
6
Wire rack
7
Roasting dish
8
Air fry trays*
9
Oven door
10
Toe kick cover
11
Storage drawer
PRODUCT OVERVIEW
*Only available with H500 models.
1
3
2
4
5
6
7
8
9
!1
!0
11
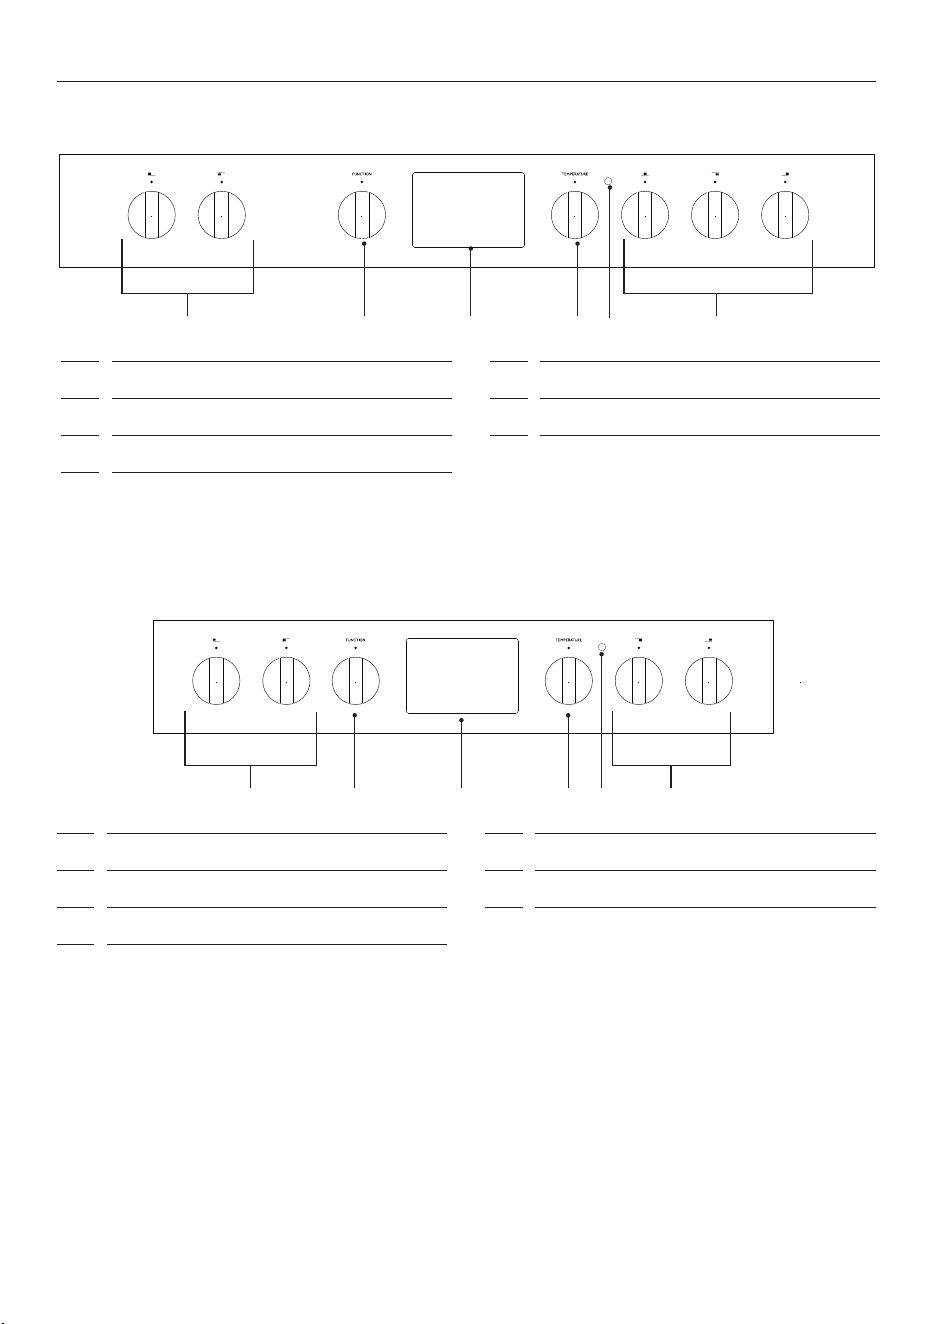
1
Elements
2
Function control dial
3
Control display
4
Temperature control dial
5
Oven heating light*
1
Elements
2
Function control dial
3
Control display
4
Temperature control dial
5
Oven heating light*
PRODUCT OVERVIEW
1
1 1
12
2
4
4
5
5
3
3
Control panel 90cm
Control panel 60cm
*Illuminated only when oven is heating up, light will turn off once set temperature is reached.
*Illuminated only when oven is heating up, light will turn off once set temperature is reached.
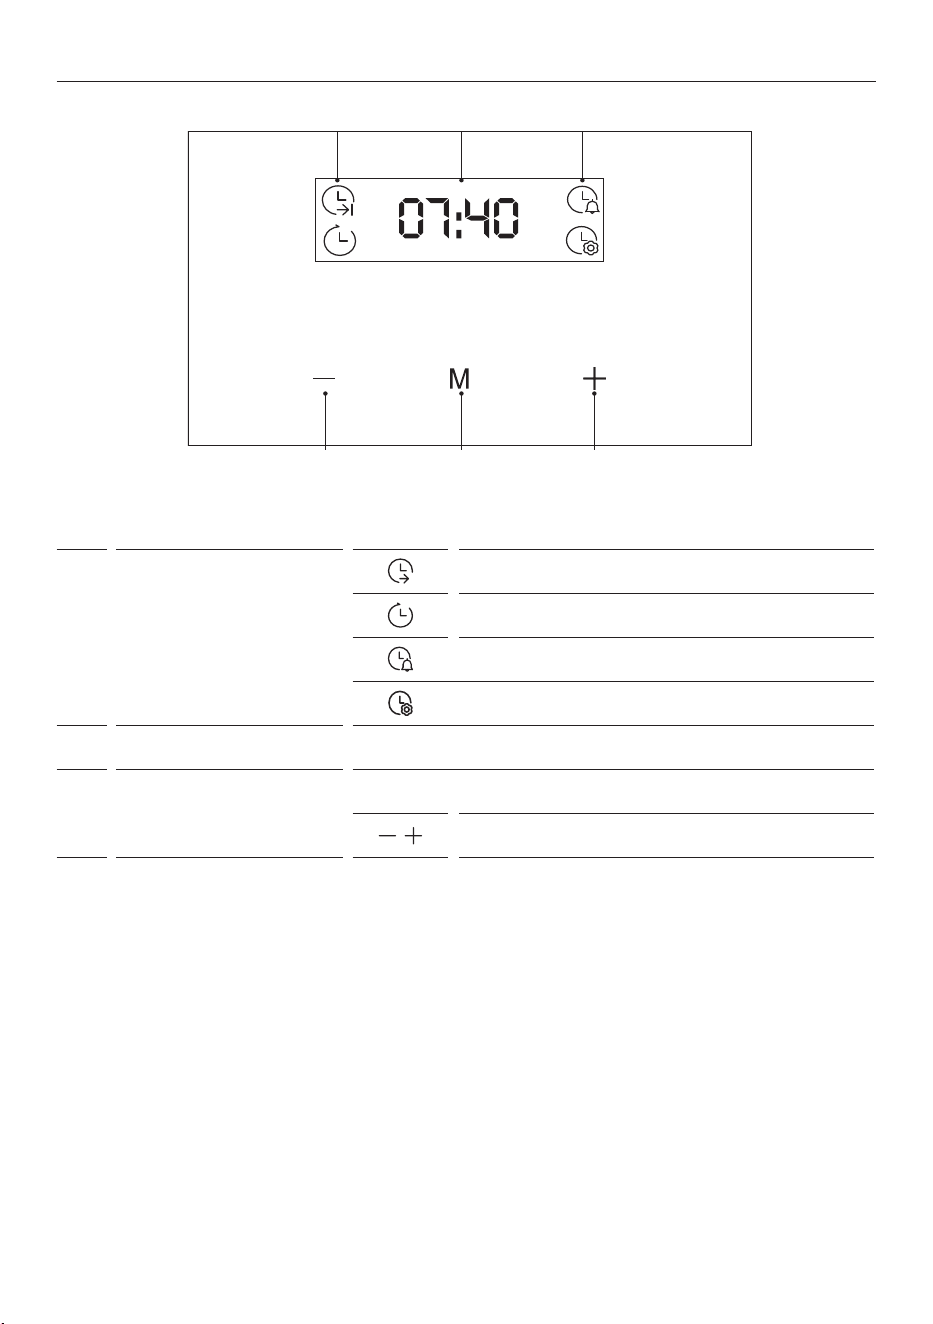
12
Timer functions
Cook duration
Delay start
Timer
Clock settings
3
Time/ Temperature display
Displays clock, cook duration, delay start, timer and temperature.
5
Selector buttons
M
Press to cycle through functions.
Press to increase or decrease time.
43
1 2 1
3
Control display
PRODUCT OVERVIEW
13
FIRST USE
Preparing your oven
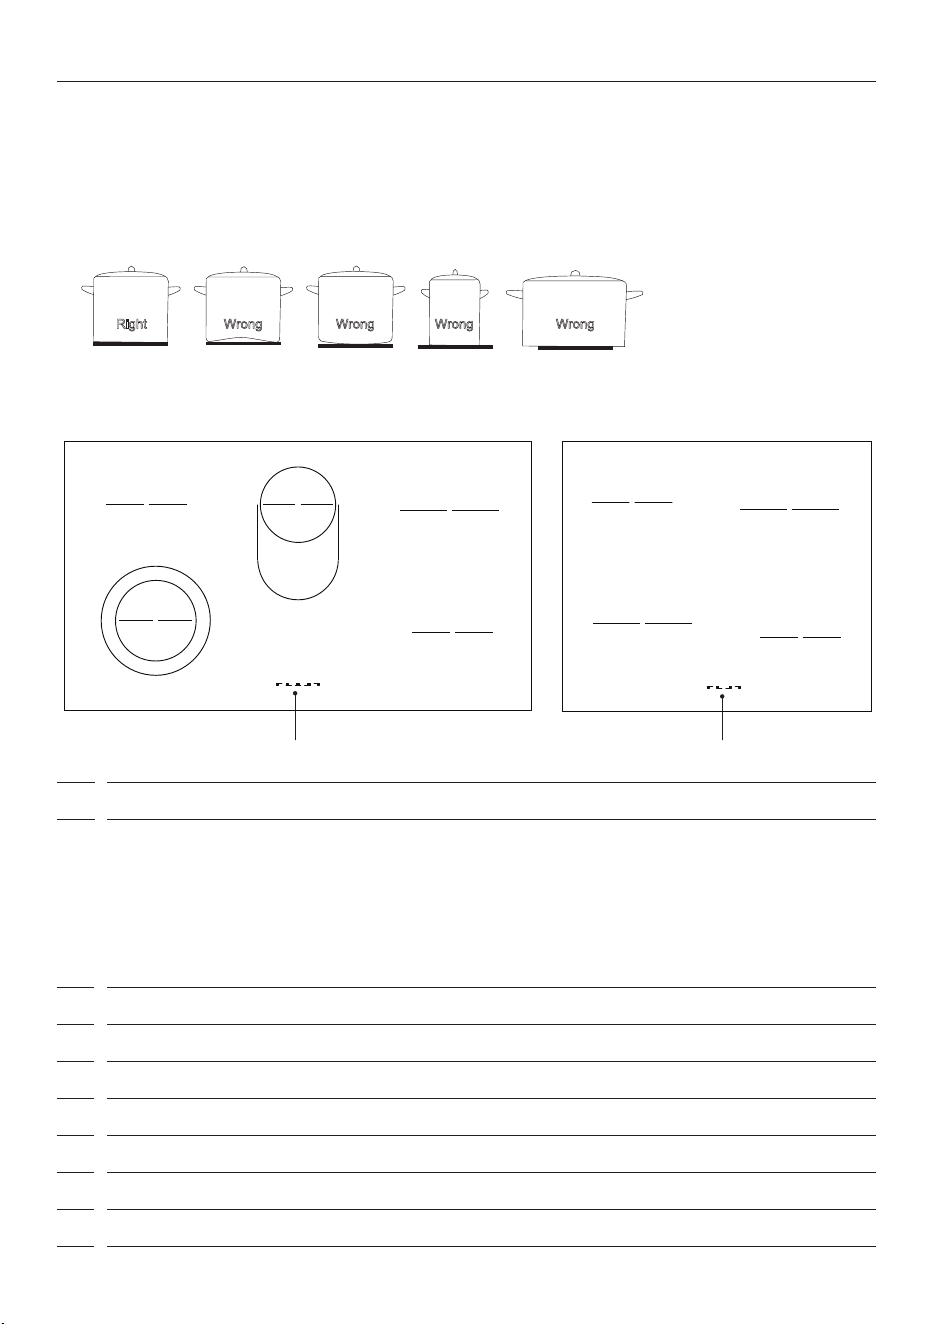
The quality of your cookware can affect cooking performance. Choose a pan with a diameter that is at least
as large as the heating zone. Do not use pans with a concave and convex base. Always remember or put a
proper cover on the pan. We recommend the use of pans with thick even bases.
If the zones and pans are soiled it is impossible to make full use of the heat.
Right
Wrong
WrongWrong Wrong
WRONG
RIGHT
6
0 Hot plate o, use of remaining heat.
1-2 Maintaining temperature, slow cooking small quantities of food (min power).
3 Slow cooking.
4-5 Slow cooking of large quantities, and slow frying of large portions.
6 Frying and preparing soup basis.
7-8 Frying.
9 Boiling, browning or frying (maximum power).
Heat level selection
The heating zones have different levels of heat. The level of heat can be adjusted gradually by turning the
appropriate knob to the right or left.
90cm 60cm
1 1
1
Element lights will turn on with coinciding element to indicate that an element is on and hot.
14
FIRST USE
Preparing your oven
Before using your oven for the first time, remove and wash all accessories, and clean the inside of the oven
with a damp, soft cloth and mild detergent. Wipe the outside with a damp, soft cloth. Dry with a clean cloth.
Run the empty oven at maximum temperature for 60 minutes to remove the newness smell. The oven
may smoke slightly during this process. This is normal. Opening a window is recommended to allow air flow
during the prep burn.
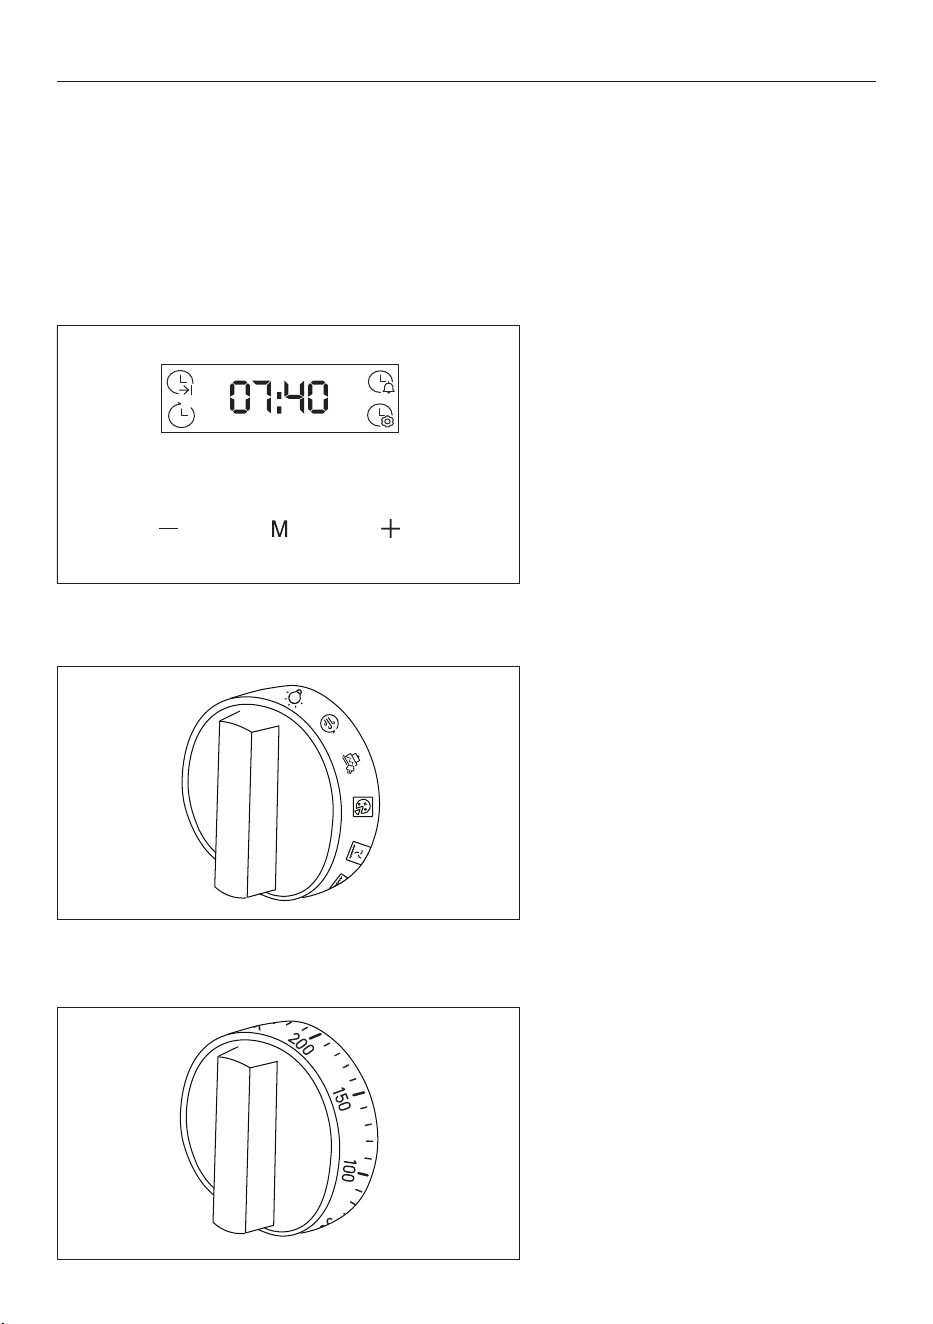
Setting a function
Turn the function selector to the desired
function. See 'Cooking functions' for
details.
Setting the temperature
Turn the temperature selector to the
desired temperature. The oven will start
once the time, function and temperature
are set. The oven heating light will turn
on to indicate that the oven is warming
up. It will switch off once the oven has
reached the set temperature.
Setting the clock
Following installation or a power reset,
the display will flash and show 12:00.
Press increase + or decrease - to set
time.
Right
Wrong
WrongWrong Wrong
WRONG
RIGHT
6
Right
Wrong
WrongWrong Wrong
WRONG
RIGHT
6
15
FIRST USE
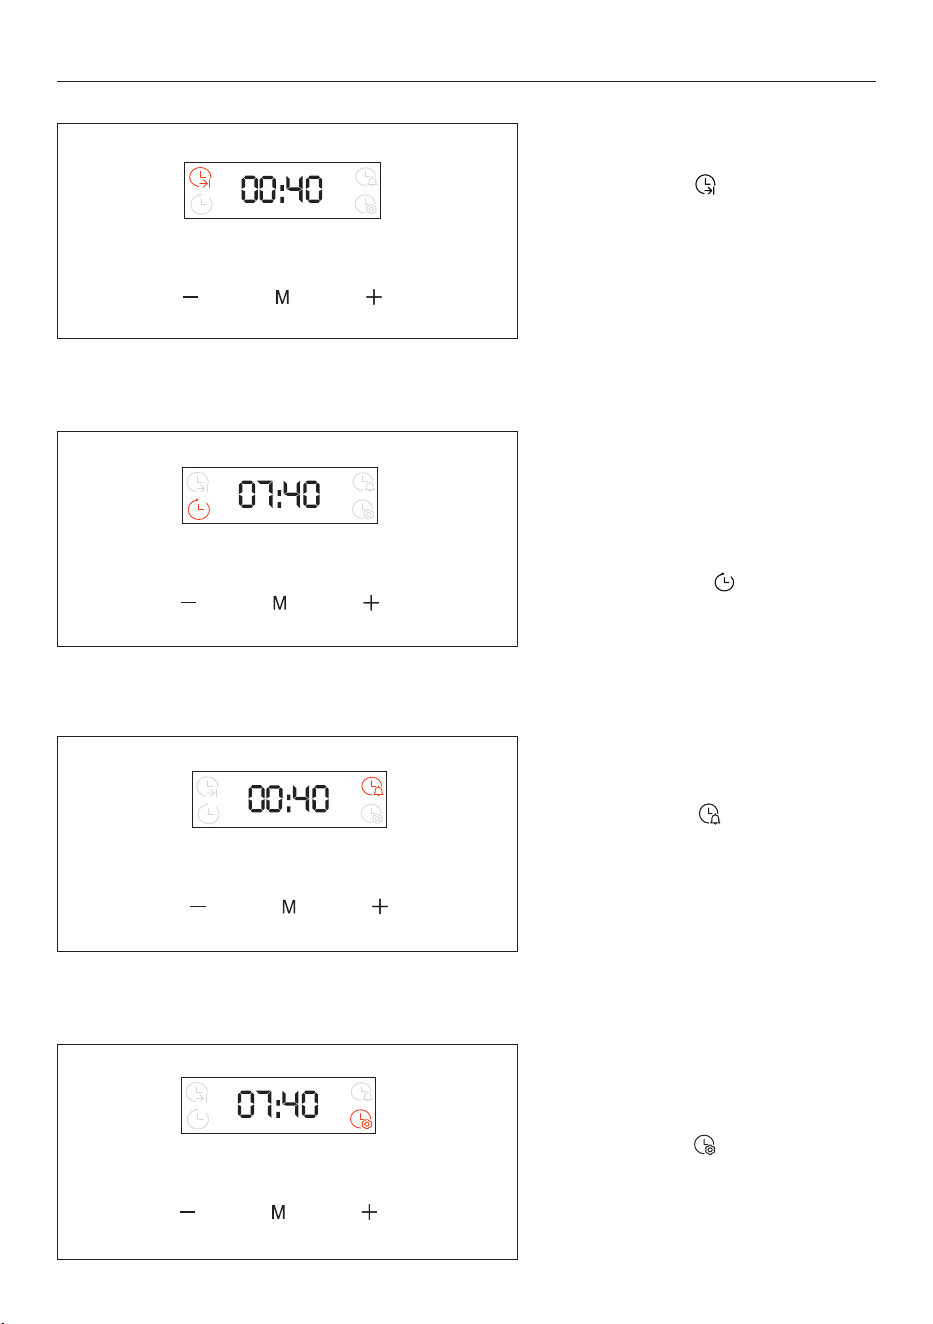
Setting delay cook
Delay cook allows you to schedule a cook
up to 24 hours in advance by setting a
function, cooking duration and desired
cooking start time.
Press M then select
, then press
increase + or decrease - to set the
cooking end time.
Setting cook duration
Press M to select , then press increase
+ or decrease - to set the cook duration.
The cooking function will turn off
automatically when the set time has
elapsed, and an alarm will sound.
Press any key to stop the alarm.
Setting the timer
Press M to select then press increase
+ or decrease - to set the timer.
Press any key to stop the alarm.
Changing the displayed time
Press M to select then press increase
+ or decrease - to set clock.
16
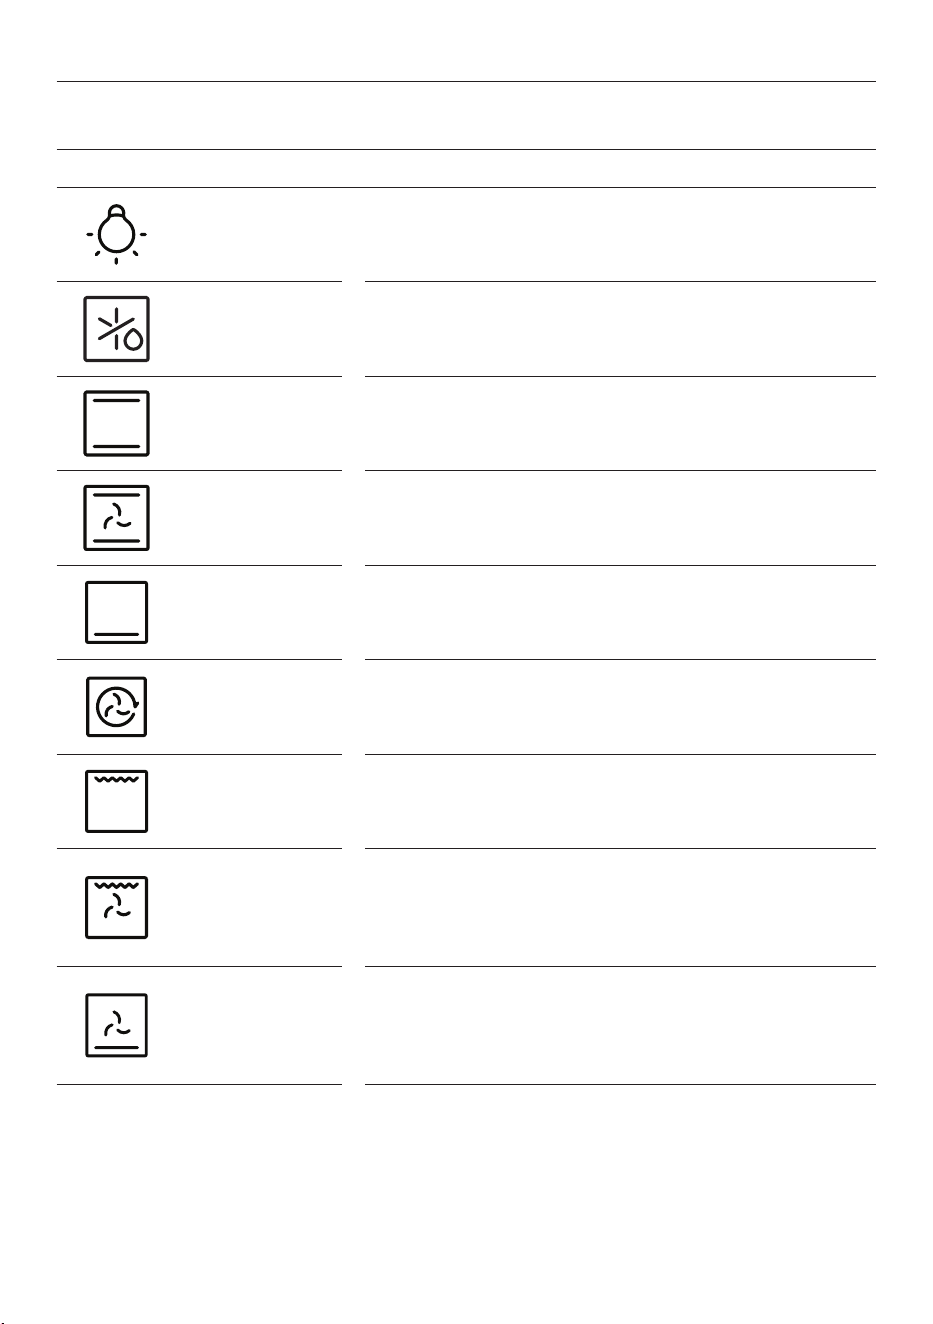
FUNCTION DESCRIPTION
LIGHT Turns the oven light ON/OFF.
DEFROST
Fan circulates air at room temperature around the frozen food to
speed up the defrosting process.
BAKE
Ideal for cakes, breads, biscuits and quiches on one level. Uses
both upper and lower heating elements.
FAN BAKE
Ideal for roasts, casseroles, vegetables and pies on one level and
for achieving surface browning.
TRADITIONAL BAKE
Ideal for traditional recipes and foods that have a pastry base and
require delicate baking or minimal surface browning.
FAN FORCED
Ideal for multilevel cooking. Uses the rear element in conjunction
with the fan. Recommended for most applications, including
poultry, pastries and vegetables.
MAXI GRILL
Ideal for sausages, steaks and toast. The entire area below the grill
element becomes hot. Use with the door closed. Turn food halfway
through cooking (If necessary).
MAXI GRILL+ FAN
Ideal for larger cuts of meat that require longer cooking with
surface browning. Use with the door closed. Slide a tray under
the shelf to collect juices. Turn food halfway through cooking (If
necessary).
PASTRY
Ideal for fruit flans, tarts, quiches and pastries. Prevents food from
drying and encourages rising in cakes, bread dough and other
bottom-cooked food.
Cooking functions for Models: HOR90S8CESX2, HOR90S8CEBX2
COOKING FUNCTIONS- H300
17
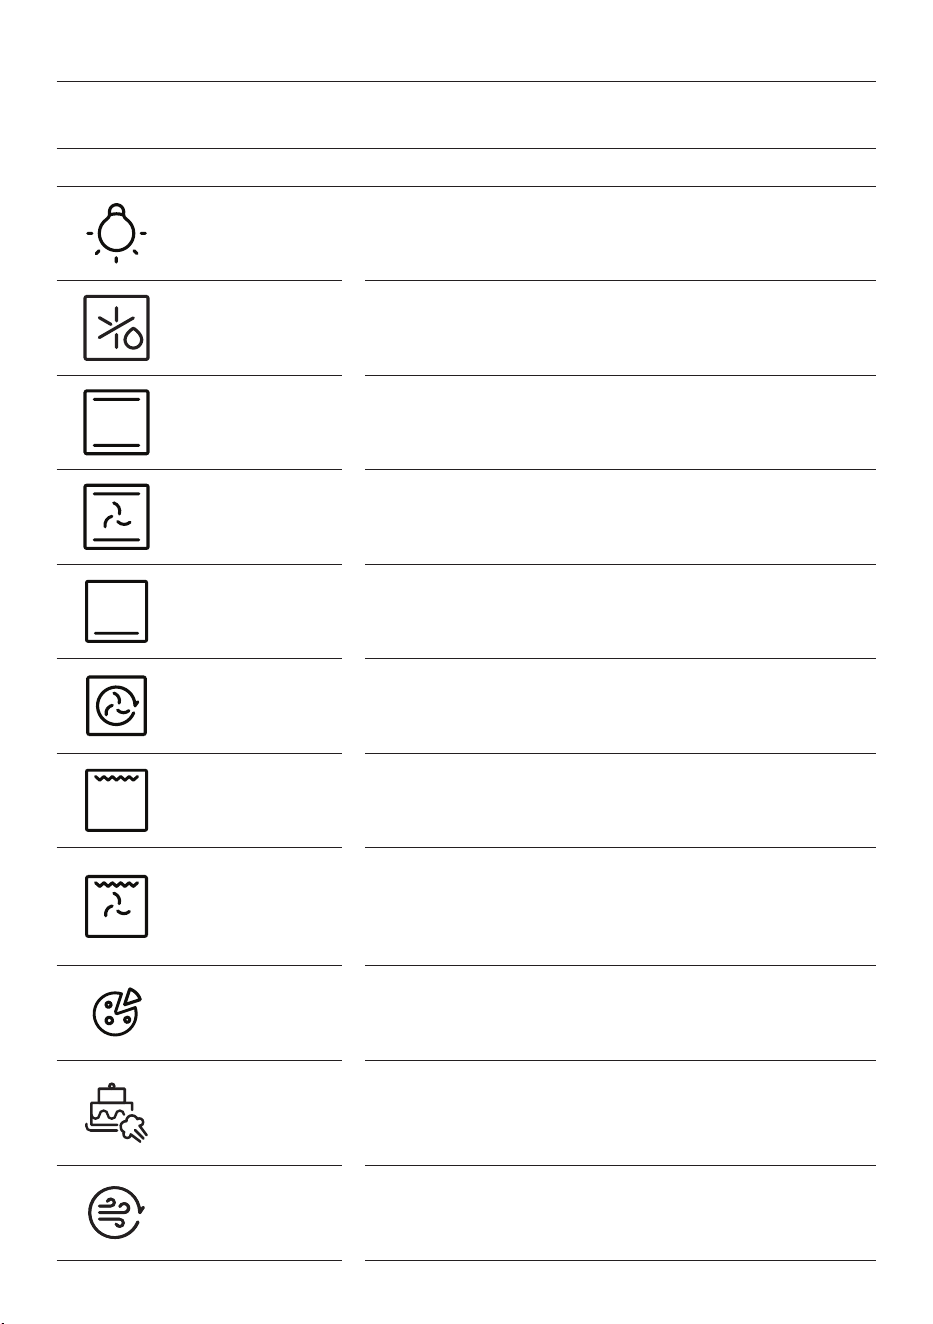
FUNCTION DESCRIPTION
LIGHT Turns the oven light ON/OFF.
DEFROST
Fan circulates air at room temperature around the frozen food to
speed up the defrosting process.
BAKE
Ideal for cakes, breads, biscuits and quiches on one level. Uses
both upper and lower heating elements.
FAN BAKE
Ideal for roasts, casseroles, vegetables and pies on one level and
for achieving surface browning.
TRADITIONAL BAKE
Ideal for traditional recipes and foods that have a pastry base and
require delicate baking or minimal surface browning.
FAN FORCED
Ideal for multilevel cooking. Uses the rear element in conjunction
with the fan. Recommended for most applications, including
poultry, pastries and vegetables.
MAXI GRILL
Ideal for sausages, steaks and toast. The entire area below the grill
element becomes hot. Use with the door closed. Turn food halfway
through cooking (If necessary).
MAXI GRILL+ FAN
Ideal for larger cuts of meat that require longer cooking with
surface browning. Use with the door closed. Slide a tray under
the shelf to collect juices. Turn food halfway through cooking (If
necessary).
PIZZA
Ideal for achieving a crispy base on all kinds of pizzas without
preheating the oven. We recommend using lower shelf positions
and a pizza stone. Set a cook duration time manually.
BAKERY + STEAM
Ideal for bread, pastries, and cakes, it combines traditional baking
with steam to deliver professional bakery results at home. Pour
300ml for 90cm oven and 150ml for 60cm oven of water into the
base of the oven cavity when the oven is cold, then preheat oven.
AIR FRY
Ideal for preparing frozen foods or crumbed par-cooked foods
which are usually fried.
Cooking functions for Models: HOR60S11CESX2
COOKING FUNCTIONS- H500
18
CARE AND CLEANING
The life of your product can be extended through regular cleaning. Wait for the oven to cool before carrying
out manual cleaning operations. Never use abrasive detergents, steel wool or sharp objects for cleaning as
these may damage enamelled parts. Use only water, soap, or bleach-based detergents (ammonia).
Oven window seal
Clean the seals with a slightly damp sponge. Abrasive detergents should not be used for these parts.
Baking tray
Allow to cool, then wash the tray in hot, soapy water or in the dishwasher.
Racks
The wire racks can be cleaned in the dishwasher or using a wet sponge, ensuring that they are dried
afterwards. Remove the wire racks by pulling them away from the oven walls.
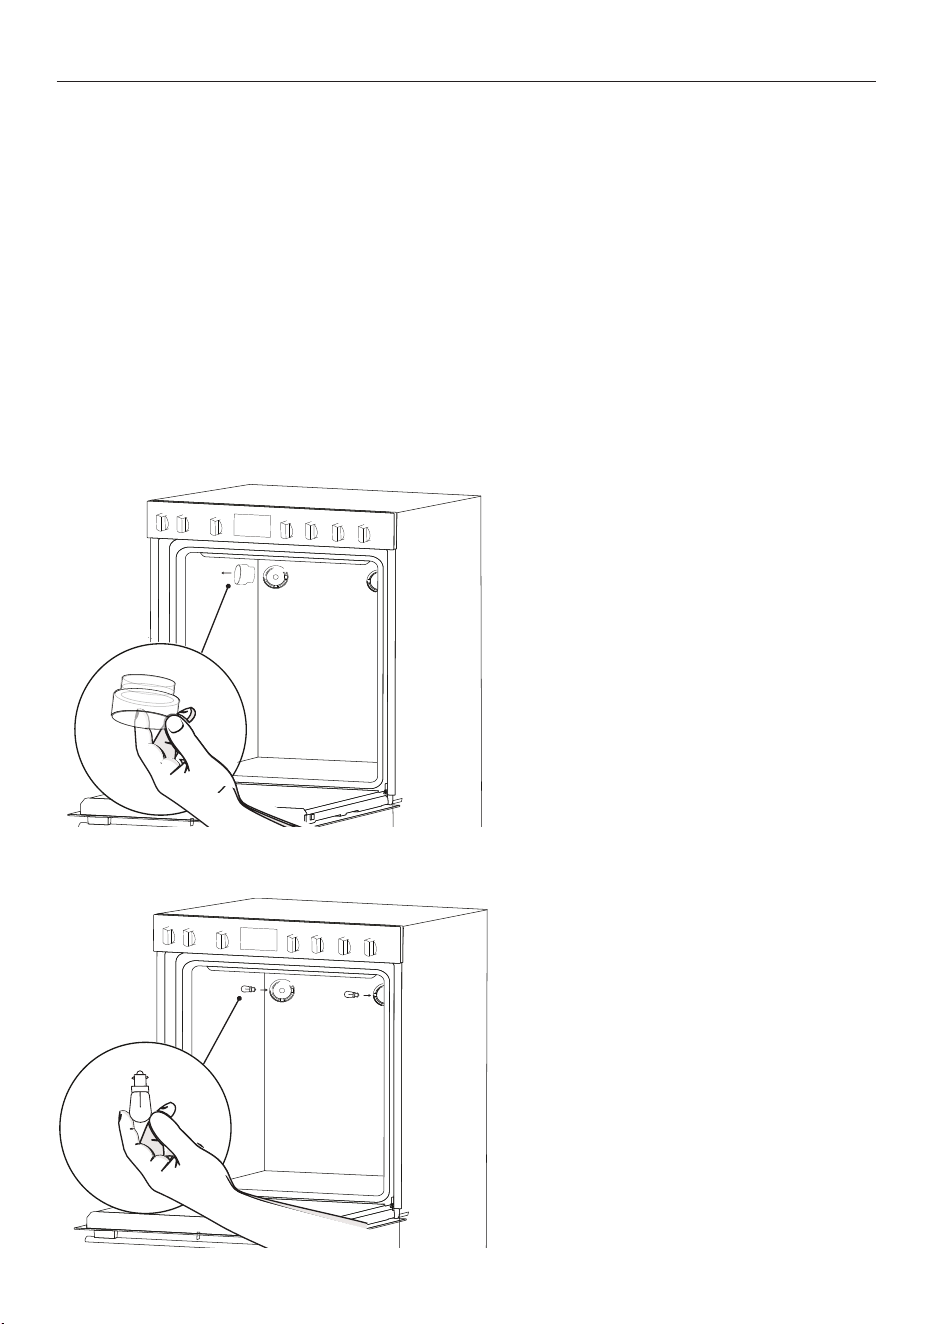
Changing the light bulbs
1. Disconnect the oven from the
power supply, then remove the glass
light cover.
2. Unscrew the light bulb and replace
with a new bulb of the same type.
Refit the glass cover.
19
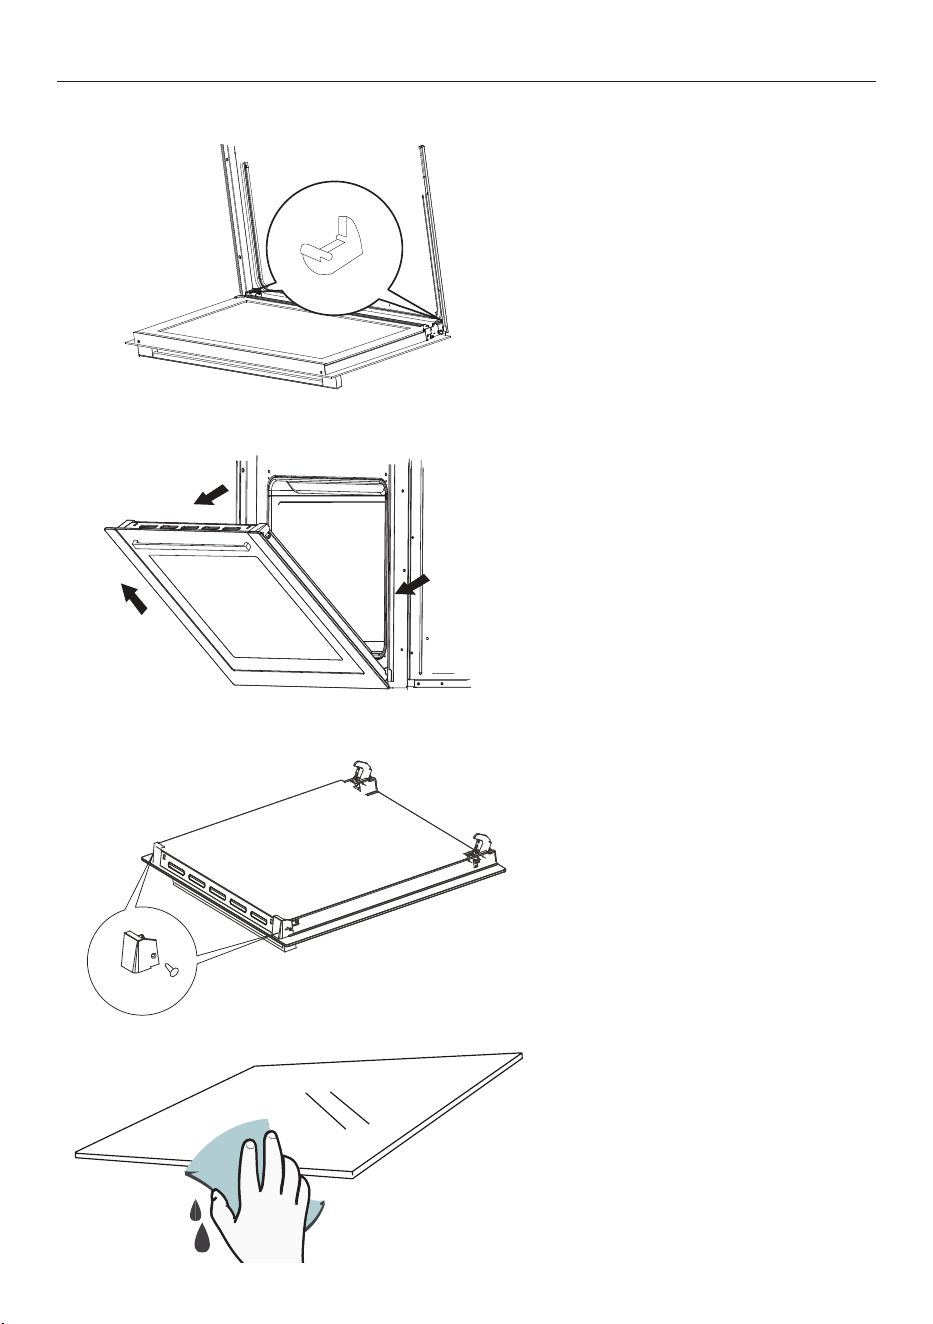
CLEANING THE OVEN DOOR
Everyday cleaning
It is advisable to clean the glass window with an absorbent kitchen towel after every use of the oven. To
remove more stubborn stains, you can use a detergent-soaked sponge, well wrung out, and then rinse with
water.
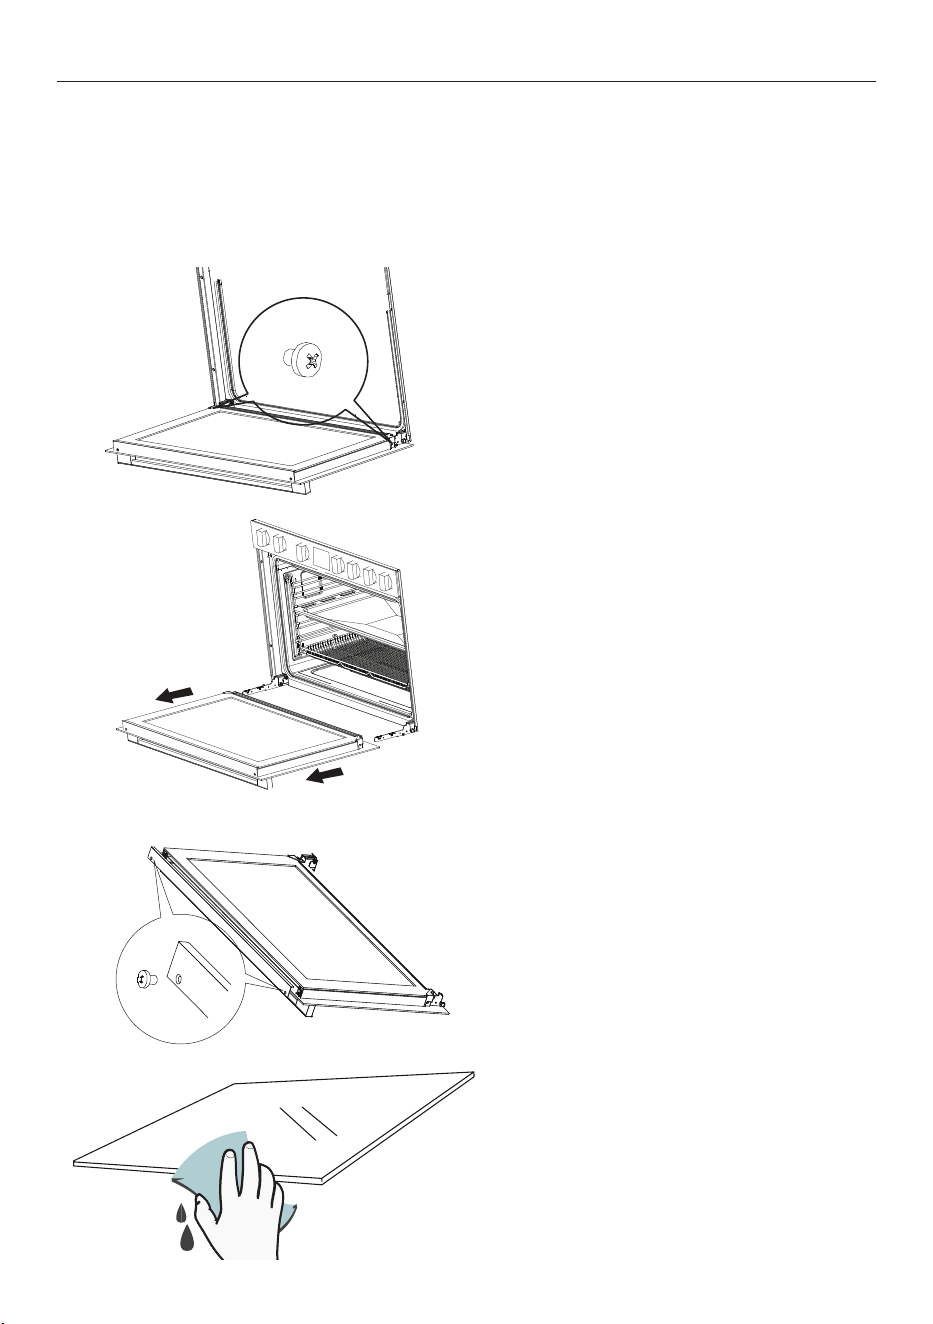
Removal and cleaning of the
door glass.
1. Open the oven door fully, then
remove the screws that secure the
hinges to the body of the oven.
90cm oven.
3. Remove the screws at the top
corners of the door, then lift the
edge of the inner pane and carefully
slide it out.
4. Remove the screws at the top
corners of the door, then lift the
edge of the inner pane and carefully
slide it out.
2. Pull the door out towards you and
place it on a flat, protected surface.
20
CLEANING THE OVEN DOOR
Removal and cleaning of the
door glass.
1. Open the oven door fully, then
tilt the safety catch on the hinge
upwards.
60cm oven.
3. Unscrew and detach the plastic
end caps that are located at the top
corners of the door. Then lift the
edge of the inner pane and carefully
slide it out.
4. Unscrew the remaining brackets
on both sides of the middle panel,
then lift the edge of the inner pane
and carefully slide it out.
2. Close the door halfway, lift and pull
it towards you and place it on a flat,
protected surface.
21
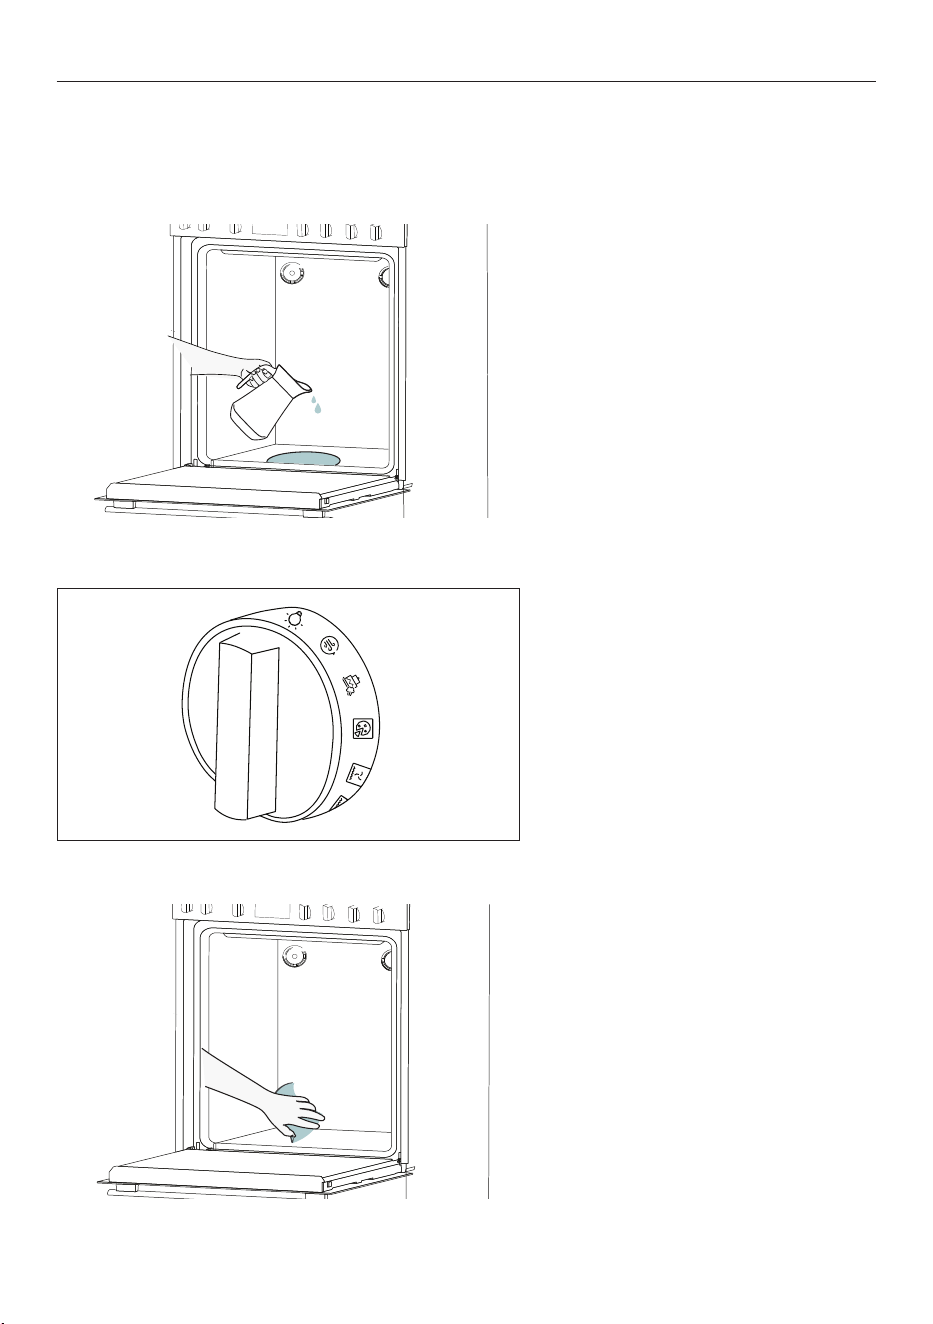
HYDRO CLEAN
Hydro clean
This function uses steam to clean light levels of residue from the oven interior in a quick and eco-friendly
way. Always use distilled or drinkable water and for the best performance begin the function when oven is
cool.
2. Press the traditional bake function
and preheat the oven to 100°C. Then
set the cook duration to 20 minutes.
1. Remove all racks, trays and side
racks from the oven. Wipe away
as much dirt as possible then pour
300ml of water for 90cm oven and
150ml for 60cm oven of water into
the base of the oven.
3. Wait for the oven to cool
completely before wiping the interior
clean with a soft, damp cloth.
Right
Wrong
WrongWrong Wrong
WRONG
RIGHT
6

22
PROBLEM POSSIBLE CAUSES WHAT TO DO
The oven does not
work
No power. Check that the mains power supply (wall switch) is
turned on, the fuse has not tripped and there is no
power outage in your area.
No function has been set. Ensure a function has been selected and temperature
set.
The lights are not
operating when I
open the oven door
The oven lights have blown. Replace the lights. See 'Changing the light bulbs'.
The oven is not
heating
The door is not fully closed. Make sure the door is properly closed.
The door has been opened too
often during cooking.
Avoid opening the door too often during cooking.
A glass pane in the
door has cracked,
chipped or shattered
The glass has been knocked or
cleaned incorrectly.
You must NOT use the oven. Call your Authorised
Repairer or Customer Service.
Hot air is coming out
of the vents when
the oven is off
The cooling fan is running. This is normal. You do not need to do anything.
The fan comes
on when I select a
function that does
not use a fan
The fan starts automatically
while preheating.
This is normal. The fan will turn o when the oven
reaches temperature.
00:00 is flashing on
the display
The oven was disconnected
from the mains or there was a
power cut.
The clock needs to be reset. See 'Setting the clock'.
Oven heating
light turning on
throughout cooking.
Fluctuating temperature of
internal oven.
This is normal. You do not need to do anything.
TROUBLESHOOTING

23
MANUFACTURER'S WARRANTY
Please read this warranty card carefully. Attach your purchase receipt to this warranty card and keep in a
safe place. You must produce both warranty card and proof of purchase in the event of a warranty repair
being required.
When you purchase any new Haier Product you automatically receive a two year Manufacturer's Warranty
covering parts and labour for servicing.
The Manufacturer undertakes to:
Repair or, at its option, replace without cost to the owner either for material or labour any part of the
Product, the serial number of which appears on the Product, which is found to be defective within TWO
YEARS from the date of purchase.
This warranty DOES NOT cover:
A Service calls which are not related to any defect in the Product. The cost of a service call will be charged
if the problem is not found to be a Product related fault. For example:
1 Correct the installation of the product.
2 Provide Instruction on use of the product or change the setup of the product.
3 Replace house fuses or correct house wiring.
4 Correcting faults) caused by the user.
5 Noise or vibration that is considered normal.
6 Water on the floor due to incorrect loading or excessive suds.
7 Blocked pumps, removal of foreign objects/substances from the machine, including the pump and
inlet house filters.
8 Correcting damage caused by pests, eg. rats, cockroaches etc.
9 Correct corrosion or discolouration due to chemical attack.
!0 Power outages or surges.
B Defects caused by factors other than:
1 Normal domestic use or
2 Use in accordance with the Product's User Guide.
C Defects to the Product caused by accident, neglect, misuse or 'Act of God'.
D The cost of repairs carried out by non-authorised repairers or the cost of correcting such
unauthorised repairs.
E Normal recommended maintenance as set out in the Product's User Guide.
F Repairs when the appliance has been dismantled, repaired or serviced by other than an AUTHORISED
CUSTOMER SERVICE CENTRE or the selling dealer.
G Pick up and delivery.
H Transportation or travelling costs involved in the repair when the product is installed outside the
AUTHORISED CUSTOMER SERVICE CENTRE'S normal service area.
This product has been designed for use in a normal domestic environment. It is not intended for
commercial use. Doing so may affect product warranty.
Service under this warranty must be provided by an Authorised Service Repairer (refer to the Customer
Care section for contact details). Such service shall be provided during normal business hours. This
warranty certificate should be shown when making any claim.

24
MANUFACTURER'S WARRANTY
Note:
This Warranty is an extra benefit and does not affect your legal rights and applies only to product
purchased in New Zealand and Australia. Please keep this Warranty Card in a safe place.
For Australian customers:
Our goods come with guarantees that cannot be excluded under the Australian Consumer Law. You are
entitled to a replacement or refund for a major failure and for compensation for any other reasonably
foreseeable loss or damage. You are also entitled to have the goods repaired or replaced if the goods fail to
be of acceptable quality and the failure does not amount to a major failure.

25
CUSTOMER SERVICE
We recommend our Haier Customer Service and the use of original spare parts.
If you have a problem with your appliance, please first check TROUBLESHOOTING. If you cannot find a
solution there, please contact:
z
Your local dealer
z
The Service & Support area at
www.haier.com.au or
www.haier.co.nz
Where you can activate the service claim and also find FAQs.
To contact our Service, ensure that you have the following data available.
The information can be found on the rating plate at the door.
Model
Serial No.
Complete and keep for safe reference:
Model
Serial No.
Purchase Date
Purchaser
Dealer
Suburb
To w n
Country