Hearth & Home Technologies • Vesper Outdoor Mesh Doors • 4153-918 Rev A • 02/23
1
tm
tm
Models:
VOFBSD-36, VOFBSD-42
Mesh Door Kits
Installation
Instructions
These mesh door kits have been tested for use with specic Hearth & Home Technologies products. Check with your local
building code agency before you begin installation to ensure compliance with local codes, including the need for permits
and follow-up inspections. If you encounter any problems regarding code approvals, or if you need clarication of any of
the instructions contained here, contact your Hearth & Home Technologies dealer. For the dealer nearest you, please visit
www.hearthnhome.com.
WARNING
Hot screen/mesh and glass doors will cause burns.
• Do not touch screen/mesh or glass doors until cooled
• NEVER allow children to touch screen/mesh or glass
doors
• Keep children away
• CAREFULLY SUPERVISE children in same room as
replace.
• Alert children and adults to hazards of high
temperatures.
High temperatures may ignite clothing or other
ammable materials.
• Keep clothing, furniture, draperies and other ammable
materials away.
HOT SURFACES!
Screen/mesh, glass doors and
other surfaces are hot during
operation AND cool down.
NOTICE: All ngerprints and smudges must be wiped clean
from the viewable surfaces of the door kit prior to the initial
burning of the replace. If this is not done, these prints and
smudges will be cured into the nish and set for the life of
the replace. To keep the nish looking its best, gently wipe
with a soft cloth and if desired, soap and water. Never use
thinner or abrasive cleaners since these products will damage
the nish.
CAUTION! Risk of Cuts/Abrasions. Wear protective
gloves and safety glasses during installation. Sheet metal
edges are sharp.
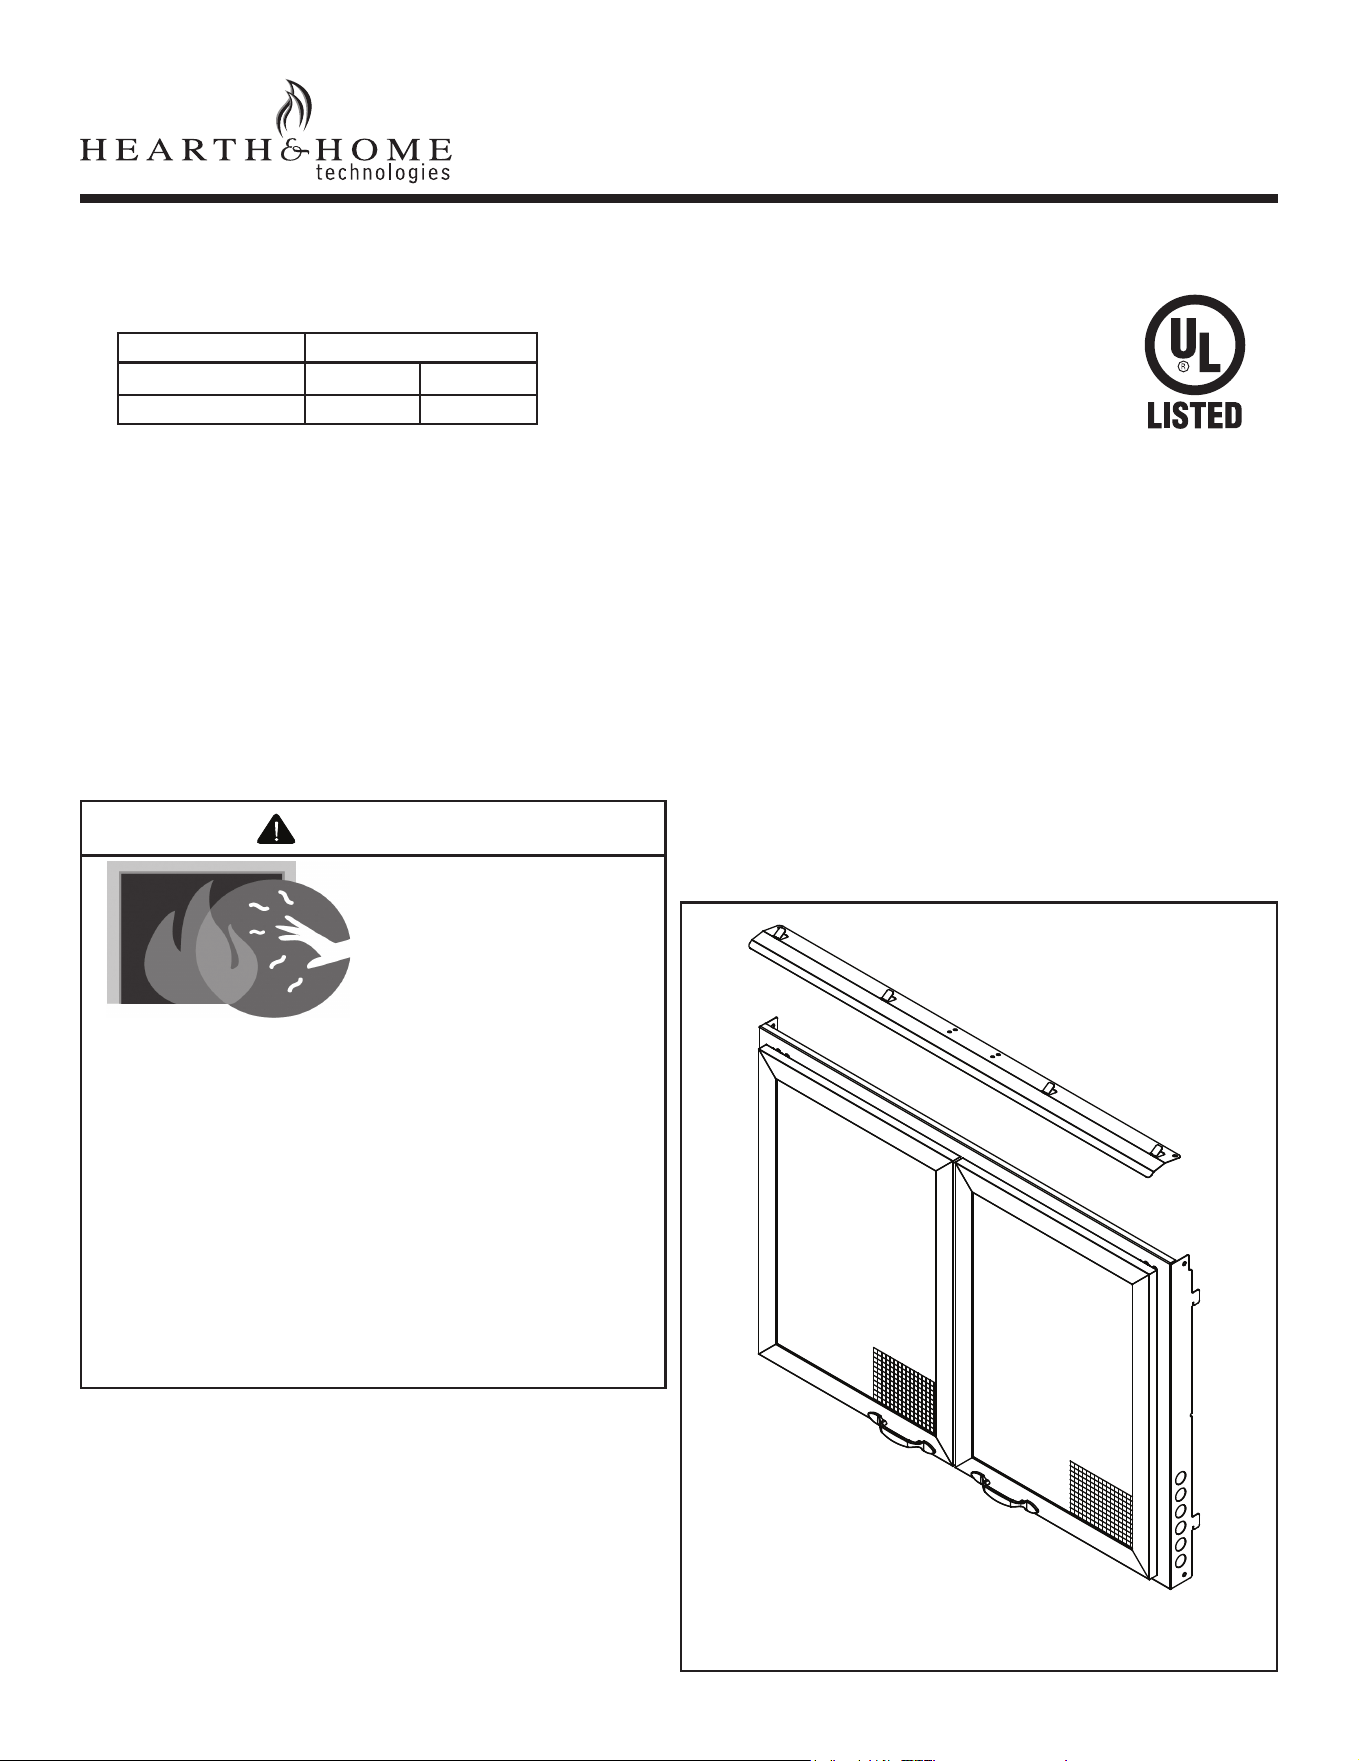
Figure 1 Vesper Outdoor Mesh Door
Door Model Number For Use on Models
VOFBSD-36 VOBF36-T VOFB36-H
VOFBSD-42 VOFB42-T VOFB42-H
Hearth & Home Technologies • Vesper Outdoor Mesh Doors • 4153-918 Rev A • 02/23
2
CAUTION! The door kit is heavy. We recommend two
installers to put the front assembly in place.
WARNING! Risk of Fire! DO NOT place combustible mate-
rials on the metal replace face or columns.
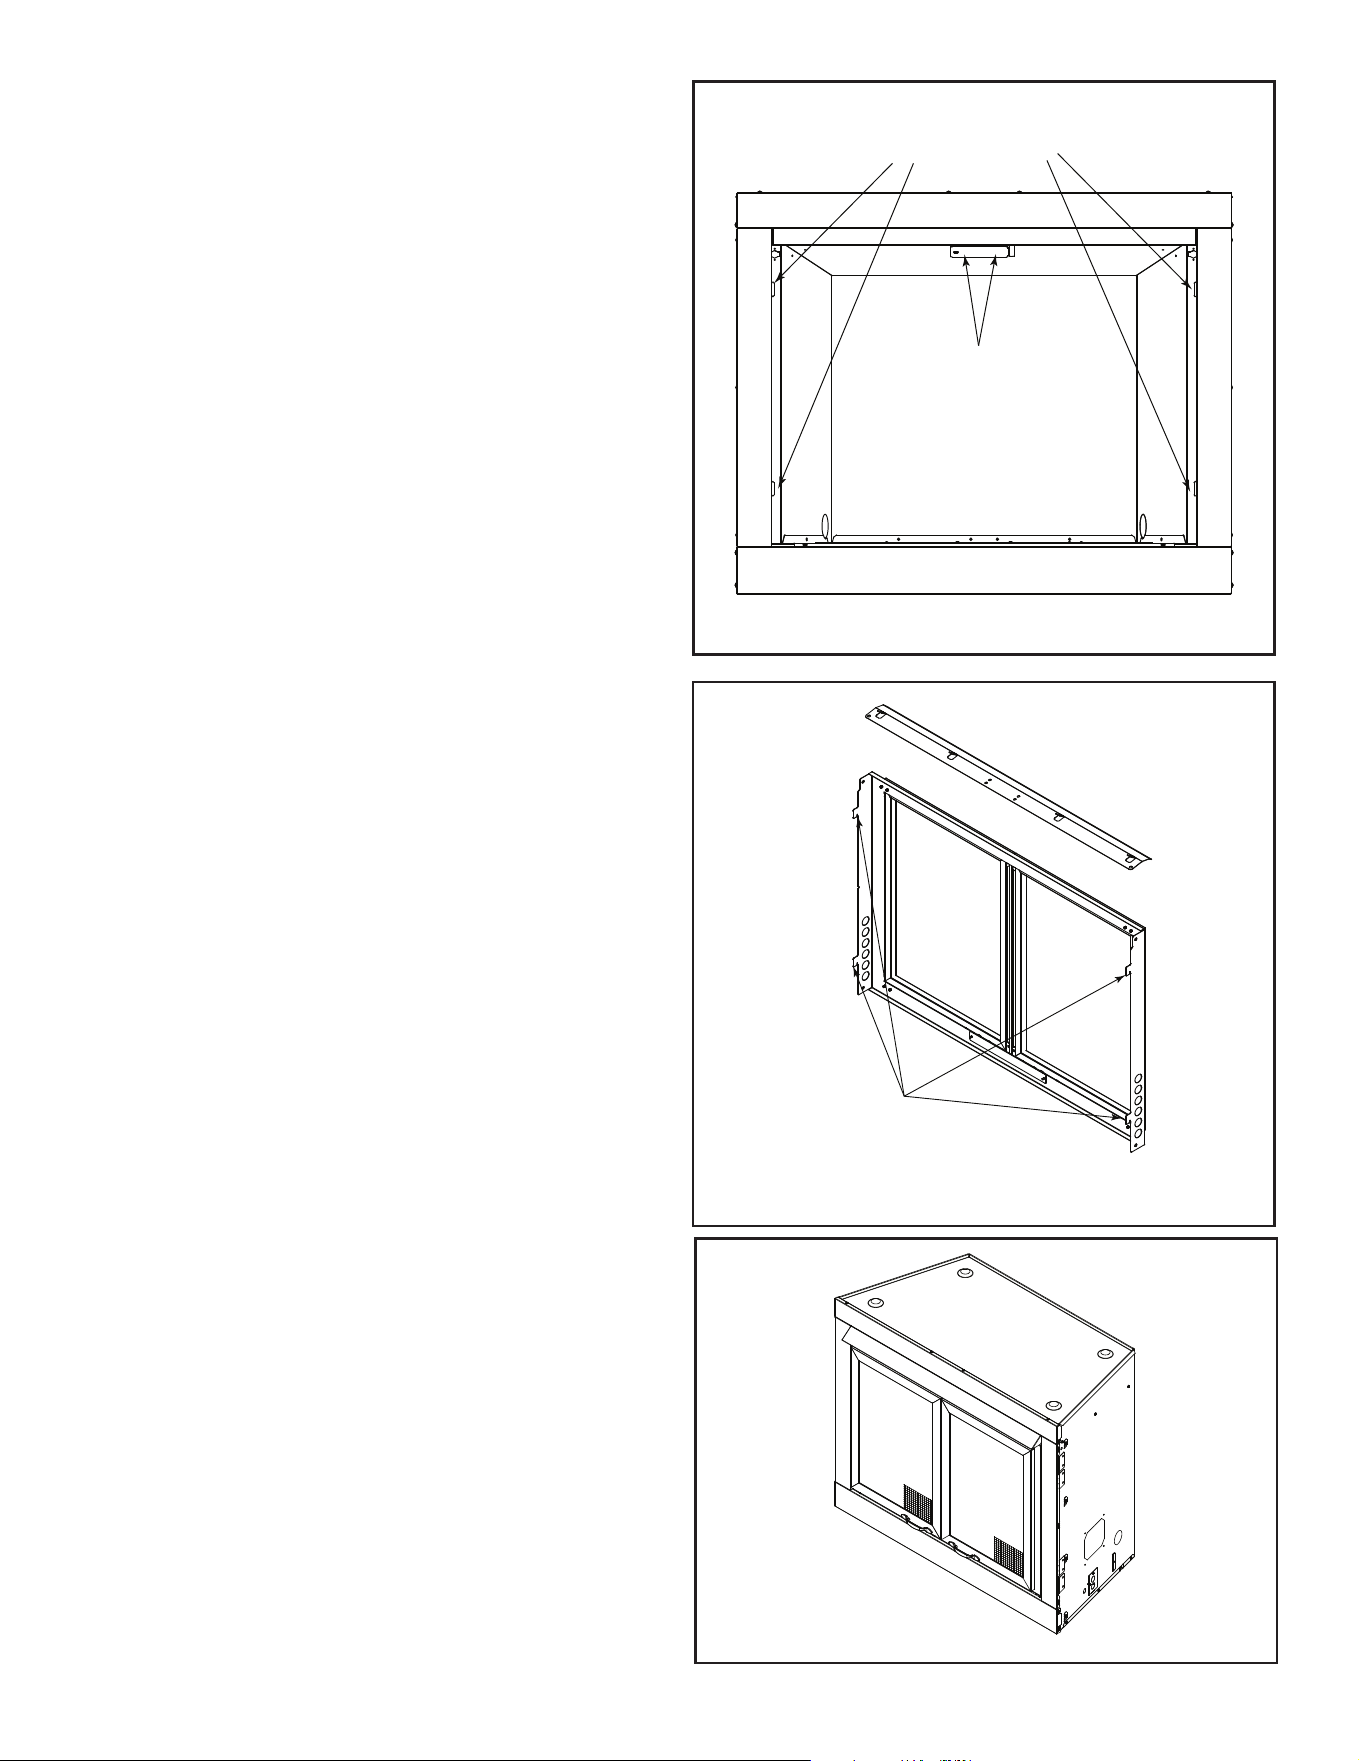
Figure 3 Frame Assembly
Hang Hooks
Figure 4 Completed Mesh Door Installation
Figure 2 Remove Existing Screens
Mesh Door Hang Holes
Screen Rod Screws
Installation:
1. Remove the existing screens from the replace.
See Figure 2:
• Remove one screw in each of the screen rods
behind the upper screen cover
• Slide screen rods out of support holes.
• Rods and screen will come out as an assembly.
• Discard.
2. Install inner hood by using the bend tabs to locate. Use
the 2 screws from the screen rods to secure into place.
Leave original hood in place.
3. Hang door frame assembly into the 4 slots located
on the rebox (see Figure 2) with the corresponding
hooks on the door frame. See Figure 3. Be sure door
is all the way down on the hooks. Door frame will have
approximatley 1/2 inch gap on the bottom of frame.
See Figure 4.