
DESIGN &
INSTALLATION
GUIDE

2
1. Quick-step Guide
2. Intro to U-Chill
3. Inside the box
4. Design Allowances
5. Ventilation
6. Install: Curved
6.1OpeningSpecication
6.2 Installation
7. Power Up & Test
8.Specications
9. Transport & Handling
10. Safety Notice
CONTENTS
3
4
5
6
7
9
9
10
13
14
15
15
3
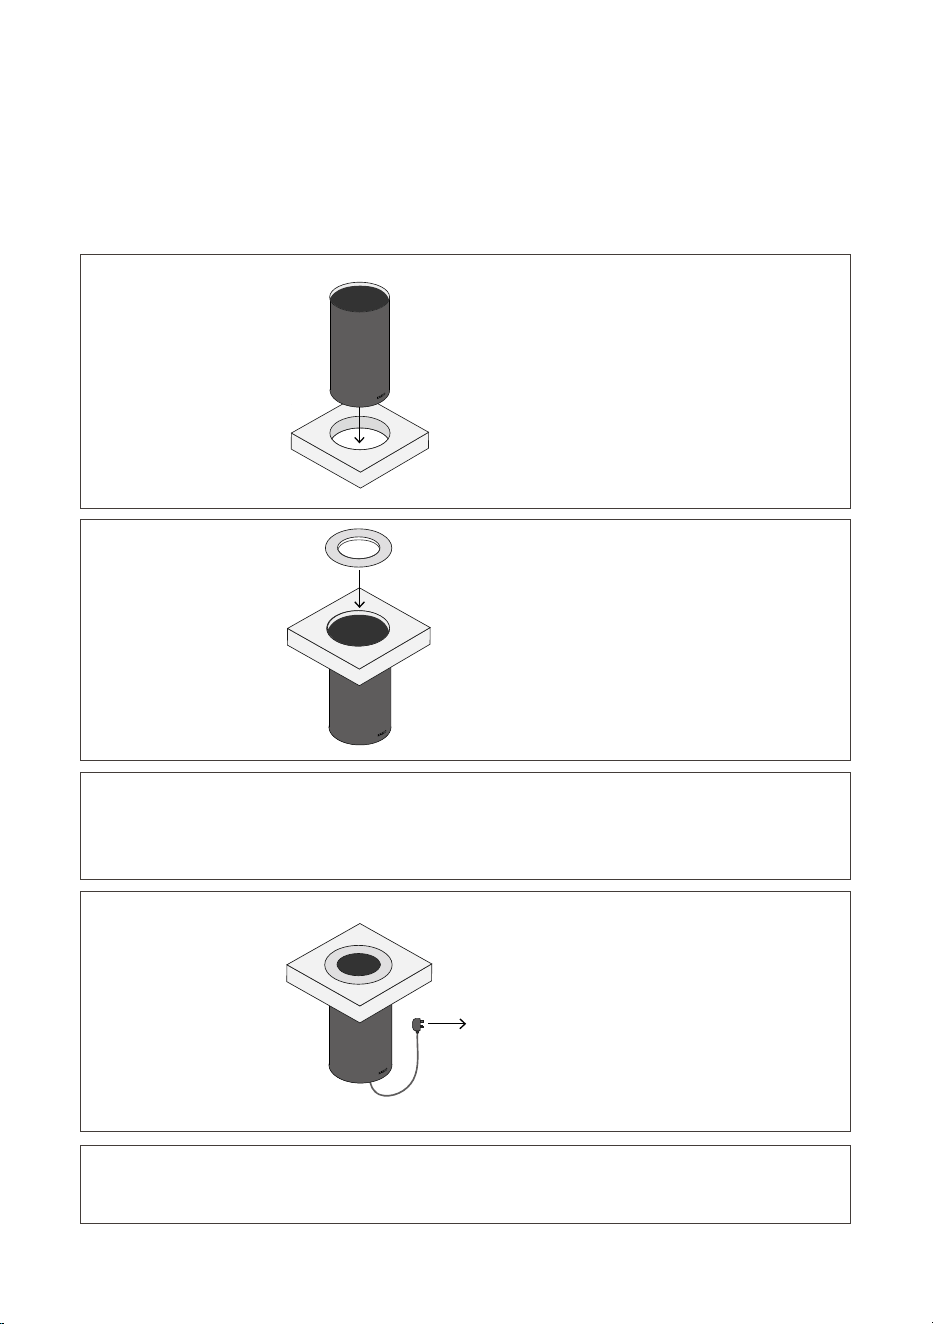
1. QUICK-STEP GUIDE
STEP 1.
CURVED DESIGNS
STEP 2.
Lower U-Chill into fabricated opening,
Place the Crown on U-Chill.
STEP 3.
STEP 4.
STEP 5.
Connect U-Chill cord with the
power supply cord.
Plug power supply cord into
electrical outlet.
Turn on power outlet.

4
2. INTRO TO U-CHILL
U-Chillkeepsyourdrinkatitsopeningtemperature,soeverysipisascoolastherst.
It can be easily integrated into any surface. Simply specify an opening, place U-Chill in, then
plug into an electrical outlet. We recommend the opening is cut by a countertop fabricator, and
installation can be completed by kitchen installers.
5
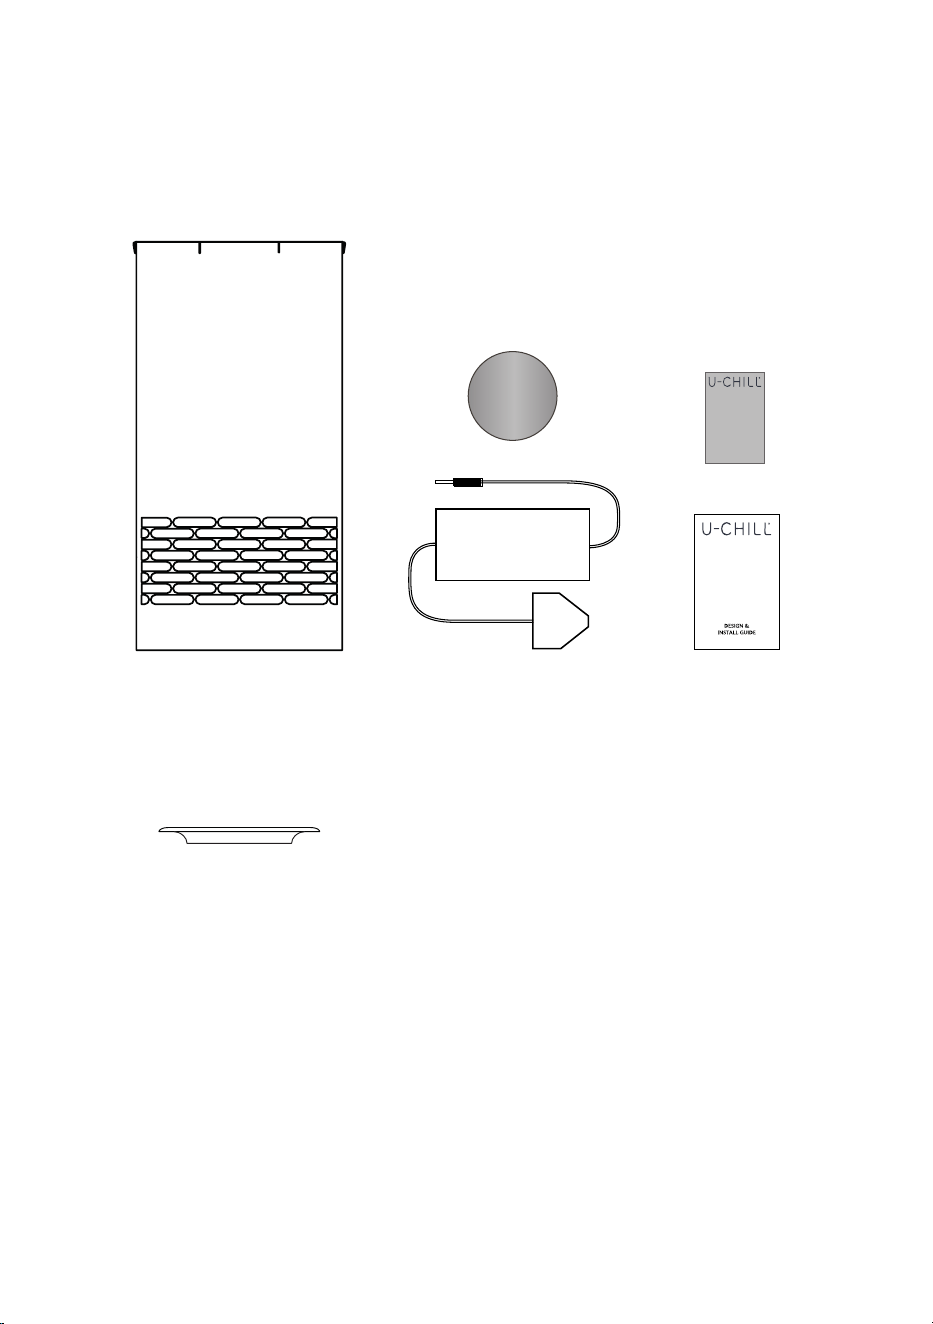
3. INSIDE THE BOX
Rubber Mat
Power Adapter
U-Chill or
U-Chill Plus
User Guide*
This Guide
*Ensure the User Guide is given to the end-user
Curved Crown

6
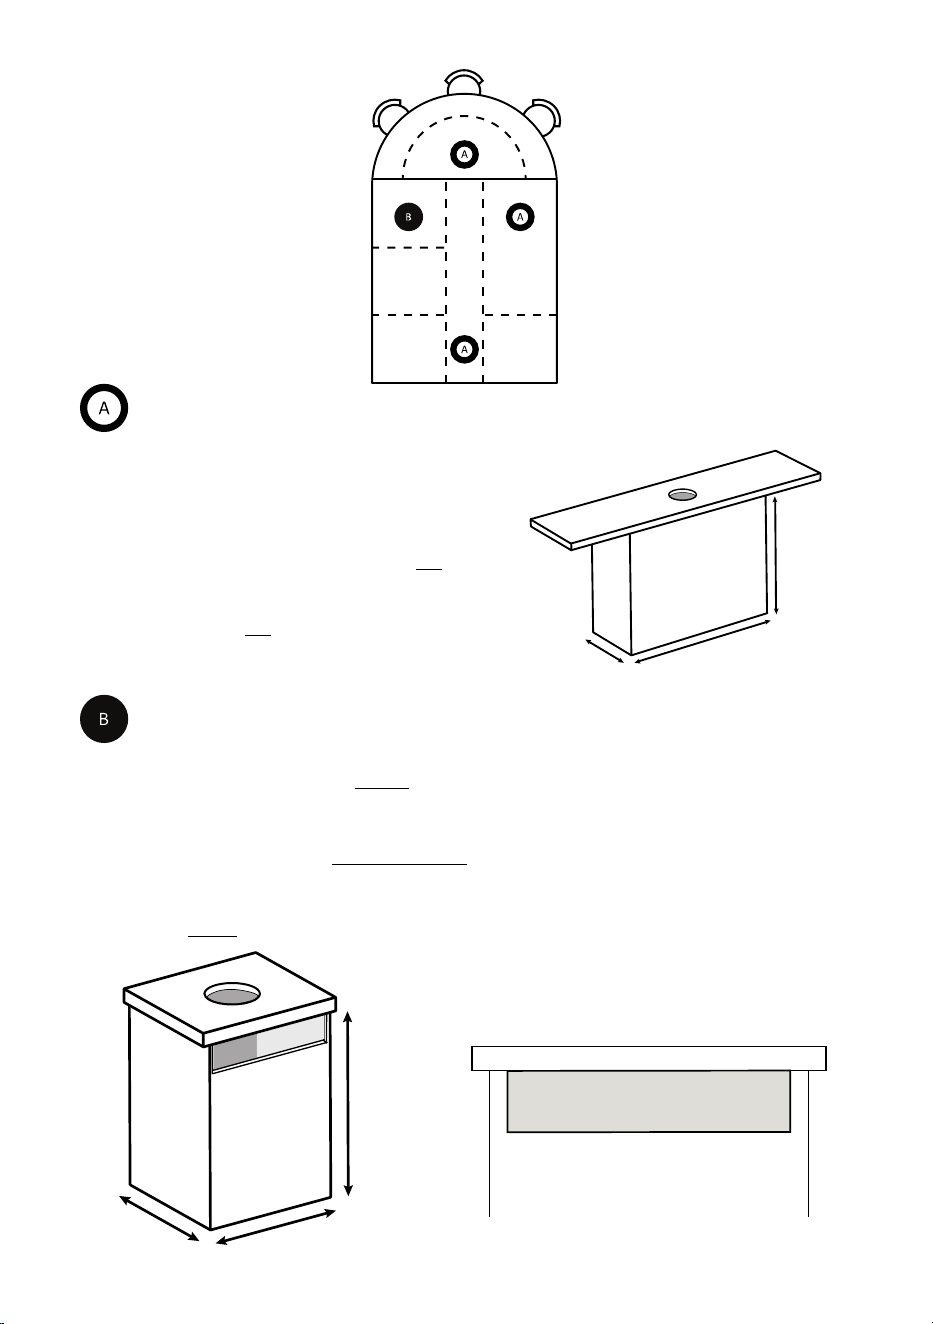
4. DESIGN
ALLOWANCE
WhendesigningwithU-Chill,allthat’srequiredisthespecicationofanopening,anaccessible
poweroutletand,dependingonthesizeofthespace,asmallventforgoodairow.
3/16”-3”
Countertop thickness:
Ensure that the space has a minimum internal
heightof17”andtheU-Chillunitisatleast
3”awayfromtheinternalwalls.
If installing multiple U-Chill’s into one space,
ensure that the center points of each opening
areleast77/8”apart.
Counterop thickness allowances between
3/16”-3”.
Do not install into metal or glass surfaces.
4.1 MINIMUM
ALLOWANCES
4.3 MARINE APPLICATIONS
4.2 SURFACE
73m m
420m m
This product is sold with a 110-240v powerpack that delivers a regulated 12v supply that is essential
for operation and warranty. This powerpack must be used in all applications, as it provides a regulated
12v supply, particularly if the product is to be used in a marine/battery environment where supply
voltagemayuctuate.
If designing U-Chill into a yacht or marine environment:
Install in-cabin and keep dry
Keep away from chlorinated water, such as hot tubs and swimming pools
17”
3”
7
Ventilation is not required when U-Chill is installed
into a space with a volume larger than 4.5 cu. ft.
A small vent is required when U-Chill is installed
into a space with a volume smaller than 4.6 cu. ft.
See following page for further instructions.
5. VENTILATION
We advise that asmall ventis included in all installations,to allowsufcient airow to the
U-Chill base unit. Be aware if the ambient air around the U-Chill is above 32 degrees, the unit
will not function as intended and shut down.
If ventilation isn’t possible, there are larger spaces which don’t require it, see below for details.
If ventilation is not possible in smaller spaces than what is required, we do not recommend
installing your U-Chill as functionality may be compromised.
INSTALLATION
CONSIDERATIONS
Ensure U-Chill is not installed in close
proximity to appliances that generate heat
Ensure the base and sides of the U-Chill
are not obstructed
Ensure the base and sides of the U-Chill
are not located in an area where they are
vulnerable to damage or obstruction
8
Spaces that are greater than 4.5 cu. ft. do not require
ventilation when a single U-Chill is installed.
If installing multiple U-Chills into a single space, ensure
that the void allows for at least 4.5 cu. ft. per U-Chill,
otherwise ventilation is required.
This example would not require ventilation:
8”x32”x32”=4.7cu.ft.
5.1 EXAMPLE A - NON-VENTED INSTALL
800mm
800mm
200mm
8”
32”
32”
5.2 EXAMPLE B - VENTED INSTALL
Spaces that are less than 4.5 cu. ft. require a small vent into another void or into ambient air to
allowforbetterairowcirculation.
The vent should have an area of at least 14 sq. in. and is usually best placed in the back panel. We
recommendtheventtobeplacedatthetopofthepanelforimprovedairow.
This example wouldrequireavent:12”x12”x32”=2.54cu.ft.
back panel
vent example size:
1.6”x9”=14.5sq.in.
300mm
back panel
12”
12”
32”
9
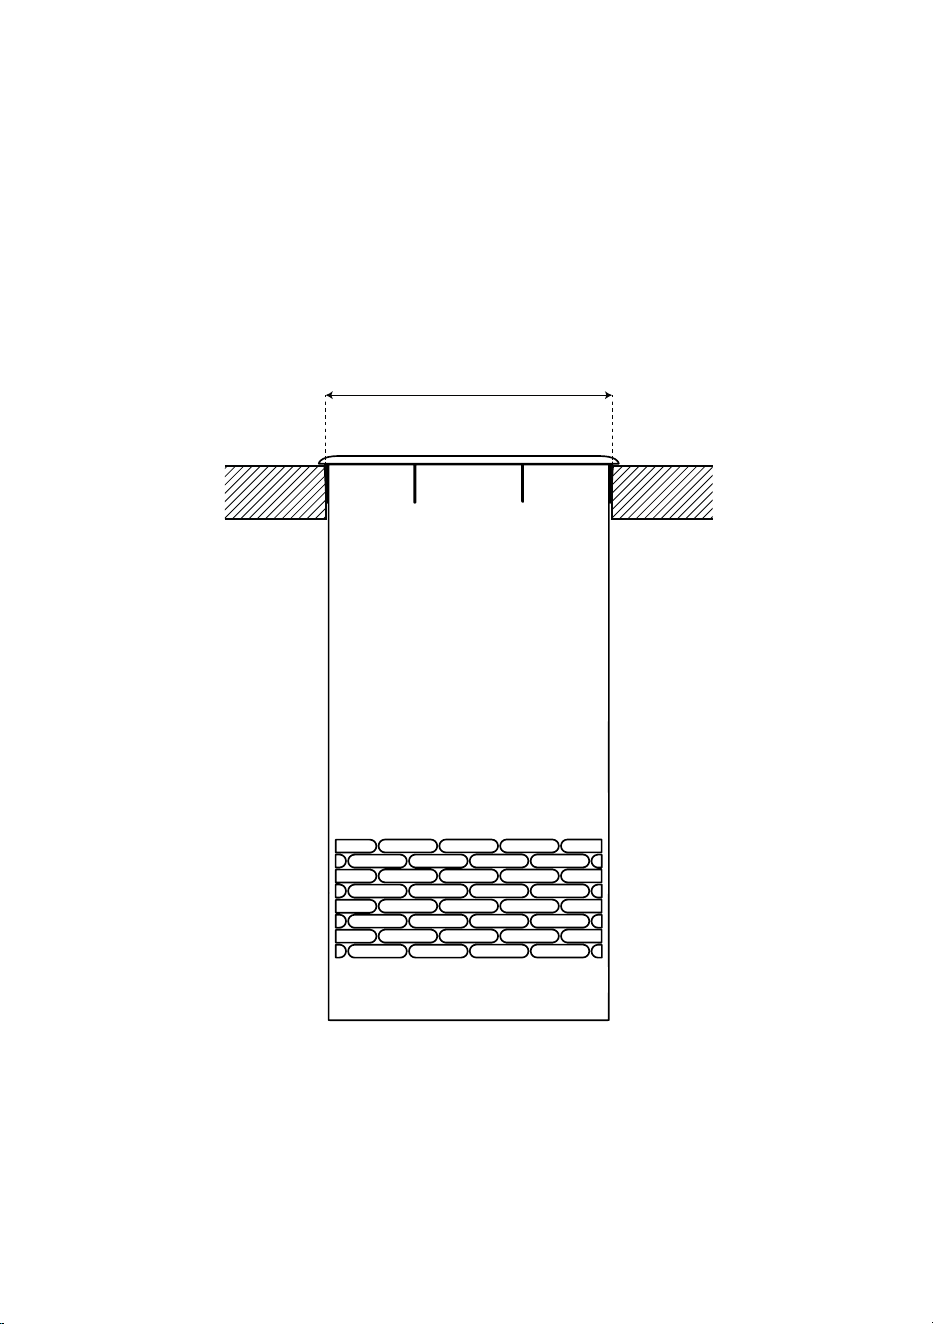
6. INSTALL
6.1 OPENING SPECIFICATION
A61/8”openingcanbecreatedusingCNCorwaterjetcutting.
Ø 61/8”opening
10
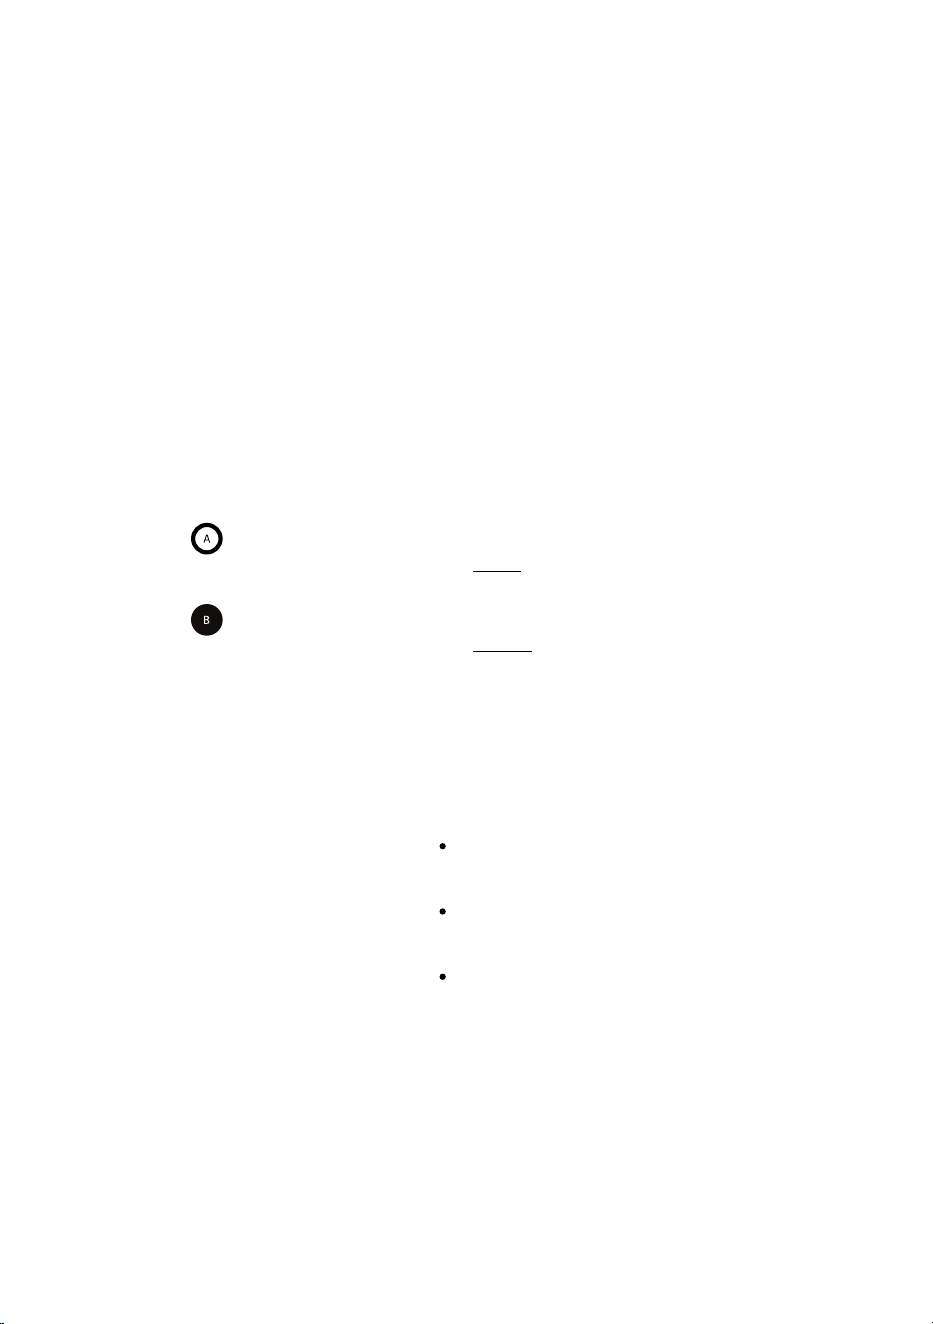
5.
5. 2
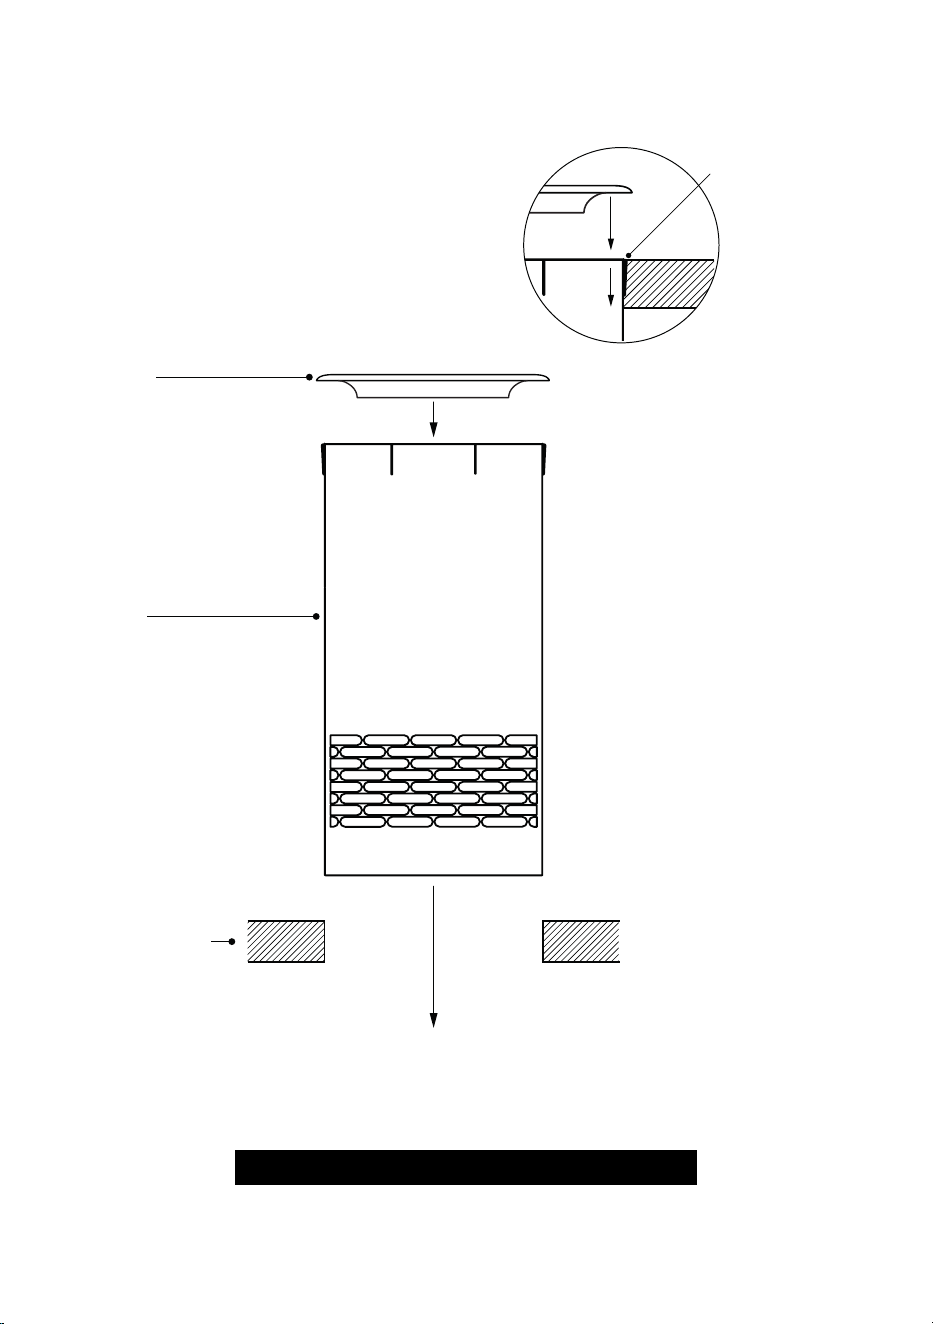
Crow
n
Silicone Sealan
t
(between base uni
t
edge, work surface
& crown
)
5. 2
5. 3
4
Always place the Crown onto the U-Chill unit before plugging into the electrical outlet.
If not, the touch controls will not calibrate and it will not function correctly
6.2 INSTALLATION
IMPORTANT
U-Chill
Opening
Surface

11
6.1 CUT OPENING & VENT
For opening - see page 10
For ventilation - see section 5
6.2 INSERT U-CHILL
Carefully lift the U-Chill from the box using two
hands and lower slowly into opening. Push down
evenly to secure the unit in place
There is a black circular seal on the base unit top
where the Crown will sit, don’t remove this
Before placing the Crown onto the U-Chill, it is
recommended to place a bead of silicone at the
edge of the U-Chill unit lip
Ensure no silicone is between the Crown and
U-Chill unit magnets
Place the Crown onto the U-Chill, push down
evenly to attach the magnets
Wipe away any excess silicone, taking care not to
scratch the Crown surface
RemovetheprotectivelmfromtheCrown
Always ensure the Crown is attached before
plugging into electrical outlet
6.4 ATTACH CROWN
6.5 POWER UP
6.3 SEAL SURFACE
The power pack generates a small amount of
heat, so place as far away from the U-Chill as the
installation space and cable allows
Ensure the power pack is not near a surface that
might be subject to liquids. Best practice is to
mount onto a surrounding wall
Don’t remove the Crown once powered up. If it is
removed, unplug from the electrical outlet, place
the Crown back on. Wait 15 seconds, then turn
on.

12
7. POWER UP & TEST
Once power is detected, the U-Chill will light up.
ToturntheU-Chillon,simplyholdyourngeron
the Crown
For full User Guide instructions, go to u-line.com
7.1 POWER UP & ENJOY
7.2 TESTING
Check the U-Chill is secure by applying pressure
into the chamber
Hold your nger on the Crown until the lights
turn on
TaptheCrown3times,waituntilitashes,then
tap repeatedly to check the lights change color
Touch the base of the chamber after 3 minutes to
check the U-Chill is cold
To turn off, touch and hold the Crown for 2
seconds until the lights turn off
Once U-Chill is installed, please perform the
following tests to ensure optimal performance:

13
7.3 ADDITIONAL
TESTING FOR U-CHILL
PLUS ONLY
7.4 TROUBLESHOOT
Hold your nger on the Crown until the lights
turn on
HoldyourngerdownontheCrown.Checkthat
the lights change from off, to red, to blue then
white
If the U-Chill is not operating properly, unplug
it from the outlet. Ensure the Crown is securely
attached to the U-Chill, wait 15 seconds, then
plug it back in.
Perform steps 7.2 again
If the problem persists, get in touch:
+1.414.354.0300
Note the unique serial number when getting in
touch. This be found at the base of the chamber,
underneath the mat, and on the side of the base
unit

14
CURVED
8. SPECIFICATIONS
Adapter Input Voltage
U-Chill Input Voltage
Max Power Usage
Max 12v DC Amps
Ambient Temp. Limit
Auto Switch Off
100 to 240V AC, 2.5A, 50-60Hz
12 volts
90 watts
7.5 amps
After 4 hours
10 to 32
º
C / 50 to 90
º
F
Tap within the last hour to extend
Auto Switch Off by an extra hour
U-Chill will automatically switch off if
the temperature is above 32
º
C / 90
º
F
63/8”
6”
1113/16”
471/4” 51/2” 471/4”

15
9. TRANSPORT
& HANDLING
PleaseonlyinstallaU-Chillintoaxedsurfaceorunitthatwillnotbemoved.Ifthesurfaceorunit
must be moved, please return the U-Chill to its original packaging and install once the surface/unit is
initsnallocationandposition.
Damages to the appliance, as a result of transporting while installed are not covered under the
U-Chill warranty.
10. SAFETY NOTICE - IMPORTANT
This appliance should not be used by children of any age, or persons with reduced physical,
sensory, or mental capacities, unless supervised by an adult at all times.
When U-Chill is on and in Boost mode, individuals should refrain from putting their hand deep
within the lower part of the chamber, due to hazards from cold surfaces.
Forstability,andtoavoidhazards,theappliancemustbexedinaccordancewiththeincluded
installation instructions.
We recommend unplugging the U-Chill when not in use.

customercare@u-line.com or call us at +1.414.354.0300
This guide is available online at u-line.com/u-chill
For additional support, please contact:For additional support, please contact:
u-line.com/u-chill
