Do not attempt to pierce, strike, or apply strong pressure to the
unit with sharp or heavy objects. Strong impacts or shocks could
cause irreversible damage.
Dropping or mishandling the mount may cause irreversible
damage to the unit and its batteries. Do not expose to or
submerge in water.
Keep the unit away from small children at all times or ensure
strict supervision by an adult. The unit contains small parts and
may pose a choking hazard.
Do not use the unit in the vicinity of flammable fumes or gases
(such as propane tanks or large engines).
Do not expose the mount to fire, direct sunlight, dust, high levels
of humidity, or other hot locations, as this may cause the battery
to generate heat, ignite, or explode.
Do not attempt to operate the unit using any method other than
directed.
Please use a safe, certified charger to power your device. Keep
the charger dry at all times to prevent corrosion of electronic
circuits.
Do not use harsh chemicals, cleaning solvents, or strong
detergents to clean the unit.
Do not attempt to disassemble or modify the unit in any way.
Immediately discontinue use if the unit has any visibly exposed
parts or appears multifunctional in any way.
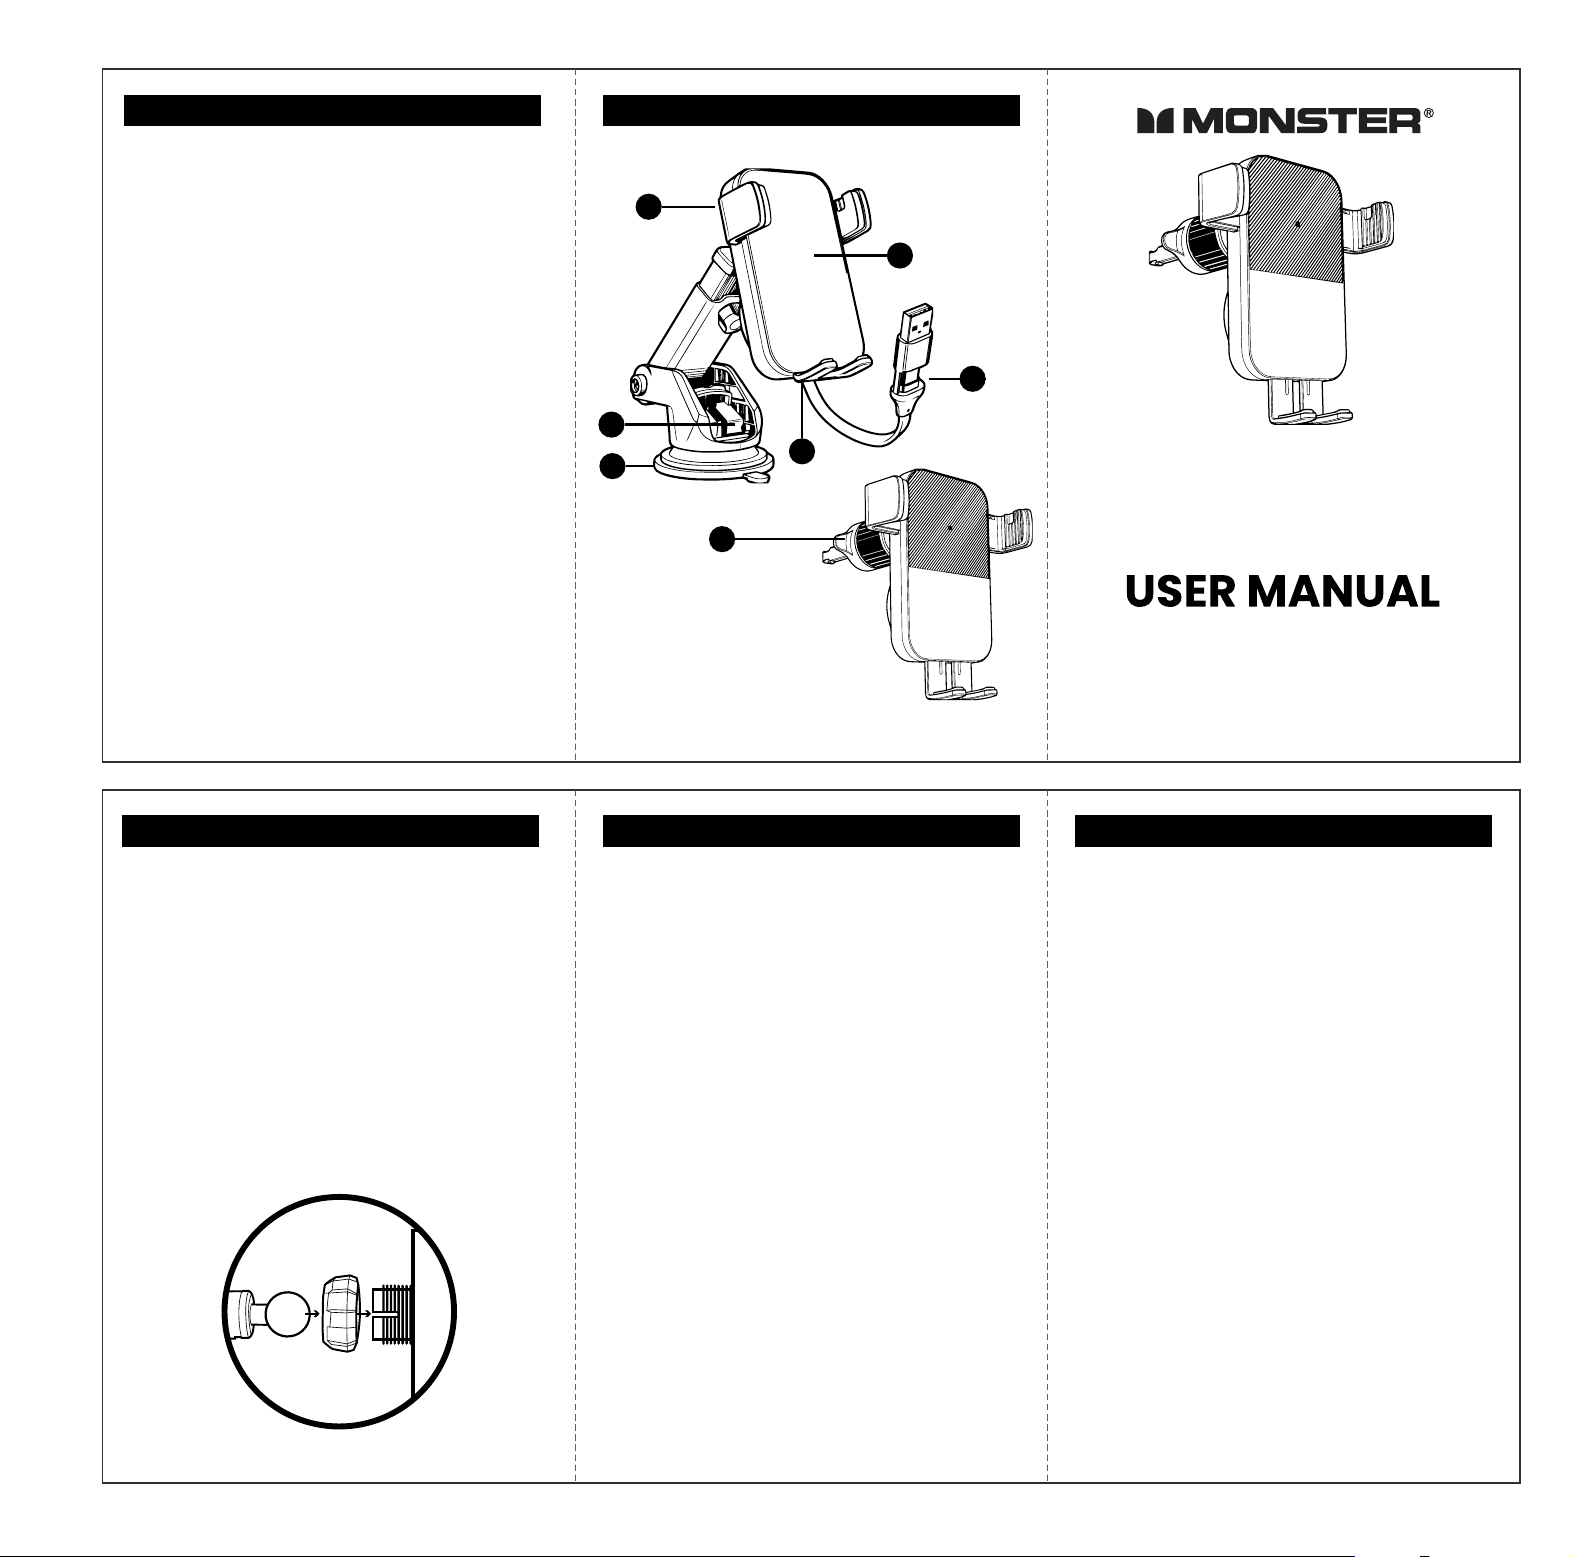
Insert the Dash Mount Ball Head (A) into the Ball Joint Socket
(C) located on the back of the wireless charger. Turn the locking
nut (B) clockwise to assemble and secure the charger.
DASHBOARD / WINDSHIELD
Place the Dash Mount on your dashboard or windshield in the
desired location. Secure the suction cup using the (7) Suction
lock lever
Connect your wireless charger to your car's power source using
the retractable charging cable.
Place your phone onto the wireless charger to begin charging.
AIR VENT CLIP
Rotate the rolling ball to release the hook.
Attach the hook to your air vent, then rotate the ball backwards
to tighten.
To begin charging, first connect your device to the car's power
source by plugging the retractable 2-in-1 cable into your car
charger.
Once the mount is powered, press the clamp open button to
extend the clamp arms.
Place your phone into the cradle, where the clamp arms will
hold it securely against the charging area to initiate wireless
charging.
If your phone does not begin charging immediately, ensure that
the cable is firmly connected to both the power source and the
mount, and verify that your phone is correctly centered within
the charging area.
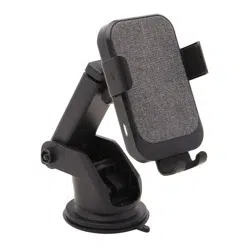
1. Clamp arm
2. Charging area
3. Extendable clamp bottom
holder
4. 2-in-1 USB-A & USB-C
charging cable
5. Air vent clip
6. Clamp open button
7. Suction base (for
windshield/dashboard)
MODEL: 2MNCM1013
FCC STATEMENTSAFETY WARNINGS
PRODUCT FEATURESCHARGING
MOUNTING
This device complies with part 15 of the FCC Rules. Operation is
subject to the following two conditions
(1) This device may not cause harmful interference, and
(2) this device must accept any interference received, including
interference that may cause undesired operation. Any Changes
or modifications not expressly approved by the party
responsible for compliance could void the user's authority to
operate the equipment.
Note: This equipment has been tested and found to comply with
the limits for a Class B digital device pursuant to part 15 of the
FCC Rules. These limits are designed to provide reasonable
protection against harmful interference in a residential
installation. This equipment generates uses and can radiate
radio frequency energy and, if not installed and used in
accordance with the instructions, may cause harmful
interference to radio communications. However, there is no
guarantee that interference will not occur in a particular
installation. If this equipment does cause harmful interference
to radio or television reception, which can be determined by
turning the equipment o and on, the user is encouraged to try
to correct the interference by one or more of the following
measures:
-Reorient or relocate the receiving antenna. -Increase the
separation between the equipment and receiver.
-Connect the equipment into an outlet on a circuit dierent from
that to which the receiver is connected
-Consult the dealer or an experienced radio/TV technician for
help.
This equipment complies with FCC radiation exposure limits set
forth for an uncontrolled environment. This equipment should
be installed and operated with minimum distance 20cm
between the radiator & your body.
Connecting the Ball joint to the car mount
Input: 5V/3A, 9V/2A, 12V/1.67A
Output: 5W/7.5W/10W/15W
Cable Length: 80 cm
2026© Lifeworks Technology Group LLC. New York, NY 10018. The M Monster logo and the M slice logo are
trademarks or registered trademarks of Monster Inc. or its subsidiaries in the U.S. and other countries and are
used under license. Manufactured, licensed, marketed and distributed by Lifeworks Technology Group LLC.
iPhone® is a trademark of Apple Inc., registered in the U.S. and other countries. All other brands and logos are
trademarks of their respective companies.USB Type-C® and USB-C® are trademarks of USB Implementers
Forum. *Actual products may dier slightly from Images. Made in China.
Compatible with wireless charging enabled smart phones*. Wireless charging performance may be aected by
thick, metal, or magnetic phone cases. For best results, ensure your case is compatible with wireless charging
(A)
(B)
(C)
CAR MOUNT
WITH 2-IN-1 RETRACTABLE CABLE
DASHBOARD | WINDSHIELD | AIR VENT CLIP
3-IN-1 WIRELESS CHARGING
1
2
7
6
5
4
3