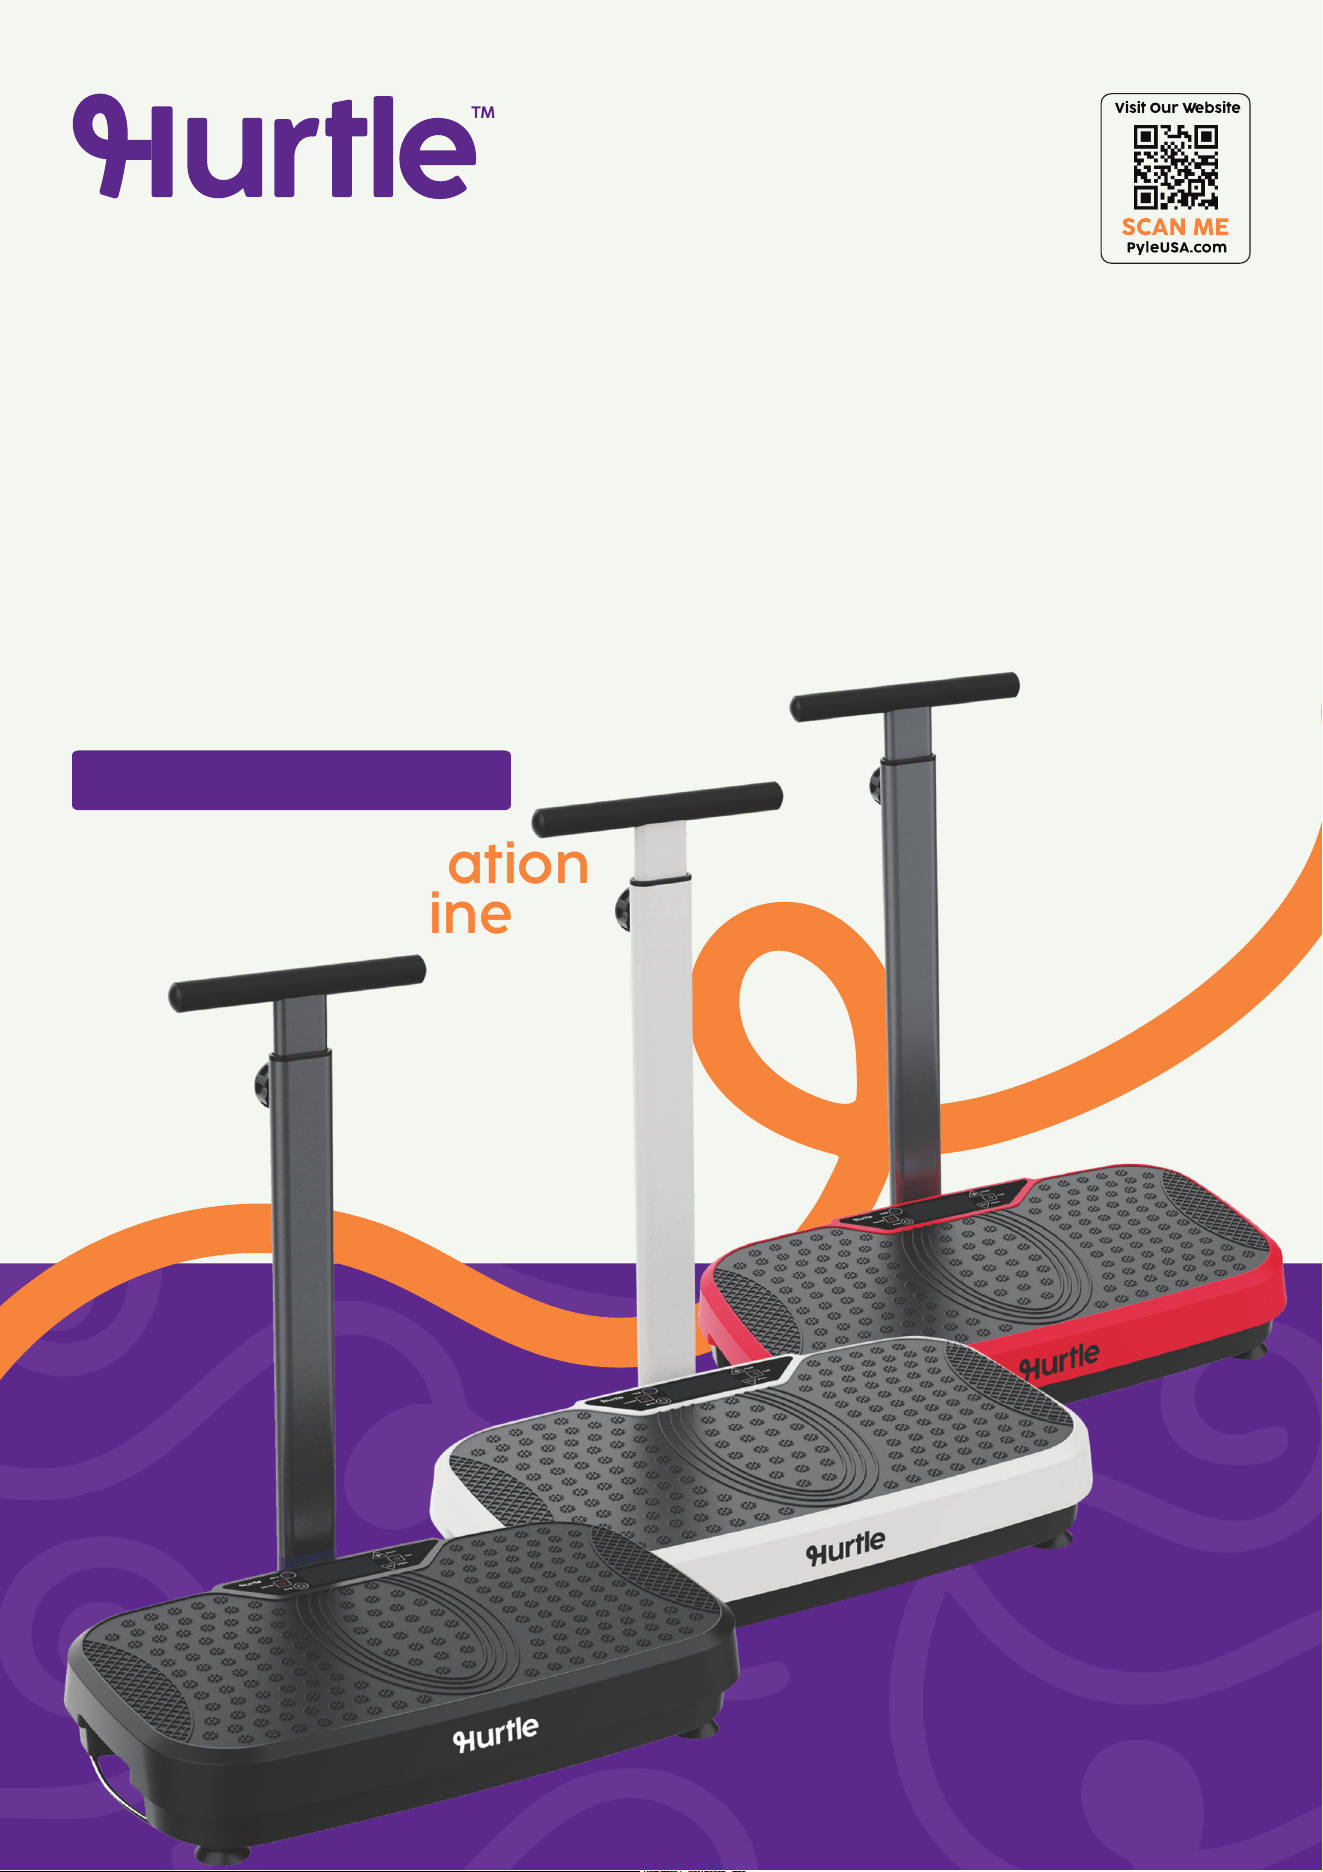
USER
MANUAL
HURVBTRHB Series
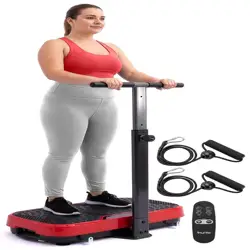
Standing Vibration
Fitness Machine
2
important safety precautions
• Epilepsy
• Severe diabetes
• Heart and vascular
diseases
• Skin disease
• Asthma or other
respiratory disorders
• Hypertension
• Spinal disc herniation
or other spinal
abnormalities
• Knee or hip implants
• Pacemaker
• Bone fractures or joint problems
• Recently inserted IUD or metal pins
• Blood clots
• Tumors
• Recent infections
• Pregnancy
• Women during their menstrual cycle
• Severe migraines
• Patients recovering from surgery
Read all instructions before using the unit. When using an electric
apparatus, basic precautions should always be followed, including
the following:
DANGER: To reduce the risk of electric shock
• Always remove the power plug from the electrical outlet
immediately after use.
• Always remove the power plug from the electrical outlet before
cleaning.
WARNING: To reduce the risk of burns, re, electric shock, or injury to
persons
• To reduce the risk of short-circuit and fire, always insert the power
plug completely into the outlet.
• Before turning ON the unit, check to make sure that electrical
current in your power outlet matches the voltage indicated on
the unit's power adapter.
Before Use
• Do not operate this unit during thunderstorms and lightning strikes.
• If you have experienced previous illness, or are concerned about your
current level, please consult your doctor before using this unit. Persons
with the following conditions should check with a doctor before using
this unit:
• Close supervision is necessary when the unit is used by, on, or near children.
• This unit is NOT intended for use by persons with reduced physical, sensory,
or mental capacities, invalids, or disabled persons, unless supervised closely
by a person responsible for their safety
important safety precautions
• Do not allow pets to use this unit.
• Do not load heavy objects onto the unit.
• Only operate this unit according to its intended usage, as described
in this manual.
• Use caution when moving the unit from one location to another.
Dragging it over certain surfaces, such as wood or tile, may result in
damage.
• Do not work out on the unit within 30 minutes before and after meals.
• Do not operate this unit for any purposes other than exercise.
• Drink plenty of water both before and after use.
• Do not wrap the power cord around the unit's footplate.
• Do not drop or insert any object into any opening on the unit.
• Do not strike the unit, especially with any hard objects.
• Keep children and pets away from the unit at all times.
During Use
This unit was built to be used by ONE person at a time. Injury or damage
may result if two or more people step on the plate at the same time.
• Do not jog or hop up and down on the footplate.
• Do not kneel on the footplate. Vibration is not intended to the knees.
• Always balance your weight on the foolplate. Do not load all of your body
weight on one side or the other.
• Do not touch or operate this unit with wet or humid hands. Electric shock
or malfunction may result.
• Be careful with the remote control. Damage may result if it falls onto the
ground or the footplate.
• Stop using the unit if you experience any discomfort. Consult a doctor
immediately.
• Do not strike or apply excessive force on the unit. Injury and/or malfunction
may result.
• While working out on the unit, do not remain in the same pose for over
10 minutes. Muscle cramping may result.
• Do not work out on this unit more than four times a day.
After Use
• After each session, turn o the power and disconnect the power
plug from the wall outlet. (Running electricity may cause re or
electric shock).
• Remember to drink plenty of water both before and after use.
• If the unit needs cleaning, use only a dry cloth to do so. Keep
any moisture away from the unit.
3
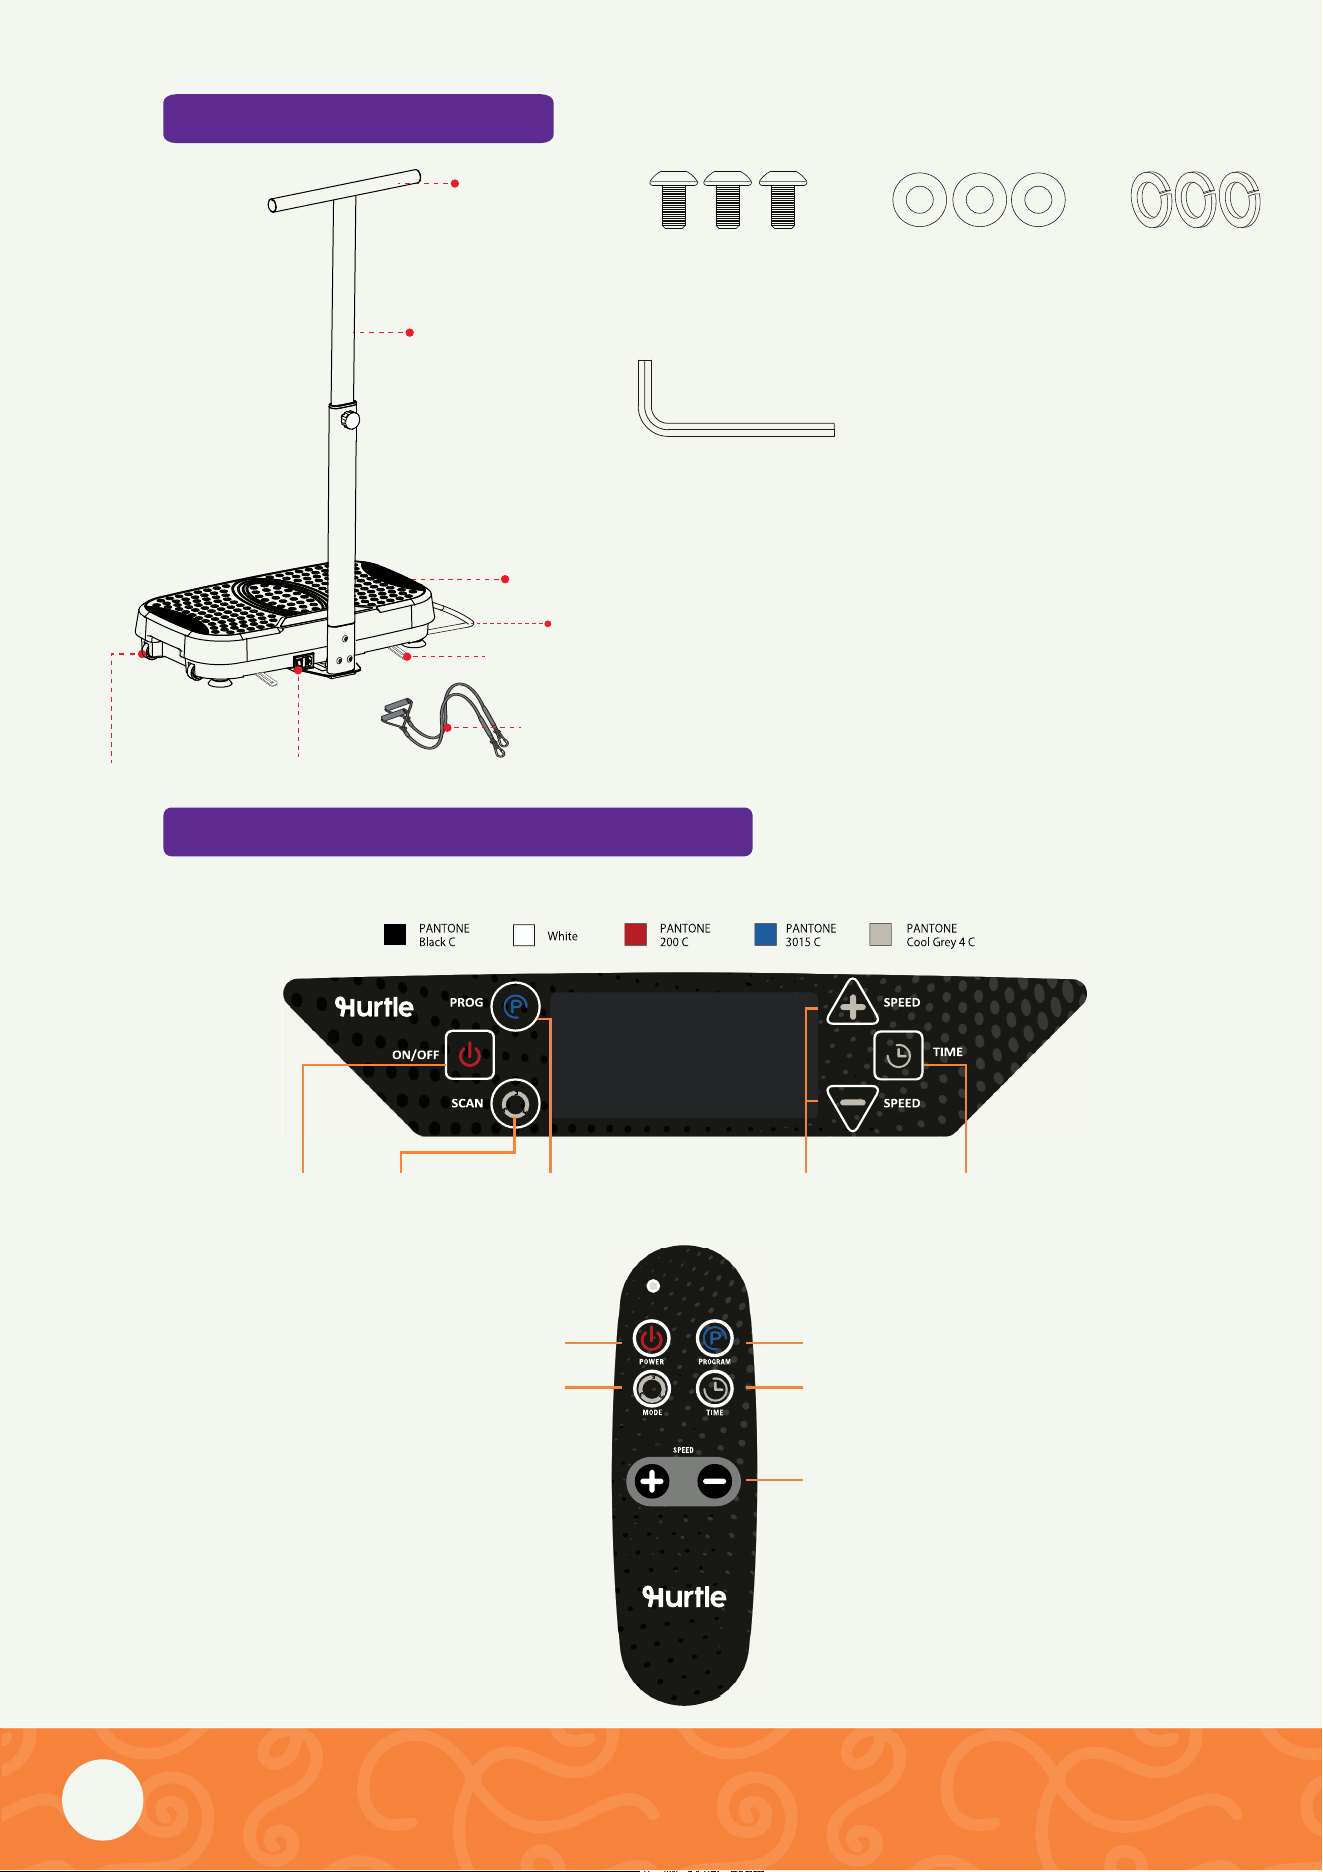
Program ButtonOn/Off Button
on/off
button
mode
button
speed
buttons
time
buttons
program
button
Program Button
Time Button
Speed Button
part names & tool kits
control panel and remote control
4
Wheels
Telescopic Tube
Handle
Main Unit
Carrying Handle
Power Switch
Resistance Band Grips
Resistance Bands
M8x16mm
Hex Bolt x 3
Curve Washer
x 3
Spring Washer
x 3
5#/ Allen Wench
x 1
operation
1. Insert the Fitness Machine's power plug into a standard electrical outlet.
2. Flip the power switch to the “ON” position. The unit will enter “Standby”
mode, indicated by a couple of beeps and four horizontal dashes on the
control panel.
Steps below can be conducted using either the keys on the control panel
or on the remote control:
3. Press to begin operation. Vibrating action begins in Manual mode P1,
initially set at Speed 1, running for 10 minutes.
a. In Manual Mode (P1), the timer can be set between 1 and 20 minutes.
Press to add time in increments of 1 minute.
b. In Manual Mode (P1), vibration speed can be adjusted in increments
between 1 and 99 using or or
4. To use one of the automatic programs, press . Each press cycles
through one of the Program Modes: P2, P3, and P4 are pre-set programs.
Each auto program is 10 minutes long, and features vibration speeds
that vary in intensity through out. (Returning to P1 will return you to
Manual Mode.)
automatic programs
Note: Program 1 (P1) is considered “manual mode.” It will start at speed
level1 and will run for 10 minutes. Follow instructions to manually adjust the
speed and duration settings for P1.
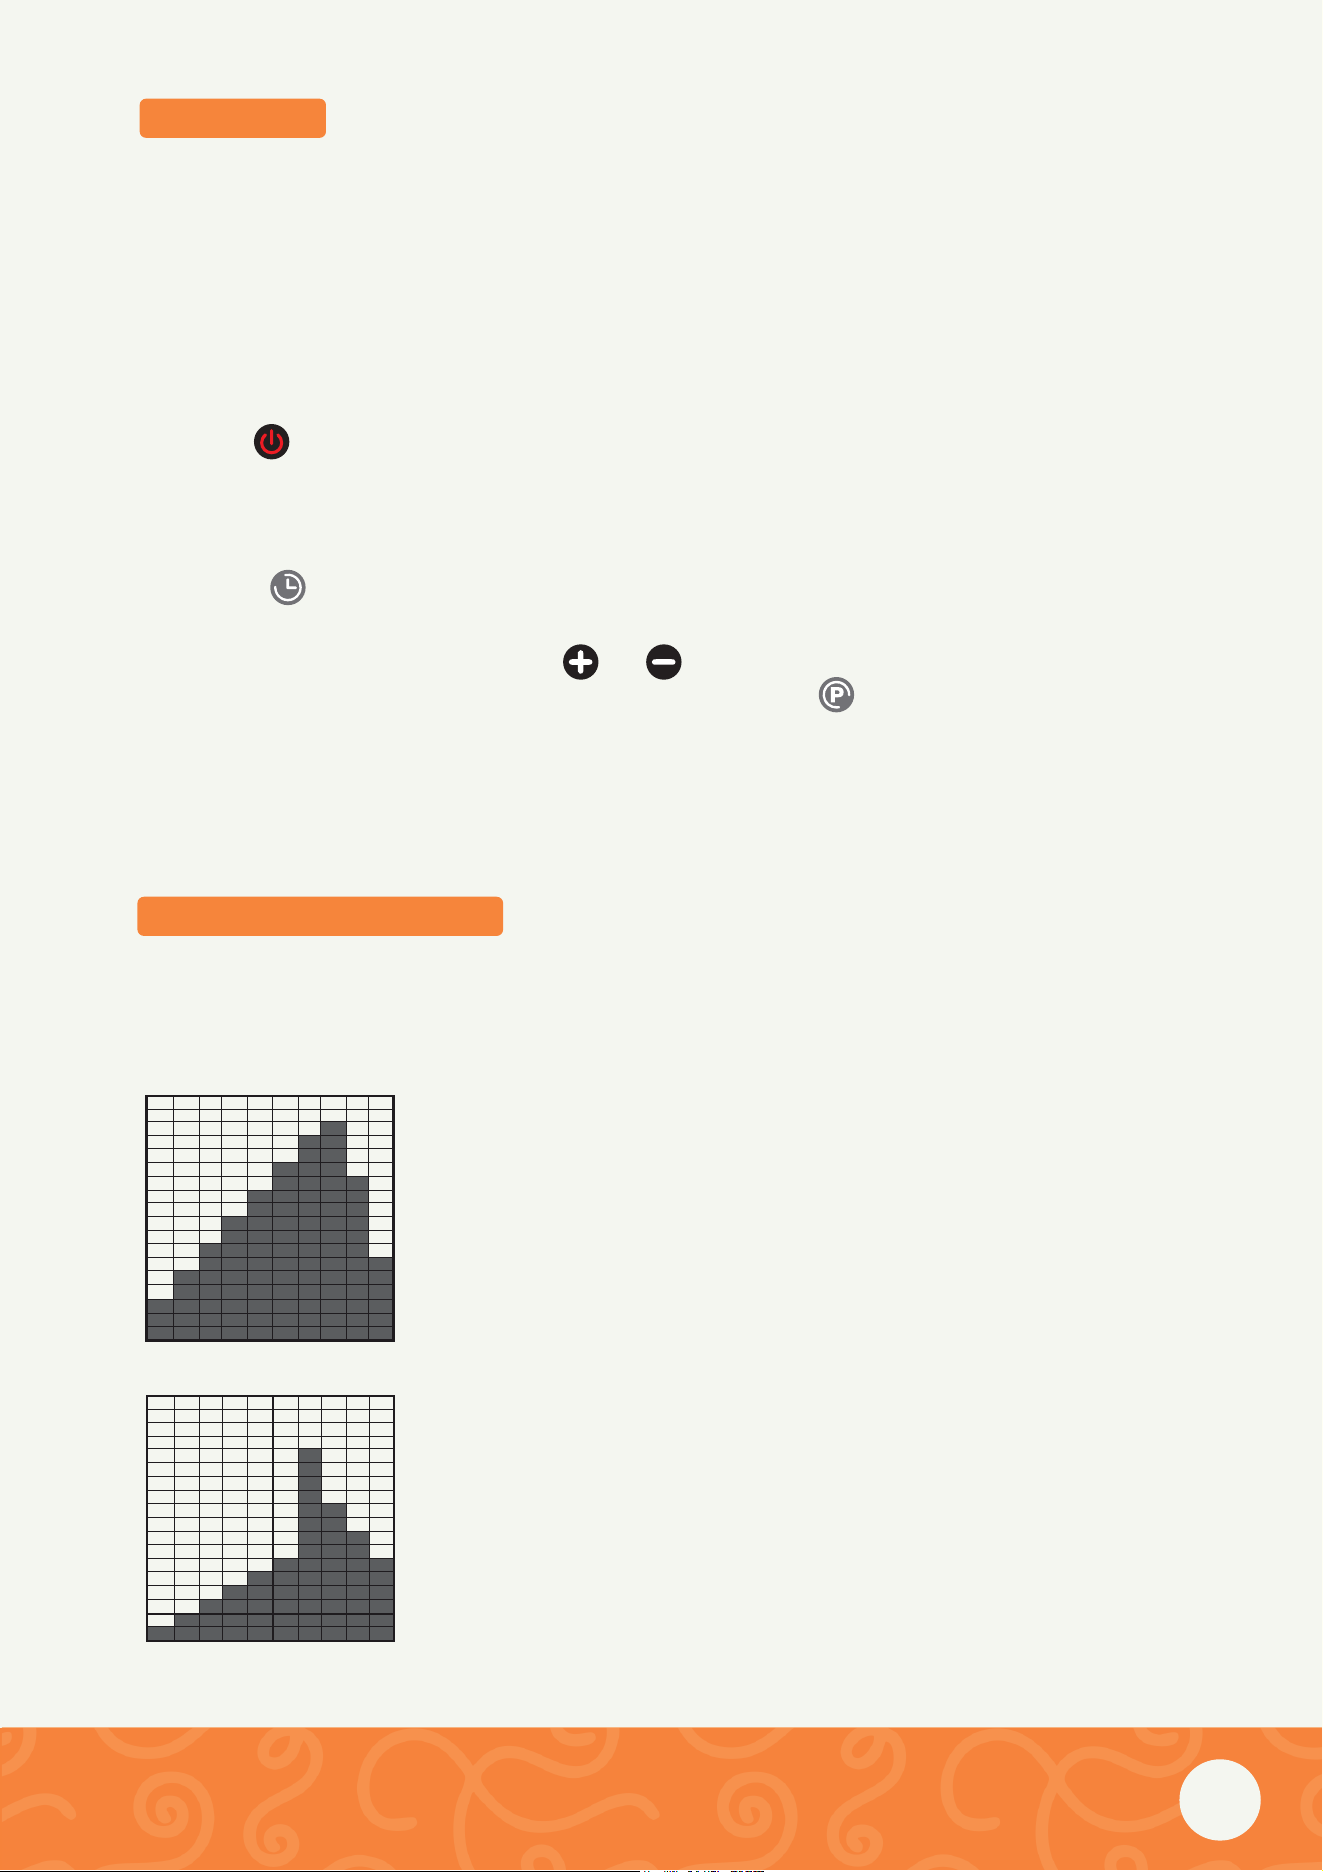
Program 2 (P2):
Quick climb and cool down. P2 will start at speed
10 and increase 10 speed levels per minute until it
reaches speed 80. In the �nal 3 minutes, speed will
be gradually reduced
Program 3 (P3):
Gentle climb. P3 will start at speed 30 and will
gently raise to a maximum speed of 90
5
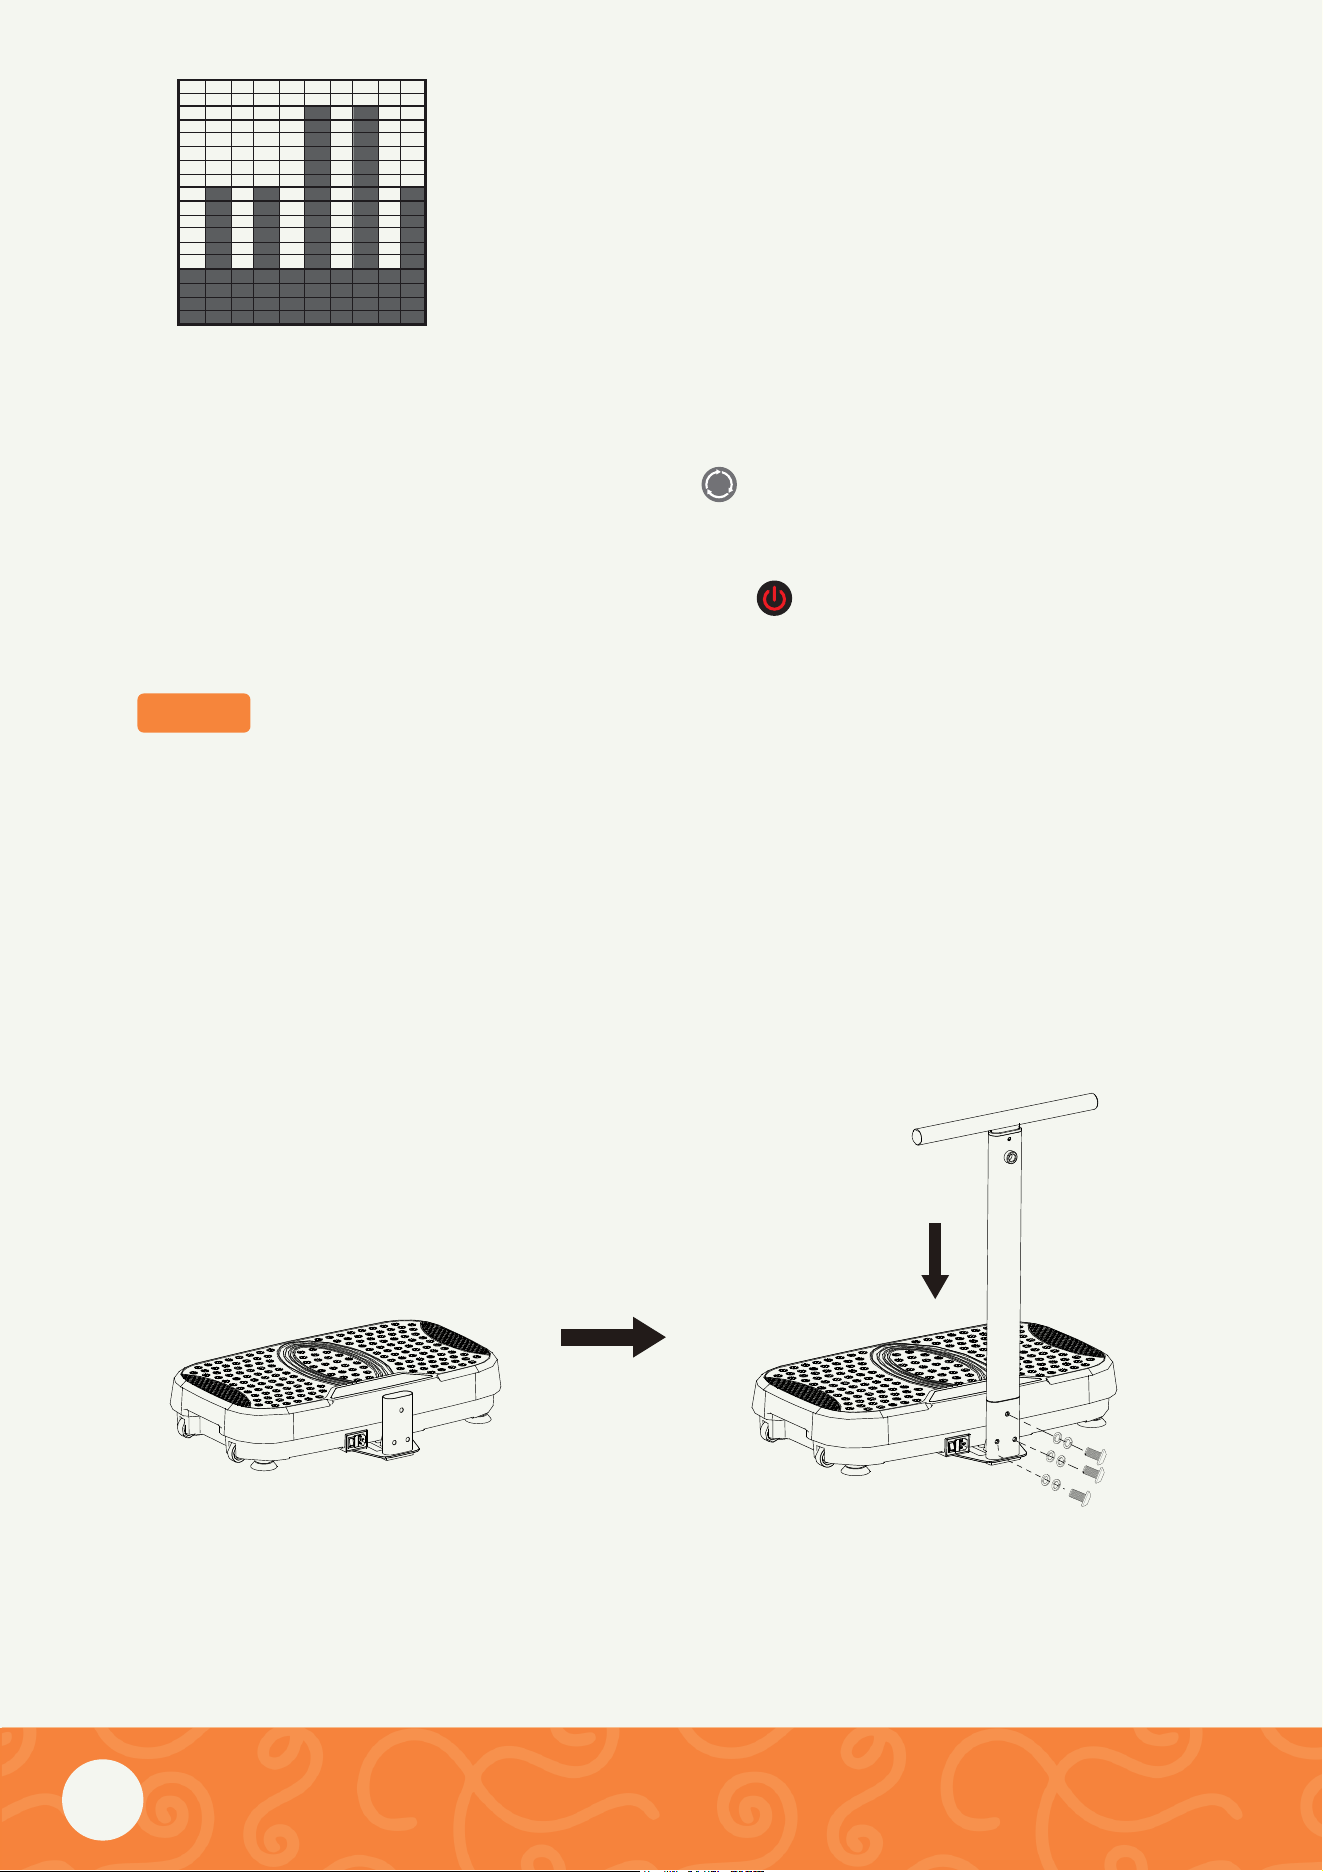
Program 4 (P4):
Interval training. P4 will follow a slow/fast pattern,
switching each minute, with a maximum speed of
80
Note: While any Automatic mode is in operation, massage speed and time
selections are disabled.
5. During any massage program, press to scroll through display of
calories burned, vibration speed, and time elapsed.
6. To end your massage at any point, press
setup
1. Locate the handle underneath one edge of the platform. Tilt this entire
platform upward to form a 45˚ angle with the floor beneath. With the
weight of the platform now on its wheels, pull to draw the handle out to its
full length. Grasp the handle to move the entire unit to your desired
placement location.
2. Set the platform onto a smooth, level surface. To prevent possible injury,
leave at least 3 feet of space on either side.
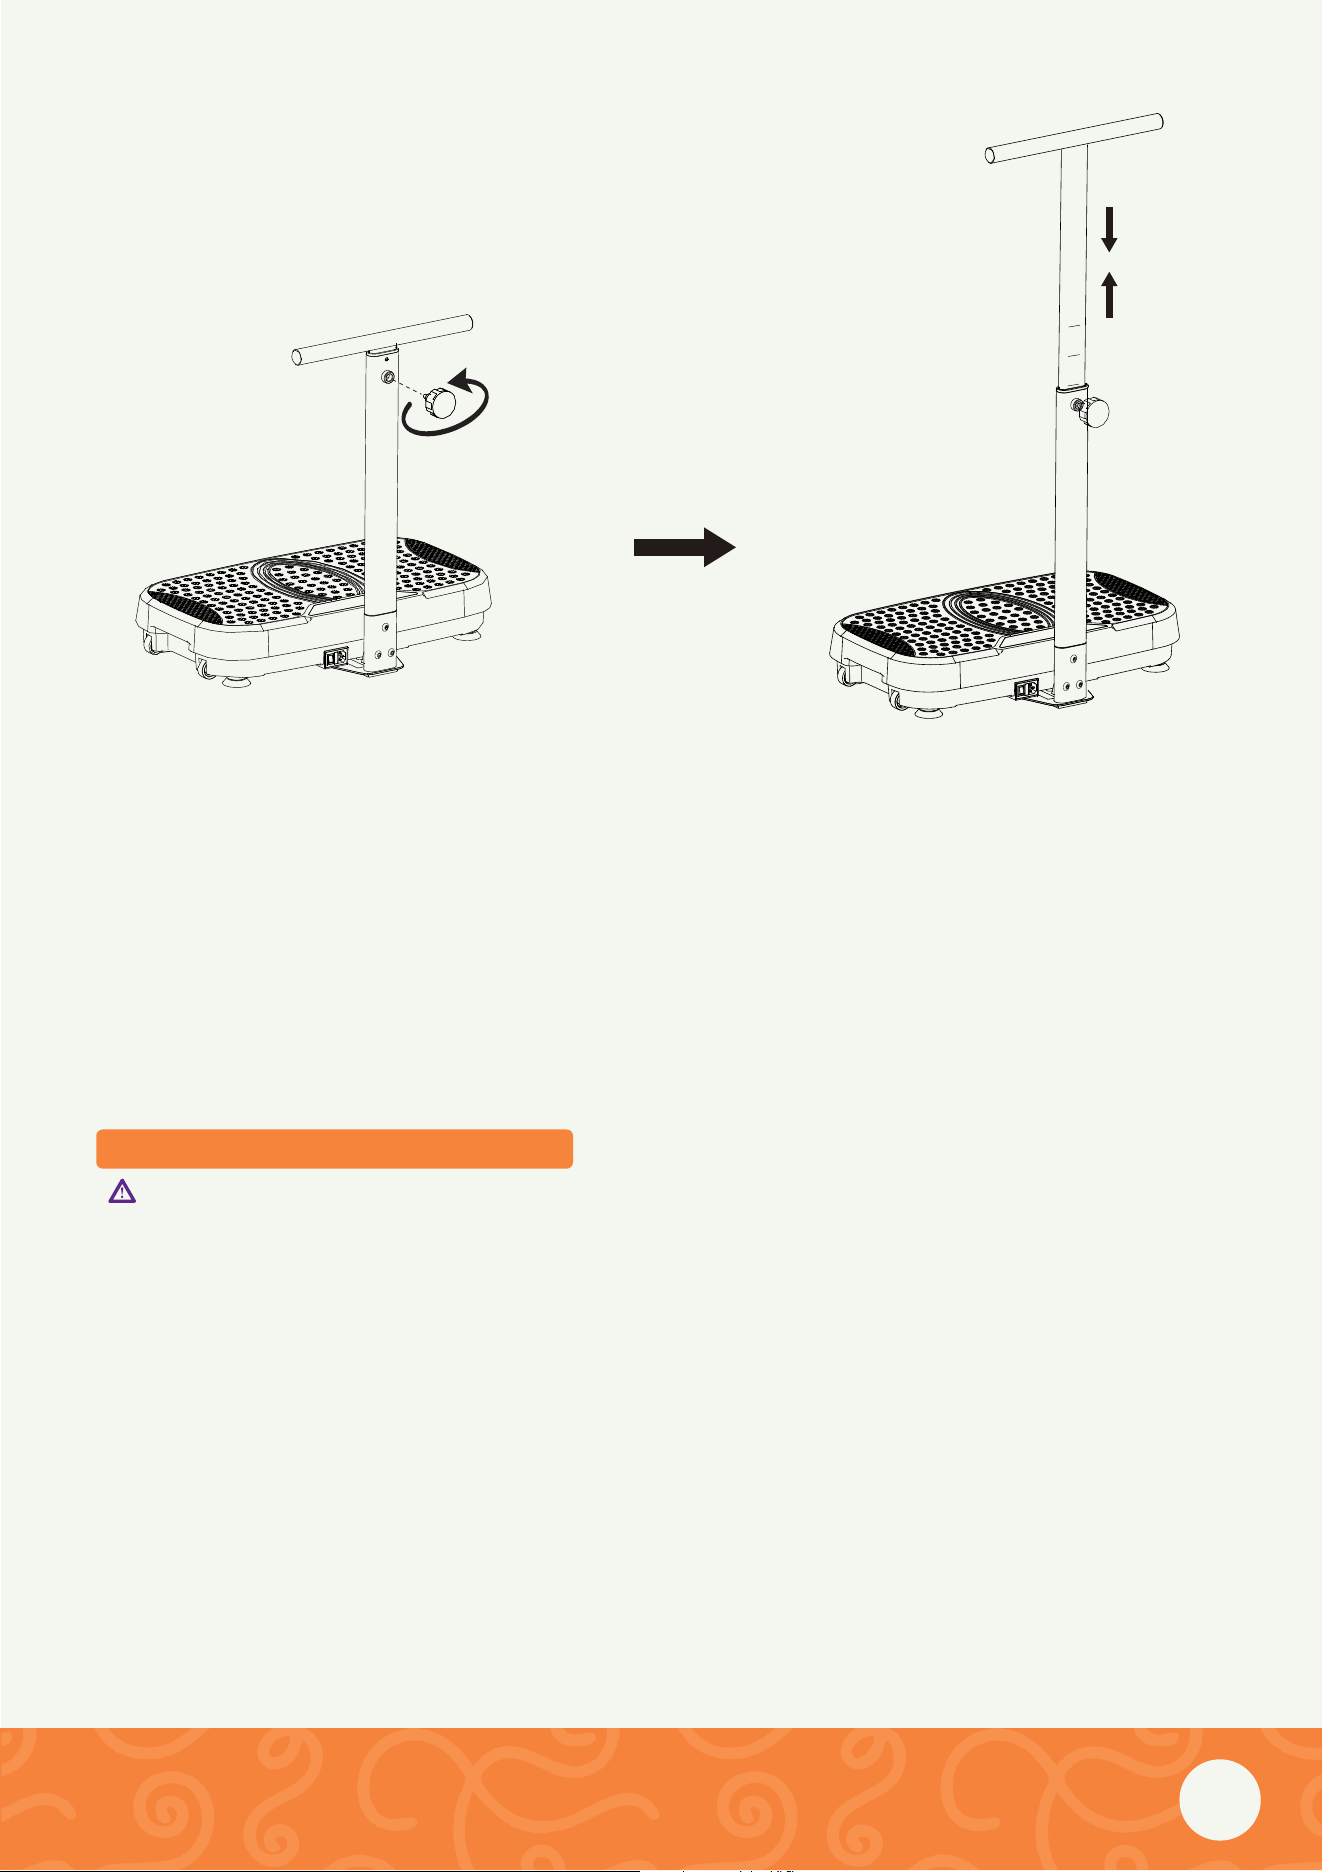
3. Place the telescopic tube onto the base frame, use three M8x16mm Hex
Bolts, three Curve Washers and three Spring Washers to tighten it.
4. Adjust the telescopic tube to your desired height, tighten it by the spring
knob provided.
6
7
5. Unwind the power cord and insert the plug into an electrical outlet.
6. Insert 2 AAA batteries intor the battery compartment of the remote control.
• Batteries should be recycled or disposed of as far state and local guidelines.
• Install only new batteries of the same type in your product.
• Failure to insert batteries in the correct polarity, as indicated in the battery
compartment, may shorten the life of the batteries or cause batteries to leak.
• Don not mix Alkaline, Standard (Carbon-Zinc) or Rechargeable (Nickel Cadmium)
or (Nickel Metal Hydride) batteries.
• Do not dispose of batteries in fire.
cleaning and maintenance
DANGER
To reduce the risk of electric shock
Avoid spraying water on the unit. Avoid immersing the unit or any of its
parts in water or any other type of liquid.
1. Wipe all surfaces of the unit with a soft, damp cloth on a regular basis to
remove excessive accumulation of dust, dirt, sweat, and other substances,
especially alter each workout.
Do not treat with abrasive solvents.
2. When this unit is not being used, store it in a dry location.
Do not store neat intense heat or an open �flame
3. Do not leave the unit under direct sunlight for prolonged periods of time
4. Keep the unit out of the reach of pets and young children.
5. We recommend placing the unit back into its original packaging for storage
Spring Knob

features and technical specs
Features:
• Revolutionary Design for Fitness that's Fun
• Vibration Assisted Exercise for Full Body Training
• Excellent Toning for Abs, Thighs & Buttocks
• 3 Presets Program for Maximum Workout
• Next Generation Dyanmic Oscillating Motion Technology
• High-Powered Vibrations do the Hard Work
• Accelerated Fat Burning & Weight Loss
• Incorporates Upper Body, Lower Body & Core Workouts
• Lab Tested to Improve Muscle Strength, Flexibility & Circulation
• Detachable Handheld Resistance Bands for More Versatile Routines
• Reduce Appearance of Cellulite, Improves Metabolic Rates
• Simple Operation: Stand On & Power On
• Ideal for All Body Types & Age Groups
• (99) Level Adjustable Speeds
• Digital Touch Button Controls
• Rubber Grip 'Anti-Slip' Surface Pad
• Compact and Portable with Carrying Handle and Wheels
• Perfect for Sports Training, Weight Loss, Burning Fat
• Includes Remote Control
What's in the Box:
• Vibration Machine
• Remote Control, (2) 'AAA' Included
• Power Cord
• User Manual
• (2) Resistance Band
• Telescopic Handle
• Spring Knob
• Tool Kit
Technical Specs:
• High Power Output: 300 Watt
• RPM (Revolutions Per Minute): 3300+ RPM
• Construction Material: Engineered ABS
• Maximum Session Time Setting: 20 Minutes
• Maximum Load Capacity: 265 lbs. (120.2 kg)
• Battery Operated Remote Control, Requires (2) x 'AAA' Batteries, Included
• Power Cord Length: 1.8m (70.8 inches) (180 cm)
• Power Output: 120V
• Dimensions (L x W x H):
26.77'' x 14.96'' x 43.5'' -inches (68 x 38 x 110.5 cm)
8
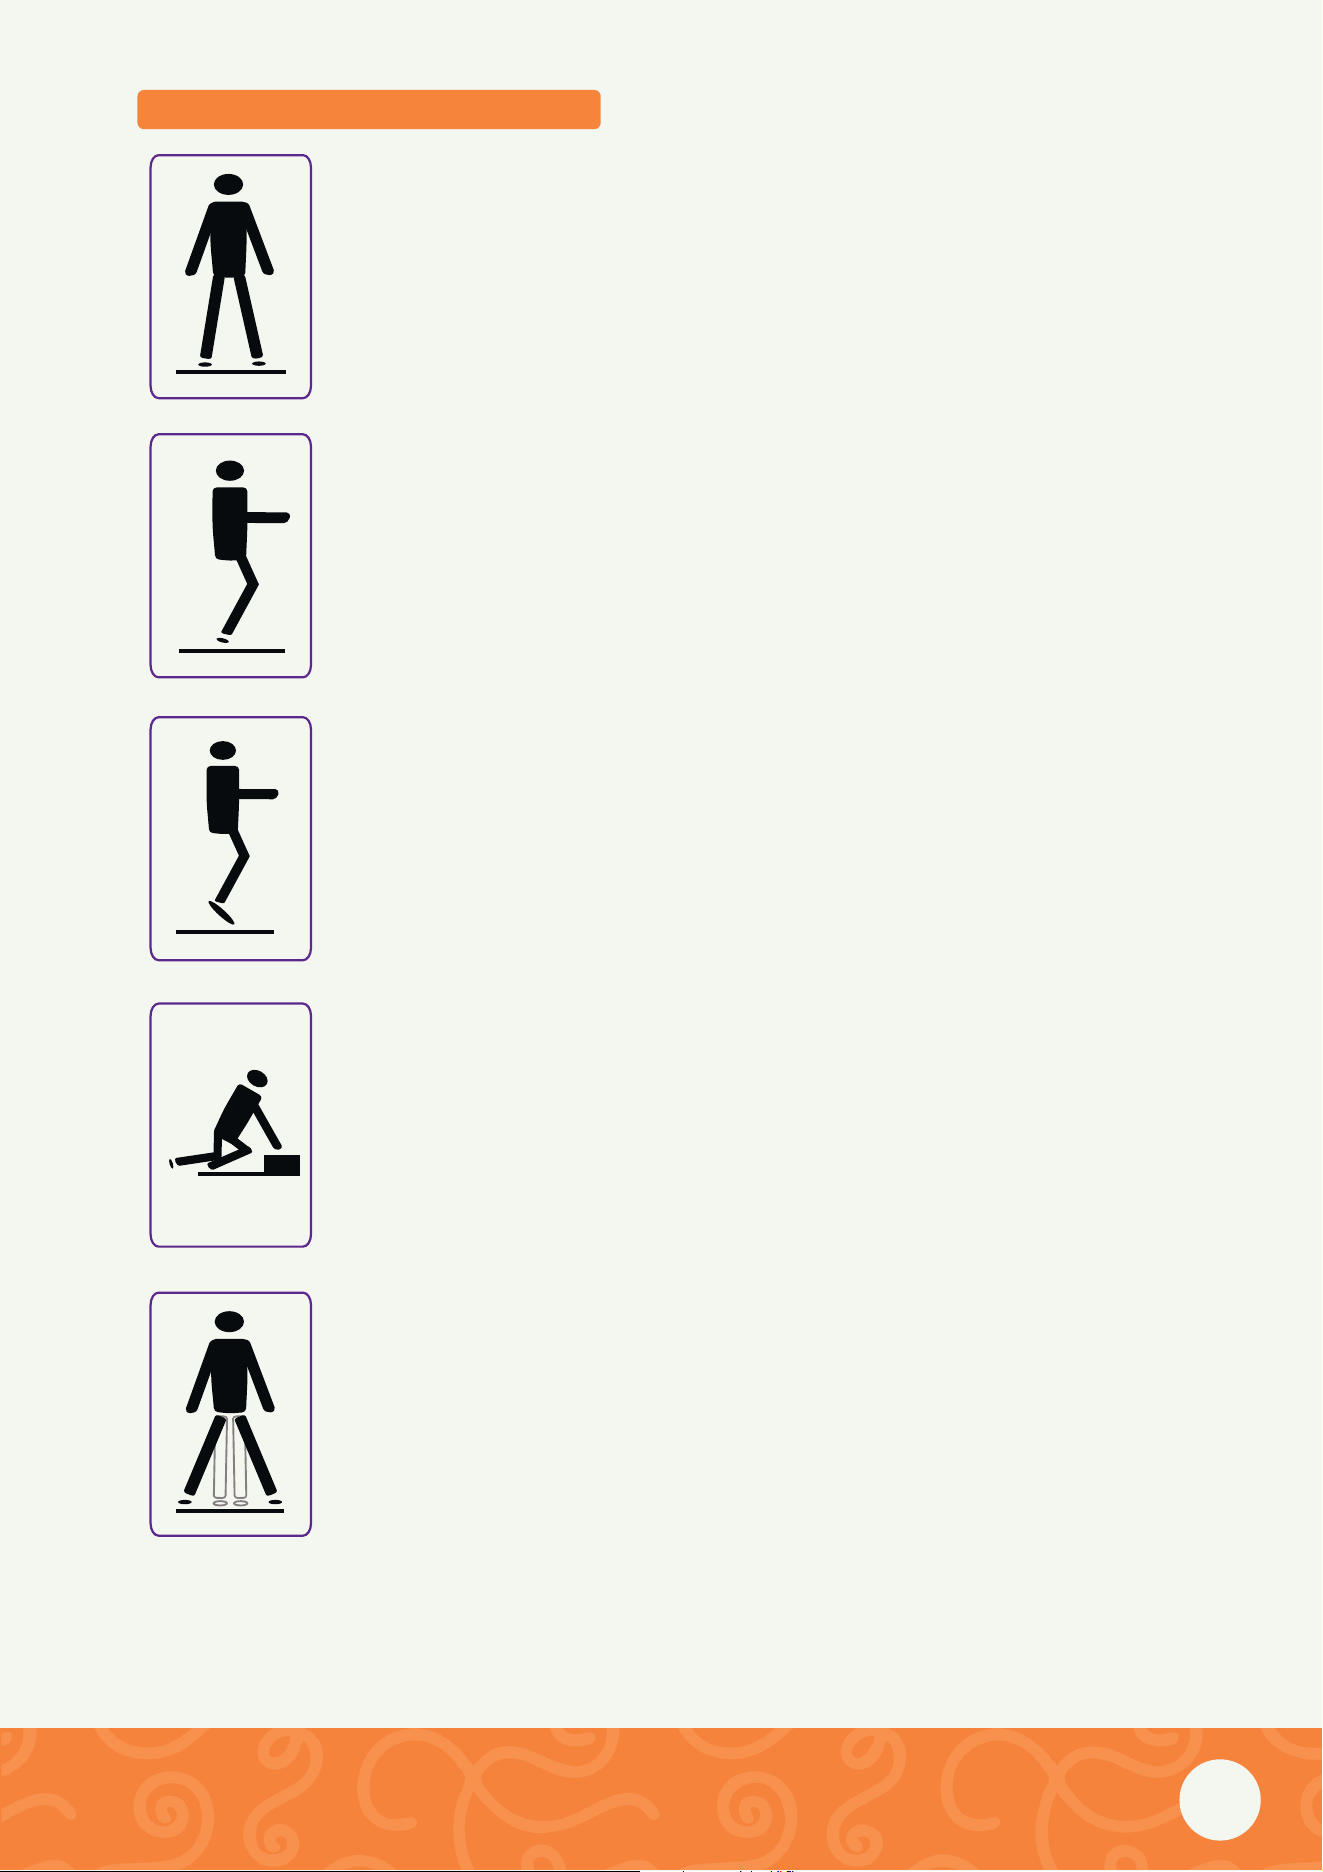
Standing position (5 minutes)
Stand on the platform with your feet shoulder-width apart,
Gripping the handles securely with both hands. This position
Works muscles in the back, waist, glutes, chest, and stomach.
Standing position (2 minutes)
Stand on the platform with your feet a bit wider apart than
Shoulder -width. Bend your knees to lower height about 6
Inches. This position works muscles in the glules, thighs, and
Along the vertebrae.
Tip toe position (2 minutes)
Stand on the platform with your feet a bit wider apart than
Shoulder -width. Bend your knees to lower your body height
About 6 inches. Lift your heels o� of the platform, shifting your
Weight onto your toes. This position works muscles in the feel,
Glutes, thighs, and along the vertebrae.
Starting block position (2 minutes)
Lower your self onto the �floor next to the unit, and place
your Palms onto the platform. Lean your upper body forward,
keeping Both legs slightly bent, your front leg at a sharper
angle than your Back leg. This position works muscles in the
shoulders, back, and Arms
Central pivoting position (2 minutes)
The hurvbtr36 uses a central pivoting system, meaning
that The further away you are from the center, the higher
the intensity. Change your stance to vary workout intensity.
Resistance band workout
Pair an upper-body workout with any usage position! Simply attach hooks
At the front end of the units platform.
workout reccomendations
9