Page1
JAMESBE/SDXSERIESINSTALL
Preliminaryv1
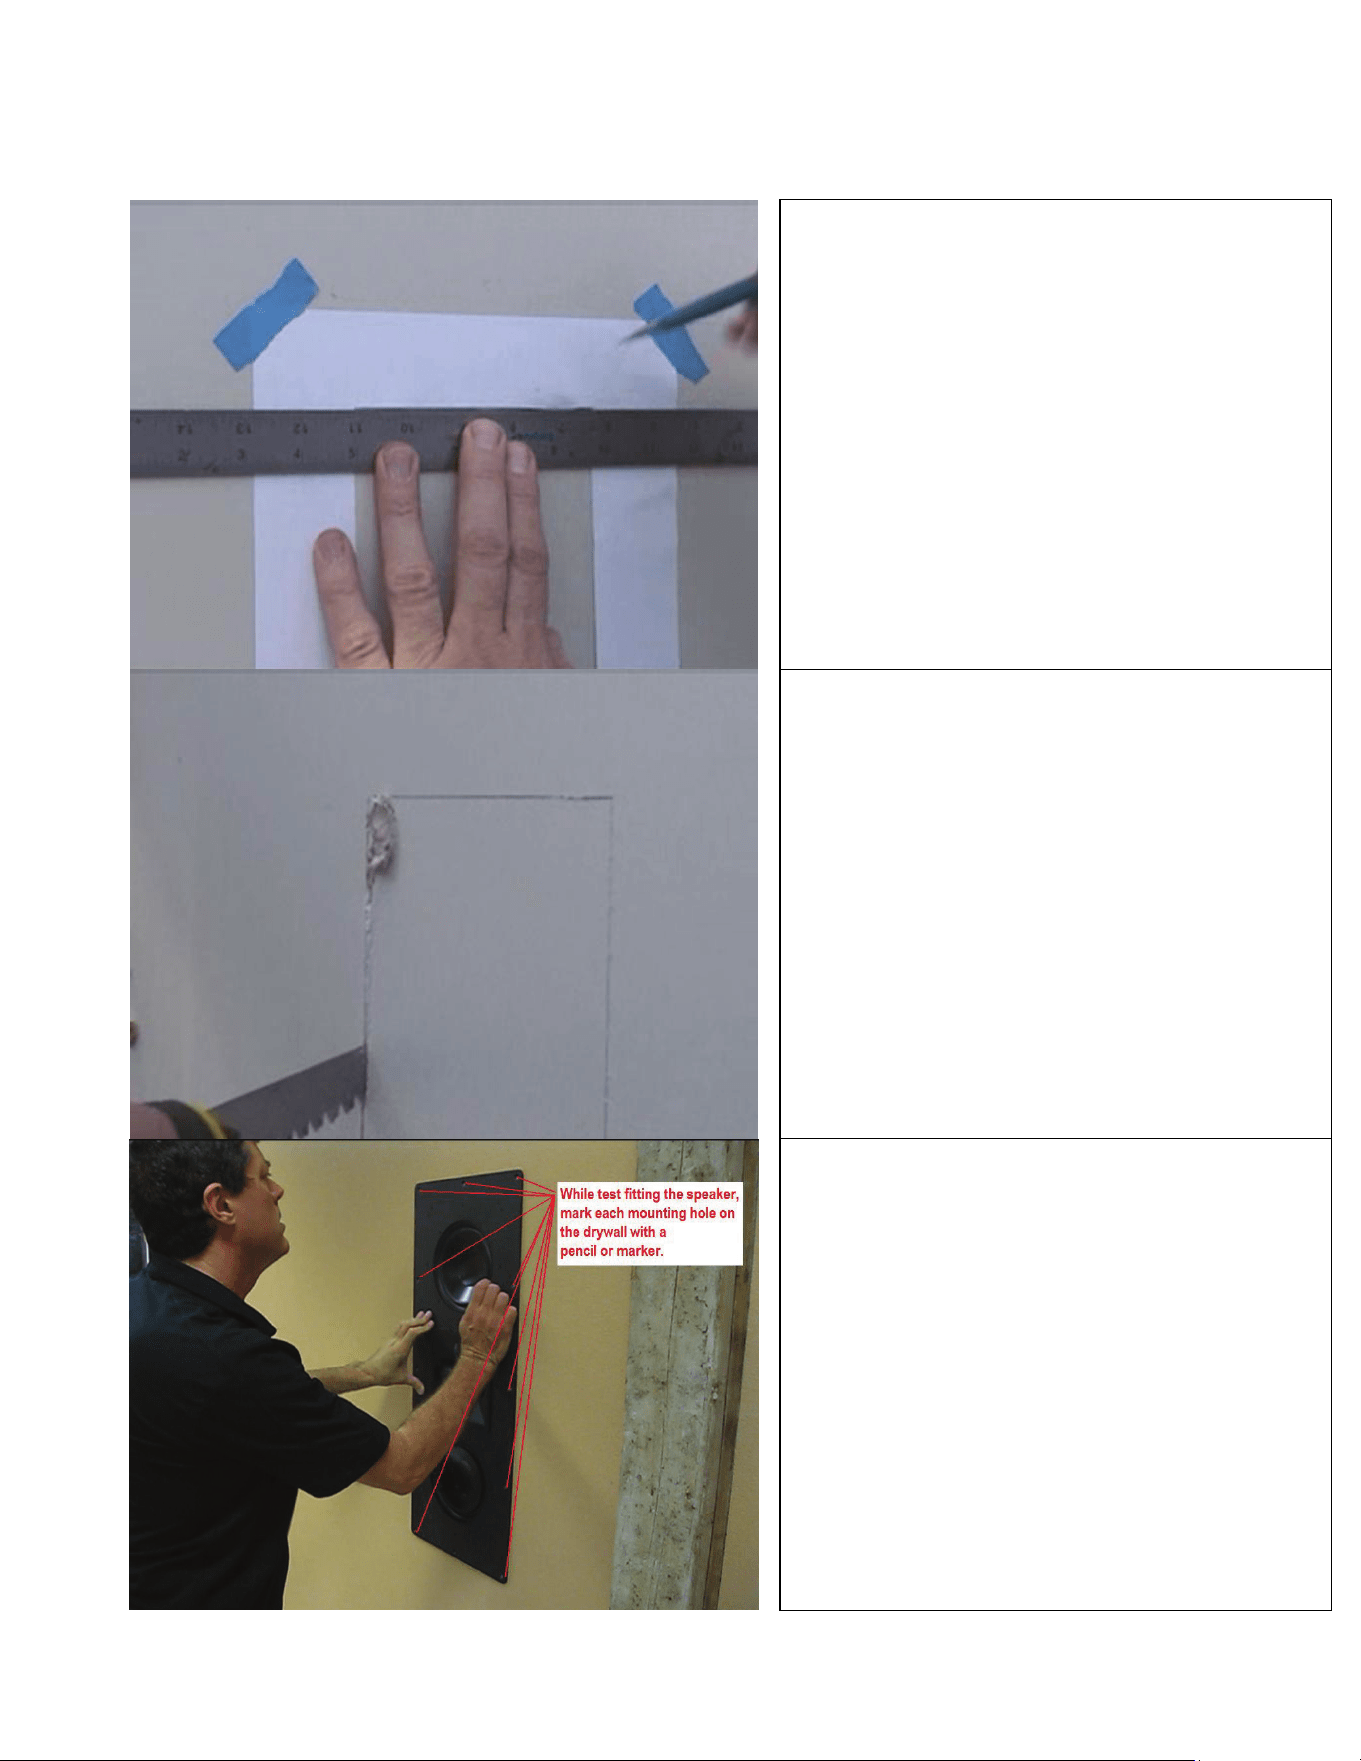
Markthewallwiththerequiredcutout
dimensionsfortheJamesmodelyouare
installing.Keeptheverticallinesplumbsothe
speakerwillbestraightwheninstalled.Alevel
shouldbeused.
AfterMarkingthewall,useyourpreferred
methodofcuttingthehole,eitherusingapower
toolorbyhand.
Aftermakingthecutout,testfitthespeakerto
makesurethespeakerfitsanddoesnotbind.
Whilethespeakerisinthewall,MARKEACH
MOUNTINGHOLELOCATIONwithapencil,
markerornailpunch.Theselocationswillbe
usedlaterasareference.
Page2
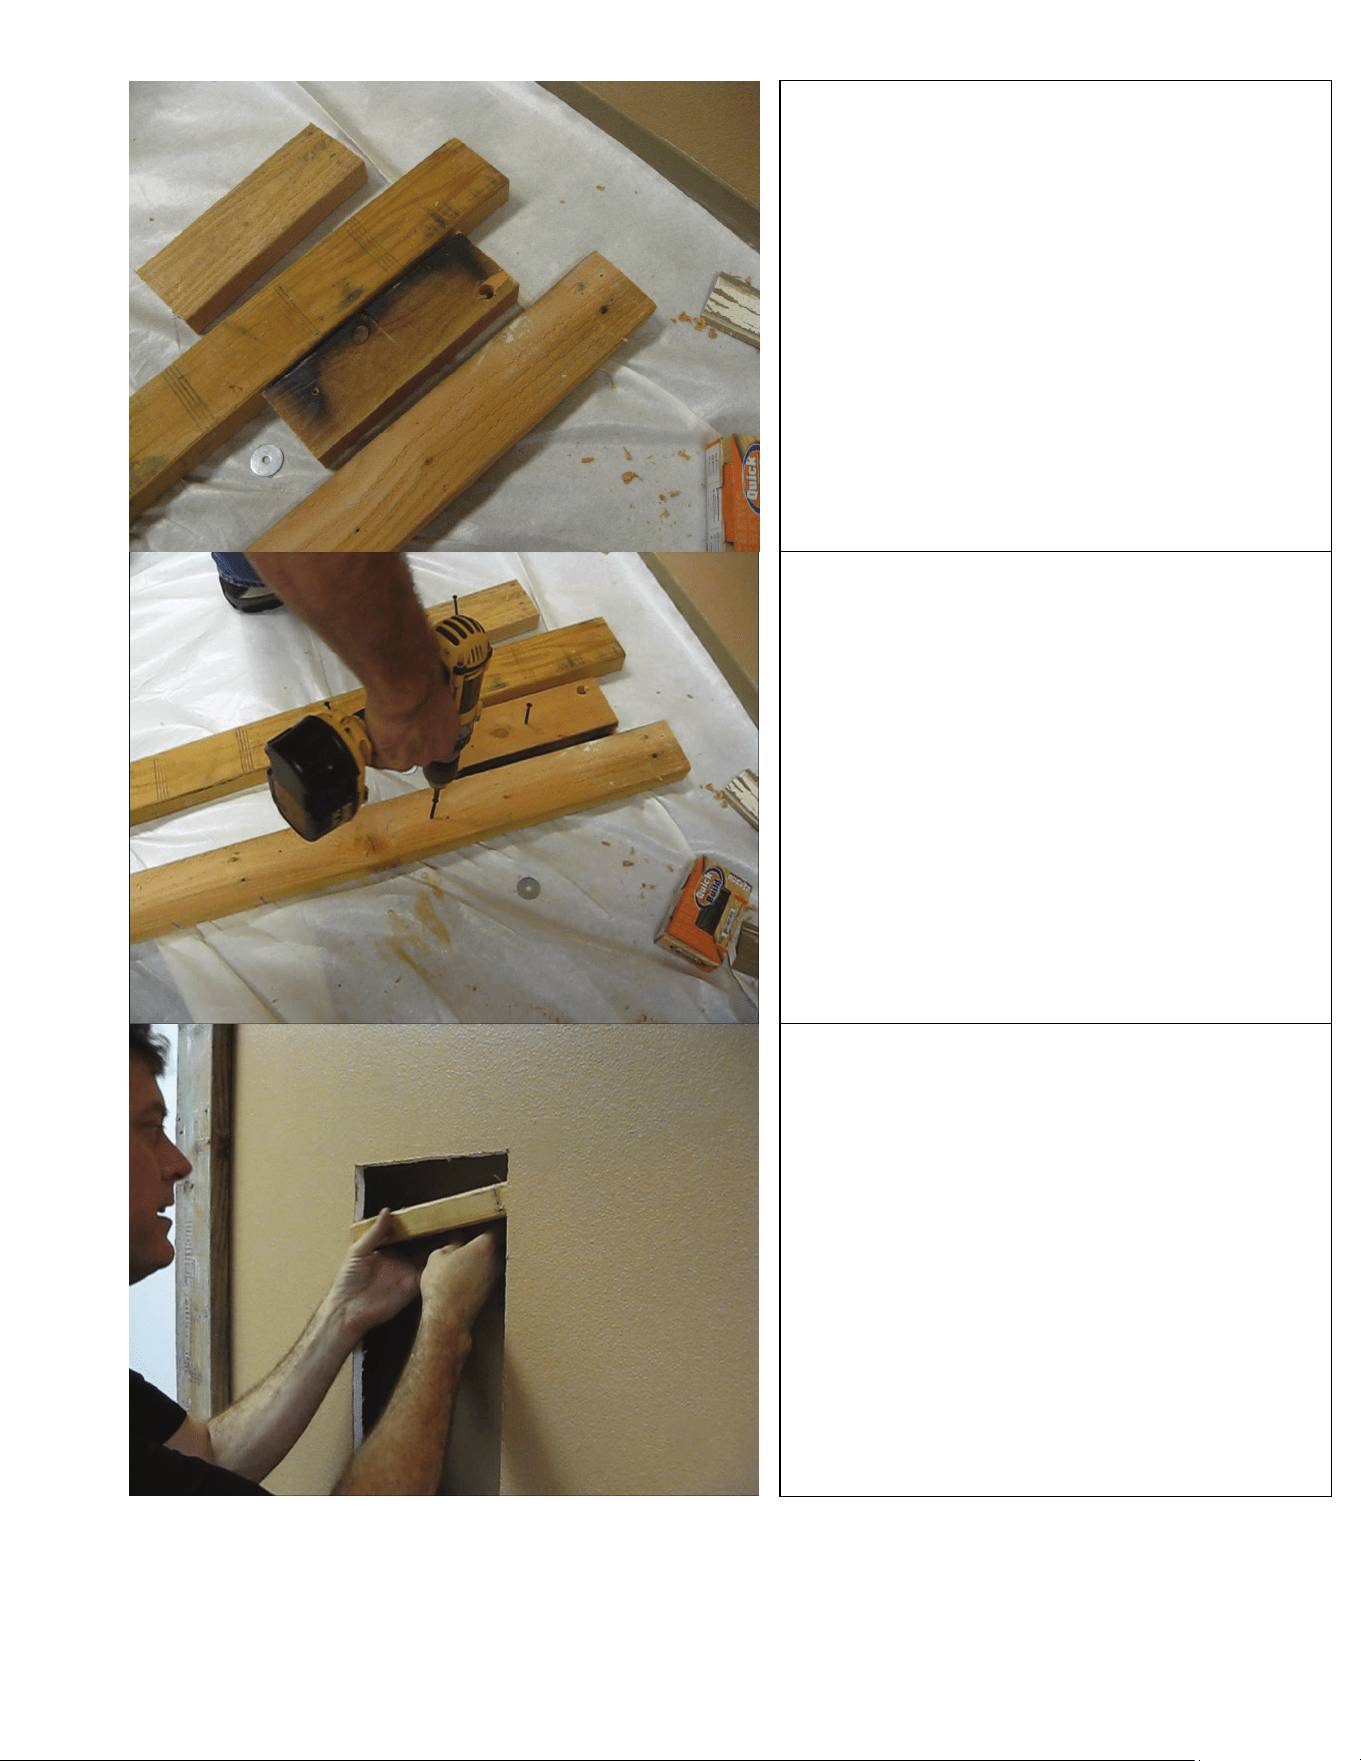
ThewallboardwillnotsupportalargeBEseries
directlywithoutadditionalsupport.Sothe
cutoutshouldbeboxedinwith2x4toprovide
somethingforthemountingscrewstofastento.
Socut2side2x4sand2top/bottom2x4sthat
justfittheheightandwidthoftheopening.
Iftheopeninghappenstobeagainstastud,
thenyoumayonlyneed3sectionsof2x4to
frametheopening.
Youwillneedtoholdthese2x4swhileyou
screwthemtothewall,soputadrywallscrew
intoeach2x4toactasa“temporaryhandle”.
Whileholdingthedrywallscrew“handle”,slide
the2x4sintoeachlocation.
Page3
Whileholdingthedrywallscrew“handle”,screw
throughthedrywallintothe2x4’swithdrywall
screws.BesureNOTtoplacescrewswhereyou
previouslymarkedthespeakermountingholes
oryouwillnotbeabletomountthespeaker
later.
Oncescrewedinplace,youcanremovethe
temporarydrywallscrew“handles”.
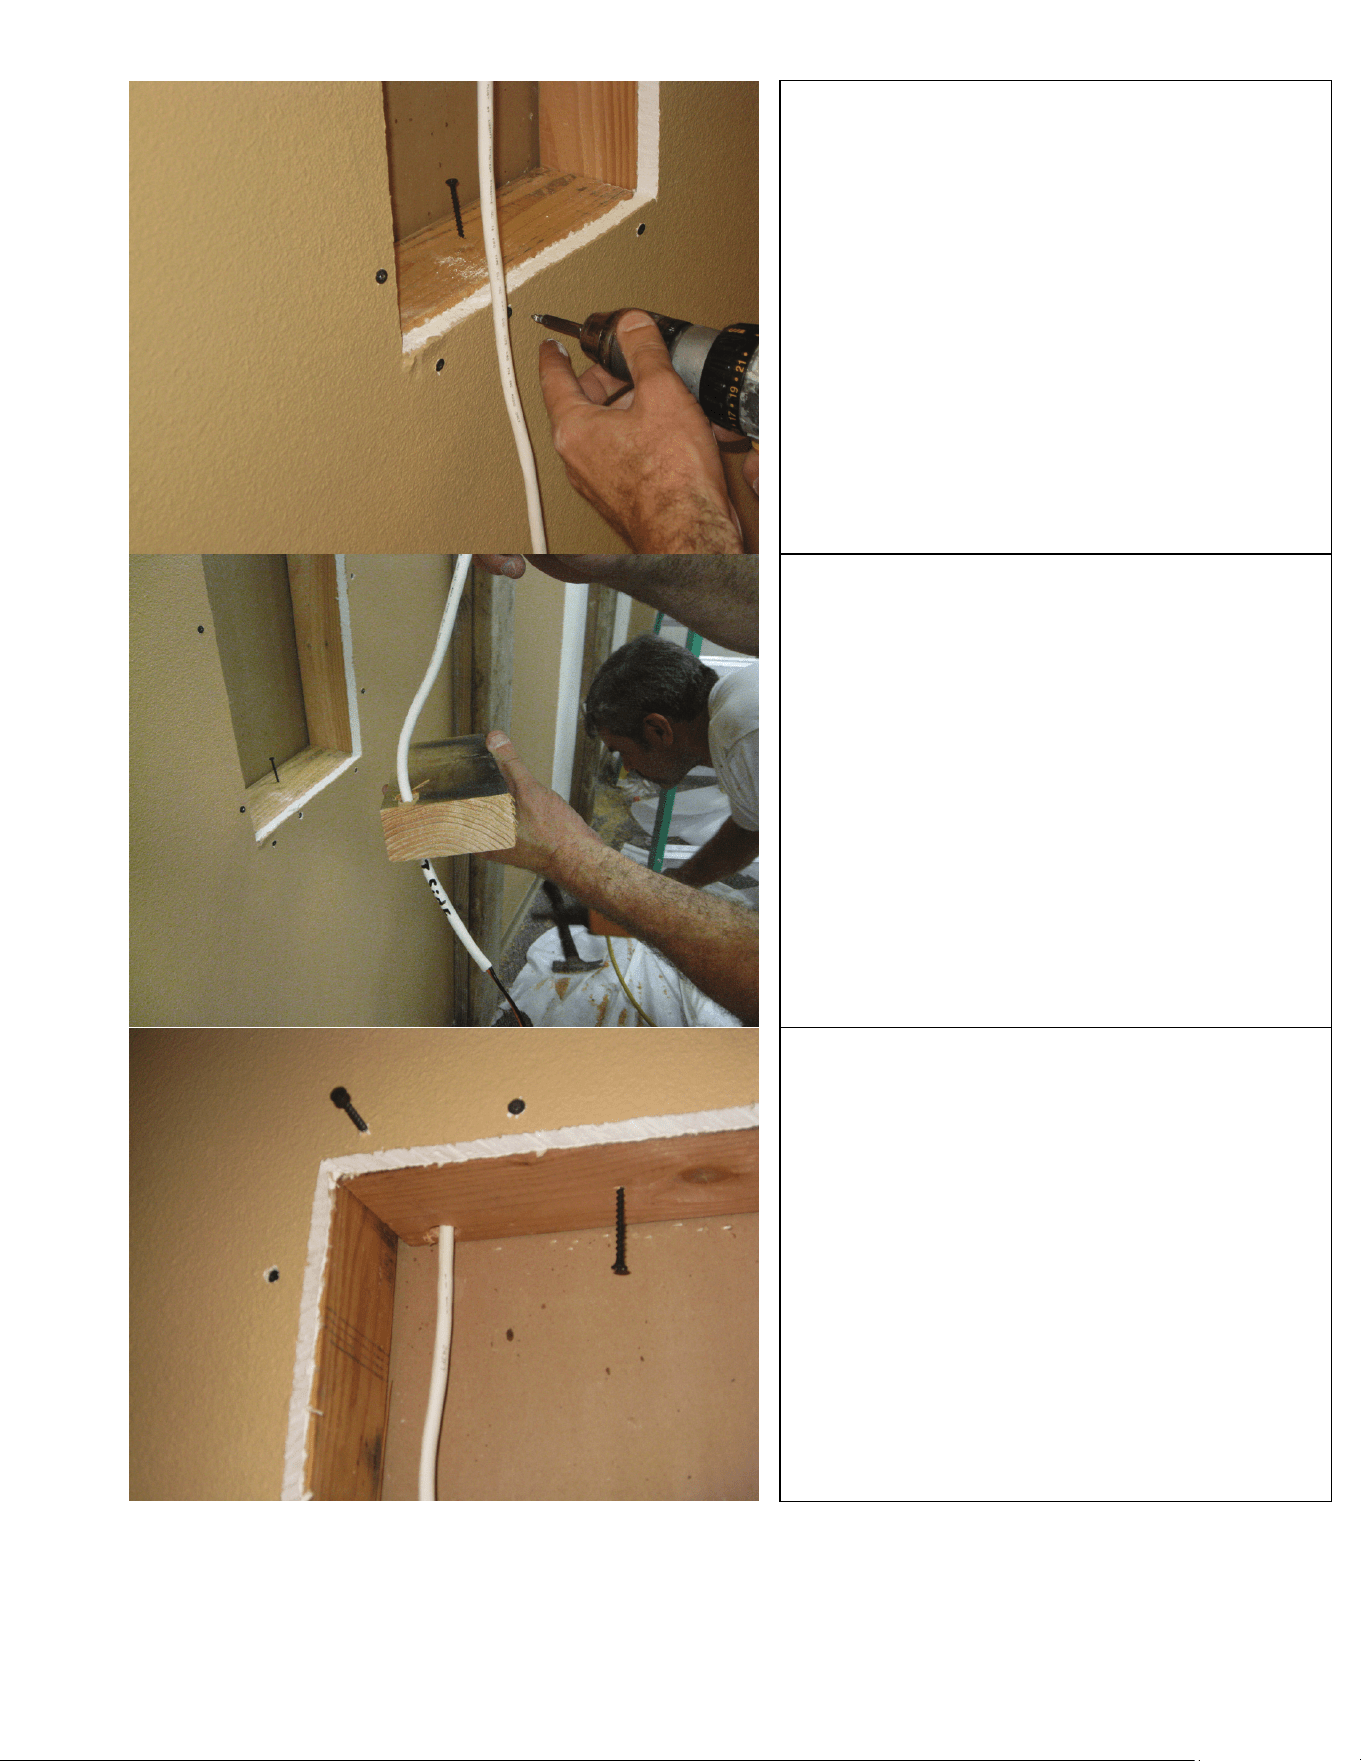
Also,ifyouarefullyboxinginthewallopening,
youmightwanttodrillaholeinthetop2x4and
fishyourwirethroughsothefinal2x4canbe
placed.
Obviously,ifyourcablecomesfromthebottom,
theholeshouldbeplacedinthebottom2x4.
Shownhereisthetop2x4withthespeakerwire
fishedoutandthelastdrywallscrewbeing
placedtoholdthe2x4.The“handle”screwis
stillinthetop2x4andwillberemoved.
Page4
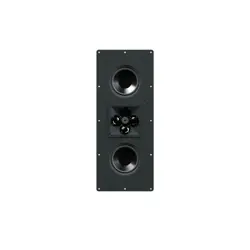
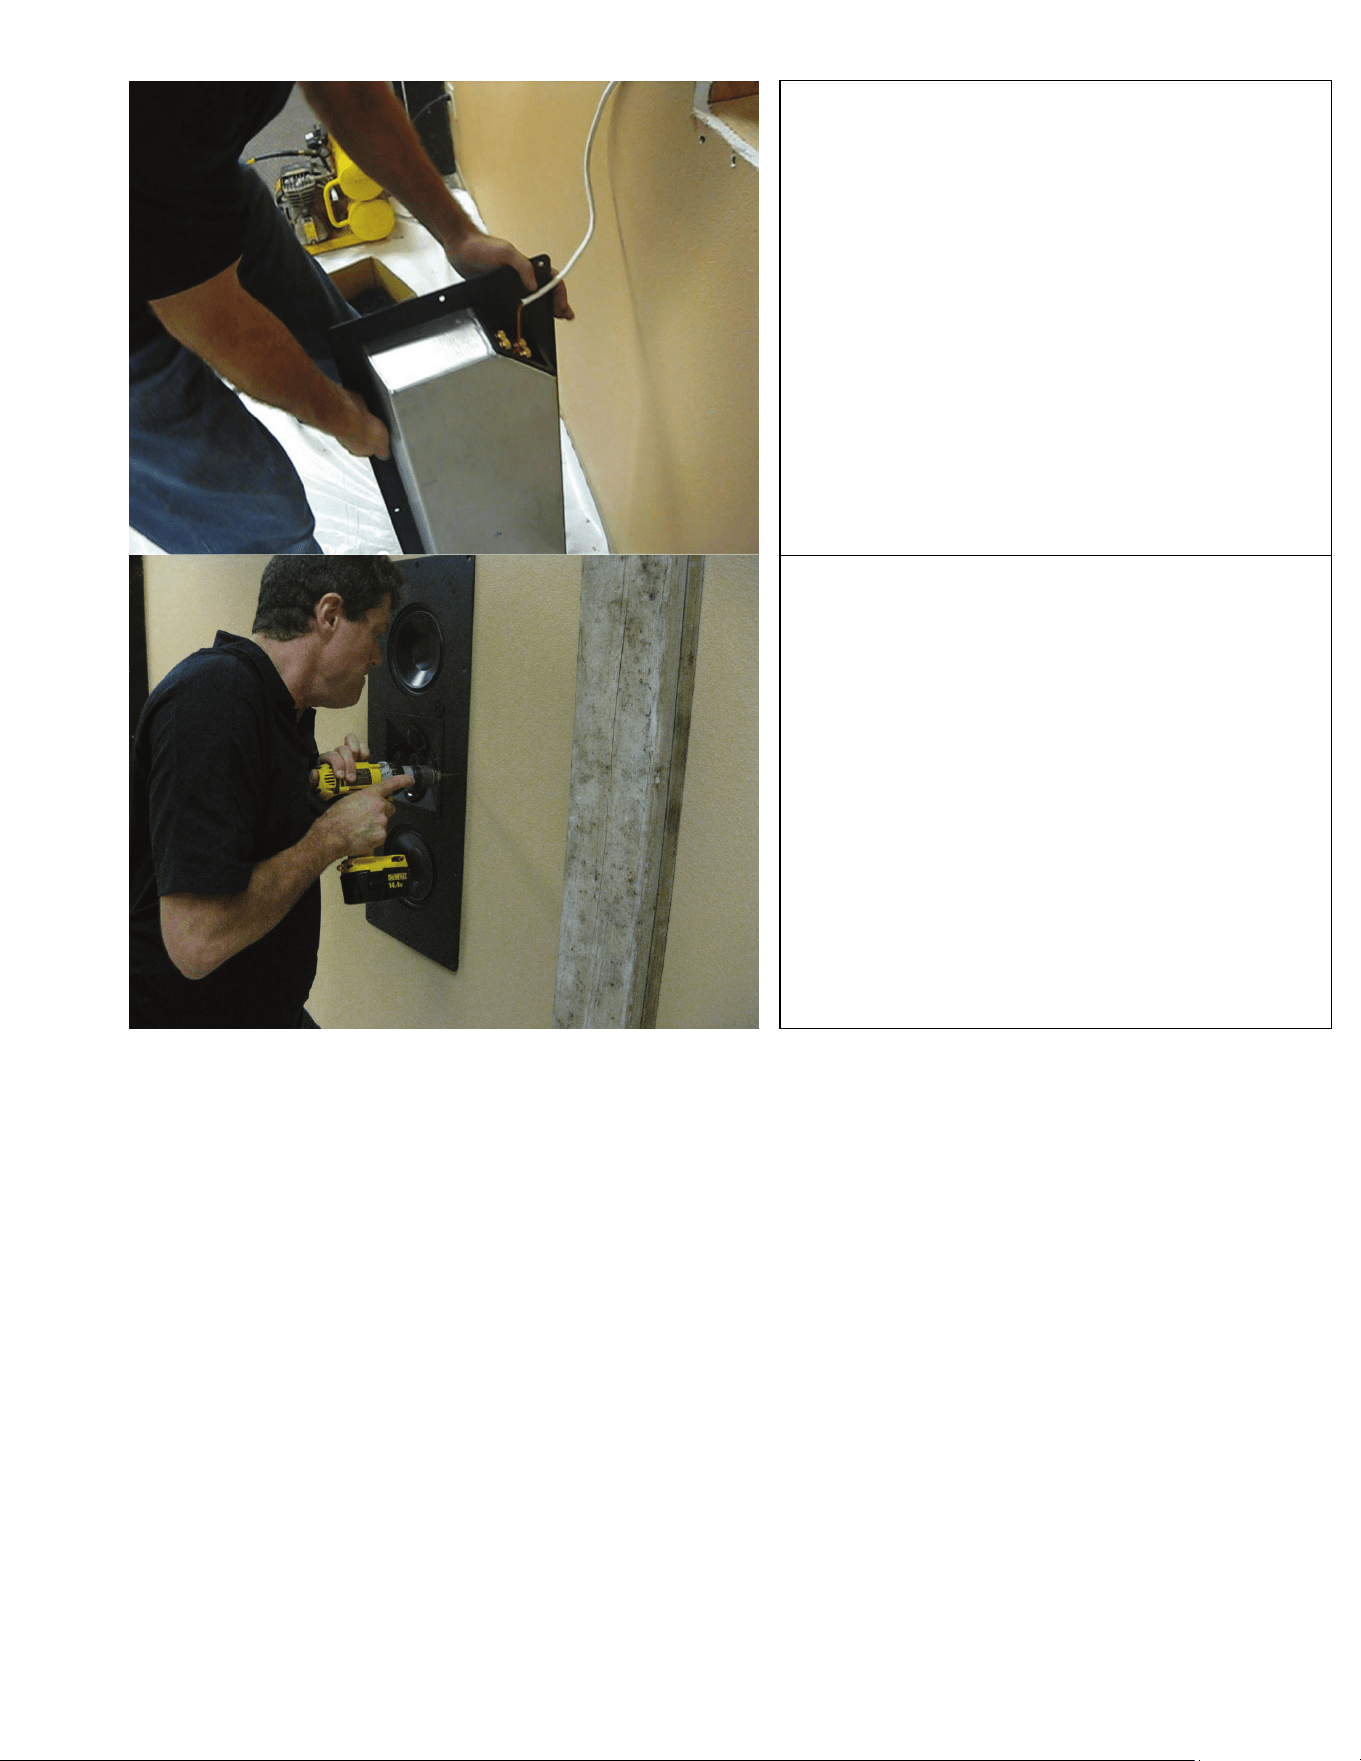
Connectthespeakerwiretothespeaker
terminalsobservingpolaritymarkings.
Placethespeakerintothewall.
Youmayneedtopushsomeoftheexcesswire
backintotherearcavityinordertogetthe
speakerinplace.
Onceplaced,youmightwanttocheckthe
verticallevelandpositionbeforescrewinginthe
screwstoholdthespeaker.Asnoted,the
screwswillbegoingintothe2x4sthathave
beenaddedtoframetheopeninginthewall.