KBS-66K004
Please scan the below QR code to get
the video for easy installation.
2
01
02
Warning:
Kindly turn off the power
when connecting cables.
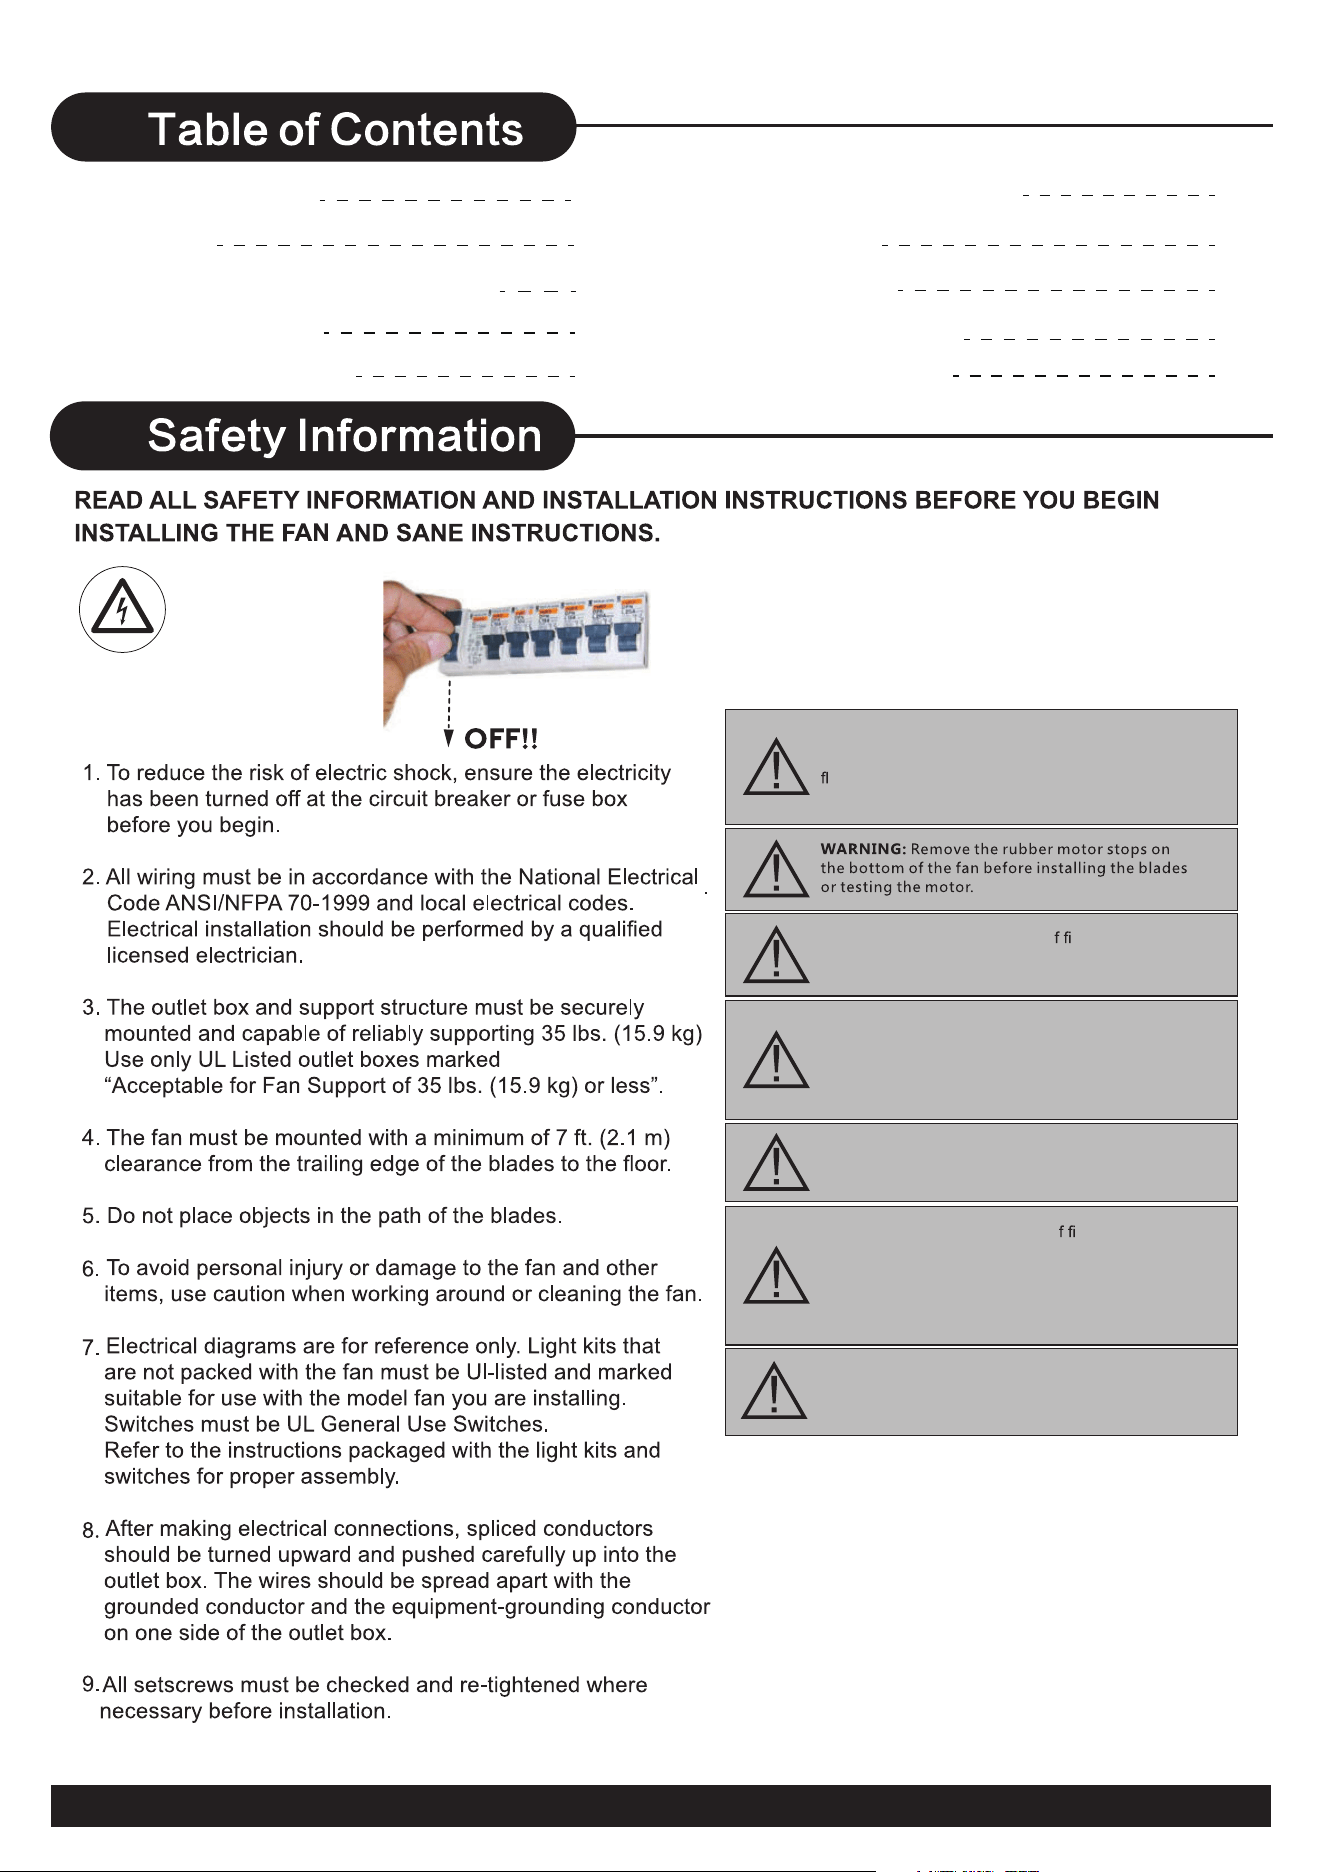
WARNING: To reduce the risk of personal injury,
do not bend the blade brackets (also referred to as
anges) during assembly or after installation. Do not
insert objects in the path of the blades.
WARNING: To reduce the risk o re or electric shock,
this fan is NOT suitable for use with solid-state speed
controls.
WARNING: To avoid possible electrical shock, make
sure that the electricity is turned off at the main power
box before starting work. If you feel you do not have
enough electrical wiring knowledge or experience,
contact a licensed electrician.
WARNING: Electrical diagrams are for reference only.
Optional use of any light kit shall be UL-listed and
marked suitable for use with this fan
WARNING: To reduce the risk o re, electrical shock
or personal injury, ensure that the fan mounting
bracket is supported directly from the building
structure or the outlet box marked “Acceptable for
Fan Support of 35 lbs. (15.9 kg) or less”. Use only
the screws provided with the outlet box.
WARNING: Do not test the fan before affixing the
blades. The DC motor needs a load to rotate properly.
Affixing blades and then testing the fans.
Safety Information 02
Remote control manual 16
Match code 17
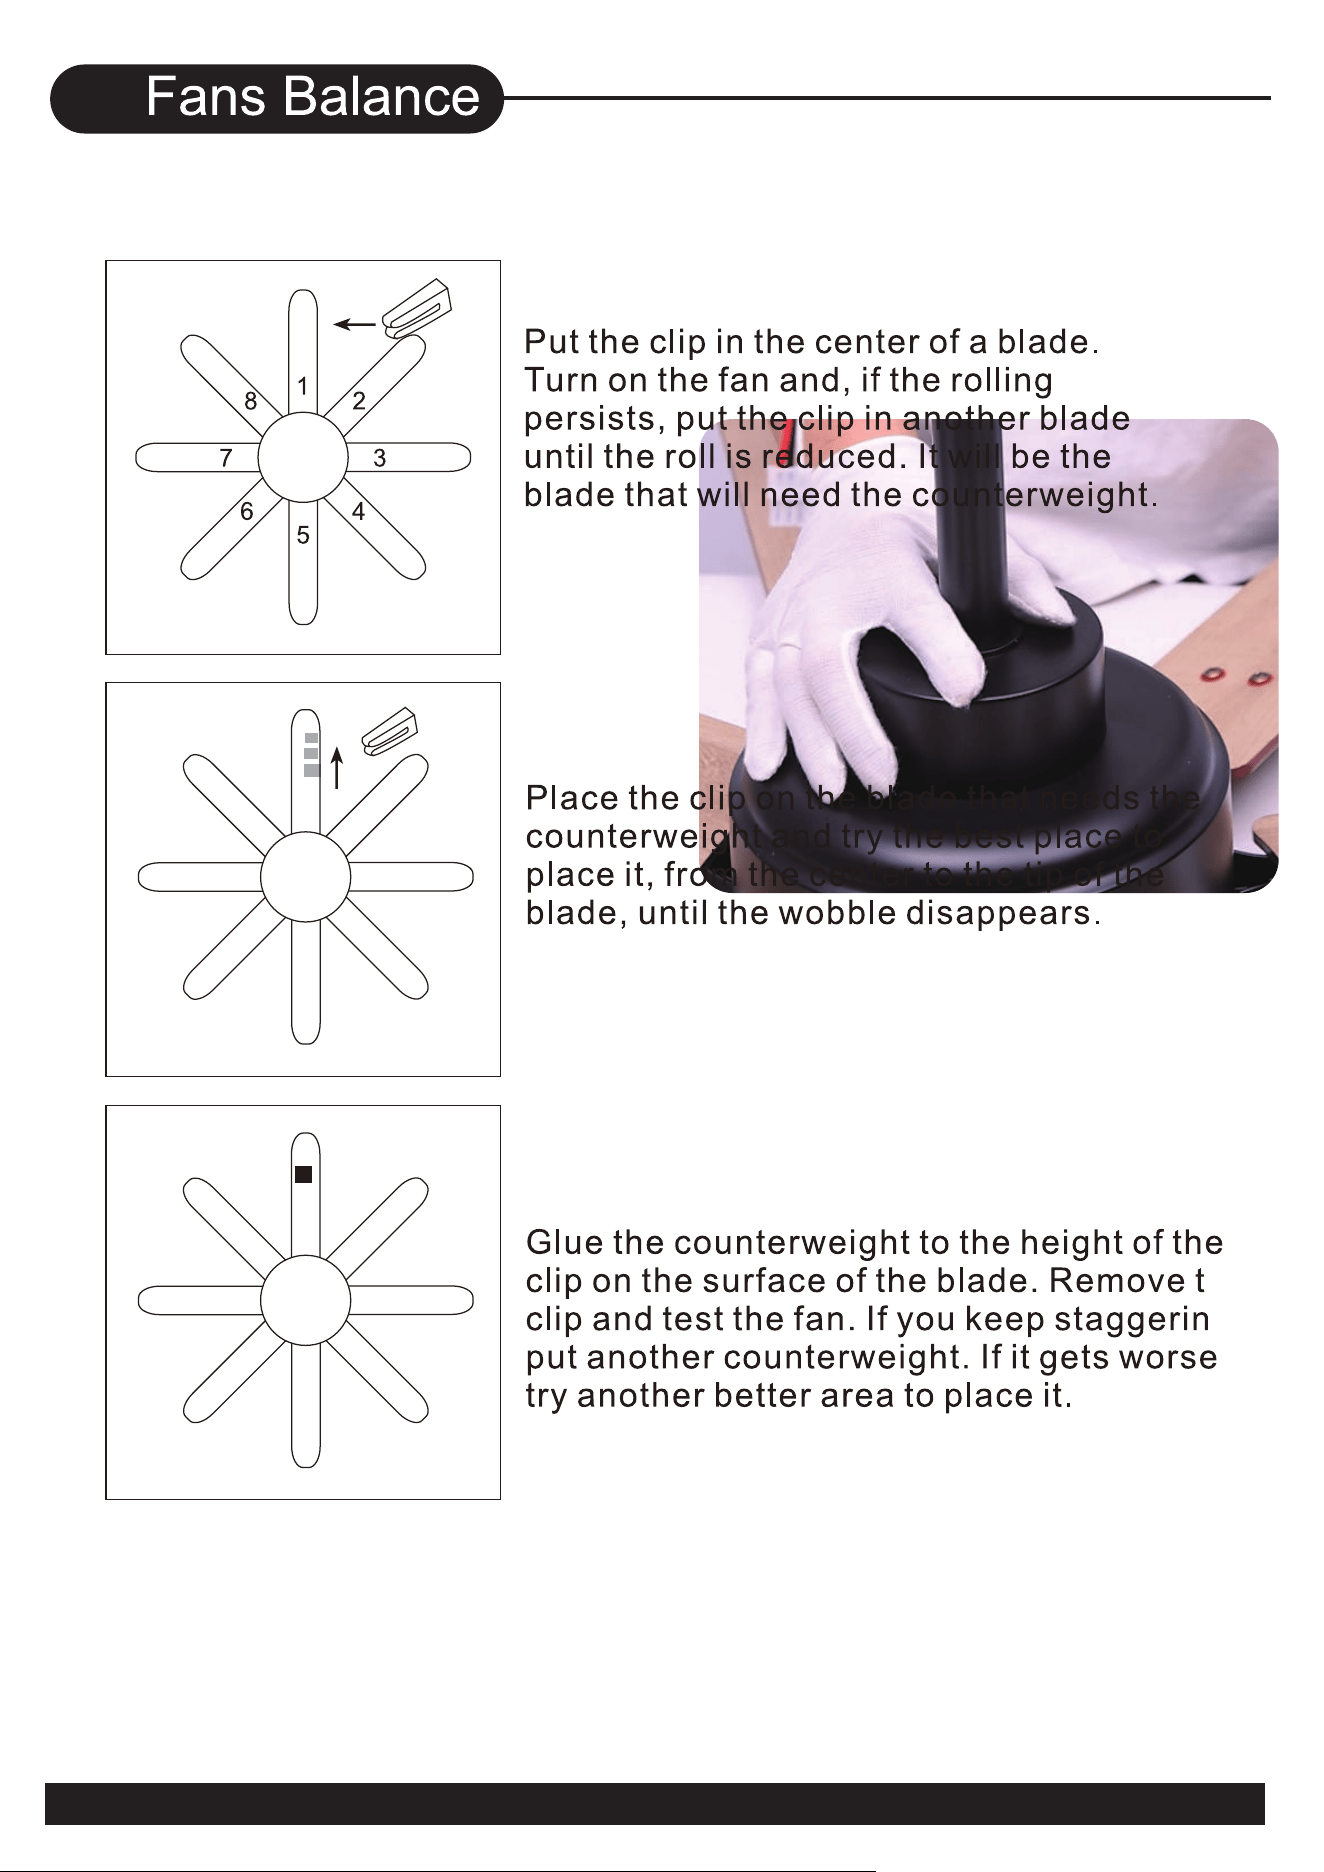
Fans Balance 18
Care and cleaning 19
Trouble shooting 19
WARNING 03
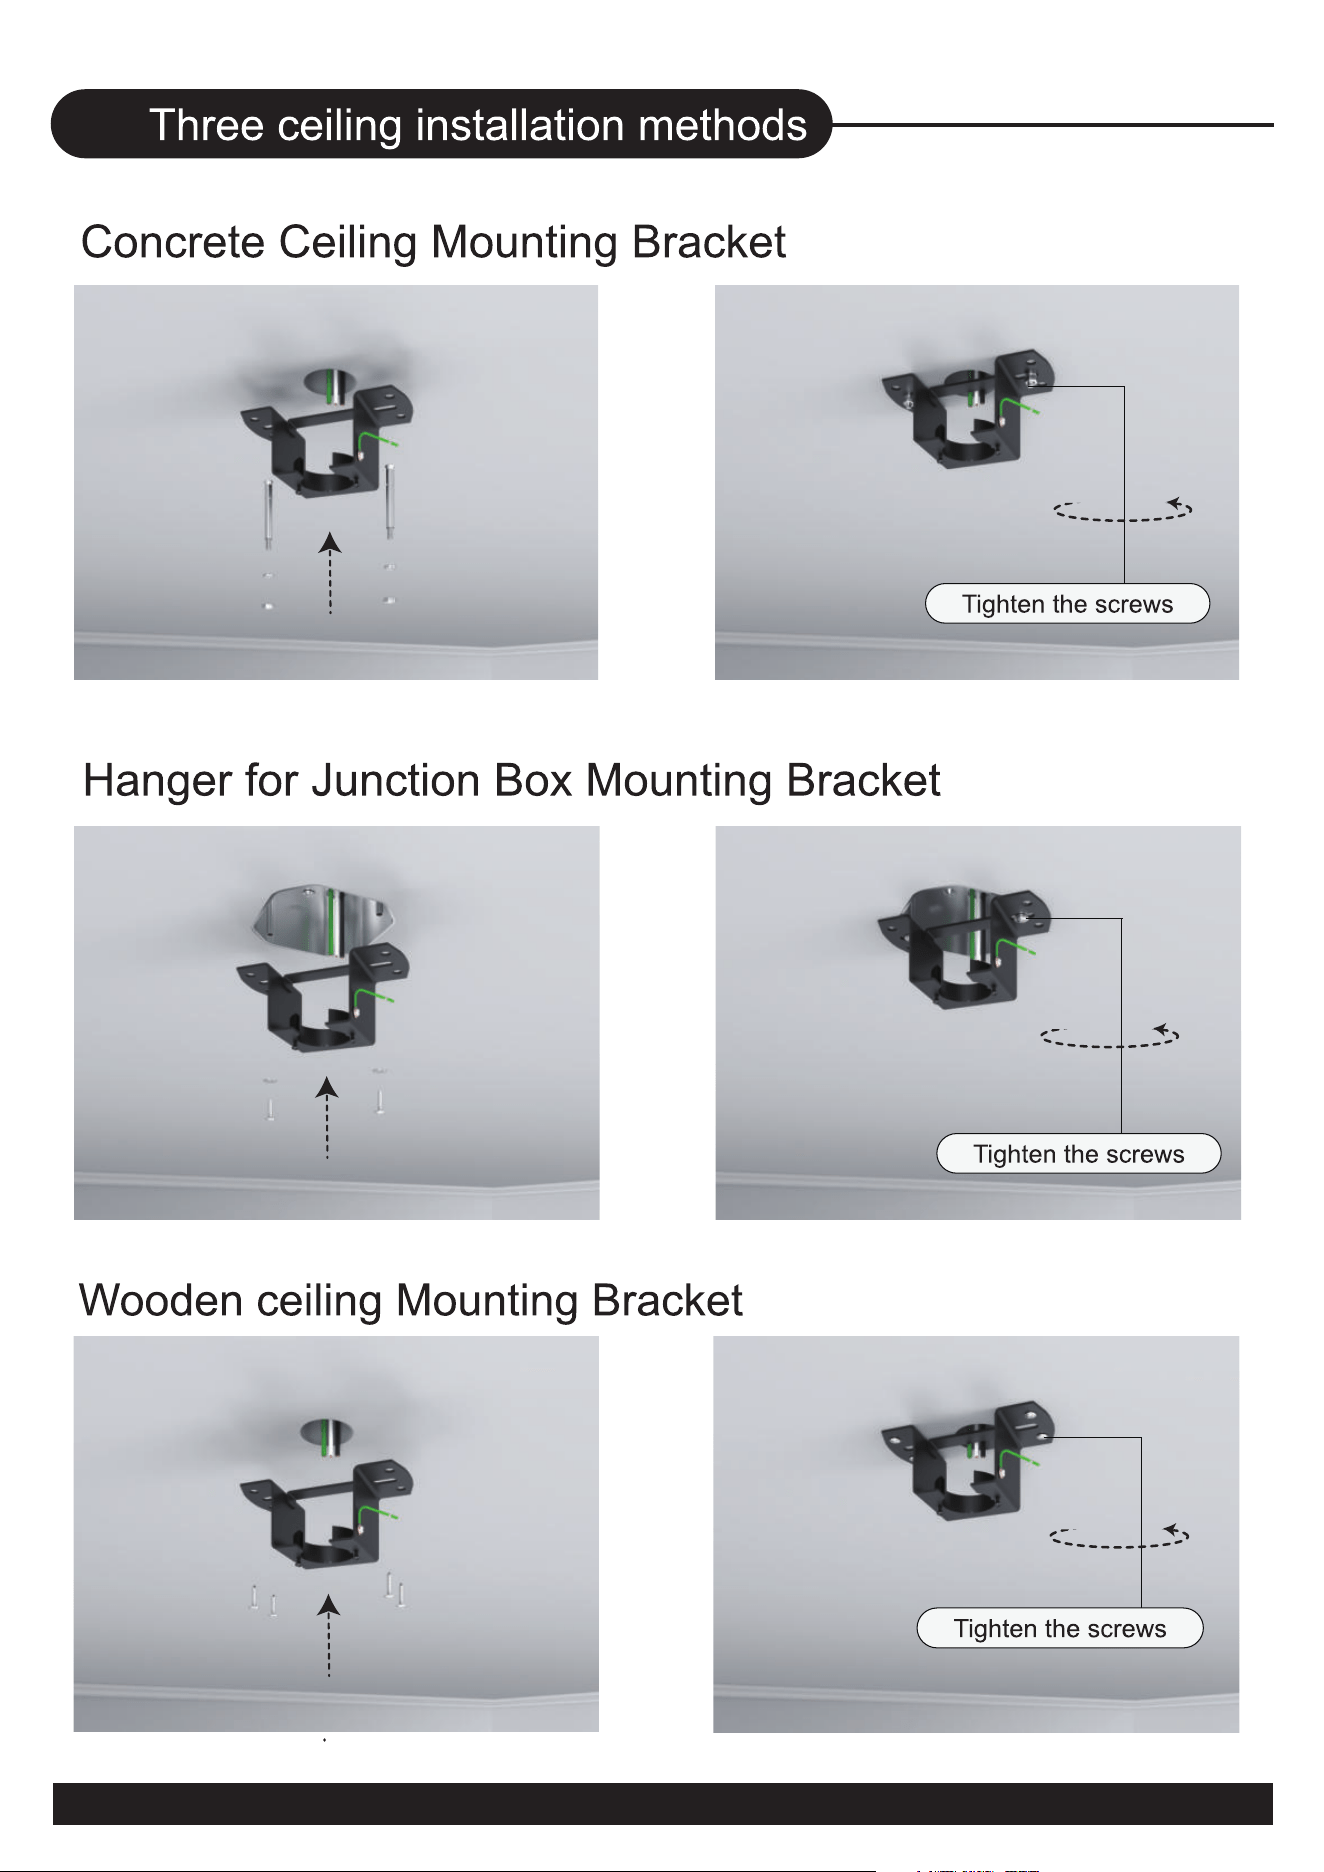
Three ceiling installation methods 04
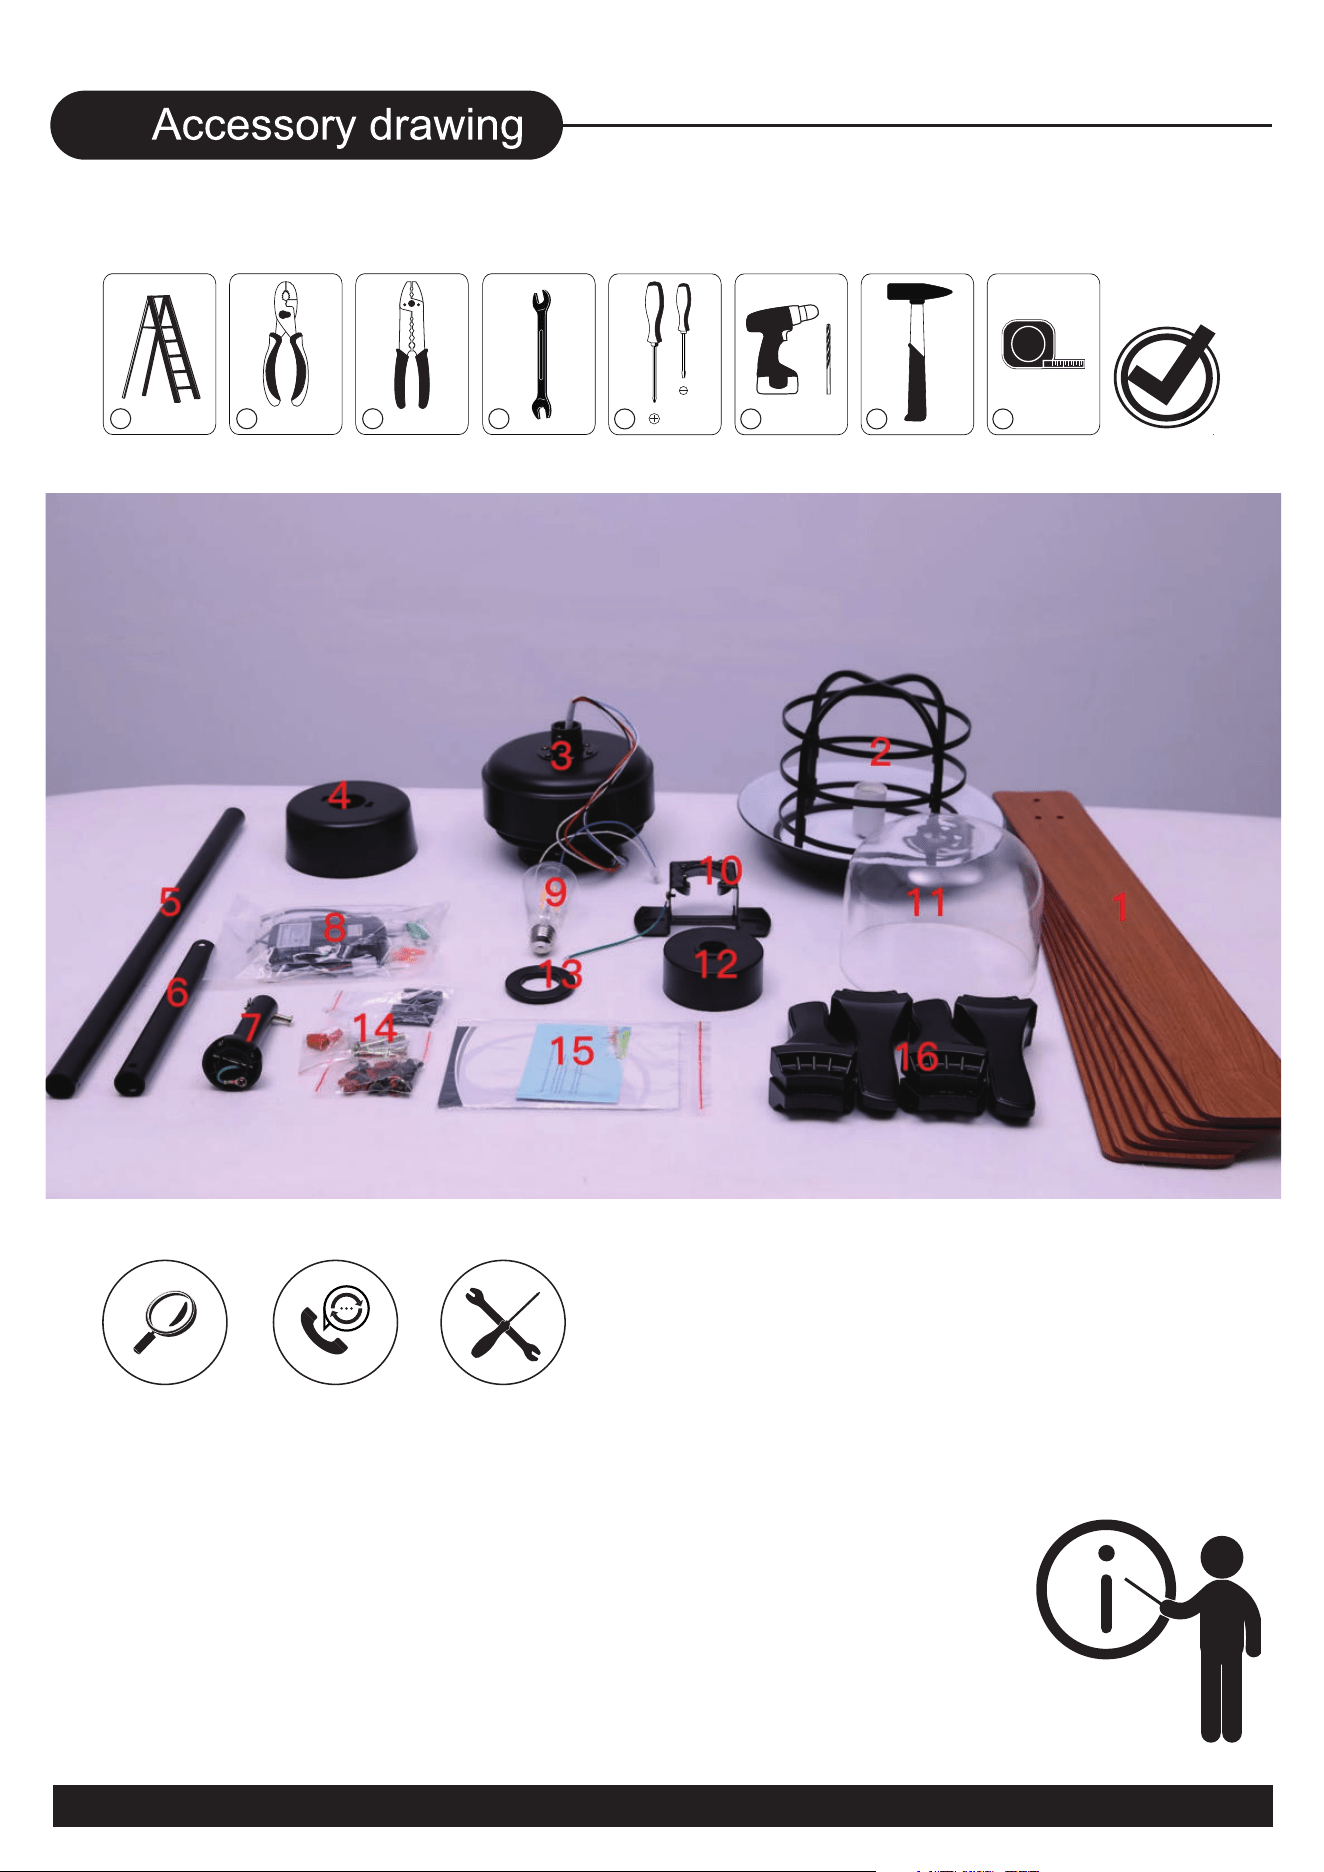
Accessory drawing 05
Installation procedure 06
3
03
4
04
5
05
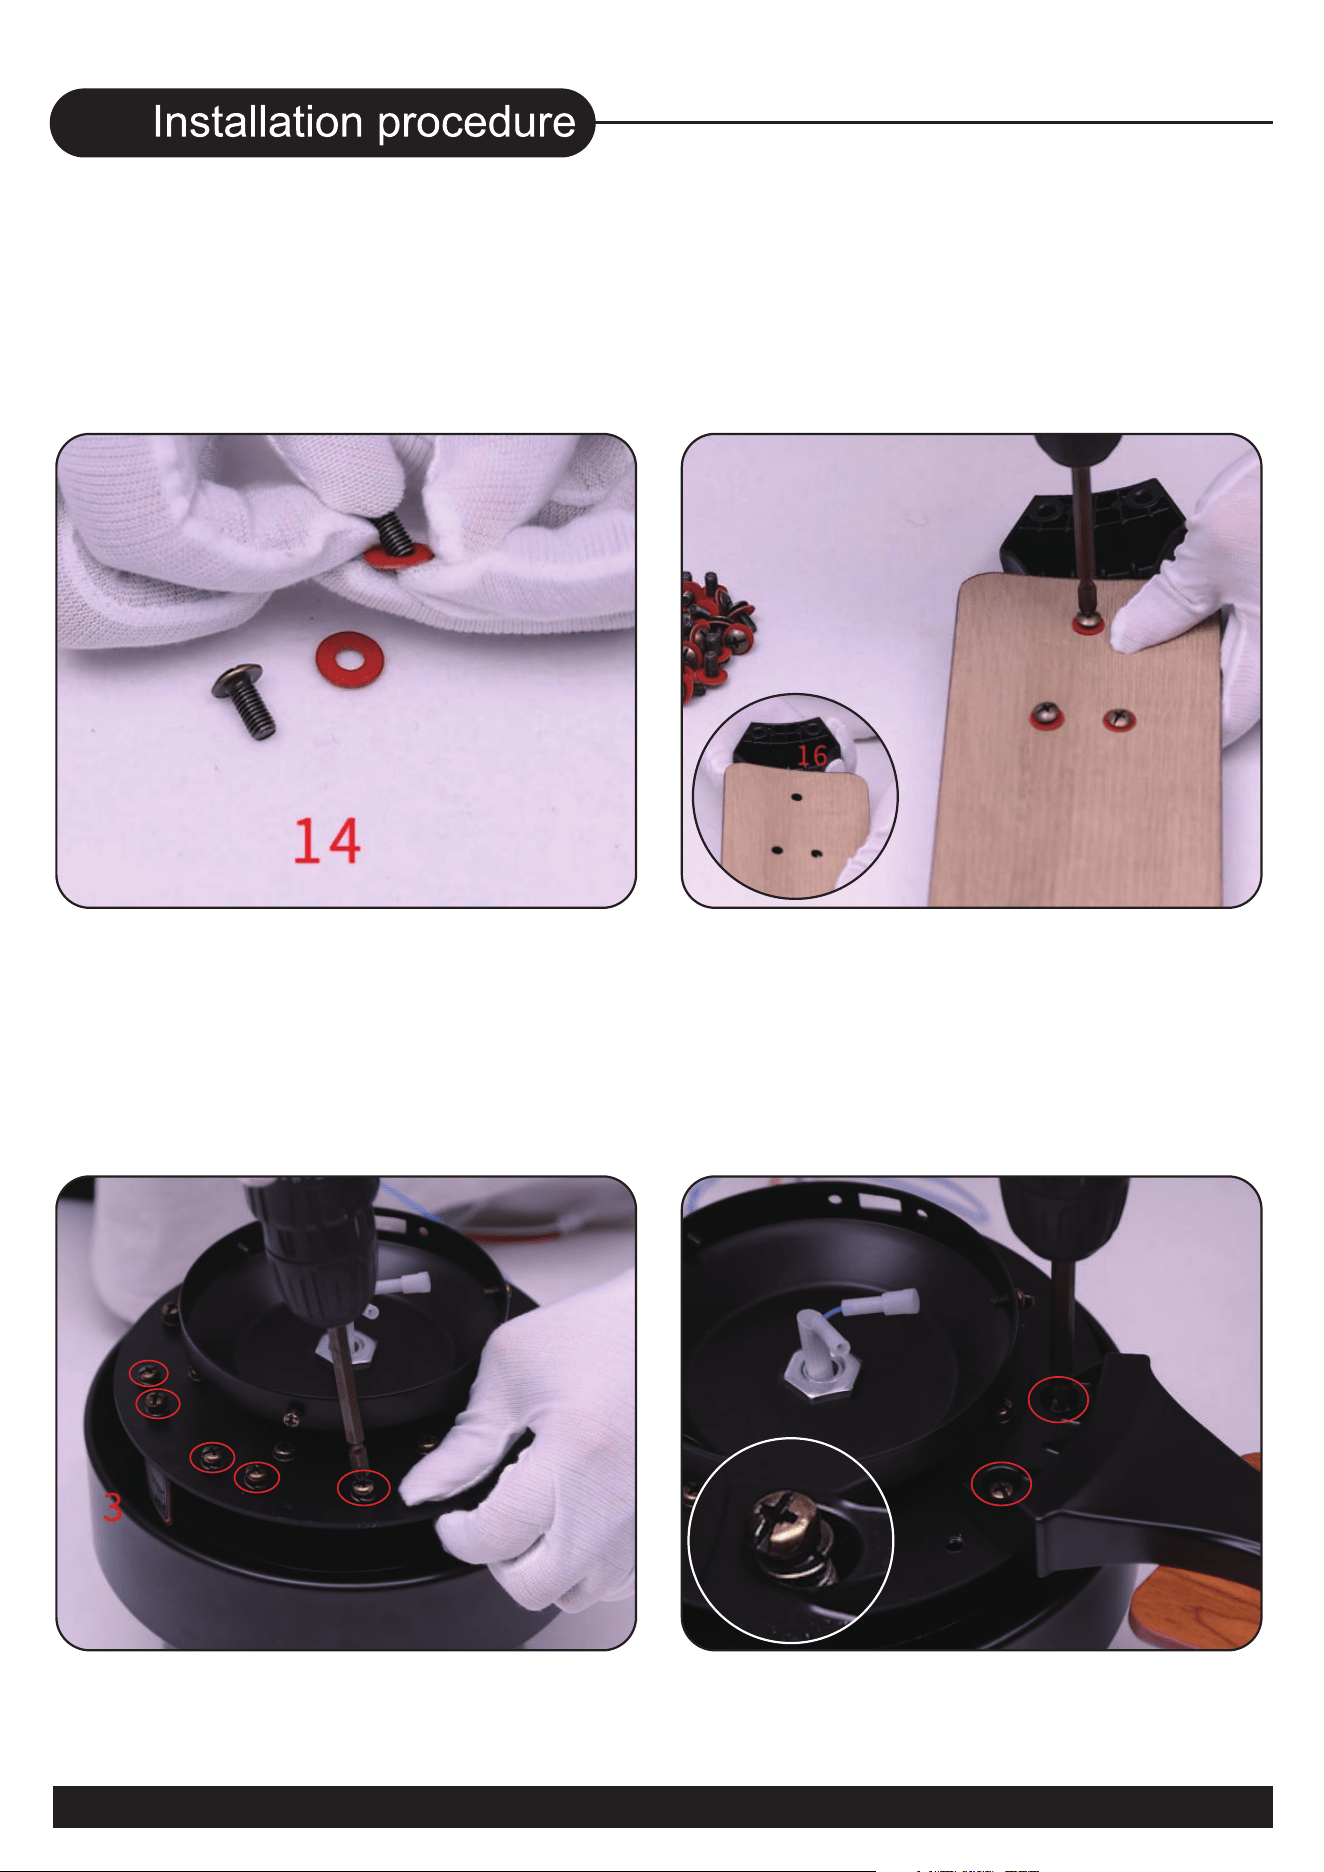
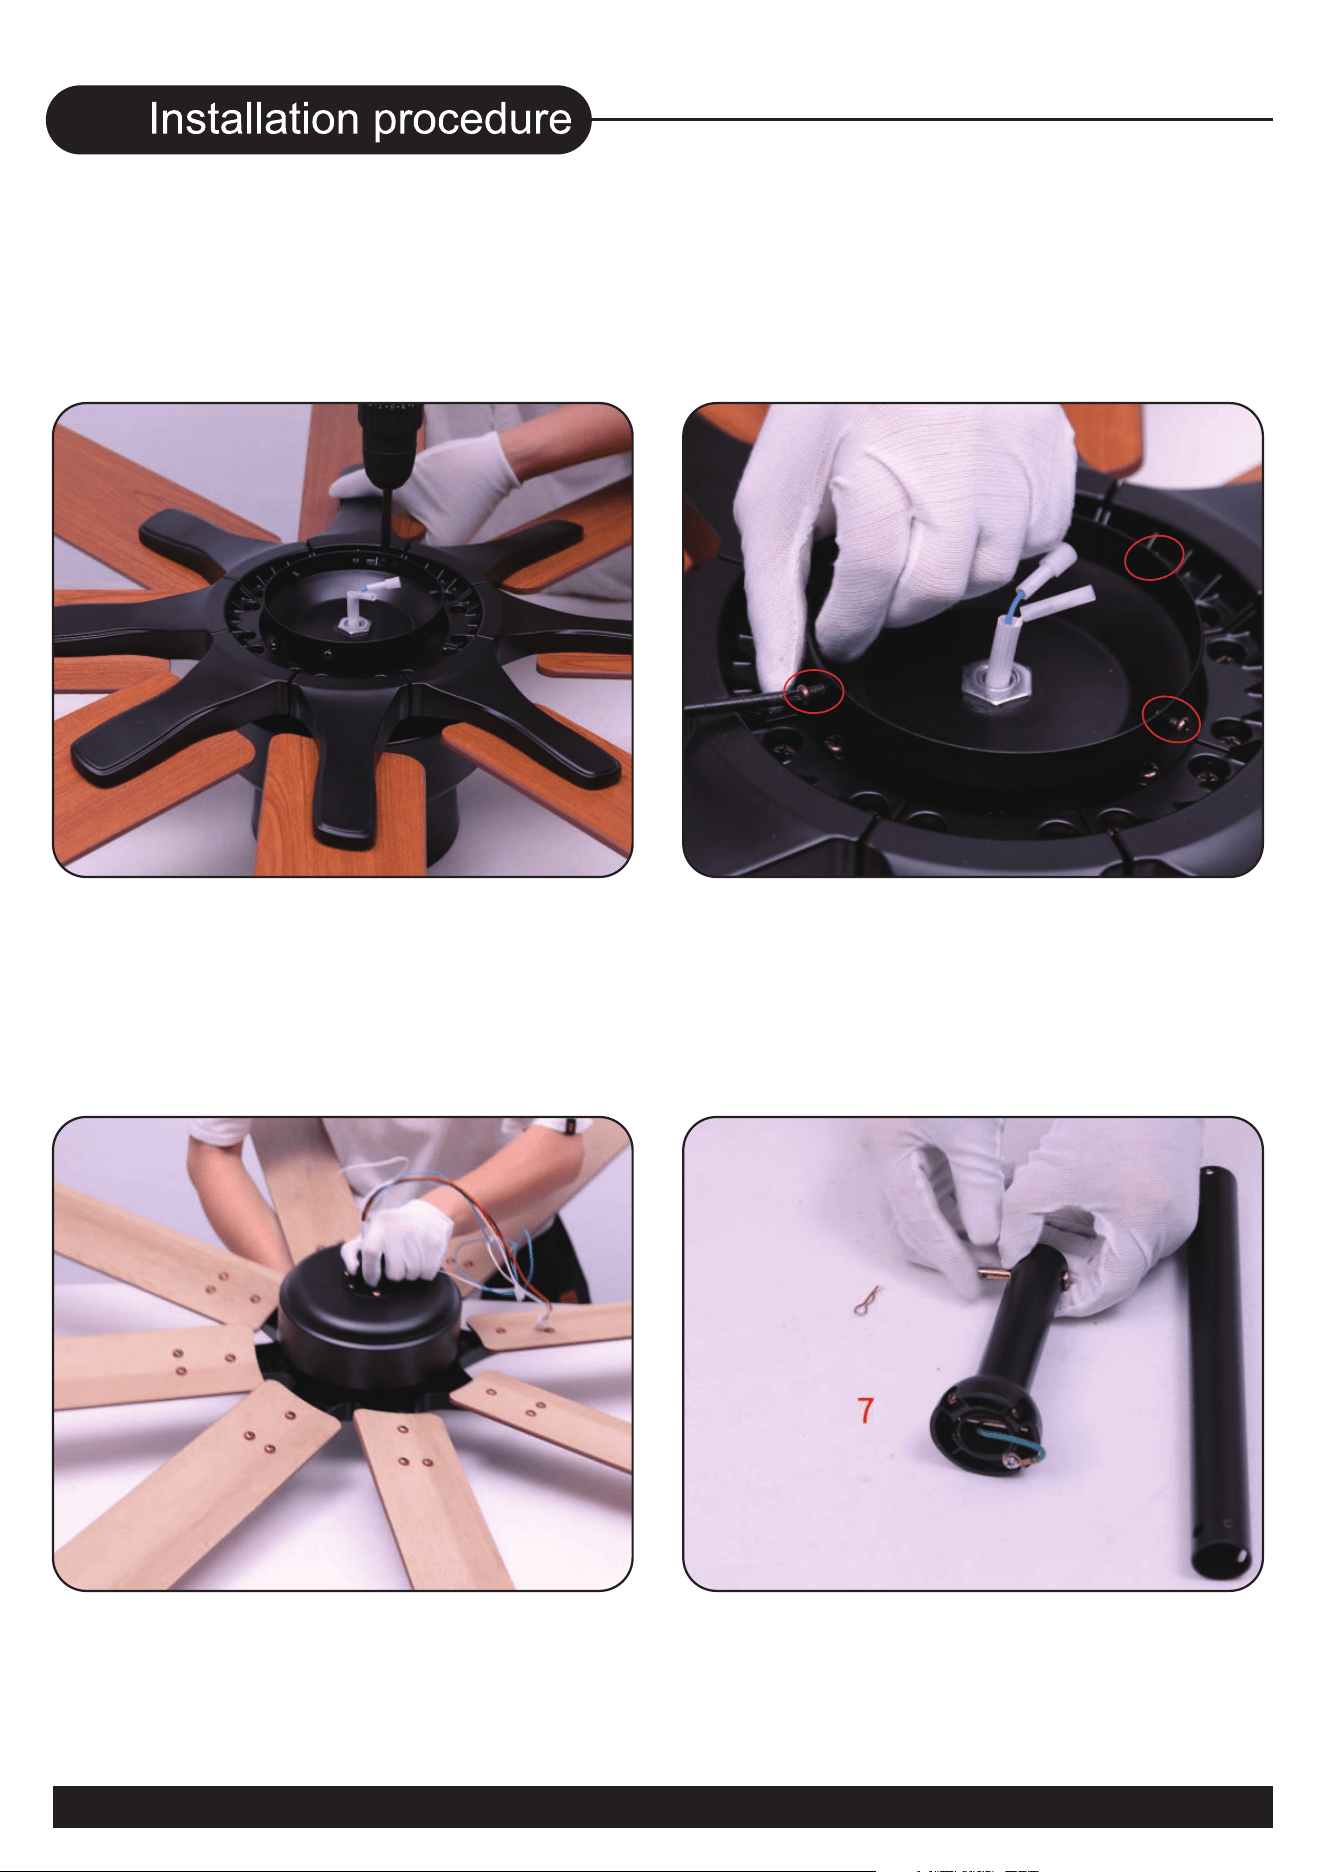
1. Put the screw washers
on the screws
3.Remove the 16 screws on
the motor and prepare to install
the blades
4.Install the blades on the motor
2.Use screws to fix the blades
to the blade bracket and
assemble all the blades first
6
06
7
06
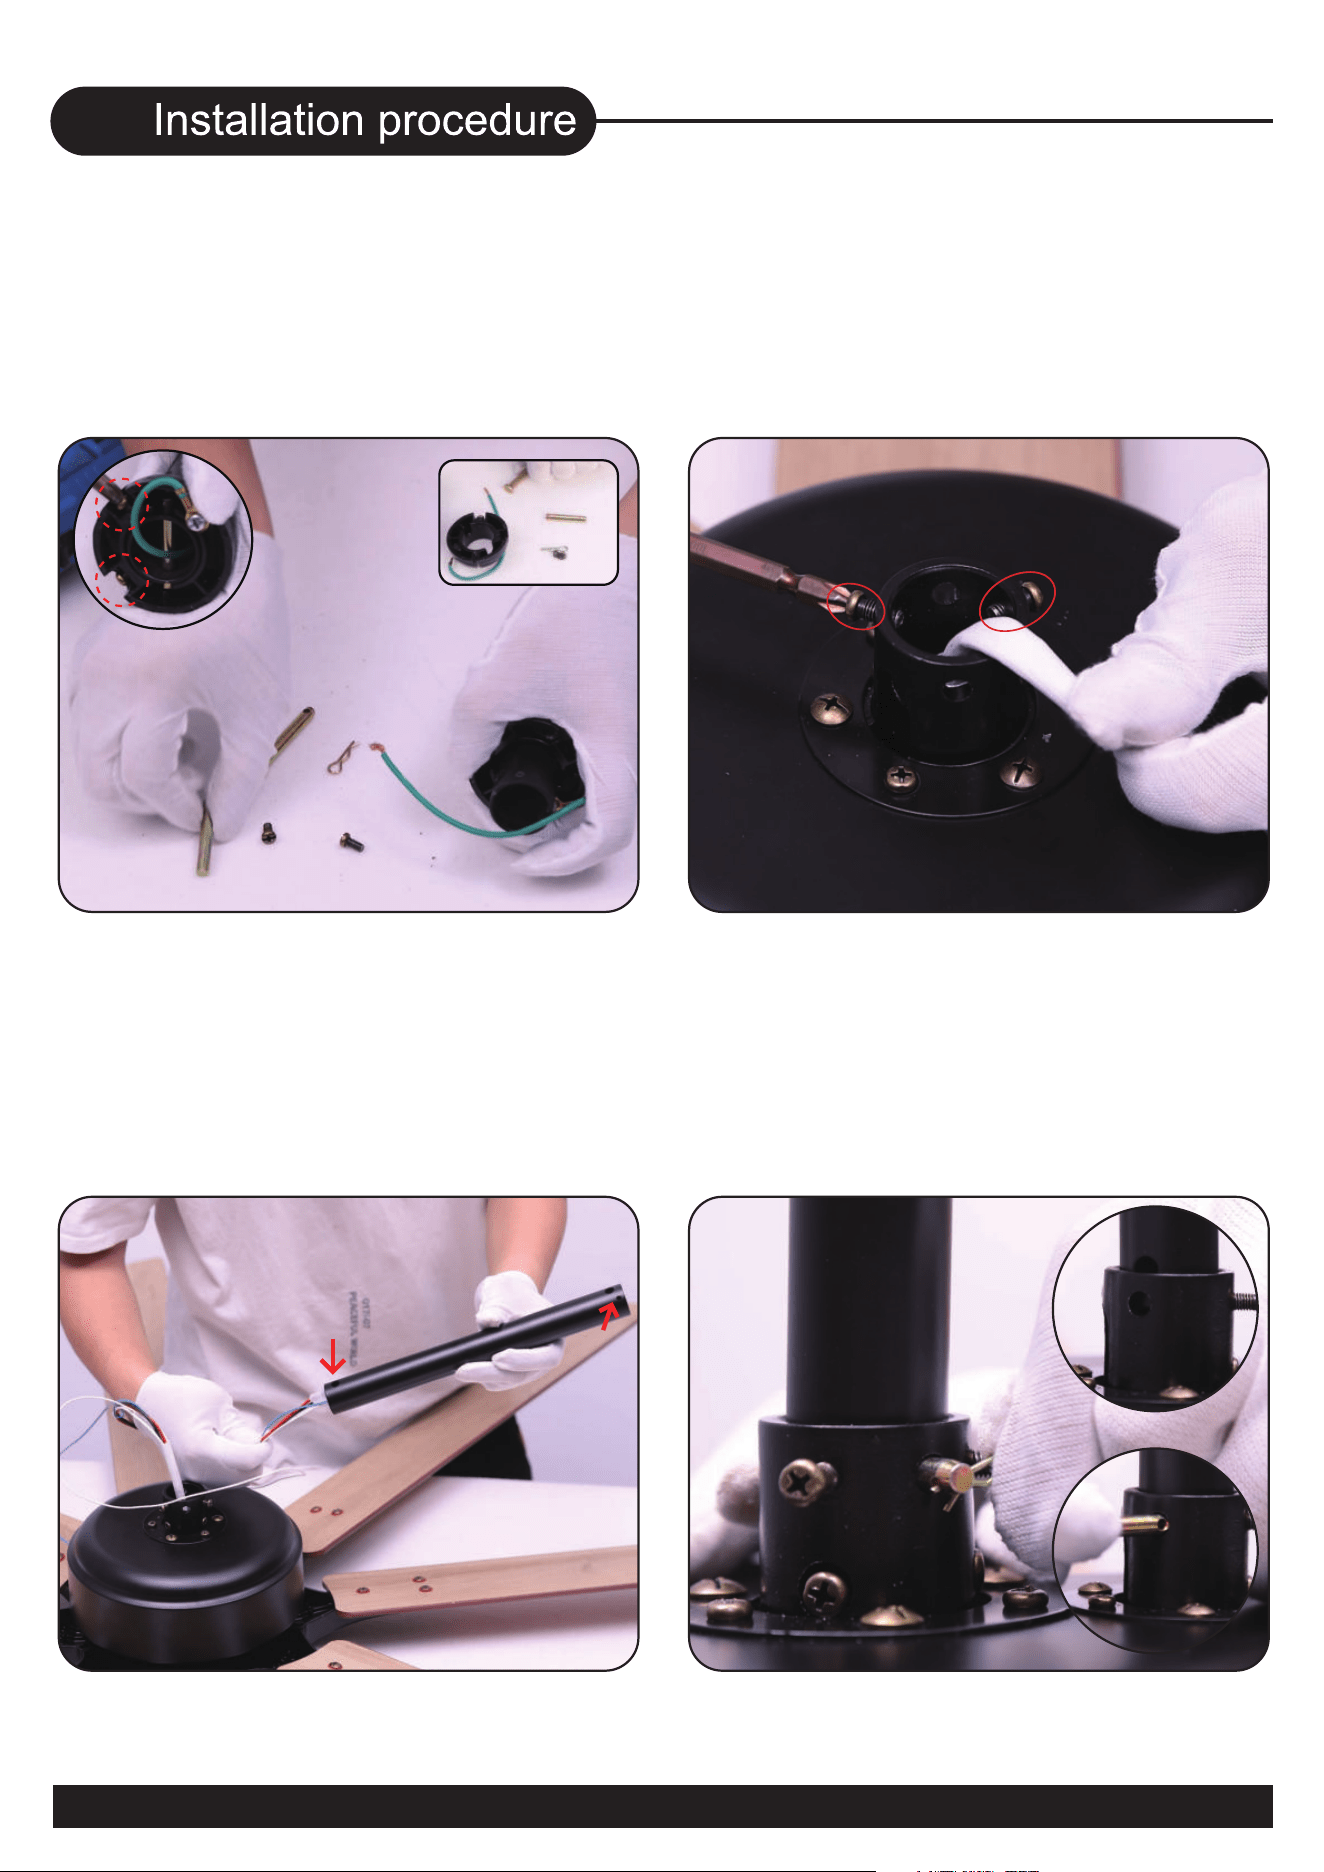
5.Install all blades 6.Remove the three screws
on the side of the motor
7.Turn the fan over 8.Remove the lock pin and the
bolt of the base of the downrod
8
06
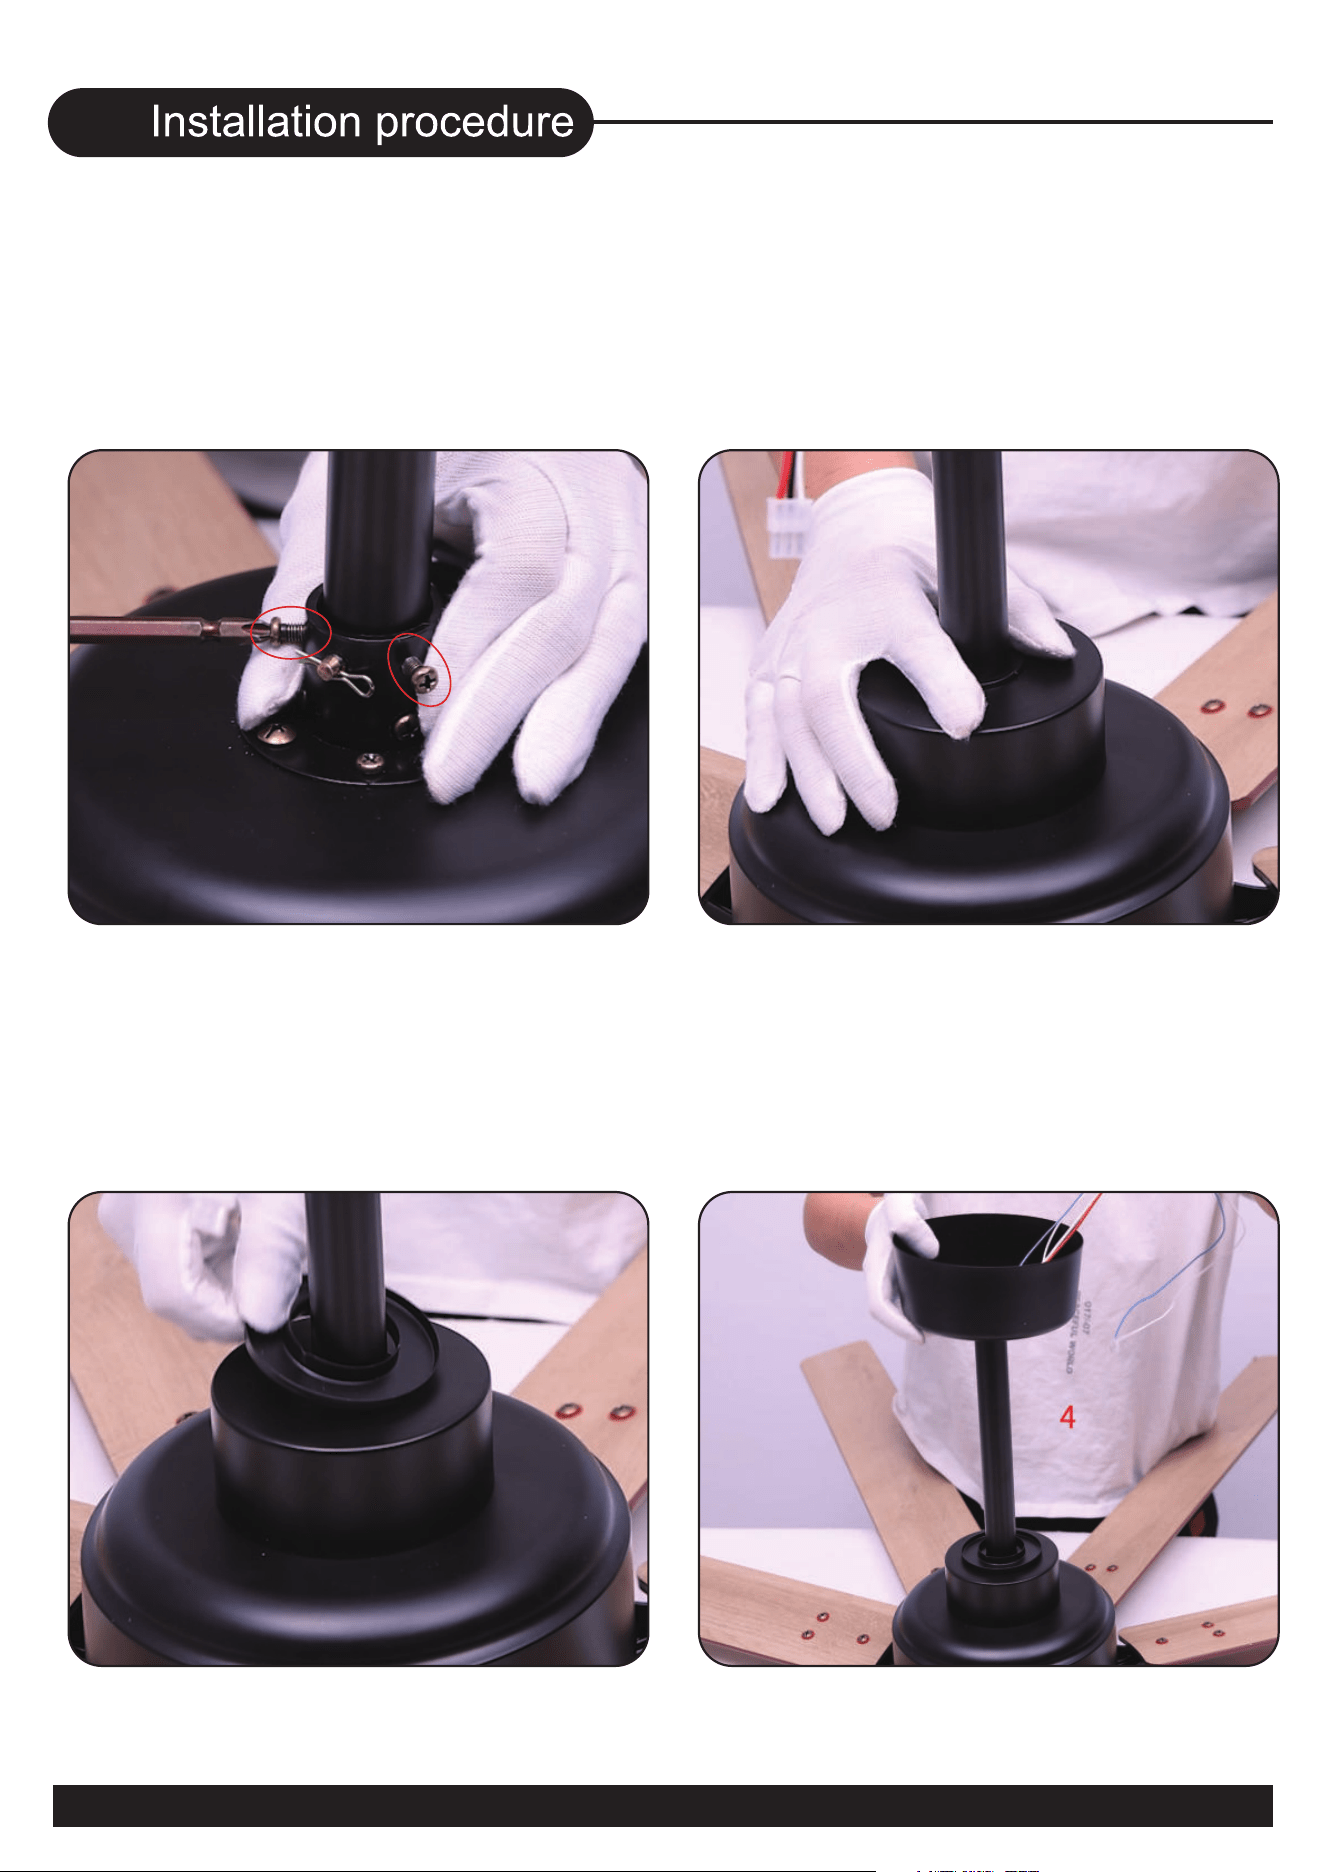
9.Remove two screws on the
hanger ball.
Remove the hanger ball and bolt
10.Loosen the screws
11.Select one downrod and pass
all motor wires through the
downrod
12.Insert the bolt, and then fix the
bolt with the lock pin
2 holes
3 holes
9
06
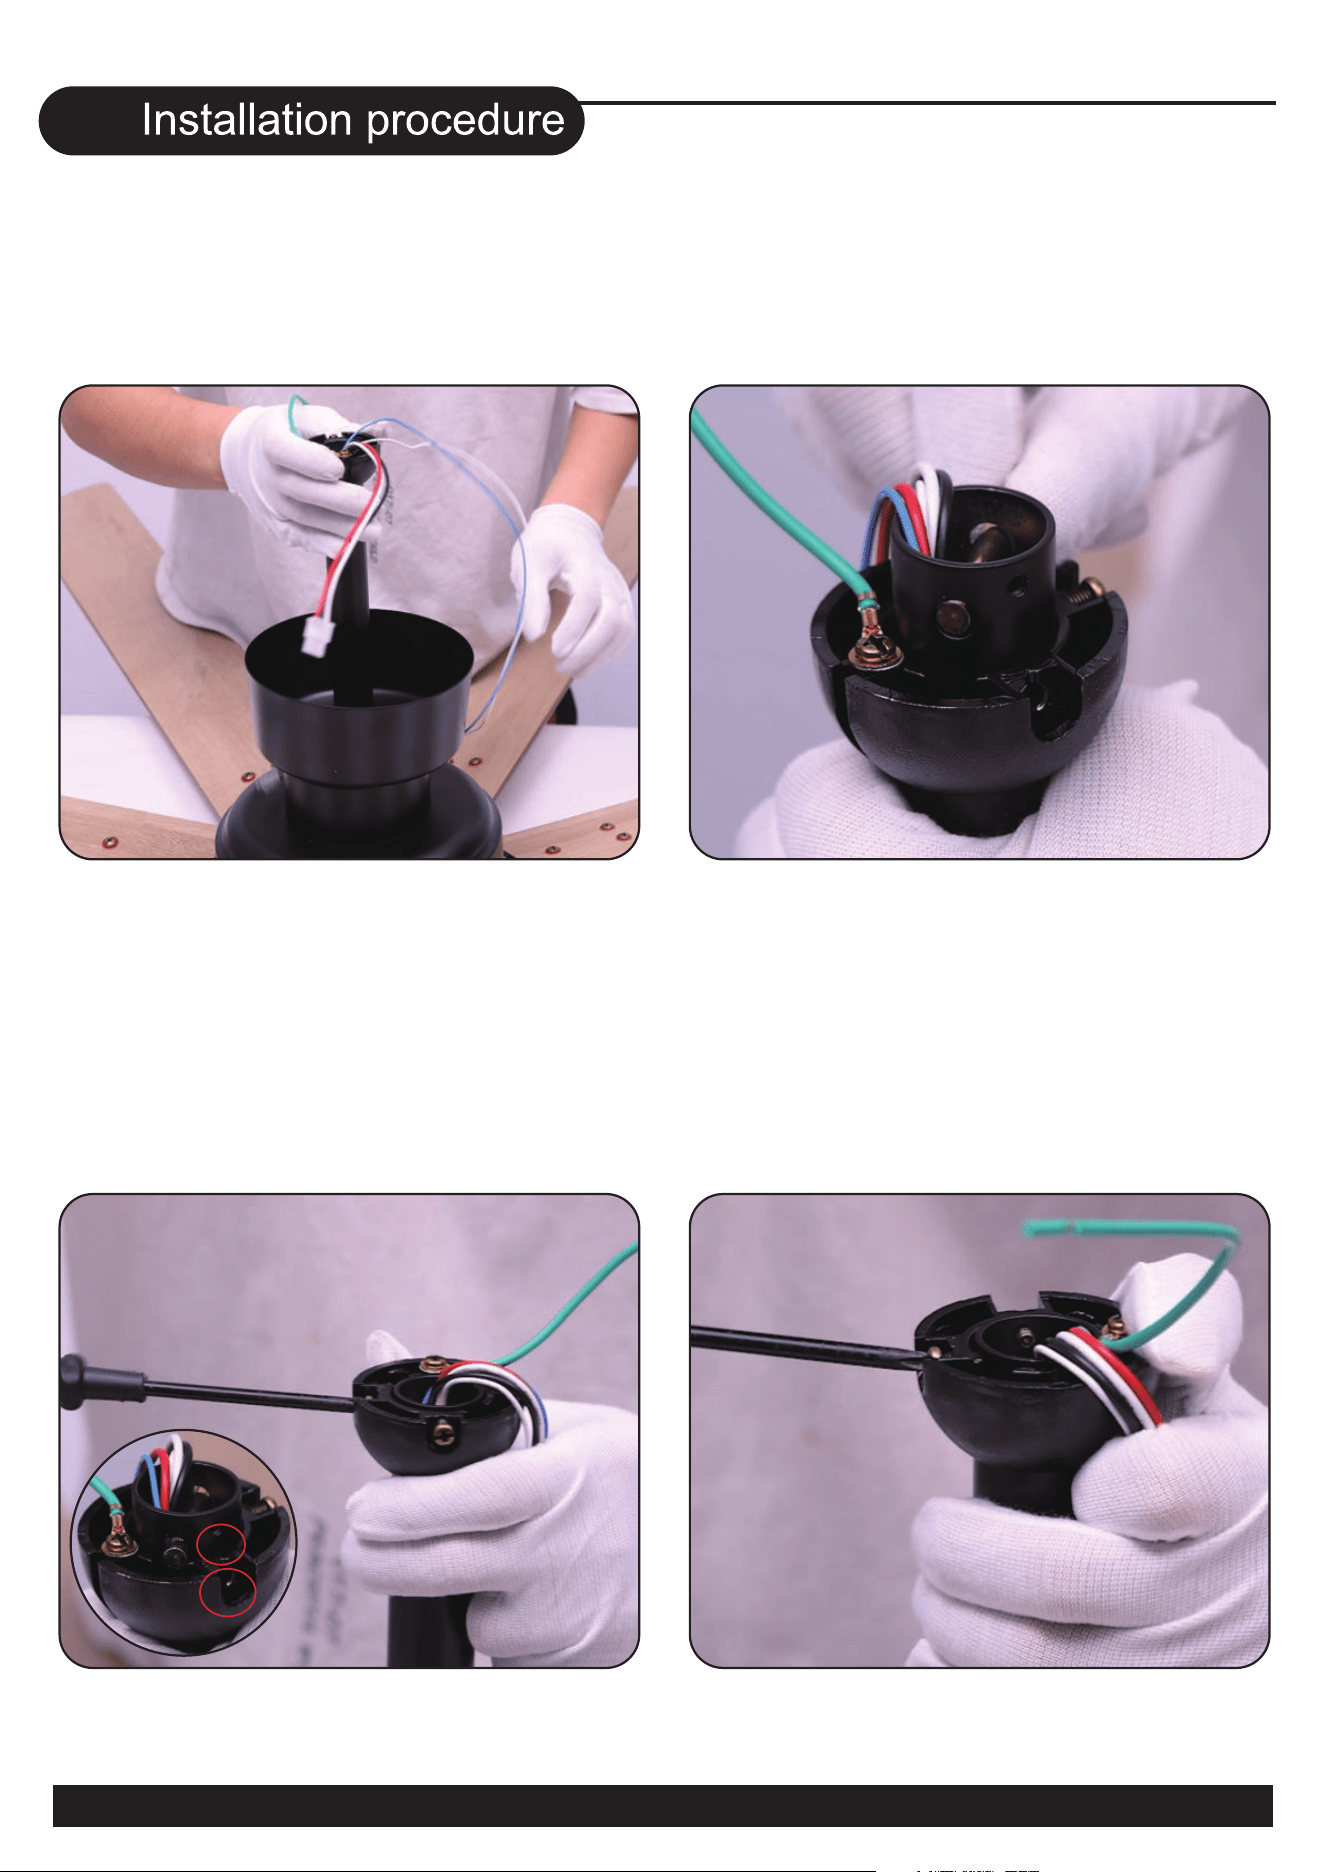
13.Tighten the 2 screws to
prevent fan shaking during
operation
14.Put the decorative cover
through the downrod
15.Put the canopy cover
through the downrod
16.Put the canopy cover through
the downrod
10
06
17.Put the hanger ball through
the downrod
18.Insert the bolt
19.Align the screw holes of the
hanging ball and boom,
use screws to align the screw
holes and tighten the screws
20.Tighten the screw
on the other side
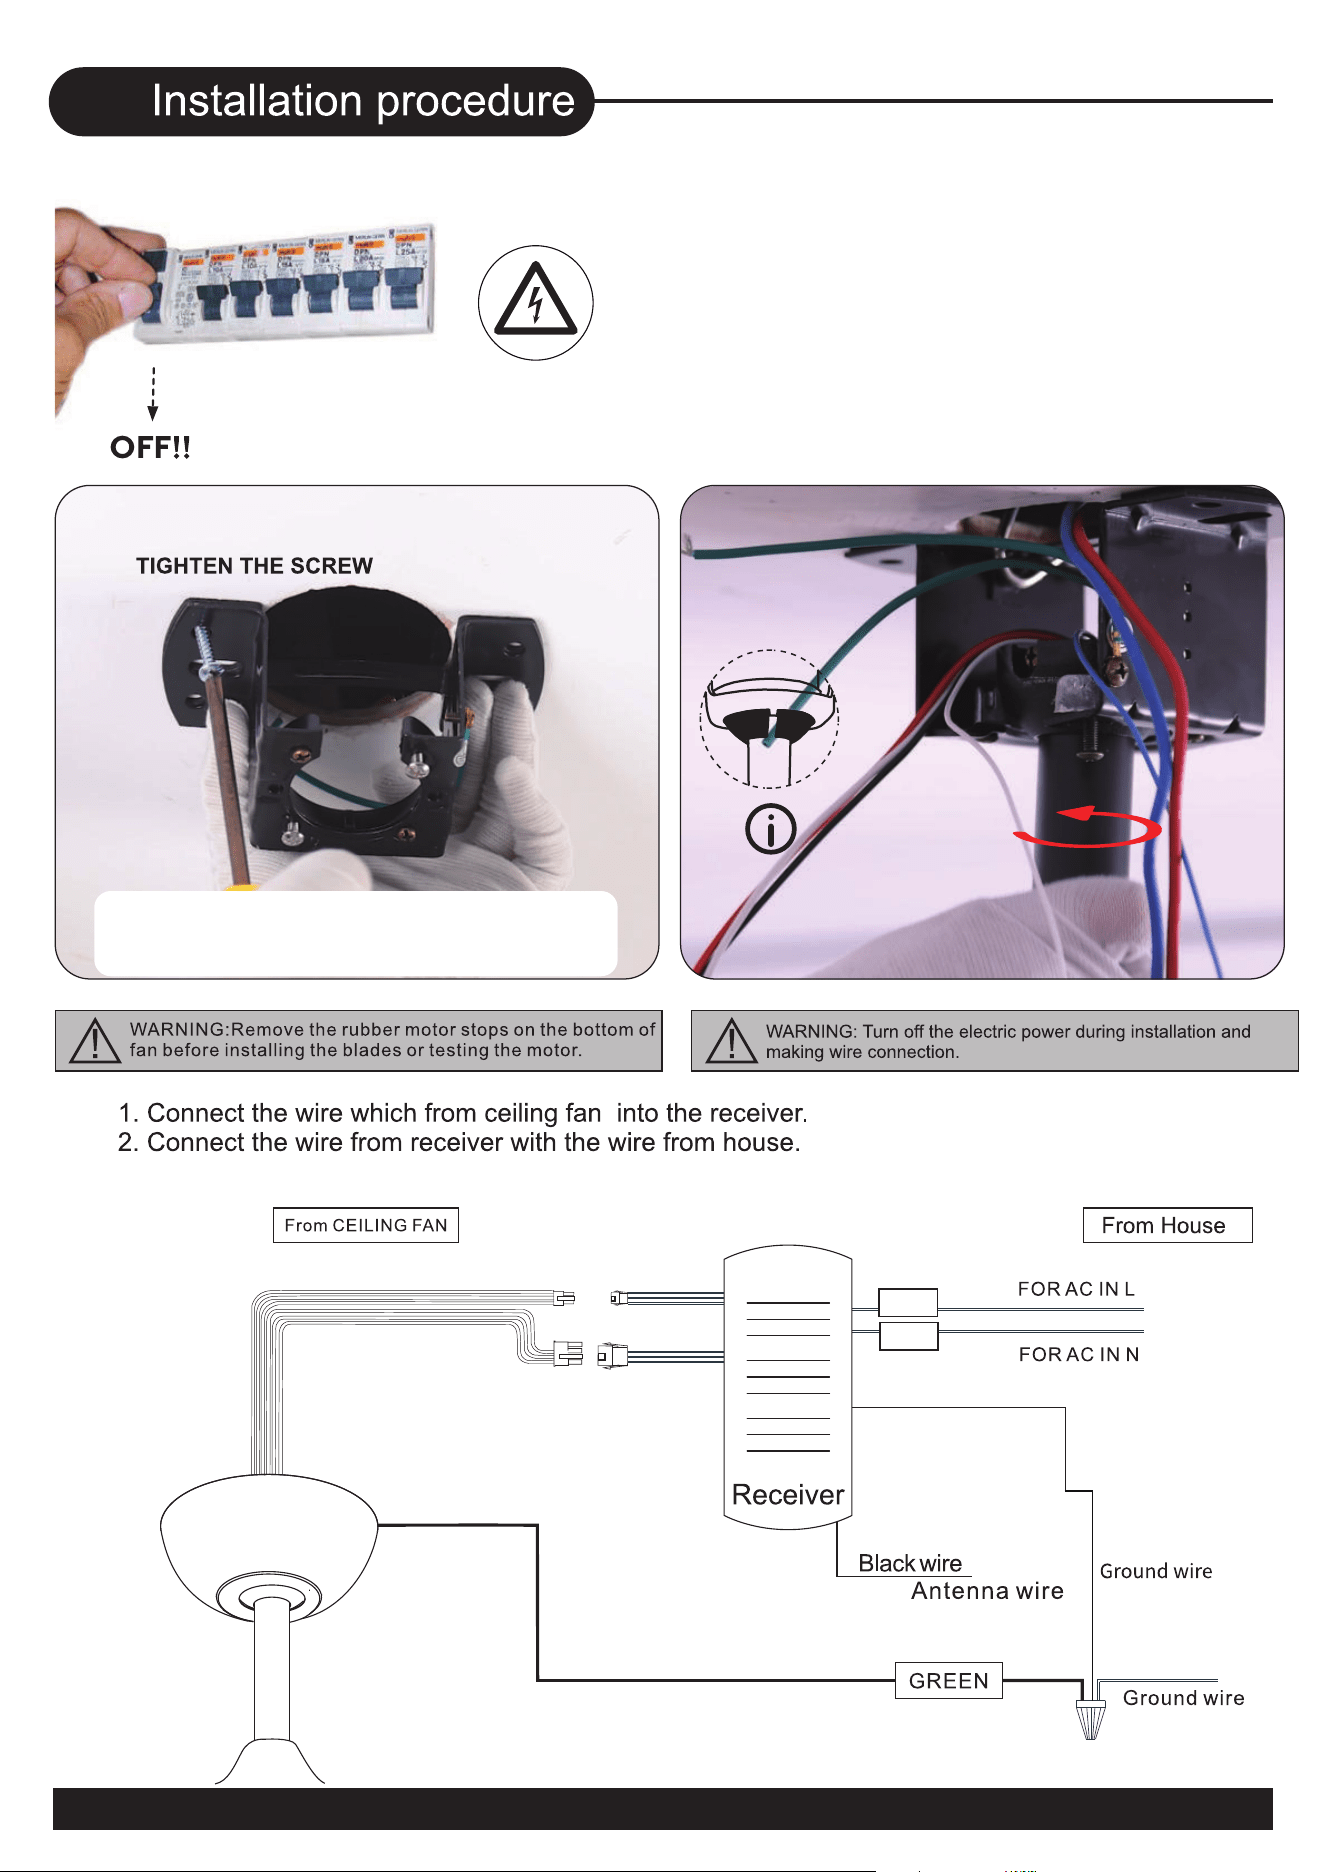
21.Install the mounting
bracket, tighten the screw
22.Install the downrod, put the
rod ball to the slide-on mounting
bracket (both of them have the
gaps, align the gap and jam it)
11
06
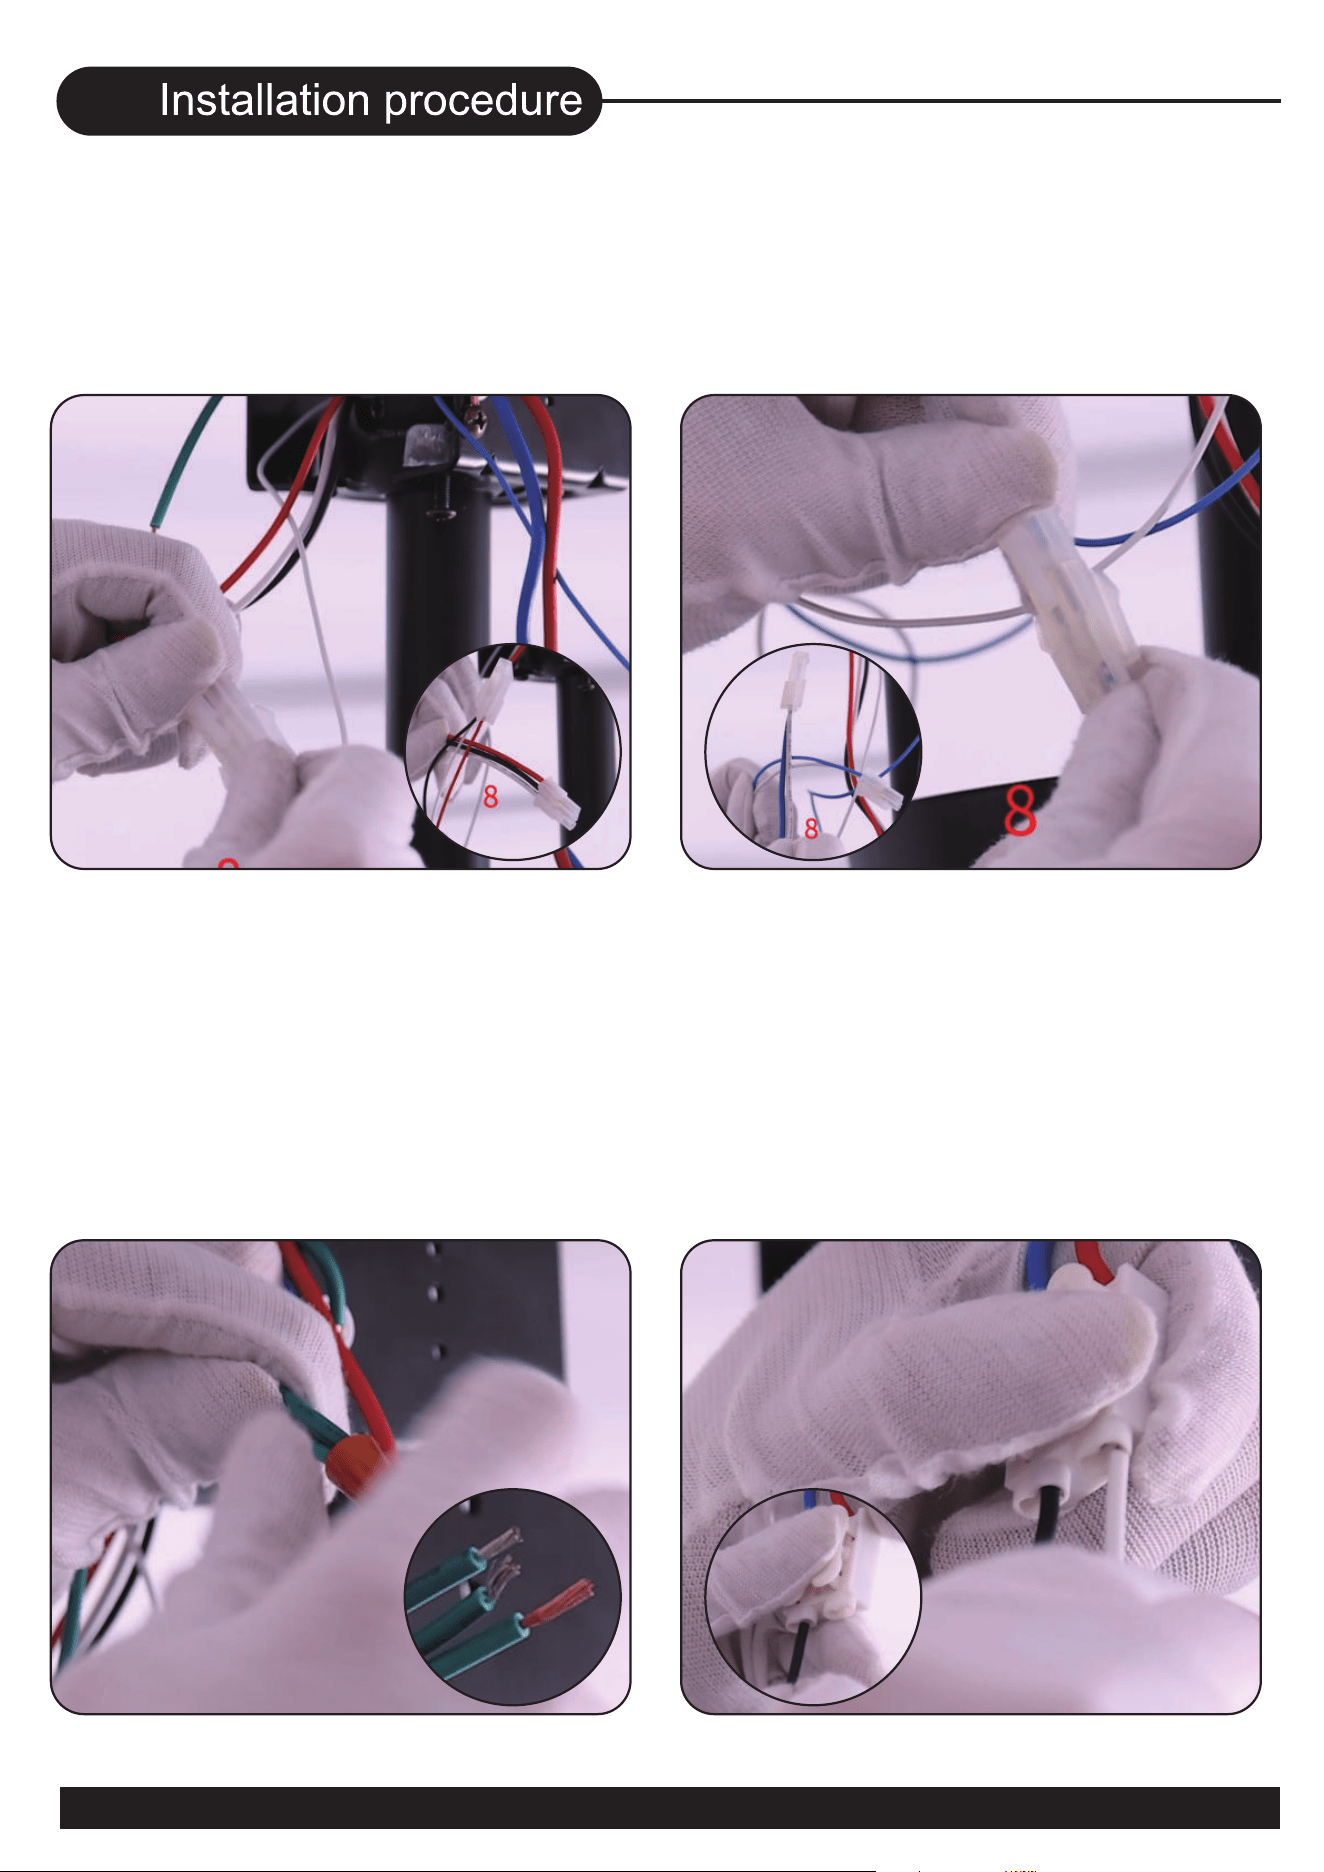
Black
White
hot wire
neutral wire
12
06
23.Connect the wire from the
ceiling fan to the receiver
( Red, White, and Black wires)
24.Connect the wire from the
ceiling fan to the receiver
( White and Blue wires)
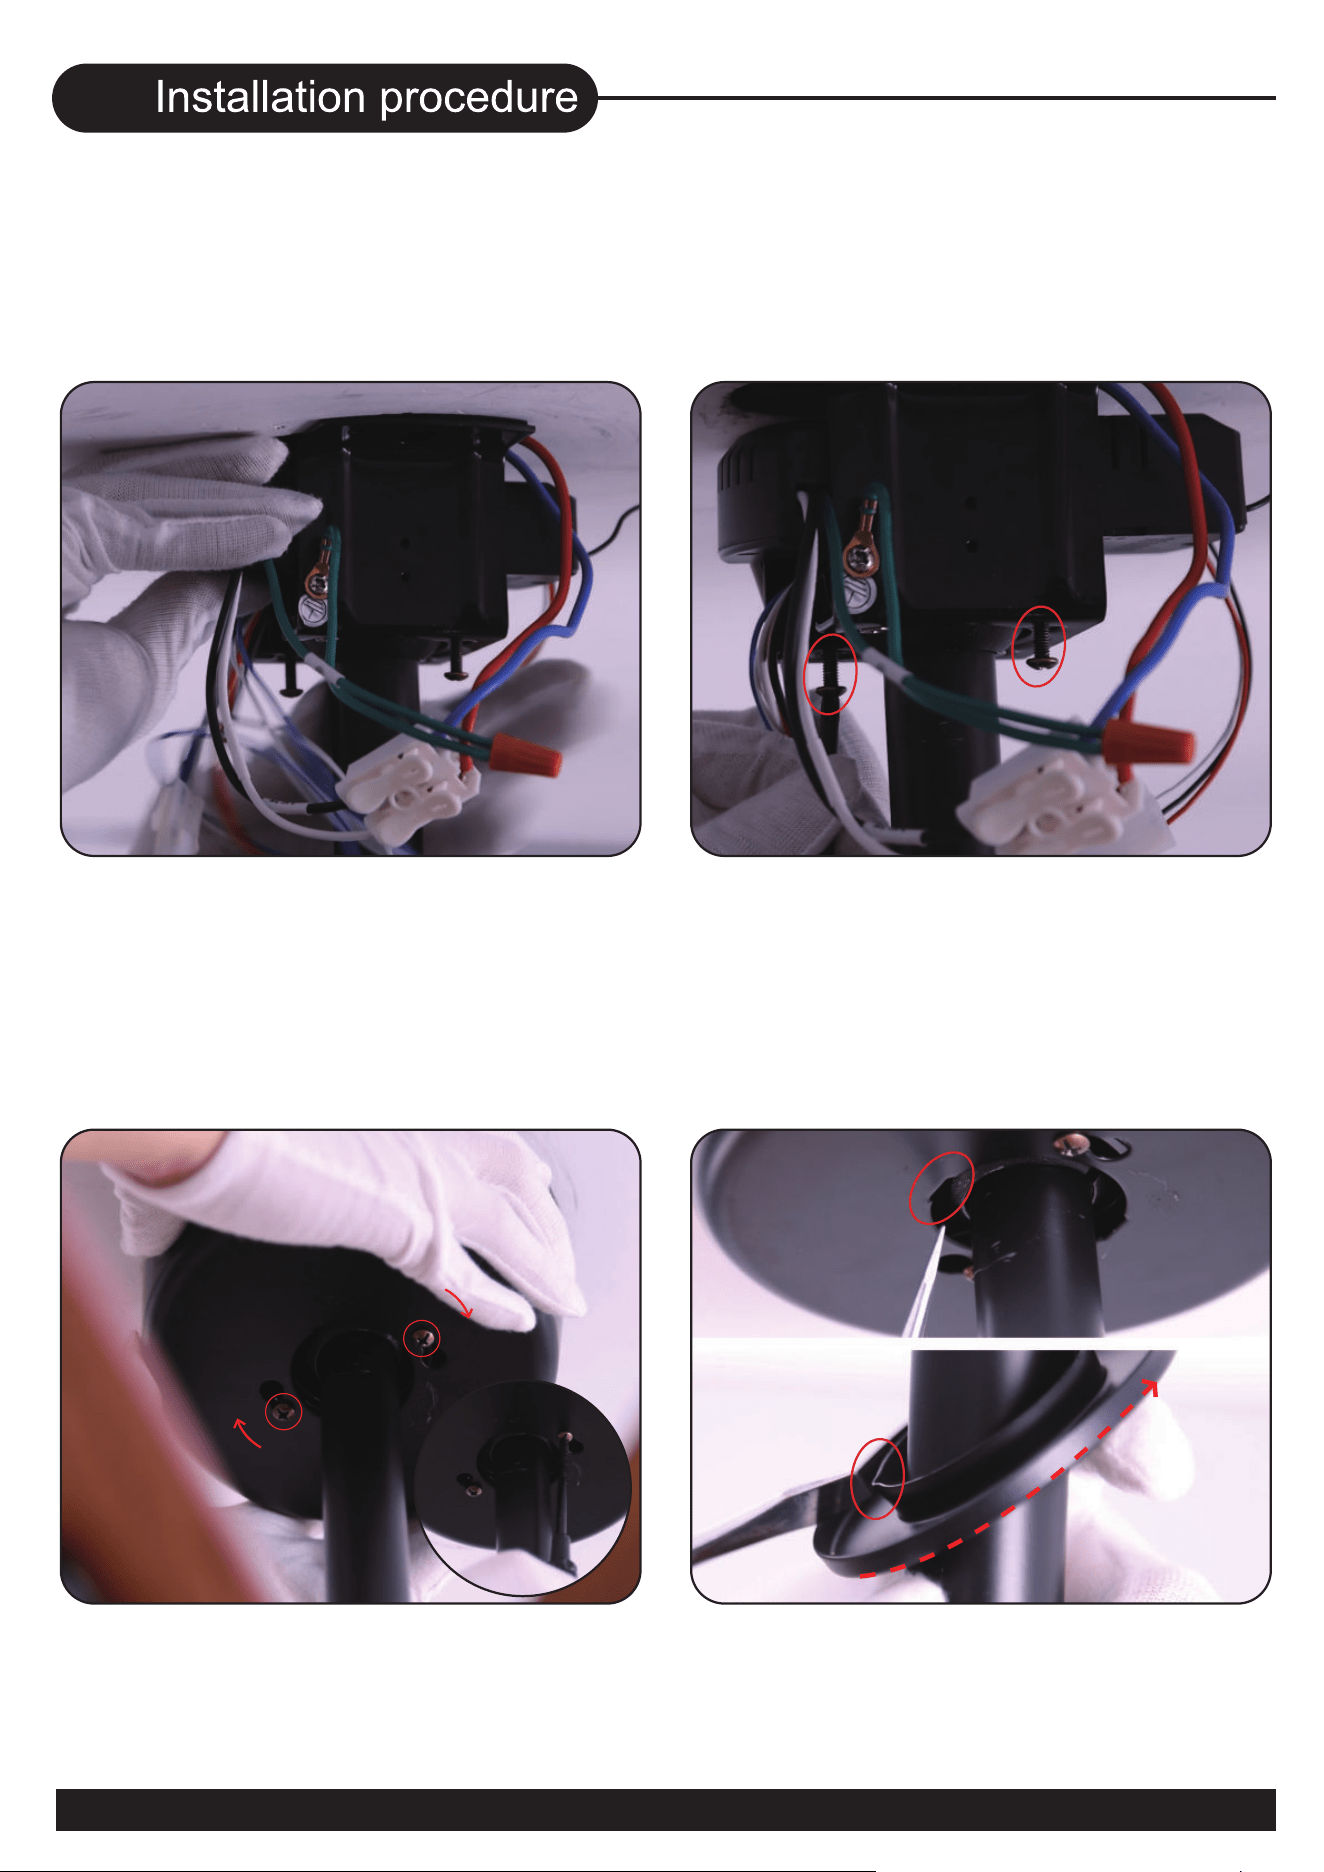
25.Use wire connecting nuts to
connect the three ground
wires( green) coming from the
downrod, receiver and ceiling
racket
26.Connect the fan live
wire (black) to your house live
wire; Connect the fan neutral
wire (white) to your house
neutral wire
13
06
27.Put the receiver into the
mounting bracket
28.Loosen the screws
(do not remove them)
29.Wrap keyhole slots around
the screws, twist clockwise and
tighten 2 screws
30.Lift the canopy cover to the
canopy,then turn and tighten
14
06
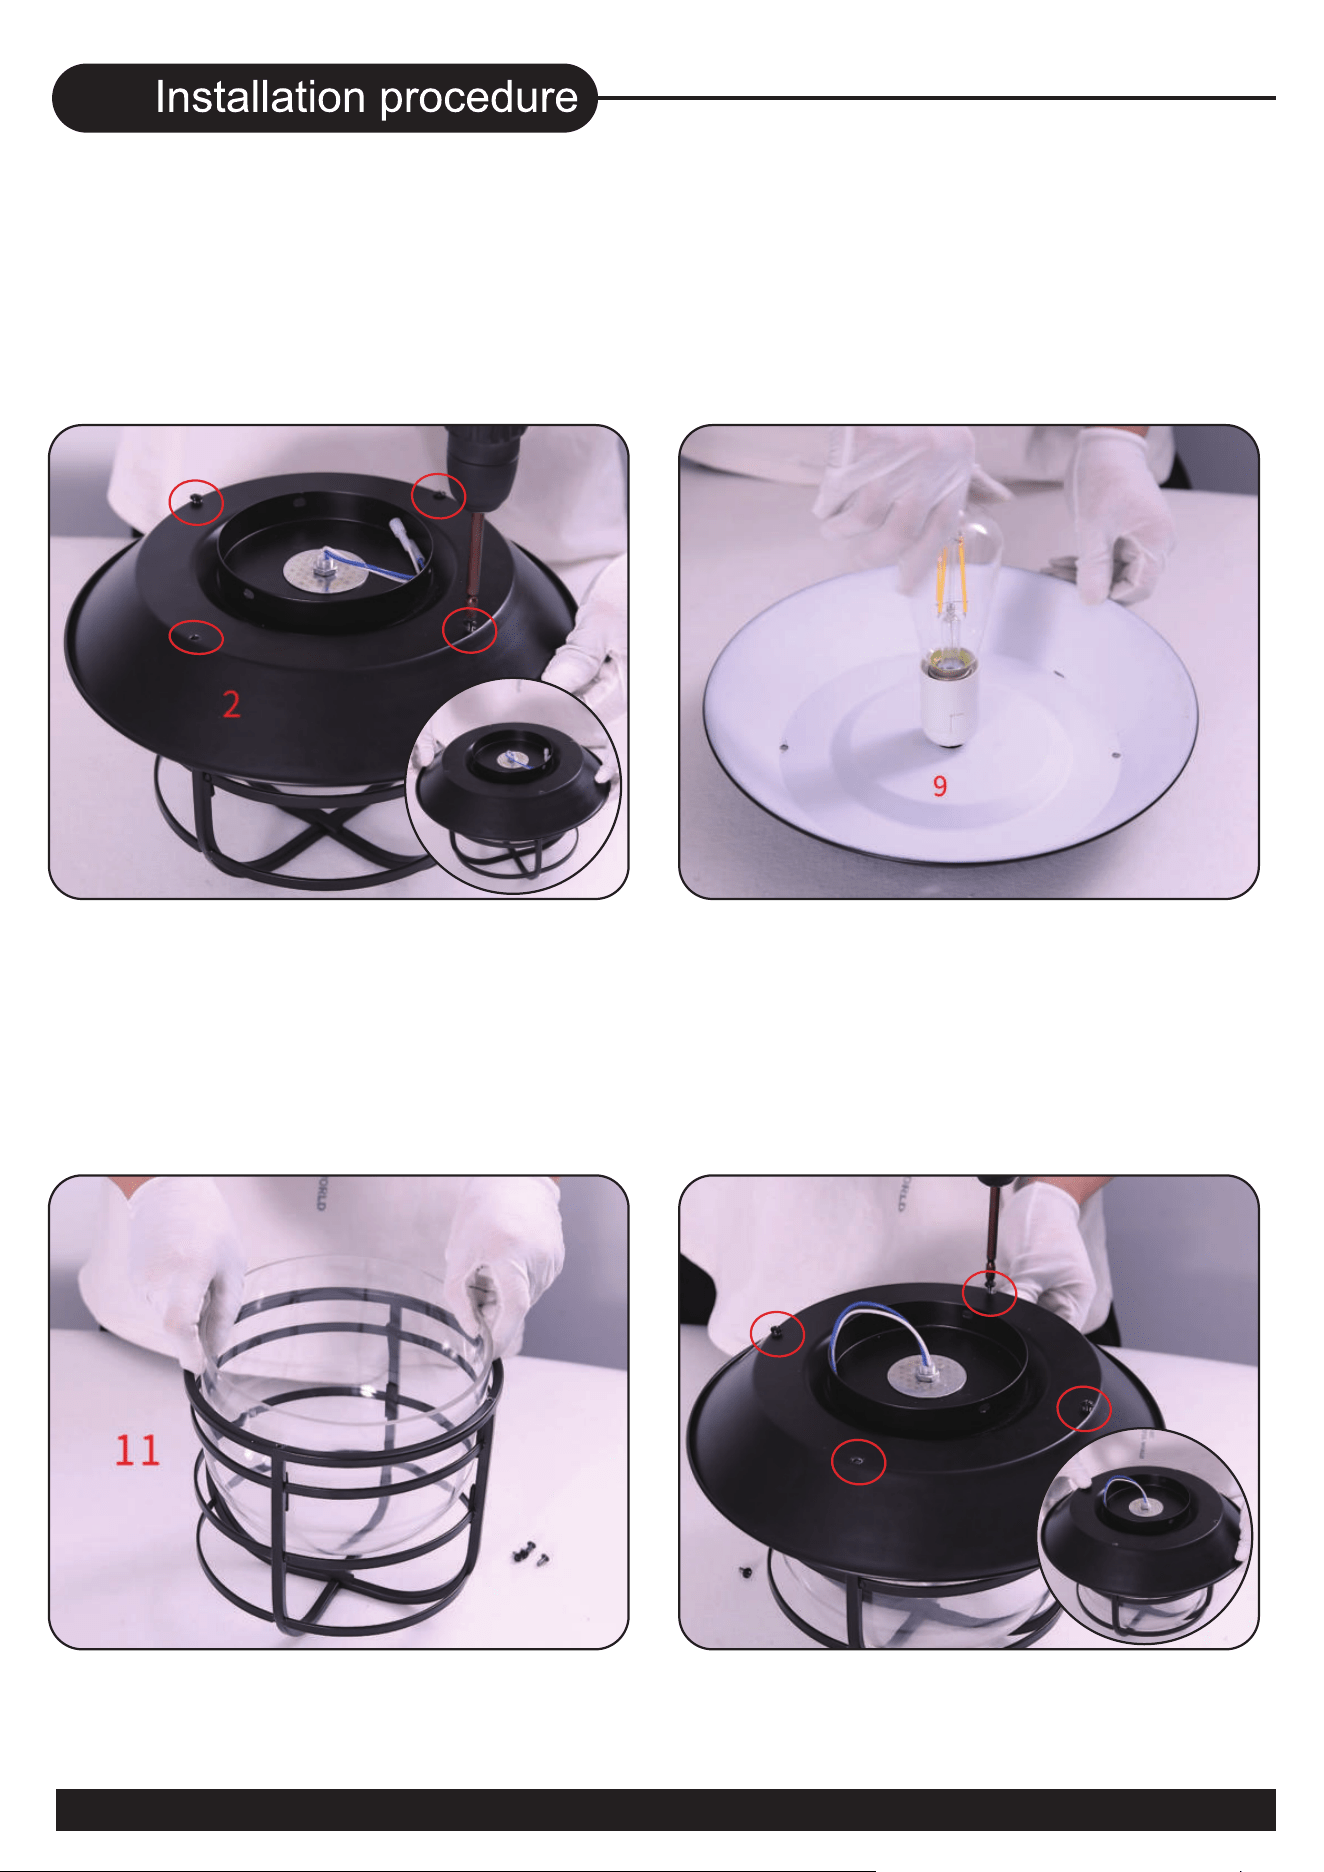
31.Install the four screws on the
back of the light panel,
and then remove the chassis of
the lamp panel.
32.Install the bulb and tighten
33.Install the glass dust cover
into the iron grid
34.Align the chassis of the lamp
panel with the four screw holes,
install it into the iron grid frame,
and tighten the four screws
15
06
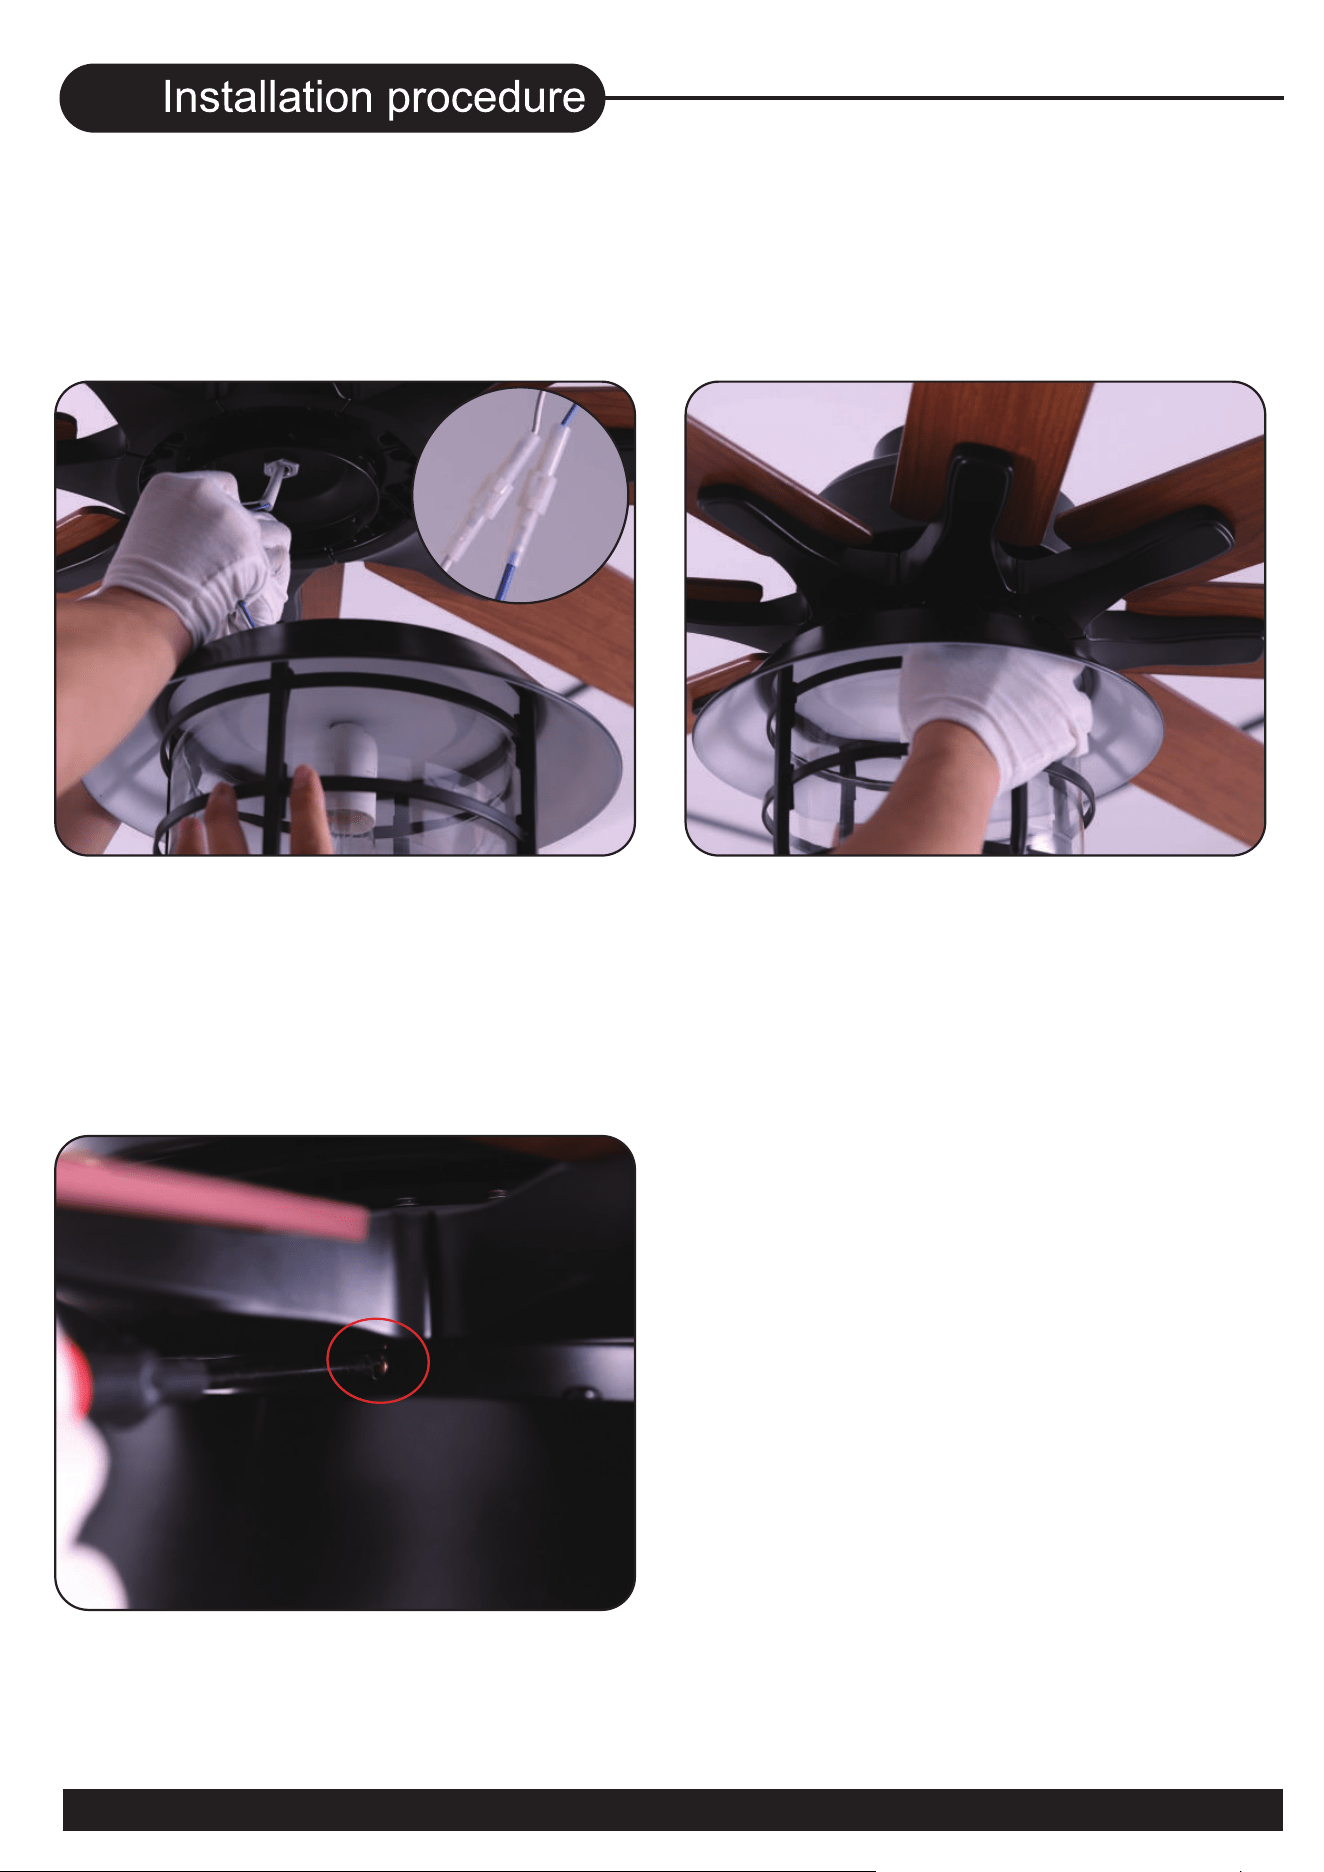
35.Connect the light source
with the wires from the motor
36.Align the three screw holes
of the lamp panel with the motor
37.Insert three light kit screws,
and then tighten them
06
16
07
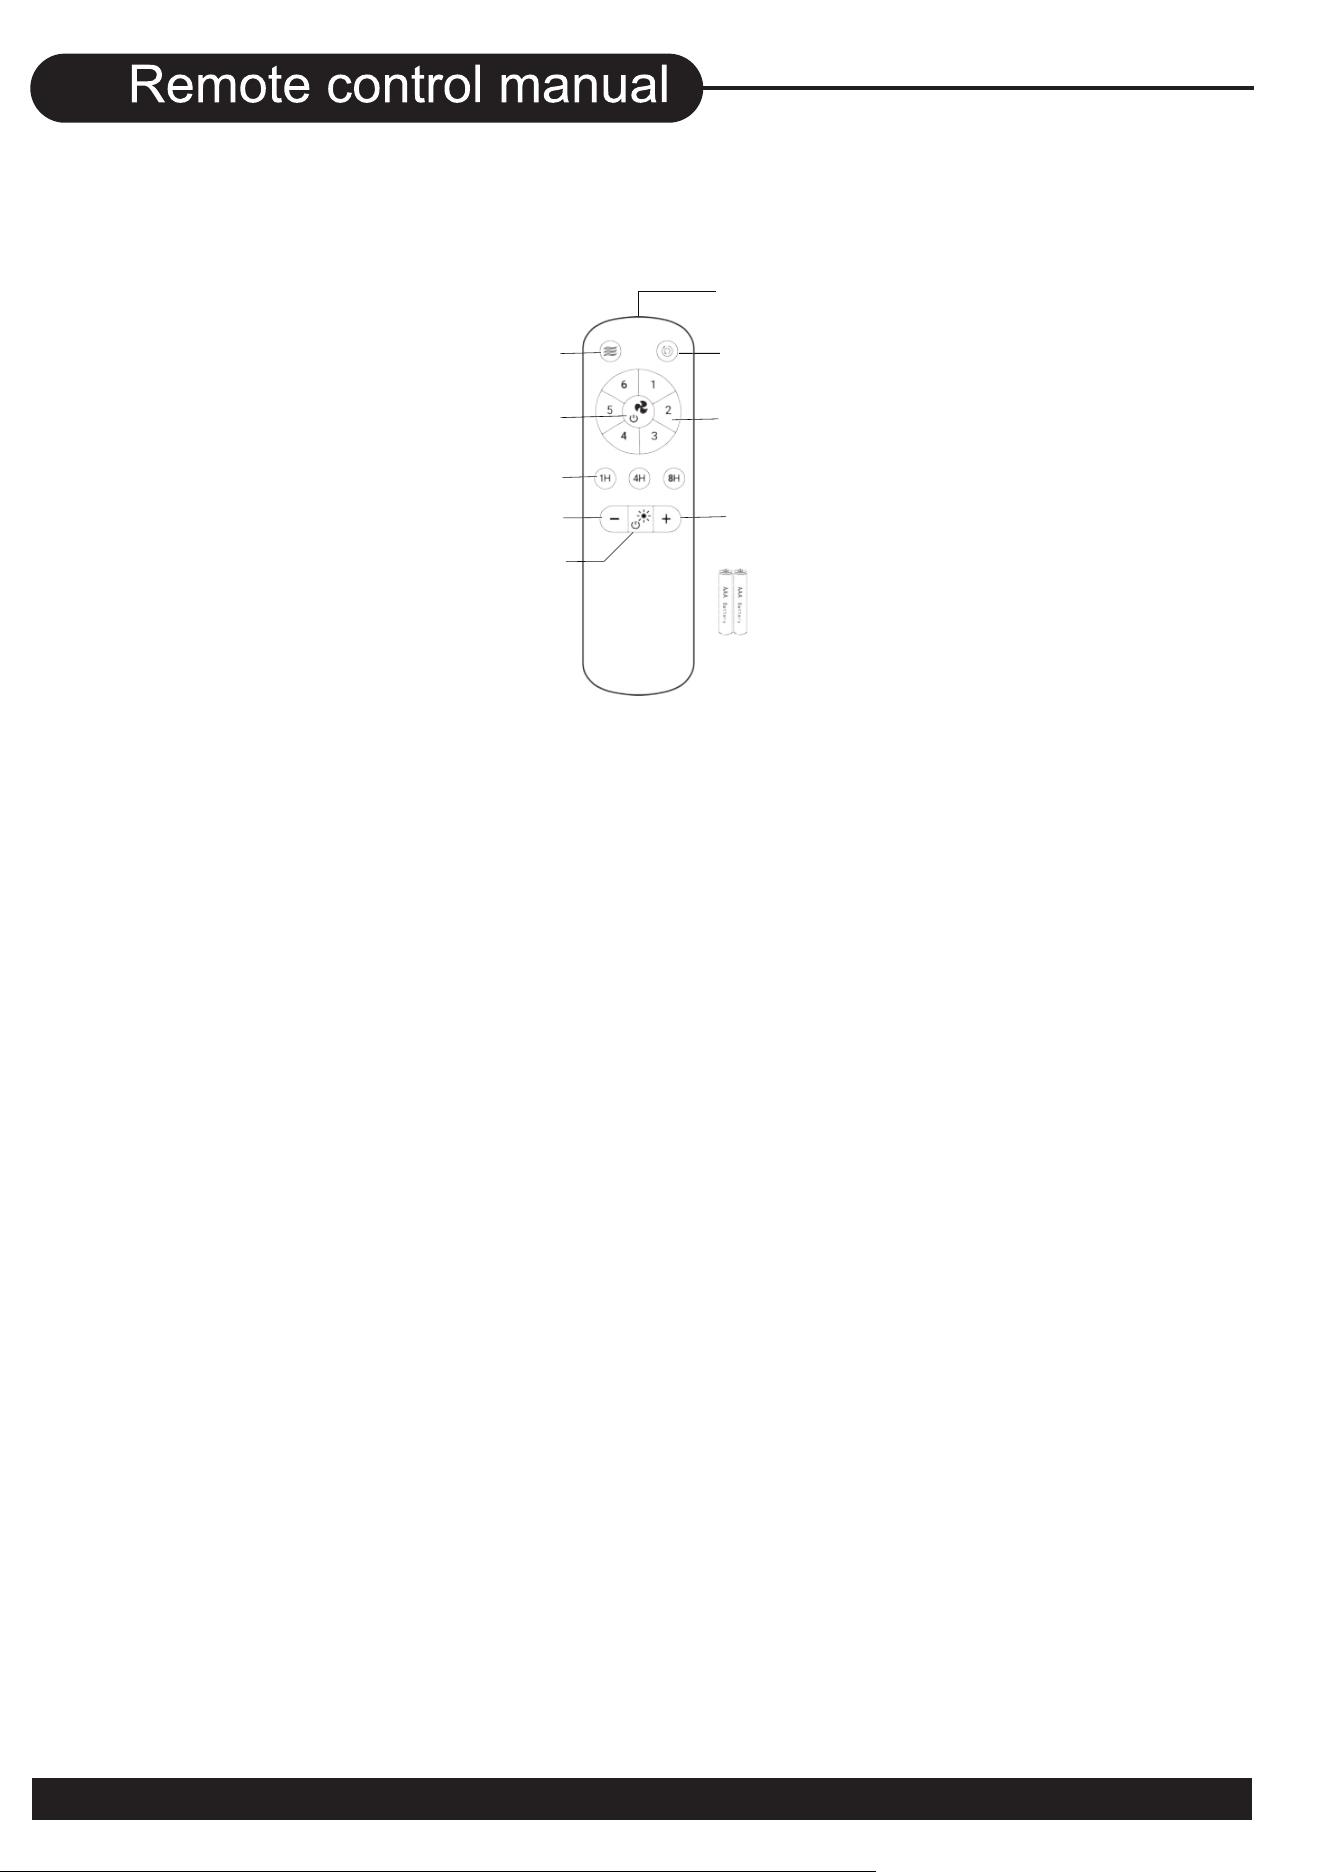
USER MANUAL FOR REMOTE CONTROL TRANSMITTER
(1) Natural wind
Press the key, the fan speed automatic change between 1 to 6 speed.
(2) Direction of the fan
Press this key to change the running direction of the fan.
(3) OFF the fan
- Trun OFF the Fan .
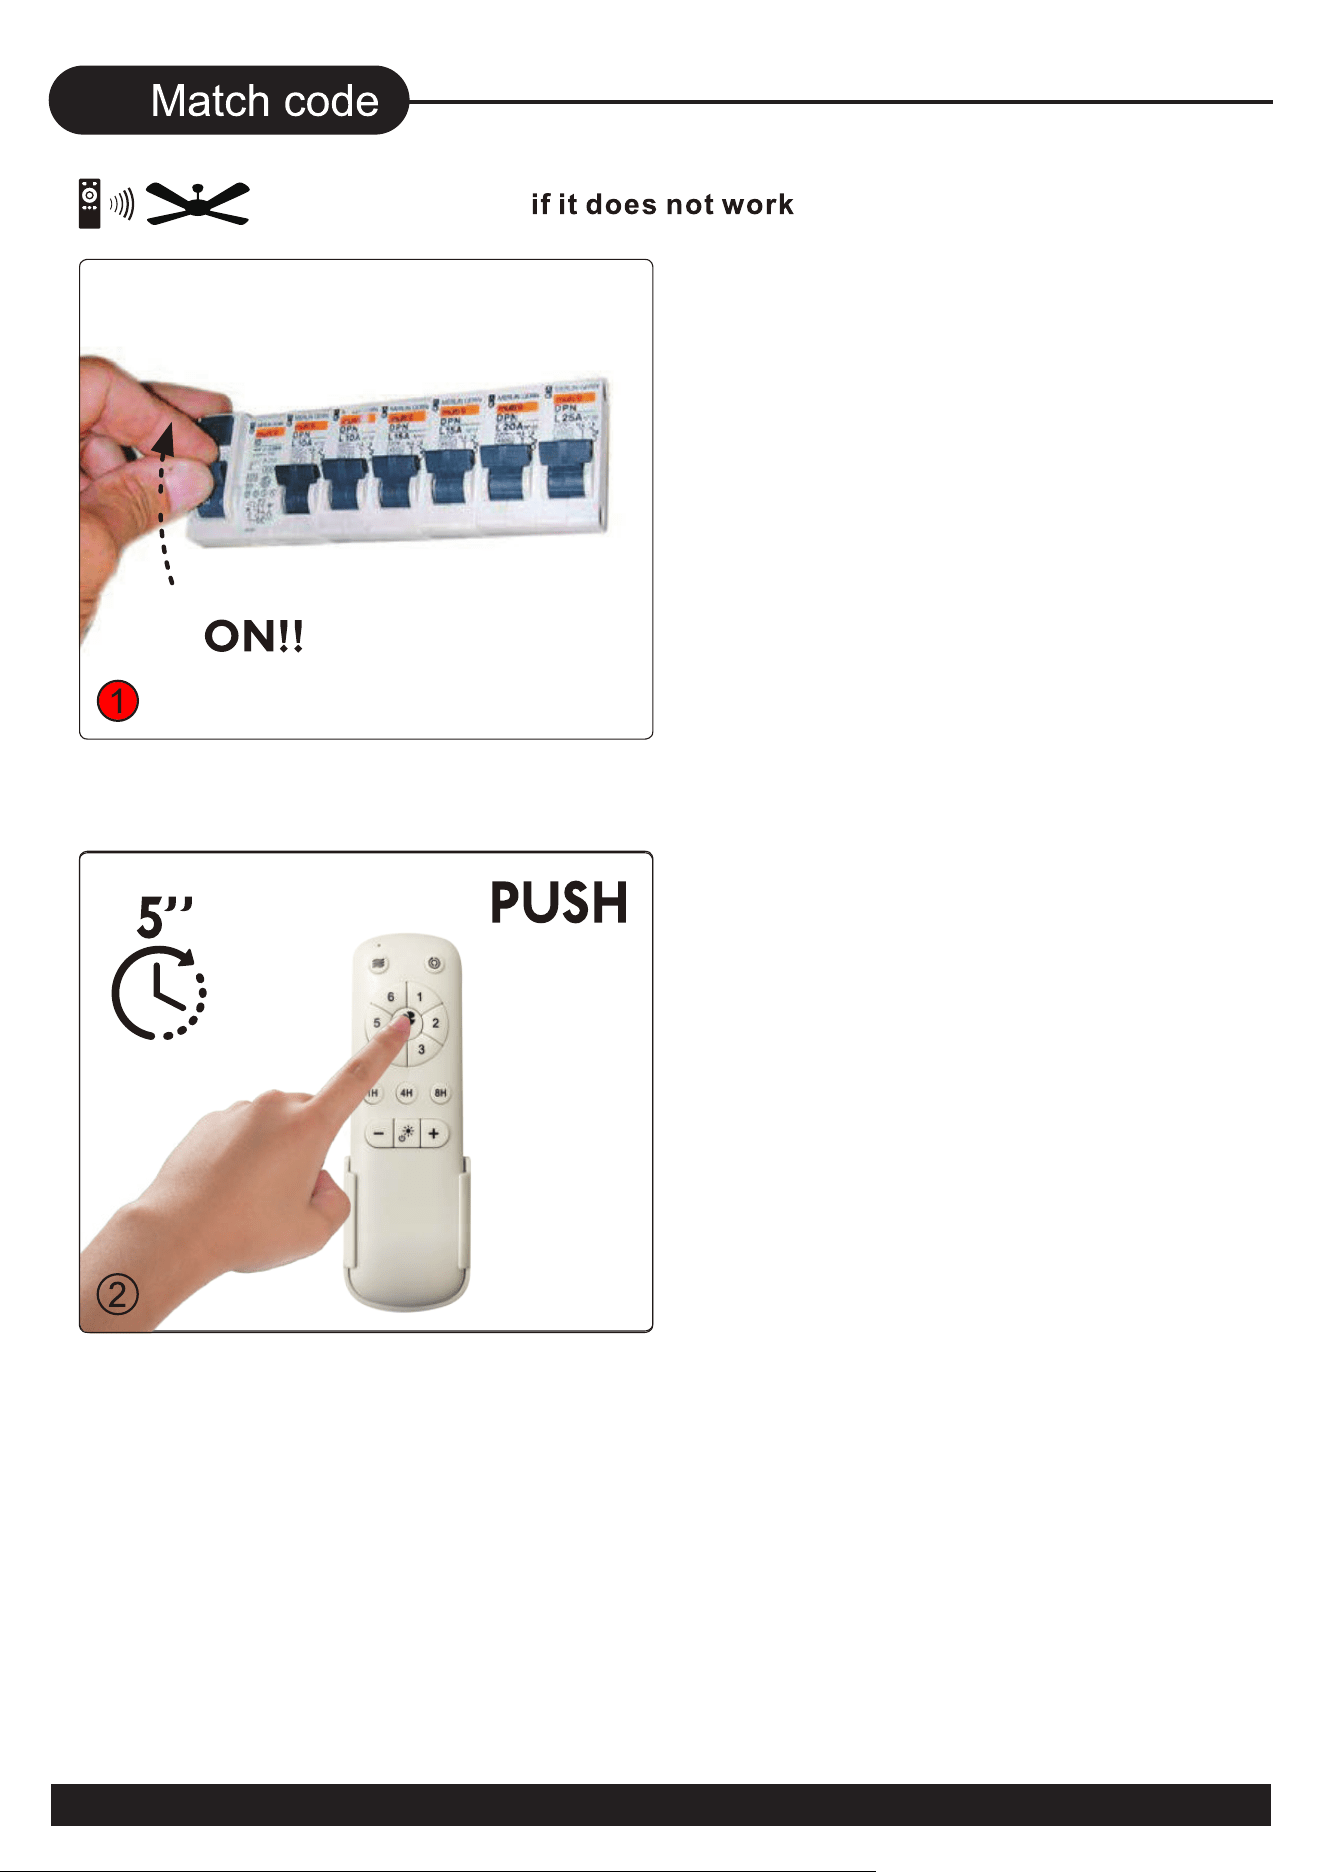
- Remote control pairing: when AC power on, press and hold the key for 3-5 seconds,
the �inish the remote control pairing.
Notice:
The remote controller only needs to be paired once. After the paired product, the controller
will have memory. The products have been paired before leaving the factory. When the
remote control is damaged or lost, it is necessary to implement remote control pairing
before using a new remote control.
(4) Fan speed
Press 1-6 key to start the fan. (Maxium speed: 6)
(5) Timing control of the Fan
- Press keys 1H / 4H / 8H to set up the timer at 1hour ,4 hours or 8 hours.
At the end of the timing, the fan will be automatically turned off.
- Timer setting cancellation : When timing function is working, press any one of 1H,4H or
8H will cancel the timing function.
(6) Light dimming down
When light is on, press and hold this key , the light gradually dimmed.
(7) Light dimming up
When light is on, press and hold this key , the light gradually brightened.
(8) Working indicator
The indicator light will light up when press any key of the remote control.
(9) Light ON/OFF switch
Press this key to turn ON or turn OFF the light.
(10) AAA battery * 2
- Please install 2 pieces of AAA batteries before use.
- Please remove the battery when it is not used for a long time.
(1) Natural wind
(5) Timing control of the Fan
(7) Light dimming up
(4) Fan speed
(8) Working indicator
(10) AAA battery *2
(2) Direction of the fan(Reverse switch)
(6) Light dimming down
(3) OFF the fan/Remote control pairing
(9) Light switch
17
08
1.Turn on the main switch.
2.Pressing and holding this key
for 5 seconds.
18
09
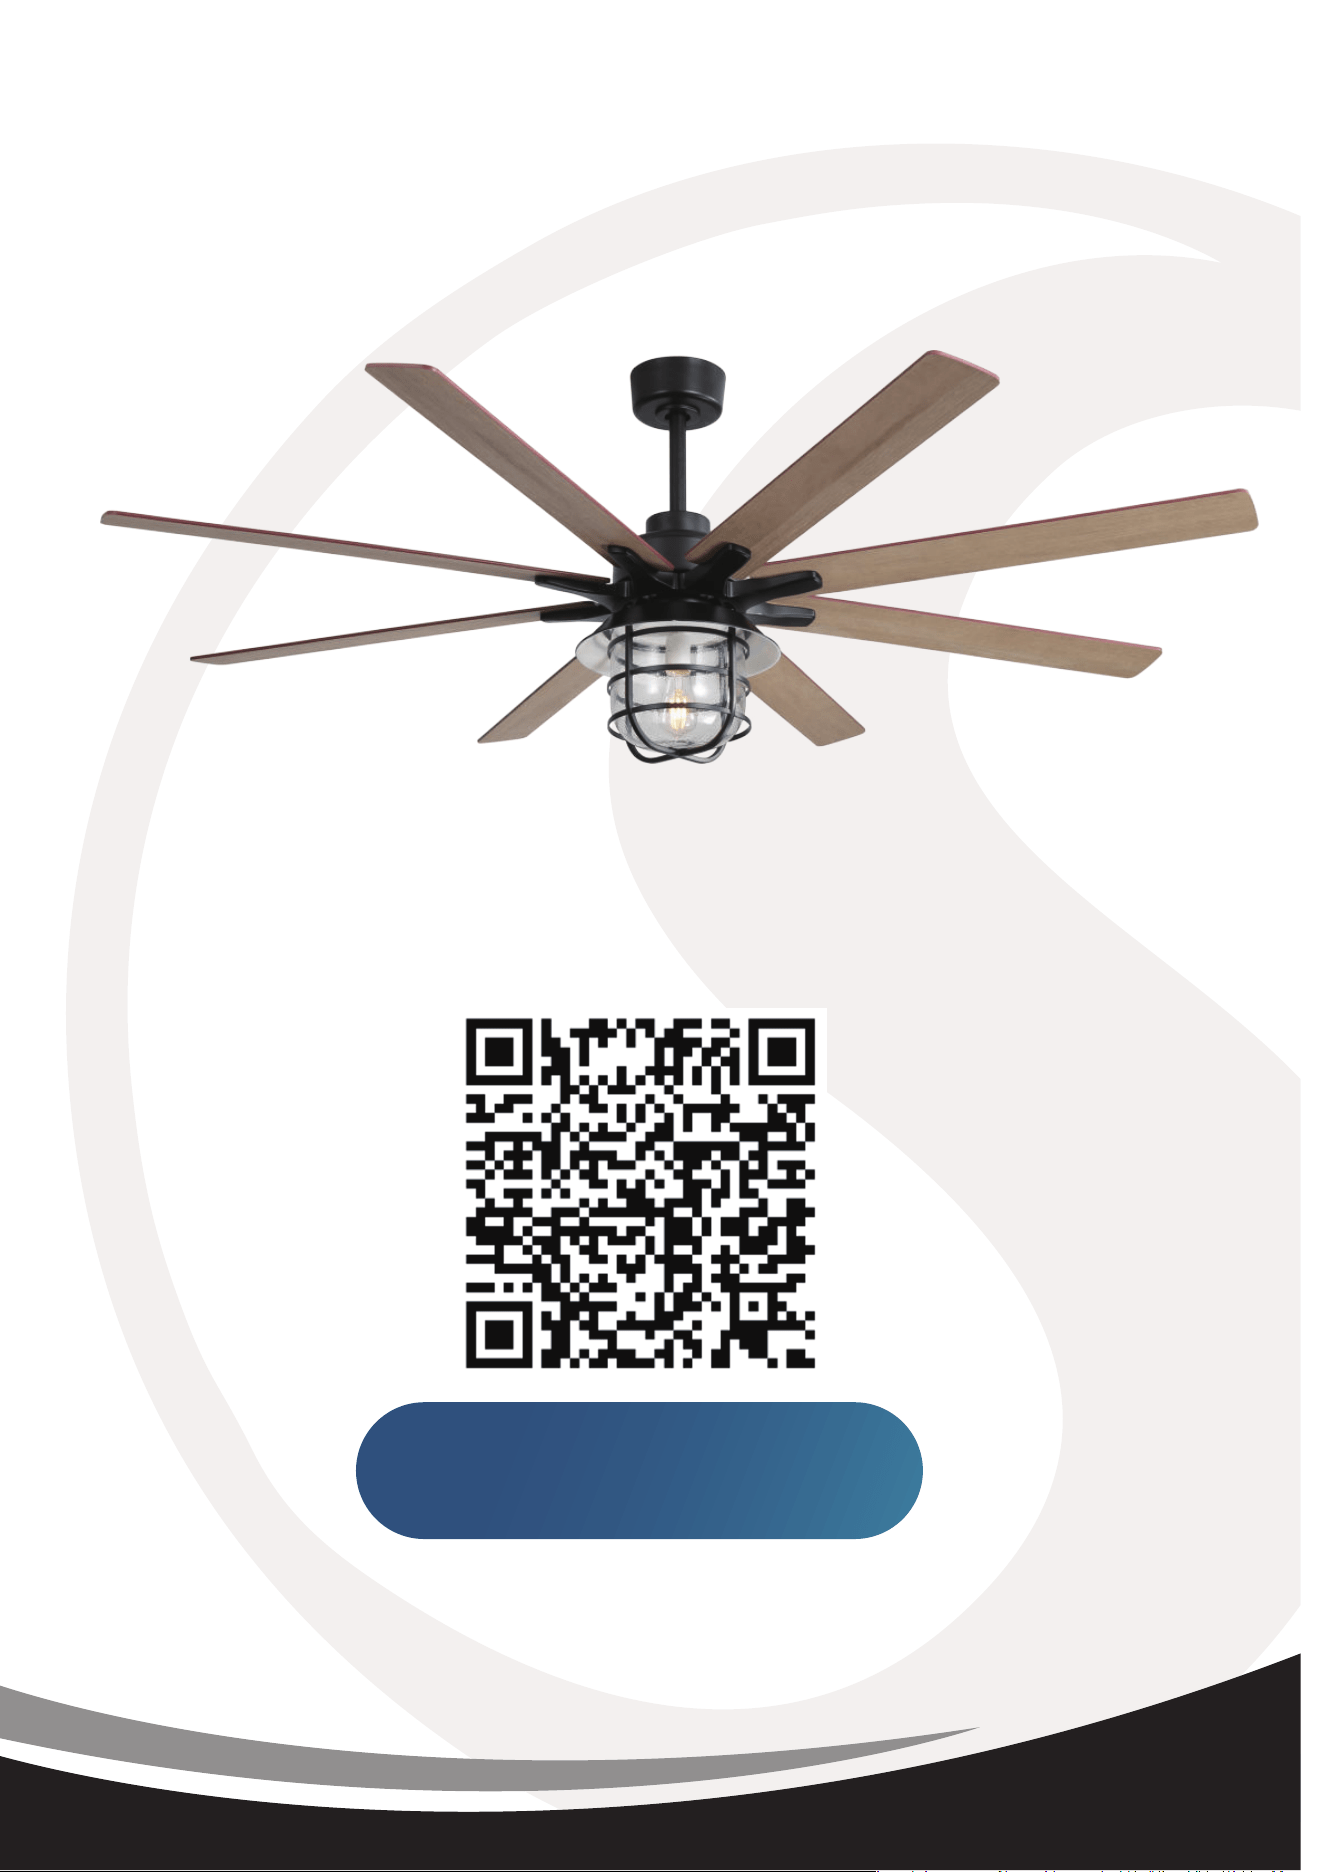
Register for Extended
2 Years Warranty+2 Year Warranty
Within the First 7 days
Scan QR code with your phone