
Professional Installation Instructions for Rotors
Always use NEW hardware + OEM torque + cross-pattern tightening.
If inexperienced, have work performed by an authorized dealer.
1. Preparation (Required)
• Tools: Torque wrench, hex/Torx sockets, brass hammer, bearing driver, NEW OEM rotor bolts, Loctite 243 (blue), clean
rags, brake caliper bracket
• Consumables: NEW rotor bolts (DO NOT reuse old bolts – risk of loosening or breaking), bearings, washers, axle cotter
pin/clip (recommended to replace)
• Vehicle: Secure on center stand/lift, remove wheel, clean hub mounting surface and rotor contact area
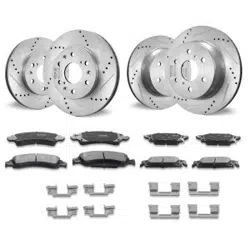
2. Rotor Structure & Installation Direction (Critical)
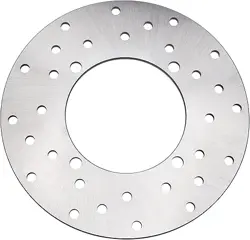
• rotor = inner carrier (hub side) + outer friction ring (allow slight movement)
• Direction: Friction surface faces the brake caliper; inner carrier against the hub, pins/rivets toward the hub
• Inspection: Rotor must float slightly radially and axially (no binding, no noise)
3. Installation Procedure (OEM Standard)
1. Cleaning & Inspection
• Thoroughly clean hub mounting surface, rotor inner diameter, and bolt holes to remove oil, dirt, and debris
• Inspect rotor: no warping, cracks, or loose rivets; outer ring must move freely
2. Alignment & Pre-Tightening
• Align rotor with hub bolt holes and install NEW OEM bolts
• Apply Loctite 243 only to threads (not bolt heads)
• Pre-tighten all bolts in a cross pattern (hand-tight + light snug; do not torque yet)
3. Reinstall Wheel & Brake
• Reinstall wheel, bearings, washers, and axle; torque axle nut to OEM spec
• Reinstall brake caliper; confirm even clearance between caliper and rotor, no rubbing
• Spin wheel slowly to verify rotor runs true with no wobble or binding
4. Critical Prohibitions (Must Read)
• ❌ DO NOT reuse old rotor bolts
• ❌ DO NOT skip cross-pattern tightening (may cause rotor warpage and brake shudder)
• ❌ DO NOT over-torque or under-torque (over-torque breaks bolts; under-torque causes loosening)
5. Post-Installation Inspection
• Spin wheel: rotor must run true with no wobble or rubbing noise
• Lightly apply brakes: smooth, no shudder, no vibration, no abnormal noise
• Recheck rotor bolt torque after 50 km to prevent loosening

Common Installation Pitfalls:
I. Why does it squeal?
1. New brake disc + new brake pads have overly smooth surfaces
Metal-to-metal contact creates high-frequency vibration, resulting in the sharp “squeal/whine” noise.
2. Lack of cleaning during installation
Anti-rust oil, grease, or fingerprints on the disc and pads can cause slipping and squealing.
3. Brake pads lack chamfering and have sharp edges
Sharp edges scrape against the brake disc, producing an especially high-pitched noise.
4. Improper installation of the brake disc or caliper
Slight run out or rubbing against the brake pads causes constant squealing.
5. Sand or small particles trapped in the brakes
Hard debris wedged between the disc and pads creates high-frequency squealing.
II. Quick way to tell if it’s normal
• Squeals only during light braking, but fades or disappears under hard braking → mostly normal break-in noise
• Normal brake feel, no shaking, pulling, or excessive overheating → generally fine
• Constant squealing that gets louder while riding, plus brake vibration → possible installation issue
III. DIY fixes (try in order)
1. Cleaning
Thoroughly clean the disc and pads with brake cleaner to remove oil and grease.
2. Low-speed break-in
Apply light brakes repeatedly at 30–40 km/h to evenly bed the pads and disc. The noise usually fades after a few dozen
kilometers.
3. Avoid hard braking
Do not brake aggressively for the first 100 km with new discs and pads, to prevent glazing, which makes slipping and noise
worse.
4. Check for pad rub
Spin the wheel to see if the brake pads rub the disc constantly. If so, adjust the caliper position.
These are usually caused by mismatched disc/pad sets, improper alignment, stuck caliper slide pins, or other installation
issues.
If you encounter any problems that cannot be solved, you can contact our merchants for assistance. We'll
make it right for you.