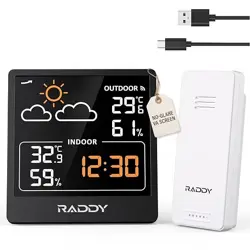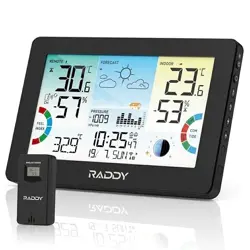
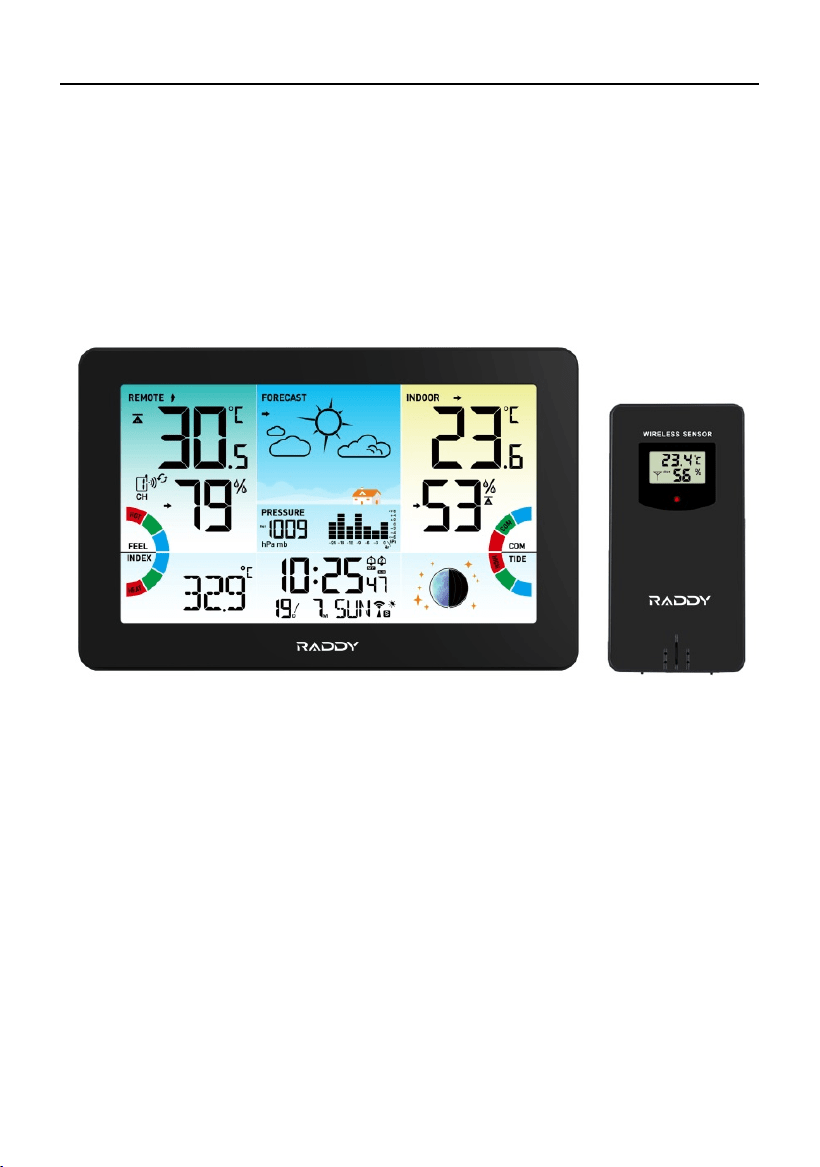
Raddy HW75 WEATHER STATION
HW75-WWVB Manual


HW75-WWVB Manual
Features:
WWVB Radio control time function
Perpetual Calendar Up to Year 2099
Day of week in 3 languages user selectable: English, French and Spanish,
Time in optional 12/24 hour format
Daily Alarm Function
Automatic snooze function
Moon phase and tide display
Temperature:
— Indoor temperature measurement ranges: 14°F (-10°C) to 122°F (50°C)
— Outdoor temperature measurement ranges: -40°F (-40°C) to 158°F (70°C)
— Temperature alternatively in °F or °C
Humidity: Indoor & outdoor measurable range: 20%RH ~ 95%RH
Minimum/maximum display for air humidity and temperature
Indoor and outdoor temperature and humidity upper and lower limit alert and frost
warning
Indoor comfort index and outdoor feeling index display
Indoor mold risk, outdoor heat index and dew point temperature are displayed on the
INDEX switch
Wireless Outdoor Sensor:
— Wall mount or table st
and
— 433.92MHz RF transmitting frequency
— 200 feet (60 meters) transmission range in an open area
—Up to 3 wireless outdoor sensors can be connected (one Wireless outdoor Sensor
Included)
Air pressure:
— Air pressure range: 17.72 to 32.48 inHg (600 to 1100 hPa)
Weather forecasting function
Power Supply:
Weather Station:
Battery: 2 x LR6 AA
DC-Power: DC5V (Input current is greater than 1.2A,
dedicated power adapter,
TYPE-C interface)
Wireless Remote Sensor
:
B
attery:2 x LR6 AA
F.Y.I.:
T
he wireless remote sensor can work at -22°F to +158°F.
Please choose the right battery
according to the limit temperature of the wireless sensor:
Alkaline zinc manganese battery can work at -4°F to +140°F
Polymer lithium ion rechargeable battery can work at -40°F to +158°F.
1
HW75-WWVB Manual
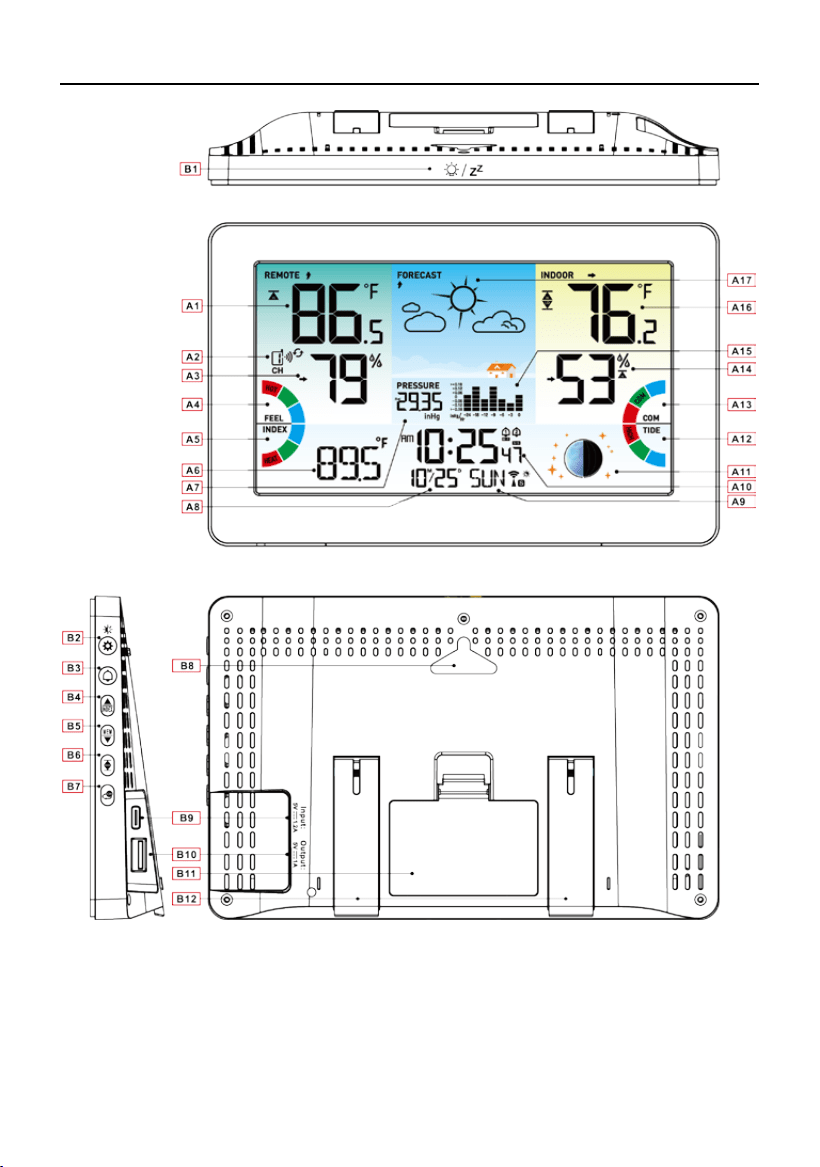
Weather Station Appearance
Part A-Positive LCD
A1: Outdoor remote temperature
A2: Outdoor channel / receiving icon
A3: Outdoor remote humidity
A4: Outdoor feeling index
A5: Index conversion bar
A6: Indoor mold risk / Outdoor heat index / Outdoor dew point
2
HW75-WWVB Manual
A7: Atmospheric pressure
A8: Calendar
A9: Day of the week
A10: Time
A11: Moon phase
A12: Tide index
A13: Indoor comfort index
A14: Indoor humidity
A15: Historical pressure trend histogram
A16: Indoor temperature
A17: Weather Forecasting
Part B – Back button and power
B1: “ ” touch field
B2: “
” button
B3: “
” button
B4: “▲
|INDEX” button
B5: “▼|MEM” button
B6: “
” button
B7: “
” button
B8: Hanging hole
B9: Type-C power socket
B10: USB charger output
B11: Battery compartment
B12: Support frame
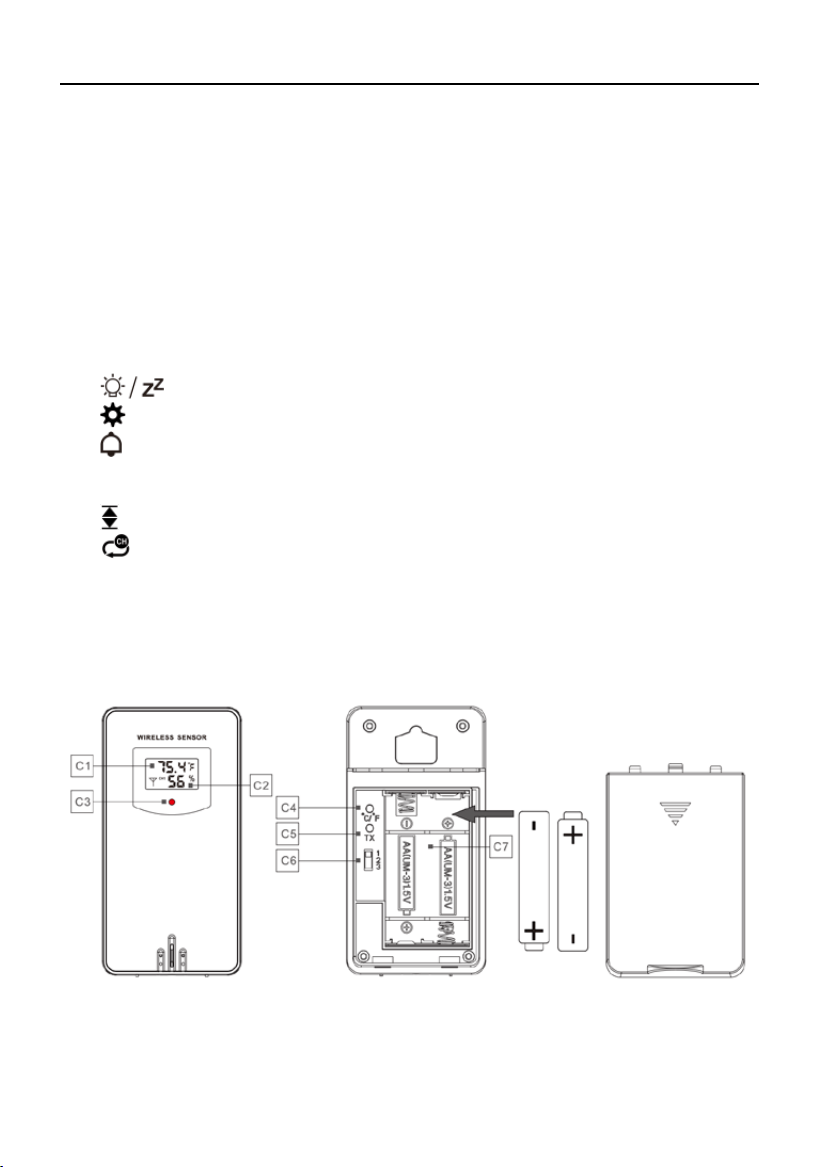
Part C –Wireless Remote Sensor 1(temperature and humidity measurement):
C1: LCD display – Temperature
C2: LCD display – Humidity
C3: Transmit signal LED
3
HW75-WWVB Manual
C4: “°C/°F” button
C5: “TX” button
C6: “CHANNEL 1 / 2 / 3” switch
C7:
Battery compartment
Initial Operation:
Connect the Type-C power adapter to the socket (B9).
Open the station battery cover and insert 2 x AA batteries, observing the correct
polarity.
Once powered, all LCD icons will light up for 3 seconds, a buzzer will sound, and the
station will begin detecting indoor temperature and humidity.
The station will enter synchronization mode for the outdoor sensor. This operation
takes about 3 minutes and is displayed by a flashing reception RF antenna symbol in the
“REMOTE” display area on the receiver.
Open the Remote Sensor battery cover. Set the desired channel (1, 2, or 3) using the
switch (C6) and insert 2 x AA batteries, observing the correct polarity.
When the wireless sensor is loaded into the battery, all the icon on the LCD display will
briefly light up for 3 seconds, and detect the temperature and humidity of the sensor, At
the same time, LED lights flicker once, the wireless sensors automatically transmit
wireless signals.
When the Wireless Sensor is launched, the Weather Station alarm automatically
receives its signal, and the “OUTDOOR” column displays the temperature and humidity
values.
F.Y.I.:
The Weather Stations can receive up to 3 wireless sensors.
The conventional wireless sensor displayed by the weather station is channel 1. If the
wireless sensor is set to channel 2 or 3, you need to press the “
” button on the right
side of the weather station to switch to that channel, and then check whether the
temperature and humidity are correct to confirm whether the signal is successfully
received.
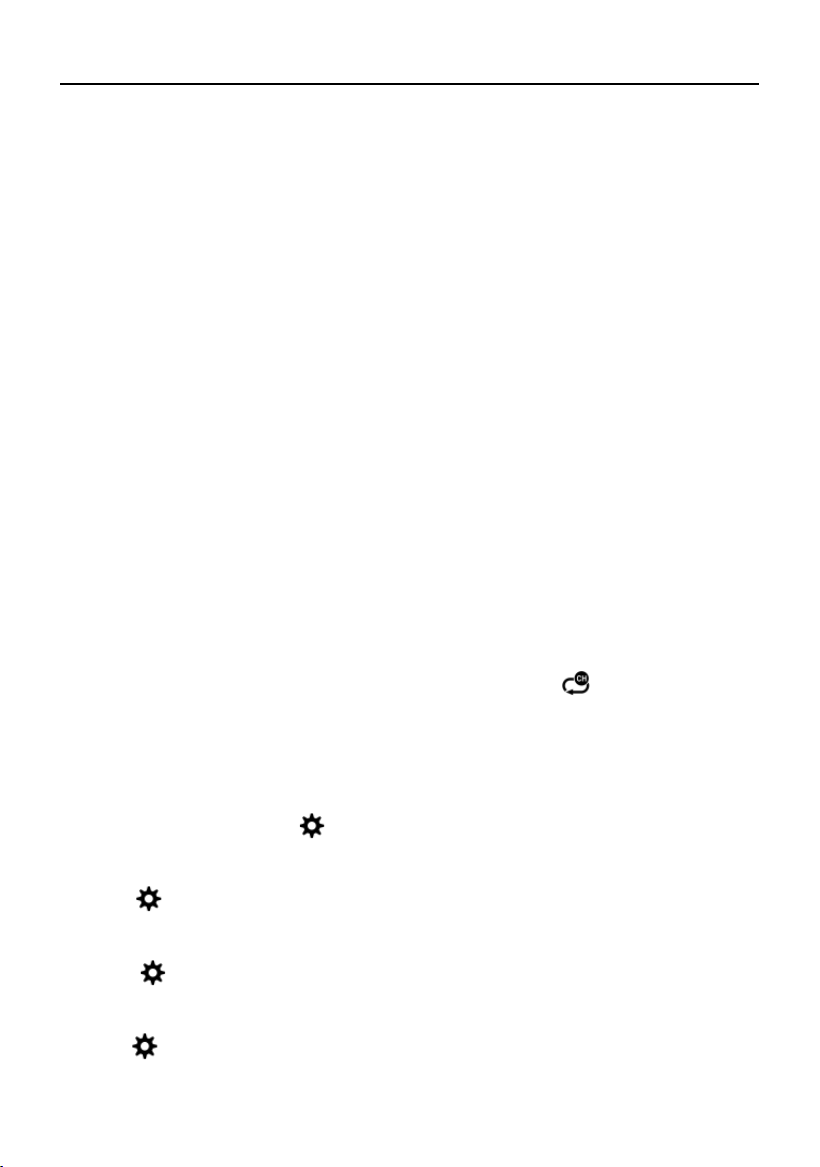
Manual Time Setting:
Press and hold down the “ ” button for 2 seconds to enter the time and general
settings, First set the unit of temperature in “°C” or “°F”, Now use the “▲” and “▼” button
to set the temperature of the unit, the unit of temperature can be set to “°C” or “°F”.
Press “
” to confirm your setting, switch to pressure unit setting. Now use the “▲”
and “▼” button to set the pressure of the unit,
the unit of t pressure can be set to “hPa” or
“inHg”
Press “
” to confirm your setting, switch to radio controlled clock(RCC) function
setting, Now use “▲” and “▼” buttons set the RCC receive function to activate(ON) or
close(OFF)
Press “
” to confirm your setting, switch to daylight saving time (DST) function setting,
Now use “▲” and “▼” buttons set the DST function to activate(ON) or close(OFF)
4
HW75-WWVB Manual
Press “ ” to confirm your setting, switch to time zone setting, Now use “▲” and “▼”
buttons set a correct time zone (AST,EST, CST, MST, PST, AKT, HAT).
Press “
” to confirm your setting, switch to the 12/24 hour mode display setting. Now
use “▲” and “▼” buttons to set the time displayed in 12-hour or 24-hour format
Press “
” to confirm your setting, switch to the hour setting. Now use “▲” and “▼”
buttons to set the correct hour.
Press “ ” to confirm your setting, switch to the minute setting. Now use“▲” and “▼”
buttons to set the correct minute.
Press “
” button to confirm your setting, switch to the Month and Date display setting.
Now use “▲” and “▼” buttons to set the date display on Month/Date or Date/Month.
Press “
” button to confirm your setting, switch to the year setting. Now use “▲” and
“▼” buttons to set the correct year.
Press “
” button to confirm your setting, switch to the month setting. Now use “▲”
and “▼” buttons to set the correct month.
Press “
” button to confirm your setting, switch to the date setting. Now use “▲” and
“▼” buttons to set the correct date.
Press “
” button to confirm your setting, switch to the language selection for the week
and month displays setting. Now use “▲” and “▼” buttons to select a language.
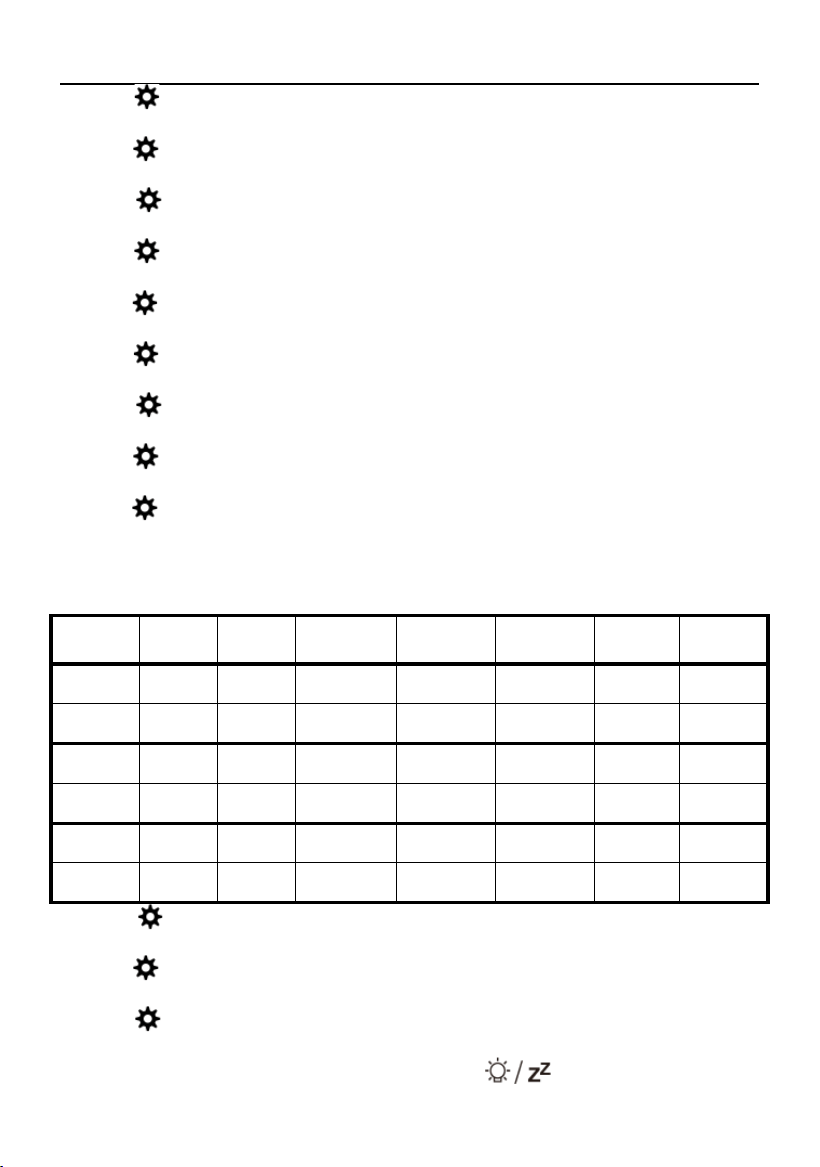
Note: There are 3 languages of Weekday: English, French and Spanish
Week language display
Language Sunday Monday Tuesday Wednesday Thursday Friday Saturday
ENGLISH MONDAY
TUESDAY
WEDNESDAY
THURSDAY FRIDAY
SATURDAY
SUNDAY
ENG MON TUE WED THU FRI SAT SUN
FRENCH LUNDI MARDI MERCREDI JEUDI VENDREDI SAMEDI
DIMANCHE
FRE LUN MAR MER JEU VEN SAM DIM
SPANISH LUNES MARTES
MIERCOLES
JUEVES VIERNES SABADO DOMINGO
SPA LUN MAR MIE JUE VIE SAB DOM
Press “ ” button to confirm your setting, switch to barometric pressure calibration
mode. Now use “▲” and “▼” buttons to set the atmospheric pressure value.
Press “
” button to confirm your setting, switch to setting the initial weather. Now use
“▲” and “▼” buttons to to select the current weather
Press “
” to confirm your setting and to end the setting procedures, enter the clock
mode.
During the setting process, press and hold the “
” button for more than 1
5

HW75-WWVB Manual
second to exit the setting mode immediately
F.Y.I.:
After 20 seconds without pressing any button, the clock will automatically switch from
Set Mode to Normal Time Mode.
When setting the time, if the minutes are changed, the seconds will automatically reset
to 00.
When setting the time, press and hold the “▲” and “▼” button to change the value
quickly.
The user must set the correct time zone according to their location. Otherwise, the
standard time received from the RCC signal may display incorrectly. The available time
zones are as follows:
AST: Altantic Standard Time -4
EST: Eastern Standard Time -5
CST: Central Standard Time -6
MST: Mountain Standard Time -7
PST: Pacific Standard Time -8
AKT: Alaska Standard Time -9
HAT: Hawaii-Aleutian Standard Time -10
Exceeding the NIST radio station in Fort Collins, Colorado, USA, with a diameter of
more than 1500 km, the signal received by the radio clock signal is very poor. It is
recommended to set the RCC to OFF.
If the daylight saving time system is not implemented in this area, please select ON or
OFF according to whether the city in your area adopts daylight saving time, and the time
of sunrise and sunset will also be determined according to daylight saving time
The forecast of the weather station is based on the analysis of changes in air pressure.
The atmospheric pressure is provided by the factory and has been adjusted to absolute
pressure. Since air pressure usually decreases as altitude increases, public
meteorological agencies always publish so-called relative air pressure. In order to obtain
a comparable value, the relative air pressure has been adjusted to the topography of the
country. You can adjust the air pressure of the weather station to the ratio of its location.
For this, you must uniquely adjust the current air pressure of the weather station. Ask
your local weather forecast service about the air pressure at sea level, or get the current
value from the Internet. The above adjustment of the air pressure setting is based on this
reason.
When you use this weather station for the first time, the current local weather is not
semi sunny, so you can adjust the initial weather of the weather station
Reception Of the Radio Signal:
The clock automatically starts the WWVB signal search after 7 minutes after a restart
or battery change. The radio mast icon starts to flash.
Daily synchronization occurs at 1:00, 2:00, and 3:00 AM. If unsuccessful (the radio
mast icon disappears from the display), it will retry every hour for up to 5 attempts.
To start manual WWVB signal reception, press and hold the “▲” button for two
6
HW75-WWVB Manual
seconds. If no signals received within 7 minutes, then the WWVB signal search stops
(the radio mast icon disappears) and start again at the next full one hour.
During WWVB radio signal reception,press and hold down the “▲” button for two
seconds to stop searching radio signal.
F.Y.I.:
A flashing radio mast icon indicates that the WWVB signal reception has started.
A continuously displayed radio mast icon indicates that the WWVB signal was received
successfully.
The symbol "DST" indicates that Daylight Saving Time has been received.
We recommend keeping a minimum distance of 2.5 meters from sources of
interference, such as televisions or computer monitors.
Radio reception is weaker in rooms with concrete walls (e.g.: in cellars) and in offices.
In such extreme circumstances, place the system close to the window.
During the WWVB radio reception mode, only the “▼” button s functional.Pressing
other buttons will only turn on the backlight. If you want to perform other operation
functions, press the “▼” button to exit the WWVB radio reception mode.
When the radio-controlled time reception mode is activated, the backlight will
automatically turn off. This is normal. After the reception is completed, the backlight will
turn on automatically.
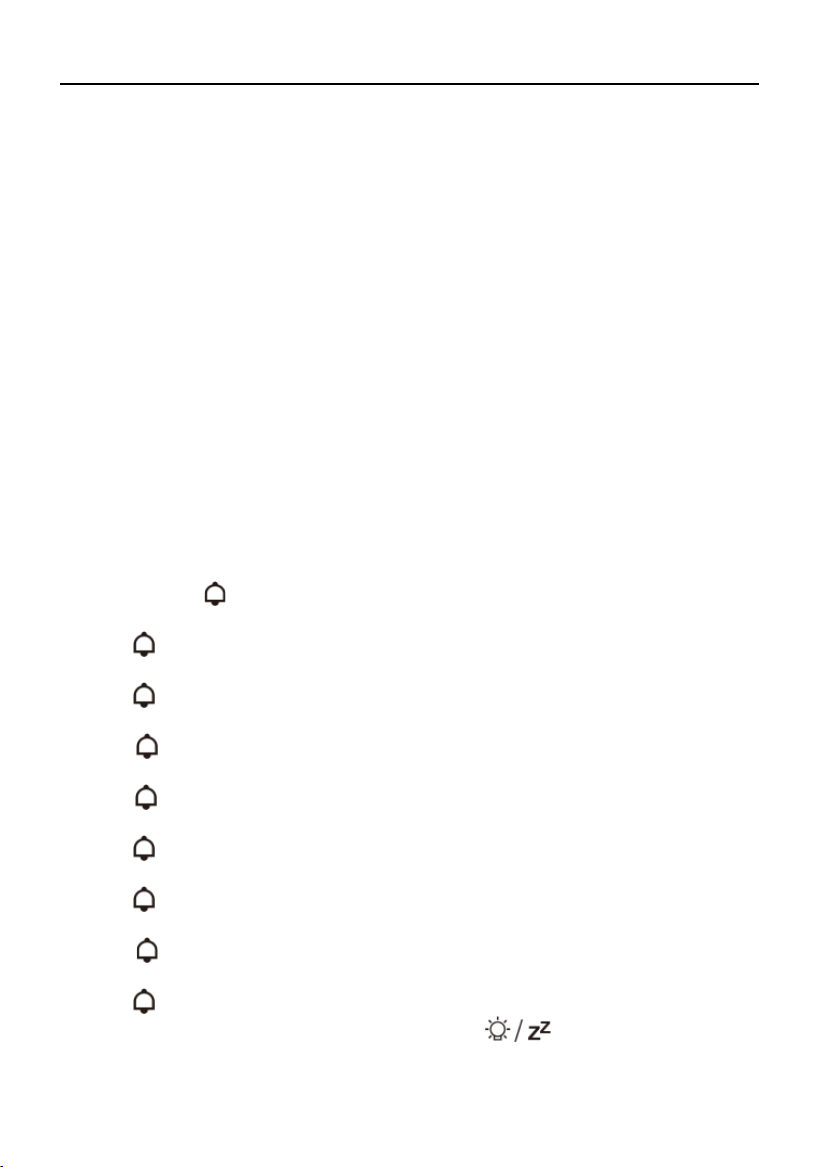
Setting the Daily Alarms:
Press and hold “ ” button for 2 seconds to enter the alarm setting mode, first enter the
alarm 1 hour setting. Use the “▲” and “▼” buttons to set the required hour.
Press “
” button to confirm your setting, switch to the alarm 1 Minute setting. Use the
“▲” and “▼” buttons to set the required minute.
Press “
” button to confirm your setting, switch to the alarm 1 repeat setting. Use the
“▲” and “▼” buttons to set the alarm repeat in “
M-F” or “S-S” or “M-F” and “S-S”.
Press “
” button to confirm your setting, switch to the alarm 1 snooze time setting.
Use the “▲” and “▼” buttons to set the minute of snooze you need.
Press “
” button to confirm your setting, switch to the alarm 2 hour setting. Use the
“▲” and “▼” buttons to set the required hour.
Press “
” button to confirm your setting, switch to the alarm 2 minute setting. Use the
“▲” and “▼” buttons to set the required minute.
Press “
” button to confirm your setting, switch to the alarm 1 repeat setting. Use the
“▲” and “▼” buttons to set the alarm repeat in “
M-F” or “S-S” or “M-F” and “S-S”.
Press “
” button to confirm your setting, switch to the alarm 1 snooze time setting.
Use the “▲” and “▼” buttons to set the minute of snooze you need.
Press “
” button to confirm your setting and to end the setting procedure.
During the setting process, press and hold the “
” button for more than 1
second to exit the setting mode immediately
7
HW75-WWVB Manual
F.Y.I.:
After 20 seconds without pressing any button, the clock will automatically switch from
Set Mode to Normal Time Mode.
The alarm is repeatedly set to M-F, the alarm function will be activated from Monday to
Friday, the Saturday and Sunday will be invalid. The alarm is repeatedly set to S-S, and
the alarm function will be activated on Saturday and Sunday, and will expire from
Monday to Friday. When the alarm is repeatedly set to display both M-F and S-S, the
alarm function will be activated throughout the week.
the snooze time setting range: 5 ~ 60MIN, OFF, when set to OFF, means no snooze
function. Snooze time unit is minutes.
The Alarm for Opening and Closing
Press “ ” button can switch the display in sequence at ALARM1 time \ ALARM2 time
When switching display in ALARM1 time mode, press the “▲” button to turn the alarm1
on or off. The alarm 1 turn on, the “ ” is displayed, the alarm 1 function is open, the
repeat of alarm icon at the same time is also displayed.
When switching display in ALARM2 time mode, press the “▲” button to turn the alarm2
on or off. The alarm 2 turn on, the “ ” is displayed, the alarm 2 function is open, the
repeat of alarm icon at the same time is also displayed.
The alarm 1 or alarm 2 turn off, the“ ” or “ ”icon disappears, the alarm 1 or alarm 2
function is close.
Switching Off the Alarm Signal
Press any button except the “ ” button to stop the alarm signal. It is not
necessary to reactivate the alarm. It switches itself automatically to the alarm time which
has already been set.
F.Y.I.:
The alarm will sound for 2 minutes if you do not deactivate it by pressing any button. In
this case the alarm will be repeated automatically after 24 hours.
Rising alarm sound (crescendo, duration: 2 minutes) changes the volume 4 times
whilst the alarm signal is heard.
Snooze Function:
When the time is up to the alarm, press the “ ” button, the alarm signal stops,
and enter the SNOOZE mode.
After the snooze time is counted, the alarm will ring again.
In snooze mode, press any buttons except the “
” button or touch the “ ”
icon position and hold for more than 2 seconds to exit the snooze mode.
F.Y.I.:
When the snooze function is set to OFF, when the time is up to the alarm, touch the
“
” icon position does not have this snooze function.
Moon Phases and Tides
8
HW75-WWVB Manual
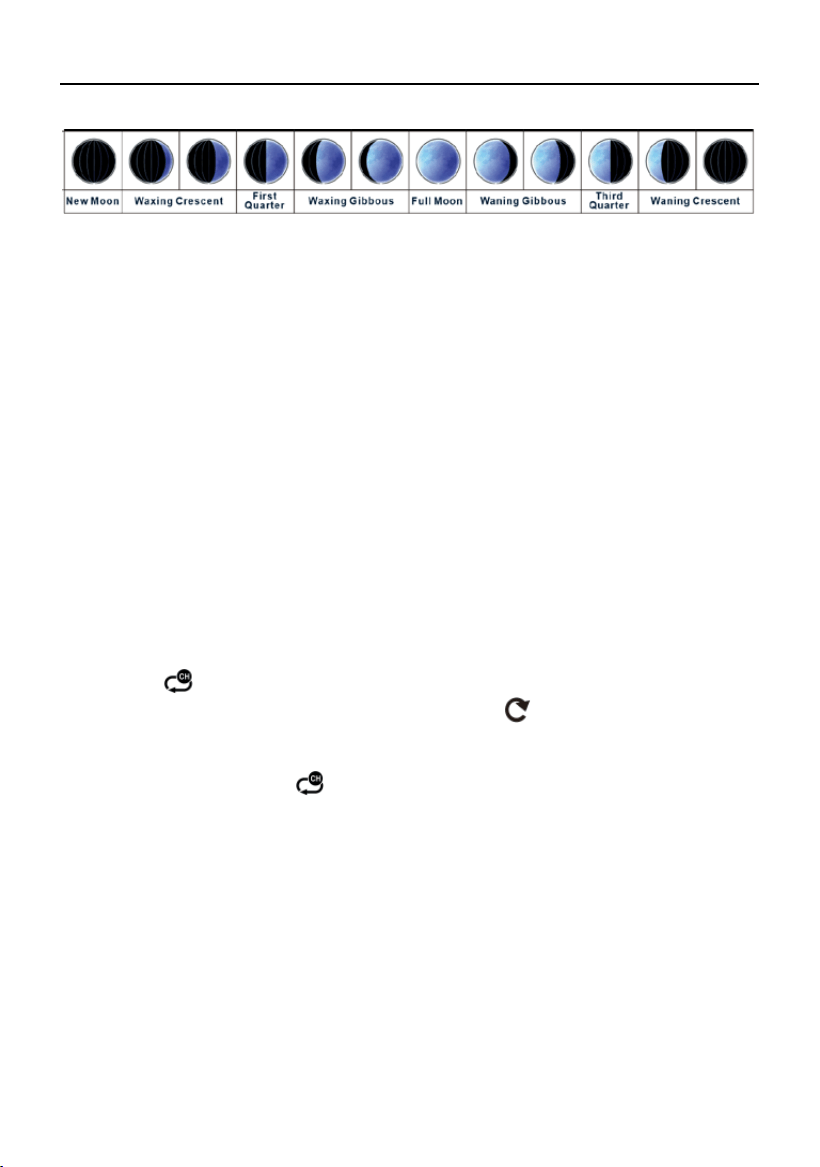
The moon icon on the weather station will display 12 different moon phases according
to the set calendar, as shown in the table below:
The weather station's "TIDE" display will calculate the tide level for that day as high,
medium, or low based on the date and time.
Temperature & Humidity Detection:
Indoor temperature measuring range: +14°F (-10°C) ~ +122°F (+50°C), LL.L °F(°C)
will displayed if value lower than +14°F (-10°C), HH.H °F(°C) will displayed if value
higher than +122°F (+50°C).
Outdoor temperature measuring range: -40°F (-40°C) ~ +158°F (+70°C), LL.L °F(°C)
will displayed if value lower than -40°F (-40°C), HH.H °F(°C) will displayed if value higher
than +158°F (+70°C).
Indoor and outdoor humidity measuring range: 20%RH ~ 95%RH, 20%RH will
displayed if value lower than 20%RH, 95%RH will displayed if value higher than 95%RH.
Wireless Sensor Transmission:
When the Weather Station successfully receives signals from the Wireless Sensor, the
temperature and humidity of the outdoor are displayed on the “REMOTO” column of the
weather station.
The Weather station can connect up to 3 channel wireless sensor registration, the use
of multiple wireless sensor, the wireless sensor channel cannot choose the same
channel at the same time (a total of 1, 2, 3 channel can choose)
Press the “
” button can switch the display of different channels of outdoor
temperature and humidity, when displaying the symbol "
", will display the channel
every 5 seconds automatically switch a channel
If the Weather Station failed to receive transmission from outdoor sensor (“--” display
on the LCD), press and hold “
” button for 3 seconds to receive transmission manually.
the “OUTDOOR” will show an animation of the RF antenna symbol,the Weather Station
will re receive the wireless signal of the outdoor sensor.
F.Y.I.:
when the wireless sensor set up different channels, the weather station "OUTDOOE"
also want to switch to the same channel. When there is no wireless sensor signal
transmission on the channel, "--" will be displayed in the channel of the weather station
Displaying Temperature/Humidity and Temperature/Humidity
Trend
The current indoor temperature/humidity/barometric pressure and the
temperature/humidity trend (indoors) are shown in the LCD display.
After successfully connecting with the remote sensor, the weather station can display
the remote temperature/humidity and the temperature/humidity trend (remote)
9
HW75-WWVB Manual
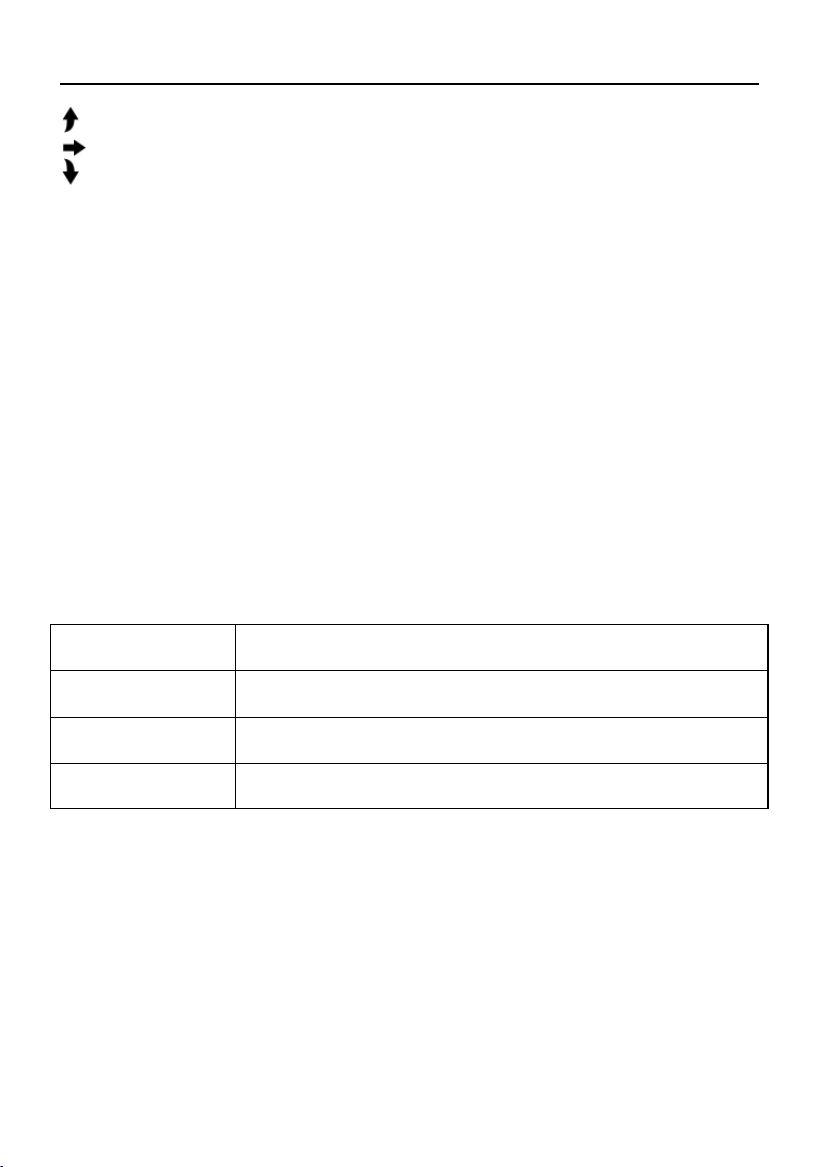
You may see the following displays:
: The temperature/humidity is rising.
: The temperature/humidity is remaining constant.
: The temperature/humidity is falling.
Maximum/Minimum Temperature/Relative Humidity
To toggle indoor/outdoor maximum, minimum temperature and humidity data, press the
“MEM” button:
Once to show the maximum temperature and humidity values.
Twice to sow the minimum temperature and humidity values
Three times to return to the current temperature and humidity levels
To reset the maximum and minimum temperature and humidity, press and hold down
the “MEM” button about 2 seconds. This will reset all minimum and maximum data
recorded to the current displayed values.
F.Y.I.:
If the temperature reading is below ranges, the LL.L will be displayed. If the
temperature reading is above ranges, the HH.H will be displayed.
If the humidity reading is below ranges, the 19%RH will be displayed. If the humidity
reading is above ranges, the 96%RH will be displayed.
Indoor Comfort
Comfort level is calculated based on indoor temperature and humidity, and is divided
into 4 states. Displayed in the "COM" column
DRY
The temperature is any value and the humidity is
less than 40%
COM
Temperature is between 68.0°F
~
82.4°F & 20.0°C
~
28.0°C,
humidity is between 40%
~
70%
WET
The temperature is any value, and the humidity is greater than
70%
Do not display
emoticons
Temperature is less than 68.0°F & 20.0°C or greater than
82.4°F & 28°C, humidity is within the range of 40% to 70%
Outdoor Feeling Index
The perceived temperature is calculated based on the outdoor temperature and
humidity data. The "FEEL" column displays three levels based on how the temperature
feels: COLD, COM and HOT.
Indoor Mold Risk
The INDEX section allows you to switch between three different indices by pressing the
"INDEX" button: mold risk, heat index, and dew point temperature.
The mold risk display screen reads indoor humidity to determine the mold risk level.
The weather station displays the MOLD indicator by pressing the "INDEX" button; there
are four risk levels: high, medium, low, and no risk (displayed as ---).
10
HW75-WWVB Manual
Temperature
range
No risk Low risk Medium risk High risk
Display
No icon
LO
ME
HI(flashing)
<51.8°F
&11.0
℃
Any humidity
11.0
℃~
25.9
℃
51.8°F ~ 78.7°F
humidity≤48%
49
≤
humidity
≤
78%
79%≤humidity
26.0
℃~
30.9
℃
78.8°F~87.7°F
humidity≤78%
79%
≤
humidity
≤
87%
88%≤humidity
31.0
℃~
40.9
℃
87.8°F~105.7°F
humidity≤48%
49%
≤
humidity
≤
87%
88%≤humidity
> 105.8°F &
41.0
℃
Any humidity
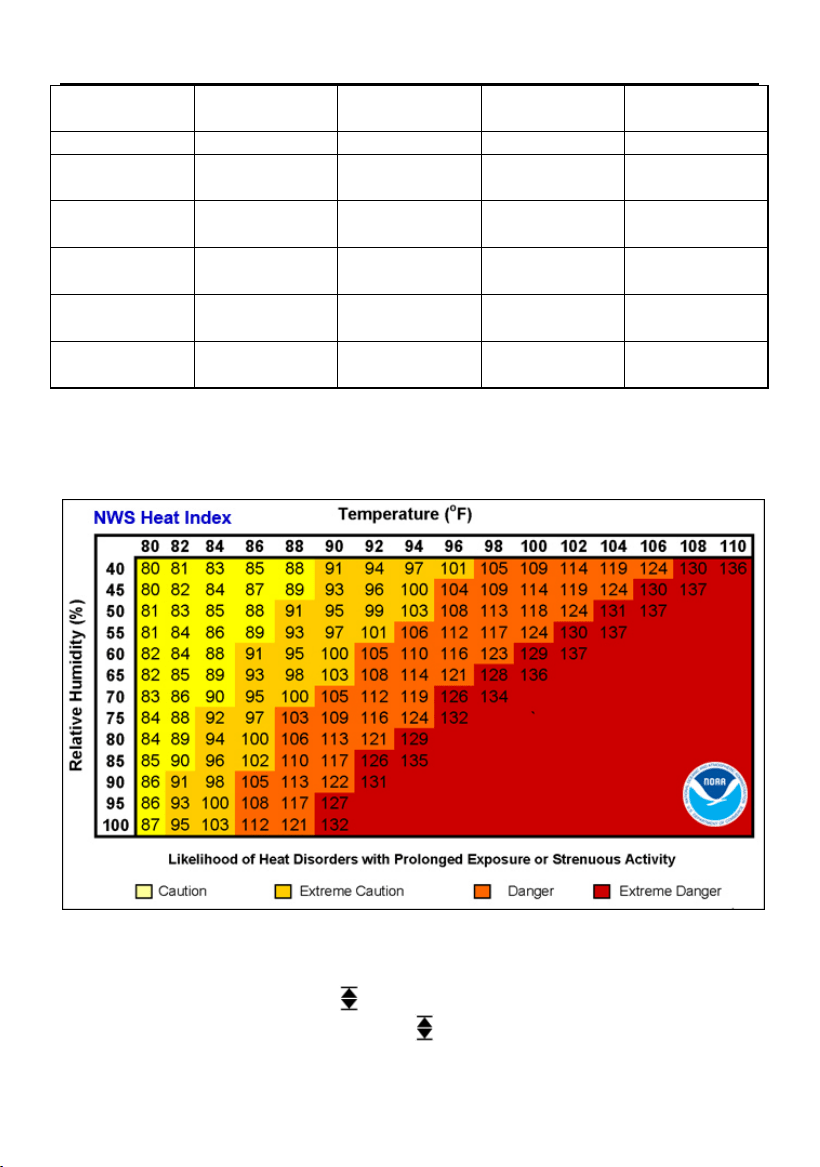
The heat index and dew point temperature are calculated based on the outdoor
temperature and humidity, displaying the actual temperature values.
Risk table of heat index
Temperature and Humidity Alerts Setting
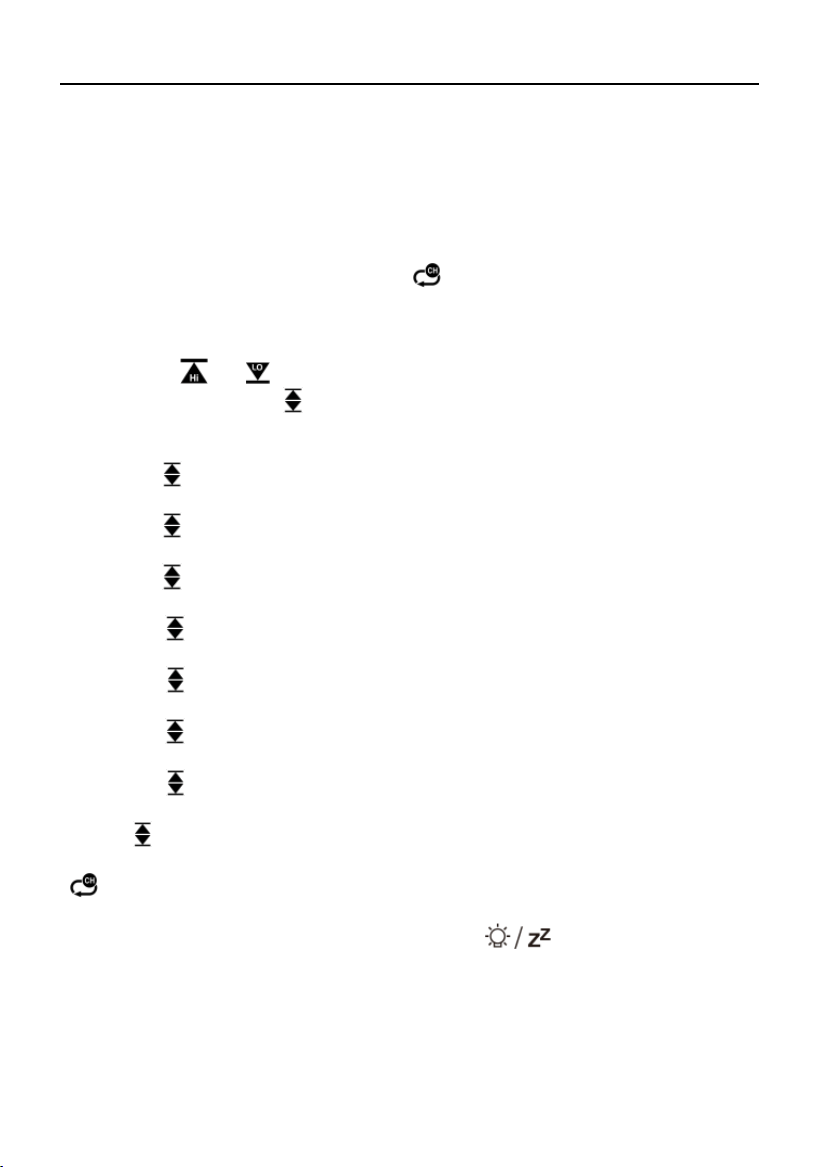
In the normal display, press the “ ” button to switch to the temperature and humidity
alert item viewing mode, and then press the “
” button to switch to view the next item, in
order:
1. In temperature upper limit alarm
11
HW75-WWVB Manual
2. In temperature lower limit alarm
3. In humidity upper limit alarm
4. In humidity lower limit alarm
5. Out temperature upper limit alarm
6. Out temperature lower limit alarm
7. Out humidity upper limit alarm
8. Out humidity lower limit alarm
In out alert item viewing mode, press the “
” button to switch to a different channel,
in the order of items: CH1, CH2, CH3, and can switch cyclically
In this alert item viewing mode,
the alert function of each item can be turned on or off
by pressing the “
-” button when the respective item is displayed, and the corresponding
alarm symbol “
” or “ ” is displayed when it is turned on.
Press and hold down the “
” button for more than 2 seconds to enter the temperature
and humidity alert setting, the first is the upper limit alert setting of the in temperature.
Use the“▲” and “▼” buttons to set the upper limit alert value
Press the “
” button to confirm and switch to the next item, set the lower limit of the in
temperature alert, Use the “▲” and “▼” buttons to set the lower limit alert value
Press the “
” button to confirm and switch to the next item, set the upper limit of the in
humidity alert, Use the “▲” and “▼” buttons to set the upper limit alert value
Press the “
” button to confirm and switch to the next item, set the lower limit of the in
humidity alert, Use the “▲” and “▼” buttons to set the lower limit alert value
Press the “
” button to confirm and switch to the next item, set the upper limit of the
out temperature alert, Use the “▲” and “▼” buttons to set the upper limit alert value
Press the “
” button to confirm and switch to the next item, set the lower limit of the
out temperature alert, Use the “▲” and “▼” buttons to set the lower limit alert value
Press the “
” button to confirm and switch to the next item, set the upper limit of the
out humidity alert, Use the “▲” and “▼” buttons to set the upper limit alert value
Press the “
” button to confirm and switch to the next item, set the lower limit of the
out humidity alert, Use the “▲” and “▼” buttons to set the lower limit alert value
Press “
” button to confirm your settings and end the setup process.
When setting the upper and lower limit alerts for temperature and humidity, press the
“
” button to switch the alert settings for setting the upper and lower temperature and
humidity limits of different channels.
During the setting process, press and hold the “
” button for more than 1
second to exit the setting mode immediately
F.Y.I.:
After 20 seconds without pressing any button, the weather station switches
automatically from Set Mode to Normal Time Mode.
12
HW75-WWVB Manual
Temperature and Humidity Upper and Lower Limit
When the upper limit or lower limit alarm of the corresponding channel is turned on,
and the actual value of its temperature or humidity exceeds the set upper limit or lower
limit limit, the corresponding upper limit symbol “
” or lower limit symbol “ ” and the
corresponding display data will flash. At the same time, the product emits an alarm
sound.
In this alert mode, press any button to stop the alarm sound, and the warning is still
displayed.
The Atmospheric Pressure Detection:
Atmospheric pressure detection range: 17.72 inHg~32.50 inHg & 600 hPa/mb~1100
hPa/mb; display resolution: 0.01 inHg & 1 hPa/mb
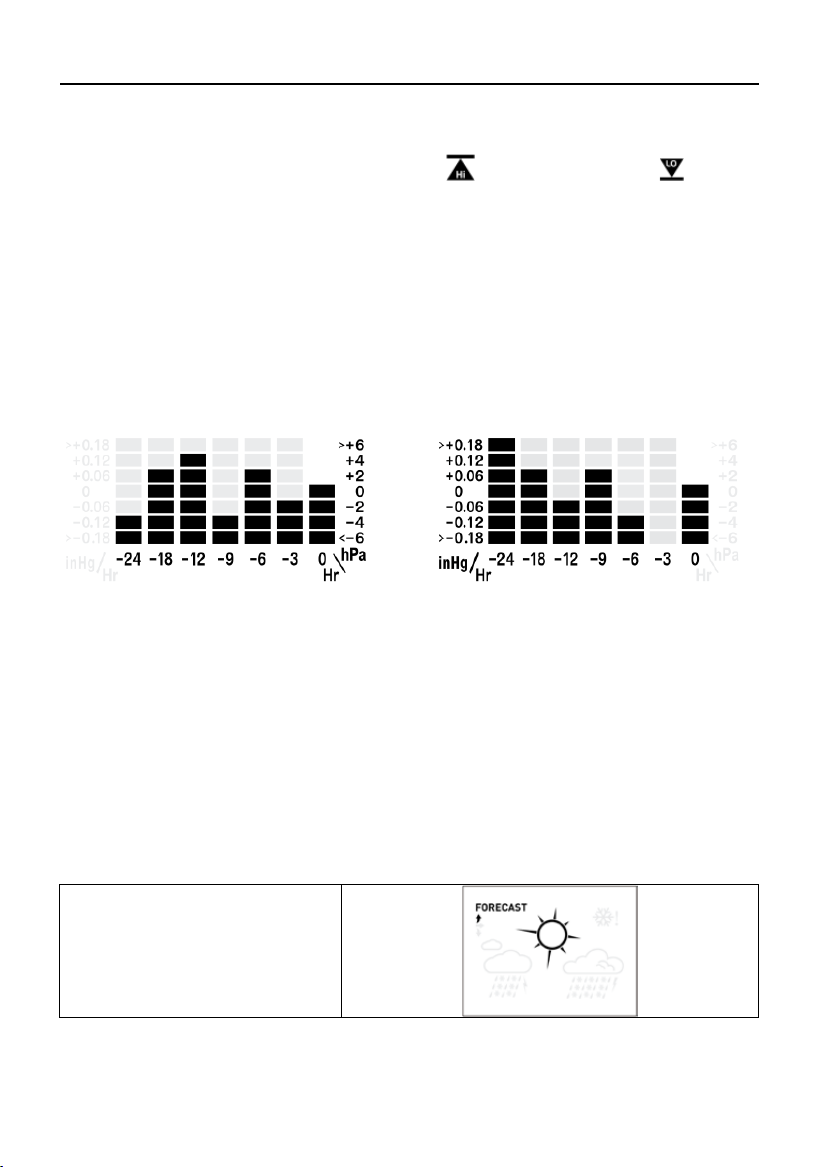
The weather station records atmospheric pressure values for the past 3, 6, 9, 12, 18,
and 24 hours and compares them with the current atmospheric pressure value to create
a trend histogram, as shown in the example below:
Display in hPa Display in inHg
Weather Forecast:
The weather station calculates a weather forecast for about the next 12 hours based
on the barometric pressure trend. Of course this forecast can‘t compare to that of
professional weather services supported by satellites and high performance computers,
It provides only an approximate indication of the current weather development in a small
local area. Please take the weather forecast from your local weather forecasting service
into account as well as the forecast from your weather station. If there are discrepancies
between the information from your device and from the local weather forecasting service,
please take the advice of the latter as authoritative.
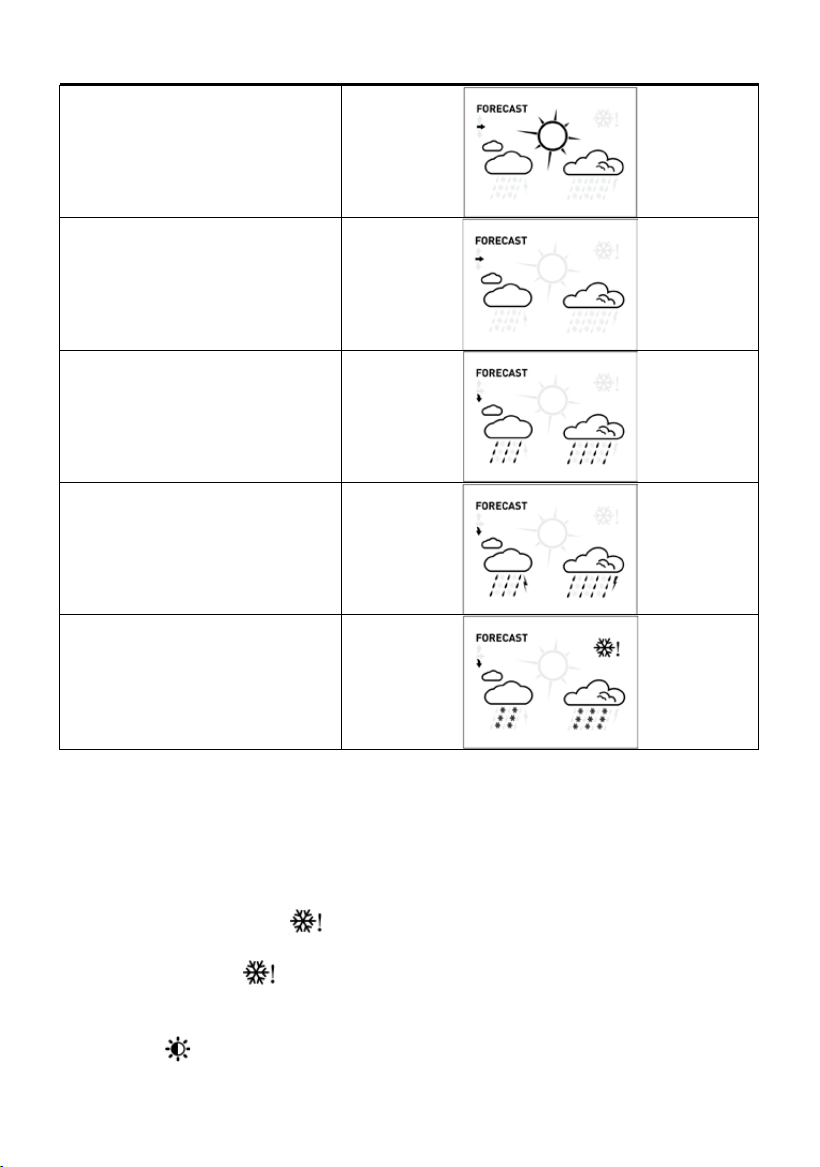
The weather station displays the following weather icon:
sunny
13
HW75-WWVB Manual
slightly cloudy
cloudy
rainy
Heavy rainy
Snowy
Note: Changes in air pressure cause the weather to change to rainy. Furthermore, when
the outdoor temperature is below 24.8°F and -4°C, the rainy weather turns into snowy
weather. (The default outdoor temperature is CH1. If CH1 has no signal, the default is
CH2. If CH2 also has no signal, the default is CH3.)
Cold Weather Warning Function:
When the outdoor sensor measures a temperature of 30.2°F~33.8°F & -1°C~+1°C, the
cold weather warning icon "
" will flash at 1HZ per second
When the outdoor sensor measures a temperature below 30°F & -1.1°C, the cold
weather warning icon "
" will be constantly displayed
Background Lighting
Press the “ ” button to adjust the backlight brightness, you can adjust the 5 state: 4
different brightness backlight and close the backlight.
When the backlight brightness is
14
HW75-WWVB Manual
not at the highest brightness, Press the “ ” button. Backlight turns to highest
brightness of 15 seconds.
Note: If only the battery is used for power supply, it is recommended that the backlight
be turned off. If you need to watch the display, press the “
” button to light it up for
15 seconds. Otherwise, the battery will soon run out of power and the backlight will
become darker and darker
The weather station can also set the backlight to automatically dim at night. Press and
hold the “
” field for more than 2 seconds to enter the night mode setting. First,
turn the night function on or off. Now use “▲” and “▼” buttons set the night function to
activate (ON) or close (OFF).
Note: If the night backlight function is set to OFF, pressing the “
” button will
automatically exit the setting mode, and there will be no switching to the next setting
Press “
” button to confirm your setting, switch to the brightness setting of the
backlight change after entering the night. Now use “▲” and “▼” buttons set the
brightness required for the backlight change after entering the night
Press “
” button to confirm your setting, switch to the hour of enter night mode setting.
Now use “▲” and “▼” buttons set the required hour
Press “
” button to confirm your setting, switch to the minute t of enter night mode
setting. Now use “▲” and “▼” buttons set the required minute
Press “
” button to confirm your setting, switch to the hour of exit night mode setting.
Now use “▲” and “▼” buttons set the required hour
Press “
” button to confirm your setting, switch to the minute of exit night mode
setting. Now use “▲” and “▼” buttons set the required minute
Press “
” button to confirm your setting and to end the setting procedure.
During the setting process, press and hold the “
” button for more than 1
second to exit the setting mode immediately
When the night mode is on, the icon “
” will be displayed. When the time reaches the
time to enter the night mode, the backlight will automatically switch to the set night mode
brightness, and when the time reaches the time to exit the night mode, the backlight will
return to the original brightness
In night mode, the backlight can be switched to the highest brightness for 15 seconds
by Pressing the “
” button.
When the backlight is turned off, the night mode automatically fails
Low Battery:
If the “INDOOR” column is display the battery icon “ ”, replace the weather station's
battery as soon as possible,
If the “OUTDOOR” column is to display the battery icon “
”, replace the batteries of
the corresponding wireless sensor according to the displayed channel.
15

16

17

SAIN3 LLC
251 Little Falls Drive Wilmington, New Castle, DE, 19808
www.iraddy.com
support@iraddy.com
18