
OPERATING MANUAL
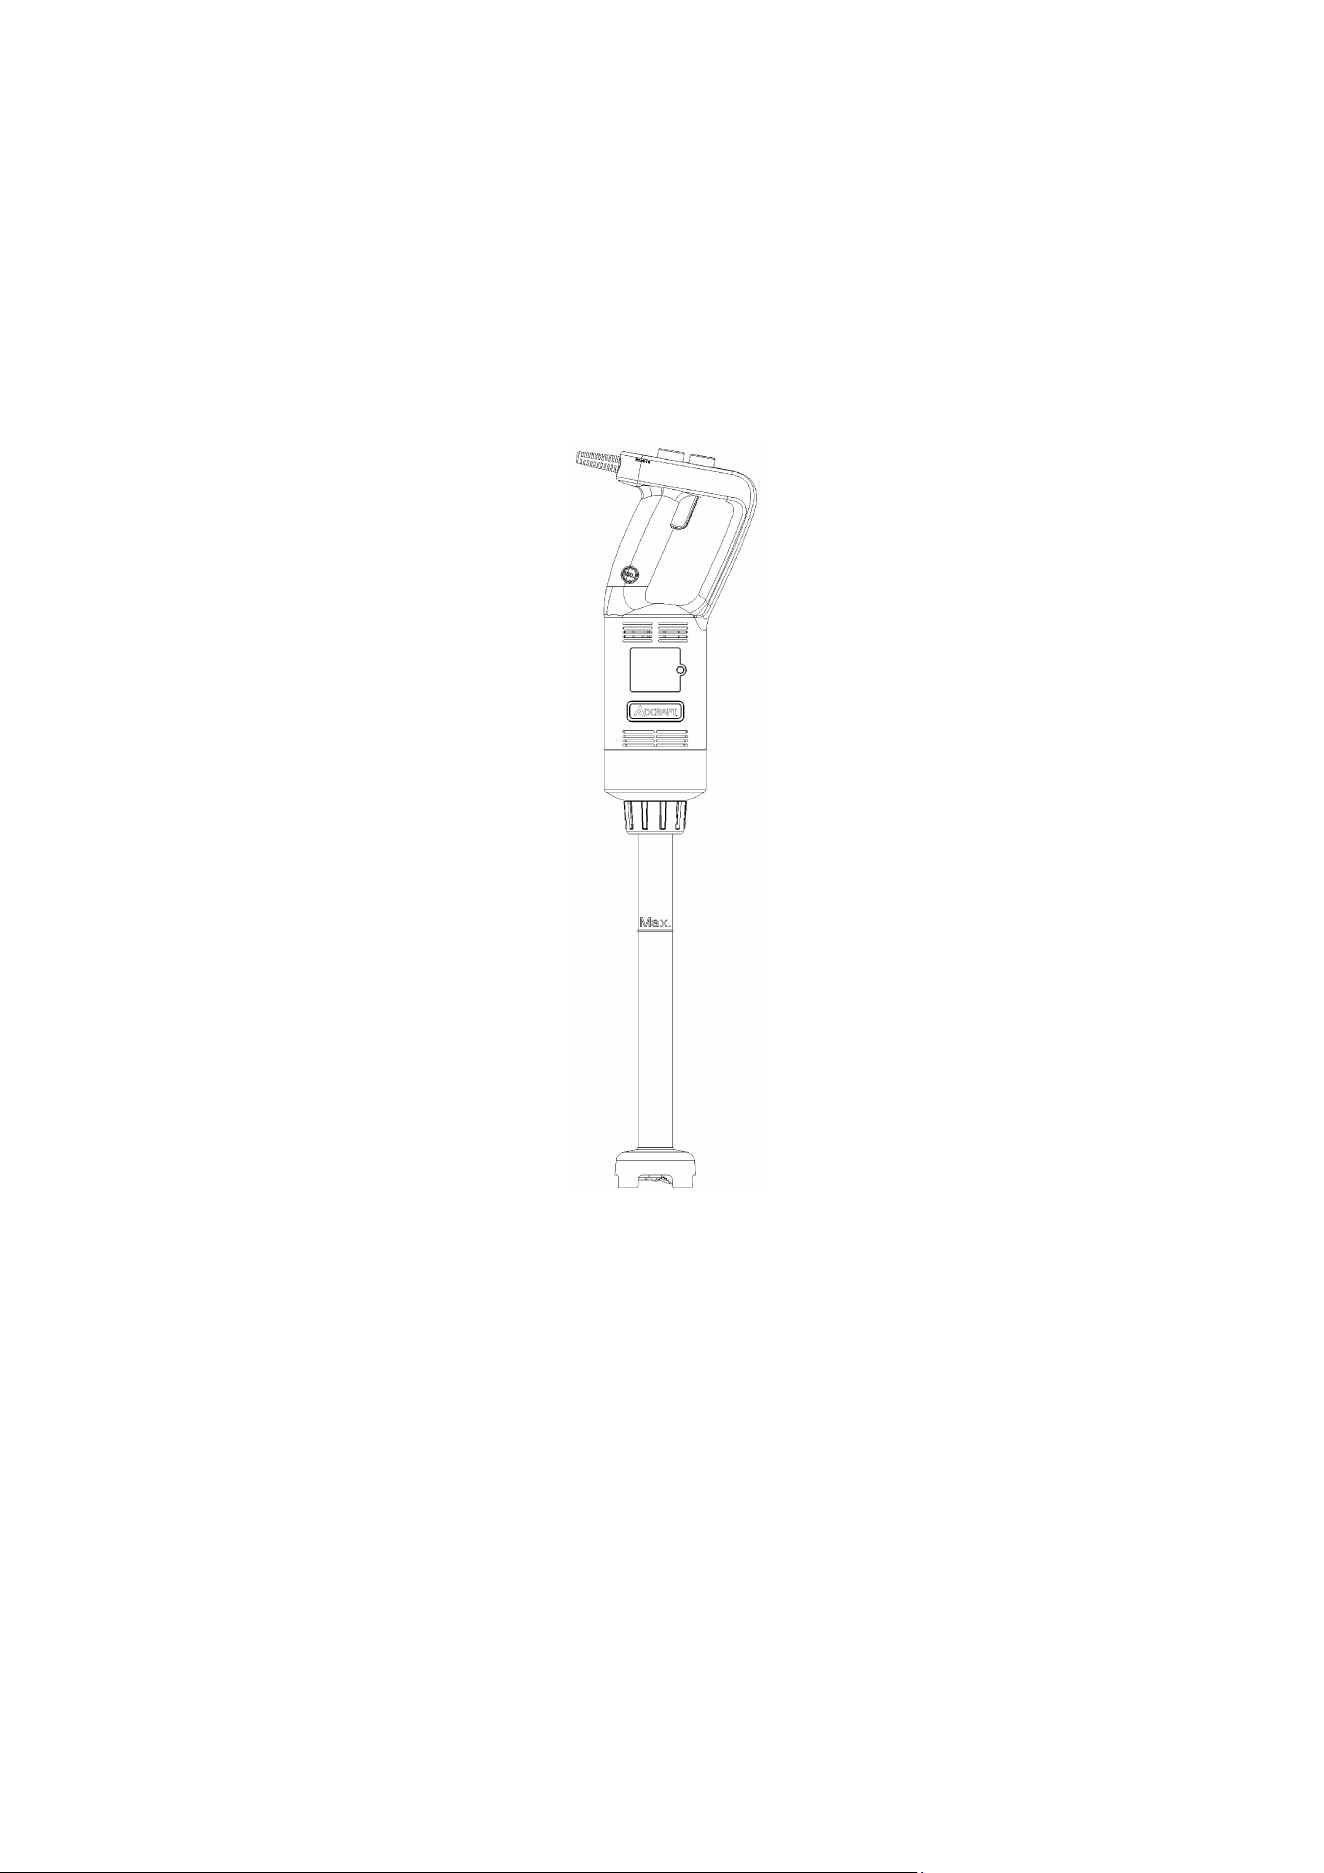
HEAVY DUTY IMMERSION BLENDER
Models: ACIB75016, 750W (1HP), 16” (406mm) SHAFT
ACIB35010, 350W (1/2HP), 10” (254mm) SHAFT
Read this manual thoroughly before using and save it for future reference.
Admiral Craft Equipment Corps.
3355 Enterprise Drive – Suite 160
Ft. Lauderdale, FL 33331
Phone: 800.223.7751 Fax: 800.447.7751

1
IMPORTANT SAFEGUARDS
Before using the electrical appliance, the following basic precautions should
always be followed including the following:
1) Read all instructions.
2) Before using check that the voltage of wall outlet corresponds to the one
shown on the rating plate.
3) Do not operate any appliance with a damaged cord or plug or after the
appliance malfunctions or is dropped or damaged in any manner. Return
appliance to the nearest authorized service facility for examination, repair or
electrical or mechanical adjustment.
4) If the supply cord is damaged it must be replaced by the manufacturer or a
authorized service agent or a qualified technician in order to avoid a hazard.
5) Always disconnect the blender from the supply if it is left unattended and
before assembling, disassembling, or cleaning.
6) Do not let cord hang over edge of table or hot surface. Be careful not to trip
over the long power cord when using the appliance.
7) Do not immerse upper part of blender into water as this would give rise to
electric shock.
8) Avoid contacting moving parts.
9) The use of accessory not recommended by the manufacturer may cause
injuries to persons.
10) Do not operate the appliance for other than its intended use.
11) Avoid splashing the food into the vent holes of unit body during blending.
12) The blender must be used in a working environment that is far away from
corrosive materials or oil pollution and must be kept away from explosive and
flammable materials.
13) The metal blades are extremely sharp, please handle carefully.
14) Be care of potential injury from misuse.
15) In the process of using the appliance, it is necessary to hold it with both hands,
one hand holding the host handle, and the other hand holding the plastic
connector.
16) Switch off the appliance and disconnect from supply before changing
accessories or approaching parts that move in use.
17) This appliance is not intended for use by children or by persons with reduced
physical, sensory, or mental capabilities, or lack of experience and knowledge.
Close supervision is necessary when any appliance is used near children.
SAVE THESE INSTRUCTIONS
FOR COMMERCIAL USE ONLY
2
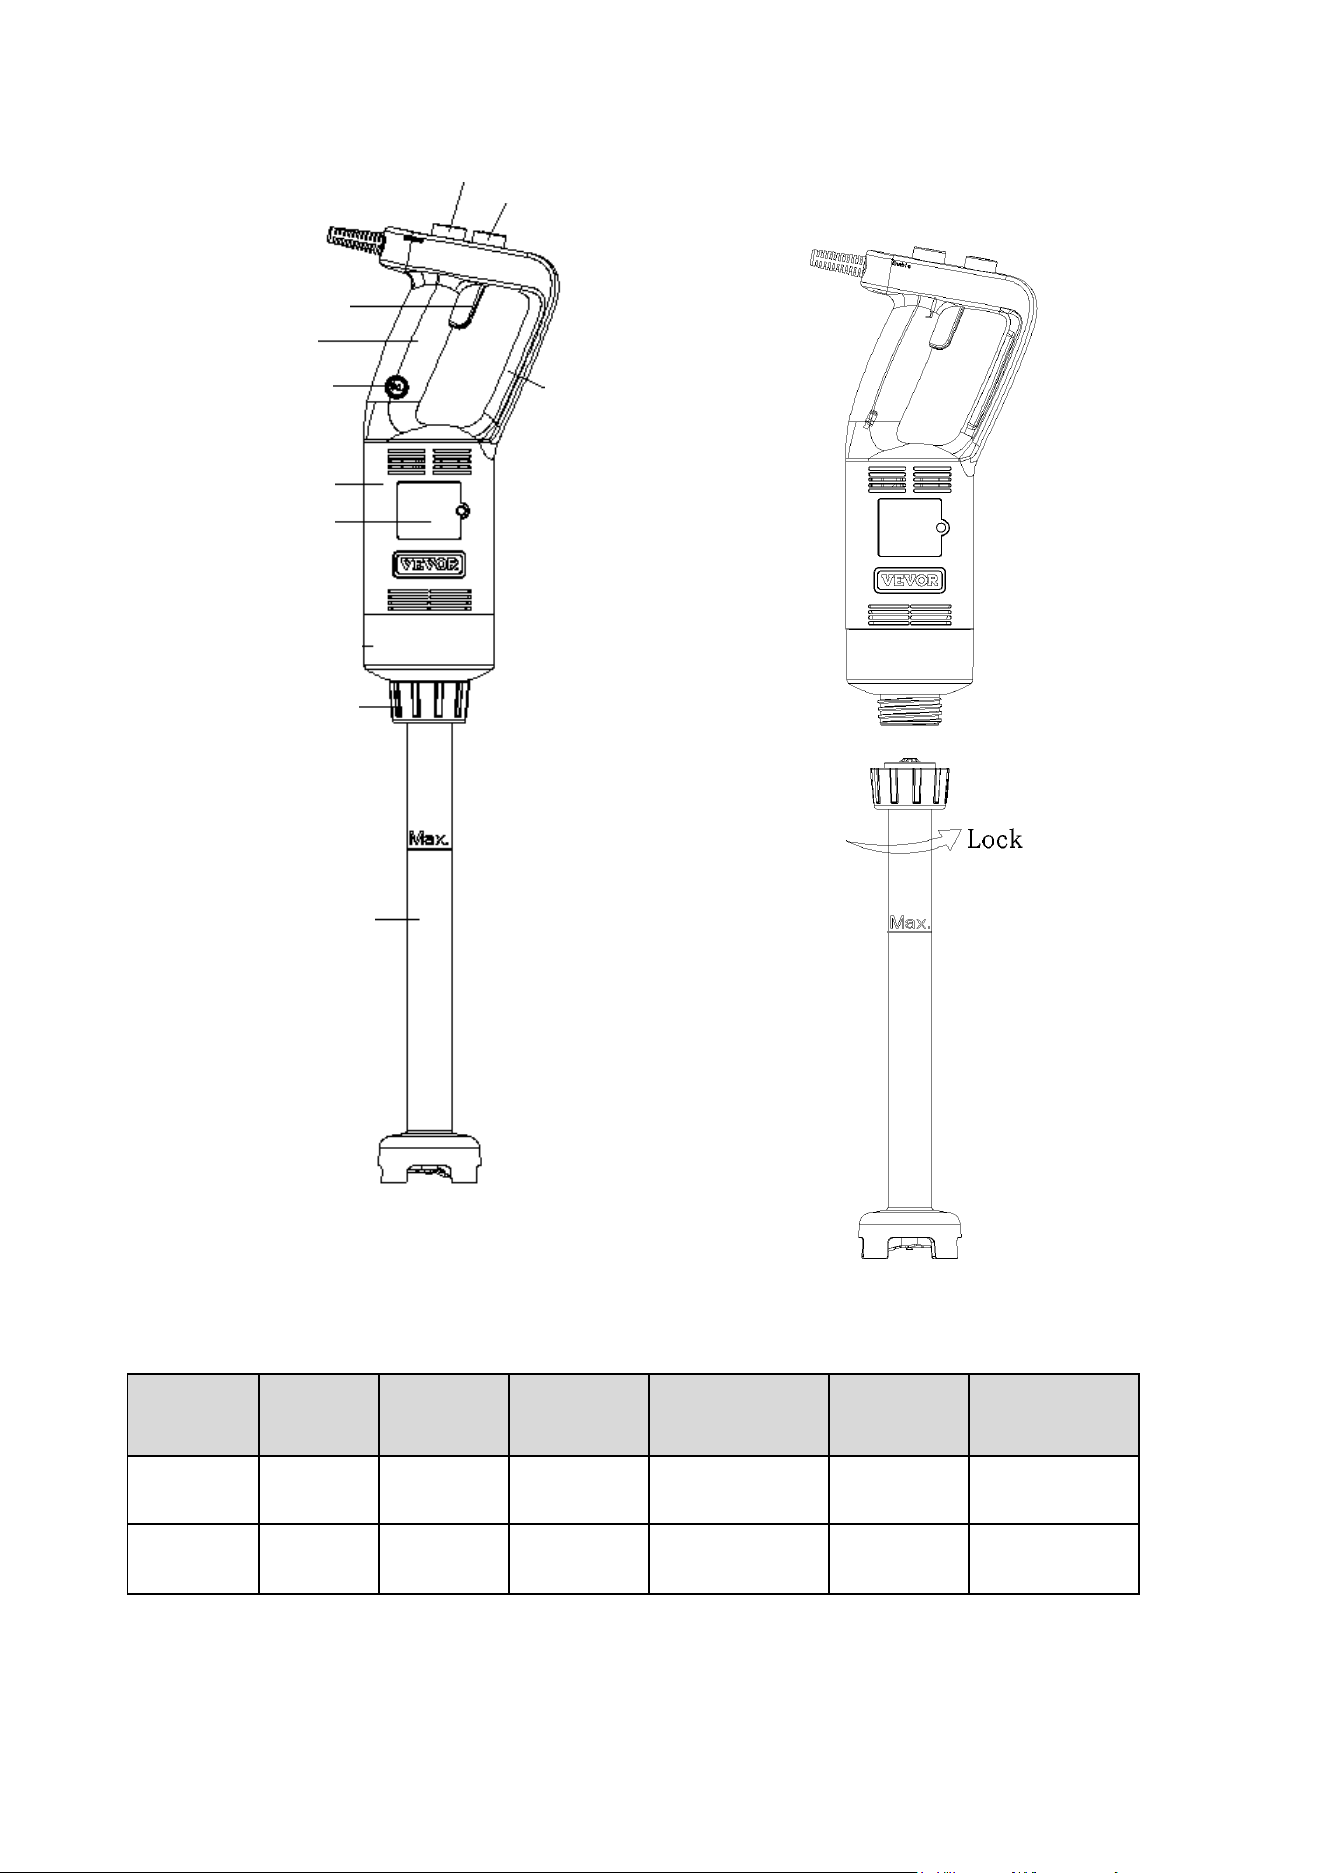
Shaft
Length
Power
SPEED
(RPM)
Voltage Frequency
NET
WEIGHT
Working
noise level
16"
406mm
750W
1 hp
18,000 120V 60Hz
8.1 lb
3.7 kg
≤85dB
10"
254mm
350W
1/2 hp
16,000 120V 60Hz
7 lb
3.2 kg
≤85dB
SAFETY BUTTON
SPEED KNOB
POWER BUTTON
LOCK BUTTON
HANDLE POSITION 1
HANDLE POSITION 2
HOUSING
CARBON BRUSH COVER
LOCK NUT
BLENDING ROD
3
IMPORTANT: Blades are very sharp, handle with care. Ensure that the blender is
unplugged from the power outlet before installing or removing attachments.
How to attach blending rod:
1) Insert the blending rod into the threaded inner hole of the unit body. When
inserting, align the slot of the connector with the ribs of the square aluminum
cover to ensure that the connector is inserted in place.
2) Tighten the lock nut to fix the blending rod firmly onto the body.
To detach:
1) Loosen the lock nut.
2) Pull out the blending rod.
USING YOUR BLENDER
Before the first use, clean the blender according to the section of “QUICK
CLEANING”.
The time running unit without load should not exceed 20 seconds.
CAUTION: Blades are very sharp, handle with care.
GETTING STARTED AND STOPPED
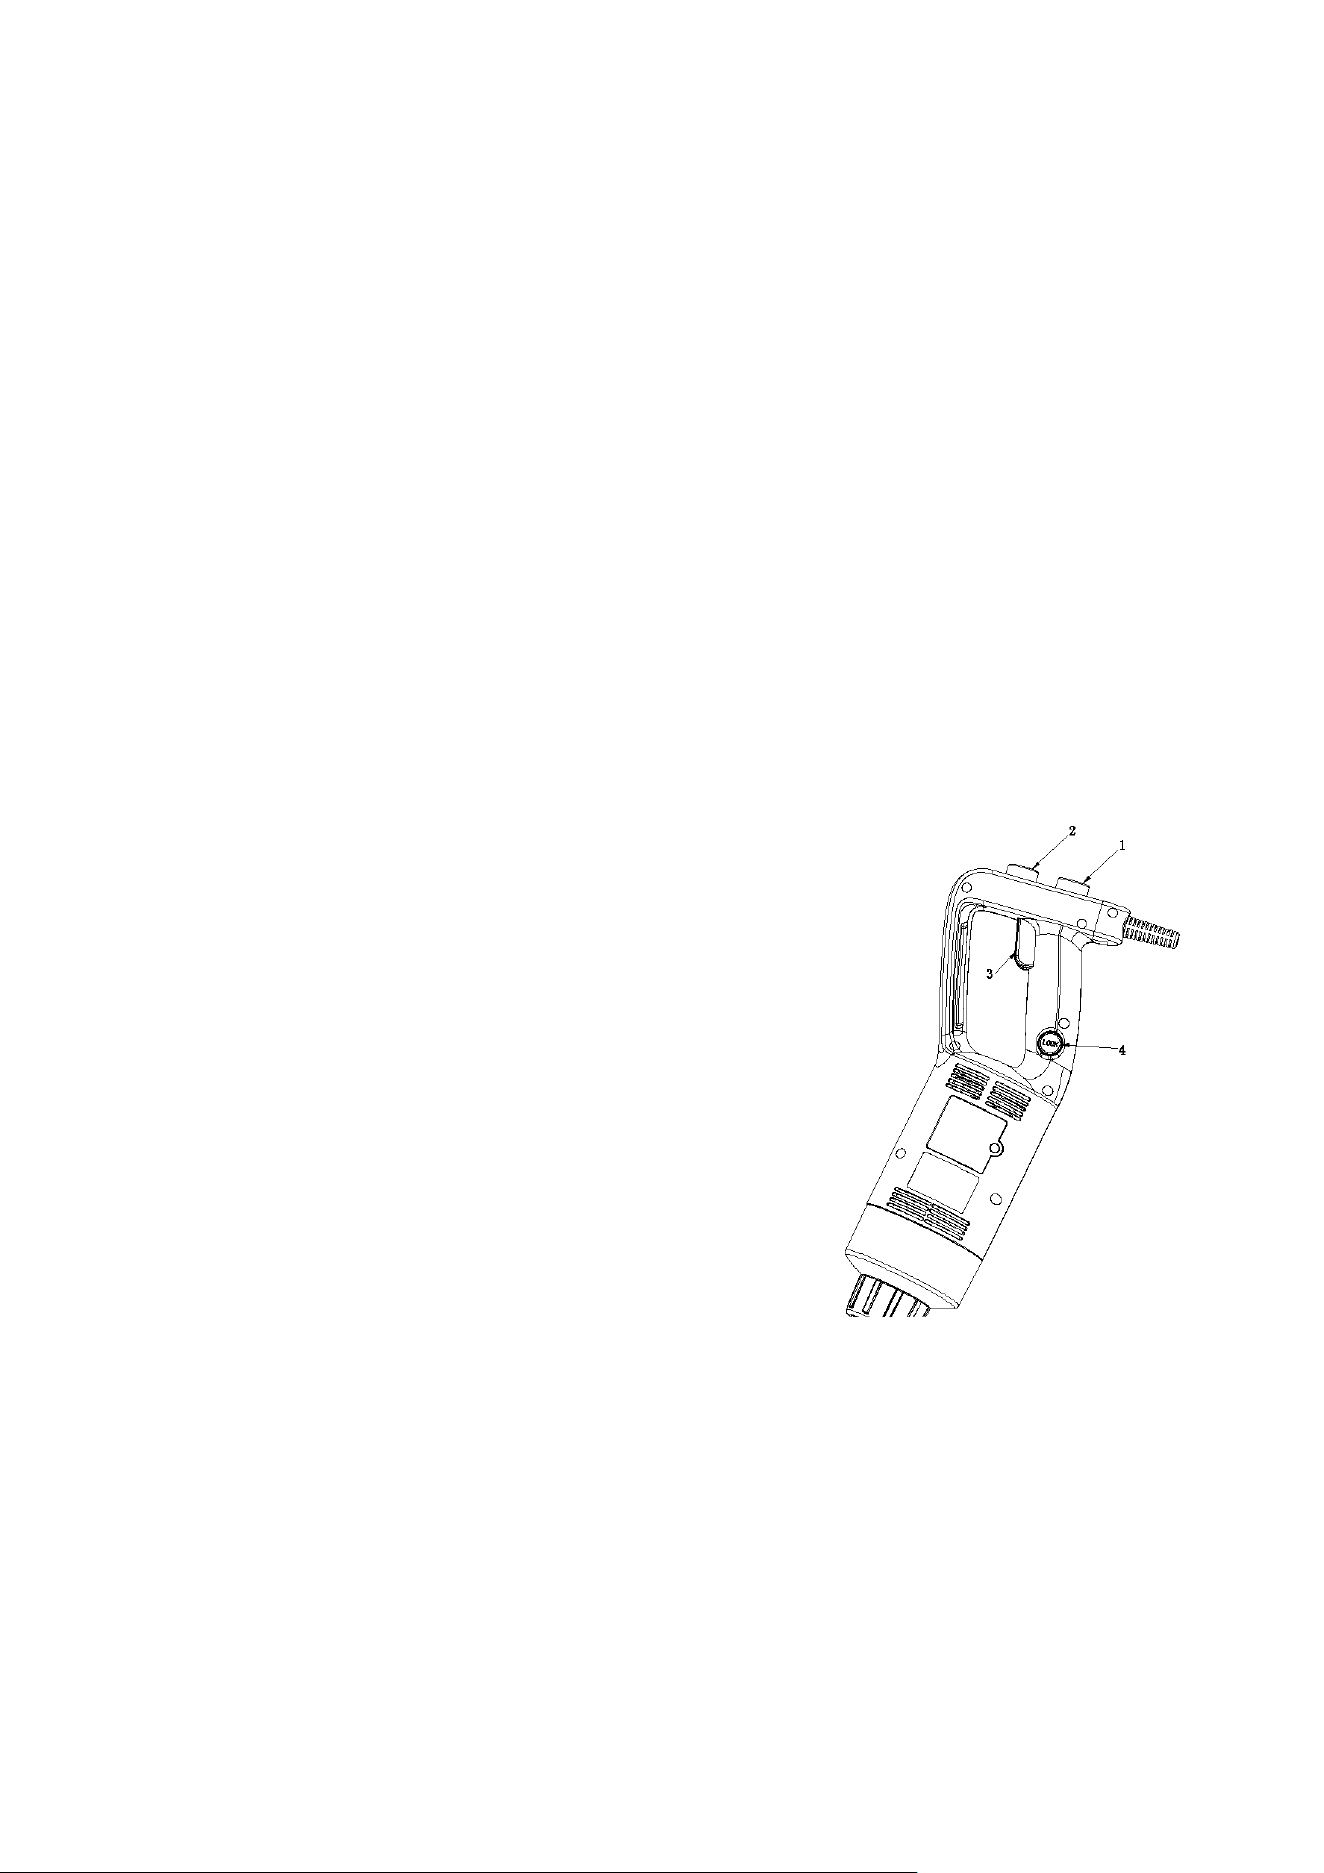
1) Ensure the power button (3) is released
2) Install the blending rod
3) Connect main unit into power source
4) Press the safety button (1) and proceed to the
next step within 5 seconds. If the unlocking fails
after 5 seconds, press the safety button (1) again.
5) Press the power button (3) to start the hand
blender (working time per cycle≤ 3 minutes,
interval time between two cycles≥ 1 minute)
6) Release the power button (3), and the blender
will stop automatically
How to grip the blender during working:
To blend food, operate the blender with one or both hands. When operating with
one hand, just hold the handle position 1. When operating with both hands, hold
the handle position 1 with one hand while holding the handle position 2 with the
other hand
Speed adjustment
:
Rotate the speed knob (2) to the desired speed setting
4
CONTINUOUS OPERATION INSTRUCTIONS
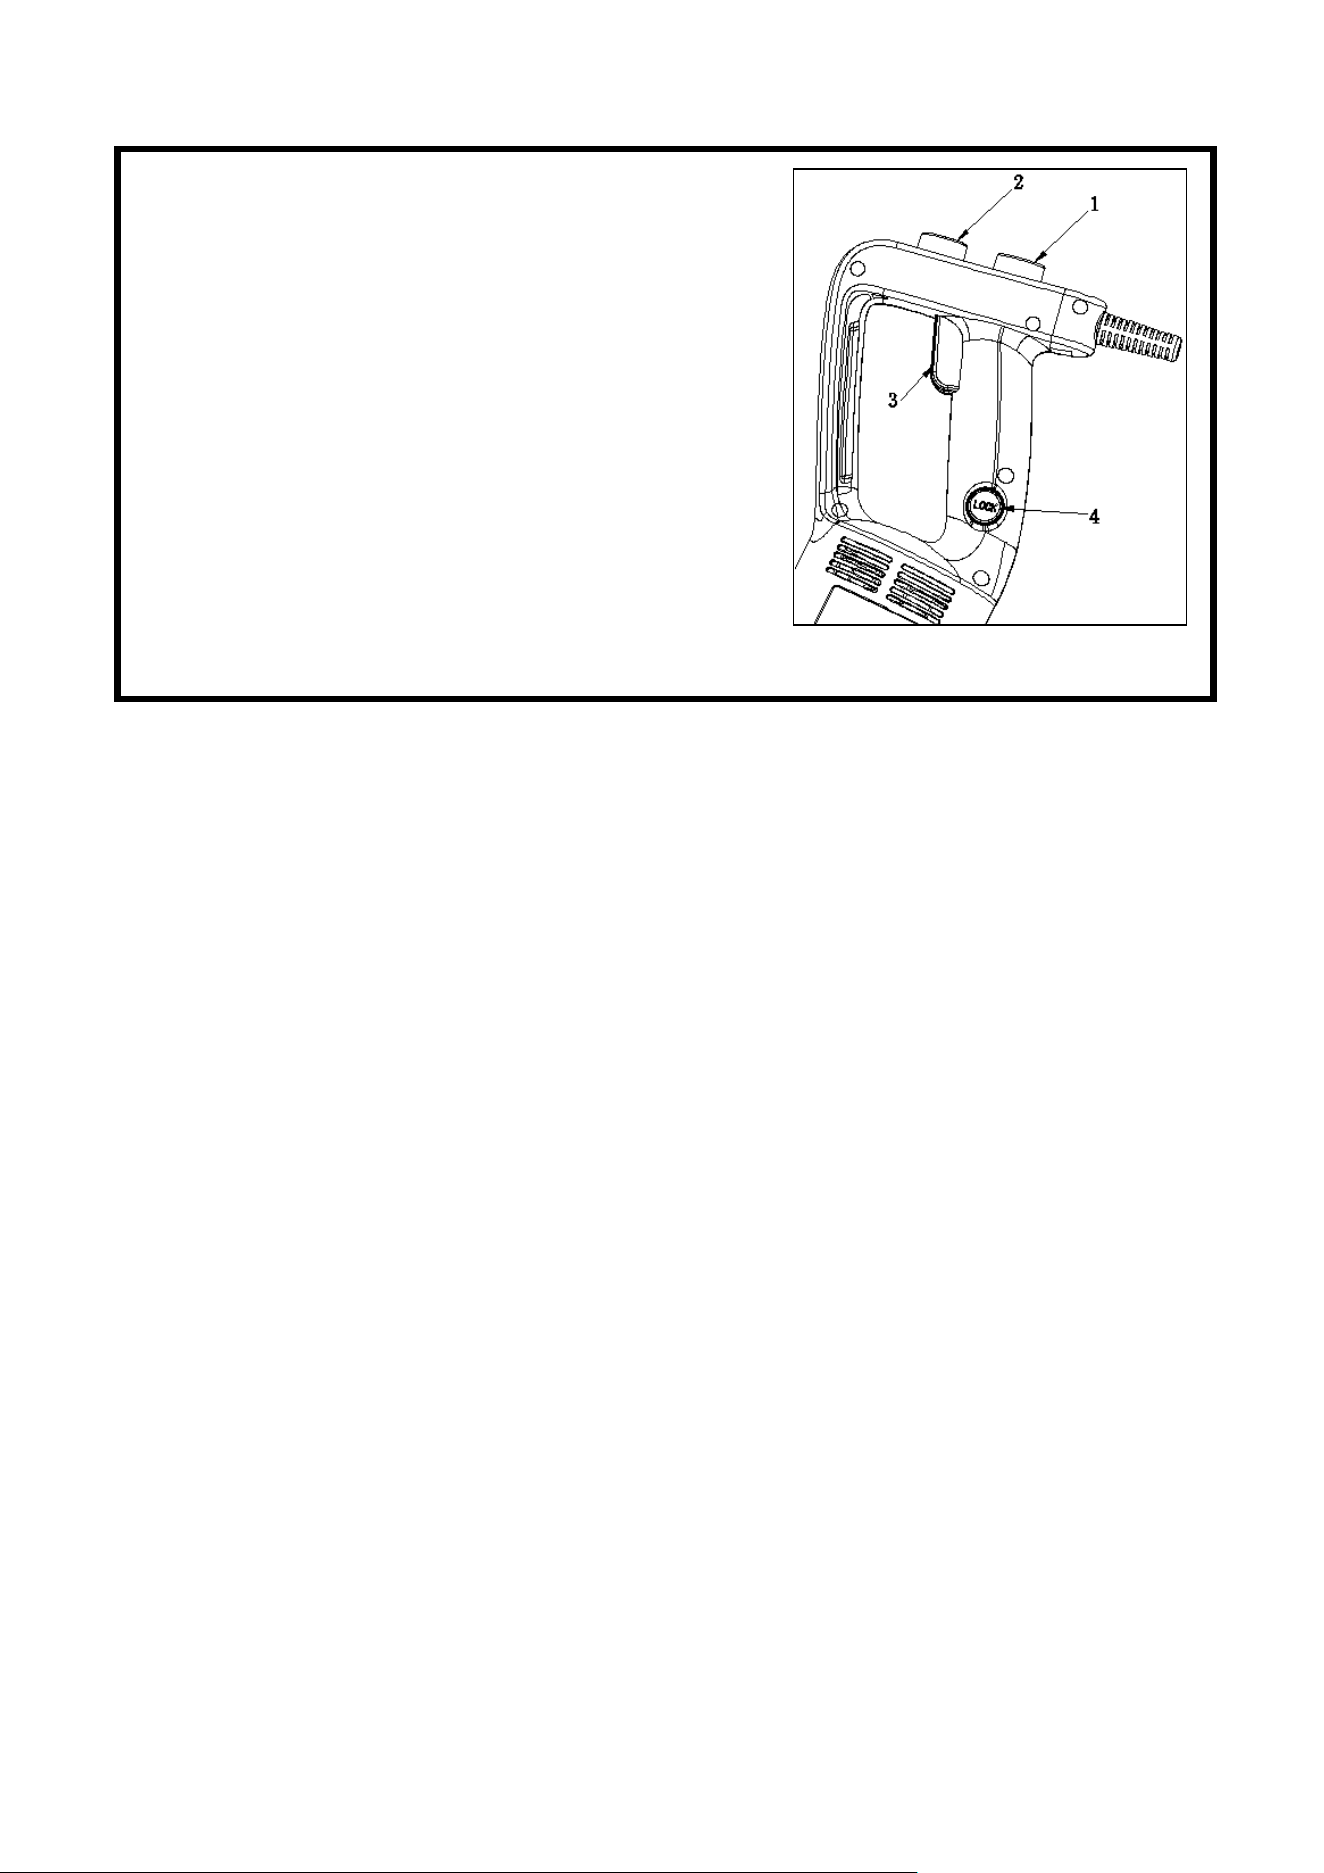
After completing steps 1-5 above, proceed to
the following steps:
1) Hold the lock button (4) while the power
button (3) is pressed down, and the red
indicator of the lock button lights up.
2) Release the power button (3) first and then
release the lock button (4), the hand blender
will work continuously, and the red indicator
becomes solid
3) Press the power button (3) again, the
appliance stops working, the lock button (4)
will release, and the red indicator goes off.
NOTE: During continuous working, do not touch
the power button when gripping the blender to avoid triggering it to stop working.
NOTE
To better control the hand blender, it is recommended to hold the handle and
the bottom of the body, tilting the blender at a slight angle to prevent the bell-
shaped housing from touching the bottom of the container. The ingredients in the
container should not exceed the MAX height of the blending rod. Avoid splashing
the food into the vent holes of unit body during blending.
CLEANING AND MAINTENANCE
1) Unplug the appliance and remove the detachable blending rod.
2) Wash the detachable blending rod under running water, without the use of
abrasive cleaner or detergents. After finishing cleaning, the detachable
blending rod, place it upright so that any water which may have got in can be
drained out. The blending rod is a dishwasher-safe component.
3) Wipe the motor unit with a damp cloth. Never immerse it in water for cleaning
as an electric shock may occur.
4) Dry thoroughly.
QUICK CLEANING
Between processing tasks, hold the hand-held blender in the container half filled
with water and turn on for a few seconds.
5
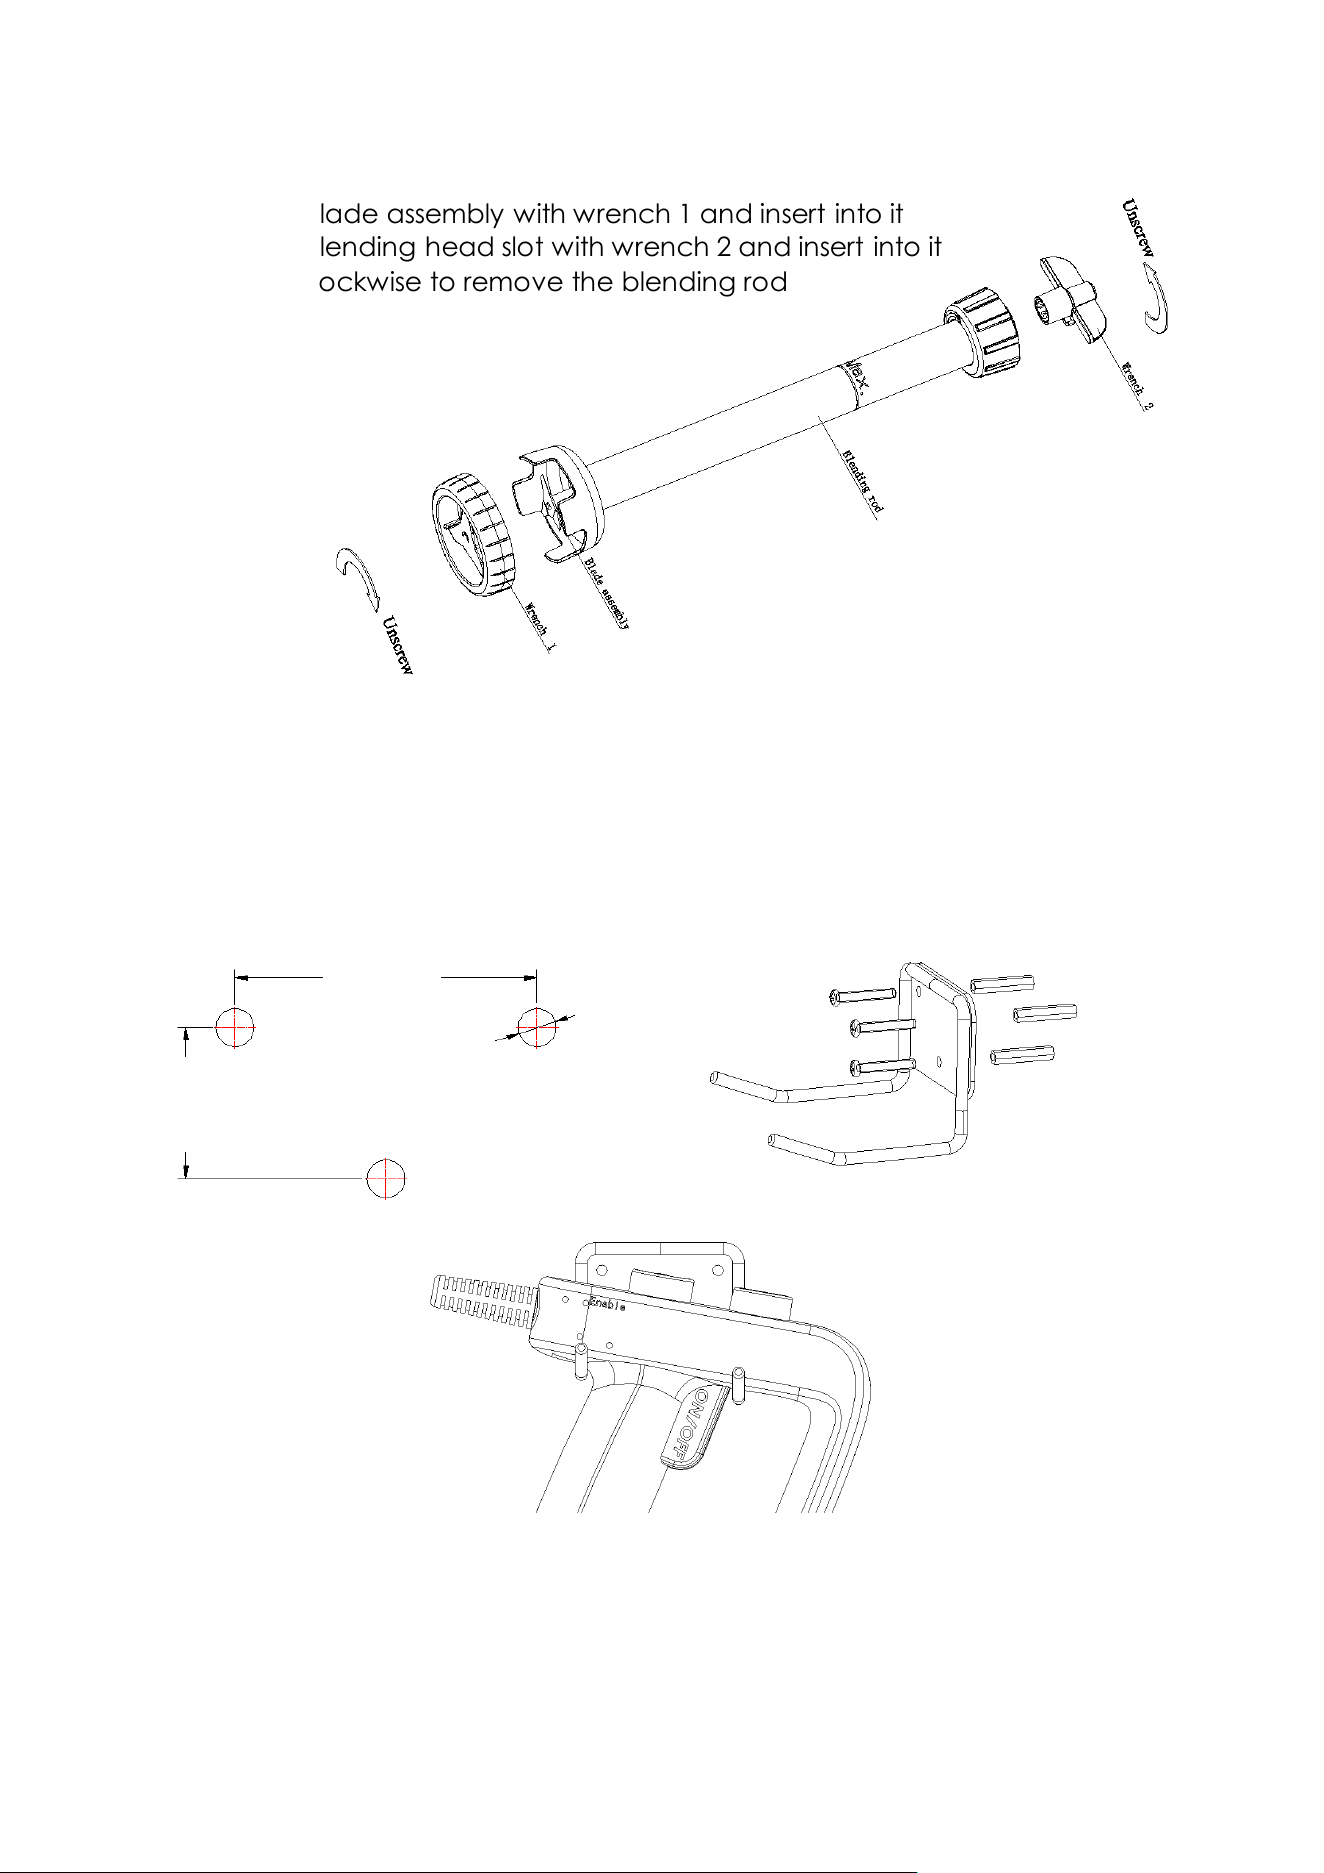
REMOVAL/INSTALLATION OF BLADE ASSEMBLY:
1) Align the blade assembly with wrench 1 and insert into it
2) Align the blending head slot with wrench 2 and insert into it
3) Unscrew clockwise to remove the blending rod
WALL MOUNT BRACKET INSTALLATION
1) Drill three holes with a diameter of 6mm on the wall according to the
dimensions below figure;
2) Put the expansion nails into the round holes;
3) Aligning with the 3 holes, place the wall mount bracket into them;
4) Lock the wall mount bracket with tapping screws.
1.875”
48mm
0.945”
24mm
0.25”
6mm

