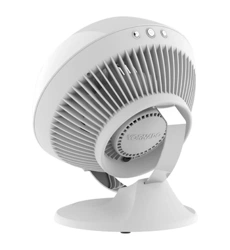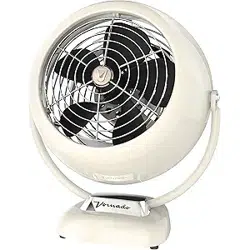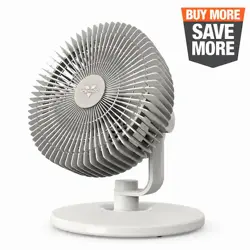

CL3-1072 R-, V00
Vornado Air, LLC
415 East 13th Street, Andover, Kansas 67002
800.234.0604 | vornado.com
model
Refresh 8
vornado.com
WHOLE ROOM CIRCULATOR
OWNER’S GUIDE
GUÍA DEL PROPIETARIO DEL
CIRCULADOR DE AIRE PARA TODA
LA HABITACIÓN
READ AND SAVE
THESE INSTRUCTIONS
LEER Y GUARDAR ESTAS
INSTRUCCIONES
2 English
vornado.com
800-234-0604
help@vornado.com
We expect this
product to be
perfect.
If it is not, we
will make it
right.
23
Español
AÑOS
SATISFACCIÓN
GARANTIZADA
Vornado Air LLC (“Vornado”) garantiza al consumidor o comprador original que este Circulador
para todo el ambiente Vornado® (“Producto”) estará libre de defectos de materiales o
fabricación durante un periodo de cinco (5) años a partir de la fecha de compra. En caso de
detectarse algún defecto de este tipo dentro del periodo de garantía, Vornado, a su discreción,
reparará o reemplazará el Producto sin costo alguno.
Servicio de garantía, llame al 1-800-234-0604 o envíe un correo electrónico a help@vornado.
com para obtener un formulario de Autorización de Devolución (“RA” por sus siglas en inglés).
Cuando se comunique con Vornado por el servicio de garantía, tenga o incluya el número
de modelo y número de serie del Producto, como también su nombre, dirección, ciudad,
estado, código postal, e-mail, y número de teléfono. Para presentar un reclamo de garantía sin
contacto, visite vornado.com/contact-us.
Luego de recibir el formulario RA, envíe su Producto a, Vornado Air LLC Attn: Warranty &
Repair 415 East 13th Street Andover, KS 67002. Para su comodidad, tenga a mano el número de
modelo y número de serie al comunicarse con Vornado para realizar consultas sobre servicio.
Para garantizar la manipulación adecuada, los paquetes deben estar claramente marcados con
el número RA. Los paquetes que no estén claramente marcados con el número RA podrán ser
rechazados en la plataforma de recepción. El servicio de garantía y devolución de su Producto
tardará entre 2 y 3 semanas a partir de la recepción del Producto.
Esta garantía no se aplica a defectos generados por abuso del Producto, modifi cación,
alteración, manipulación indebida, mantenimiento inadecuado, uso comercial o reparación o
servicio del Producto por parte de una persona externa a Vornado, daños producidos durante
el envío o atribuidos a hechos fortuitos. El uso inadecuado del producto, que incluye el uso
de un dispositivo externo que altera o convierte el voltaje o la frecuencia de la electricidad,
o el envío de un producto Vornado a un país donde su uso no está previsto invalidará todas
las garantías. No se recomienda la modifi cación no autorizada del producto, la reparación
realizada por un centro de reparaciones no autorizado, o el uso de repuestos no aprobados, y
sus consecuencias no serán cubiertas por los servicios de soporte o las garantías del producto.
La garantía del producto tendrá validez solo para los modelos que se usan en el país previsto.
LA REPARACIÓN O EL REEMPLAZO SEGÚN SE ESTABLECE EN VIRTUD DE ESTA GARANTÍA
ES UN RECURSO EXCLUSIVO DEL CONSUMIDOR. VORNADO NO SERÁ RESPONSABLE DE
LOS DAÑOS INCIDENTALES O INDIRECTOS PRODUCIDOS COMO CONSECUENCIA DEL
INCUMPLIMIENTO DE UNA GARANTÍA EXPLÍCITA O IMPLÍCITA SOBRE ESTE PRODUCTO.
SALVO QUE LA LEY APLICABLE LO PROHÍBA, LA VIGENCIA DE LA GARANTÍA IMPLÍCITA DE
APTITUD O IDONEIDAD PARA UN FIN ESPECÍFICO DE ESTE PRODUCTO ESTARÁ LIMITADA
A LA VIGENCIA DE ESTA GARANTÍA. Algunos estados no permiten la exclusión o limitación de
los daños incidentales o indirectos, o limitaciones sobre la vigencia de una garantía implícita.
Por ello, las limitaciones o exclusiones que se indican anteriormente pueden no aplicarse en su
caso. Esta garantía le otorga derechos legales específi cos, y usted puede tener otros derechos
que varían entre un estado y otro. El fabricante no asume responsabilidad alguna por los daños
causados por la falta de cumplimiento de estas instrucciones o el uso inadecuado del producto.
Dichas acciones invalidarán la garantía del producto.
Los nombres de empresas y productos son marcas comerciales de sus respectivos propietarios.
© Todos los derechos reservados. La información técnica, los datos y las instrucciones para la
instalación, conexión y operación que contienen estas instrucciones de uso corresponden a la
última información disponible al momento de la impresión. El contenido de este manual puede
diferir ligeramente del producto real. Tenga en cuenta los suplementos adicionales.
GARANTÍA
Esperamos que este producto sea perfecto. Si no está satisfecho con este producto, háganoslo saber.
Estamos Aquí Para Ayudar
800.234.0604
vornado.com
© 2024 Vornado Air LLC Andover, KS 67002 EE.UU. Patente en Curso. Especifi caciones del producto
sujetas a cambio sin previo aviso. Vornado® es marca registrado de Vornado Air LLC.
Pensado y diseñado y respaldado en Andover, KS

22
Español
El artefacto no está enchufado. Enchufe el cable de alimentación en la toma de corriente eléctrica.
Asegúrese de que el artefacto se encuentra en modo de ventilador.
La unidad está dañada o necesita reparación. Suspenda el uso y desenchúfela. Comuníquese con el
servicio de atención al cliente para obtener asistencia.
Saltó el fusible del enchufe. Cambie el fusible. Consulte las INSTRUCCIONES DE MANTENIMIENTO
PARA EL USUARIO.
El enchufe está gastado o dañado. Pruebe con otro enchufe o contacte a un electricista certifi cado.
Asegurar la unidad está puesta en turbo (más alto) para máxima circulación de aire.
Permita que la unidad haga circular por completo en toda la habitación; esto puede tomar varios minu-
tos.
Verifi que que las entradas de aire y la rejilla de salida no estén obstruidas.
Apriete la perilla ubicada en el cuerpo del ventilador hasta que el ventilador se mantenga en la posición
deseada.
Bajo ciertas condiciones, es posible que un enchufe GFCI recolocado no funcione cuando el usuario
cambia la velocidad del circulador Vornado. En este caso, cambie a un enchufe que no esté conectado
a un artefacto GFCI. Asimismo, esto podría indicar que el enchufe GFCI se encuentra en mal estado o
defectuoso. Comuníquese con un electricista certifi cado para que verifi que el enchufe GFCI.
El artefacto no se enciende.
El fl ujo de aire es débil o
lento.
El cuerpo del ventilador no
permanecerá en la posición
deseada.
El GFCI se detiene.
RESOLUCIÓN DE PROBLEMAS
POSIBLE CAUSA Y SOLUCIÓNPROBLEMA
3
English
Important Safety Instructions .............................................................4
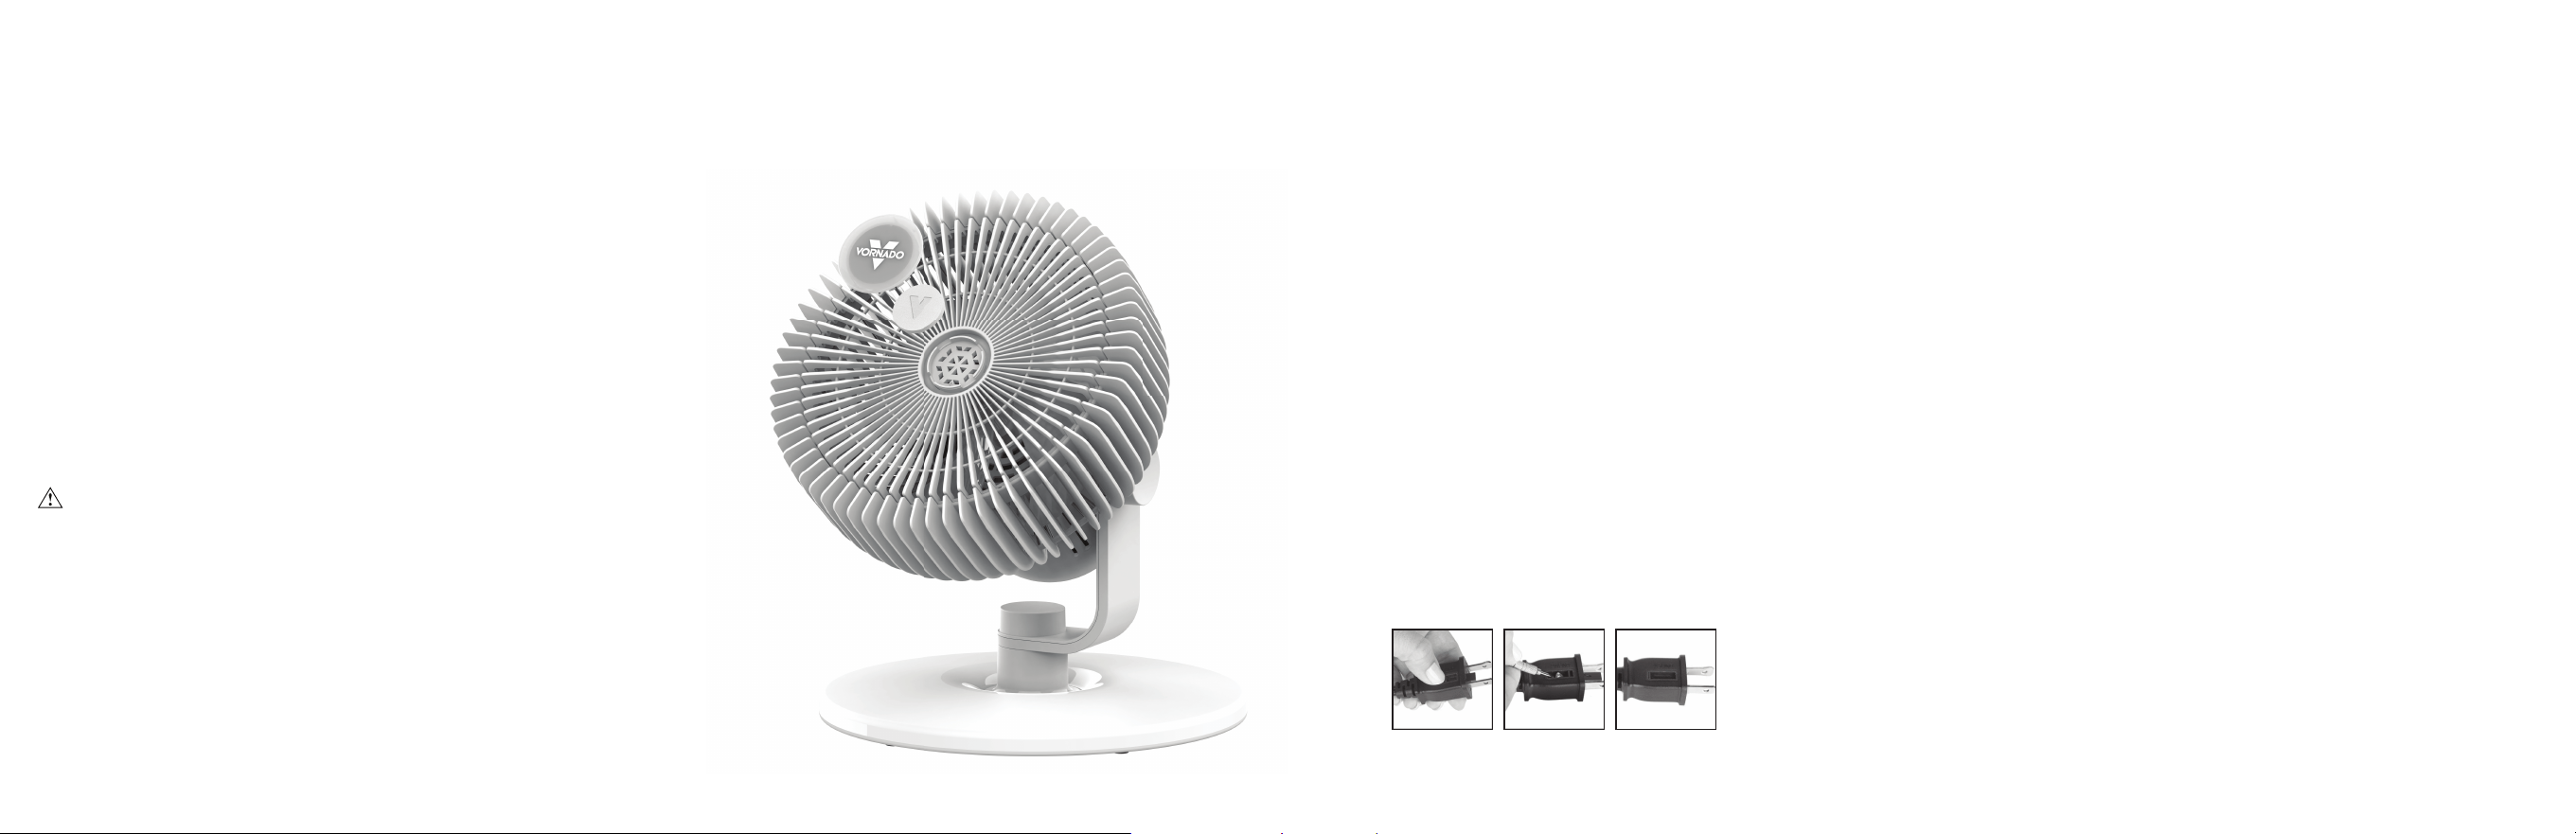
Features ..............................................................................................7
Getting Started ...................................................................................8
Cleaning ..............................................................................................9
Troubleshooting ............................................................................... 11
Warranty ............................................................................................ 12
CONTENTS
Español p. 13
4 English
READ AND SAVE THESE INSTRUCTIONS
IMPORTANT SAFETY INSTRUCTIONS
This owner’s guide and any additional inserts are considered part of
the product. They contain important information about safety, use
and disposal. Before using the product, please familiarize yourself
with all operating and safety instructions. Please keep all documents
for future reference and pass these documents on, together with
the product, to any future owner. See www.vornado.com to view,
download and print the most current version of these instructions.
INTENDED USE: This product is intended to circulate the air in
indoor living spaces only in the United States. This product is not
intended for commercial or industrial use. The manufacturer assumes
no responsibility for damage or injury due to unauthorized use or
product modifi cation. Failure to follow these directions will void the
product warranty.
WARNING: Risk to Children and Impaired Persons
Supervision is required during the installation, operation, cleaning
and maintenance of this product by children 12 years of age and
younger and anyone with reduced physical, sensory or mental
capabilities. Children should be supervised to ensure that they do not
play with the appliance, its parts and packaging material.
INSTALLATION WARNING—To reduce risk of fi re, electrical
shock and injury to persons, observe the following:
- Place this product away from curtains, draperies, tablecloths and
other fabrics, since they may be drawn into the product, damage
the motor and/or cause a fi re.
- No part of this product (the appliance, power cord, plug,
packaging, etc.) should be placed near furnaces, fi replaces, stoves
or other high temperature heat sources. Do not use this product in
a window, on an uneven or unstable surface, or near water.
- The appliance, power supply, power cord and plug cannot come
into contact with water. Do not use this product on wet surfaces.
Do not use this product in a bathtub or shower or position product
where it may fall into a bathtub, laundry, swimming pool or other
water container. Do not use this product outdoors or expose it to
weather or elements.
- Do not run cord under carpeting. Do not cover cord with throw
rugs, runners, or similar coverings. Do not route cord under
furniture or appliances. Arrange cord away from traffi c area and
where it will not be tripped over. The cord should not hang over
edges of counters or be placed where it can be crimped or closed
in doors. Place appliance near an easily accessible outlet so the
product can be unplugged quickly during an emergency.
SAFE USE WARNING—To reduce risk of fi re, electrical shock
and injury to persons, observe the following:
- WARNING: To reduce likelihood of circuit overload, fi re and
electric shock, do not operate with a solid state speed device, such
as a dimmer control switch.
- Do not operate any fan with a damaged cord or plug. Discard fan
or return to an authorized service facility for examination and/or
repair.
- Do not operate unit if the unit has been dropped or damaged. Do
not use this product if it has a damaged power cord or plug. To
avoid risk of electrical shock, do not attempt to repair or replace
parts. Only original replacement parts may be used. If the power
cord is damaged, it must be replaced by the manufacturer, its
service agent, or similarly qualifi ed persons in order to avoid a
21
Español
LIMPIEZA
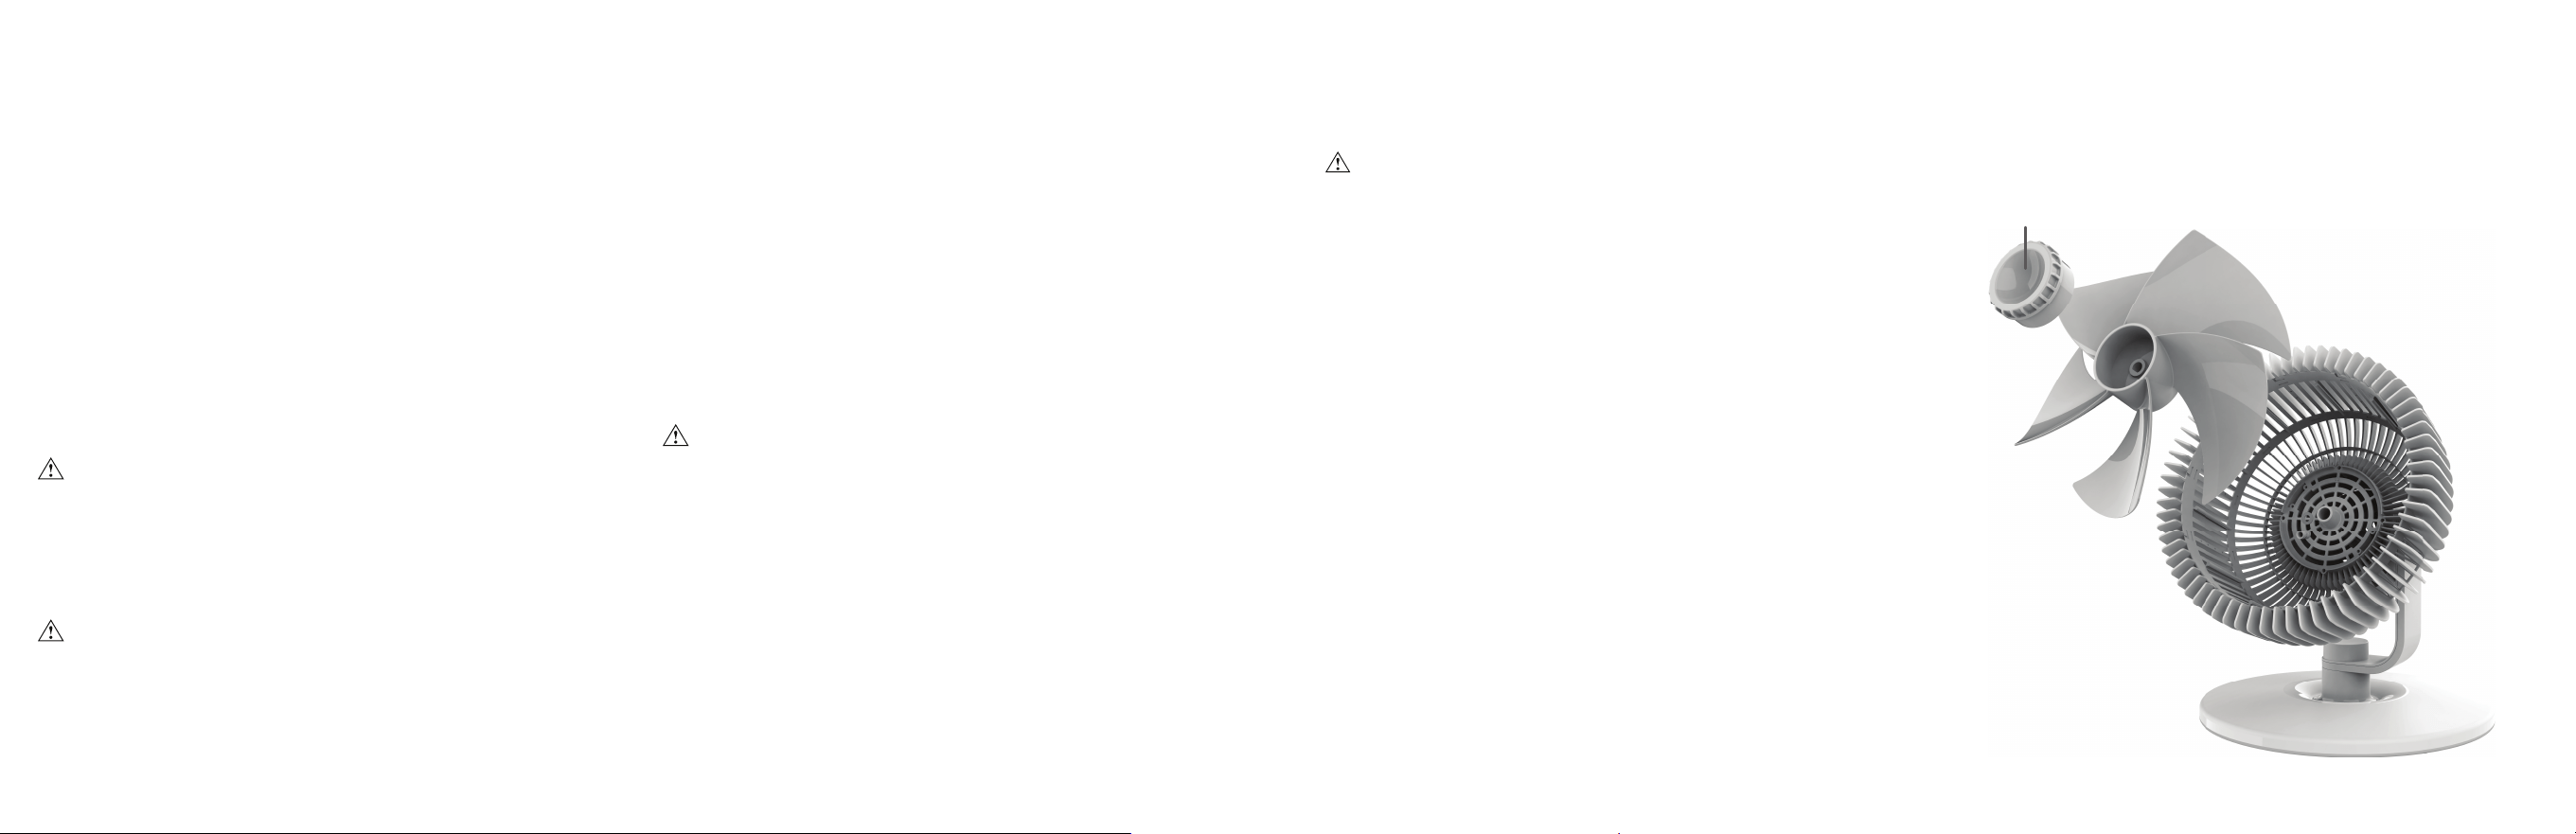
REMOCIÓN DEL ASPA
1. Desenrosque la tapa de la cuchilla sujetándola fi rmemente con una
mano y girando la tapa en el sentido de las manecillas del reloj.
Retire la cuchilla tirando de ella en línea recta desde el eje.
2. Limpie el aspa con un paño suave. Si el circulador se usa en un
ambiente grasoso, como la cocina, puede ser necesario utilizar un
jabón suave o un producto de limpieza común. No use solventes.
3. Para reubicar el aspa, asegúrese de que el lado plano de la varilla
esté alineado directamente con el lado plano correspondiente en
el enchufe del aspa. Desenrosque la tapa de las aspas sujetando
las aspas en su lugar con una mano mientras gira la tapa de las as-
pas en sentido horario. No utilice un martillo, pues podría dañar
el artefacto.
4. Vuelva a colocar la tapa de las aspas y asegúrese de que esté bien
apretada.
ADVERTENCIA: Para reducir el riesgo de descarga eléctrica o daños a personas, desenchufe el circulador antes de remover el aspa.
Tapa de las aspas
20
Español
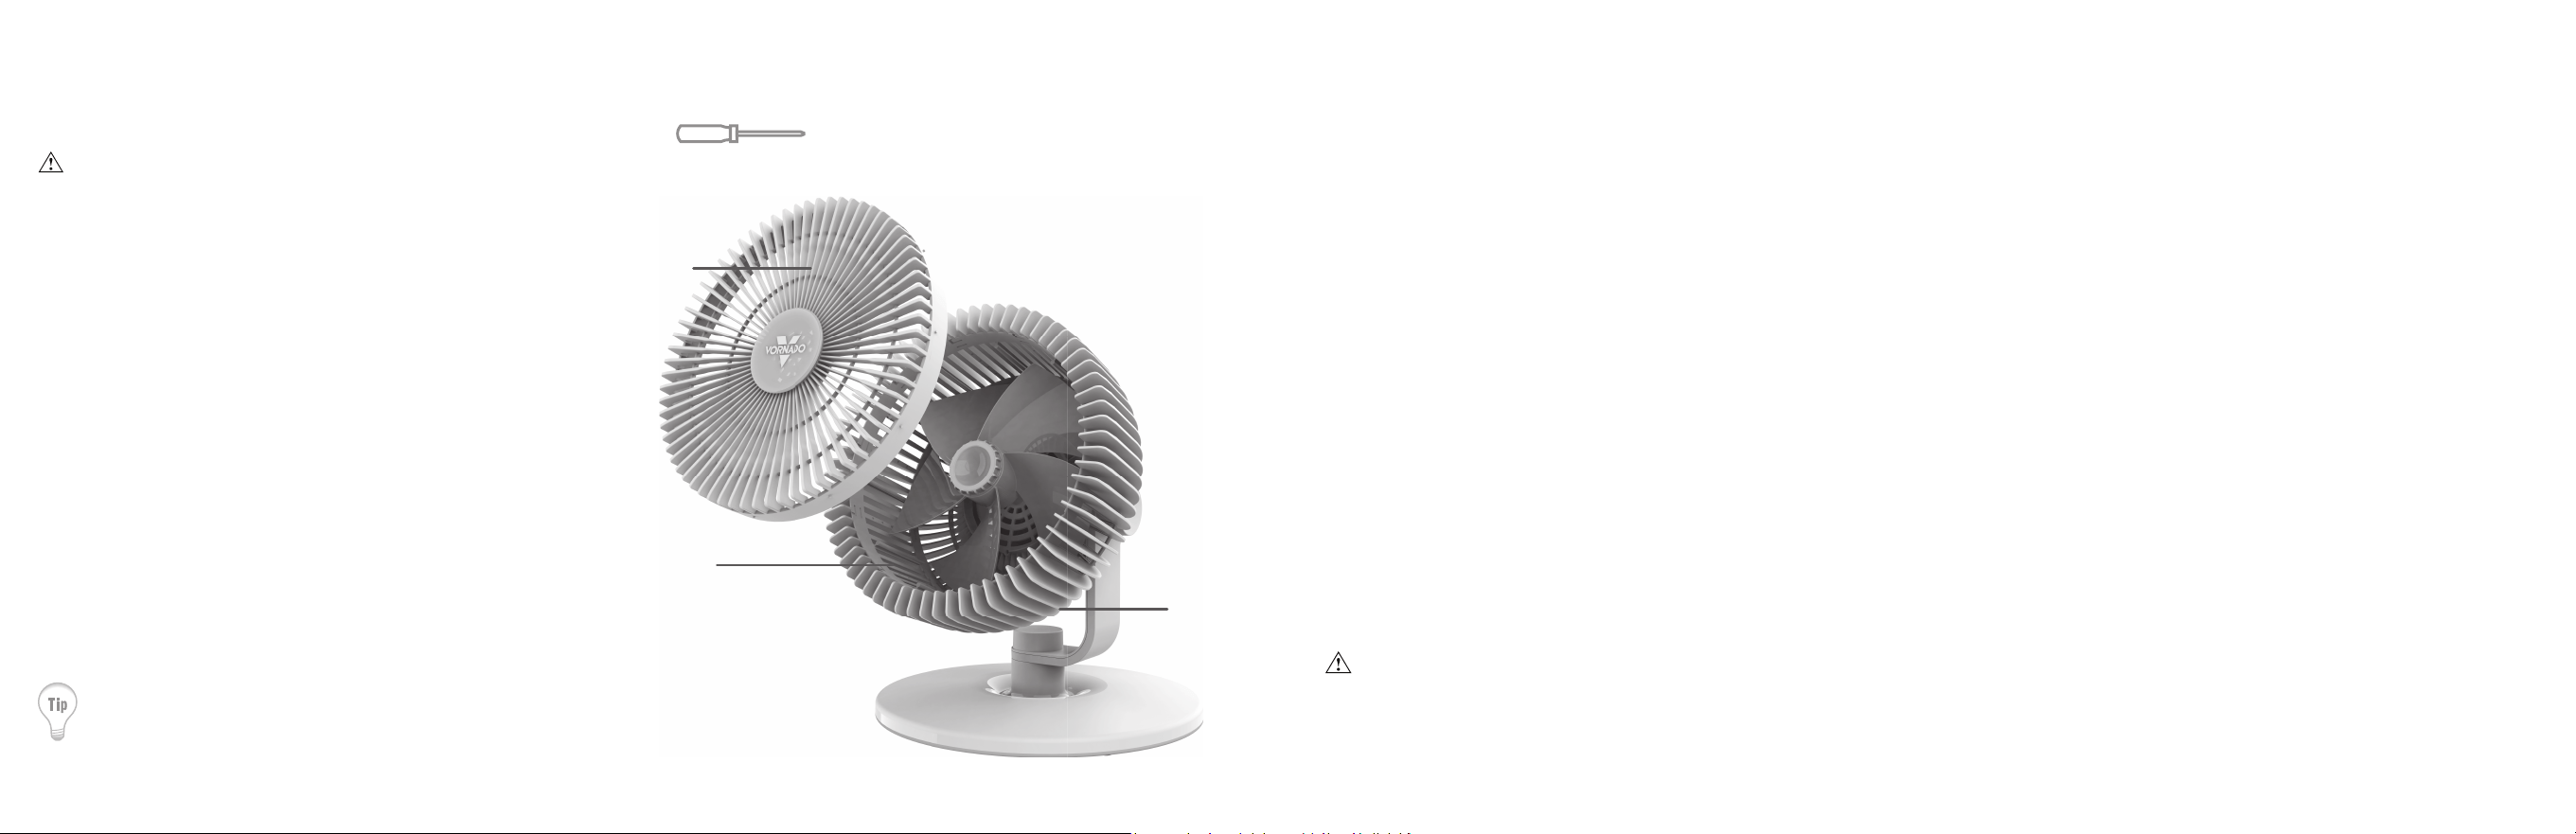
1. Retire el tornillo que se encuentra entre las nervaduras de la
cubierta, en la posición equivalente a las 6 en punto de un reloj.
Gire la rejilla en sentido contrario a las manecillas del reloj y tire
directamente hacia afuera para retirarla.
2. Limpie o lave la rejilla con un jabón suave para lavavajillas. No
coloque ninguna de las partes en el lavavajillas. El calor excesivo
puede deformar el plástico.
3. Para volver a colocarla, alinee el saliente roscado en la parte
inferior trasera de la rejilla ligeramente a la derecha del saliente
roscado en la cubierta.
4. Cerciórese de que las muescas ubicadas en la parte superior de la
rejilla estén alineadas con las hendiduras de la cubierta.
5. Gire la rejilla en sentido horario hasta que encaje en su lugar con
un "clic".
6. Reemplace el tornillo.
LIMPIEZA
REMOCIÓN DE LA REJILLA Se requiere un destornillador.
ADVERTENCIA: Para reducir el riesgo de descarga eléctrica y lesiones a personas, desenchufe el circulador antes de quitar la rejilla.
Utilice el cepillo del aspirador para aspirar
cualquier polvo acumulado en la rejilla y la
cubierta.
Rejilla
Cubierta
Tornillo
5
English
hazard. Contact Vornado Consumer Service at 1-800-234-0604
(phone) or [email protected] (email) for further
instructions about replacement and repair.
- Before plugging power cord into electrical outlet, be sure that
all electrical information on the rating label, including voltage, is
compatible with your outlet’s power supply.
- Do not sit or stand on product.
- Never use the cord as a handle or otherwise yank, strain or stretch
the power cord.
- While the product is plugged in, do not insert or allow foreign
objects to enter any input or output opening as this may cause risk
of electric shock or fi re, or damage the product.
- A loose fi t between wall outlet (receptacle) and plug may cause
overheating and distortion of the plug. Discontinue use of the
product in this outlet. Contact a qualifi ed electrician to replace
loose or worn outlets.
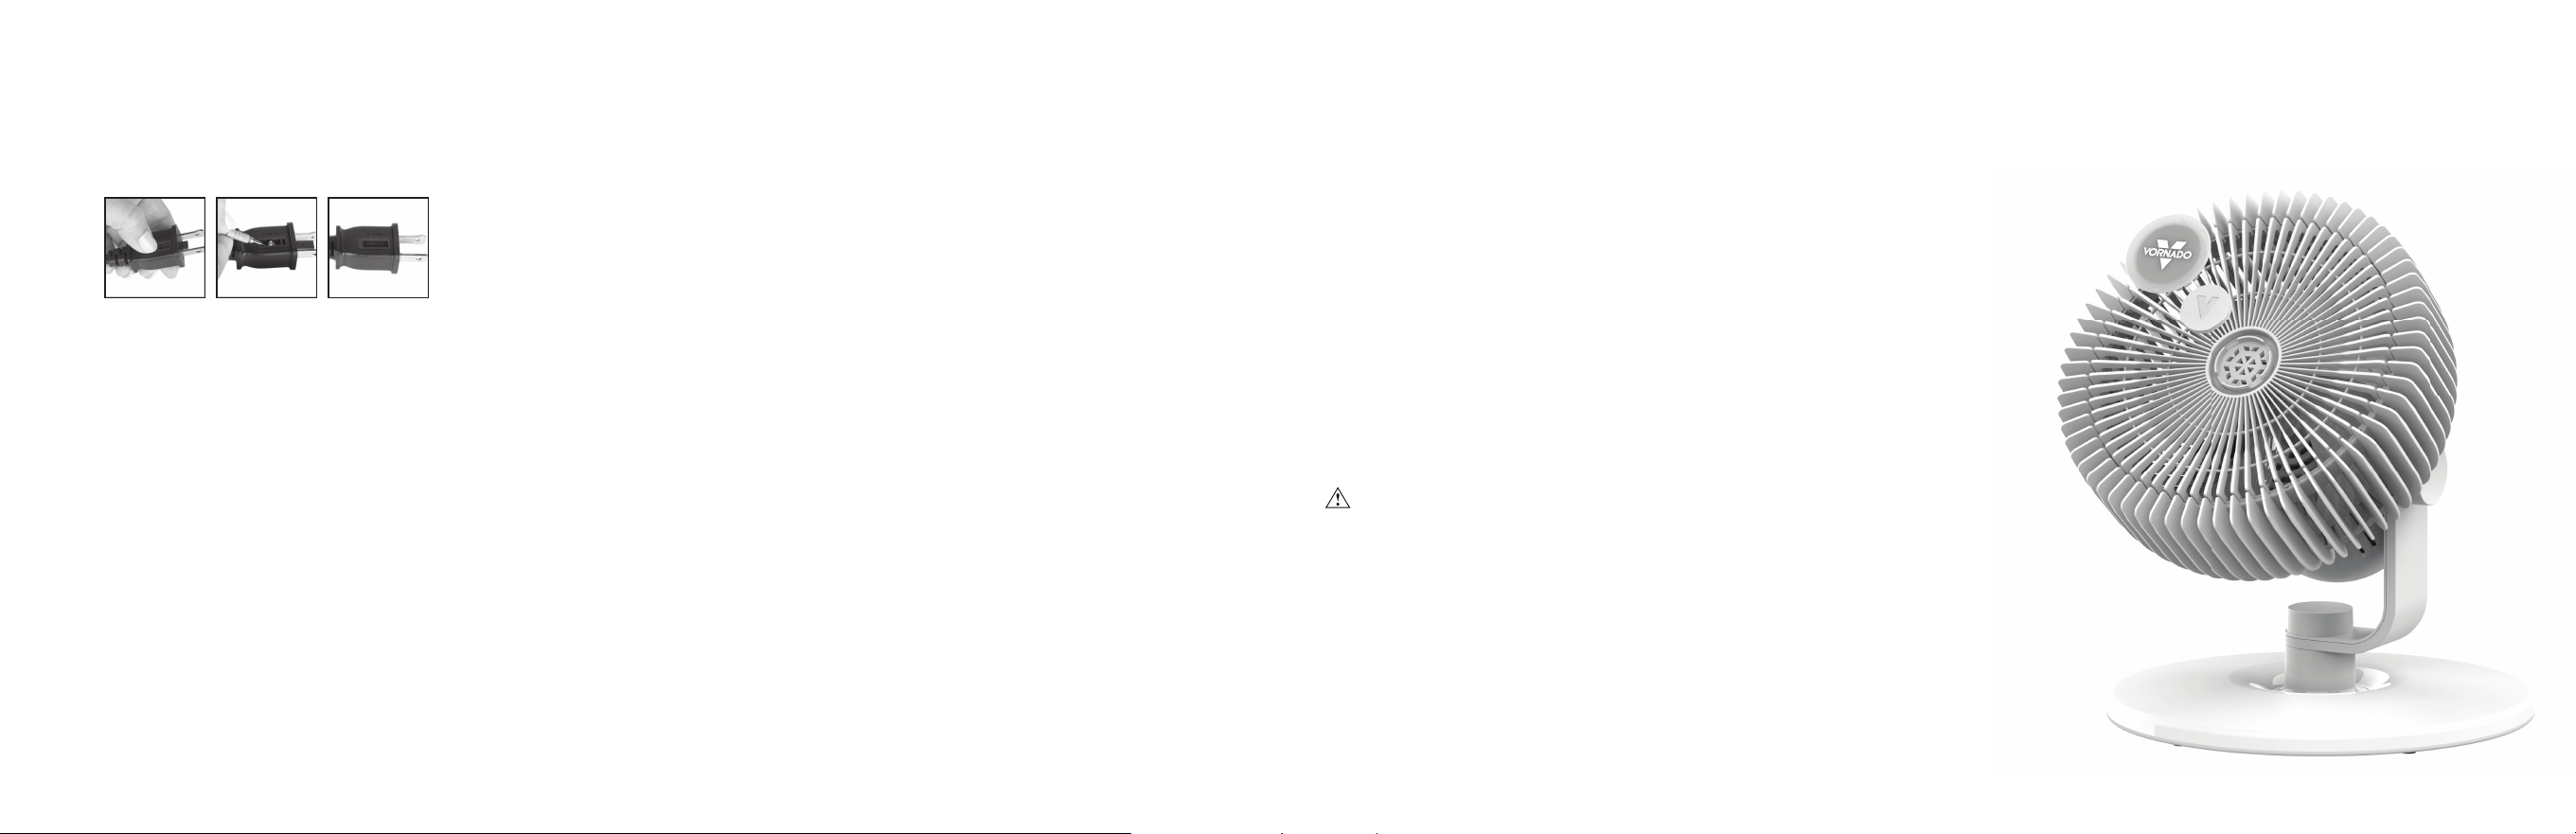
- This appliance has a polarized plug (one blade is wider than the
other.) To reduce the risk of electric shock, this plug is intended to
fi t in a polarized outlet only one way. If the plug does not fi t fully in
the outlet, reverse the plug. If it still does not fi t, contact a qualifi ed
electrician. Do not attempt to defeat this safety feature.
- Before moving, repositioning, servicing, cleaning and when not
in use, use the product controls to turn off the power and then
unplug. To disconnect from outlet, grasp and pull only the plug.
Also, power off and unplug if the product will be left unattended
for an extended period of time or during electrical storms.
SERVICING WARNING—To reduce risk of fi re, electrical shock
and injury to persons, observe the following:
- Clean your product regularly, only as is instructed in this manual.
Prior to cleaning, turn off the power on your product and unplug.
Do not use gasoline, thinners, solvents, ammonias or other
chemicals for cleaning. Refer to the CLEANING instructions
provided.
- Do not open appliance housing while product is plugged in. To
avoid risk of shock, all service and/or repairs must be done by a
Vornado Authorized Service Center.
- This product employs overload protection (fuse). A blown fuse
indicates an overload or short-circuit situation. If the fuse blows,
unplug the product from the outlet. Replace the fuse as per the
user servicing instructions (follow product marking for proper fuse
rating) and check the product. If the replacement fuse blows, a
short-circuit may be present and the product should be discarded
or returned to an authorized service facility for examination and/or
repair.
User Servicing Instructions
1. Using the product controls, turn off the appliance.
2. Grasp the plug (not the cord) and disconnect from the outlet.
3. Risk of Fire. Replace fuse only with 2.5 Amp, 125 Volt fuse as
approved by Vornado Consumer Service. For an authorized
replacement fuse, please contact Vornado Consumer Service.
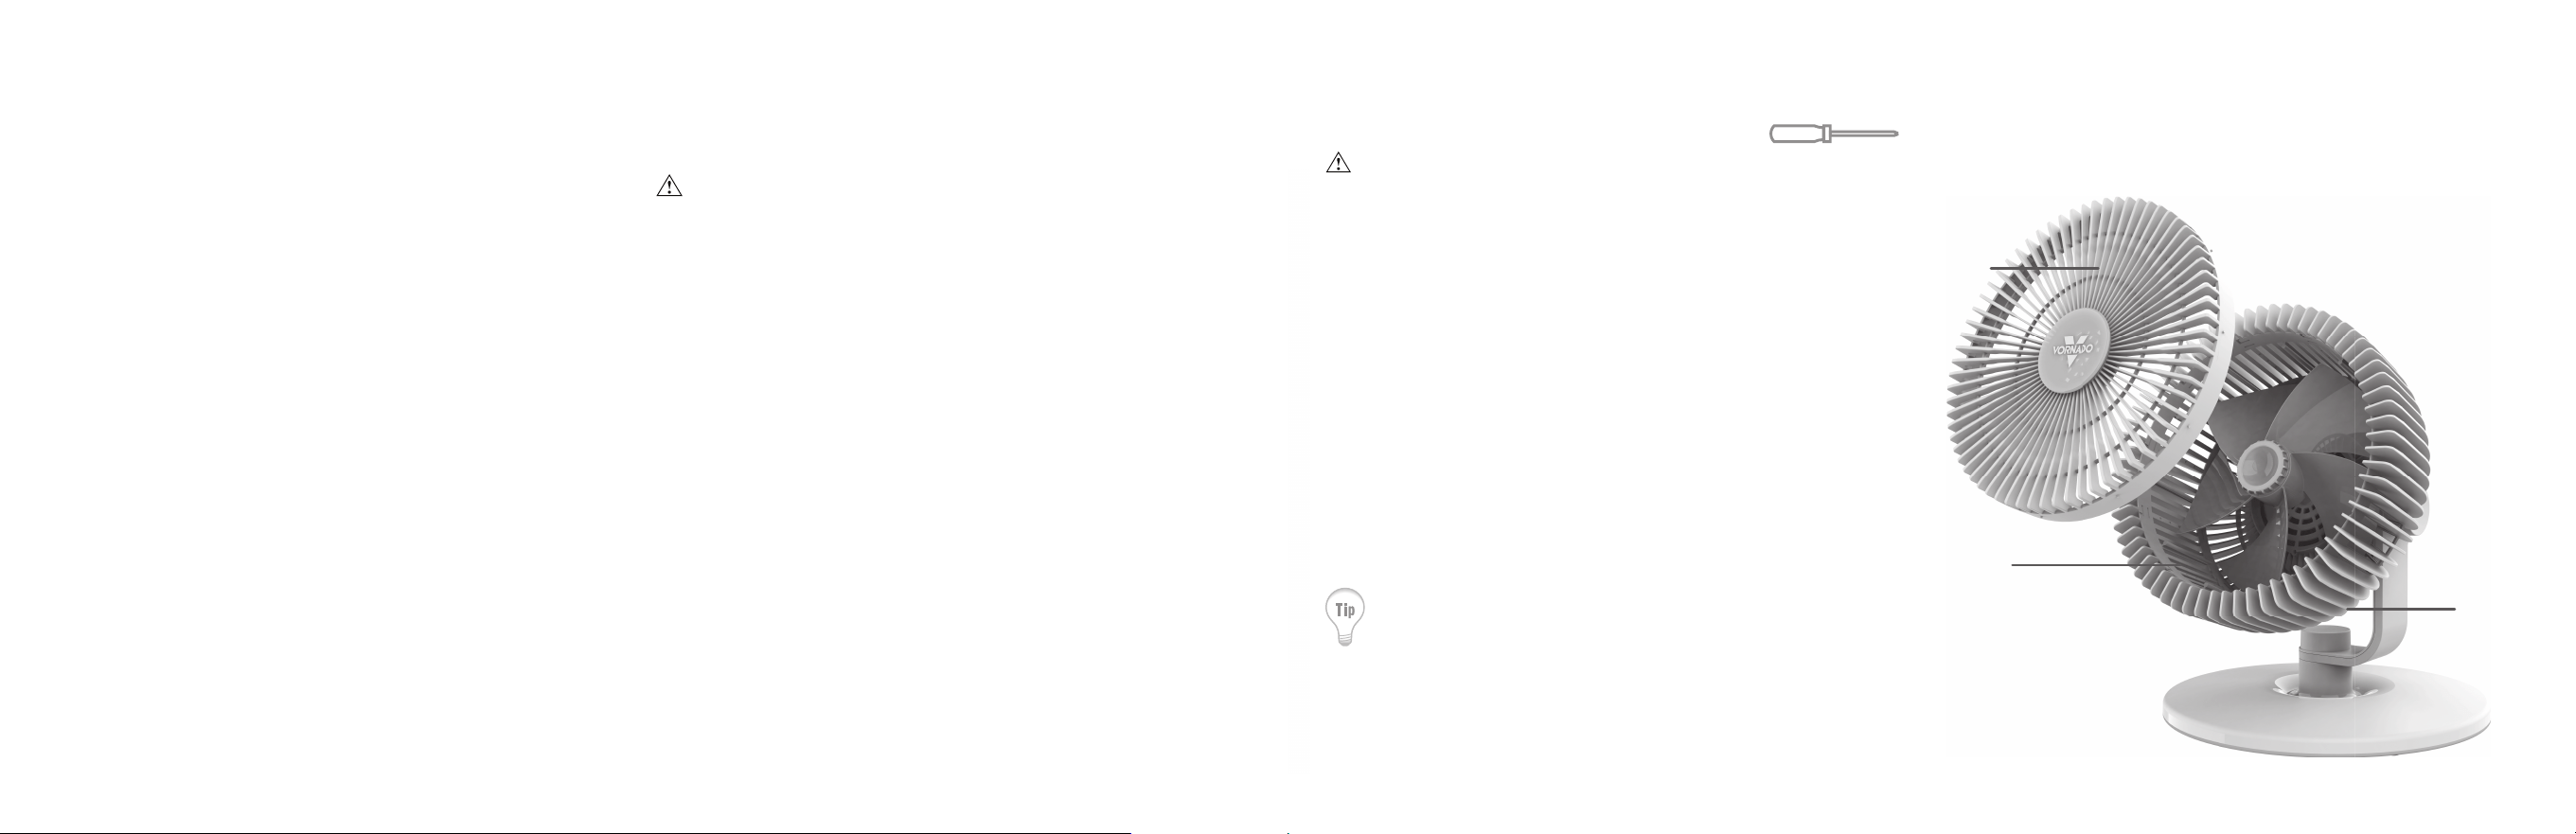
4. Once the replacement is received, use a small fl at-head
screwdriver to slide open the fuse cover (located on the plug)
(See Fig. A).
5. Remove fuse by using the screwdriver to gently lift each end
of the fuse (See Fig. B).
6. Install the replacement fuse by using the screwdriver to gently
push each metal end of the fuse into the receptacle one at a
time. Do not push on the center of the fuse—it is fragile and
may break.
7. Slide the fuse cover closed using the screwdriver. When
6 English
closed, the cover should fi t completely in the plug. No part of
the cover should stick out (See Fig. C).
8. Plug your appliance into the outlet and turn the power on.
9. If the replacement fuse blows, a short-circuit may be present
and the product should be discarded or returned to an
authorized service facility for examination and/or repair.
Fig. A Fig. B Fig. C
Risk of fi re. Do not replace attachment plug. Contains a safety device
(fuse, AFCI, LCDI) that should not be removed. Discard product if the
attachment plug is damaged.
SAVE THESE INSTRUCTIONS
19
Español
1. Retire la tapa del compartimento de almohadillas aromáticas.
2. Añada a la almohadilla unas gotas de aceite esencial.
NOTA: Tenga precaución al añadir el aceite esencial. No sobresature
la almohadilla aromática.
3. Install Scent-Ready Pad.
4. Instale la almohadilla aromática.
PRIMEROS PASOS
LA ALMOHADILLA AROMÁTICA
Esta almohadilla viene sin aroma. Para agregar su aceite esencial favorito a la almohadilla, siga las instrucciones a continuación:
mohadilla
,
siga
las
instr
u
cciones
a
contin
u
ación
:
ADVERTENCIA: Los materiales utilizados para la tapa y el soporte de
la almohadilla aromática se diseñaron específi camente para usarse con
aceites esenciales. Para preservar la vida útil del producto, se recomienda
no aplicar aceites esenciales en ninguna otra parte de este.
18
Español
CARACTERÍSTICAS
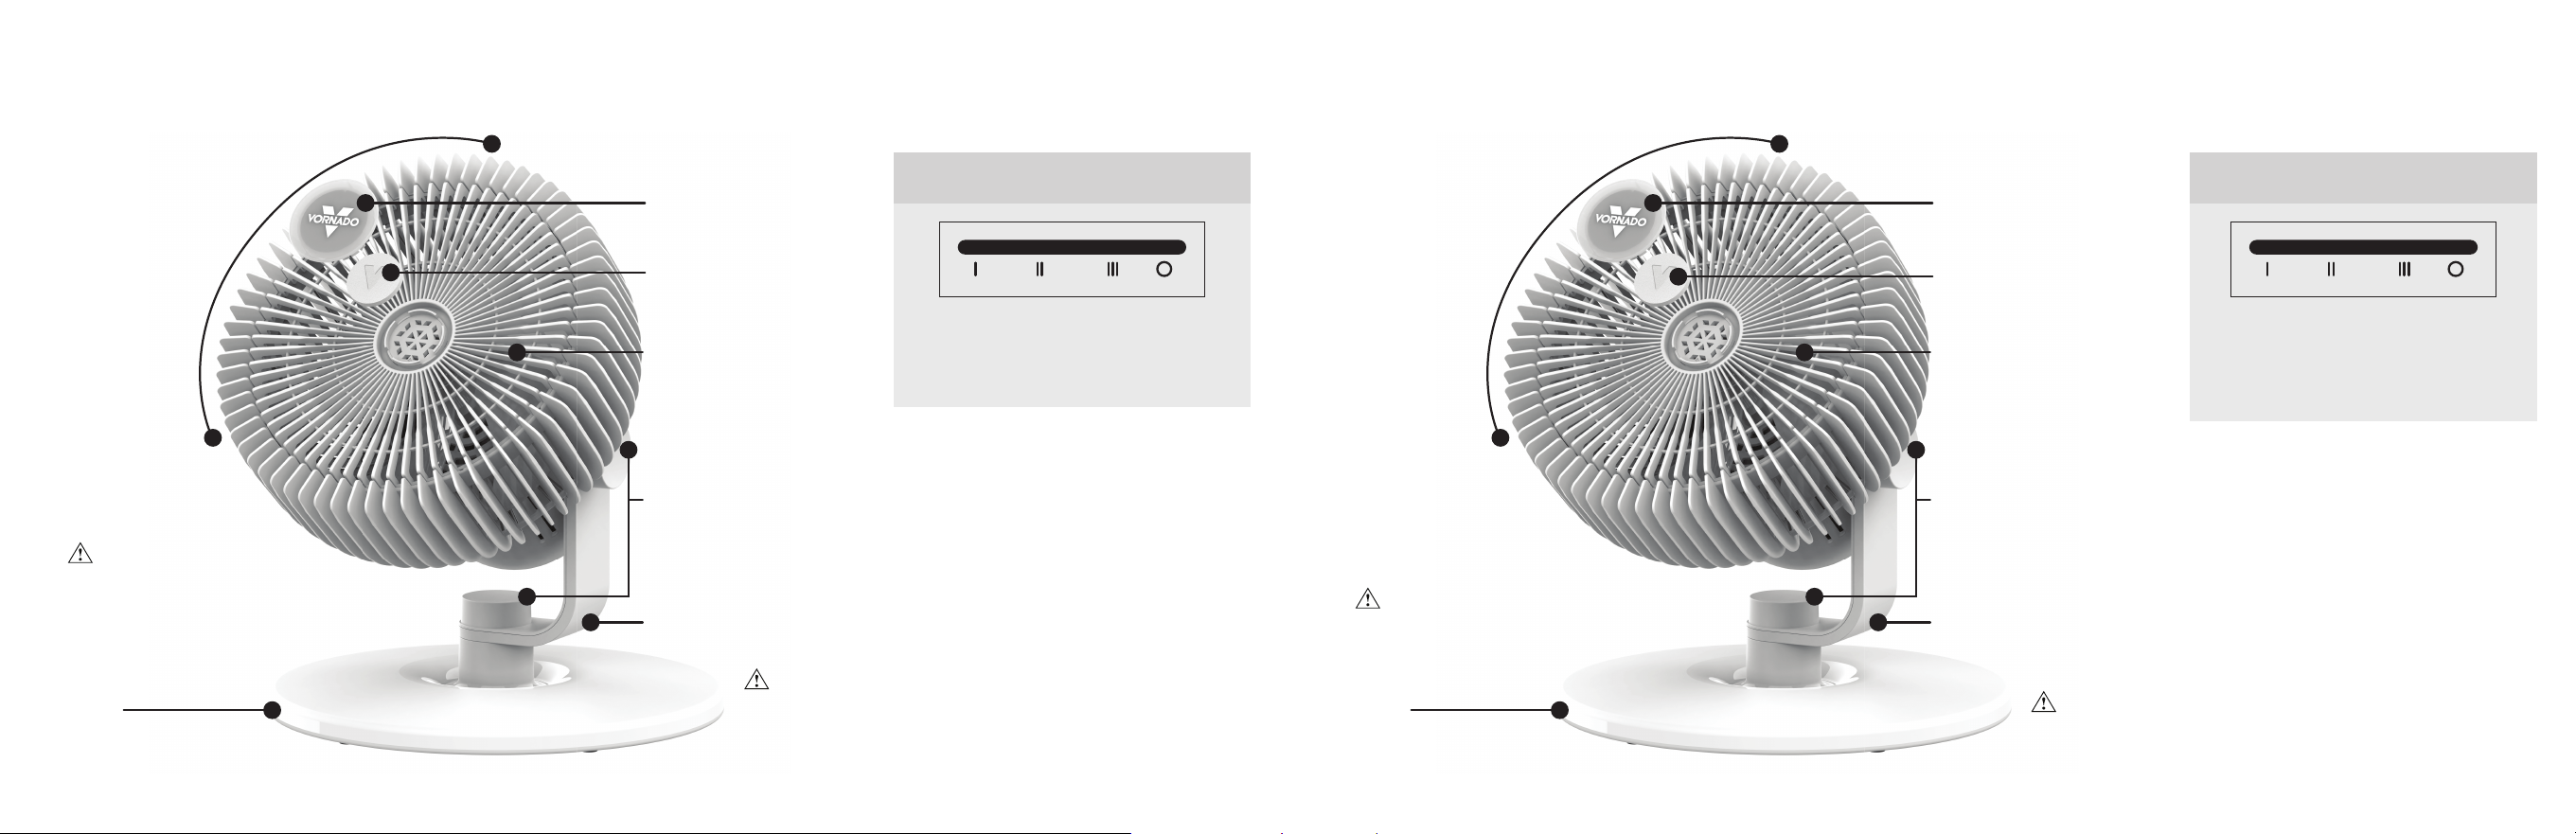
CONTROLES
CORRIENTE DE AIRE
DIRECCIONAL DE 45˚
Dirija el vórtice del
circulador hacia
donde desee.
BASE
I - VELOCIDAD DEL VENTILADOR BAJA
II - VELOCIDAD DEL VENTILADOR MEDIA
III - VELOCIDAD DEL VENTILADOR ALTA
O - APAGADO
ADVERTENCIA - Peligro de pellizco entre el cuerpo del
ventilador y el soporte del brazo. Verifi que que la perilla
esté asegurada y totalmente ajustada antes de mover el
producto.
ALMOHADILLAS
AROMÁTICAS (10
INCLUIDAS)
BRAZO DEL SOPORTE
Para giratorio 360
º
.
PERILLAS DE AJUSTE (2)
NOTA: Con el tiempo, puede
ser necesario ajustar las perillas.
ADVERTENCIA: Peli-
gro de asfi xia. Mantenga
las piezas pequeñas,
como las bases de sili-
con, fuera del alcance de
los niños y las mascotas.
REMOVEABLE GRILLE
AND BLADE
SCENT-READY PAD CAP
7
English
FEATURES
CONTROLS
45˚ DIRECTABLE AIRFLOW
Direct the airfl ow where
you want it.
SUPPORT ARM
For 360˚ swivel.
TIGHTENING KNOBS (2)
NOTE: Overtime, the knobs
may need tightened.
REMOVEABLE GRILLE
AND BLADE
SCENT-READY PADS
(10 INCLUDED)
SCENT-READY PAD CAP
BASE
I - LOW FAN SPEED
II - MEDIUM FAN SPEED
III - HIGH FAN SPEED
O - OFF
WARNING - Pinch Hazard between Fan Body and Arm
Support. Ensure knob is secured and fully tightened prior
to moving product.
WARNING: Choking
Hazard. Keep small parts
like silicone feet away
from children and pets.
8 English
1. Remove the Scent-Ready Pad Cap.
2. Add a few drops of essential oil to the pad.
NOTE: Use caution when adding essential oil. Do not oversoak the
scent pad.
3. Install Scent-Ready Pad.
4. Replace the Scent-Ready Pad Cap.
GETTING STARTED
SCENT-READY PAD
This pad is unscented. To add your favorite essential oil to the pad, please follow the below instructions:
WARNING: The material used on the scent-ready pad cap and pad
holder are designed specifi cally for use with essential oils. To maintain
product longevity, do not put essential oils anywhere else on the product.
w
the
belo
w
instr
u
ctions
:
17
Español
2. Tome el enchufe (no el cable) y desconéctelo de la toma
de corriente.
3. Riesgo de incendio. Reemplace con un fusible de 2.5 Amp,
125 v con el amperaje aprobado por el Servicio de Atención
al Cliente de Vornado. Comuníquese con el Servicio de
Atención al Cliente de Vornado para obtener un fusible de
repuesto autorizado.
4. Una vez que ha recibido el repuesto, utilice un destornillador
plano pequeño para abrir la tapa del fusible (ubicada en el
enchufe) (Fig. A).
5. Retire el fusible utilizando el destornillador para levantar
suavemente cada extremo del fusible (Fig. B).
6. Instale el fusible de repuesto utilizando el destornillador para
empujar suavemente cada extremo de metal del fusible en el
receptáculo, un extremo a la vez. No empuje en el centro del
fusible; es frágil y puede romperse.
7. Deslice la tapa del fusible para cerrarla utilizando el
destornillador. Una vez cerrada, la tapa debe caber
completamente en el enchufe. Ninguna parte de la tapa debe
sobresalir (Fig. C).
8. Enchufe el artefacto en una toma de corriente y enciéndalo.
9. Si el fusible de reemplazo se quema, puede haber un
cortocircuito, y el producto debe desecharse o ser devuelto a
un representante de servicio autorizado para que lo examinen
o reparen.
Fig. A Fig. B Fig. C
Riesgo de incendio. No reemplace el enchufe. Contiene un artefacto
de seguridad (fusible, AFCI, LCDI) que no debe retirarse. Deseche el
producto si el enchufe está dañado.
CONSERVE ESTAS INSTRUCCIONES
16
Español
de voltaje.
- No opere ningún ventilador con un cable o enchufe dañado.
Deseche el ventilador o devuélvalo a un centro de servicio
autorizado para que lo examinen o reparen.
- No opere la unidad si se ha caído o se ha dañado. No utilice este
producto si tiene un cable o enchufe dañado. Para evitar el riesgo
de descarga eléctrica, no intente reparar o reemplazar piezas. Solo
se pueden utilizar repuestos originales. Si el cable de alimentación
está dañado, debe ser reemplazado por el fabricante, su agente
de servicio o personas califi cadas de manera similar para evitar un
peligro. Comuníquese con el Servicio al consumidor de Vornado al
1-800-234-0604 (teléfono) o [email protected] (correo
electrónico) para obtener más instrucciones sobre el reemplazo y la
reparación.
- Antes de enchufar el cable de alimentación en la toma de corriente
eléctrica, asegúrese de la información eléctrica de la etiqueta de
califi cación, incluido el voltaje, sean compatibles con el suministro
de alimentación de su toma de corriente.
- No se siente ni se pare sobre el producto.
- Nunca utilice el cable como una manija, jale, separe ni tire del cable
de alimentación.
- Mientras el producto esté enchufado, no coloque ni permita que
objetos extraños entren en una abertura de entrada o salida ya
que podrían causar el riesgo de descarga eléctrica o de incendio, o
dañar el producto.
- Un calce no fi rme entre la toma de corriente de pared (receptáculo)
y el enchufe pueden causar sobrecalentamiento del enchufe. Deje
de utilizar el producto en esta toma de corriente. Comuníquese con
un electricista califi cado para reemplazar las tomas con corriente
fl ojas o desgastadas.
- Antes de mover, colocar en otra parte, reparar, limpiar o cuando
no esté en uso, utilice los controles para apagar la alimentación y
desenchufe. Para desconectar de la toma de corriente, tire solo del
enchufe. También, apague y desenchufe el producto si lo dejará
sin supervisión durante un largo período de tiempo o durante
tormentas eléctricas.
ADVERTENCIA DE REPARACIÓN: Para reducir el riesgo de
incendio, de descarga eléctrica y de lesiones a personas, tenga en
cuenta lo|siguiente:
- Limpie su producto regularmente, solo como se indica en este
manual Antes de limpiar, apague y desenchufe el producto. No
utilice gasolina, diluyentes, solventes, amoníacos ni otros químicos
para limpiar. Consulte las instrucciones de LIMPIEZA provistas.
- No abra la carcasa del artefacto mientras el producto está
enchufado. Para evitar el riesgo de descarga, todo servicio o
reparaciones deben ser realizados por un Centro de Servicio
Autorizado de Vornado.
- Este producto posee protección contra sobrecargas (fusible). Un
fusible quemado indica que se ha producido una sobrecarga o un
cortocircuito. Si el fusible se quema, desconecte el producto del
tomacorriente. Reemplace el fusible de acuerdo a las instrucciones
de reparación para el usuario (tenga en cuenta las indicaciones del
producto para obtener información sobre el valor correspondiente
del fusible) y verifi que el producto. Si el fusible de repuesto se
quema, es posible que ocurra un cortocircuito. En ese caso, el
producto debe desecharse o ser devuelto a un representante de
servicio autorizado para que examine o repare
el producto.
Instrucciones De Reparación Para El Usuario
1. Utilizando los controles del producto, apague el artefacto.
9
English
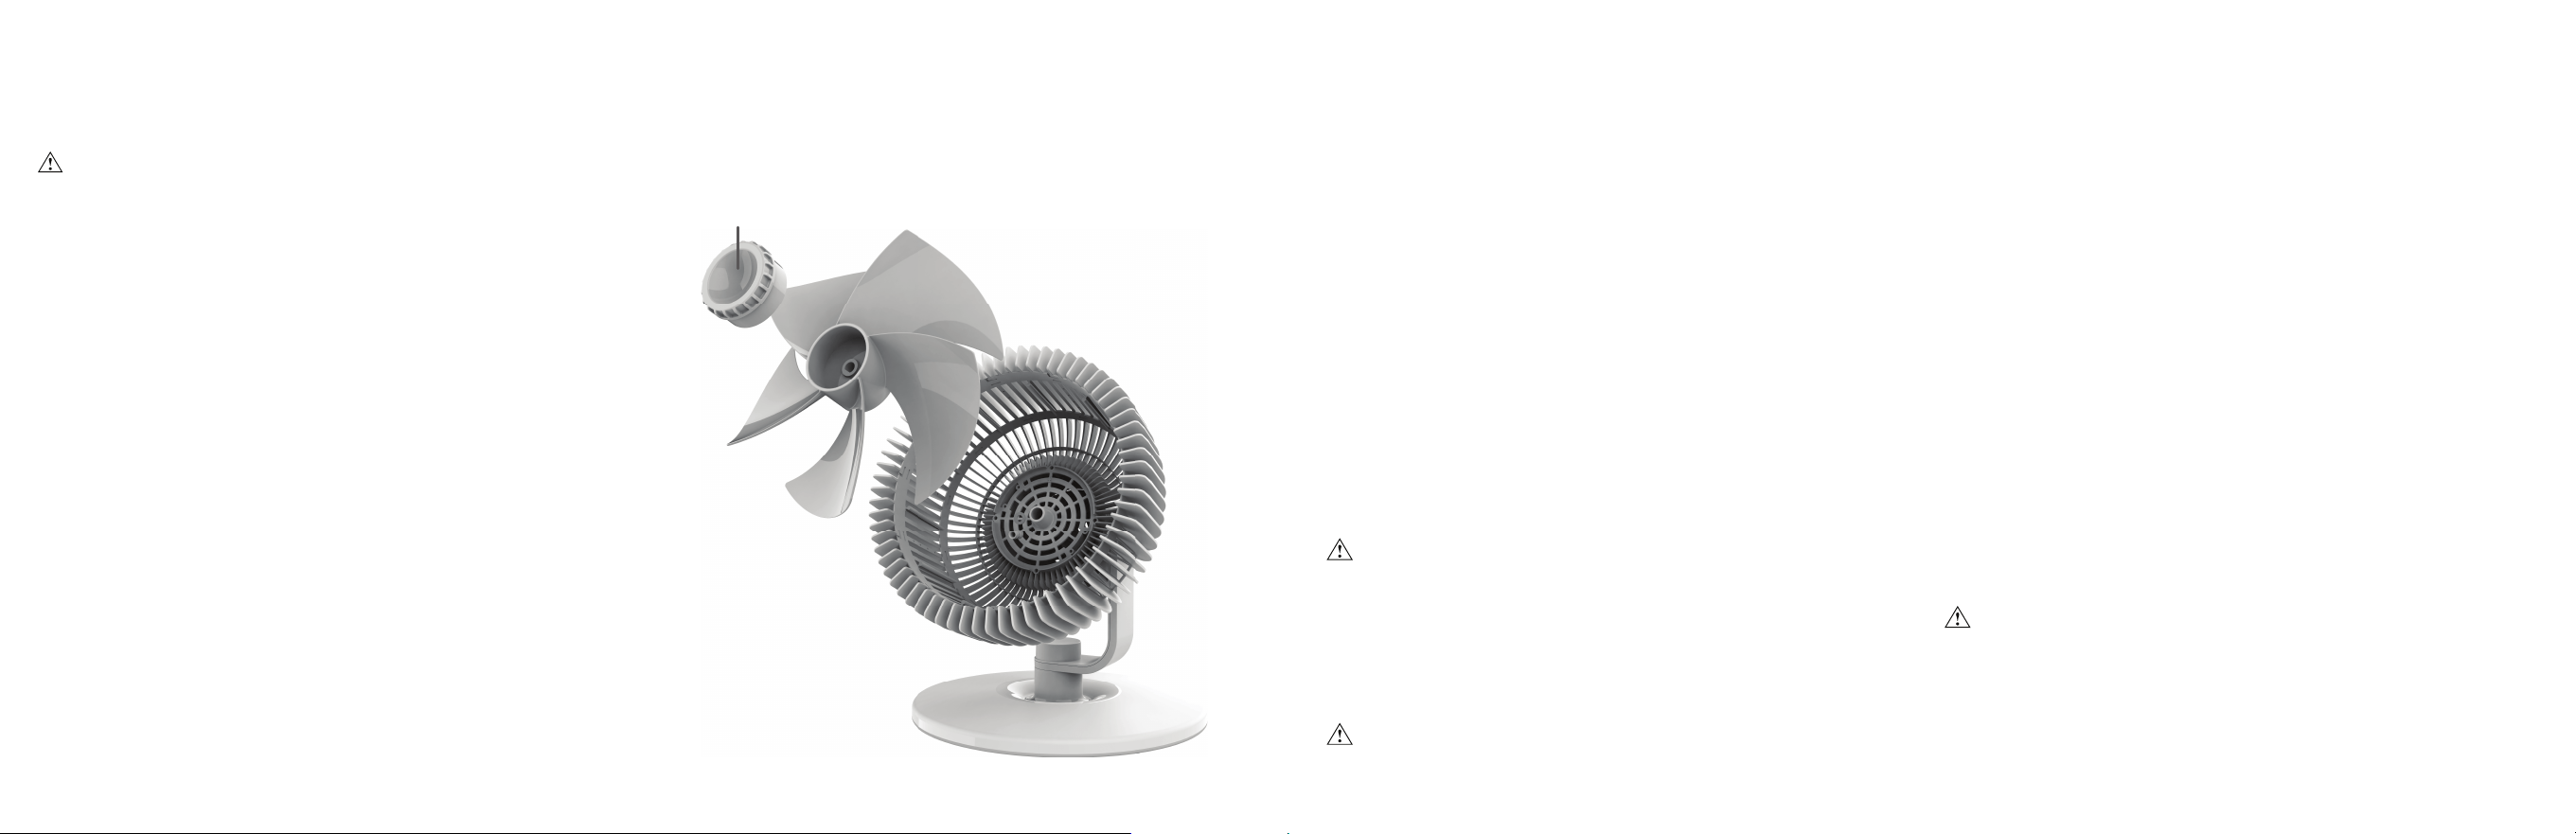
1. Remove the screw located in between the ribs of the Shroud at
the 6 o’clock position. Rotate the Grille counterclockwise and pull
directly out to remove.
2. Dust or wash Grille with a mild dishwashing soap. Do not place
Grille in the dishwasher. The excessive heat can distort the plastic.
3. To reattach – align the screw boss on the bottom backside of the
Grille slightly to the right of the screw boss on the Shroud.
4. Ensure notches on top of Grille are aligned with indents on Shroud.
5. Rotate Grille clockwise until it “clicks” into place.
6. Replace screw.
CLEANING
GRILLE REMOVAL Screwdriver required.
WARNING: To reduce the risk of electrical shock and injury to persons, unplug the circulator before removing grille.
Use the brush attachment on your household
vacuum cleaner to vacuum any accumulated
dust off the Grille and Shroud.
Grille
Shroud
Screw
10 English
CLEANING
BLADE REMOVAL
1. Unscrew the blade cap by holding the blade in place with one
hand while turning the blade cap clockwise. Pull the blade straight
out from the shaft.
2. Wipe the blade with a damp cloth. If your circulator is used in a
greasy environment, such as a kitchen, mild soap or a common
household cleaner may be necessary. Do not use solvents. Do not
place blade in the dishwasher. The excessive heat can distort the
plastic.
3. To reattach - be certain the fl at side of the shaft aligns directly with
the corresponding fl at side on the blade's socket. Push the blade
all the way on the shaft until it bottoms out and the threads on the
shaft are completely through the blade socket. Do not use a ham-
mer as this could result in bearing damage.
4. Reinstall blade cap and ensure it has been fi rmly tightened.
WARNING: To reduce the risk of electrical shock and injury to persons, unplug the circulator before removing blade.
Blade Cap
15
Español
LEA Y CONSERVE ESTAS
INSTRUCCIONES
INSTRUCCIONES DE SEGURIDAD IMPORTANTES
Este manual de usuario y todos los folletos adicionales se consideran
parte del producto. Contienen información importante sobre
seguridad, utilización y eliminación. Antes de utilizar el producto, lea
todas las instrucciones de seguridad y de operación. Conserve todos
los documentos para referencia futura y entregue estos documentos,
junto con el producto, en caso de venderlo. Consulte www.vornado.
com para ver, descargar e imprimir la versión más reciente de estas
instrucciones.
USO PREVISTO: Este producto está previsto para circular el aire
de espacios interiores de viviendas solo en Estados Unidos. Este
producto no está previsto para uso comercial o industrial. El fabricante
no asume ninguna responsabilidad por daños o lesiones que se
ocasionen debido a la utilización o a la modifi cación no autorizadas
del producto. La inobservancia de estas instrucciones invalidará la
garantía del producto.
ADVERTENCIA: Peligro de quemadura química. Mantenga las
pilas fuera del alcance de los niños.
Se requiere la supervisión durante la instalación, la operación, la
limpieza y el mantenimiento de este producto por parte de niños de
12 años y menores y de cualquier persona con capacidades físicas,
sensoriales o mentales reducidas. Se debe supervisar que los niños no
jueguen con este producto, sus partes ni el material de empaque.
ADVERTENCIA DE INSTALACIÓN: Para reducir el riesgo de
incendio, de descarga eléctrica y de lesiones a personas, tenga en
cuenta lo|siguiente:
- Coloque este producto alejado de cortinas, tapices, manteles y
otras telas, ya que podrían ser atraídas por el producto, dañar el
motor o causar un incendio.
- Ninguna pieza de este producto (el artefacto, el cable de
alimentación, el enchufe, el empaque, etc.) debe colocarse cerca
de estufas, hogares, hornos u otras fuentes de calor de alta
temperatura. No utilice este producto en una ventana, o en una
superfi cie despareja o inestable, ni cerca de agua.
- El artefacto, el cable de alimentación y el enchufe no pueden estar
en contacto con agua. No utilice este producto en superfi cies
húmedas. No utilice este producto en una tina o ducha, ni coloque
el producto de donde se pueda caer a una tina, lavadora, piscina
u otro contenedor de agua. No utilice este producto al aire libre o
expuesto a la intemperie.
- No pase el cable debajo del alfombrado. No cubra el cable con
alfombras, tapetes o coberturas similares. No lo pase debajo de
muebles o electrodomésticos. Coloque el cable fuera del área
de paso y donde no genere tropiezos. El cable no debe colgar
de bordes de mesadas ni estar colocado donde pueda quedar
doblado o apretado por puertas. Coloque el artefacto cerca de una
toma de corriente simple y accesible para que el producto pueda
desenchufarse rápidamente en caso de emergencia.
ADVERTENCIA PARA LA UTILIZACIÓN SEGURA: Para reducir
el riesgo de incendio, de descarga eléctrica y de lesiones a
personas, tenga en cuenta lo|siguiente:
- ADVERTENCIA: Para reducir la posibilidad de una sobrecarga
del circuito, de incendio o de descarga eléctrica, no conecte a
un dispositivo de velocidad de estado sólido como un regulador

14
Español
Instrucciones De Seguridad Importantes ......................................... 15
Características ...................................................................................18
Primeros Pasos .................................................................................. 19
Limpieza ............................................................................................20
Resolución De Problemas .................................................................22
Garantía ............................................................................................. 23
CONTENIDO
11
English
TROUBLESHOOTING
POSSIBLE CAUSE AND SOLUTIONPROBLEM
Unit is not plugged in. Plug Power Cord into electrical outlet.
Ensure unit fan speed setting is selected.
Unit is damaged or in need of repair. Cease usage and unplug. Contact Consumer Service for assistance.
Plug fuse has blown. Replace fuse. See USER SERVICING INSTRUCTIONS.
The outlet is worn or damaged. Try another outlet or contact a qualifi ed electrician.
Unit set to a low speed setting. Adjust to a higher speed setting.
Allow the unit to fully circulate the air throughout the room, this may take several minutes.
Ensure all air inlets and outlet grille are unobstructed.
Tighten the knob located on the Fan Body until Fan stays in the desired position.
Under certain conditions, it is possible for a reset GFCI (Ground Fault Circuit Interrupter) outlet to trip
when the user is changing speeds on a Vornado circulator. In this event, change to an outlet that is not
connected to a GFCI device. It could also indicate a weak or defective GFCI outlet. Contact a qualifi ed
electrician to check the GFCI outlet.
The unit fails to power on.
Airfl ow is weak or slow.
Fan Body will not stay in
desired position.
GFCI has tripped.

12 English
Vornado Air LLC (“Vornado”) warrants to the original consumer or purchaser this Vornado®
Whole Room Circulator (“Product”) is free from defects in material or workmanship for a
period of fi ve (5) years from the date of purchase. If any such defect is discovered within
the warranty period, Vornado, at its discretion, will repair or replace the Product at no cost.
For warranty service: Call 1-800-234-0604 or email [email protected] to obtain a Return
Authorization (“RA”). Please have or include your Product’s model number and serial
number, as well as your name, address, city, state, zip code, e-mail, and phone number
when contacting Vornado for warranty service. To fi le a contactless warranty claim, visit
vornado.com/contact-us.
After receiving the RA form, ship your Product to: Vornado Air LLC Attn: Warranty & Repair
415 East 13th Street Andover, KS 67002. For your convenience, please have your model
number and serial number when contacting Vornado with service inquiries. To assure
proper handling, packages must be clearly marked with the RA number. Packages not
clearly marked with the RA number may be refused at the receiving dock. Please allow 2-3
weeks for warranty service and return of your Product after the Product is received.
This warranty does not apply to defects resulting from abuse of the Product, modifi cation,
alteration, mishandling, improper maintenance, commercial use or repair or service of the
Product by anyone other than Vornado; damages which occur in shipment or are attributed
to acts of God. Improper product use, which includes using an external device that
alters or converts the voltage or frequency of electricity, or shipping a Vornado product
to a country not intended for use will void all warranties. Any unauthorized product
modifi cation, repair by unauthorized repair center, or use of non-approved replacement
parts is not recommended and any consequences will not be covered by support services
or product warranties. The product warranty will be honored only on models that are being
used in the country intended. REPAIR OR REPLACEMENT AS PROVIDED UNDER THIS
WARRANTY IS THE EXCLUSIVE REMEDY OF THE CONSUMER. VORNADO SHALL NOT
BE LIABLE FOR ANY INCIDENTAL OR CONSEQUENTIAL DAMAGES FOR BREACH OF
ANY EXPRESS OR IMPLIED WARRANTY ON THIS PRODUCT. EXCEPT TO THE EXTENT
PROHIBITED BY APPLICABLE LAW, ANY IMPLIED WARRANTY OF MERCHANTABILITY
OR FITNESS FOR A PARTICULAR PURPOSE ON THIS PRODUCT IS LIMITED IN
DURATION TO THE DURATION OF THIS WARRANTY. Some states do not allow the
exclusion or limitation of incidental or consequential damages, or allow limitations on how
long an implied warranty lasts, so the above limitations or exclusions may not apply to you.
This warranty gives you specifi c legal rights, and you may have other rights that vary from
state to state. The manufacturer assumes no responsibility for damage caused by failure
to follow these instructions or improper product use. Any such actions will invalidate the
product warranty.
All company names and product names are trademarks of their respective owners. ©
All rights reserved. All technical information, data, and instructions for the installation,
connection, and operation contained in these instructions for use correspond to the latest
available information at time of printing. The contents of this manual may differ slightly
from the actual product. Observe any additional supplements.
WARRANTY
We expect this product to be perfect. If you’re not satisfi ed with this product, let us know.
We’re Here To Help
800.234.0604
vornado.com
© 2024 Vornado Air LLC Andover, KS 67002 U.S. Patent Pending. Specifi cations subject to change
without notice. Vornado® is a trademark owned by Vornado Air LLC.
Designed, engineered and supported in Andover, KS
13
Español
vornado.com
800-234-0604
help@vornado.com
Esperamos que
este producto
sea perfecto.
Si no lo es,
ayúdenos a
corregirlo