
Poly Mission 400/600 Series USB
Headset User Guide
SUMMARY
This guide provides the end-user with task-based user information for the featured product.

Legal information
Copyright and license
© 2026, HP Development Company, L.P. The information contained herein is subject to change
without notice. The only warranties for HP products and services are set forth in the express
warranty statements accompanying such products and services. Nothing herein should be
construed as constituting an additional warranty. HP shall not be liable for technical or editorial
errors or omissions contained herein.
Trademark credits
All third-party trademarks are the property of their respective owners.
Privacy policy
HP complies with applicable data privacy and protection laws and regulations. HP products and
services process customer data in a manner consistent with the HP Privacy Policy. Please refer to
HP Privacy Statement.
Open source software used in this product
This product contains open source software. You may receive the open source software from HP
up to three (3) years after the distribution date of the applicable product or software at a charge
not greater than the cost to HP of shipping or distributing the software to you. To receive software
information, as well as the open source software code used in this product, contact HP by email at
ipgoopensourceinfo@hp.com.

Table of contents
1 Headset overview 1
Inline controller LEDs 1
Headset LEDs (Mission 600 series only) 2
Locate the serial number on your HP Poly Mission USB headset 3
2 Load software 4
Update your Poly device 4
3 Fit 5
Adjust the headband 5
Position the boom 5
Adjust the boom 6
Replace foam ear cushion (Mission 400 Classic models) 6
Replace leather ear cushion (Mission 400/600 models) 6
Replace headband cushion (Mission 600 series only) 7
4 Connect to PC 8
Use USB-C to USB-A adapter 8
5 Manage calls 9
Answer a call 9
End a call 9
Reject a call 9
Make a call 9
Hold a call 9
Mute 9
Listening volume 10
Adjust headset microphone volume (softphone) 10
Switch between calls (flash) 10
Answer a second call 10
6 Advanced call features 11
Configure Teams/Custom button 11
Microsoft Teams settings 11
Other Providers settings 11
Mute reminder 12
Hold reminder 12
7 What's in the box 13
iii

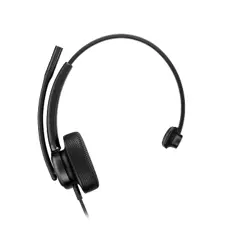
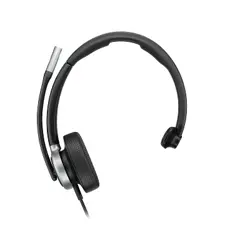
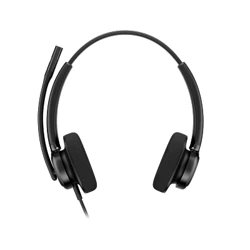
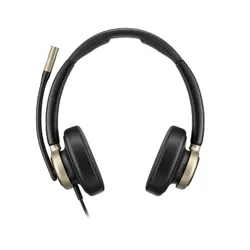
Headset overview1
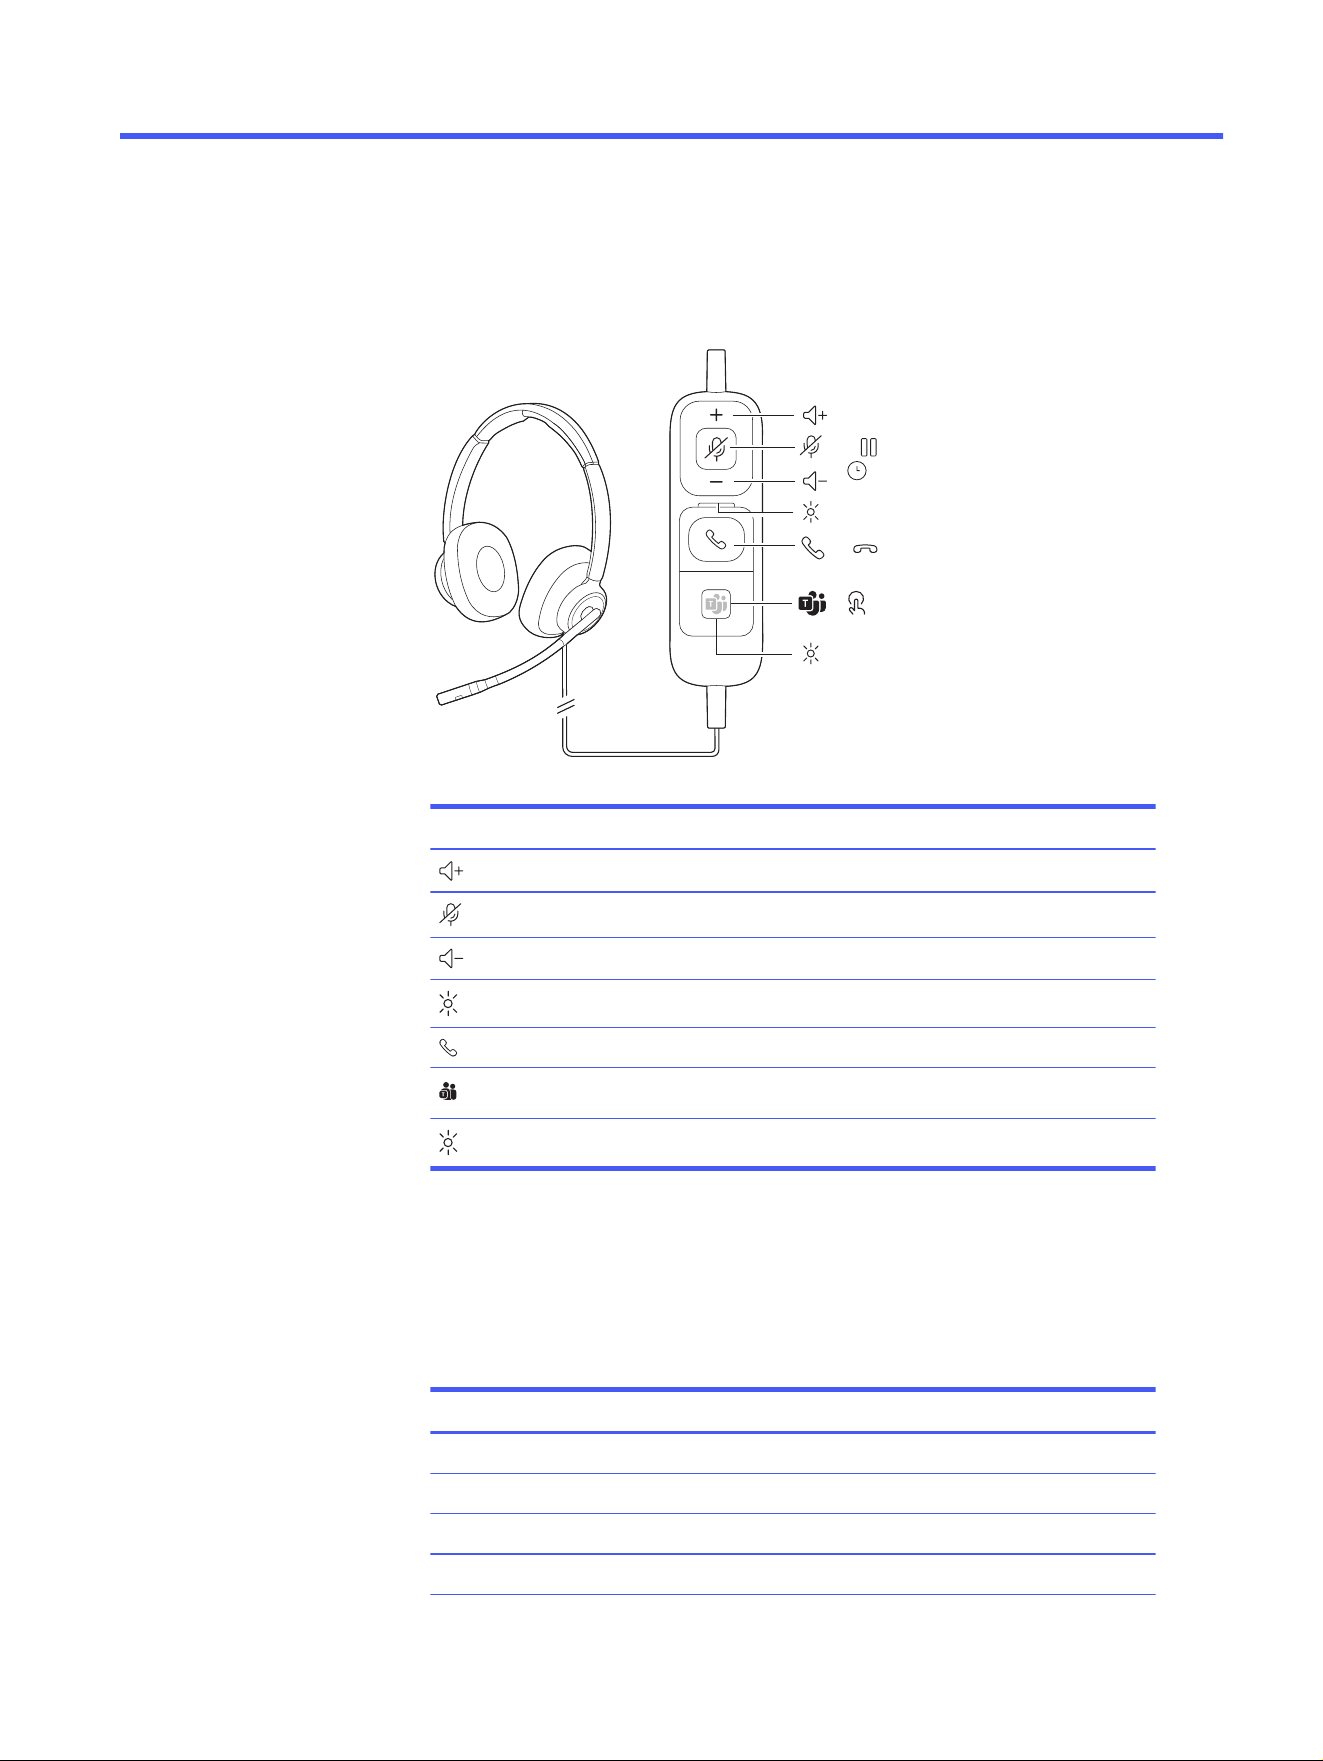
Use your headset inline controller for call and media control.
/
/
:02
/
Table 1-1 Headset icon descriptions
Icon Control
Volume up
Mute/Hold button
Volume down
Call status LED
Answer/end call
Microsoft Teams/Custom button
Microsoft Teams status LED
Inline controller LEDs
Your inline controller has 2 status LEDs. The top LED shows call status, and the
Teams/Custom button LED shows Microsoft Teams status.
Table 1-2
Call LED
LED color Status
Off Idle or streaming media
Flashing green Incoming call
Solid green Active call
Solid red Muted
Headset overview 1

Table 1-2 Call LED (continued)
LED color Status
Pulsing orange Call on hold
Pulsing red Call on hold and call muted
Table 1-3 Teams LED
LED color Status
Flashing white Teams connecting
Solid white Teams connected
Pulsing white Teams event
Off Teams not connected
NOTE: The Teams LED does not show status when Other Providers is selected
as the Custom Button feature in HP Poly Studio.
Headset LEDs
(Mission 600 series only)
Your headset LEDs flash red to inform others that you are on a call.
NOTE: Applies to Mission 600 series. Mission 400 series headsets do not have
headset LEDs.
Table 1-4
Headset LEDs
LED Status
Pulsing red Active call
Flashing red Call on hold
Off Idle/not on call
■
Manage settings in HP Poly Studio Desktop app. Go to Settings > General >
Online Indicator.
2
Chapter 1 Headset overview

Locate the serial number on your HP Poly Mission USB headset
Find the serial number on the back of the inline controller.
■
On the back of the inline controller, find the serial number SN: XXXXXX
(typically 6 digits).
SN: XXXXXX
TIP: Take a photo with your smartphone for a better view of the serial number.
Locate the serial number on your HP Poly Mission USB headset
3

Load software2
Download HP Poly Studio to get the most out of your device. Some softphones
require the installation of HP software to enable device call control (answer or end
a call and mute) functionality.
NOTE: Administrative privileges may be required to download the desktop
application. If you don't have administrator privileges on your system, contact
your system administrator.
● Download the HP Poly Studio Desktop app at hp.com/studio.
Table 2-1
Supported features
Feature HP Poly Studio Desktop app
Configure call control for softphones ✓
Change headset language ✓
Enable features ✓
Choose preferred Equalizer setting
Battery meter
Update device firmware ✓
Manage notifications and alerts ✓
Schedule wellbeing reminders
View user guide ✓
FindMyHeadset
Update your Poly device
Keep your firmware and software up to date to improve performance and add new
features to your Poly device.
Update your device using HP Poly Studio. Download the app at hp.com/studio.
4
Chapter 2 Load software
Fit3
Wear your headset correctly for the best call and sound quality.
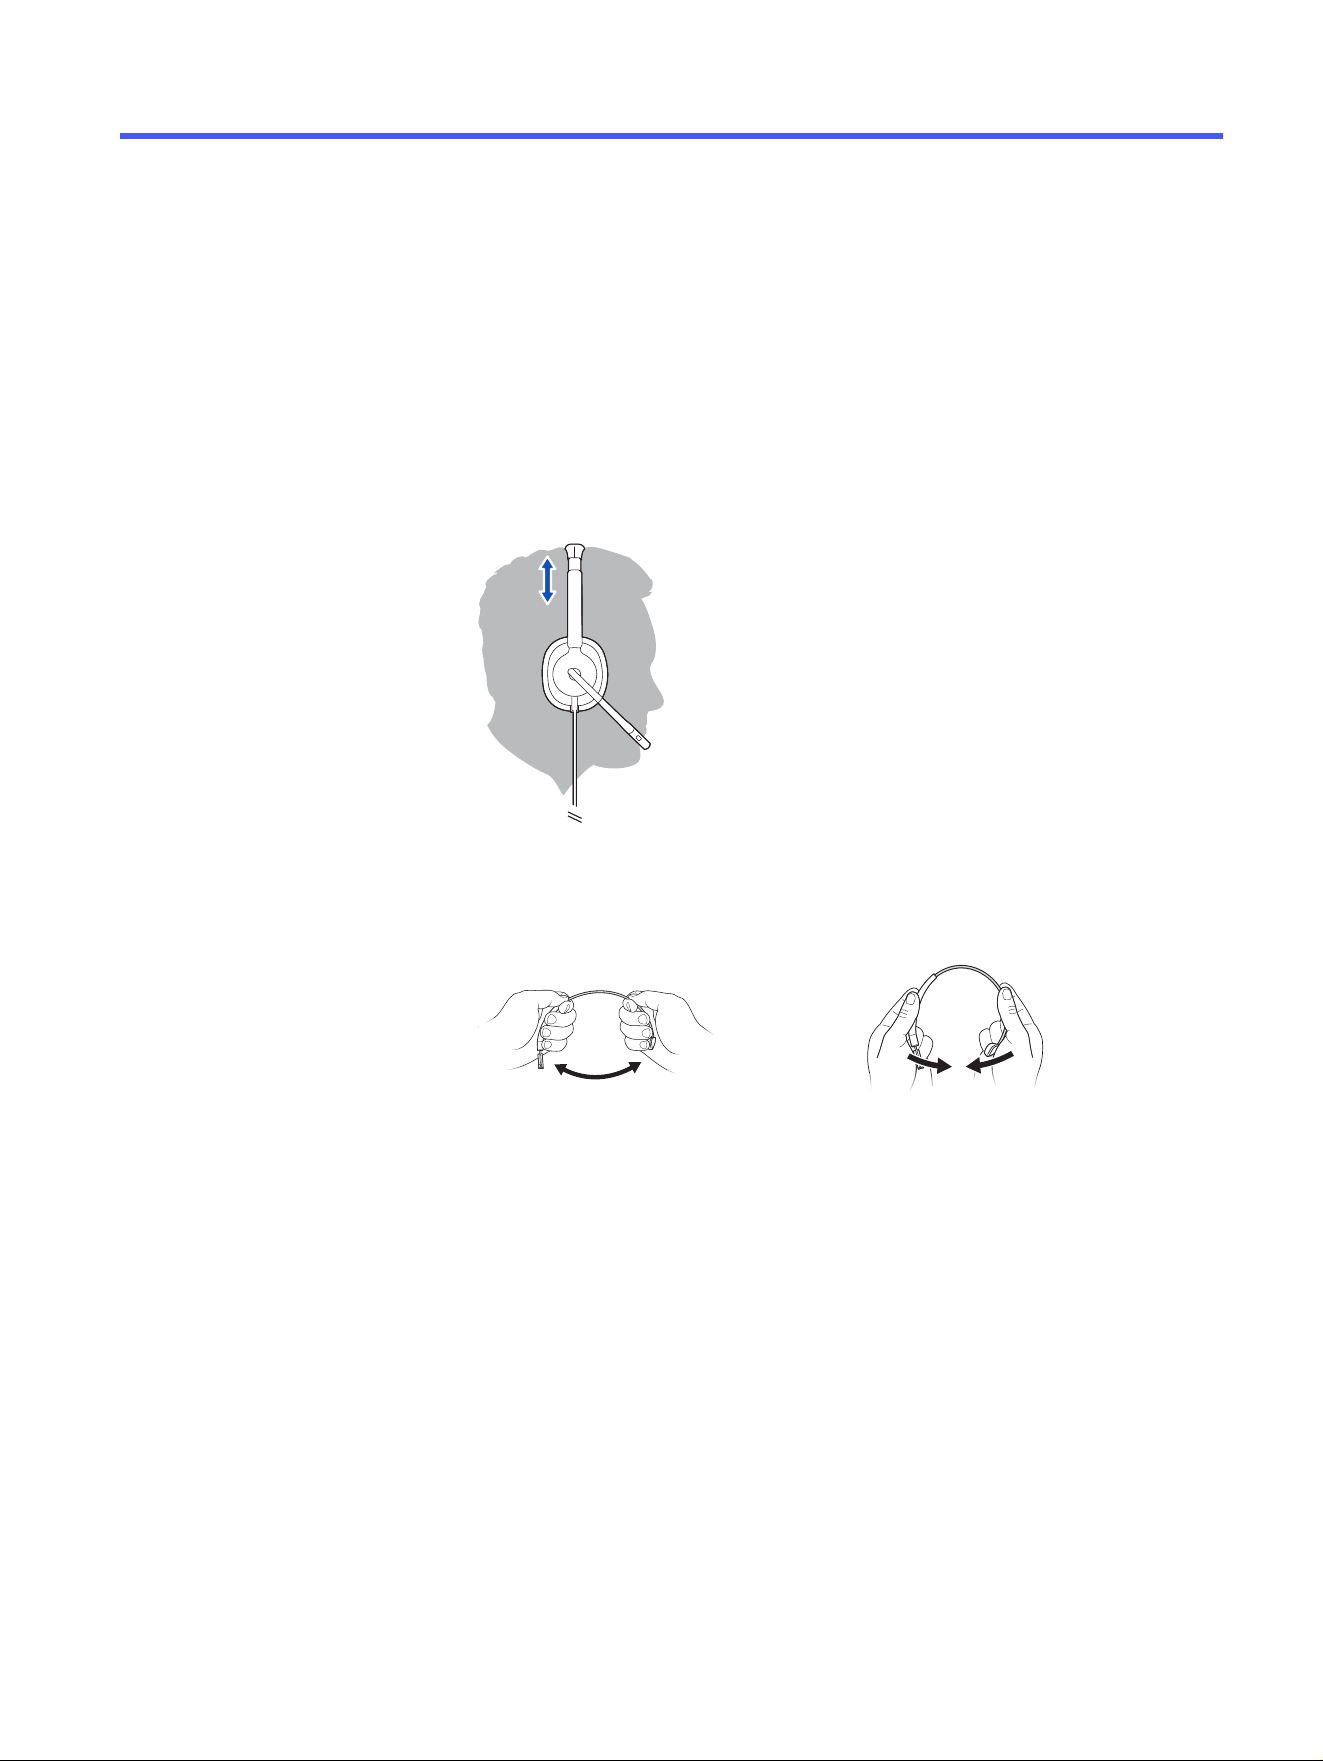
Adjust the headband
Adjust your headband for comfort.
1. Lengthen or shorten the band until it fits comfortably. The cushions should sit
comfortably over the center of your ears.
2. If the headband is too tight or loose, gently bend the headband for a
comfortable fit. Bend the headband outward to loosen headband, or bend
inward to tighten.
Position the boom
The headset microphone boom can be worn on the left or right side.
Fit
5
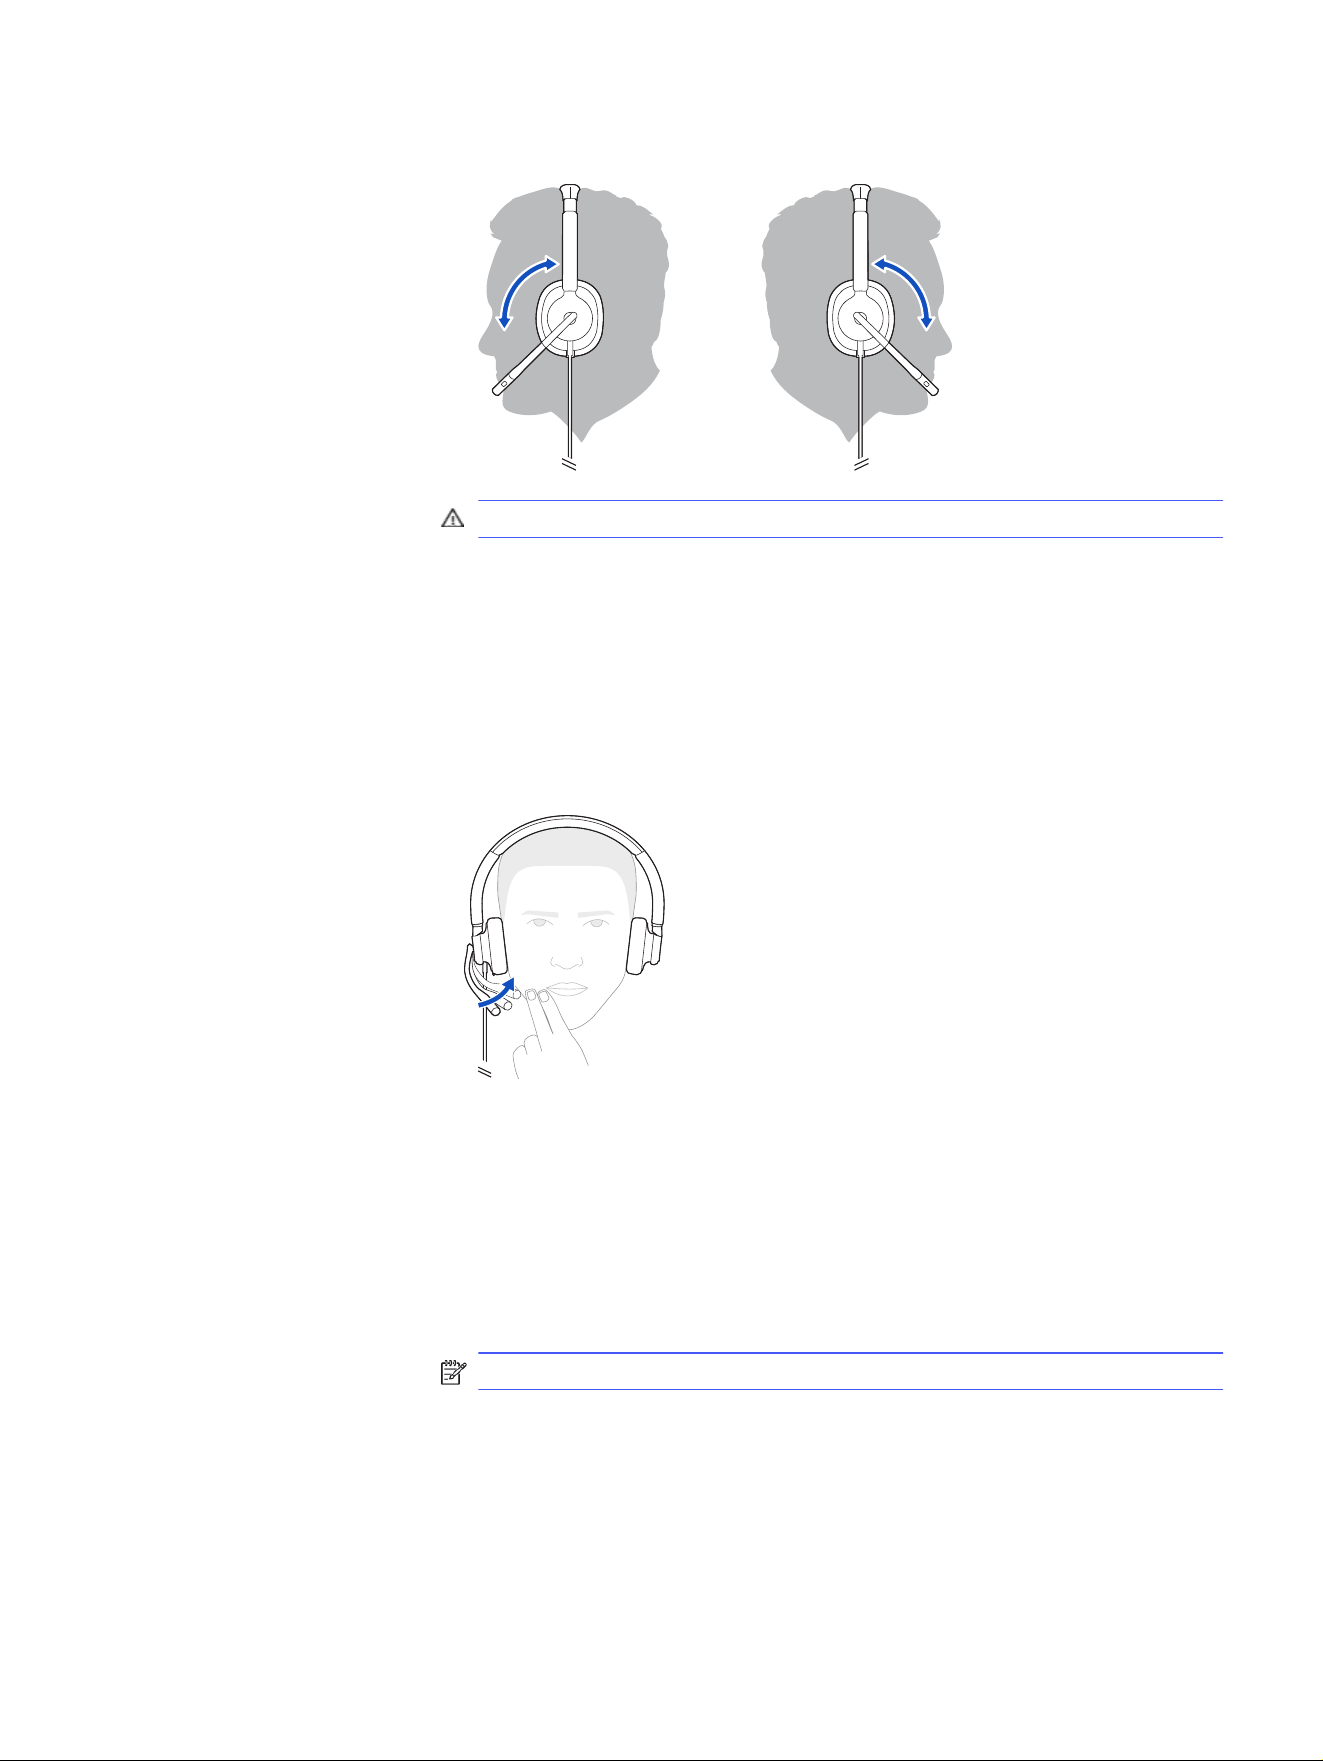
1. Rotate the boom to align with your mouth.
CAUTION: To avoid breaking the boom, only rotate it up and over 180°.
2. Manage headset microphone settings in HP Poly Studio Desktop app. Go to
Settings > General > Wearing Preference.
Adjust the boom
Adjust the microphone boom for optimum outgoing audio on a call.
■
Gently bend the boom in or out so it is approximately two finger widths from
the corner of your mouth.
Replace foam ear cushion
(Mission 400 Classic models)
Replace your headset ear cushions.
1. To remove the existing ear cushion, gently pull the foam cushion away from
the lip around your headset ear cup.
2. Fit the new foam ear cushion over the lip of the ear cup until secured.
NOTE: Left and right ear cushions are interchangeable.
Replace leather ear cushion
(Mission 400/600 models)
Replace your headset ear cushions.
1. To remove the existing ear cushion, gently grasp the ear cushion and pull it
away from your headset.
6
Chapter 3 Fit

2. Attach each new ear cushion by aligning with the headset ear cups and press
together until you hear it click into place. Ensure the cushion's small red print
is oriented to the bottom of the headset.
NOTE: Left and right ear cushions are interchangeable.
Replace headband cushion
(Mission 600 series only)
Replace your headset headband cushion.
1. To remove the existing headband cushion, locate the cushion's opening on
top of the headband and peel the cushion away from the headband to
remove.
2. To attach the replacement cushion, cover the headband with the cushion with
the opening located at the top of the headband arch. Ensure the cushion is
fully wrapped around the headband to secure it.
Replace headband cushion
(Mission 600 series only)
7
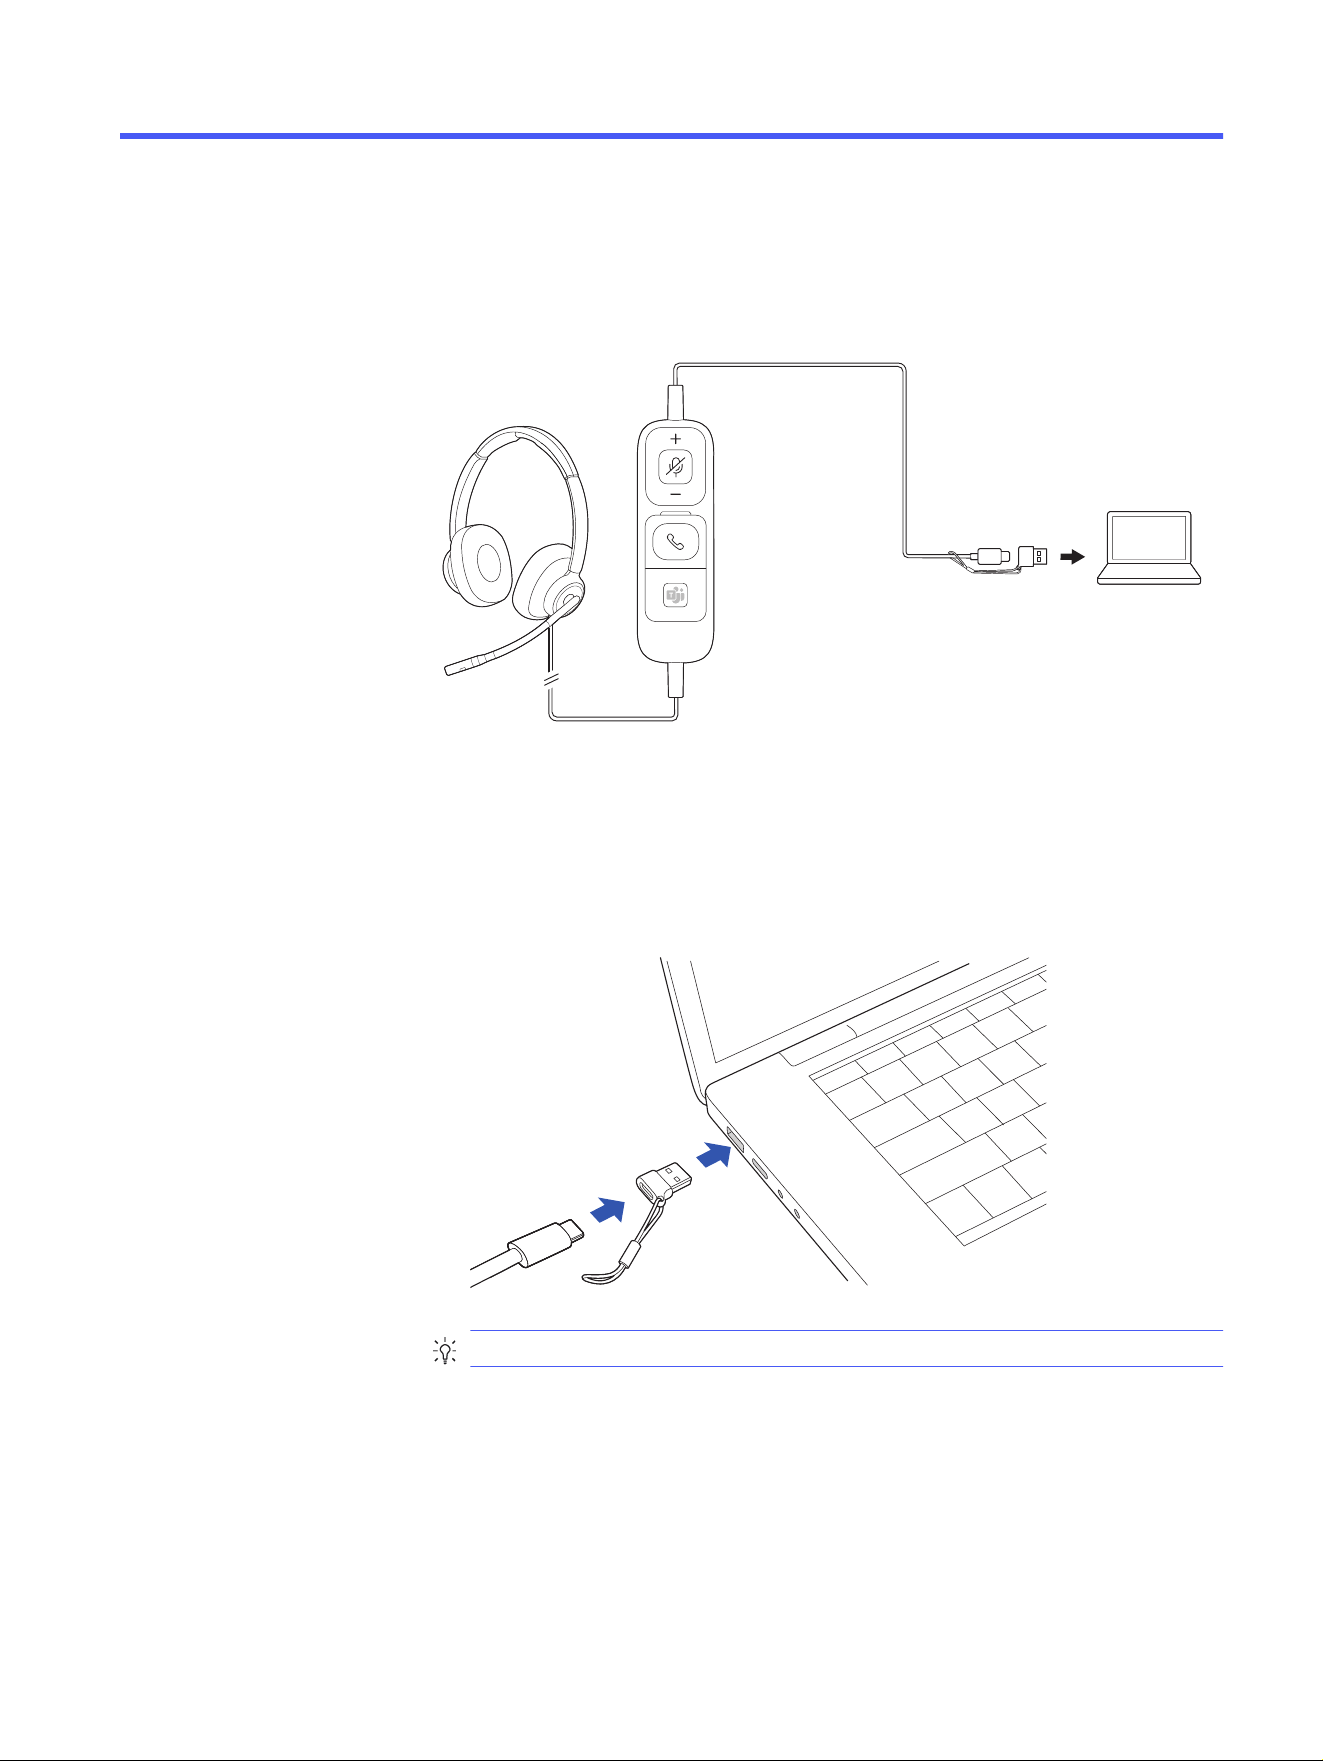
Connect to PC4
Power on your headset by connecting it to your computer.
Use USB-C to USB-A adapter
Use the USB-C to USB-A adapter to connect your device to USB-A ports.
● Connect the USB-C charge cable to the adapter and connect to a USB-A port.
TIP: Use the lanyard to attach the adapter to your cable.
8
Chapter 4 Connect to PC

Manage calls5
Manage calls with your headset.
Answer a call
Use your headset to answer an incoming call.
■
Press the Call button.
End a call
End calls with your headset.
■
Press the Call button.
Reject a call
Reject incoming calls with your headset.
■
Press the Call button for 2 seconds until you hear a tone.
Make a call
Use your softphone to make an outgoing call.
■
Dial using your softphone app.
Hold a call
Use your headset to place an active call on hold.
1. Press and hold the Mute button for 2 seconds to hold the call.
The Call LED pulses orange.
2. To resume call, hold the Mute button again for 2 seconds.
The Call LED returns to solid green.
Mute
Mute your microphone during calls.
■
During an active call:
● Press the Mute button to mute or unmute your headset.
Manage calls
9

● Mission 600 series only: Rotate your microphone boom into the up
position.
Listening volume
Adjust your headset volume using the inline controller.
■
Press the Volume up (+) or Volume down (-) button.
Adjust headset microphone volume (softphone)
Adjust your headset volume for softphone calls.
■
Place a test softphone call and adjust softphone volume and PC sound volume
accordingly.
Switch between calls (flash)
Use your headset to switch between two active softphone calls.
■
Press the headset Mute button for 2 seconds.
Active call is put on hold and the second call is routed to the headset.
Answer a second call
Answer a second incoming call while on an active call.
1. Press and hold the Mute button for 2 seconds to hold the current call.
2. Press the Call button to answer new call.
10
Chapter 5 Manage calls

Advanced call features6
Use advanced call handling features with your headset.
Configure Teams/Custom button
Configure your Teams/Custom button actions in HP Poly Studio.
Microsoft Teams features are the default actions.
1. Open HP Poly Studio and go to Settings > Custom Button.
2. Select Microsoft Teams to assign Teams actions or other Providers.
■
If other Providers is selected, choose from Hold/Resume call, Pause/
Resume media, or Do nothing.
NOTE: Other providers is not available when Microsoft Teams is connected.
Microsoft Teams settings
Control all Microsoft Teams features in the table below when Microsoft Teams is
selected as the Custom Button.
Table 6-1
Microsoft Teams features
Teams feature Button press
Launch Teams Press once to view Microsoft Teams app on your
computer.
Raise hand in Teams When in an active Teams call, press the button
for 2 seconds to raise your hand.
View Teams message Press once to view the Teams message.
Other Providers settings
Choose 1 of the following features to assign when Other Providers is selected as
the Custom Button.
NOTE: Other providers is not available when Microsoft Teams is connected.
Table 6-2
Other Providers options
Feature Button press
Hold/resume call Press once to place a call on hold. Press once to
resume held call.
Pause/resume media Press once to pause or resume media.
Press two times to play the next track.
Press three times to play the previous track.
Advanced call features 11

Table 6-2 Other Providers options (continued)
Feature Button press
Do nothing Button presses do nothing.
Mute reminder
Receive mute reminders during calls.
■
If mute reminder is on, an alert plays when you speak to remind you that mute
is activated. Customize your settings in HP Poly Studio Desktop.
Hold reminder
Receive hold alerts when you have a call on hold.
■
If hold reminder is on, an alert repeats to remind you that you have a call on
hold. Customize your settings in HP Poly Studio Desktop.
12
Chapter 6 Advanced call features
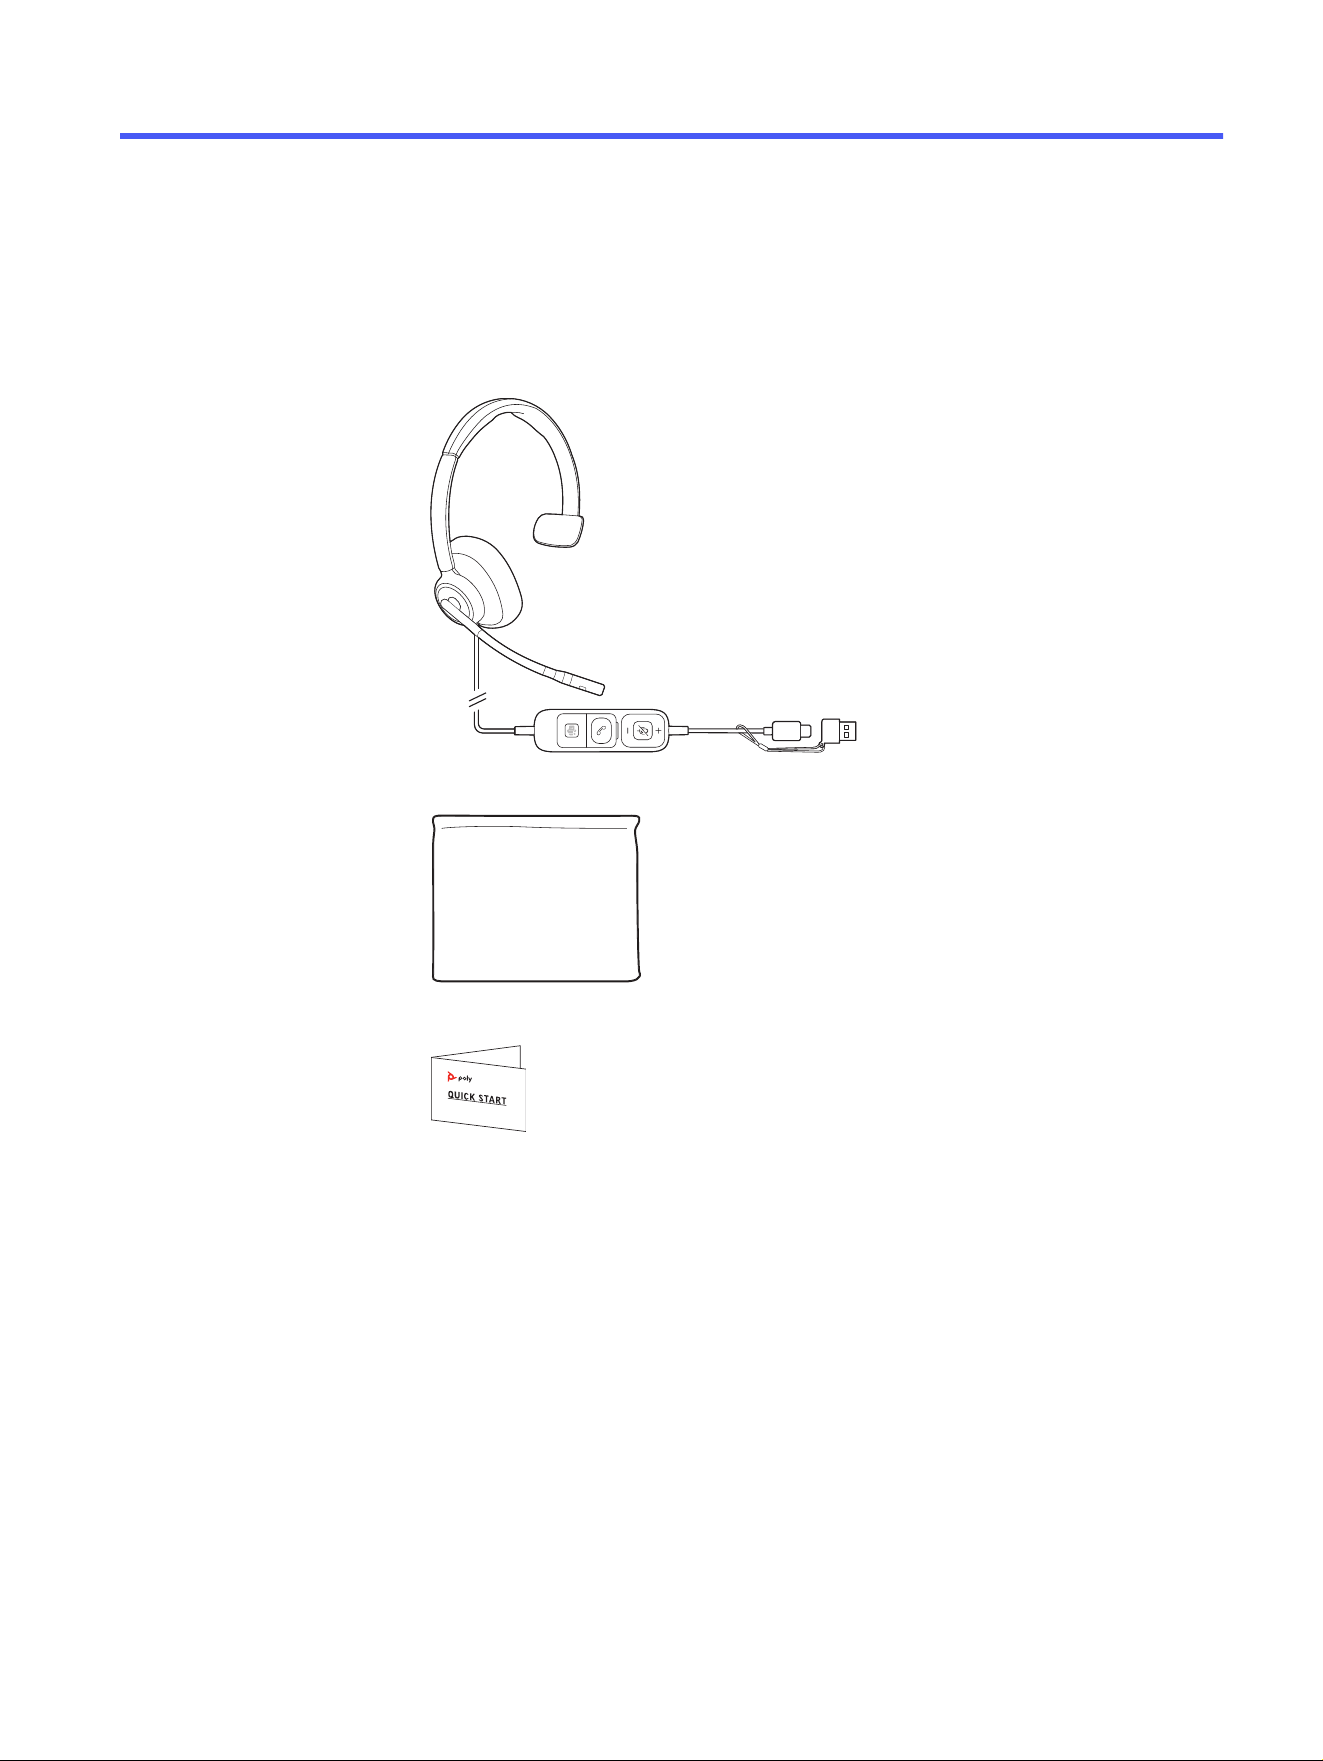
What's in the box7
Contents may vary by product.
Figure 7-1 USB headset with inline call control and USB-C to USB-A adapter
lanyard
Figure 7-2 Pouch
Figure 7-3 Quick start guide
What's in the box
13

Safety warnings8
Safety Instructions
To reduce the risk of fire, electric shock, injury to persons and damage to property,
read all operating instructions and the following safety instructions before using
your HP product. Operating, storage and charging temperature is 10˚C to 40˚C
(50˚F to 104˚F).
● Only use those HP products and accessories designed for use with this
product.
● If you experience a skin irritation after using this product, discontinue use and
contact HP.
● CHILDREN. Never allow children to play with the product-small parts may be a
choking hazard.
● Do not disassemble the product as this may expose you to dangerous
voltages or other risks. Incorrect reassembly can cause electric shock or fire
when the product is subsequently used.
● Unplug, discontinue use and contact HP if the product overheats or has a
damaged outer casing, cord or plug.
● Exposure to high volume sound levels or excessive sound pressure may
cause temporary or permanent damage to your hearing. Although there is
no single volume setting that is appropriate for everyone, you should always
use your headset/headphones with the volume set at moderate levels and
avoid prolonged exposure to high volume sound levels. The louder the volume,
the less time is required before your hearing could be affected. You may
experience different sound levels when using your headset/headphones with
different devices. The device you use and its settings affect the level of sound
you hear. If you experience hearing discomfort, you should stop listening to the
device through your headset/headphones and have your hearing checked by
your doctor. To protect your hearing, some hearing experts suggest that you:
1. Set the volume control in a low position before putting your headset/
headphones on your ears and use as low a volume as possible.
2. Avoid turning up the volume to block out noisy surroundings. Whenever
possible, use your headset/headphones in a quiet environment with low
background noise.
3. Limit the amount of time you use headsets/headphones at high volume levels.
4. Turn the volume down if the sound from the headset/headphones prevent you
from hearing people speaking near you.
14
Chapter 8 Safety warnings

● If you use your headset/headphones while driving, check local laws regarding
use of a mobile phone and headset, and ensure your attention and focus
remain on driving safely. Use of a headset/headphones that covers both ears
will impair your ability to hear other sounds and in most regions is illegal to
use while operating a motor vehicle or riding a bicycle and may be a serious
hazard for you and others.
● If this product includes earbuds/eartips, install and use them in accordance
with the instructions provided. Do not force earbuds/eartips down the ear
canal. Consult a doctor if they become lodged in the ear canal.
● Plug the mains adapter or charger into a socket-outlet that is near to the
equipment and will be easily accessible.
Embedded magnet warning
Please read the following embedded magnet warning.
WARNING! This device contains embedded magnets. Please be aware that
magnetic fields may interfere with the proper functioning of medical devices
such as pacemakers and implantable cardioverter-defibrillators (ICD’s). As a
precaution it is recommended to keep this device at least 15 cm or at least 30 cm
(when using a wireless charger) away from any individuals wearing electronic
medical devices. If interference is suspected, stop using the device immediately
and consult your physician and the medical device manufacturer for further
guidance.
Embedded magnet warning
15

Support9
NEED MORE HELP?
support.hp.com/poly
HP Inc.
1501 Page Mill Road
Palo Alto, CA 94304, U.S.A.
650-857-1501
HP REG 23010, 08028
Barcelona, Spain
HP Inc UK Ltd
Regulatory Enquiries, Earley West
300 Thames Valley Park Drive
Reading, RG6 1PT
United Kingdom
台灣惠普資訊科技股份有限公司
臺北市南港區經貿二路 66 號 10 樓
電話:02-37899900
RMN (Regulatory Model Number): PUM410, PUM420, PUM610, PUM620
Document part number: Q08998-001
Publication date: February 2026
Email us at documentation.f[email protected] with queries or suggestions related
to this document.
16
Chapter 9 Support